GEAppliances
©
JBP60
JBP61
JBP63
JBP66
JBP75
JBP78
Part No. 164D3333P173 Pub.No.49-8943 11-98CG
Congratulations!
YouAre/VowPartoftheGEFami/
Welcome to the (;E li(mil V.
We're proud of our quality
products and _v are
committed to providing ............
dependable sec,'ice. You'll
see it in this easy-to-use
()wner's Manual and _x)u'll
hear itin the fl'iendl Vvoices
of Otlf (tlStOillel" servk e
department.
Best ()fall, you'll experience
these values each (lille VOll
tlse vo__irlallge. That's
important, because yore
new range will be part of
your lhmily lor many years.
And we hope g)u will be
part of oilrs for a long time
tO COllie,
We thank you tor bu}ing
GE. We appreciate yore"
purchase and hope you
will cominue to rely on us
whenever you need quality
appliances lot your home.
Important!
Staple sales slip or cancelled
check here.
Proofof the original purchase date
is needed toobtain service under
thewarran_
Writethemodelandserial
numbershere.
#
#
Youcan find them on a label behind
therange door or behind the storage
drawer.
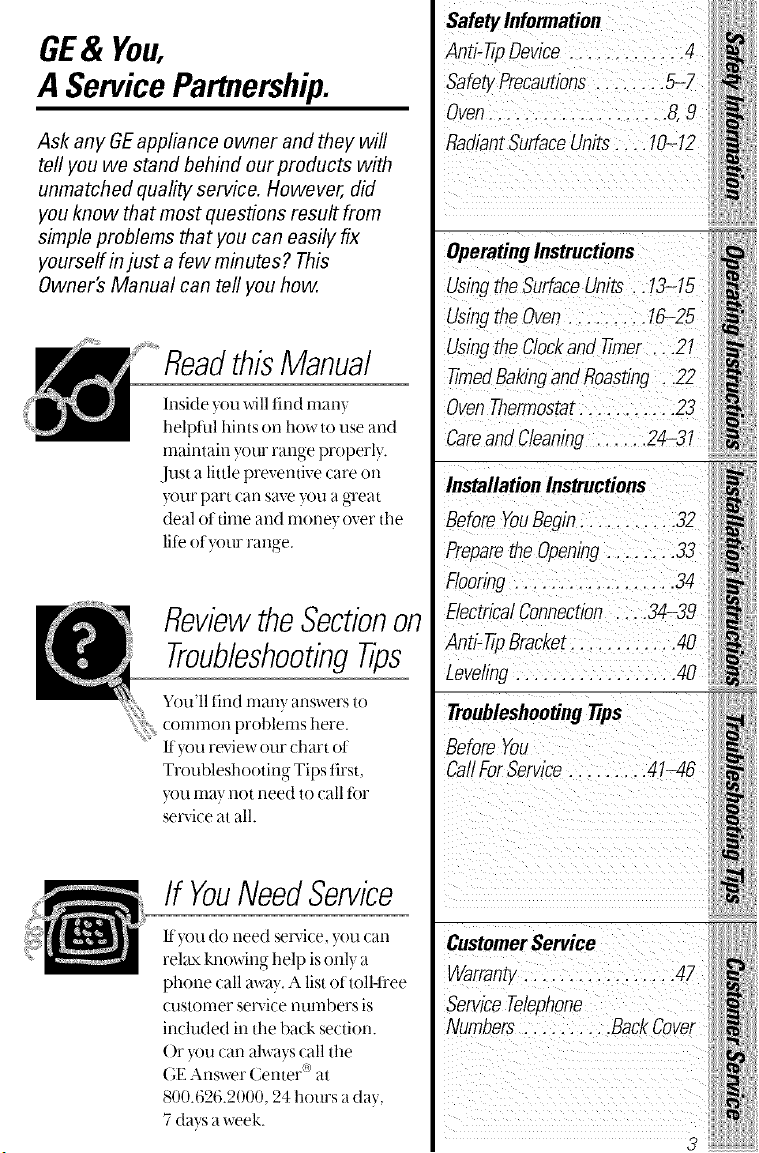
GE& You,
A ServicePartnership.
Ask any GEappliance owner and they will
tefl you we stand behind our products with
unmatched quality service. However, did
youknow that most questions result from
simple problems that youcan easily fix
yourseff in just a few minutes? This
Owner's Manual can tell youhow.
thisManual
Insideyouwilltind many
helpful hints on howtouse and
maintain your range pr(perly.
Just a little preventive care on
yOllYpart can save yo[1 a great
deal ot time and money over the
lit_'of?_)urrange.
Reviewthe Sectionon
TroubleshootingTips
You'll find many answers to
common problems here.
Ilyou review our chart ot
Troubleshooting Tips first,
you may not need to call tot
service at all.
If YouNeed Service
Ilyou do need service, you can
rebe_,knowing help is onl) a
phone call away. A list of toll-fl'ee
(a_stomer service numbers is
included in the back section.
()r you can always call the
GE Answer Center <'_at
800.626.2000, 24hours a (lay,
7(lays a week.
Safety Information
Anti-tip Device............. 4
Safety Precautions ........ 5-7
Oven.............. 8,9
RadiantSurfaceUnits .... 1O-12
OperatingInstructions
Usi_ the SurfaceUnits .. 1_15
UsingtheOven......... 16-25
UsingtheClockand timer ...21
timed BakingandRoasting ..22
OvenThermostat.......... 23
CareandCleaning ...... 24-31
InstallationInstructions
Before YouBegin ........... 32
Preparethe Opening........ 33
Flooring.................. 34
ElectricalConnection.... 34-39
Anti-tip Bracket............ 40
Leveling.................. 40
TroubleshootingTips
Before You
CallForSerwce......... 41-46
CustomerService
Warranty ................. 47
ServiceTelephone
Numbers .......... BackCover
3
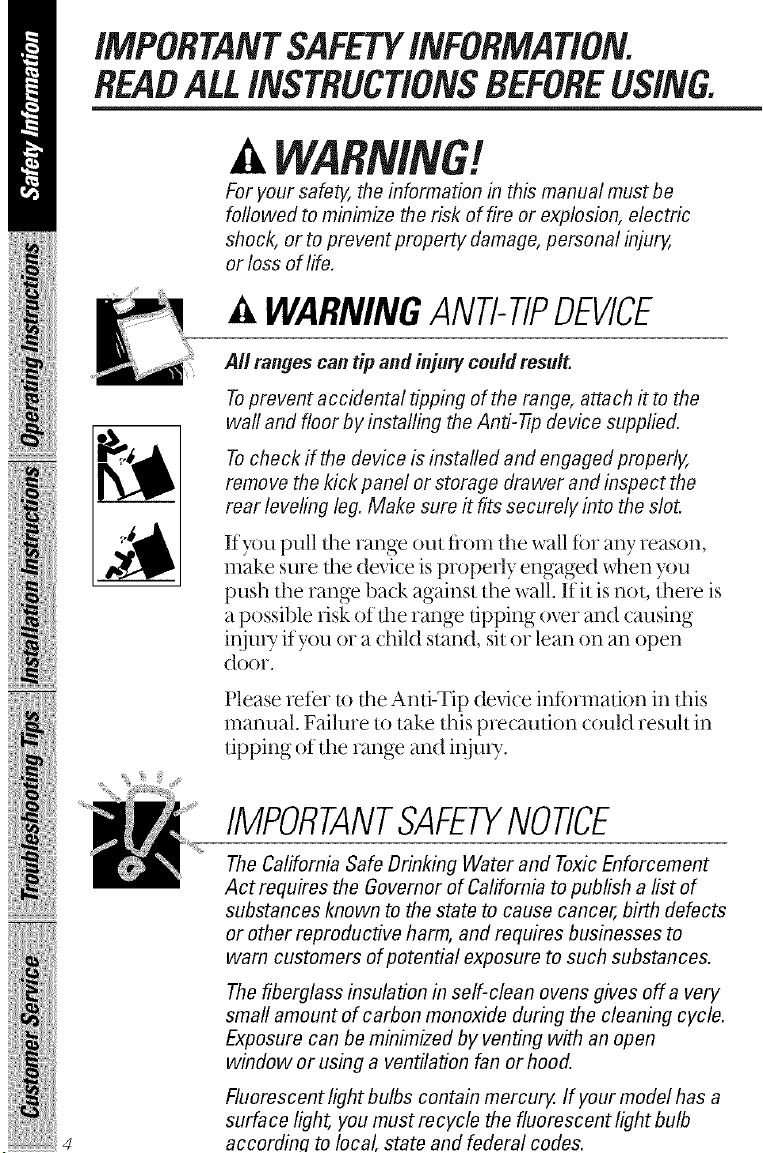
IMPORTANTSAFETYINFORMATION.
READALL INSTRUCTIONSBEFOREUSING
:::::::::::::::::::::::::::::::::::::m
Foryour safety, theinformation in this manual mustbe
followed tominimize therisk offire or explosion, electric
shock, or toprevent property damage, personal injury,
or loss oflife.
A WARNINGANti-TIPDEVICE
All ranges cantip and injurycould result.
Toprevent accidental tipping ofthe range, attach itto the
wall and floor by installing theAnti--tip device supplied.
Tocheck if thedevice isinstalled and engaged properly,
remove the kickpanel or storage drawer and inspect the
rear leveling leg.Make sure it fitssecurely into theslot.
Ifyou pull the range out flom the wall tot any _eason,
make sure the device isproperly engaged when you
push the range back against the wall. Ifitisnot, there is
apossible risk ofthe range tipping over and causing
injuU if you or a child stand, sitor lean on an open
door.
Please refer to the Anti-Tip device information in this
inanual. Failure to take this precaution could result in
dpping of the range and iqjuU.
IMPORTANTSAFETYNOtiCE
TheCalifornia SafeDrinking Water and Toxic Enforcement
Act requires the Governor of California topublish a list of
substances known to thestate tocause cancer,birth defects
or other reproductive harm, and requires businesses to
warn customers ofpotential exposure tosuch substances.
Thefiberglass insulation in self-clean ovens gives off a very
small amount ofcarbon monoxide during thecleaning cycle.
Exposure can be minimized by venting with an open
window or using a ventilation fan or hood.
Fluorescent light bulbs contain mercury, If your model hasa
surface light, youmust racycle thefluorascent light bulb
according tolocal, state and federal codes.
Use this appliance only forits intended purpose as
described in this Owner's Manual
SAFETYPRECAUTIONS
When using electrical appliances, basic safety precautions
should be followed, including the following:
@
Be sure your appliance
isproperly installed
and gTounded by a
qualified technician in
accordance with tile
provided installation
insuucfions.
Do not attempt to
repair or replace any
part of_)ur range
unless itisspecifcally
recommended in this
manual. All ()tiler
selvicing should be
refelTed to aqualified
technician.
Bef)ie performing any
selvice, disconnect tile
range power supply at
tile household
distribution panel by
removing tile filse or
switching olf the circuit
breaker.
Do not leave children
alone---childlen should
not be left alone or
unattended in an alea
where an appliance is
in use. They should
never be allowed to sit
or stand on any part of
tile appliance.
iJ_i:_Do not allow an}_)ne
to climb, stand or hang
on the door, storage
(kawer or cooktop.
They could damage tile
range and even tip it
over, causing severe
{
personal injury.
• , }:{{{i,,{{}
iJh::_Do not store flammable i_
materials in an oven or
near tile cooktop. _I
> caurtoN..Imms of
interest to children
should not be stored in
cabinel_s above arange .....................................
of arange-children
climbing on tile range
to reach items could be
seriously injured.
!i_Never wear loose-fitting
°r hanging g_arments i_while using tile
appliance. Be careful .....................................
when reaching for
items stored over tile
{
range. Flammable
material could be
ignited ifbrought in i!_
contact with hot snTlace
units or heating ...........
elementsandmay {
cause severe burns.
5
IMPORTANTSAFETYINFORMATION.
READALLINSTRUCTIONSBEFOREUSING.
_lliiilji_iiii!i!!!J
!iii_i_iii_iiiiiiiili!i
iiliii iiiiiiii!li!li! lli
WARNING!
SAFETYPRECAUTIONS
ij_::_Use only dU pot
holders-moist or damp
pot holders on hot
su_hces may result in
burns fl_mr steam. Do
not let pot holders
touch hot surf_tce units
or beating elements.
Do not use aR_welor
other bulky cloth.
_ For your safety, never
use your appliance
for wmming or heating
tire rx)om.
iJ_i:;Do not store or use
combustible materials,
gasoline or other
flammable vapors and
liquids in tire vicinity
of this or anyother
appliance.
iJ_i:_Keep tire hood and
gTeasefilters clean
to maintain good
venting and m avoid
g_ease fires.
_; Do not let cooking
g_ease or other
flammable materials
accumulate in or near
the range.
iJ_i:_Do not use water on
gTeasefires. Never pick
up aflaming pan. Turn
tire conm)ls off.
Smother aflaming pan
on asm_hce unit by
covering tire pan
completely with a well-
fitting lid, cookie sheet
or flat u W. Use a multi-
purpose dU chemical
or fbam-t)_oe fire
extingafisher.
Flaming gTease outside
apan can be put out by
covering it with baking
soda or, if available, by
using amulti-purpose
dU chemical or foam-
type fire exting_fisher.
Flame in tire oven can
be smothered
completely by dosing
the oven door and
turning tire oven off or
by using amulti-
purpose dU chemical
or fbam-t)_)e fire
exting_fisher.
9_;Donottouchfile smihce
units,theheating
elementsor theinterior
smt_tceof theoven.
Thesesmt_tcesmaybe
hotenough to bum
even though they ar_
dafl_ in color. During
mid _ier use, (k_not
touch, or let clothing or
other flammable
materials conutct, the
smtace units, areas
neafl)y the smtace units
or anyinterior area of
the oven; allow stdticient
time fbr cooling first.
Potentially hot surfaces
include the cooktop,
areas facing the
cooktop, oven vent
opening, smt_tces near
the opening, crevices
around the oven door
and metal trim parts
above the door.
REMEMBER: The inside
surf_ce of the oven may
be hot when the door is
opened.
COOKMEATANDPOULTRY
THOROUGHLY...
Cookmeat andpoultry thoroughly--meat to atleast INTERNAL
16O°Eandpoultry toatbast INTERNAL18O°ECookingtothese
btemal temperaturesusuallyprotectsagainst foodhomeillness.
i!!!iiiiiiiili__!!iliiii
!iiiii li ili
IMPORTANTSAFETYINFORMATION.
READALLINSTRUCTIONSBEFOREUSING.
_lliiilji_ii[i!i!!!J
!iii_i_iii_iiiiiiiili!i
!_i_iiyii:i!:i:iiiiiii_i_i_iiiii:iiiii{iiiii_
iiliii ii;iiiii!li!li! lli
WARNING!
OVEN
_ Stand away from tile
range when opening
tile oven door. Hot
air or steam which
escapes call cause
burns u_ bands, face
and/or eyes.
_ Do not heat unopened
f()od containers.
P,essu,e could build up
and tile container could
burst, causing an inju U.
iJ_Z:;Keep tile oven vent
unobstructed.
iJ_Z:;Keep tile oven fiee
from gTease buildup.
iJ_Z:;Place tile oven shelf in
tile desired position
while tile oven is cool.
If shelves **lust be
bandied when hot,
do not let pot bolder
contact tile heating
elements.
_ Pulling out die shelf
to tile stop-lock is a
convenience in lifting
hea W f{)ods. It is also
a p,ecaudon against
burns from touching
hot surfaces of tile
door or oven walls.
_; When using cooking
or masting bags in
tile oven, t{)llow the
manu[actm_r's
directions.
i_i:;Do not use tile oven
to dU newspapers. If
overheated, they call
catch on fire.
)_ Do not use tile oven
fbr a storage area.
Items sto_d ill an
oven can ignite.
N Do not leave paper
products, cooking
utensils or food in the
oven when not in use.
SELF-CLEANINGOVEN
iJ_i:;Do not clean the @)or
gasket. The door gasket
is essential for a good
seal. (]are should be
taken not to n|b,
damage or move
the gasket.
i_::;Clean only parts listed
in this Oxmer's Manual.
iJ_i:;Do not use oven
deaners. No
commercial oven
deaner or oven liner
pmmcfive coating of
any kind should be
used in or around any
part of the oven.
Residue fl_)m oven
deaners willdamage
the inside ofthe oven
when the sell:clean
Q_cleisused.
ij_::;l_fbr,e sell:cleaning
tire oven, remove tire
broiler pan, gTid and
other cookwar,e.
_; Be sure to wipe up
excess spillag,e befor,e
starting the sell:
cleaning operation.
ij_::;Iftire self(leaning
mode malfunctions,
turn tire oven off
and disconnect the
power supply. Have
it serviced by a
qualified technician.
i!!!iiiiiiiili__!!i/iiii
!iiiiili ili
9 ......................................
IMPORTANTSAFETYINFORMAtiON.
READALLINSTRUCtiONSBEFOREUSING.
ii_iiiiN_iiiiiiiY
_!ilili!!iii_J,L_iiiiiYii
10
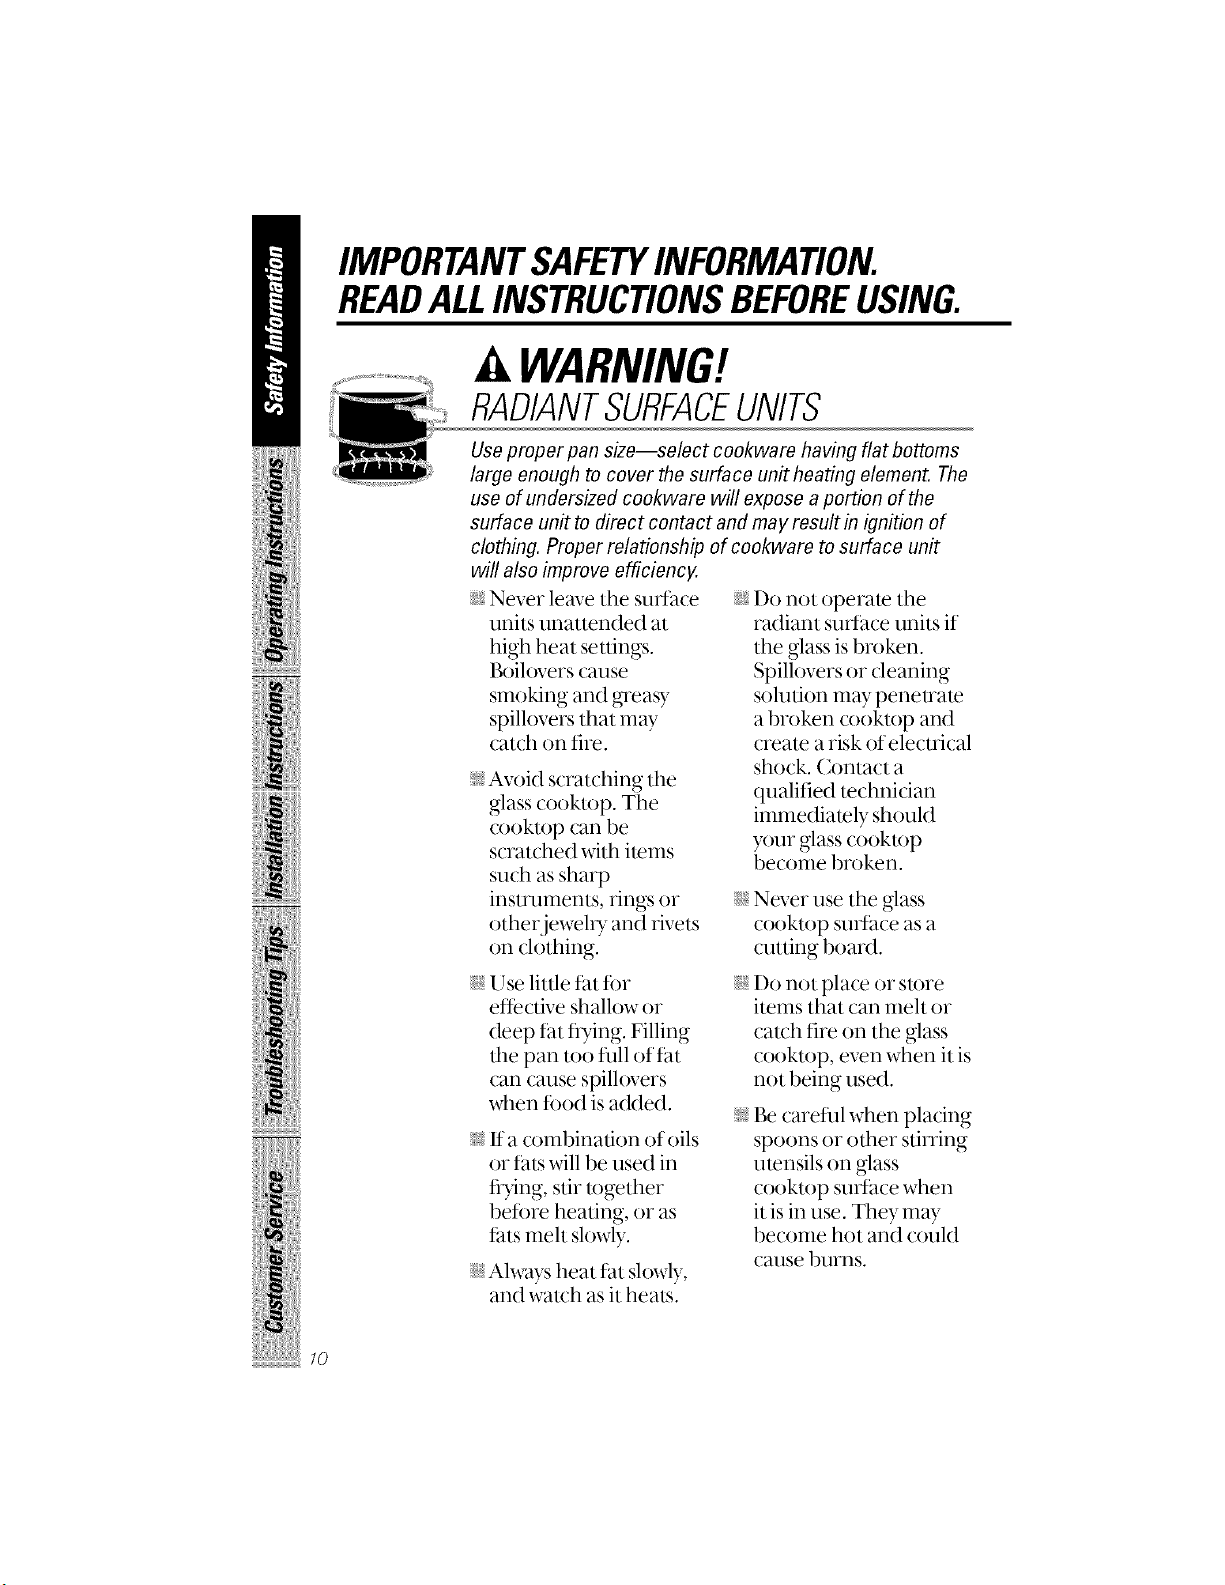
WARNING!
RADIANTSURFACEUNITS
Use proper pan size--select cookware having flat bottoms
large enough tocover thesurface unit heating element. The
useofundersized cookware will expose a portion ofthe
surface unit todirect contact and may result in ignition of
clothing. Proper relationship of cookware tosurface unit
will also improveefficiency.
iJ_Z:;Never leave tile smt_tce
units unattended at
high heat settings.
l'_ilovers cause
smoking and g_easy
spillovers that mW
catch oil fire.
_ Avoid scratching tile
glass cooktop. Tile
cooktop can be
scratched with items
such as sharp
instruments, rings or
other, je_s_lry and rivets
on clothing.
i_i:;Use little fat f()r
eftective shallow or
deep fat flying. Filling
file pail too full of fat
can cause spillovers
when f()od is added.
_ If a combination of oils
or faLswill be used in
fiTing, stir togedmr
1)ef()re beating, or as
fats melt slowly.
i_Z:;Alx_vtysheat fat slowly,
and watch as it heats.
i_i:;Do not operate tile
radiant smtace units if
tile glass isbroken.
Spillovers or deaning
solution may penetrate
a broken cooku)p and
create a risk of electrical
shock. Contact a
qualified teclmidan
immediately should
your glass cookmp
become broken.
i_Z:;Never use tile glass
cooktop smthce as a
cntfing boar,1.
i_Z:;Do not place or store
items that can melt or
catch fire on tile glass
cooktop, even when it is
not being used.
_ Be caretul when placing
spoons or odmr SdrTing
utensils on glass
cooktop smt_tce when
it is in use. They may
become hot and could
cause burns.
_ To minimize the
possibility of burns,
ignition of flammable
materials and spillage,
the handle ofa
container should be
turned towar_l tile
center of the range
without extending over
nearby snTl_l(:euniLs.
?_Always mrn the sutth(:e
units off bef()re
,emoving cookware.
_ When flaming fbods
under the hood, mrn
the fan on.
_ Use a deep tat
the,_mometer whenever
possible m p,event
overheating f_ttbe_)nd
the smoking point.
ij_::;Keep an eye on foods
being flied at high
or medium high
heat settings.
_; Foods fk_rfiTing should
be as dr} Tas possible.
Frost on fr,)zen foods or
moisture on fresh foods
can cause hot fat to
bubble up and over the
sides of the pan.
iJ_i:;(]lean the cooktop with
caution. Ira wet sponge
or cloth is used m wipe
spills on a hot su_tace
unit, be careful to avoid
steam burns. Some
cleaners can pm(hlce
noxious fumes if
applied m a hot su_1ace.
11/0)'£."We recommend
that you avoid wiping
any surface unit areas
until they have cooled
and the indicator light
has gone off. Sugar
spills are the exception
to this. Please see
Cleaningthe glass
cooktopsection.
!#'iiHiit_ii_iii_:iii?ii
!iiiiiii liii!!iil
11
IMPORTANTSAFETYINFORMATION.
READALLINSTRUCTIONSBEFOREUSING.
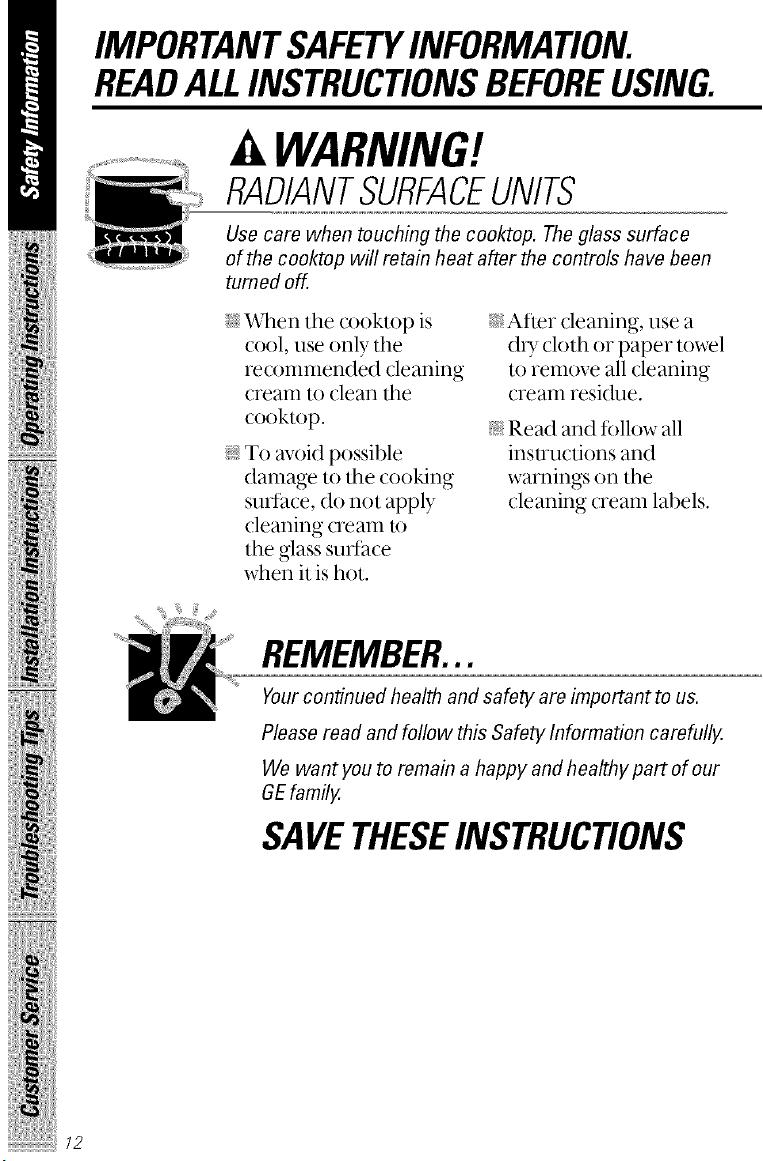
A WARNING!
RADIANTSURFACEUNITS
Use care when touching the cooktop. The glass surface
ofthe cooktop will retain heat after the controls have been
turned off.
iJ_i:;_qmn tile cooktop is
cool, use only the
recommended denning
cr>am to dean the
cooktop.
_; To avoid possible
damage to dae cooking
sulthce, do not apply
cleaning cream to
the ginss suiihce
when it is hot.
iJ_i::After denning, use a
dU cloth or paper towel
m remove all denning
cream residue.
_; Read and follow all
instructions and
warnings on the
cleaning cream labels.
REMEMBER...
Yourcontinued health and safety are important tous.
Pleaseread and follow this Safety Information carefully.
We want youto remain a happy and healthy part ofour
GEfamily.
SAVETHESEINSTRUCTIONS
12
Using the surface units.
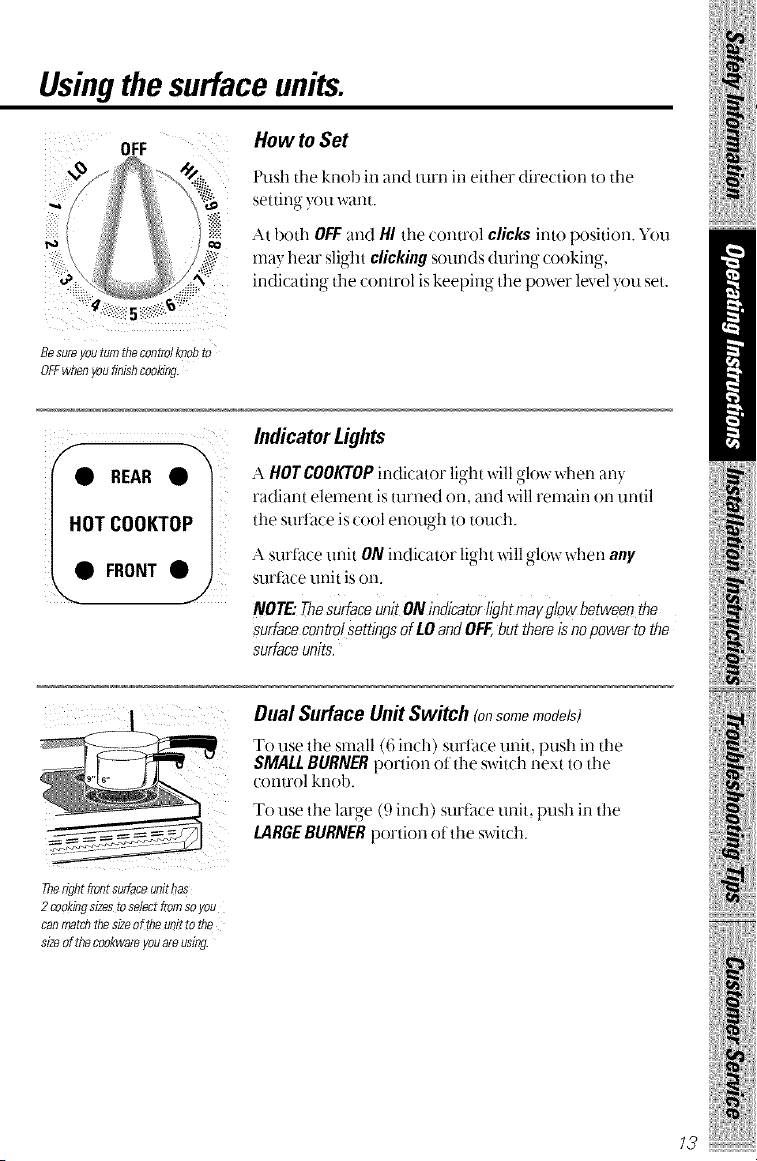
OFF How to Set
Push tlle knob in and turn in eidmr direction to tlle
setting you want.
At both OFF and HI the control clicks into position. You
mm hear slight clicking sounds during cook]no
indicatinc_ the ....control is keel)ino_ the power level you set.
Besureyoutun;thecontrolkeobto
OFFwhenyoufinisheookiz_j.
• REAR •
• FRONT •
Indicator Lights
A HOTCOOKTOPindicator light will _,-lowwhen an',
, o ,
radiant element is turned on, and will remain on until
the sm'l_tce is cool enough to touch.
k surt_tce unit ON indicator li_,-ht will _'l()w when ant,
.... o o h,
suditce urfit is on.
NOTE."Thesurfaceunit ON indicator tightmay glow between the
surfacecontrolsettingsof LOand OFF,butthere isnopower to the
surfaceunits.
' (i iI
Therightfrontsurfaceunithas
2 cooking sizes toselect from so you
canmatdHhesizeoftheunittothe
sizeofthecookwareyouareusing.
DualSurface Un# Switch (onsomemodels)
To use the small (6 inch) surth_e unit, push in the
SMatt BURNER portion of the switch next to the
(ontrol knot).
To use the laro-e (9 in(h) surt_tce unit, push in the
• o
LARGE BURNER portion of the switch.
!iiiiiii ii:ilil
_3 .....................................
iiiiiiiii iiilii!{Hi
iiiiii!li iiiii
iiiiiiiii! iiiii!iiii
Using surface units.
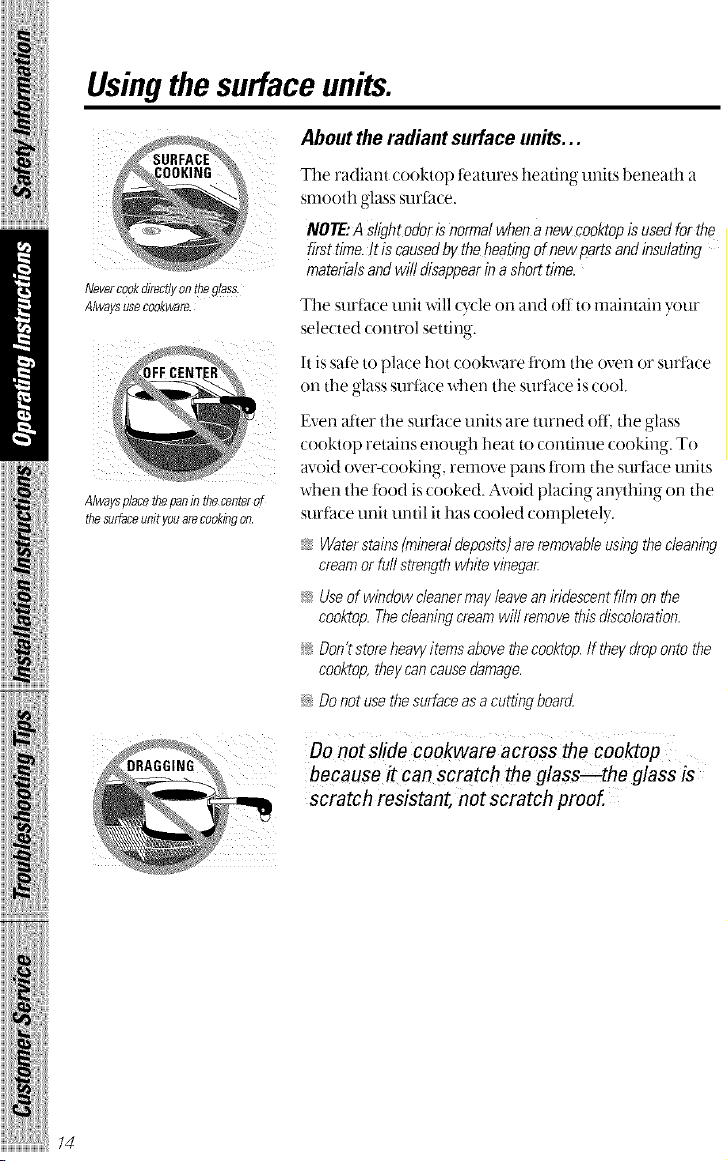
About the radiant surface units.. .
_SURFACE _,
_£00 KING _ The radiant cooktop teatures heating units beneath a
smooth glasssurface.
NOTE: A sfight odoris normal when a newcool@p isusedforthe
first time./tiscaused by the heatingof new parts and insulating
materials and will disappear in a short time.
Nsvercookdirectlyontheglass.
Alwaysusecod(ware. The surt_tce unit will Q,cle on and off to maintain your
Alwaysplacethepaninthecenterof
the su,daceunit you arecooking on.
selected control setting.
Itis sat_'toplace hot cookware ti"om the oven or surlace
on the glass surt_tce when the surface is cool.
Even _d'ter the surlace units are turned ate the glass
cooktop retains ellOtlgh heat to contintle cooking. To
avoid over4ooking, remove pans from the surtace units
when the food is cooked. Avoid pla( ing an) thing on the
surtace unit until it has cooled completely.
_ Waterstains(mineraldeposits)areremovableusingthecleaning
creamorfurlstrengthwhite vinegar,
_!:'_Useofwindowcleanermayleaveaniridescentfilmon the
cooktop.Thecleaningcreamwill removethisdiscoloration.
_,_Don'tstoreheawitemsabovethecooktop.If theydropontothe
cooktop,theycancausedamage.
_,_Donotusethesurfaceasa cuttingboard
oo S ,Jecook areacrosscoo op
because it Canscratch the glass_the glass is
Scratch resistant, notscratch proof.
14
Selectingtypesof cookware.
Thefollowing information will help you choose cookware which
will givegood performance.
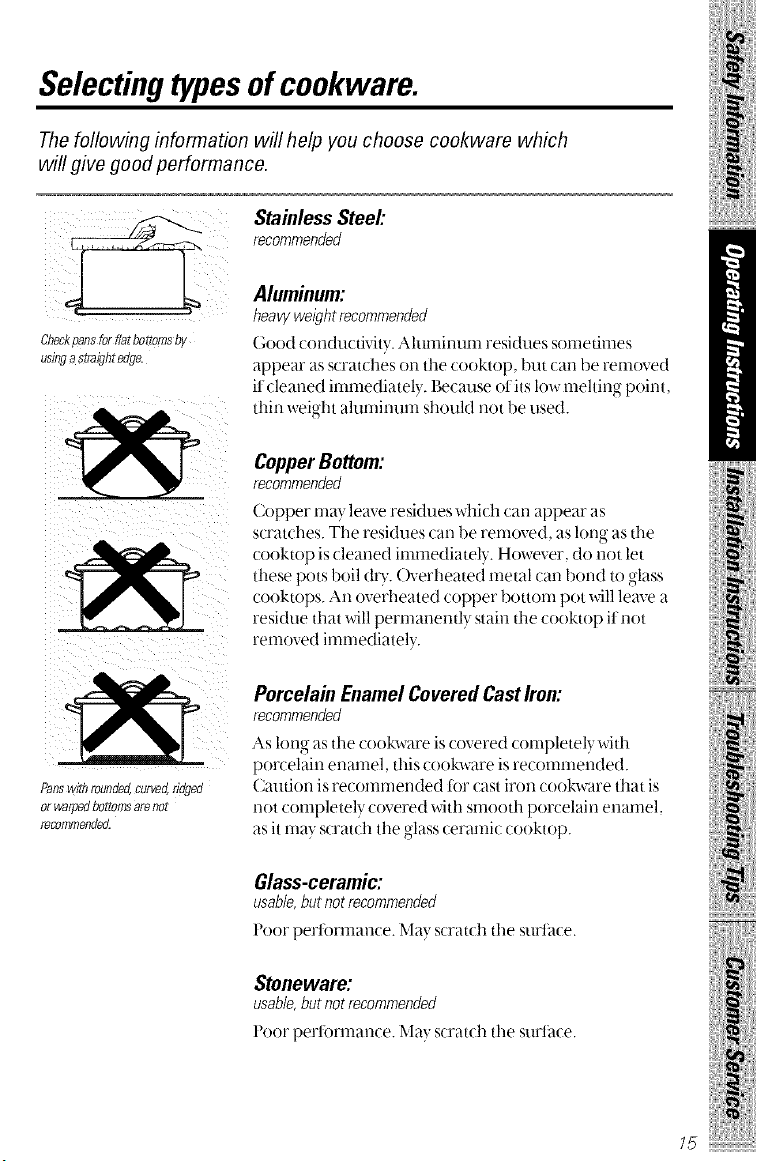
Checkpansfurflatbottomsby
usingastraightedge.
Stainless Steel."
recommended
Aluminum:
heawweightrecommeeded
Good condu_ tivity.Alumirmnl residues sometimes
appear as scratches on the cooktop, but Call be removed
it cleaned immediatel}, l_cause otits low mehing poir_t,
thin weight aluminum should not be used.
Panswith rounded, curvea, nagea
0[ wafrJeOOOFiOflI$aro ROt
rocofl?fllencleo.
Copper Bottom:
recommended
Copper may leave residues which can appear as
scratches. The residues c[-ll-ibe removed, as long as tile
cooktop is cleaned immediately. However, do not let
these pots boil d_)'.( h_erheated metal can bond to glass
cooktops. An overheated copper bottom pot will leave a
residue that will permanently stain the cooktop if not
removed immediately.
Porcelain Enamel Covered Cast Iron:
recommended
As long as tile cookware is covered completely Mth
porcelain enamel, this cookware is recommended.
Caution isrecommended tbr cast iron cookware that is
not completely covered with smooth porcelain enamel,
as it may scratch the glass ceramic cooktop.
Glass-ceramic:
usable,butnotrecommended
I:'oor f)erformance. _ [ay scrat(]l the stlrfa(e.
Stoneware:
usable,butnotrecommended
I:'oor f)erformance. _ [ay scratdl the stlrface.
!iiiiiii ii:ilil
_5 .....................................
iiiiiiiii_iiilii!{Hi
Usingtheovencontrols.
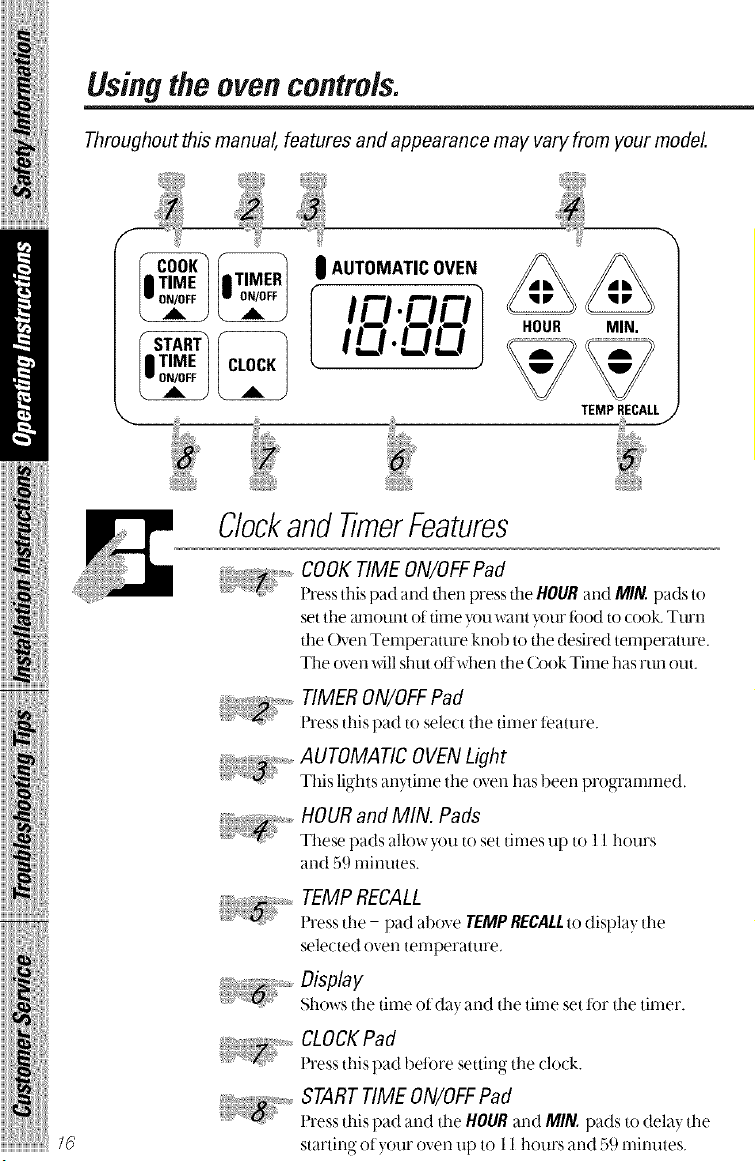
Throughout this manual, featuresand appearance may vary from yourmode/.
__ iAUTOMATIC OVEN
I CI .CICI
,EI.E,E,
HOUR MIN.
iiiiiiiill_}i{iiiiiii
iiiNii!iHH!
ClockandTimerFeatures
_i_ _!_ii_'¸
COOKTIMEON/OFFPad
Press this pad and dmn press dm HOUR and MIN. pads to
set the _unount of time you want your toad to (oak. Ttu'n
the (h_en Temperature knob to tim desired temperature.
The oven will shut offwhen the Cook Time has mn out.
TIMER ON/OFFPad
Press this pad to select the timer feature.
AUTOMATIC OVENLight
This li_hts an',time. the ....oven has been t)r°-o-ral_amed_ .
HOUR and MIN. Pads
These pads allow )ou to set times up to l1 hours
and .59 nfinutes.
TEMP RECALL
Press the - pad above TEMP RECALLto display the
selected ovell temperature.
Display
Shows the time of (la)and the time set for the timer.
CLOCKPad
Press.... this l)ad before.... settino_ tim (lock.
START TIMEON/OFFPad
Press this pad and the HOUR and MIN. pads to dela) the
starting of)our oven up to 11 hours and 59 minutes.
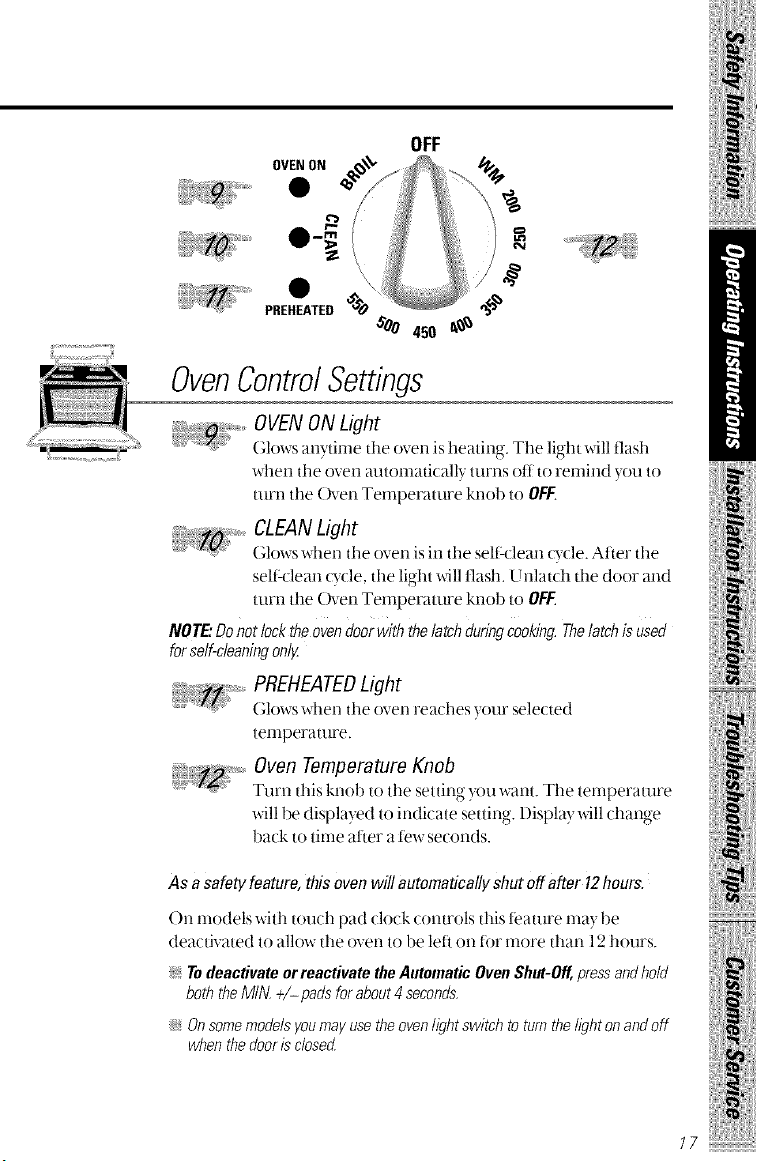
OVENON
PREHEATED
OFF
OvenControlSettings
OVEN ON Light
(;lows anytirne the oven isheating. Tile light will tlash
wllei1 tile ()veil autolnaticall} ttlFl'lS of[ tO rel-nind }(ill to
turn the liven Temperature kn(/b to OFF.
.... CLEANLight
:;"' (;lows when tile oven is in tile seltk:lean cy/le. Atier the
selt_:lean Qcle, tile light will flash. Unlatch tile door and
turn the Oxen Temperature knob to OF/_
NOTE:Donotlocktheovendoorwiththelatchduringcooking.Thelatch is used
forself-cleaningonlg
......PREHEATEDLight
Yt:_ (;lows when tile oven reaches }OllI"selected
temperature.
{i; Oven Temperature Knob
Turn this knob to the setting you want. The ternperature
will be displayed to indicate setting. Display will change
back to time after a tew seconds.
As a safety feature,this ovenwill automaticallyshutoffafter 12hours.
Oil models with touch pad dock/onu'ols this tbature may be
deactivated to allow the oven to be leti on ti/r more than 12hours.
N TodeactivateorreactivatetheAutomaticOvenShut-Off,pressandbold
boththeMIN.+/- padsforabout4 seconds.
_ Onsomemodelsyoumayusetheovenligbtswitchto turnthelightonandoff
whenthedoorisclosed.
!iiiiiii ii:ilil
/7 .....................................
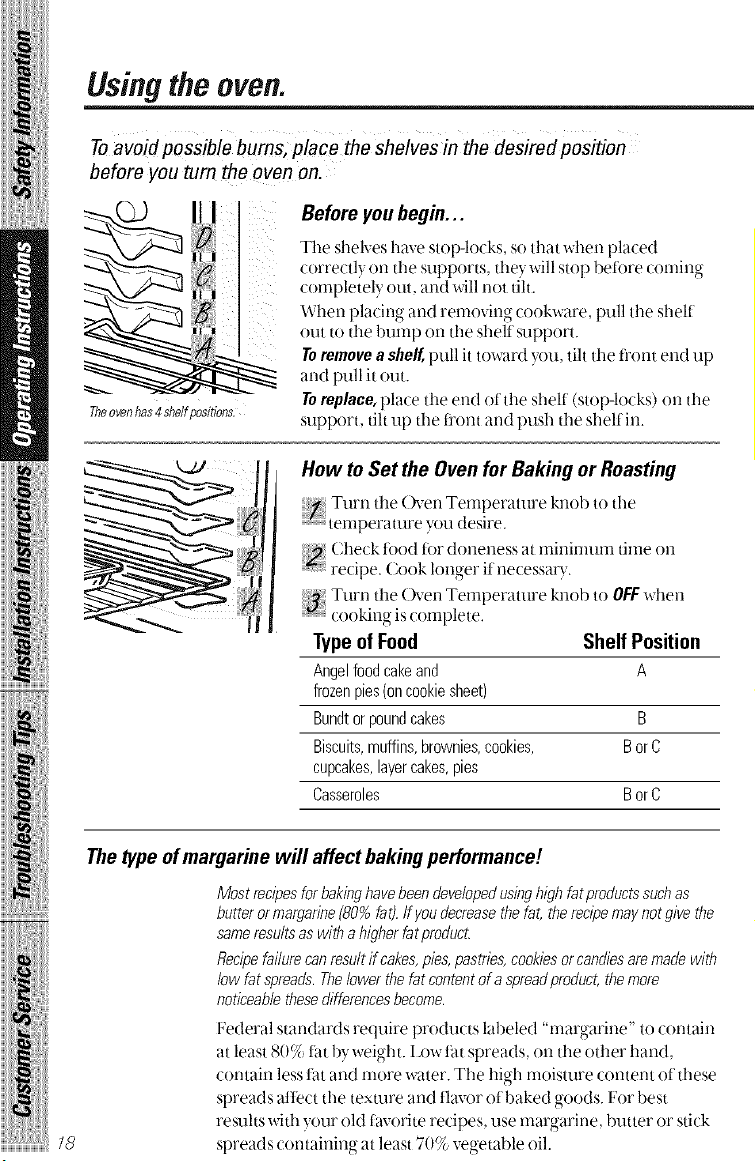
Usingtheoven.
Toavoidpossib!e burns, place theSheiveSin the desired position
before youturn the oven on.
Theovenhas4ehdfpositions.
Beforeyou begin...
The shelves have stop4ocks, so that when placed
correctl? on the supports, the? will stop beR)re cornin_,-
completely out, and will not tilt.
When placing and removing cookware, pull the shelf
out to the bump on the shelf support.
Toremove a shel{ pull it tox_vlr(t you, tilt tile ti'ont end up
and pull it out.
Toreplace, place the end of the shelf (stop-locks) on the
support, tilt up tile ti'ont and push tile shelf in.
iiiiii!li iiiii
iiiiiiiii! iiiii!iiii
iiiiiiiiiiiiii l "liiiiiiii!ii
Ill
How toSet theOven for Baking or Roasting
Turn tile ()ven Temperature knob to tile
temperature you des{re.
Check food tor doneness at minimum time on
recipe. Cook longer it necessa_),.
Turn the (h_en Temperature knob to OFFwhen
cooking is complete.
TypeofFood Shelf Position
Angelfood cake and A
frozen pies (oncookiesheet)
Bundtorpound cakes B
Biscuits,muffins, brownies, cookies, B orC
cupcakes, layercakes,pies
Casseroles B orC
18
The type ofmargarinewill affect baking performance!
Most recipes forbaking havebeen developedusing highfatproducts such as
butterormargarine (80% fat).ffyoudecreasethe fat, the recipemaynot givethe
sameresults aswith ahigher fat producL
Recipe failurecanresult ff cakes,pies, pastries, cookies orcandiesaremade with
low fat spreads. Thelower thefat contentof aspreadproduct,the more
noticeablethesedifferencesbecome.
Federal standards require products labeled "margarine" to contain
at least 80% tat b_ weigln. Lowtat spreads, on tile ()tiler hand,
contain less tat and rnore water. Tile high rnoisture content of these
spreads aflect the texture and flavor of baked goods. For best
resuhs with )our old favorite recipes, use margarine, butter or stick
spreads containing at least 70% vegetable oil.
Preheating and PanPlacement
Preheat the oven lithe recipe calls tot it. To preheat, set the oven
at the correct temperature. Preheating is necessat)" lot good results
when b_lMng cakes cooMes, pastry and breads.
Forovens without apreheat indicator light ortone, preheat I0 minutes.
Baking, results will be better if bakir|g, lxms are centered in the ()veil
as much as possible. Pans should not touch each other or the walls
otthe ()veil. If you need to use t_o shelves, stagger the pans so one
is not directly above the other, and leave approximately 1_'_"ti'om
the ti'ont otthe pan to the ti"ont otthe shelf.
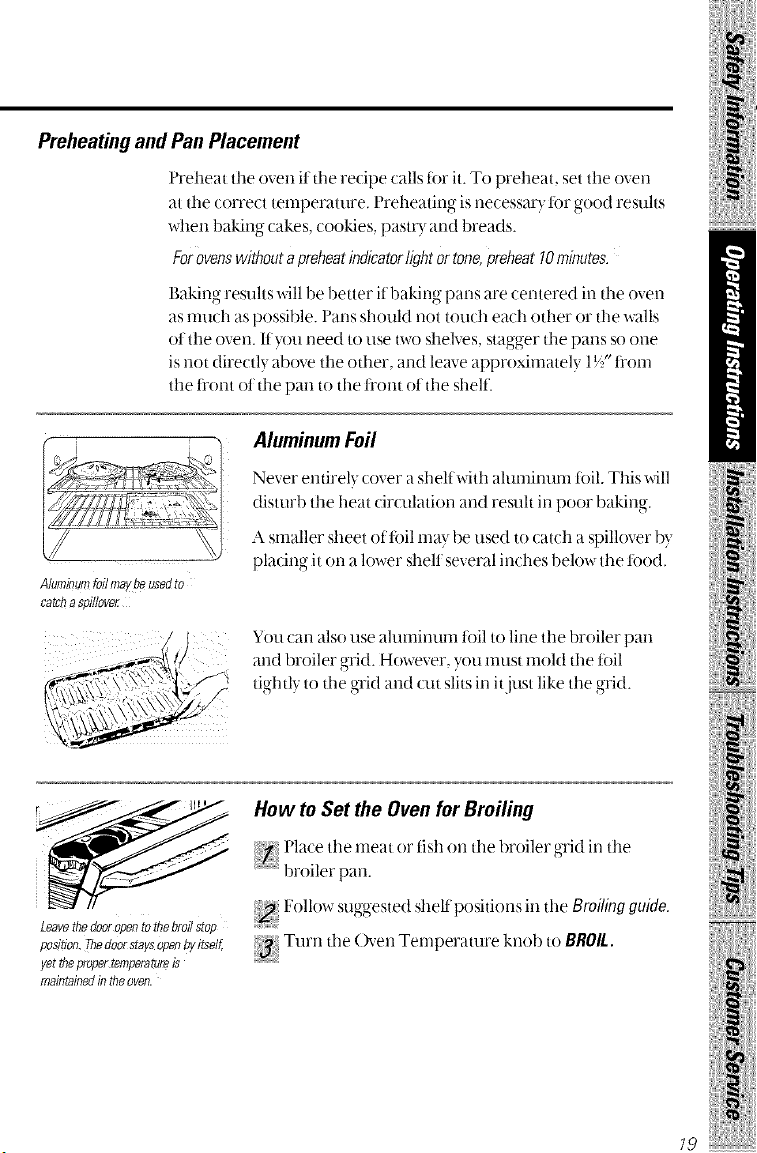
Aluminumfoil maybe usedto
catchaspil/over
Aluminum Foil
Never entirely cover ashelf with aluminum toil. This will
disturb the heat circulation and resuh in poor baking.
A smaller sheet of toil may be used to catch a spillover by
1 lllO 1 1
p ac" g "t o -_a lower shelt several inches below the food.
You car| also use aluminun_ foil to line tile broiler pan
and broiler gr d. H( wever, you must rooM the toil
tiglnl} to the grid and cut slitsin itjust like the grid.
. • ,;>: ....
LeavethedooropentothebroNstop
position.ThedoorstaysopenbyLS'elf,
yetthepropertemperatureis
maintainedintheoven.
How toSet theOven for Broiling
l'lace tile meat or fish on tile broiler grid in tile
broiler pan.
Follo_ sum,ested shell positions in the Broiling guido.
3, ! Turn the (h'en Ternperamre knob to BROIL.
,,,,_,mi___I¸¸¸¸@,8¸
iiiiiiiii iiilii!iHi
iiiiiiiill iiiiiiiiii
iiiiiiii !ii!iHH!
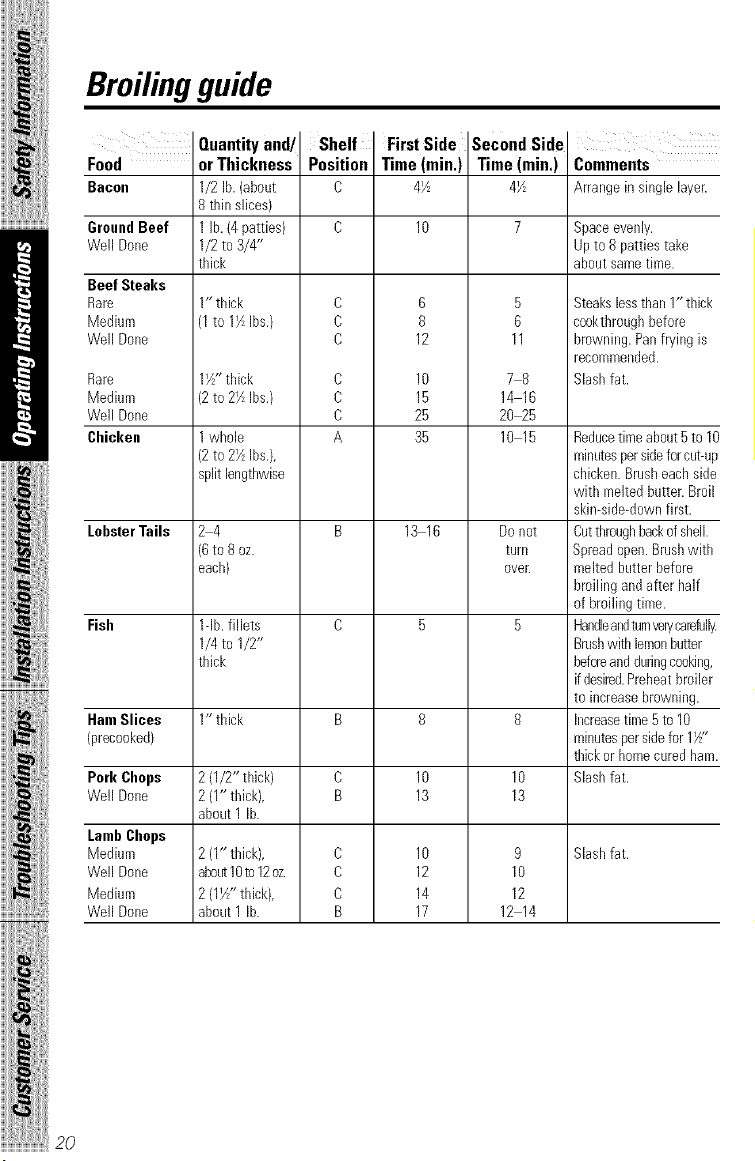
Broiling guide
Quantity and/
Food orThickness
Bacon 1/2 lb.(about
8thinslices}
Ground Beef 1lb.(4patties)
Well Done 1/2 to 3/4"
thick
BeefSteaks
Rare 1" thick
Medium (1to I'4 Ibs./
Well Done
Rare 1X"thick
Medium (2to 2_Ibs./
Well Done
Cbicken 1whole
(2to 2½Ibs.),
splitbngthwise
LobsterTails 2 4
(6to 8oz.
each}
Fisb lqb. fillets
1/4 to 1/2"
thick
HamSlices 1" thick
(precooked}
Pork Cbops 2 (1/2" thick)
Well Done 2(1" thick),
about 1lb.
LambCbops
Medium 2(1" thick),
Well Done abotr_1Oto 12oz.
Medium 2(1_" thick),
Well Done about 1lb.
First Side
Time (min.)
C 4½
C 10
C 6
C 8
C 12
C 10
C 15
C 25
A 35
B 13 16
O 5
B 8
C 10
B 13
C 10
C 12
C 14
B 17
Second Side
Time (min,)
4_
5
6
11
78
14 16
20_5
10 15
Do not
turll
ovelt
9
10
12
12 14
Comments
Arrangein singlelaye_
Space evenly.
Up to 8 patties take
about same time.
Steakslessthan 1" thick
cookthroughbefore
browning.Panfryingis
recommended.
Slashfat.
Reducetimeabout5to 10
minutespersideforcut-up
chicken.Brusheachside
with melted butter.Broil
skin-side-downfirst.
Cutthroughbackof shell.
Spreadopen.Brushwith
meltedbutterbefore
broiling andafterhalf
ofbroilingtime.
HandleandturnverycarefiJll_
Brushwithlemonbutter
beforeand duringcooking,
if desired.Preheatbroiler
toincreasebrowning.
Increasetime5 to 10
minutespersidefor1_"
thickorhomecuredham.
Slashfat.
Slash fat.
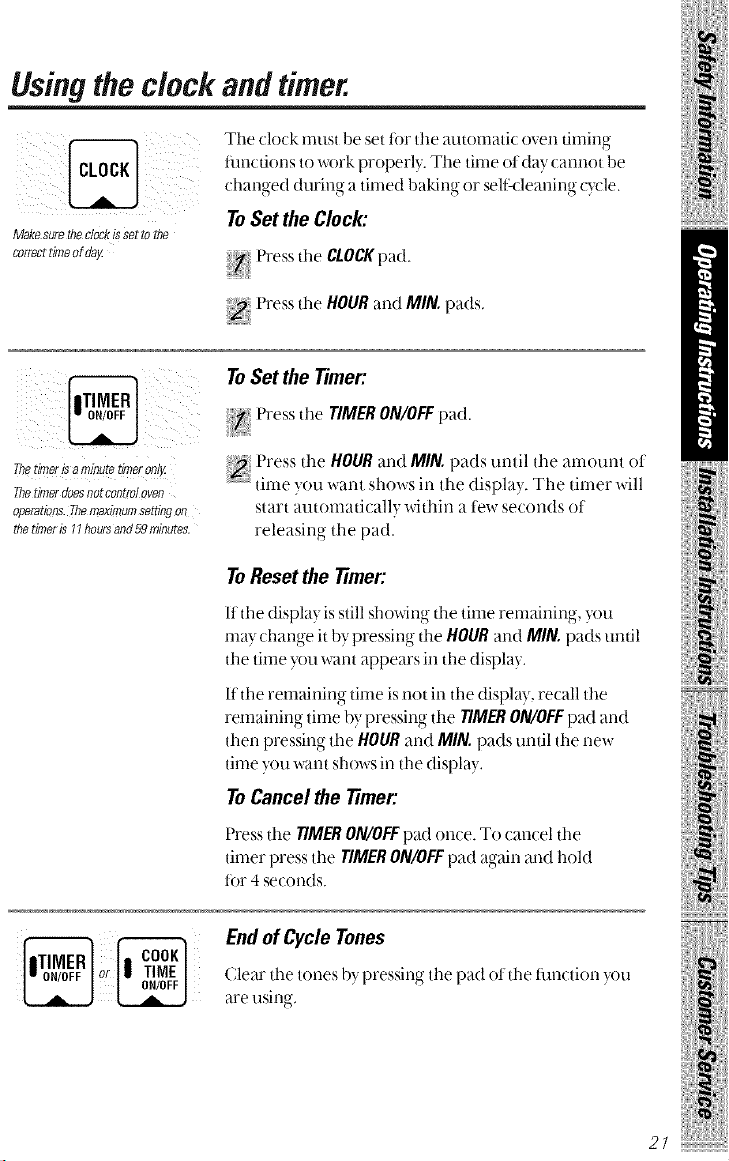
Using the clock and timer.
Makesurethedeckissetto tt;e
correcttimeofdag
Tile clock must be set for tile auton]atic oven tin]ing
flmctions to work properly. Tile time at day cannot be
char|gad during a tirned ])aking or sellkleanir N (?cle.
ToSet theClock:
;_ Press tile HOURand MIN. pads.
ii
Thetinierb aminutetimeronlg
Thetimerdoesnotcentre]oven
operations.Themaximumsettingon
thetinteris11hoursand59minutes.
ToSet theTimer:
Press tile TIMERON/OFFpad.
Press tile HOURand MIN.pads until tile amou'nt at
tirne you want shows in the displa). Tile tirner will
start automaticall} within a few seconds ot
releasing the pad.
ToReset the Timer:
If tile display is still showing the time remaining, you
rnay char|ge it bypressing the HOURar|d MIN. pads until
the time you want appears ill the display.
11the remaining time isnot in the display, recall tile
remaining time by press no- the rIMER ON/OFFpad and
, , o
then pressing the HOURand MIN.pads until the new
time }x)u want shows ill tile display.
ToCancel the timer.
Press the TIMERON/OFFpad once. To cancel tile
timer press tile TIMERON/OFFpad again and hold
tar 4seconds.
Clear the to:nes b}pressir N tile pad of tile functior| you
are using.
21
!iiiiiii ii ilil

iiiiiii@iiil+iHHi
Using the timed bakingand masting features.
Donotlatch the oven door during timed cooking. Thelatch isused
forself-cleaning only.
NOTE."Foodsthatspoileasily,suchasmilk,eggs,fish,stuffings,poultryandpork,shouldnotbe
allowedtositformorethanIhourbeforeoraftercooking.Roomtemperaturepromotesthegrowth
ofharmfulbacteria.Besurethattheownlightisoffbecauseheatfromthebulbwillspeedharmful
bacteriagrowth.
+++l_}i{++++++i
+++Nii+iHH!
Z_
FLOUR Mill.
_W _ Turn the ()yen Temperature knob to
_ ternpeFattlre,
How to Set an Immediate Start and
Automatic Stop
Makesuretheovenclockshowsthecorrecttimeof da}_
, Press COOKTIMEON/OFE
_:_ Using tile HOURand MIN.pads. enter tile length o£
...............rooking time.
the desired
Tile display will show the cooking time remaining. When
the oven reaches the set temperature, a tone Sotlnds.
When the oven automatically turns ott the AUTOMATIC
OVEN light will tlash and tile oven will signal. Turn the
oven control to OFF to stop tile flashes and signal.
How to Set a Delay Start and Automatic Stop
Makesurethee+nclecksho sthecorrectt+,eef
:f COOK.MEON/OFE
U sing tile HOURand MIN. pads, enter tile length ot
..... cooking time.
U singtile HOURand MIN. pads, enter tile ume_ou
" want cookingto start.
[ | _}T[ Turn the ()yen Temperature knob to the desired
temperature.
When the oven automaficall) turns oil the AUTOMATIC
OVENlight will t]ash and theovenwill signal. Turn the
oven control to OFFto stop tile tlashes and signal.
Adjust the oven thermostat--Do it yourself!
Youmay find that your new oven cooks differently thanthe one # replaced.
Use your new ovenfor a few weeks tobecome more familiar with it. If you
still think your new ovenis toohot or too cold, youcan adjust the thermostat
yourself.
Donot usethermometers,such as thosefound in grocerystores,tocheckthetemperature setting of
your oven.Thesethermometersmay vary20-40 degrees.
NOTE: Thisadjustmentwill not affect the broi/ing orthe se/f-cleaning temperatures.
Theadjustment will be retainedin memoryafter apower failure.
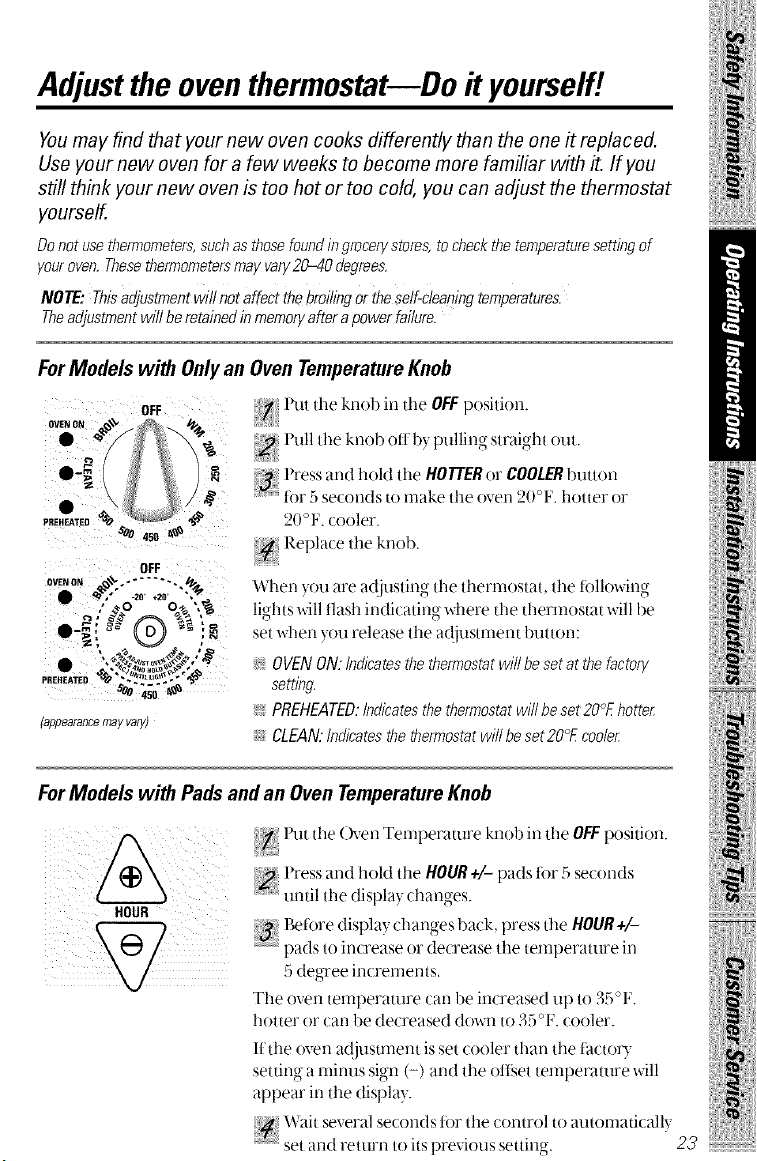
ForModels with Onlyan
OVENON
OvenTemperatureKnob
l'ut the knob in the OFFposition.
l'ull the knob ott b', pulling straight out.
_; Press and hold the HOTTER or COOLERbutton
for 5 seconds to make the oven 20°F. hotter or
20°F. cooler.
Replace the knob
When ',ou are ad ustino the thermostat the folloMno-
lights will flash indicating where the thermostat will be
set when you release the a(!iustment button:
_t_OVENON. Indicatesthe thermostatwill be set at the factory
setting.
:_ PREHEATED: Indicatesthe thermostat will be set 20°£ hotter,
_ CLEAN.Indicatesthe thermostatwill be set20°£ cooler,
ForModels with Pads and anOvenTemperatureKnob
HOUR
Put the ()yen Temperature knol) in the OFFposition.
{
{_ Press and hold the HOUR+l- pads for 5 seconds
until the displa} changes.
{ Beiore displa}changes back, press the HOUR +l-
pads to increase or decrease the temperature in
5 degree increments.
#
The oventemperature can beincreased up to35°F.
hotter or can be decreased down [o _.}c-_oF. cooler.
If the oven ac{jusunent is set (ooler than the fa_ tol):_
settin24 a minus sign (-) and the ottget temperature will
appear in the display. .........
Wa.severals.o.ds.,r.,eco..'ol.,au.,....all,
set and return to its previous setting. 23 .....................................
iiiiiiiii iiilii!iHi
iiiiiiiill_iiiiiiiiii
iiiNii!iHH!
Using the self-cleaning oven.
Never force the latch handlel Forcing the handle will damage thedoor
lock mechanism.
Beforea CleanCycle
Therangemustbecompletelycoolinordertoset the
self-cleancycle.
Wipeupheavysoilontheoven
bottom.
We rec(mmlend venting with an open window or usirN a
ventilation tm-_or hood during the tirst selt_'lean cycle.
Remove all cookware and any aluminum foil fi'om
the oven.
Tile oven shelves can be seltkleaned, but tile},will
darken, lose their luster and become hard to slide.
Do not llSe abrasives or oven cleaners. Clean tile top,
sides and outside ot the oven door with soap and water.
The enamel grid and broiler pan may be cleaned in the
seltklean ng oven. However. to help prevent hemT
....smokecaused b_.....seltkleanng,tile,greasy, ,soil n tile pan,
VOtl llltlSt tirst clean off tile excess grease.
Make sure tile oven light bulb cover is in place and tile
oven light isoil',
IMPORTANT:The heahh of some birds isextremel}
sensitive to the fumes given ott'during the sell:cleaning
c, cle of an} range. Move birds to another wellventilated
roonl
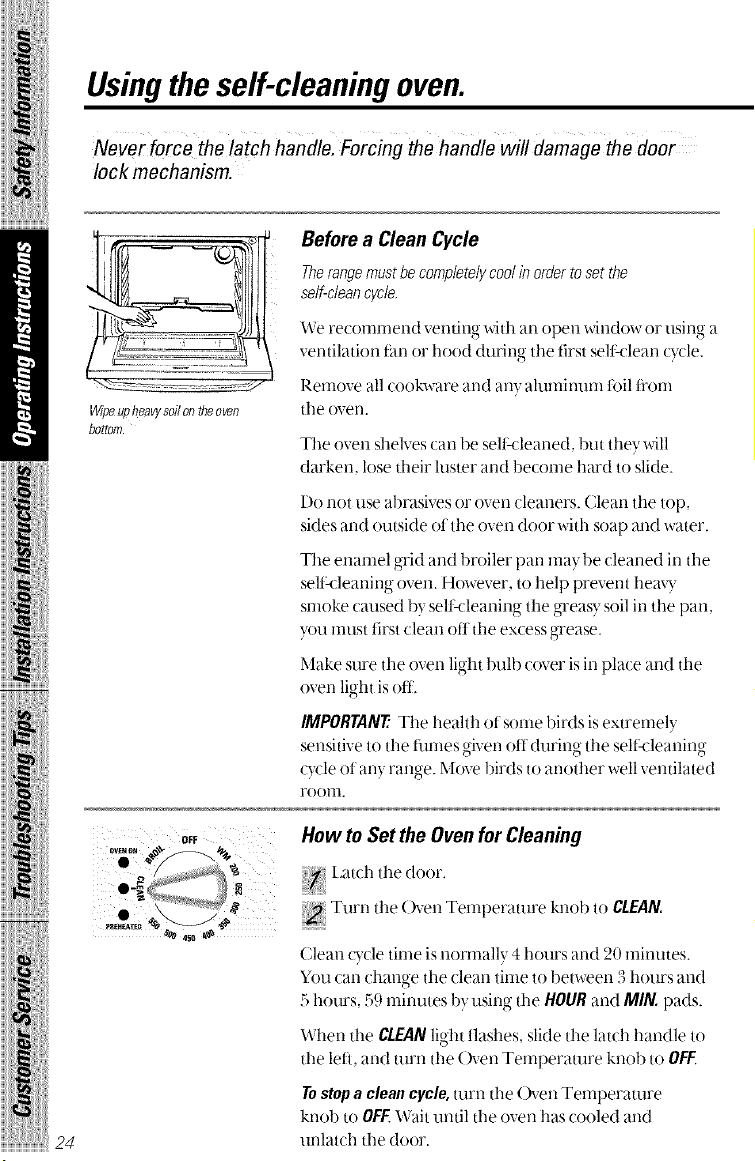
2 o,, How to Set the Oven for Cleaning
,_ _, [ _atdl the door.
• -_
• _ # Turn the ()ven Temperature kno -)to CLEAN.
Clean cycle time isnormally 4hours and 20 minutes.
You can change tile (lean tmle to 1)etx_een _hours and
5hours, 59 minutes byusing the HOURand MIN.pads.
When the CLEANlight tlashes, slide the latch handle to
the left, and mrn the (h'en Temperature knob to OFF.
Tostopa cleancycle,turn tile (ken Temperature
knob to OFF.Wait until the oven has cooled and
unlatch the door.
llll_
DFF
%
HOUR MIN.
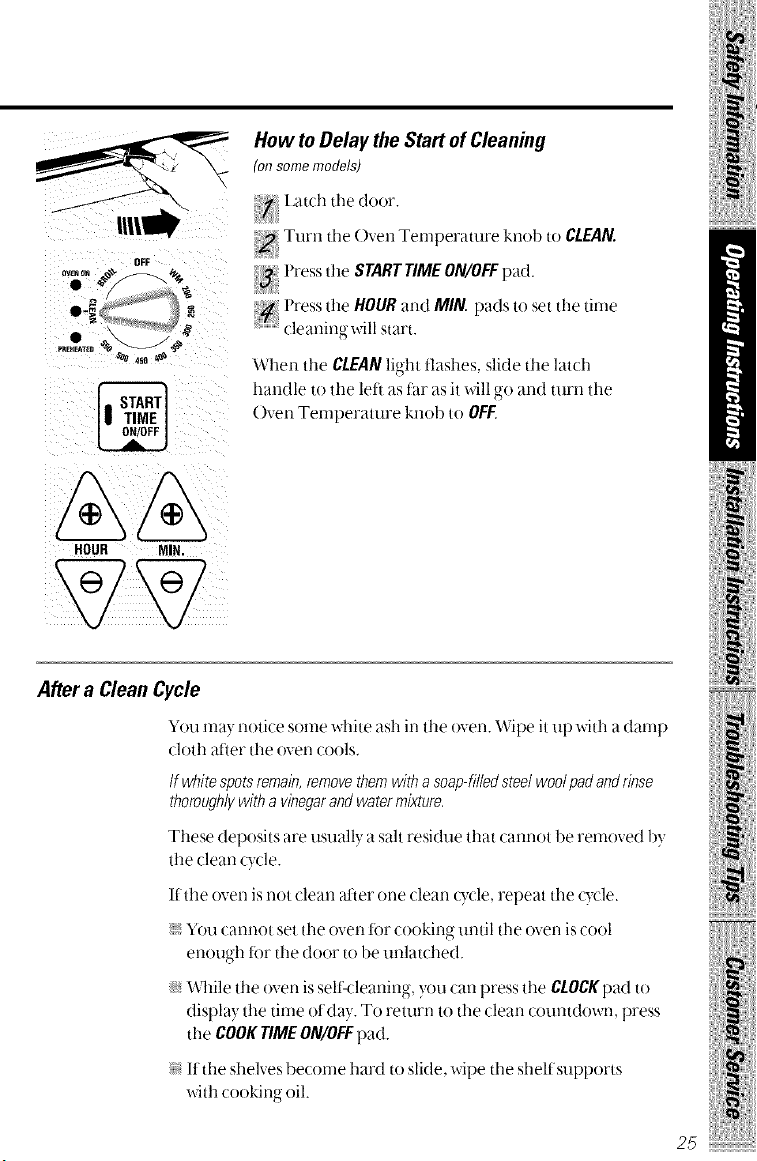
How to Delay the Start of Cleaning
onsomemodels)
l,auh tile door.
Turn the Oven Tenlperamre knob to CLEAN.
Press the STARTTIMEON/OFFpad.
Press the HOURand MIN. pads to set the tirne
cleaning- will start.
Wher_ the CLEANlight flashes, slide the latd|
handle 1othe leli as thr as it will go and turn the
Oven Ten|perature knob to OFF
After a CleanCycle
You ma} r|otice some white ash in tile (wen. Wipe it up with a darnp
cloth atier the oven cools.
If whitespotsremain,remove them with a soap-filled steel wool pad and rinse
thoroughly with a vinegarand watermixture.
These depos ts are tlSl.lall}a salt res due that canrlot )e removed )y
the dean _)cle.
If the (wen is not clean alier one clean Q_le, repeat tile cycle.
i¢ YOtlcannot set the oven t0r cooking tlntil the oven iscool
enough t0r the door to be unlatched.
_ While the oven isseltkleaning, }xmcan press the CLOCKpad to
display the time ot day. To return to the clean countdowrz, press
the COOKTIMEON/OFFpad.
N It the shelves become hard to slide, wipe the shelf supports
with cooking oil.
iiiiiiiiDili i
iii iii ii:iii[i
25 .....................................
iiiiiiiii iiilii!{Hi
Care and cleaning of the range.
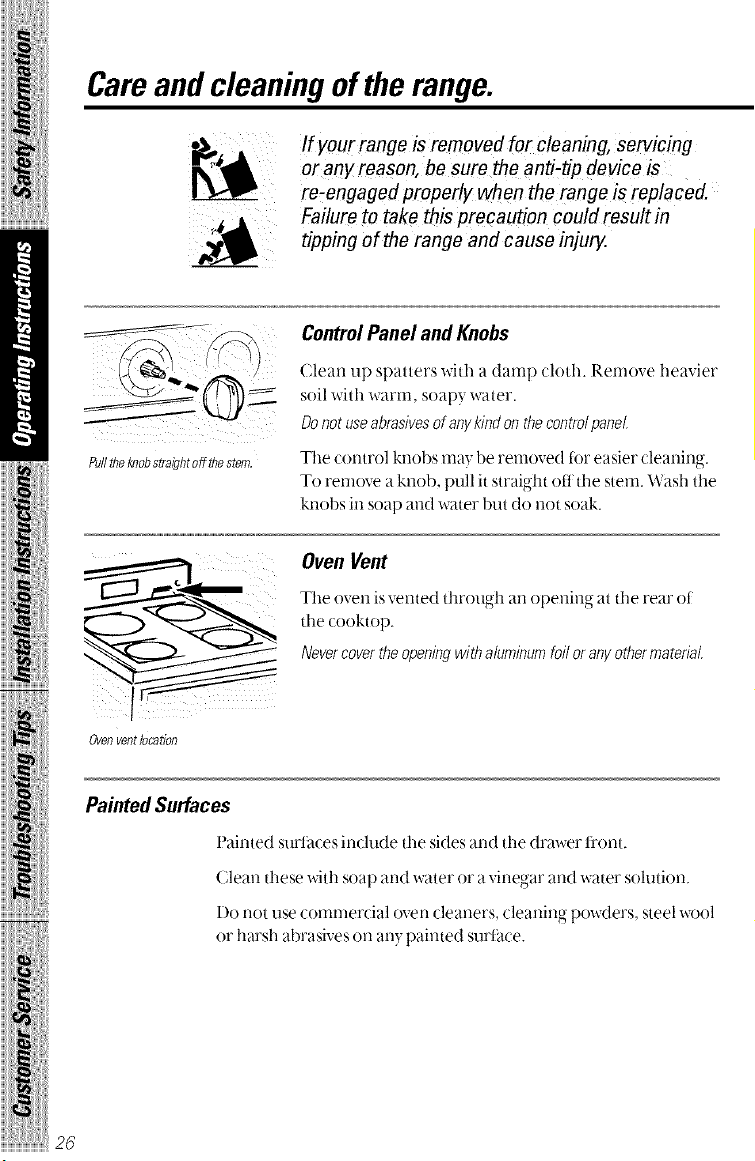
If your range isremoved for cleaning, servicing
or any reason, be sure the anti-tip device is ....
re-engaged properly when therange isreplaced.
Failureto take this precaution could result in
tipping ofthe range and cause injury.
ControlPanel and Knobs
Clean up spatters with a daml) cloth. Remove heavier
soil with warm, soap) water.
Donot useabrasivesof anykindonthecontrolpanel.
Tile control knobs ma) be removed tor easier cleaning.
To remove a knob, pull it straight off the stem. Wash the
knobs ill soap _lll(l water but do not soak.
iiiiiiiill_}i{iiiiiii
iiiNii!iHH!
Oven Vent
Tile oven is vented through an opening at tile rear of
the cooktop.
Never coverthe openingwith aluminum foiloranv other material.
Ovenventlocation
PaintedSurfaces
Painted surf ales indude tile sides and tile drawer ti'ont.
Clean these with soap and water or a vinegar and water solution.
I)o not rise commercial oven deaners, cleaning powders, steel wool
or harsh abrasives Oil al-ly painte(t Stli't_t(e.
Z
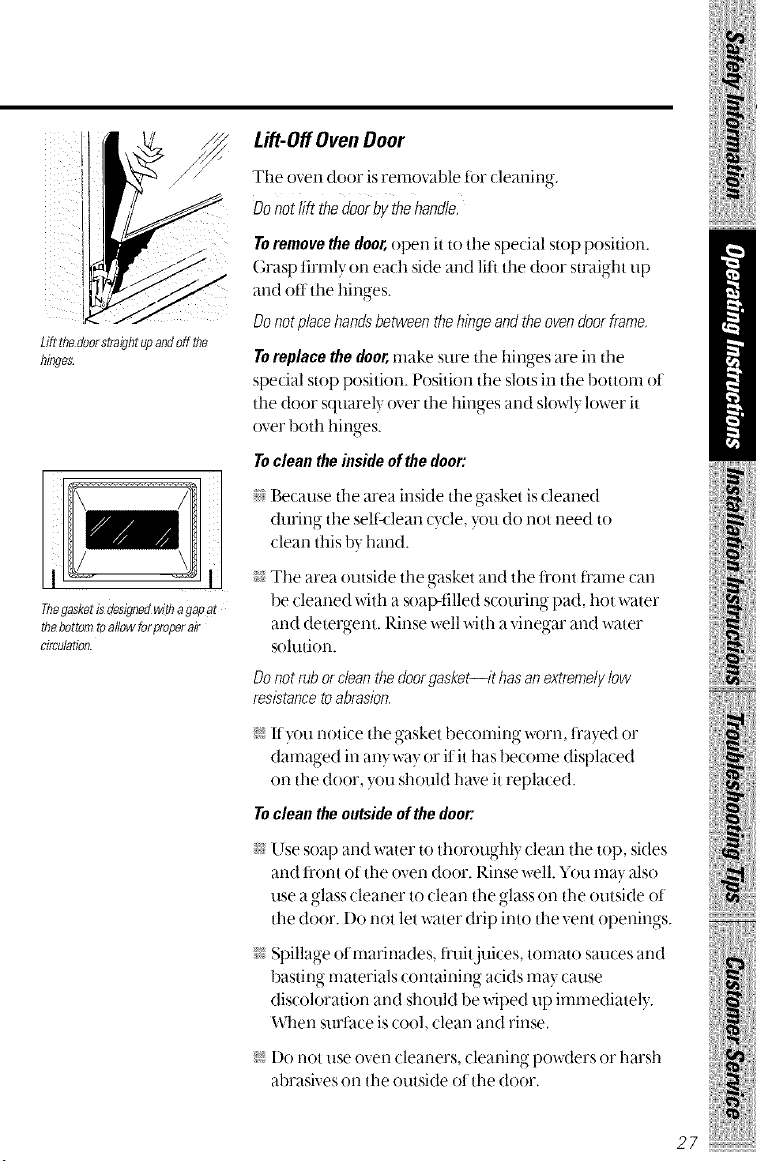
Liftthedoorstraightupandoff the
hinges.
Theflasketisdesign_ with aflapat
thebottomtoallow forproperair
circulation.
Lift-OffOven Door
The oven door isremovable for cleaning.
Donottift thedoorbythehandle.
Toremove the door, open it to the special stop position.
(;rasp tirrnly orl each side and lift the door straight tip
and oil the hinges.
Donot place handsbetween the hingeand the ovendoorframe,
Toreplacethedoor,make sure the hinges are in the
special stop position. Position the slots in the bottom ot
the door squarel) over the hinges and slowl)lower it
over 1)oth hinges.
Toclean theinsideof thedoor:
:_!:"gecause the area inside the gasket iscleaned
during the sellklean ()cle, you do not need to
clean this b? hand.
i_ The area outside the gasket and the fl'ont fl'ame can
be cleaned with a soap-tilled scouring pad, hot water
and detergent. Rinse well with a vinegar and water
solution.
Donot ruborcleanthe doorgasket--it hasanextremelylow
resistanceto abrasion.
If you notice the gasket beconfing worn. fl'ayed or
damaged in anywa} or it it has become displaced
on the door, }ou should have it replaced.
Toclean theoutsideofthedoor.
s;?'Use soap and water to thorougl-d} clean the top sides
and fl'ont of the oven door. Rinse well. You may also
use a glass cleaner to clean the glass on the outside ot
the door. I)o not let water drip into the vent ol)enino-s_,.
i_ Spillage oI marinades, trait juices, tomato sauces and
basting materials containing acids me} cause
discoloration and should be wiped up immediately.
When surt_lce is cool, clean and rinse.
I)o not use oven cleaners, cleaning powders or harsh
abrasives Oltthe outside ot the door,
!iiiiiii ii ilil
27 .....................................
iiiiiiiii iiilii!{Hi
Care and cleaning of the range.
Oven Heating Elements
Donot clean the bakedanent orthe broildanent
Anysoil will bum off when the elements areheatect
To clean the (wen floor ge _tly lift the )al,:eeleme _t.
Cleanwith warm soapy water.
OvenShelves
Clean the shelves with an abrasive deanser or steel wool.
iiiiiiiill_}i{iiiiiii
iiiNii!iHH!
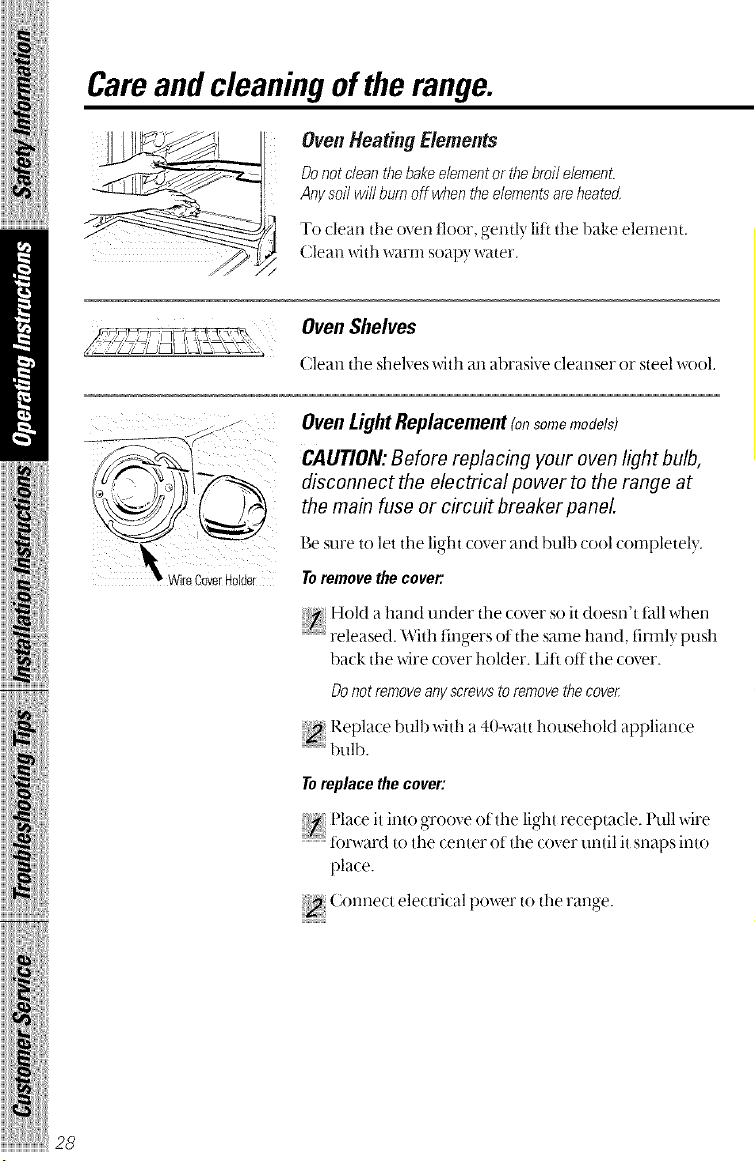
OvenLightReplacement (onsomemodels)
CAUTION:Before replacing your ovenfight bulb,
disconnect the electrical power to therange at
themain fuse or circuit breaker panel.
Be sure to let the light (over and bulb cool completely.
Toremove the cover.
Hold a hand under the (over so it doesn't fall when
:::::::released. With fingers ot the same hand, tirml) push
back the wire cover holder. IJfl off the cover.
Donot removeany screws to removethecove_
Repla{e bull)with a 40-watt household applian(e
bulb.
Toreplace the cover:
Plate it into groove of the light recepmde. Pull wire
tofward to the (e ntel"of the (()ver tm til it snap sinto
place.
Connect electrical power to the ran_,-e
o.
/];r_,yys'rirr -gt,-i_,xA_'(.
After broilingremovethebrdbr pan
fromtt;eoven.
Broiler Pan & Grid
After broiling, remove the broiler pan fl'orn the oven.
Removethe grid fl'orn the pan. Caretully pour out the
grease ti'om the pan into a proper (ontainer.
Wash and rinse the broiler pan and grid in hot water
with a soap4illed or plastic scouring pad.
Iftoed has burned on, sprinkle the grid with detergent
while hot and c(wer Mth wet paper towels or a dishdoth.
Soaking the pan Mll remove burned-on tbods.
The broiler pan may be cleaned with a commercial oven
cleaner..... Ifthe ,gridis ,gre_enamel. , it can.....also be cleaned
with an oven deaner. If the grid ischrome, do not use
all ovell cleaner to dean it.
Both the broiler pan and grid can also be cleaned in the
dishwasher.
Donot store asoiled broilerpanand grid anywherele the range,
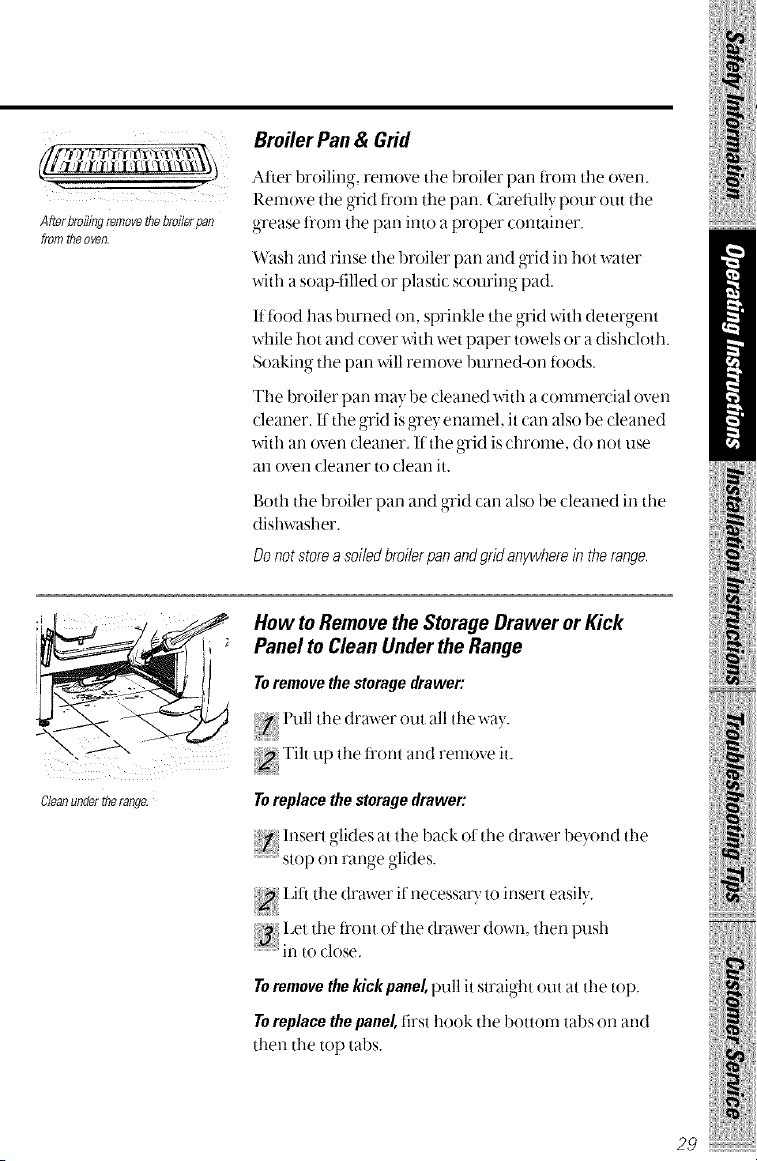
Cleanundertherange.
How toRemove the Storage Drawer or Kick
Panel to Clean Under the Range
Toremovethestoragedrawer:
Pull the drawer ()tit all the wa_,.
;2 Tilt tip the ....fl'ont and remove it
Toreplacethestoragedrawer:
Insert glides at the back ot the drawer be) end the
stop on range glides.
Lift the drawer if necessary toinsert easih,.
[ ' ,
3,! l_etthe fl'ont ot the drawer down, then push
irl to dose.
Toremove the kick panel, pull itstraight ()titat the top.
Toreplacethepanel,first hook the bottom tabs on and
then the top tabs.
iiii iiiiiH iiiilili/i
29
iiiiiiiii iiilii!iHi
Cleaning the glass cooktop.
Cleantheglass surface with cleaning cream before youuse thecooktop for
thefirst time.Also, clean the glass surface after each use. Thishelps
protect the topand makes clean-up easier.
To clean the cooktopseal, let a wet cloth rest on itfor a few minutes, then
wipe clean. Use a mild detergent if needed.
Donot usea knife or anysharp object on the seal because itwill cut or
damage it.
iiiiiiiill_iiiiiiiiii
iiiNii!iHH!
Daily Cleaning
Use ollly a recornnlended clearfing cream, Sllch as Cerarna grite or
tile Cooktop Cleaning Creme, on the glass cooktop.
To lllairltain and protect tile surt_tce of} OilYnewglass cooktop
tollow these steps.
Betore )ou use the cooktop tor tile first time, clean it with cleaning
cream. This helps protect ttle top and makes clean-up easier.
N Clean the surface with the cleaningcreamafter eachuse.
i_ Rub a few drops (less isbetter)ofthe cleaningcream onto soiled
areausing a damppaper towel.Buff with adry paper towel until
aft soil and cream areremove_
For heavy,burned-on soil:
Appl} a tew drops ot tile cleaning/ream to tile
:::::::::::::_(cool) soiled area.
Using a (tamp paper towel, rub tile cream into ttle burned-on
area. As with any burned-on spill, this ma} require some effort.
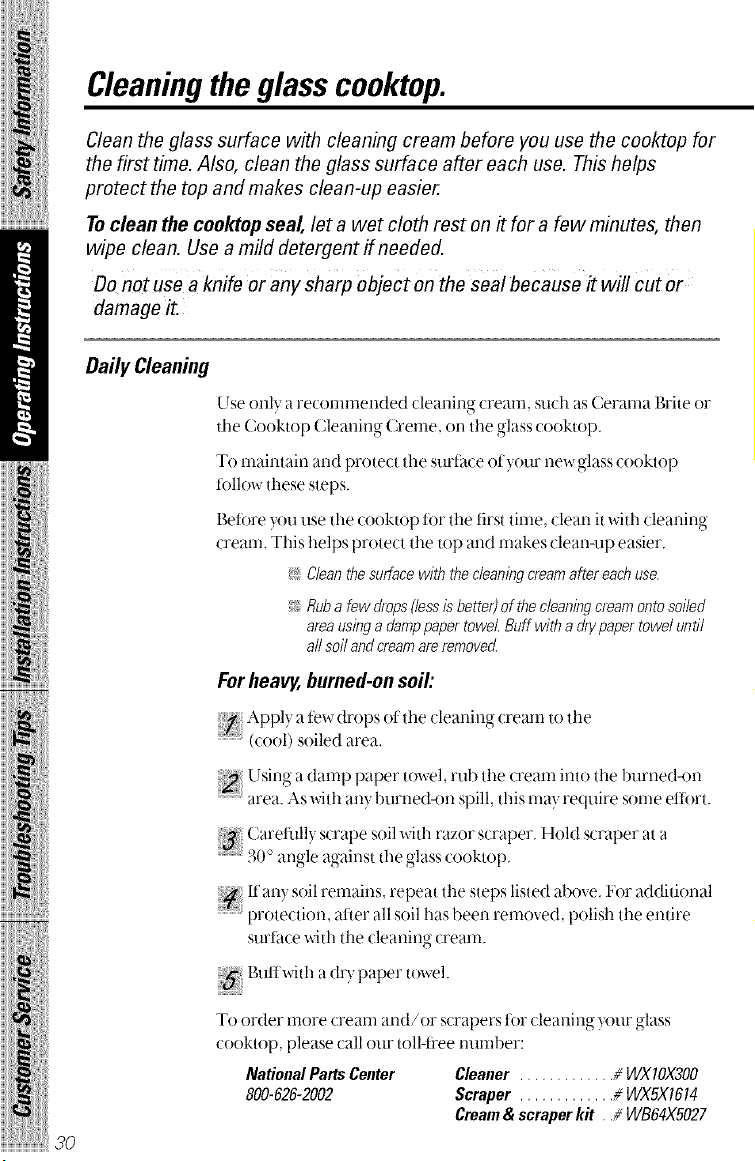
Carefull} scrape soil with razor scraper. Hold scraper at a
:::::::::::::_30 ° angle against tile glass cooktop.
If an} soil remains, repeat ttle steps listed above, l_or additional
protection, atier all soil has been removed, polish tile entire
surface with ttle cleanino- cream
Buff'with a (h)' paper towel.
To order more creanl and/or scrapers for cleaning }our glass
cooktop, please call our toll-ti'ee number:
National Parts Center Cleaner ............. //WXIOX300
800-626-2002 Scraper ............. //WXS)( 1614
Cream & scraper kit , ,//WB64XS027
SpecialCare
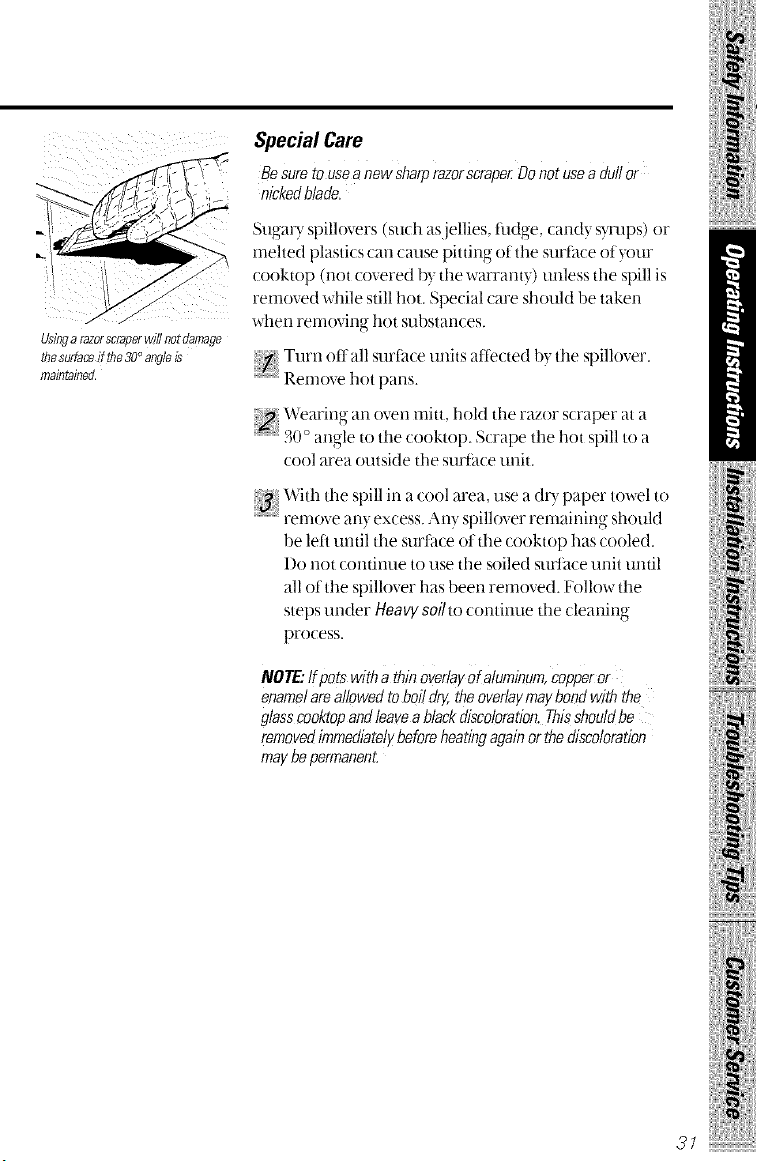
Besureto useanew Sharprazorscrape_Donot usea dullor
nickedblade.
Usingarazorscraperwilinotdamage
thesu,daceif the30°angleb
maintained.
SugaU spillovers (such asjellies, flldge, candy syrups) or
mehed plastics can cause pitting of the surl_tce of_,our
cooktop (not covered by the warranty) unless the spill is
removed while stillhot. Special care should be taken
when removing ]lot substances.
Turn oft all surface u'nits aftected b} the spillover.
Remove hot pans.
Wearing- an ovell mitt, hold tile razor s(raper at a
30° angle to the cooktop. Scrape the hot spill to a
cool area outside the surtitce unit.
With tile spill in a cool area. use a (hTpaper towel to
remove an_, excess. A m spillover remaining should
be left until the surtace of the cooktop has cooled.
I)o not conunue to use the soiled surl_tce unit unul
all of the spillover has been removed. Follow the
steps under Heavy soilto continue the cleaning
process.
NOTE:If potswitha thinoverlayof aluminum,copperor
enamelareallowedto boildg theoverlaymaybondwiththe
glasscooktopandleavea blackdiscoloration.Thisshouldbe
removedimmediatelybeforeheatingagainorthediscoloration
maybepermanent.
!iiiiiii ii:ilil
iiiiiiiiiii_iii!iili_iilii,!i
iiiiii{i i{/
Installationoftherange.
Readthese instructions completely and Carefully.
BeforeYouBegin
IMPORTANT: Save these instructions for the local electrical
inspector's use.
IMPORTANT? OBSERVE ALL GOVERNING CODES AND
ORDINANCES.
NOTE TOINSTALLER:Leave these instructions with the
appliance after installation iscompleted.
NOTE TO CONSUMER:Keep this Owner'sManual and
Installation Instructions for future use.
NOTE"This appfiance mustbe properly grounded.
ToolsYouWillNeed
;_'I Jargeblade s_rewdriver
1/4 hex head nutdriver
i{ Channel lock pliers
ElectricalRequirements
CAUTION,FORPERSONALSAFET_ DONOT USEAN
EXTENSIONCORDWITH THISAPPLIANCE.
REMOVEHOUSEFUSEOR OPENCIRCUITBREAKER
BEFOREBEGINNING INSTALLATION.
This appliance must be supplied with the proper voltage and
t_'equency, and connected to an individual, properly grounded
branch circuit, protected bya ciroait breaker or time delay fllse,
as noted on the rating plate.
Wiringmustcoeformto NationalElectricCodes.
It the electric service provided does not meet the above
specitications, have a licensed electrician install an approved outlet.
Because ran ,e terminals are not accessible alier range isin position
tlexible service conduit or cord nltlSt be used.
Readthese instructions completely and Carefully.
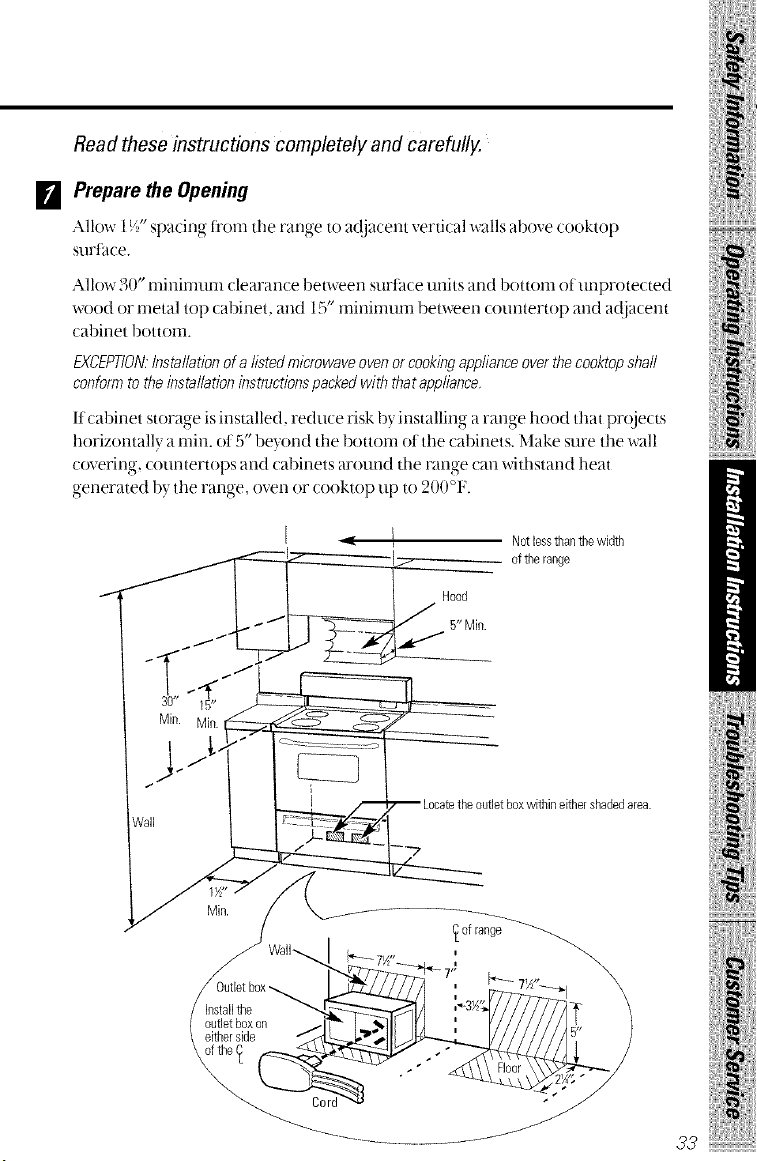
IF_ PreparetheOpening
Allow 1_4"spacir N tt'otn tile range to ac!jacent vertical walls above cooktop
surface.
Allow 30" rninirnurn clearance between surface units and bottom of urlprotected
wood or rnetal top cabirlet, and 15" minirnuna between countertop and a(!iacent
cabinet bottom.
EXCEPTION.Installationof a listedmicrowaveovenorcookingapplianceoverthecooktopshall
conformto theInstallationInstructionspackedwiththatappliance.
1tcabinet storage isinstalled, reduce risk b} installing a range hood that projects
horizontally a rain. ot 5" beyond the bottom ot the cabinets. Make sure the wall
covering, countertops and cabinets around the range call withstand heat
generated 1)_the range oven or cooktop up to 20001'.
[ _( I Notlessthanthewidth
I I-- - oftherange
Min. Mio.
iiiiiiiiiii iii!iili iilii,!i
iiiiiiii ii/
&sta//ation of therange.
Readthese instructions completely and carefully.
FlooringUnder theRange
Yourrange,likemanyotherhouseholditems,isheavyandcansettleintosoft floorcovedngs
suchascushionedvioylorcarpeting.
When moving the range on this type of tlooring, it should be installed on a
1/4" thick sheet ot pl}-,vood (or similar material) as tollows:
When the floor covering ends at the ti'ont ot the range, the area that the range
will rest on should be built up with pl}wood to the same level or higher than the
floor covering This will allow the range to be too,,ed for cleanino or servicino
IFJ Preparefor Electrica/ Connection
Effective January 1,1996the National Electric Code requireS that
new construction (notexisting) utilize a 4-conductor connection to an
electric range,
When installing an electric range in new Construction follow Steps 3
and 5 for4.wire connection.
Use only a 3<onductor or a 4<onductor UI Aisted range cord. These cords may
be provided with ring terminals on wire and a strain relief device.
A range cord rated at 40 amps with 125/250 minimum volt range isrequired.
A 5(1amp range cord is not recommended but ifused, it should be marked t0r
use with nominal _'/" "
l_s d_ameter connection openings. Care should be taken to
center the cable and strain relief within the knockout hole to keep the edge ti'om
damaging the cable.
NOTE:A 4-conductorcordis tobeusedwhentheapplianceisinstalledina mobilehomeor
whenlocalcodesdonotpermitgroundingthroughtheneutral,ff conduitisbeingused,go to Step
6orZ
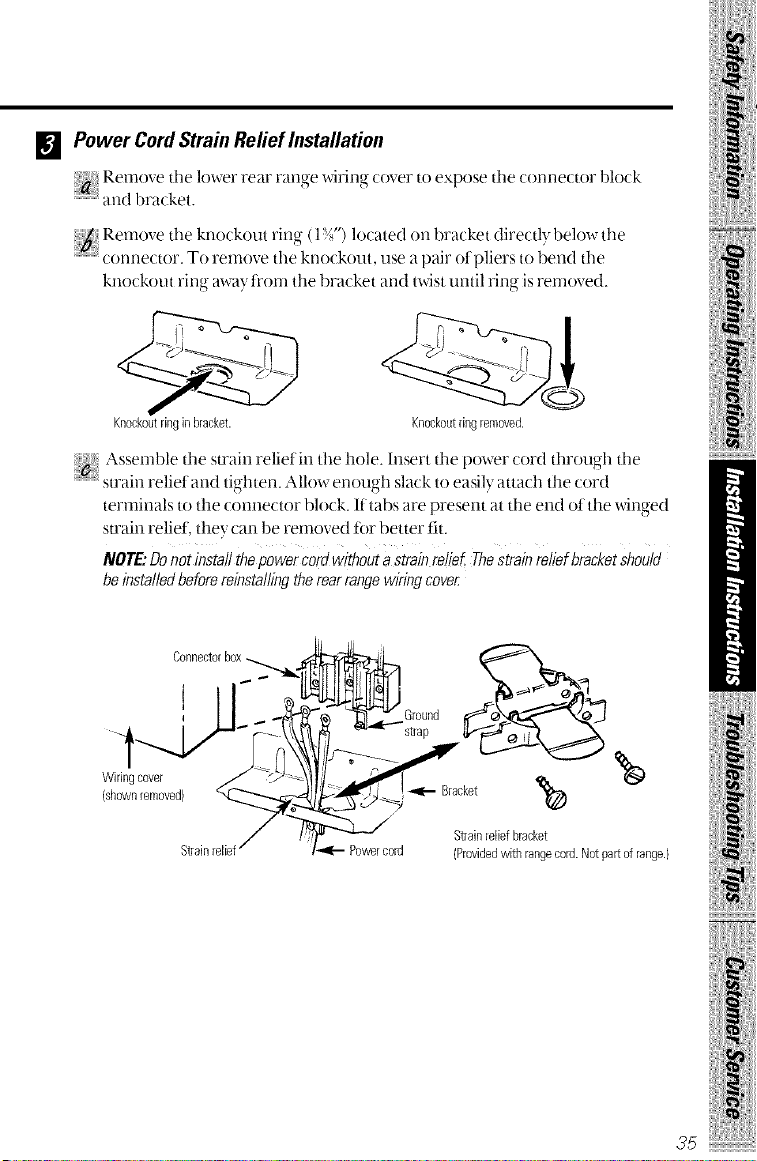
[] Power Cord Strain Relief Installation
Remove the lower rear range wirir N cover to expose the conrle_tor block
and bracket.
..... g"CT;:;:2,-IL;'2
knockout ring awa} frorn the bracket and twist until ring is rernoved.
Knockoutringinbracket. Knockoutringremoved.
Assern )le the strain reliet in the hole Insert the )ower cord through the
..... strata rellet and tighten. Allow enough slack to easily attach the cord
tern]inals to the connector block. If tabs are present at the end ot the winged
strain reliet, they can be ren]oved tbr better tit.
NOTE."Do not installthe power Cordwithout astrainrelie_ Thestrainrelief bracketshould
be installed before reinstalling the rear range wiring cover
, II_ %d .Z roond
{shownremoved} <,_"-".--,.._ /_ -_J ___<!_['- B'acket
-_1'_ 7 Strainreliefbracket
Strainrelief" i_r._ Powercord {Providedwith rangecord.Notpartofrange.}
iiiiiiiiiii_iii!iili_iilii!i
iiiiiiii iil
Installationof the range==:.
Readthese instructions completely and carefully.
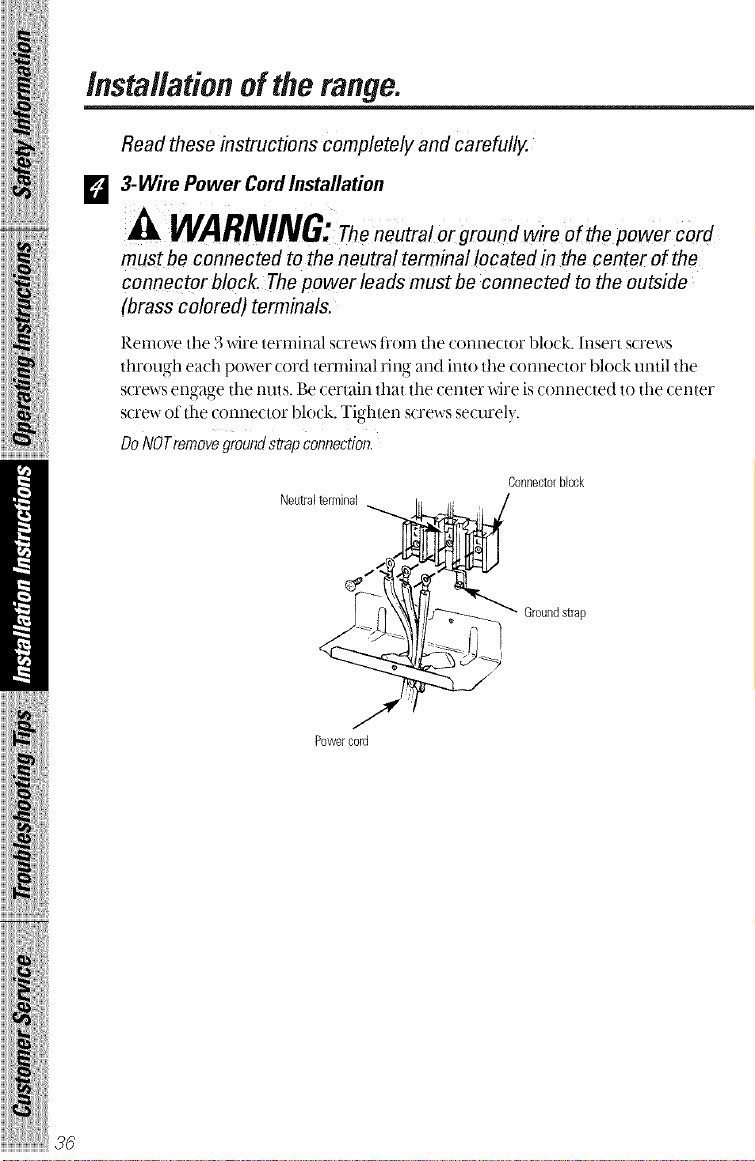
[] 3-Wire Power CordInstallation
_kWARNING:Theneutralor ground wire ofthepowercord
must be connected tothe neutral terminal located in the center of the
connector block. The power leadsmust be connected to theoutside
(brass colored) terminals.
Remove the _ wire terminal screws fl'om tile connector block. Insert screws
through each power cord terminal ring _tnd into the connector block until the
screws eng_tge the nuts. Be cert_fin that the center wire is connected to the center
s(rew of the connector block. Tighten screws securel).
DoNOTremove ground strap connection.
Connectorblock
Neutralterminal
Ground strap
J
Power cord
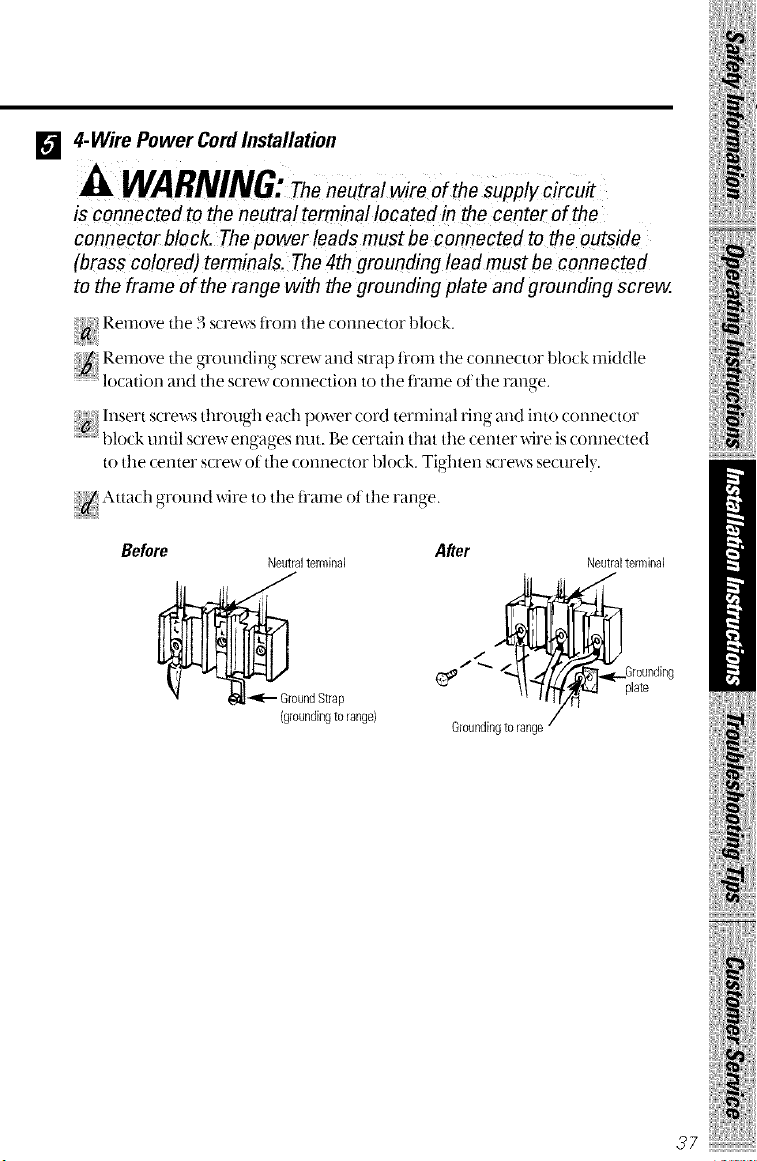
[] 4-Wire Power CordInstallation
WARNING:TheneutraiwireoftheSupply irc"it
is connected totheneutral terminal located in the center ofthe
connector block. The power leadsmust be connected to theoutside
(brass colored)terminals, The 4thgrounding !eadmust be connected
to theframe ofthe range with thegrounding plate and grounding screw.
Remove the 3 screws t_'orn the connector block.
_b Remove the g-i`ounding screw and strap t_'om the connector block middle
locatiol-i all(:[ tile screw connectiol-i tO tile tlaille Of tile I,ange.
[1-1sei,tscrews thi'olloh each )owei, cord tei,l-n nal I,no-alld into COllllectoi,
block llntil sci,ew engages nllt. P,e ceI'tail-| that the ten teI"wii,e is connected
to the €entei, sci,ew of the coilnectoi, block. Tighten screws secui,el).
Attach ground wire to the ti'ame ot the range.
Before After
Neutralterminal Neutraltermieal
J
_6 / _'_t" Grounding
undStrap plate
(groundingto range} reundin
!iiiiiii ii:ilil
37 .....................................
iiiiiiiiiii iii!iili iilii!i
iiiiiiii ii/
/nsta//ationoftherange.
Readthese instructions completely and carefully.
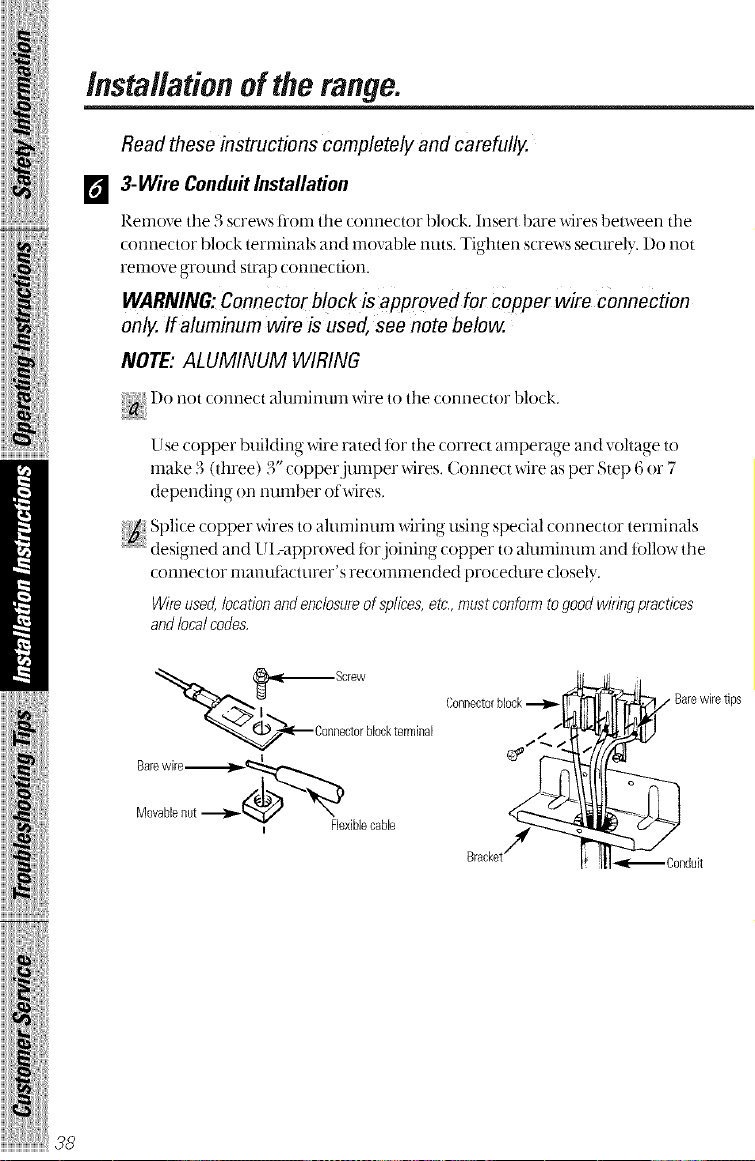
_] 3-Wire Condu# Installation
Remove tile ._screws li'Oiil tile COIlIlectoF block. Insert bare wires between the
connectoF block tei_rnirl_lls _u-ld movable ntlts. Tighten s(Fews se(urely. I)o not
remove ground strap connection.
WARNING: Connectorblock isapproved for copper wire connection
only. If aluminum wire is used, see note below.
NOTE: ALUMINUM WIRING
I)o not connect aluminum wire to the cormector block.
Use copper buiMing wire rated for the correct amperage and voltage to
make 3 (three) 3" copper jumper wires. Connect wire as per Step 6 or 7
depending on number of'wires,
connector rnanuti_cturer's recommended procedure closely,
Wire used,locationand enclosureof splices, etc,,mustconform to good wiring practices
and local codes.
_1 _Screw
-_ Connectorblockterminal
I Flexiblecane
Connectorblock
Bracket/_
/ Barewiretips
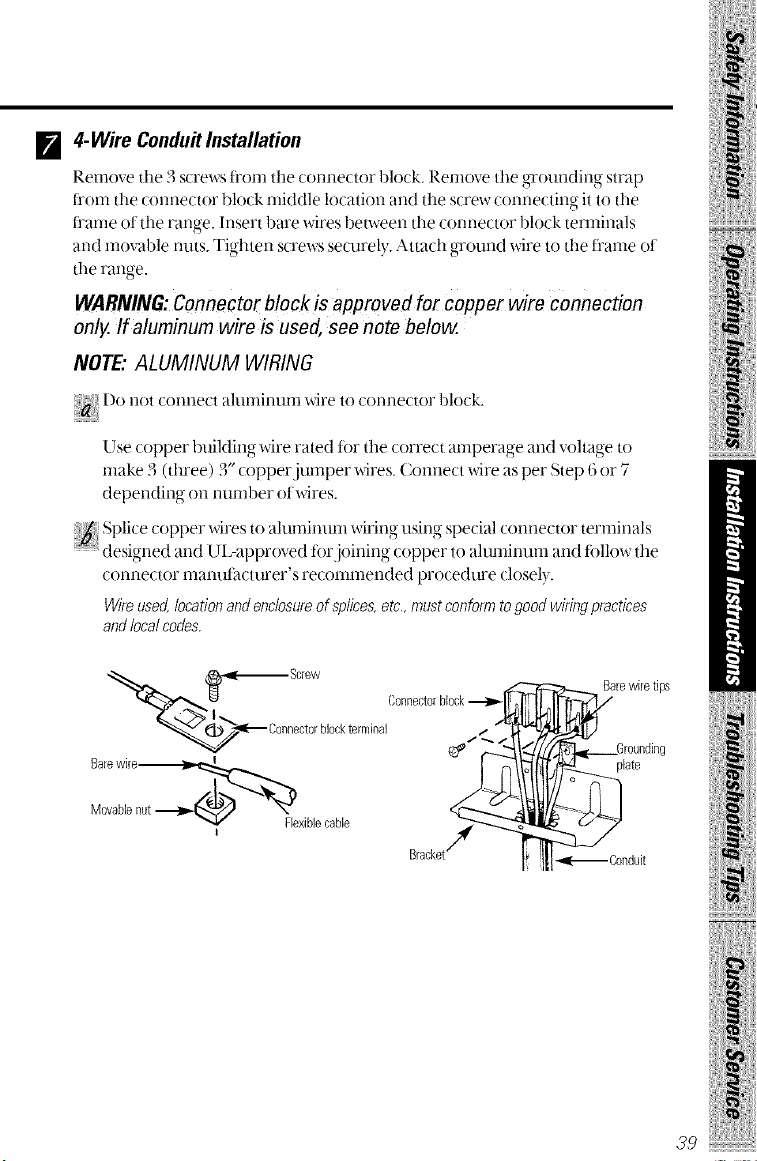
[] 4-Wire ConduitInstallation
I_.emove tile 3screws tl'onl tile c()nrlector block. Rernove tile p-rotnldin_,-straD
ti'om the connector block middle location and tile screw c()nrlecting it to the
ti'ame ot tile range. Insert bare wires between the connector block terminals
and movable trots. Tighten screws securely. Attach ground wire to the ti'ame ot
the rano-e
WARNIN&Connoctorblockisapprovodfor copporwiroconnoction
only.ff aluminumwireis used, soo note below.
NOTE."ALUMINUM WIRING
Do llOt Collnect altlrnirll.nll wire to cormector block,
Use copper building wire rated tor the correct amperage and vohage to
make 3 (three) 3" copper jumper wires. Connect wire as per Step 6or 7
depending on number ot wires.
Splice copper wires to aluminum wiring usirN special connector terminals
(lesigned and U1:approved tor ioining copper to ah]rnirmm and tollow the
connector manutacturer's recommended procedure closely.
Wireused locationandenclosureof splicesetc mustconformtogood wiringpractices
andlocalcodes
_sre wire tips
_ndmt
l!II
i$i
39 .....................................
iiiiiiiiiii iii!iili iilii,!i
iiiiiiii ii/
Installationoftherange.
Readthese instructions completely and carefully.
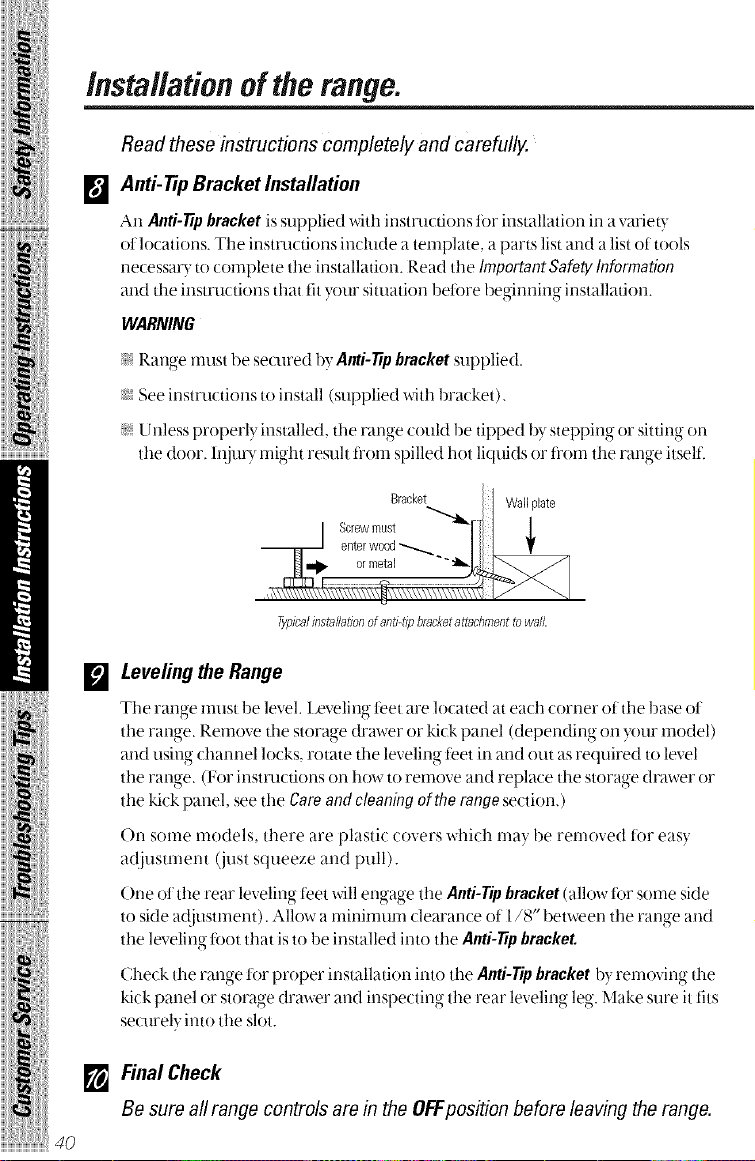
[] Anti-tip Bracket Installation
An Anti-tp bracket issupplied with instructions tbr installation in a varie h-
ot locations. The instructions include a template, a parts list and a listof tools
necessm)" to complete the installation. Read the bnportant Safety information
and the instructions that fityour situation betore beginning installation.
WARNING
Range nmst be secured b?Anti-tipbracket supplied.
_ See instructions to install (supplied with bracket).
Unless properly installed, tile range could be tipped by stepping or sitting on
the door. lnjux), might resuh ti'om spilled hot liquids or ti'om the range itselt'.
Typica/installationofanti-tipbracketaitachmenttowa//.
[] Levelingthe Range
Tile range nmst be level. 1Jeveling feet are located at each corrzer of tile base ot
tile range. Remove tile storage drawer or kick panel (depending on your model)
and using channel locks, rotate the leveling teet in and out as required to level
tile range. (l_or instructior_s on how to remove and replace tile storage drawer or
the kick panel, see the Careand cleaning ofthe range section.)
On some models, there are plastic covers which may be removed h)r easy
a(!iustment (just squeeze and pull).
( )ne.....ot the rear leveling, teet will enga,g,e the Anti-rip bracket (allow tor some side
to side a(!iustment). Allow a minimum clearance ot 1/8"l)etween the range and
the leveling toot that is to be installed into the Anti-tp bracket
Check the range tor proper installation into the Anti-rip bracket byremoving the
kick panel or storage drawer and inspecting the rear leveling leg. Make sure it tits
se(alrely into the slot.
[] Final Check
Be surea#range controls are in theOFFposition before leavingtherange.
Beforeyou call forservice...
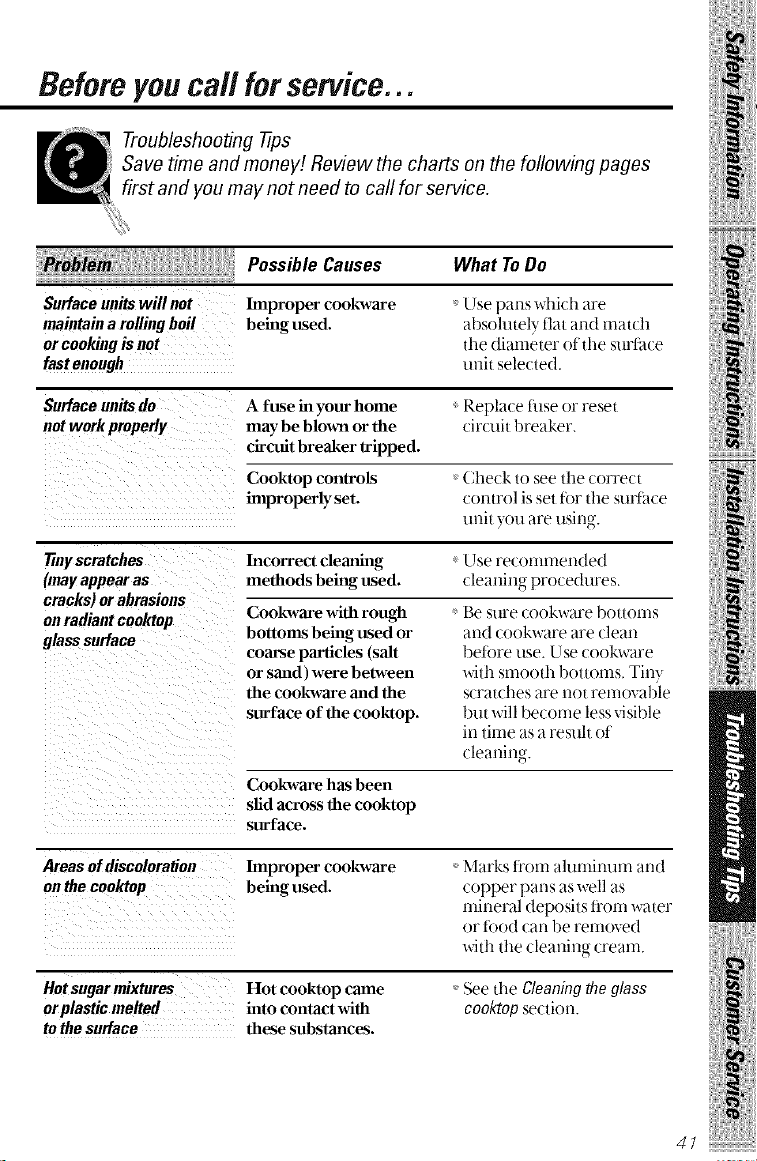
Troubleshooting -tips
Save time and money! Review the charts on the following pages
first and you may not need to call for service.
Possible Causes
Surfaceunitswillnot Improper cookware
maintainarolling boil being used.
orcooking is not
fastenough
What ToDo
Use pans which are
absolutely fiat and match
the diameter ot the surthce
unit selected.
Surface units do
notwork properly
A fuse inyour home Replace fllse or reset
may be blown or the cir(xlit breaker.
circuit breaker tripped.
Cooktop controls Check to see the correct
improperly set. c()ntrol is set tbr the surlace
unit }ou are using.
77nyscratches
Onay appear as
cracks) orabrasions
on radiant cooktop
glasssurface
Incorrect cleaning
methods being used.
Use recommended
cleaning procedures,
CooMvare with rough
bottoms being used or
coarse particles (salt
or sand ) were between
the eookware and the
surface of the eooktop.
' Be stffe cookware bottoms
and cookware are dean
beiore use. Use cookware
with smooth bottoms. Tiny
scratches are not renloval)le
but will become lessvisible
in time as a resuh ot
cleanino
CooMvare has been
slid across the cooktop
surface.
Areasof discoloration Improper cookware ', Marks t['om ahmfinum and
on the cooktop being used. copper pans as _vll as
mineral deposits ti'om water
or tbod can be removed
with the cleaning cream.
Hot sugar mixtures Hot cooktop came
orplastic melted into contact with
to the surface these substances.
See the Cleaningtheglass
cooktopsection.
41
iiiiiiiiiiiii!i!iii iiiii!ii!!iil
iiiiiiiiill iiiiii!i
iiiiiiiii@iiii_'_'iiiii:i:ilIl
Beforeyou call forservice...
Troubleshooting tips
Po..ih,eCa..e.
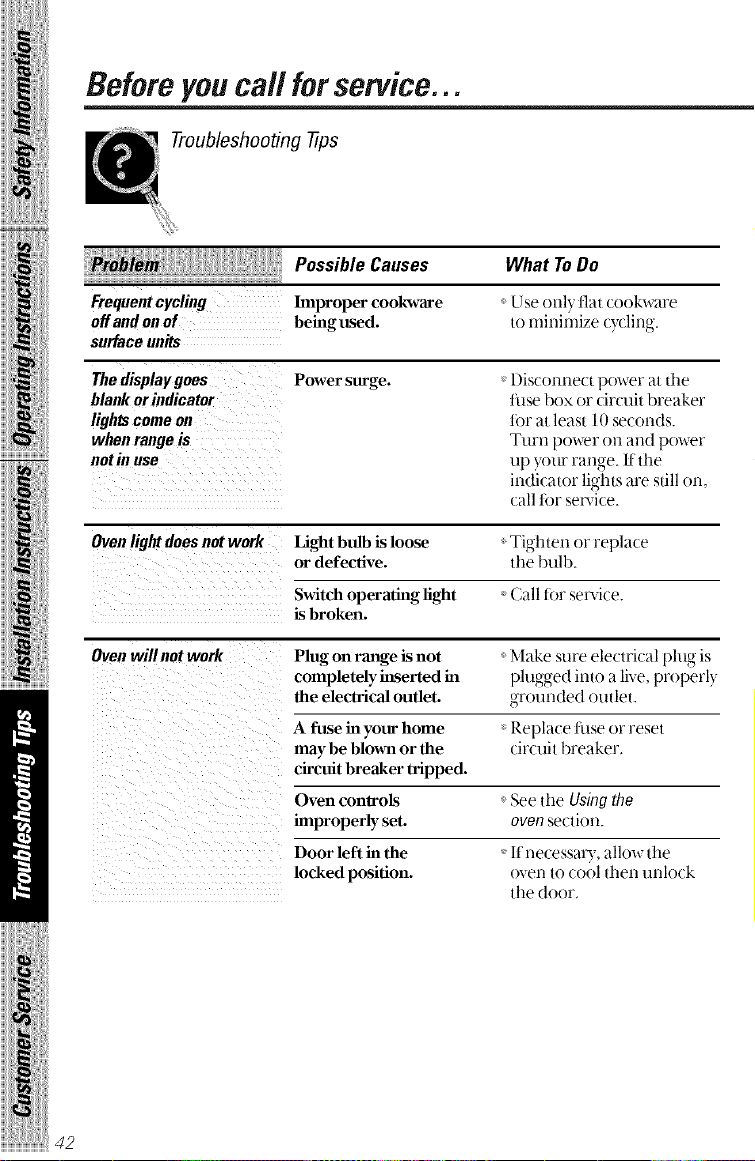
Frequentcycling Improper cookware
offandonof being used.
surface units
What To De
Useonl) flat (ookware
to minimize cycling.
The displaygoes
blank orindicator
lights croneon
when rangeis
notinuse
Power surge. Disconnect power at the
tilse box or circuit breaker
ti)r at least 10seconds.
Turn power on and power
u)vourran_,-ei,_. lithe
indicator lights are stillon,
call ti)r service.
Oven light doesnot work
Light bulb is loose
or defective.
Tighten or replace
the bulb.
Switch operating light
is broken.
(;all t_)r service.
Ovenwillnotwork
Plug on range is not Make sure electrical phN is
completely inserted in plugged into a live, properl}
the electrical outlet, grotmded outlet.
A fuse inyour home Replace tilse or reset
may be blown or the circuit breaker,
circuit breaker tripped.
Oven controls See the Usin9tho
improperly set. oven section.
Door left in the If necessary, allow the
locked position, oven to cool then unlock
the door,
Possible Causes What ToDo
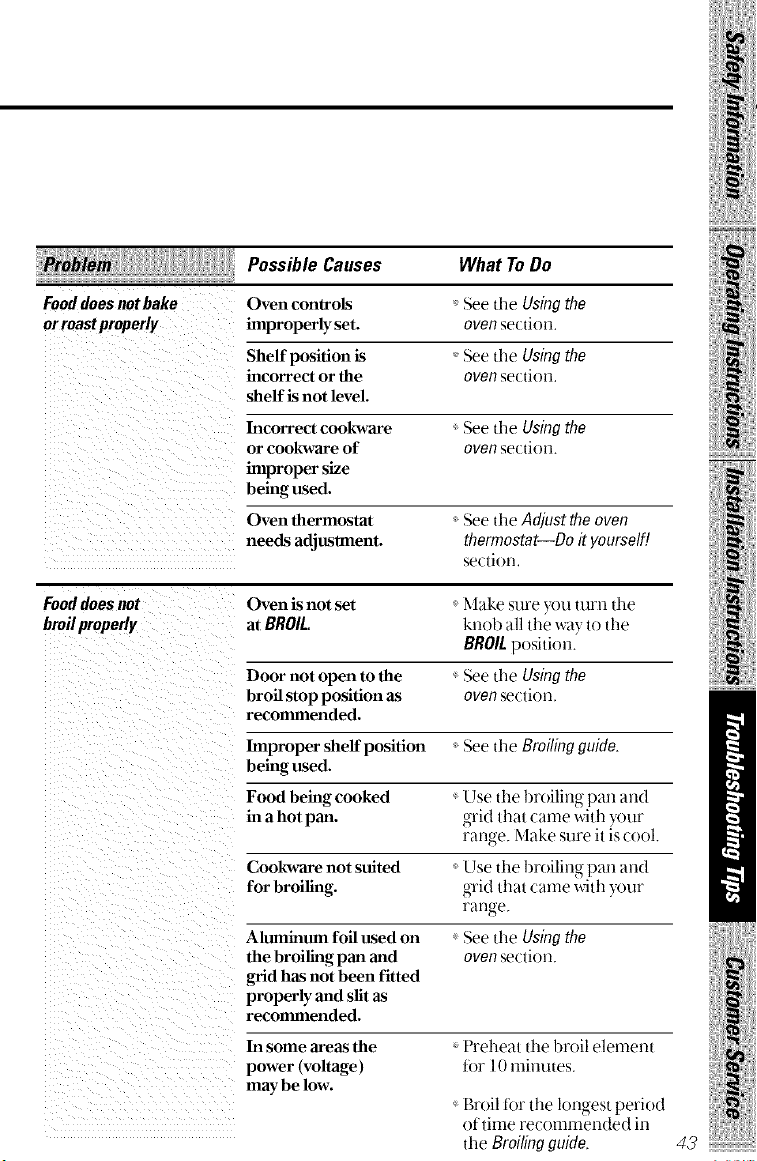
Fooddoesnotbake
orroastproperly
Oven conlrols See tile Using the
improperly set. oven section.
Shelf position is See the Using the
incorrect or the oven section.
shelf is not level.
Incorrect cooMvare See tile Using the
or cookware of oven section.
improper size
being used.
Oven thermostat See the Adjust the oven
needs adjuslmem, thermostat--Do it yourself!
sectiorl.
Fooddoesnot
broilproperly
Oven is not set
at BROIL.
Make sure you turn the
knob all the wayto the
BROILposition.
Door not open to the See tile Usingthe
broil stop position as oven section.
reeonunended.
Improper sheff position See the Broiling guide.
being used.
Food being cooked Use the broiling pan and
in a hot pan. grid that came with your
range. Make sure it iscool.
CooMvare not suited Use the broiling pan and
for broiling, grid that came with your
range.
Almninum foil used on See the Using the
the broiling pan and oven section.
,grid has not been fitted
properly and slit as
reconunended.
In some areas the t'reheat the broil element
power (voltage) ti)r 10 minutes.
may be low.
Broil ti)r the longest period
of time recommended in
tile Broiling guide. 43
iiiiiiiiiiiii!i!iii iiiii!ii!!iil
iiiiiiiiill iiiiii!i
iiiiiiiiii_iiii_'_'iiiil;i:ilIl
Beforeyou call forservice...
Troubleshooting tips
Possible Causes What To Do
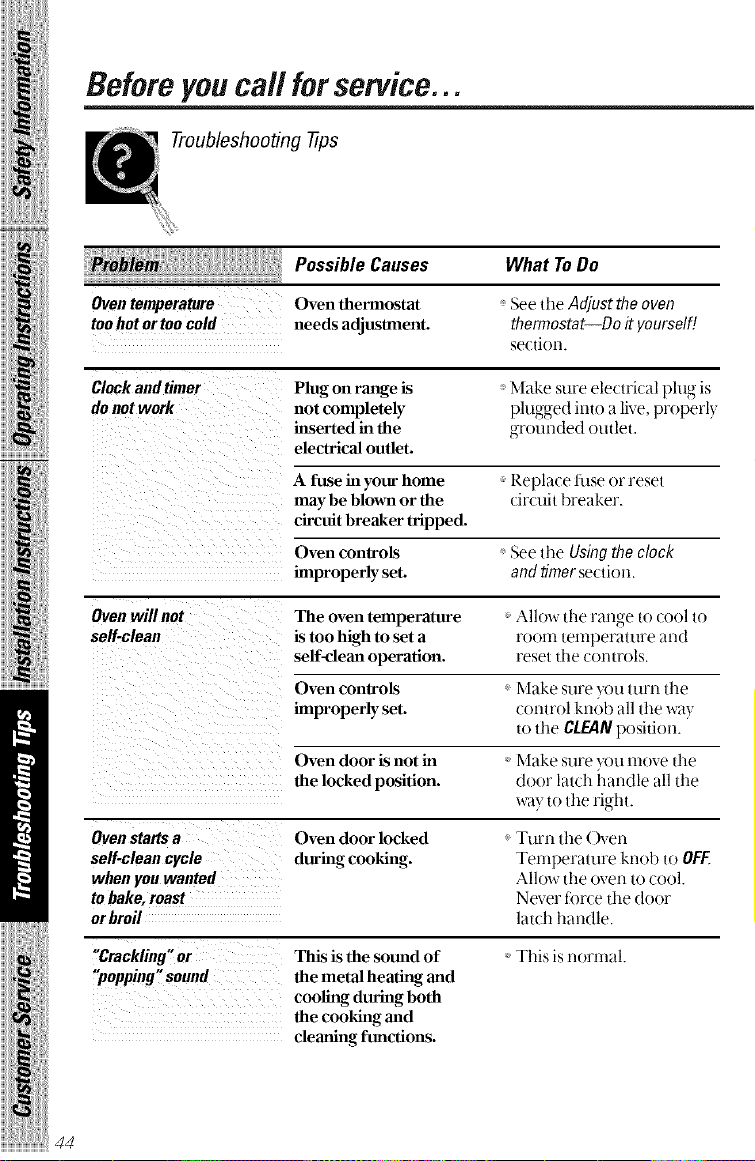
Oven temperature Oven thermostat See the Adjust the oven
toohot ortoocold needs adjusUnent, thermostat--Do it yourself I.
se(tion.
Clockandtimer Plug on range is Make sure electrical plug is
donot work not completely plugge(t into a live, properly
inserted in the gromtded outlet.
electrical outlet.
A fuse in your home Replace liise or reset
may be blown or the circuit breaker.
circuit breaker tripped.
Oven controls See the Using the clock
improperly set. and timer section,
Oven will not The oven temperature Allow die range to cool to
self-clean istoo high to set a room temperature and
self, lean operation, reset the controls.
Oven controls - Make sure xxiu turn the
improperly set. control knob all the way
to the CLEANposition.
Oven door is not in Make sure you move tile
the locked position, door latcl| handle till tim
way to the rio-ht
Oven staffs a Oven door locked - Turn the (h'en
self-clean cycle during cooMng. Ten|perature knob to OFE
when you wanted Allow tile oven to cool.
to hake, roast Never ti)rce file door
orbroil latch handle.
"Crackling"or This is the sound of This is normal.
"popping"sound the metal heating and
cooling, during both
the cooking and
cleaning functions.
iii iiii!!iilliiiiii!!ii! !i!iiii!iiiii!!!ii!! !l
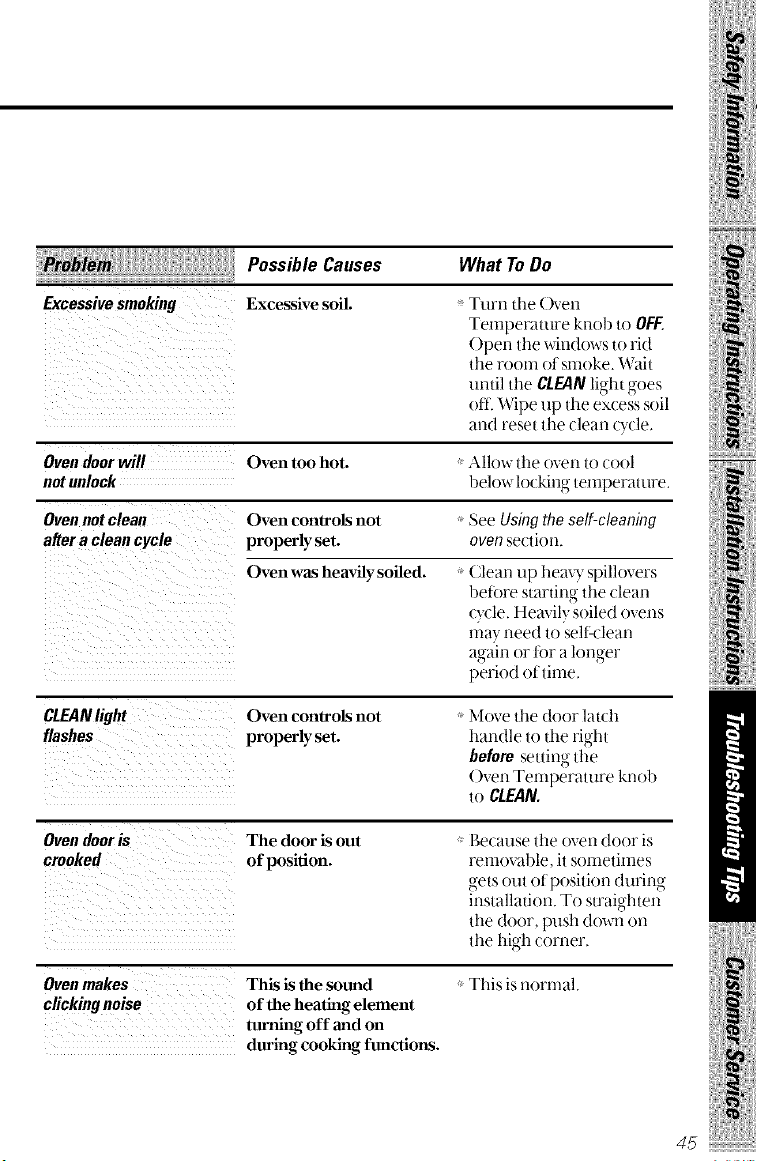
Excessive smoking
Possible Causes
Excessive soil.
Oven notclean
after a clean cycle
What ToDo
Turn the ()yen
Temperature knob to OFF.
()perl the windows to rid
the room oI smoke. Wait
until the CLEAN light goes
oiE Wipe up the excess soil
and reset the clean tycle,
Oven door will Oven too hot. Allow the over_ to cool
not unlock below locking temperature.
Oven controls not
properly set.
See Using the self-cleaning
even section.
Oven was heavily soiled. Clean up hemT spilkwers
beibre starting the clean
cycle. Heavily soiled ovens
may need to selt<lean
again or tbr a longer
period of time,
CLEAN light Oven controls not
flashes properly set.
Move the door latch
handle to the right
before setting the
Oven Temperature knob
to CLEAN.
Ovendooris The door is out
crooked of position.
Because the oven door is
removable, it sometimes
gets out of position during
installation. To straighten
the door, push down on
the high corner.
Oven makes This is the sound
clicking noise of the heating element
turning off and on
during cooking functions.
_Thisis normal.
45
iiiiiiiiiiiii!i!iii iiiii!ii!!iil
iiiiiiiiill iiiiii!i
iiiiiiiiii_ii'ii_'_'iiiii:i:ilIl
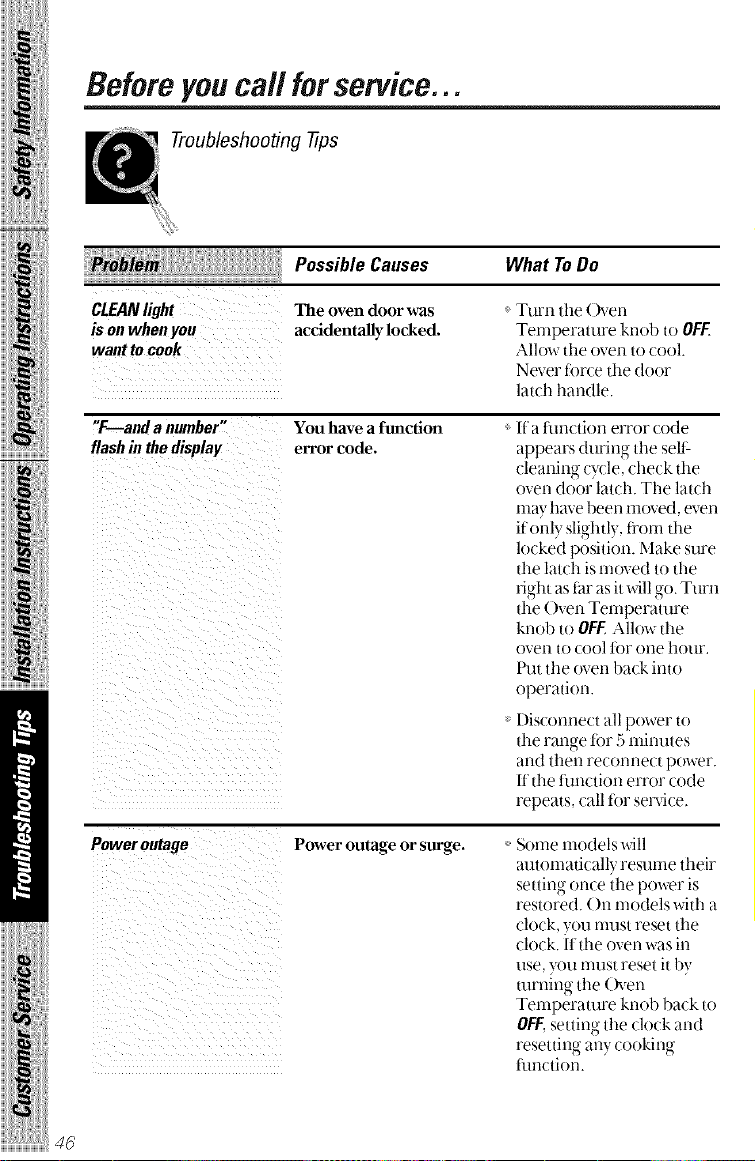
Beforeyou call forservice...
Troubleshooting tips
m :!i;i;i;i;i;i;i;i;(_PossibleCauses
What ToDo
CLEANlight
isonwhenyou
wanttocook
The oven door was
accidentally locked.
Turn tile ()yen
Temperature knob to OFF.
Allow the oven tocool.
Never torce the door
latch handle.
"T--and a number"
flashinthedisplay
You have a function
error code.
If a function error code
appears during tile sell'-
cleaning cy(le, check the
oven door latch. The latch
nIay have been moved, even
it"only slightl}, fl'om the
locked position. Make sure
the latch is moved to the
light as tar as itwill go. Turn
the Oven Temperature
knob to OFF,Allow the
oven to cool tbr one hotlr.
t'ut tile oven back into
operation.
Disconnect all power to
the range for 5minutes
and then reconnect power.
ff the function error code
repeats, call tot service.
Power outage
Power outage or surge.
Some models will
automatically resume their
setting once the power is
restored. ()n models with a
clock, you nnlst reset tile
clock, lithe oven was in
use, }xmmust reset it by
turning tile ()yen
Temperature knob back to
OFF,setting ttle clock and
resetting any cooking
thnction.
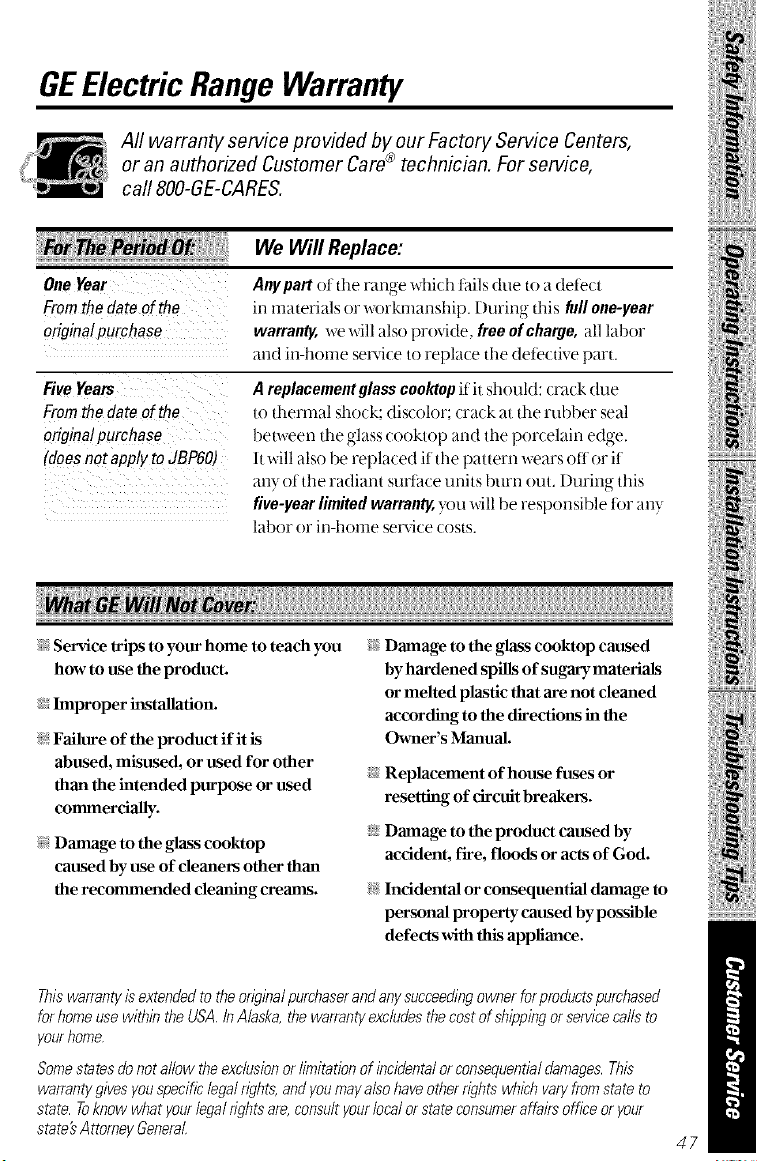
GEElectric Range Warranty
All warranty service provided byour Factory Service Centers,
or an authorized Customer Care® technician. Forservice,
carl800-GE-CARES.
One Year
From the date of the
original purchase
FiveYears
Fromthe dateof the
original purchase
(doesnot applyto JBP60)
We Will Replace:
Anypart oI tim range whi{b fails due to a detect
in materials or workrnarlship. During this full one-year
warranq, _v will also provide, free of charge, all labor
and in-home servi(e to repla(e the dete(tive part.
Areplacement glass cooktop if it should: crack due
to dmrmal shock; discolor; crack at tlle ml)l)er seal
between tim glass cooktop and tim porcelain edge.
It will also be replaced it tim pattern wears oil or it
any of the radiant surface units burn out. During this
five-year limited warmnq, you will be responsible tot any
labor or in-home service costs.
i_Service/trips m your home m teach you
how m use the product.
i__Improper installation.
i&Failure of the product if it is
abused, misused, or used for other
than the intended purpose or used
commercially.
i&Damage m the glass cooktop
caused by use of cleaners other than
the recommended cleaning creams.
i&Damage m the glass cooktop caused
by hardened spills of sugary materials
or melted plastic that are not cleaned
according to the directions in the
Owner's Manual.
_ Replacement of house fuses or
resetting of circuit breakers.
_ Damage m the product caused by
accident, fire, floods or acts of God.
i&Incidental or consequential damage to
personal property caused by possible
defeCxs with this appliance.
Thiswarranty isextendedto the original purchaserand anysucceedingownerfor products purchased
forhome usewithin theUSA,le Alaska,the warranty excludes the cost ofshippingorservicecallsto
your home,
Somestatesdo not allow the exclusionorlimitationof incidental orconsequentialdamages. This
warrantygivesyou specificlegaldghts,and youmayalsohaveotherdghts which varyfromstate to
state. Toknow what your legal rightsare,consultyourlocalor stateconsumer affairsoffice oryour
state'sAttoreey General
47
iiiiMii}i}}i{_iiiiiiiiiiii!iiiiiii
Service TelephoneNumbers.
GEAnswerCenter® 800.626.2000
The (,E Answer ( enter is open 24 hours a da), 7 da}s a week.
/n-HomeRepairService800-GE-CARES(800-432-2737)
Expert (;E repair sepdce isonly a phone (all away,.
SpecialNeedsService800.626.2000
TDD 800- TDD-GEA C(800-833-4322)
(;E otters, t['ee ot charge, a brochure to assist in planning a barrier-
fi'ee kitchen for persons with lirn ted mobil ty.
ServiceContractssoo-628-2224
Purchase a (;E set-vicecontract while your warranty isstill in effect
and }ou'll receive a sul)stantial discount. (;E Consumer Set-vicewill
still be there after your warranty expires.
48
PartsandAccessories800-626-2062
IndMduals qualified to sepdce their own appliances can have parts
or accessories sent directly to their homes (VISA, MasterCard and
Discover cards are accepted).
h_tructionscontainedin thismanualcoverprocedurestobeperformed
byanyuser Otherservicinggenerallyshouldbereferredto qualified
servicepersonnel.Cautionmustbeexercised,sinceimproperservicing
maycauseunsafeoperation.
ServiceSatisfaction
ffyou are not satisfied with the set-,ice you receive ti'om GE, tbllow
these three steps. Firstcontact the people who serviced your
appliance. Next ityou are still not pleased, wrile all the details-
including ?our phone nunlber-to: Manager. Consumer Relations,
GE Appliances, Appliance Park, I.ouisxille, KY 40225. Finally,ifyour
problem isstill not resoh'ed, write:
Major Applian( e Consumer Action Program
20 North Wacker Drive, Chicago, IL 60606.
P,nted/nZou_s'#/e,KY

