EN
CTS1000V-E-2B
USER’S GUIDE
CT
-
S1000V
Getting Ready to Play Preparing a Power
Supply
Connecting
Headphones (Option)
Connecting a Pedal
(Option)
Playing Lyric Tones
(Vocal Synthesis)
Linking with a Smart
Device and Using
Lyric Creator
Selecting a Musical
Instrument Tone
Changing the Pitch in
Semitone Units
(Transpose)
Fine Tuning (Tuning) Sustaining Notes After
Keyboard Keys Are
Released
Saving and Recalling a
Setup (MY SETUP)
Playing a Song
Linking with a Smart
Device and Using
CASIO MUSIC SPACE
Configuring Settings Troubleshooting
Cove
r
EN-1
■ About Music Score data
You can download music score data as a PDF file from the CASIO website. You will then be able to
view music scores on your smart device. You can jump from the PDF file table of contents directly to
the music score you want, and you can print out scores as needed.
https://support.casio.com/global/en/emi/manual/CT-S1000V/
Included and Optional Accessories
Use only accessories that are specified for use with this Digital Keyboard.
Use of unauthorized accessories creates the risk of fire, electric shock, and personal injury.
• You can get information about accessories that are sold separately for this product from the
CASIO catalog available from your retailer, and from the CASIO website.
https://support.casio.com/global/en/emi/manual/CT-S1000V/
• Any reproduction of the contents of this manual, either in part or its entirety, is prohibited. Except
for your own, personal use, any other use of the contents of this manual without the consent of
CASIO is prohibited under copyright laws.
• IN NO EVENT SHALL CASIO BE LIABLE FOR ANY DAMAGES WHATSOEVER (INCLUDING,
WITHOUT LIMITATION, DAMAGES FOR LOSS OF PROFITS, BUSINESS INTERRUPTION,
LOSS OF INFORMATION) ARISING OUT OF THE USE OF OR INABILITY TO USE THIS
MANUAL OR PRODUCT, EVEN IF CASIO HAS BEEN ADVISED OF THE POSSIBILITY OF
SUCH DAMAGES.
• The contents of this manual are subject to change without notice.
• The actual appearance of the product may be different from that shown in the illustrations in this
User’s Guide.
• The Bluetooth
®
word mark and logos are registered trademarks owned by Bluetooth SIG, Inc.
and any use of such marks by CASIO COMPUTER CO., LTD. is under license. Other trademarks
and trade names are those of their respective owners.
• Company and product names used in this manual may be registered trademarks of others.

EN-2
General Guide EN-6
Getting Ready to Play EN-8
Preparing a Power Supply . . . . . . . . . . . . . . . . . . . . . . . . . . . . . . . . . . . . . . . . . . . . . . . . . . . EN-8
Preparing the Music Stand . . . . . . . . . . . . . . . . . . . . . . . . . . . . . . . . . . . . . . . . . . . . . . . . . . EN-14
Connecting the Wireless MIDI & audio adaptor . . . . . . . . . . . . . . . . . . . . . . . . . . . . . . . . . . EN-14
Connecting Headphones (Option). . . . . . . . . . . . . . . . . . . . . . . . . . . . . . . . . . . . . . . . . . . . . EN-15
Connecting a Pedal (Option). . . . . . . . . . . . . . . . . . . . . . . . . . . . . . . . . . . . . . . . . . . . . . . . . EN-16
Attaching a Strap (Commercially Available) . . . . . . . . . . . . . . . . . . . . . . . . . . . . . . . . . . . . . EN-17
Operations Common to All Modes EN-18
Display Screen Contents. . . . . . . . . . . . . . . . . . . . . . . . . . . . . . . . . . . . . . . . . . . . . . . . . . . . EN-18
Home Screen . . . . . . . . . . . . . . . . . . . . . . . . . . . . . . . . . . . . . . . . . . . . . . . . . . . . . . . . . . . . EN-19
5 buttons . . . . . . . . . . . . . . . . . . . . . . . . . . . . . . . . . . . . . . . . . . . . . . . . . . . . . . . . . . . . . . . . EN-19
Changing the Button Long-press Time . . . . . . . . . . . . . . . . . . . . . . . . . . . . . . . . . . . . . . . . . EN-20
Dial Operations . . . . . . . . . . . . . . . . . . . . . . . . . . . . . . . . . . . . . . . . . . . . . . . . . . . . . . . . . . . EN-21
Selecting a Function from a Menu . . . . . . . . . . . . . . . . . . . . . . . . . . . . . . . . . . . . . . . . . . . . EN-22
Inputting Characters . . . . . . . . . . . . . . . . . . . . . . . . . . . . . . . . . . . . . . . . . . . . . . . . . . . . . . . EN-23
Playing on the Keyboard EN-26
Turning Power On or Off . . . . . . . . . . . . . . . . . . . . . . . . . . . . . . . . . . . . . . . . . . . . . . . . . . . . EN-26
Adjusting the Volume Level. . . . . . . . . . . . . . . . . . . . . . . . . . . . . . . . . . . . . . . . . . . . . . . . . . EN-28
TONE Button. . . . . . . . . . . . . . . . . . . . . . . . . . . . . . . . . . . . . . . . . . . . . . . . . . . . . . . . . . . . . EN-28
Using the Metronome . . . . . . . . . . . . . . . . . . . . . . . . . . . . . . . . . . . . . . . . . . . . . . . . . . . . . . EN-29
Listening to Demo Play . . . . . . . . . . . . . . . . . . . . . . . . . . . . . . . . . . . . . . . . . . . . . . . . . . . . . EN-34
Playing Lyric Tones (Vocal Synthesis) EN-35
Selecting and Playing with a Lyric Tone . . . . . . . . . . . . . . . . . . . . . . . . . . . . . . . . . . . . . . . . EN-37
Adding Lyric Tones (User Lyric Tones). . . . . . . . . . . . . . . . . . . . . . . . . . . . . . . . . . . . . . . . . EN-38
Changing the Voice Use to Sound Lyrics (Vocalist) . . . . . . . . . . . . . . . . . . . . . . . . . . . . . . . EN-39
Adjusting the Voice Used to Sound Lyrics . . . . . . . . . . . . . . . . . . . . . . . . . . . . . . . . . . . . . . EN-40
Setting Other Vocalist Parameters . . . . . . . . . . . . . . . . . . . . . . . . . . . . . . . . . . . . . . . . . . . . EN-42
Changing the Functions of the Knobs in the Lyric Tone Mode . . . . . . . . . . . . . . . . . . . . . . . EN-44
Using the Recommended Lyric Tone Settings . . . . . . . . . . . . . . . . . . . . . . . . . . . . . . . . . . . EN-46
Changing How Lyric Advancement is Performed When a Keyboard Key is Pressed. . . . . . EN-47
Controlling a Lyric Tone with the Keyboard (Lyric Tone Controller) . . . . . . . . . . . . . . . . . . . EN-49
Adjusting the Timing When Lyrics are Sounded . . . . . . . . . . . . . . . . . . . . . . . . . . . . . . . . . . EN-52
Changing the Syllable Advancement Control Setting in NOTE Mode. . . . . . . . . . . . . . . . . . EN-55
Making the Lyrics Advance Even if You Hold Down Keyboard Keys (Retrigger) . . . . . . . . . EN-59
Making the Retrigger Function Notes Continue to Sound When Keyboard Keys
are Released . . . . . . . . . . . . . . . . . . . . . . . . . . . . . . . . . . . . . . . . . . . . . . . . . . . . . . . . . . . EN-64
Changing the Function of a Pedal in the Lyric Tone Mode . . . . . . . . . . . . . . . . . . . . . . . . . . EN-66
Contents

Contents
EN-3
Controlling the Sound of a Performance EN-68
Selecting a Musical Instrument Tone . . . . . . . . . . . . . . . . . . . . . . . . . . . . . . . . . . . . . . . . . . EN-68
Playing with Touch Response. . . . . . . . . . . . . . . . . . . . . . . . . . . . . . . . . . . . . . . . . . . . . . . . EN-70
Using a Pedal . . . . . . . . . . . . . . . . . . . . . . . . . . . . . . . . . . . . . . . . . . . . . . . . . . . . . . . . . . . . EN-72
Sustaining Notes After Keyboard Keys Are Released . . . . . . . . . . . . . . . . . . . . . . . . . . . . . EN-81
Switching From the SUS (Sustain) Button to the UPPER PORT (Upper Portamento)
Button. . . . . . . . . . . . . . . . . . . . . . . . . . . . . . . . . . . . . . . . . . . . . . . . . . . . . . . . . . . . . . . . . EN-84
Transitioning Smoothly Between Upper Part Notes (Upper Portamento) . . . . . . . . . . . . . . . EN-85
Using the Pitch Bend Wheel . . . . . . . . . . . . . . . . . . . . . . . . . . . . . . . . . . . . . . . . . . . . . . . . . EN-89
Using the Knobs to Change the Sound. . . . . . . . . . . . . . . . . . . . . . . . . . . . . . . . . . . . . . . . . EN-91
Applying the Effect You Want to a Tone (Active DSP) . . . . . . . . . . . . . . . . . . . . . . . . . . . . . EN-98
Playing with Reverb . . . . . . . . . . . . . . . . . . . . . . . . . . . . . . . . . . . . . . . . . . . . . . . . . . . . . . EN-107
Adding the Chorus Effect to a Tone . . . . . . . . . . . . . . . . . . . . . . . . . . . . . . . . . . . . . . . . . . EN-110
Delaying Notes (Delay) . . . . . . . . . . . . . . . . . . . . . . . . . . . . . . . . . . . . . . . . . . . . . . . . . . . . EN-112
Playing with a More Expanded Sound (Surround) . . . . . . . . . . . . . . . . . . . . . . . . . . . . . . . EN-114
Sounding Arpeggio Phrases Automatically (Arpeggiator) . . . . . . . . . . . . . . . . . . . . . . . . . . EN-115
Switching the Button Function from ARP (Arpeggiator) to AH (Auto Harmonize). . . . . . . . EN-120
Adding Harmony to Melody Notes (Auto Harmonize) . . . . . . . . . . . . . . . . . . . . . . . . . . . . . EN-121
Layering and Splitting Tones. . . . . . . . . . . . . . . . . . . . . . . . . . . . . . . . . . . . . . . . . . . . . . . . EN-123
Changing the Volume Balance Between Keyboard Play and Rhythm Play (Balance) . . . . EN-128
Changing the Pitch in Octave Units (Octave Shift) . . . . . . . . . . . . . . . . . . . . . . . . . . . . . . . EN-129
Changing the Pitch in Semitone Units (Transpose) . . . . . . . . . . . . . . . . . . . . . . . . . . . . . . EN-131
Fine Tuning (Tuning). . . . . . . . . . . . . . . . . . . . . . . . . . . . . . . . . . . . . . . . . . . . . . . . . . . . . . EN-132
Changing the Keyboard Scale Tuning . . . . . . . . . . . . . . . . . . . . . . . . . . . . . . . . . . . . . . . . EN-133
Using the Equalizer . . . . . . . . . . . . . . . . . . . . . . . . . . . . . . . . . . . . . . . . . . . . . . . . . . . . . . . EN-138
Saving and Recalling a Setup (MY SETUP) EN-140
Saving to MY SETUP . . . . . . . . . . . . . . . . . . . . . . . . . . . . . . . . . . . . . . . . . . . . . . . . . . . . . EN-140
Recalling a MY SETUP . . . . . . . . . . . . . . . . . . . . . . . . . . . . . . . . . . . . . . . . . . . . . . . . . . . . EN-143
Enabling MY SETUP Power On Recall. . . . . . . . . . . . . . . . . . . . . . . . . . . . . . . . . . . . . . . . EN-144
Renaming a MY SETUP . . . . . . . . . . . . . . . . . . . . . . . . . . . . . . . . . . . . . . . . . . . . . . . . . . . EN-145
Deleting a MY SETUP. . . . . . . . . . . . . . . . . . . . . . . . . . . . . . . . . . . . . . . . . . . . . . . . . . . . . EN-147
Playing with a Rhythm Backing EN-148
Rhythm . . . . . . . . . . . . . . . . . . . . . . . . . . . . . . . . . . . . . . . . . . . . . . . . . . . . . . . . . . . . . . . . EN-148
Using the Rhythms . . . . . . . . . . . . . . . . . . . . . . . . . . . . . . . . . . . . . . . . . . . . . . . . . . . . . . . EN-148
Playing a Rhythm . . . . . . . . . . . . . . . . . . . . . . . . . . . . . . . . . . . . . . . . . . . . . . . . . . . . . . . . EN-149
Using Recommended Rhythm Settings (One Touch Presets) . . . . . . . . . . . . . . . . . . . . . . EN-153
Adjusting the Tempo by Tapping (Tap Tempo). . . . . . . . . . . . . . . . . . . . . . . . . . . . . . . . . . EN-153
Sounding Rhythm as You Use Tap Tempo. . . . . . . . . . . . . . . . . . . . . . . . . . . . . . . . . . . . . EN-154
Changing the Rhythm Pattern. . . . . . . . . . . . . . . . . . . . . . . . . . . . . . . . . . . . . . . . . . . . . . . EN-155
Inserting a Fill-in Phrase . . . . . . . . . . . . . . . . . . . . . . . . . . . . . . . . . . . . . . . . . . . . . . . . . . . EN-158
Fingering a Chord to Play a Rhythm Accompaniment . . . . . . . . . . . . . . . . . . . . . . . . . . . . EN-159
Starting Rhythm Play when a Chord is Played (Synchro Start) . . . . . . . . . . . . . . . . . . . . . EN-163

Contents
EN-4
Configuring Rhythm Play to Stop Automatically when Chord Play is Stopped
(Synchro Stop) . . . . . . . . . . . . . . . . . . . . . . . . . . . . . . . . . . . . . . . . . . . . . . . . . . . . . . . . . EN-164
Changing the Rhythm Pattern and the Fill-in Operation Type . . . . . . . . . . . . . . . . . . . . . . EN-165
Disabling Automatic Setting of the Tempo and Pattern when a Rhythm is Selected . . . . . EN-168
Increasing the Number of Rhythms (User Rhythms) . . . . . . . . . . . . . . . . . . . . . . . . . . . . . EN-169
Saving and Recalling Setups (Registration) EN-170
Saving a Setup . . . . . . . . . . . . . . . . . . . . . . . . . . . . . . . . . . . . . . . . . . . . . . . . . . . . . . . . . . EN-171
Recalling a Saved Setup. . . . . . . . . . . . . . . . . . . . . . . . . . . . . . . . . . . . . . . . . . . . . . . . . . . EN-173
Disabling Recall of Specific Settings (Freeze) . . . . . . . . . . . . . . . . . . . . . . . . . . . . . . . . . . EN-174
Enabling Auto Exit of the Registration Screen when a Setup is Recalled. . . . . . . . . . . . . . EN-176
Using the Pedal to Recall the Settings Sequentially (Registration Sequence) . . . . . . . . . . EN-177
Playing a Song EN-178
Songs . . . . . . . . . . . . . . . . . . . . . . . . . . . . . . . . . . . . . . . . . . . . . . . . . . . . . . . . . . . . . . . . . EN-178
Using the SONG Function. . . . . . . . . . . . . . . . . . . . . . . . . . . . . . . . . . . . . . . . . . . . . . . . . . EN-178
Selecting a Song on a USB Flash Drive . . . . . . . . . . . . . . . . . . . . . . . . . . . . . . . . . . . . . . . EN-179
Increasing the Selection of Songs (User Songs) . . . . . . . . . . . . . . . . . . . . . . . . . . . . . . . . EN-181
Playing Songs . . . . . . . . . . . . . . . . . . . . . . . . . . . . . . . . . . . . . . . . . . . . . . . . . . . . . . . . . . . EN-183
Practicing a Song Part (Part Off). . . . . . . . . . . . . . . . . . . . . . . . . . . . . . . . . . . . . . . . . . . . . EN-188
Sounding a Count in Time with a Song. . . . . . . . . . . . . . . . . . . . . . . . . . . . . . . . . . . . . . . . EN-189
Recording Your Keyboard Play EN-190
Easy Keyboard Play Recording . . . . . . . . . . . . . . . . . . . . . . . . . . . . . . . . . . . . . . . . . . . . . EN-191
Deleting an Easy Recording . . . . . . . . . . . . . . . . . . . . . . . . . . . . . . . . . . . . . . . . . . . . . . . . EN-195
Overdub Recording (Multi-track Recording) . . . . . . . . . . . . . . . . . . . . . . . . . . . . . . . . . . . . EN-196
Copying a Tone Recording or Rhythm Recording as a Multi-track Recording . . . . . . . . . . EN-198
Muting a Multi-track Recording Track . . . . . . . . . . . . . . . . . . . . . . . . . . . . . . . . . . . . . . . . . EN-199
Adjusting the Volume Level and Pan of Each Track of a Multi-track Recording (Mixing) . . EN-201
Copying a Multi-track Recording . . . . . . . . . . . . . . . . . . . . . . . . . . . . . . . . . . . . . . . . . . . . . EN-204
Deleting One or More of the Multi-track Recordings in Memory . . . . . . . . . . . . . . . . . . . . . EN-206
Copying the Solo Track of a Multi-track Recording. . . . . . . . . . . . . . . . . . . . . . . . . . . . . . . EN-207
Deleting a Multi-track Recording Track . . . . . . . . . . . . . . . . . . . . . . . . . . . . . . . . . . . . . . . . EN-209
Recording and Playing the Sounds You Want (Sampling) EN-211
Capturing Sounds as Tones . . . . . . . . . . . . . . . . . . . . . . . . . . . . . . . . . . . . . . . . . . . . . . . . EN-211
To select a built-in drum tone as a base for the sampled drum tone . . . . . . . . . . . . . . . . . EN-217
To configure the keyboard setting so the sound stops playing when you release
the keyboard key . . . . . . . . . . . . . . . . . . . . . . . . . . . . . . . . . . . . . . . . . . . . . . . . . . . . . . . EN-218
Sounding a Looped Sound . . . . . . . . . . . . . . . . . . . . . . . . . . . . . . . . . . . . . . . . . . . . . . . . . EN-220
To delete sampled data. . . . . . . . . . . . . . . . . . . . . . . . . . . . . . . . . . . . . . . . . . . . . . . . . . . . EN-223
To delete a sampled tone . . . . . . . . . . . . . . . . . . . . . . . . . . . . . . . . . . . . . . . . . . . . . . . . . . EN-225
Customizing the Home Screen (Home Customization) EN-226
Changing the Home Screen Base Screen . . . . . . . . . . . . . . . . . . . . . . . . . . . . . . . . . . . . . EN-226
Changing the Function of Each 5 buttons . . . . . . . . . . . . . . . . . . . . . . . . . . . . . . . . . . . . . . EN-228
Stopping All Types of Playback when HOME is Pressed (PANIC function) . . . . . . . . . . . . EN-229
Contents
EN-5
Configuring Settings EN-230
Setting Operation . . . . . . . . . . . . . . . . . . . . . . . . . . . . . . . . . . . . . . . . . . . . . . . . . . . . . . . . EN-230
Setting Item List . . . . . . . . . . . . . . . . . . . . . . . . . . . . . . . . . . . . . . . . . . . . . . . . . . . . . . . . . EN-231
Using the MIDI Controller EN-235
To change the pitch of NOTE message notes in octave units . . . . . . . . . . . . . . . . . . . . . . EN-236
To adjust the velocity of the NOTE ON message in accordance with key press intensity . . EN-237
Using the Arpeggiator . . . . . . . . . . . . . . . . . . . . . . . . . . . . . . . . . . . . . . . . . . . . . . . . . . . . . EN-239
Changing the Channel Message Channel . . . . . . . . . . . . . . . . . . . . . . . . . . . . . . . . . . . . . EN-240
Sending a Program Change Message . . . . . . . . . . . . . . . . . . . . . . . . . . . . . . . . . . . . . . . . EN-241
Sending a Control Change Message . . . . . . . . . . . . . . . . . . . . . . . . . . . . . . . . . . . . . . . . . EN-242
To switch between the control change MSB and LSB . . . . . . . . . . . . . . . . . . . . . . . . . . . . EN-245
To send a system real-time message start/stop . . . . . . . . . . . . . . . . . . . . . . . . . . . . . . . . . EN-247
Using a USB Flash Drive EN-248
Inserting and Removing a USB Flash Drive on the Digital Keyboard . . . . . . . . . . . . . . . . . EN-249
USB Flash Drive Formatting . . . . . . . . . . . . . . . . . . . . . . . . . . . . . . . . . . . . . . . . . . . . . . . . EN-251
USB Flash Drive Operations . . . . . . . . . . . . . . . . . . . . . . . . . . . . . . . . . . . . . . . . . . . . . . . . EN-253
Connecting with External Devices EN-262
Linking with a Smart Device and Using Lyric Creator . . . . . . . . . . . . . . . . . . . . . . . . . . . . . EN-262
Linking with a Smart Device and Using CASIO MUSIC SPACE. . . . . . . . . . . . . . . . . . . . . EN-264
Connecting to a Computer and Using MIDI . . . . . . . . . . . . . . . . . . . . . . . . . . . . . . . . . . . . EN-267
Using a Cable to Connect with an Audio Device. . . . . . . . . . . . . . . . . . . . . . . . . . . . . . . . . EN-270
Sounding a Bluetooth Audio Capable Device (Bluetooth Audio Pairing) . . . . . . . . . . . . . . EN-273
Deleting Bluetooth Audio Capable Device Pairing Registration . . . . . . . . . . . . . . . . . . . . . EN-275
Connection with a Bluetooth Low Energy MIDI Device. . . . . . . . . . . . . . . . . . . . . . . . . . . . EN-277
Disabling Wireless Functions . . . . . . . . . . . . . . . . . . . . . . . . . . . . . . . . . . . . . . . . . . . . . . . EN-278
Reference EN-279
Troubleshooting . . . . . . . . . . . . . . . . . . . . . . . . . . . . . . . . . . . . . . . . . . . . . . . . . . . . . . . . . EN-279
Error Indicators . . . . . . . . . . . . . . . . . . . . . . . . . . . . . . . . . . . . . . . . . . . . . . . . . . . . . . . . . . EN-282
Product Specifications. . . . . . . . . . . . . . . . . . . . . . . . . . . . . . . . . . . . . . . . . . . . . . . . . . . . . EN-284
Tone List . . . . . . . . . . . . . . . . . . . . . . . . . . . . . . . . . . . . . . . . . . . . . . . . . . . . . . . . . . . . . . . EN-288
Lyric Tone List. . . . . . . . . . . . . . . . . . . . . . . . . . . . . . . . . . . . . . . . . . . . . . . . . . . . . . . . . . . EN-307
VOCALIST List . . . . . . . . . . . . . . . . . . . . . . . . . . . . . . . . . . . . . . . . . . . . . . . . . . . . . . . . . . EN-309
Rhythm List . . . . . . . . . . . . . . . . . . . . . . . . . . . . . . . . . . . . . . . . . . . . . . . . . . . . . . . . . . . . . EN-310
Arpeggiator List . . . . . . . . . . . . . . . . . . . . . . . . . . . . . . . . . . . . . . . . . . . . . . . . . . . . . . . . . . EN-313
Drum Assignment List . . . . . . . . . . . . . . . . . . . . . . . . . . . . . . . . . . . . . . . . . . . . . . . . . . . . . EN-315
Versatile Tone Map . . . . . . . . . . . . . . . . . . . . . . . . . . . . . . . . . . . . . . . . . . . . . . . . . . . . . . . EN-321
DSP List . . . . . . . . . . . . . . . . . . . . . . . . . . . . . . . . . . . . . . . . . . . . . . . . . . . . . . . . . . . . . . . EN-323
DSP Effect List . . . . . . . . . . . . . . . . . . . . . . . . . . . . . . . . . . . . . . . . . . . . . . . . . . . . . . . . . . EN-326
Home Customization 5 buttons Function List . . . . . . . . . . . . . . . . . . . . . . . . . . . . . . . . . . . EN-340
Fingering Guide. . . . . . . . . . . . . . . . . . . . . . . . . . . . . . . . . . . . . . . . . . . . . . . . . . . . . . . . . . EN-345
Chord Example List. . . . . . . . . . . . . . . . . . . . . . . . . . . . . . . . . . . . . . . . . . . . . . . . . . . . . . . EN-347
MIDI Implementation Chart
EN-6
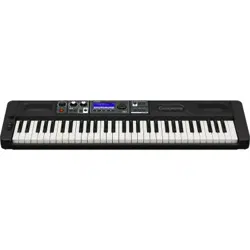
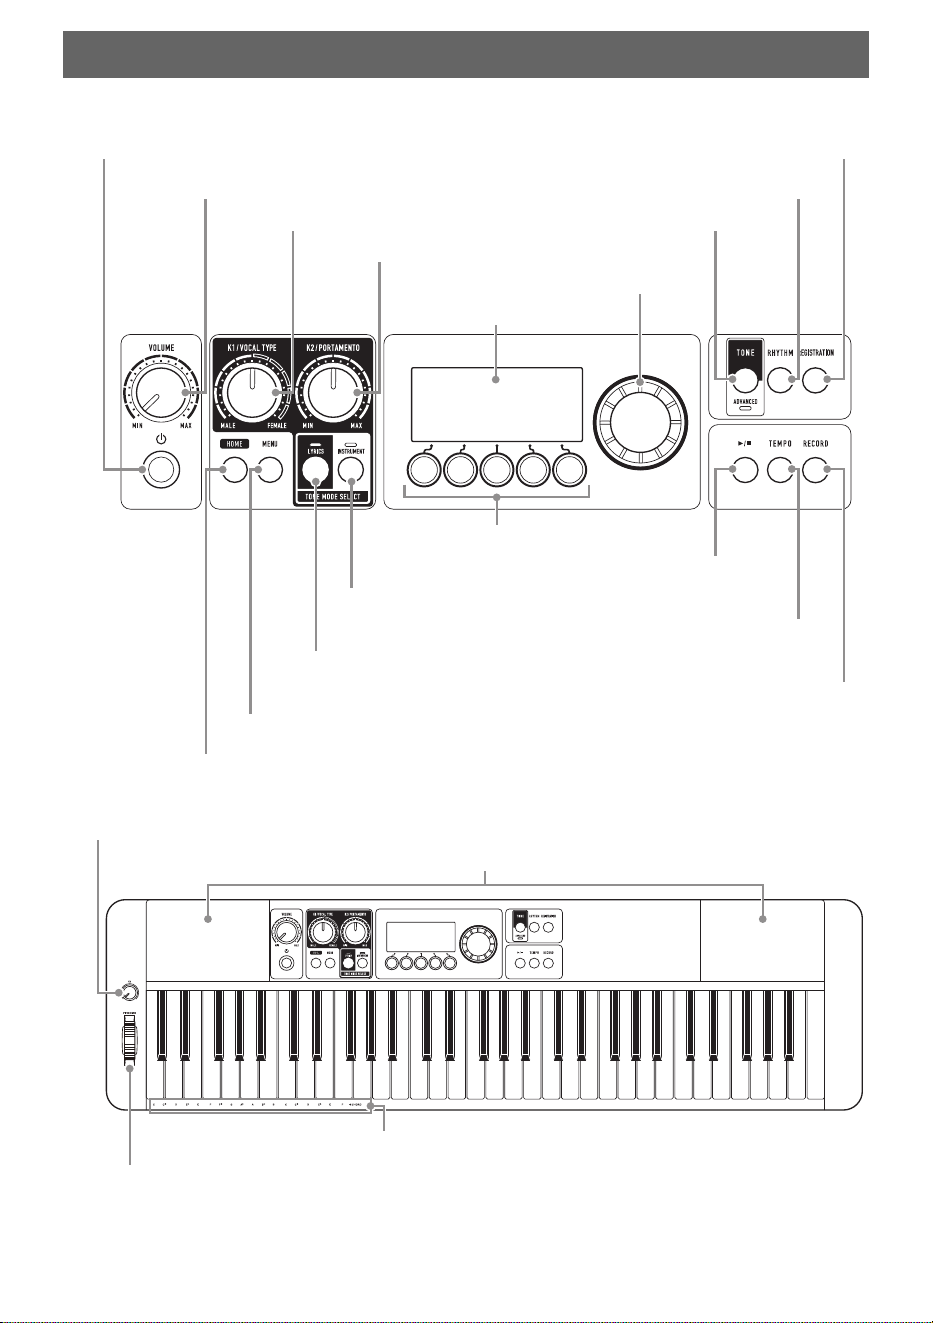
■ Front Panel
• The numbers to the right of the ☞ symbol are reference page numbers.
General Guide
Speakers
P(Power) button ☞EN-26
VOLUME knob ☞EN-28
HOME button ☞EN-19
MENU button ☞EN-22
LYRICS button ☞EN-37
K1 knob ☞EN-91
5 buttons ☞EN-19
LCD
Dial ☞EN-21
TONE button ☞EN-68
RHYTHM button ☞EN-149
REGISTRATION button ☞EN-171
a button ☞EN-183
TEMPO button ☞EN-31
RECORD button ☞EN-191
PITCH BEND wheel ☞EN-89
Chord root names
K3 knob ☞EN-91
INSTRUMENT button ☞EN-68
K2 knob ☞EN-91
General Guide
EN-7
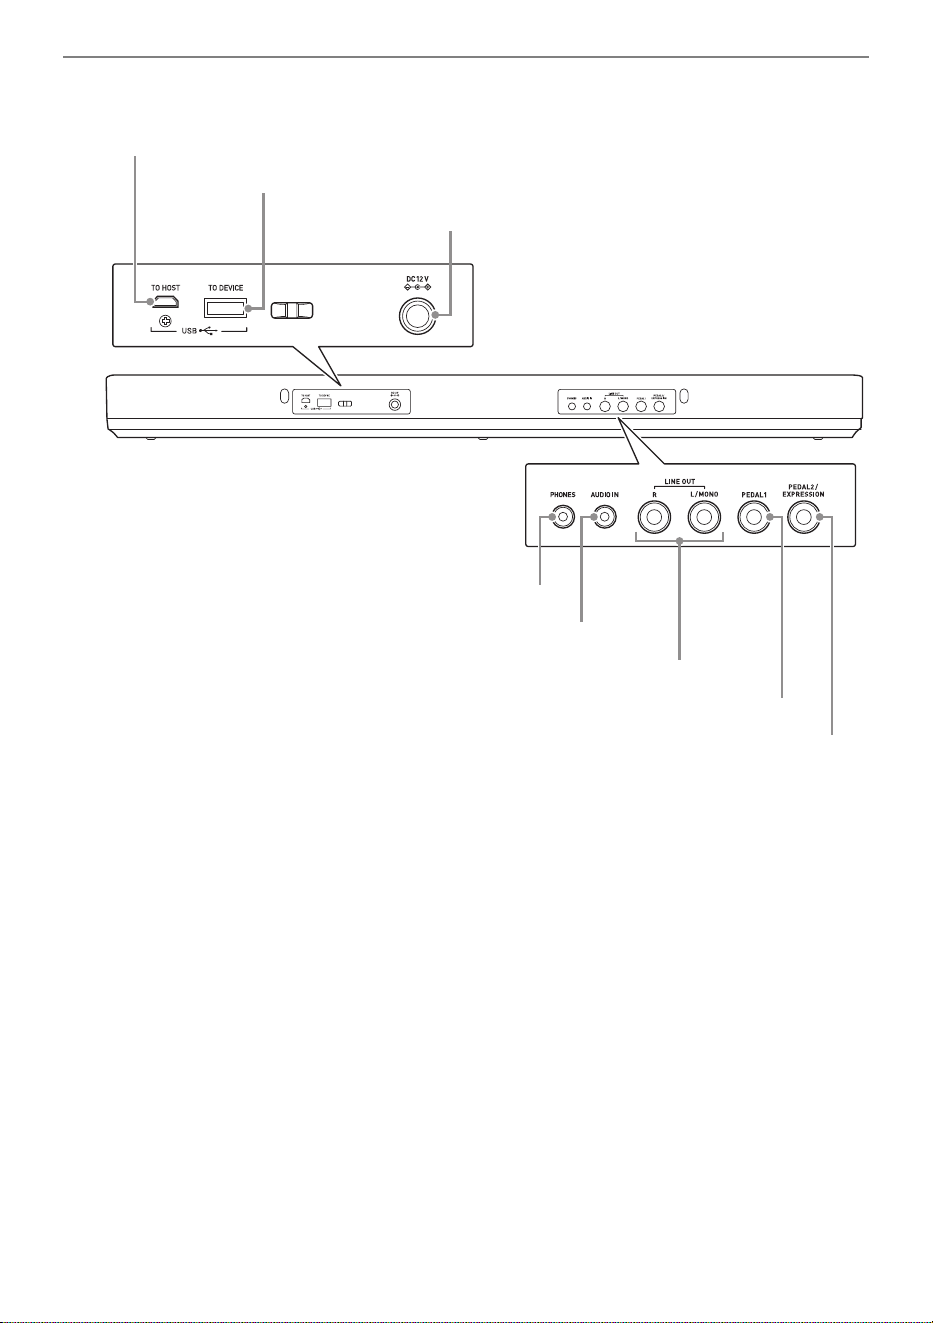
■ Back
• The numbers to the right of the ☞ symbol are reference page numbers.
USB TO HOST port ☞EN-263, EN-265
PHONES jack ☞EN-15, EN-270
Power terminal (DC 12V) ☞EN-8
USB TO DEVICE port ☞EN-14, EN-248
AUDIO IN jack ☞EN-272
PEDAL2/EXPRESSION jack ☞EN-16
PEDAL1 jack ☞EN-16
LINE OUT R, L/MONO jack ☞EN-272
EN-8
Though either an AC adaptor or batteries can be used for power, use of AC adaptor power is normally
recommended.
Use only the AC adaptor (JEITA Standard with unified polarity plug) specified for this Digital Keyboard.
Use of a different type of AC adaptor can cause malfunction.
AC Adaptor Type: AD-A12150LW (JEITA Standard plug)
• Never connect the AC adaptor (JEITA Standard, with unified polarity plug) that comes with
this Digital Keyboard to any other device besides this Digital Keyboard. Doing so creates the
risk of malfunction.
• Be sure to turn off Digital Keyboard power before connecting or disconnecting the AC
adaptor.
• The AC adaptor will become warm to the touch after very long use. This is normal and does
not indicate malfunction.
• Note the following important precautions to avoid damage to the power cord.
During Use
• Never pull on the cord with excessive force.
• Never repeatedly pull on the cord.
• Never twist the cord at the base of the plug or connector.
During Movement
• Before moving the Digital Keyboard, be sure to unplug the AC adaptor from the power outlet.
During Storage
• Loop and bundle the power cord, but never wind it around the AC adaptor.
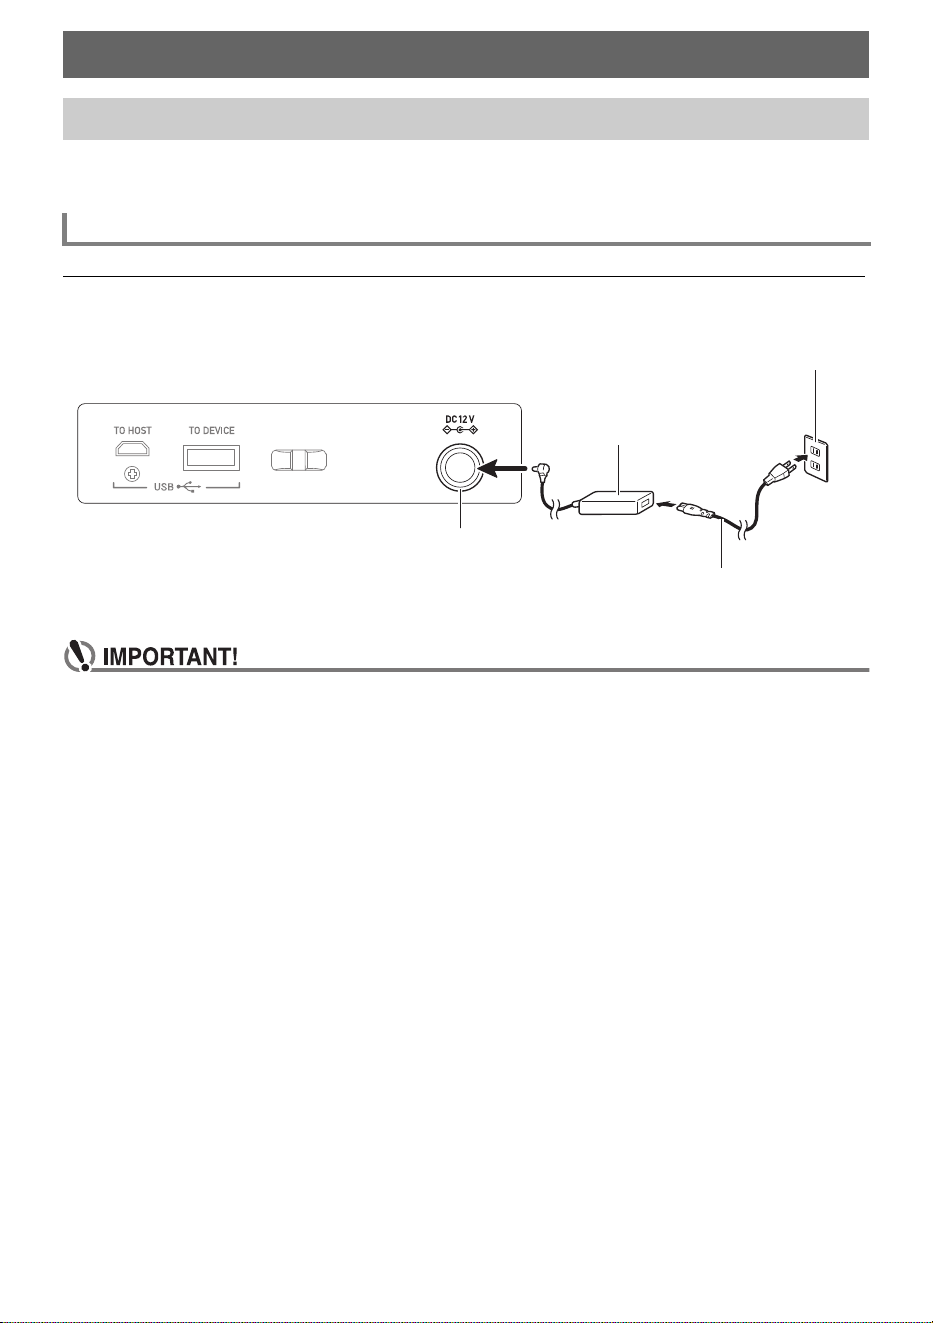
Getting Ready to Play
Preparing a Power Supply
Using the AC Adaptor
AC adaptor
DC 12V terminal
Household power outlet
Power cord

Getting Ready to Play
EN-9
• Never insert metal, pencils, or any other objects into the product’s DC12V terminal. Doing so
creates the risk of accident.
• Do not try to use the power cord that comes with the product with another device.
• Use the AC adaptor so its label surface is pointed downwards. The AC adaptor becomes
prone to emitting electromagnetic waves when the label surface is facing upwards.
• Plug the AC adaptor into a power outlet that is close to the Digital Keyboard. This lets you
immediately unplug from the power outlet should any problem occur.
• The AC adaptor is intended for indoor use only. Do not leave it in a location where it can
become wet. Also, do not place a vase or any other container of liquid on the AC adaptor.
• Make sure that the AC adaptor does not become covered with a newspaper, table cloth,
curtain, or any other type of fabric.
• If you do not plan to use the Digital Keyboard for a long time, unplug the AC adaptor from the
power outlet.
• The AC adaptor cannot be repaired. If your AC adaptor malfunctions or becomes damaged,
you need to purchase a new one.
• AC Adaptor Usage Environment
Temperature: 0 to 40°C
Humidify: 10% to 90%RH
• Output Polarity: &
Getting Ready to Play
EN-10
• Be sure to turn off power before loading batteries.
• Use commercially available AA-size alkaline batteries or AA-size rechargeable nickel metal
hydride batteries.
• Low battery power can cause abnormal operation. If this happens, replace batteries with new
ones. If you are using rechargeable batteries, charge them.
• Actual continuous operation time may be shorter due to battery type, performance type, and
usage environment. In particular, Active DSP (page EN-98) or Equalizer (page EN-138)
function settings can dramatically shorten the battery operation time. Power the Digital
Keyboard with the AC adaptor when using these functions.
■ Batteries
Note the precautions below when using rechargeable batteries.
• Use Panasonic Group AA-size eneloop rechargeable batteries. Do not use any other type of
batteries.
• Use only the specified charger to charge batteries.
• Rechargeable batteries must be removed from the product for charging.
• For information about using eneloop batteries or their specified charger, be sure to read the user
documentation and precautions that come with each item, and use them only as directed.
Be sure to replace batteries at least once a year, even if there is no indication of low battery power.
Dead rechargeable batteries (eneloop) in particular may deteriorate if they are left in the product.
Remove rechargeable batteries from the product as soon as possible after they go dead.
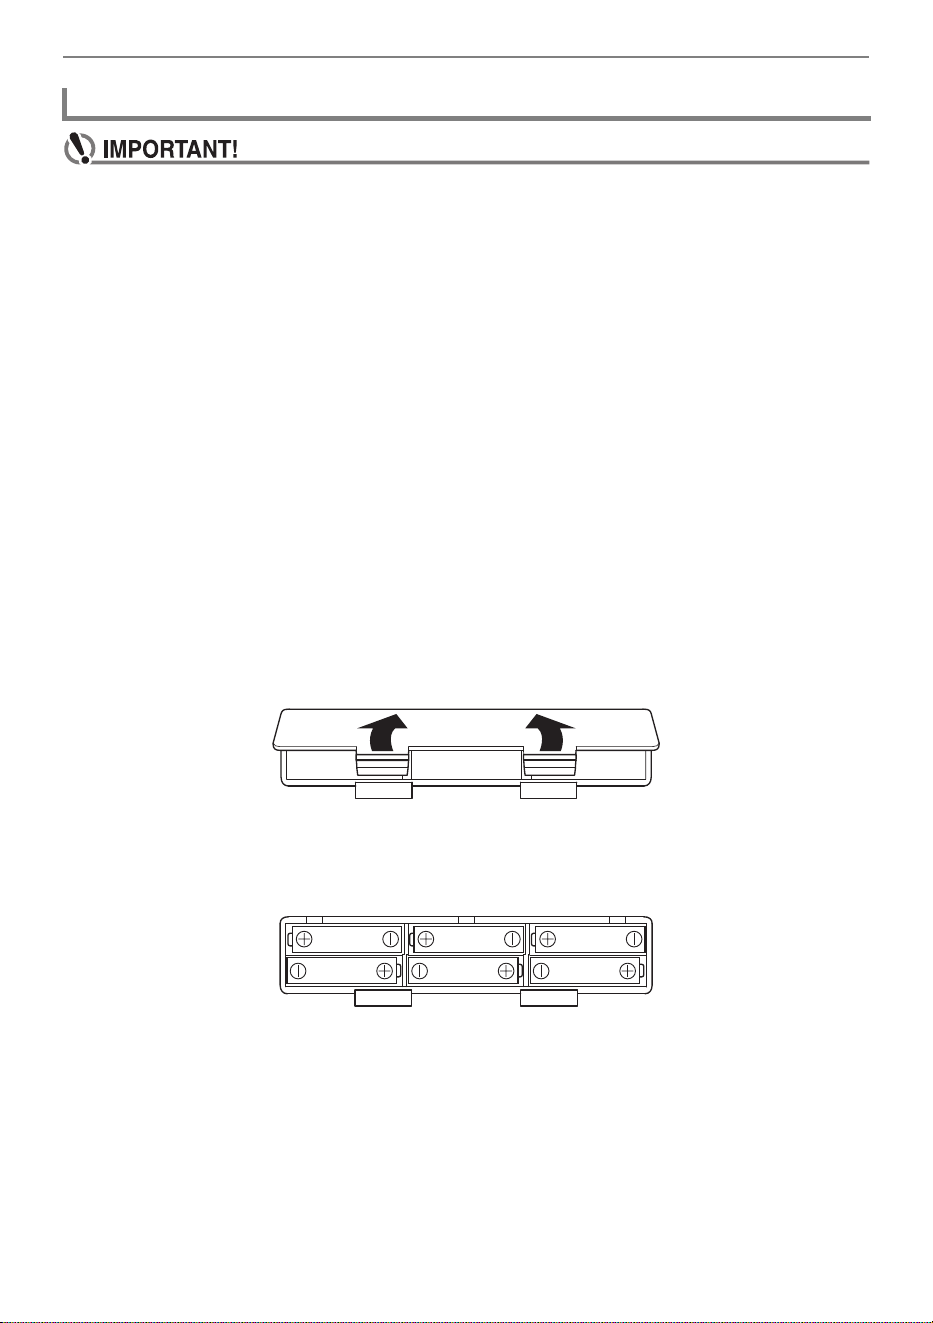
1.
Open the battery cover on the back of the Digital Keyboard.
2.
Load six AA-size batteries into the battery compartment.
• Load batteries with their positive (+) and negative (–) ends facing correctly.
Using Batteries for Power
Getting Ready to Play
EN-11
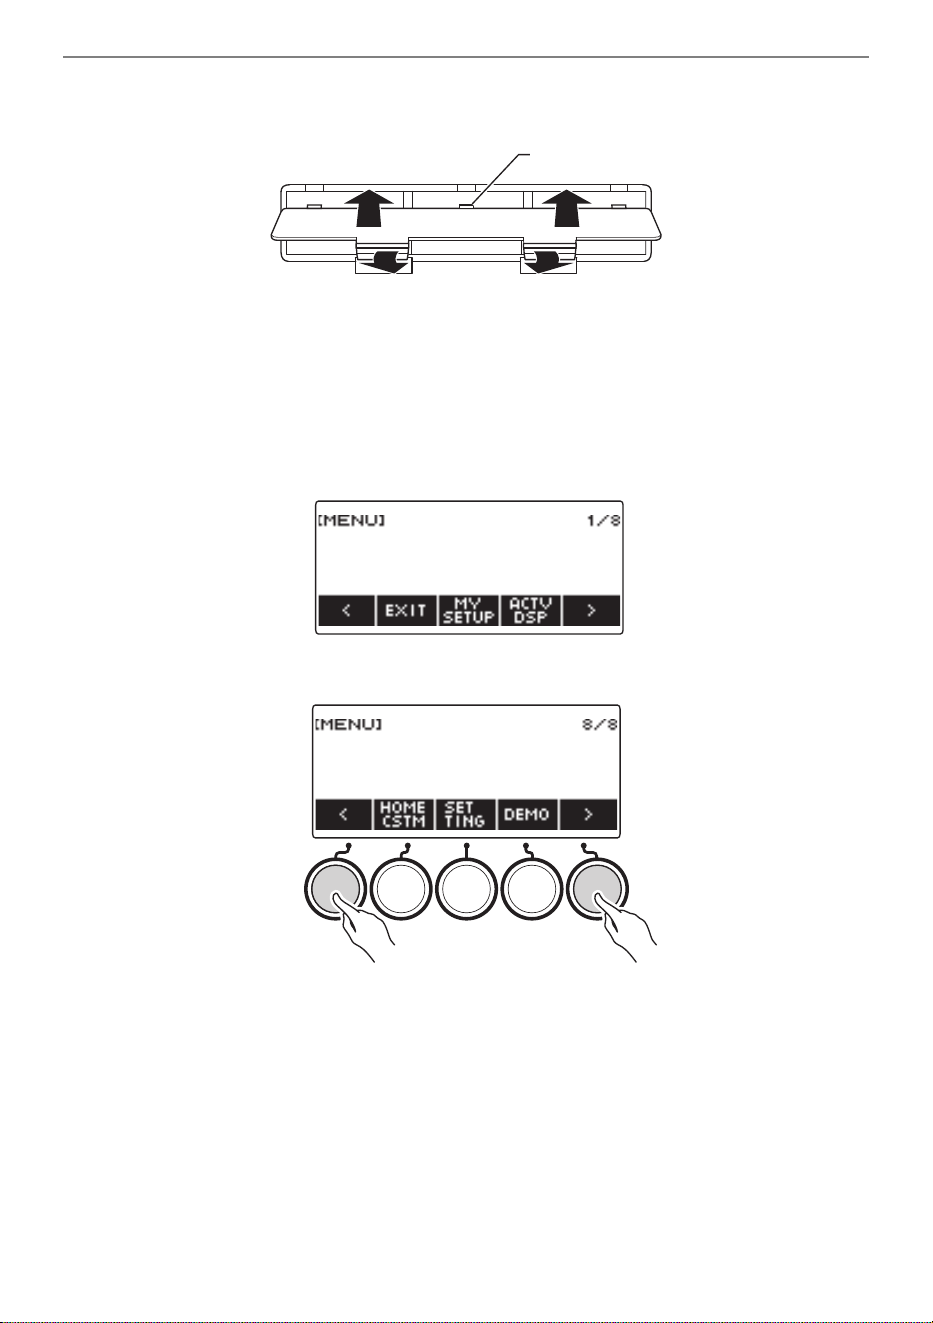
3.
Insert the tabs of the battery cover into the holes, and close the cover.
• Configure the setting below to specify the type of batteries you loaded.
■ Specifying the Battery Type
1.
Turn on the Digital Keyboard.
• See “Turning Power On or Off” (page EN-26).
2.
Press MENU.
This displays the menu screen.
3.
Use U and I to select the 5 buttons menu (page EN-19) that includes SETTING.
4.
Press SETTING.
This displays the setting screen.
Tab

Getting Ready to Play
EN-12
5.
Use U and I to select “Battery”.
6.
Rotate the dial or use – and + to select “Alkaline” (alkaline batteries) or “Ni-MH”
(nickel-metal hydride batteries).
7.
To exit the setting operation, press EXIT.
Getting Ready to Play
EN-13
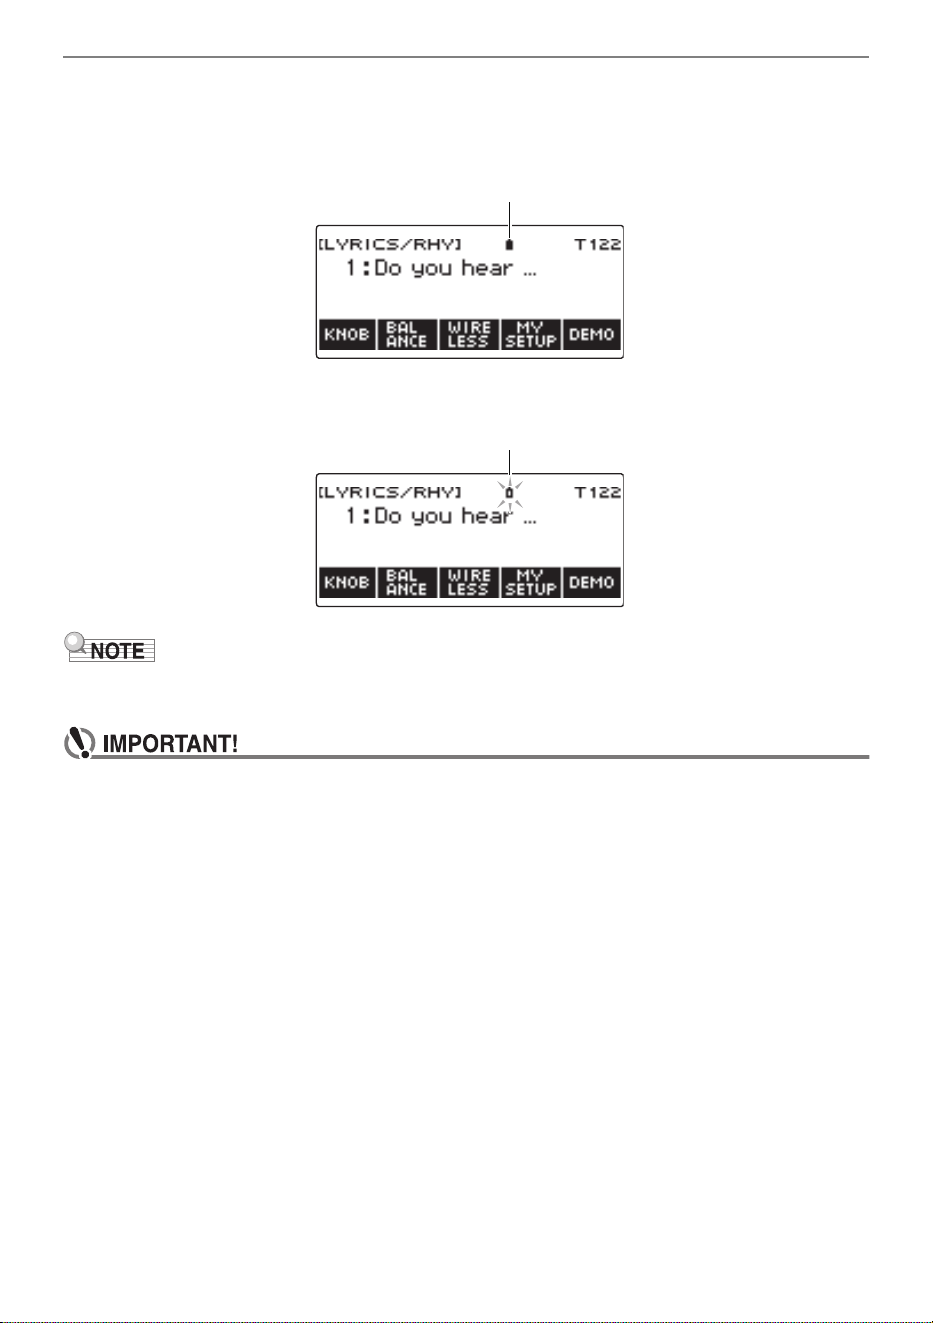
■ Low Battery Indication
A battery icon appears on the display to let you know when battery power is getting low.
Declining Battery Power
Battery Replacement Required
• Low battery power may cause notes to become distorted, or other problems.
• You can conserve battery power by using headphones and by reducing the volume level.
• Continued use with low batteries may cause power to turn off suddenly. This can cause
stored data to be corrupted or lost.
Black battery icon (not flashing)
White battery icon (flashing)
Getting Ready to Play
EN-14
Insert the music stand legs into the back of the Digital Keyboard.
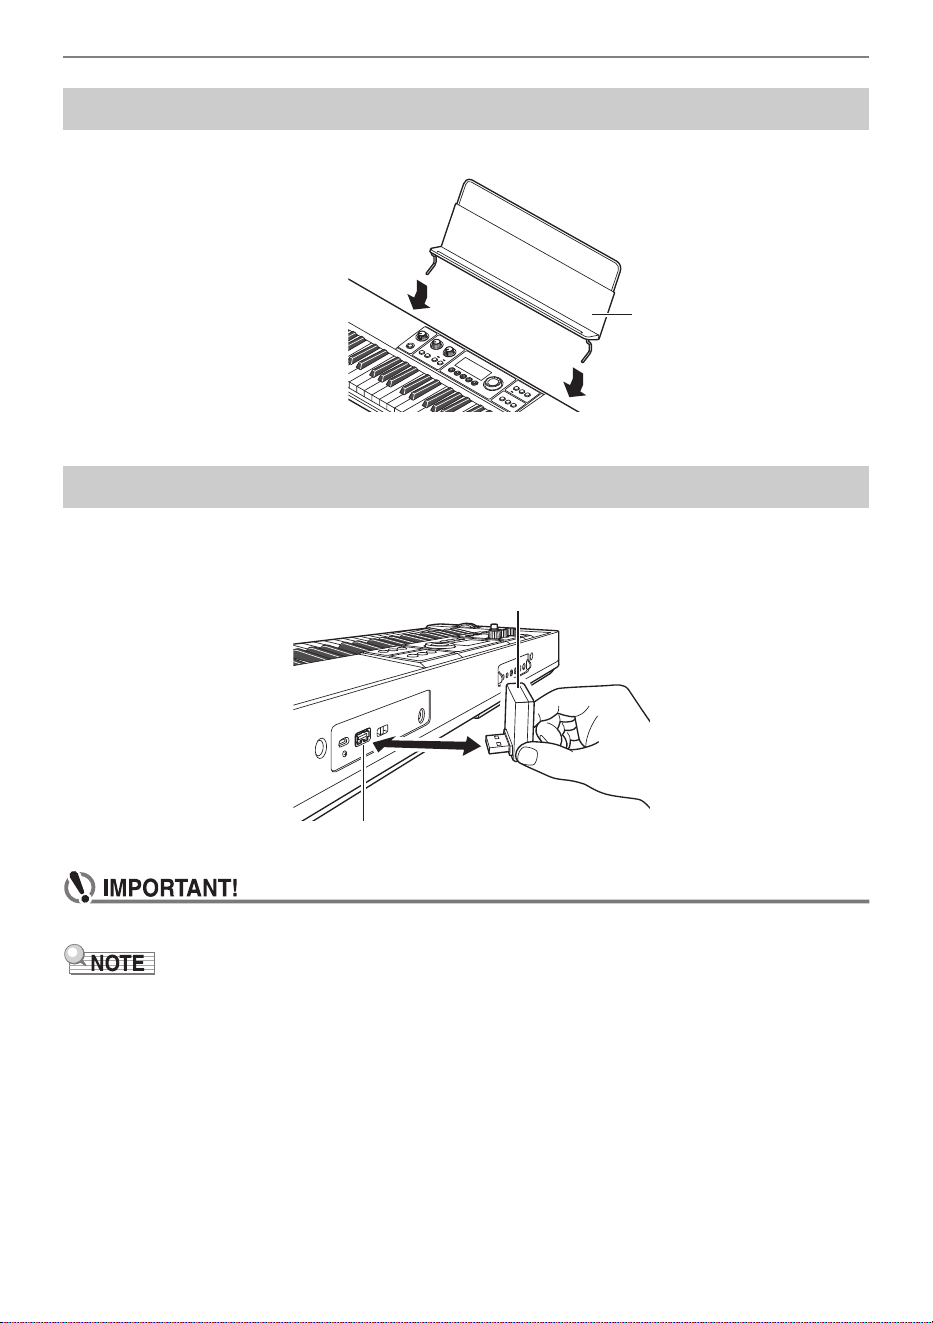
To pair this Digital Keyboard with a Bluetooth
®
capable external device, you need to plug the Wireless
MIDI & audio adaptor into the product’s USB TO DEVICE port.
• Turn off the Digital Keyboard before disconnecting the Wireless MIDI & audio adaptor.
• When connecting with a Bluetooth audio capable device, refer to “Sounding a Bluetooth Audio
Capable Device (Bluetooth Audio Pairing)” (page EN-273).
• When connecting to an external Bluetooth Low Energy MIDI compatible device, refer to “Connection
with a Bluetooth Low Energy MIDI Device” (page EN-277).
• To use the app, refer to “Linking with a Smart Device and Using CASIO MUSIC SPACE” (page
EN-264).
• The Wireless MIDI & audio adaptor may not be sold in certain countries or geographic areas.
Preparing the Music Stand
Connecting the Wireless MIDI & audio adaptor
Music stand
Wireless MIDI & audio adaptor
USB TO DEVICE port
Getting Ready to Play
EN-15
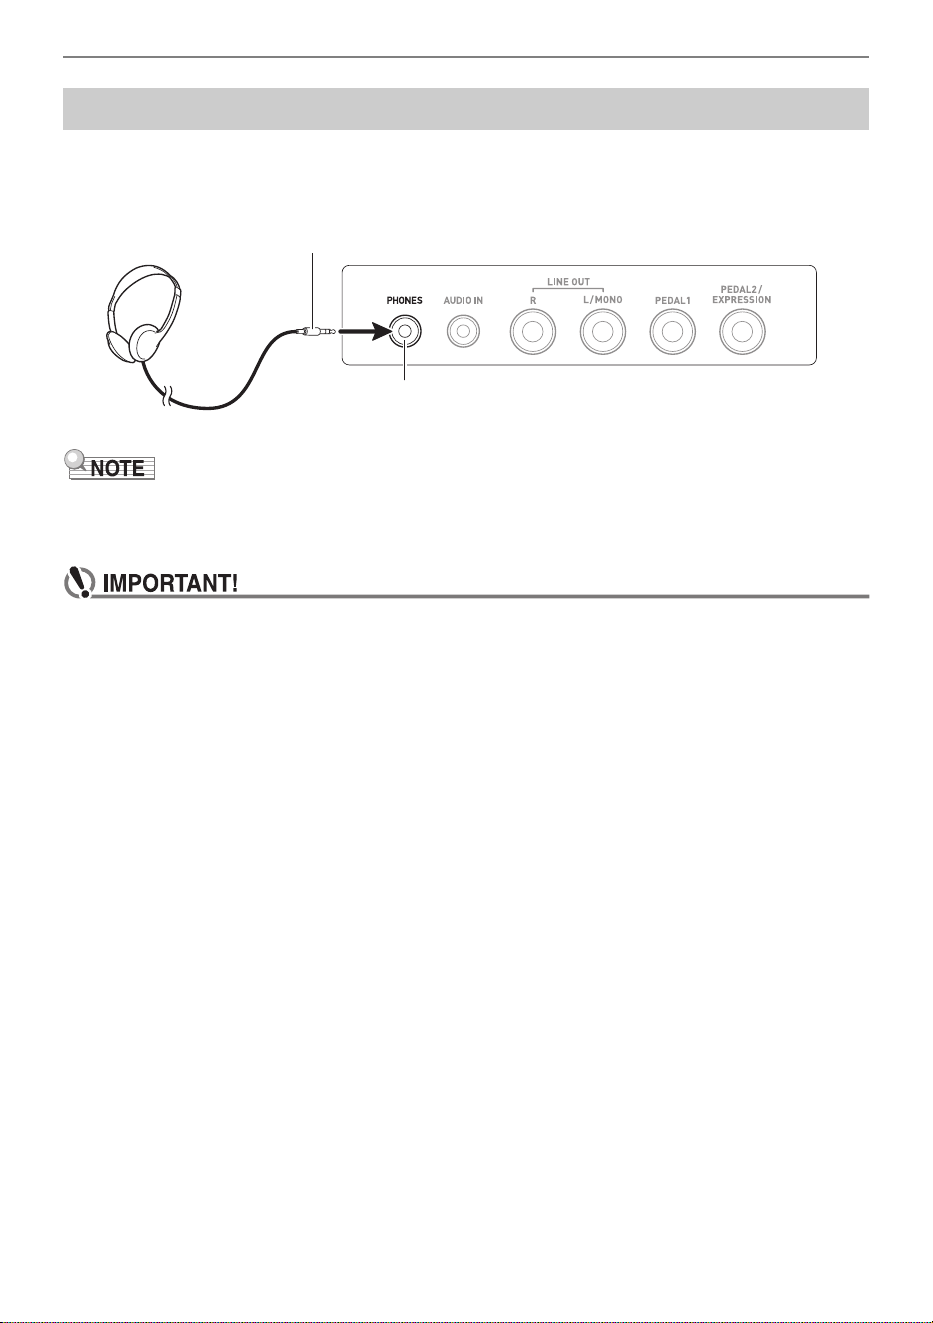
Plugging in headphones cuts off output from the built-in speakers, which means you can practice
playing even late at night without disturbing others.
• Be sure to turn down the volume level before connecting headphones.
• Headphones do not come with this Digital Keyboard.
• Use the optional (CP-16) or a commercially available headphones.
• The surround effect is not applied while you are listening over headphones.
• Do not listen to output over headphones at very high volume levels for long periods. Doing so
creates the risk of hearing damage.
• The headphones you use must have a 3.5mm 3-pole stereo mini plug. Use of other types of
plugs is not supported.
• If the plug of the headphones does not match the PHONES jack, use a commercially available
adaptor plug.
• If you are using headphones that require an adaptor plug, make sure you do not leave the
adaptor plugged in when removing the headphones.
Connecting Headphones (Option)
PHONES jack (3.5mm stereo mini jack)
Stereo mini plug
Getting Ready to Play
EN-16
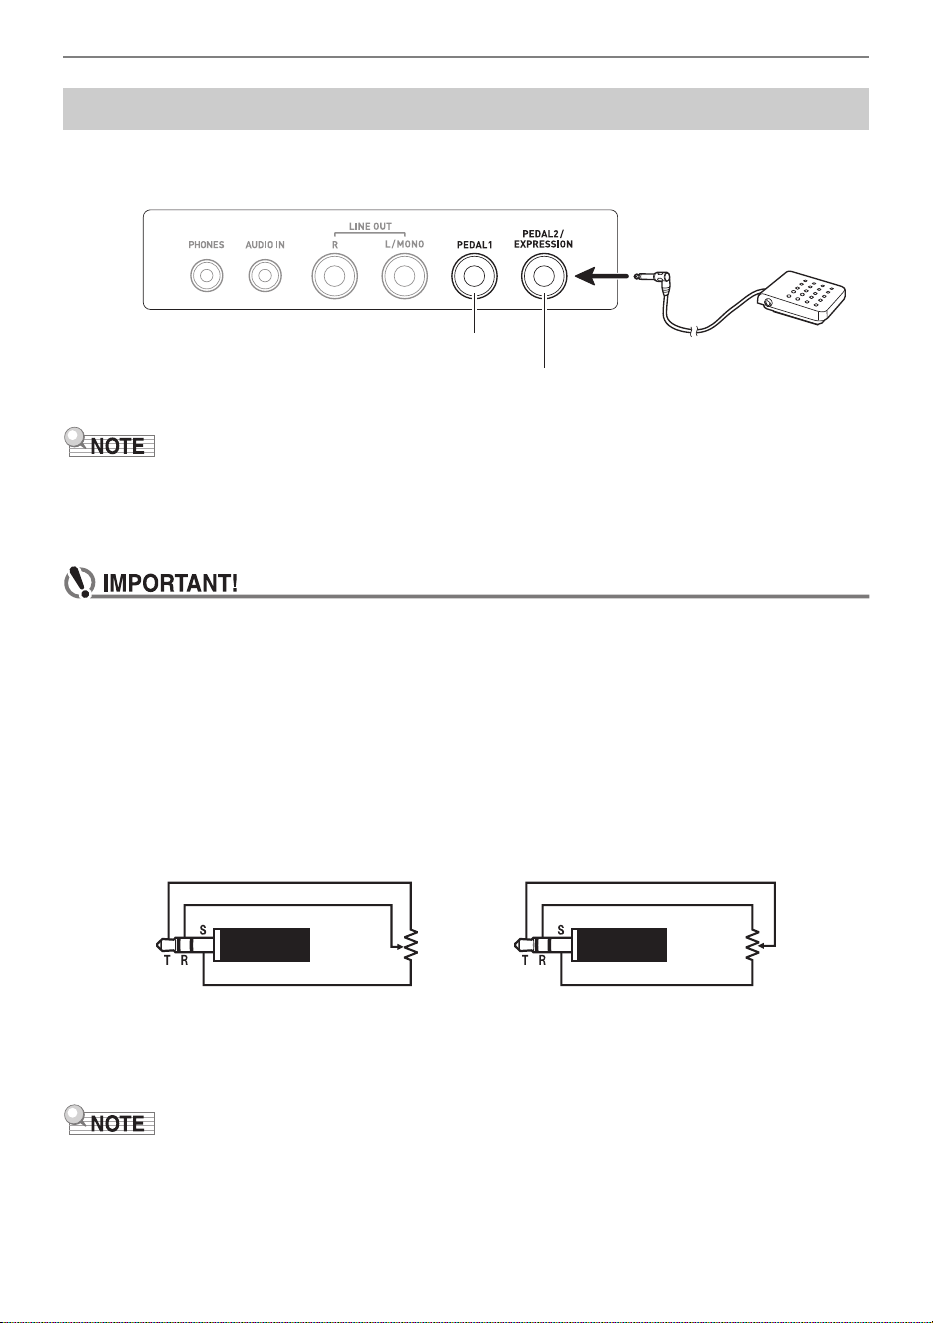
To use a pedal, connect it to the PEDAL1 or PEDAL2/EXPRESSION jack on the back of the Digital
Keyboard. The jack you should use depends on the operation you want the pedal to perform.
• This Digital Keyboard does not come with a pedal unit.
• You can use the PEDAL1 jack to connect an optional (SP-3, SP-20) sustain pedal. You can use the
PEDAL2/EXPRESSION jack to connect a commercially available sustain pedal or expression
pedal.
• Before using an expression pedal connected to the PEDAL2/EXPRESSION jack, you will
need to specify the expression pedal’s polarity and calibrate the pedal. For more information,
see “Using Volume Pedal” (page EN-75).
■ Connectable Expression Pedals
You can connect a commercially available expression pedal that satisfies the specifications below to
the PEDAL2/EXPRESSION jack. Use of a pedal whose operation has been confirmed (see below) is
recommended.
• Expression pedal with a maximum resistance value within the range of 10kΩ±20% to 50kΩ±20%
* Operation Confirmed Pedals
Roland EV-5 (Set minimum volume to 0.)
KURZWEIL CC-1
FATAR VP-25, VP-26
• Note that pedal polarity depends on the manufacturer. Use the procedure under “Using Volume
Pedal” (page EN-75) to configure the polarity type setting.
Connecting a Pedal (Option)
Pedal (option)
PEDAL1 jack (6.3mm standard jack)
PEDAL2/EXPRESSION jack (6.3mm standard jack)
Polarity Type 1 Polarity Type 2*
Getting Ready to Play
EN-17
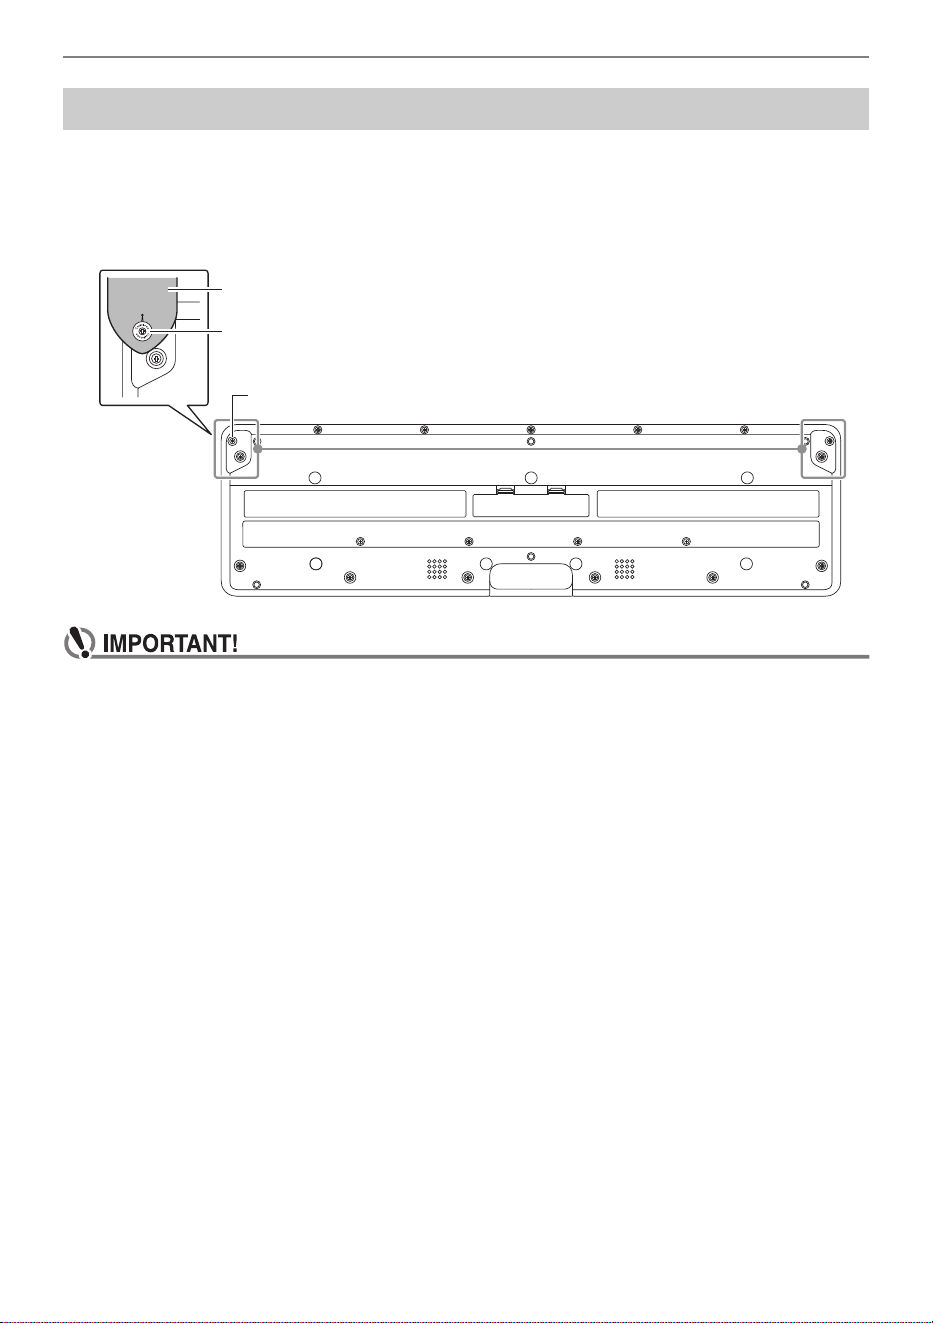
1.
Attach a strap (commercially available) to the left and right strap pins on the
bottom of the Digital Keyboard.
2.
Cover the strap pins with the strap locks.
• After attaching the strap, check to make sure that the strap is securely attached to the Digital
Keyboard.
• Do not pick up the Digital Keyboard by the strap alone. Doing so creates the risk of the Digital
Keyboard detaching from the strap and falling.
• The recessed area on the bottom of the Digital Keyboard IS NOT intended to be used as a
handle. Be sure to use both hands when picking up the Digital Keyboard.
• Should a strap lock ever become deformed or damaged, replace it.
Attaching a Strap (Commercially Available)
Strap lock
Strap (commercially available)
Strap pin
EN-18
• Display contents may become difficult to read at certain viewing angles.
• For information about how to adjust display contrast, see “Configuring Settings” (page EN-230).
Operations Common to All Modes
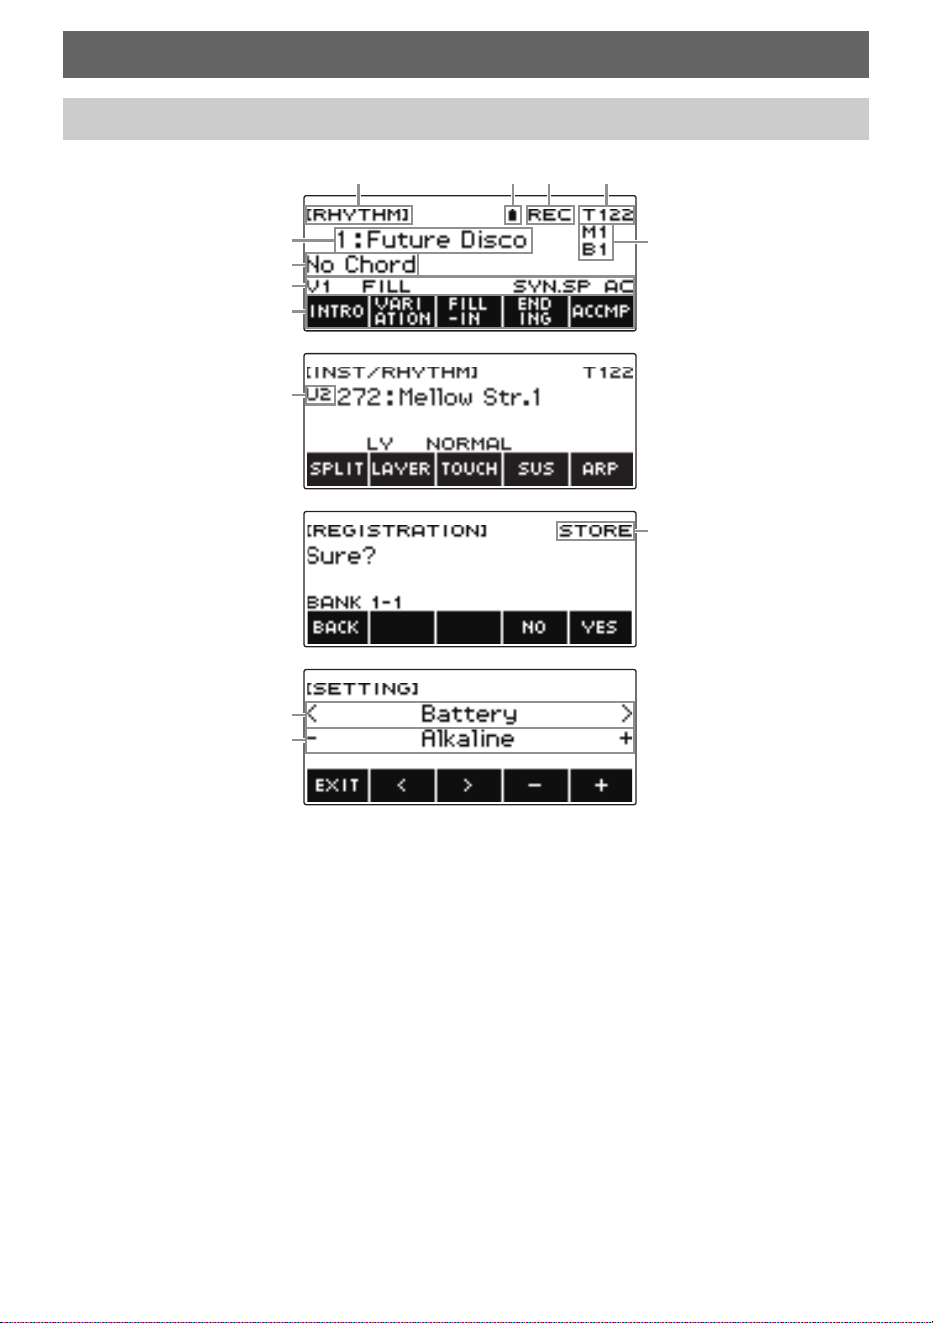
Display Screen Contents
Setting name
Battery icon
Recording status
Tempo
Setting
Measure/Beat
Sub-display
Status
5 buttons menu items
Part
Sub-title
Setting item
Setting
(1
(2
(3
(4
Operations Common to All Modes
EN-19
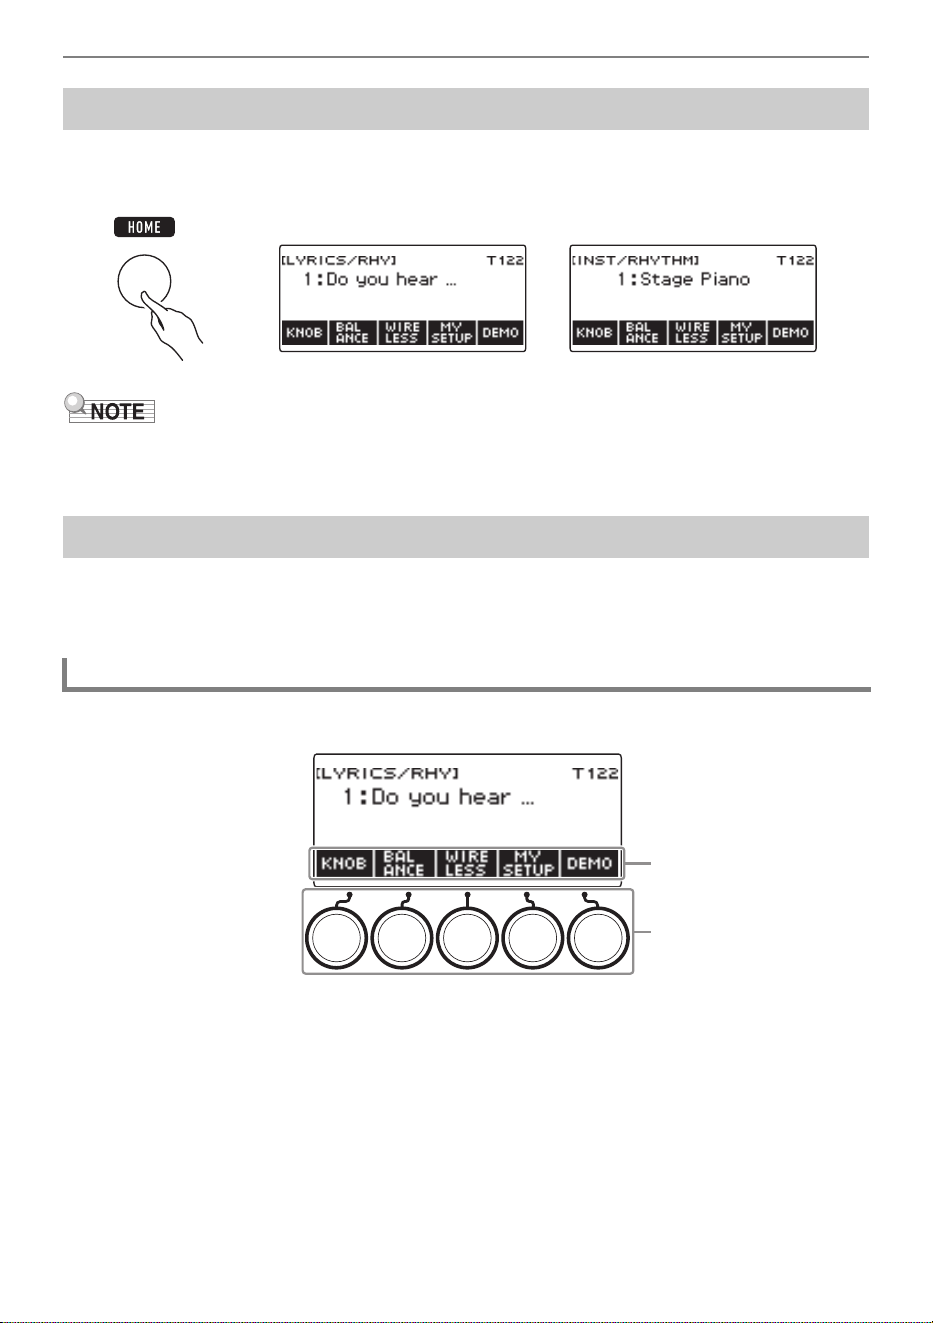
Pressing HOME causes [LYRICS/RHY] or [INST/RHYTHM] to appear, which indicates the tone
selection screen. This is the home screen. You can use the home screen to select the lyrics and
instrument tone you want to use, and to configure various settings.
• You can customize the home screen to suit your specific needs. For details, see “Customizing the
Home Screen (Home Customization)” (page EN-226).
Operations assigned to the 5 buttons along the bottom of the display change according to the setting
you are configuring. Operations currently assigned to the display buttons are indicated by labels above
the buttons (5 buttons menu).
■ Home screen (Tone Selection Screen)
Home Screen
5 buttons
5 buttons Examples
5 buttons menu
5 buttons
Operations Common to All Modes
EN-20
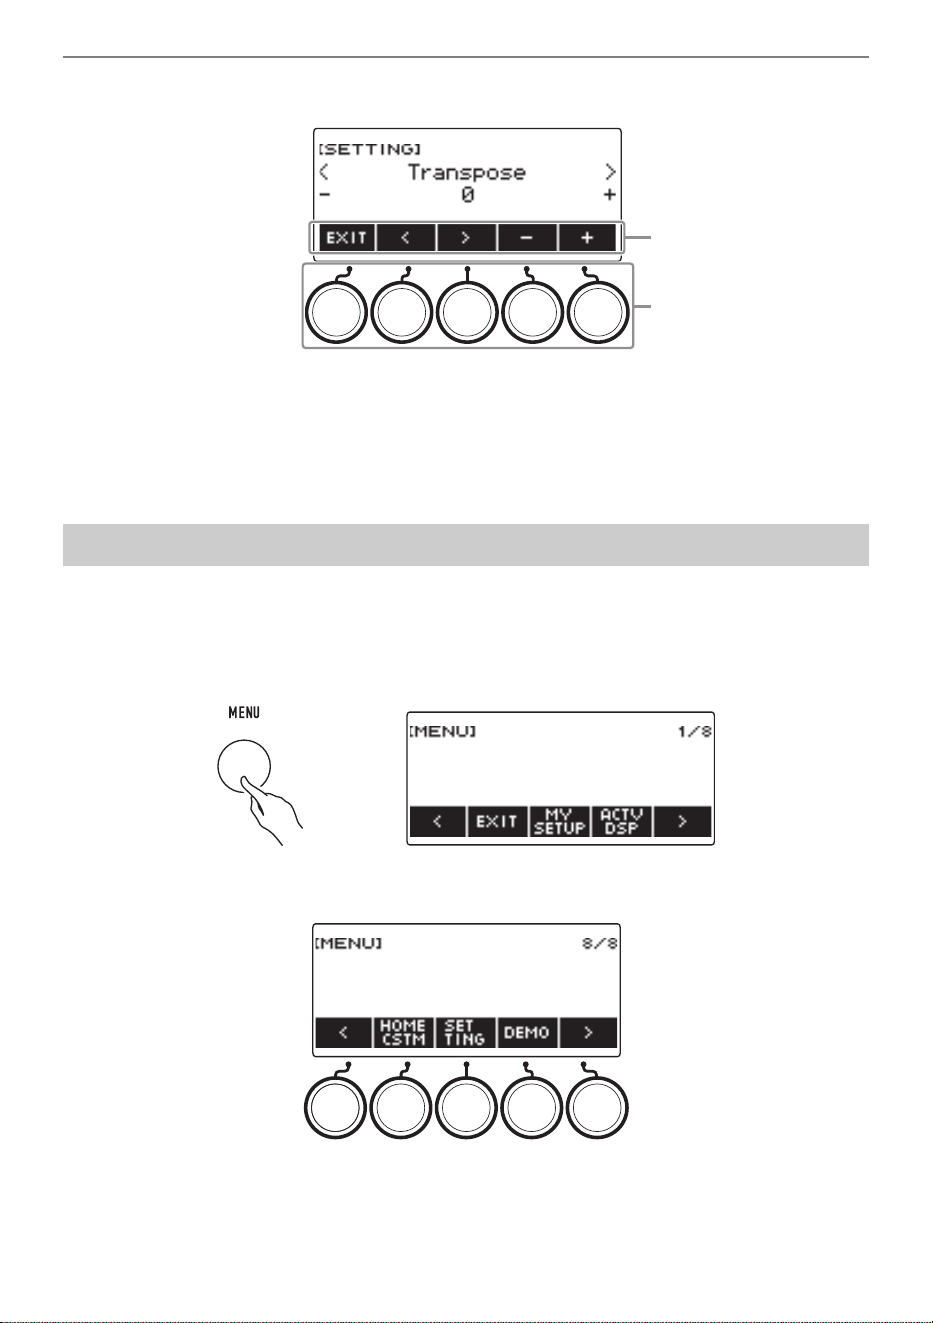
■ Setting Screen (SETTING)
• Long-pressing – or + when selecting a number or value scrolls through settings at high speed.
• To return a number or value to its initial default or recommended setting, press – and + at the same
time.
• Long-pressing U or I when changing to another item or page scrolls through items or pages at high
speed.
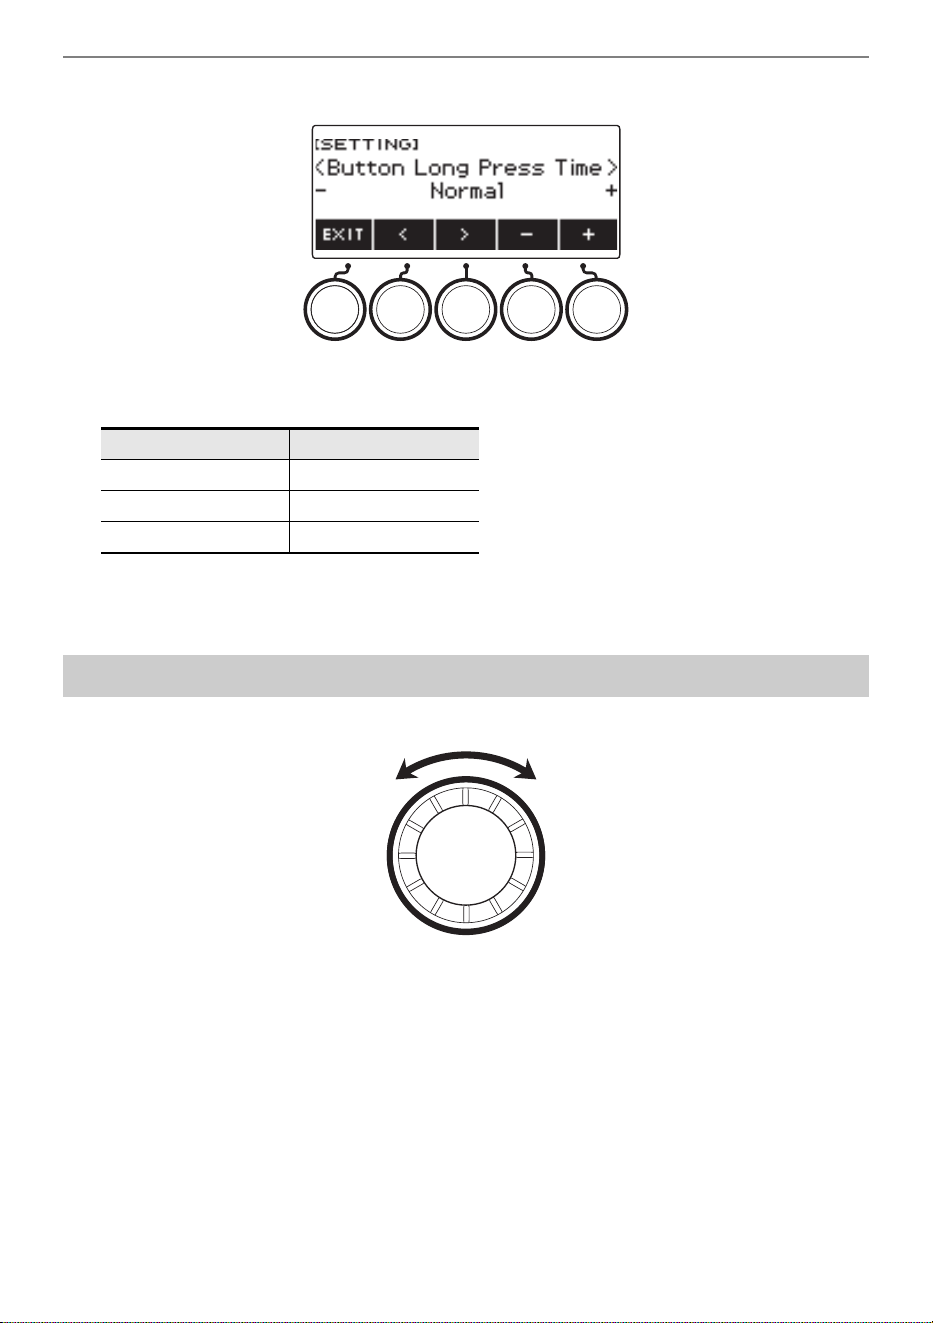
You can specify the required button long-press time.
• Note that you cannot change the required long-press time for the power off operation.
1.
Press MENU.
This displays the menu screen.
2.
Use U and I to select the 5 buttons menu that includes SETTING.
3.
Press SETTING.
This displays the setting screen.
Changing the Button Long-press Time
5 buttons menu
5 buttons
Operations Common to All Modes
EN-21
4.
Use U and I to select “Button Long Press Time”.
5.
Rotate the dial or use – and + to change the button long-press time value.
6.
To exit the setting operation, press EXIT.
Rotate the dial to change a number (tone number, etc.) or value (tempo value, etc.)
Setting Display Name
Short Short
Normal Normal
Long Long
Dial Operations

Operations Common to All Modes
EN-22
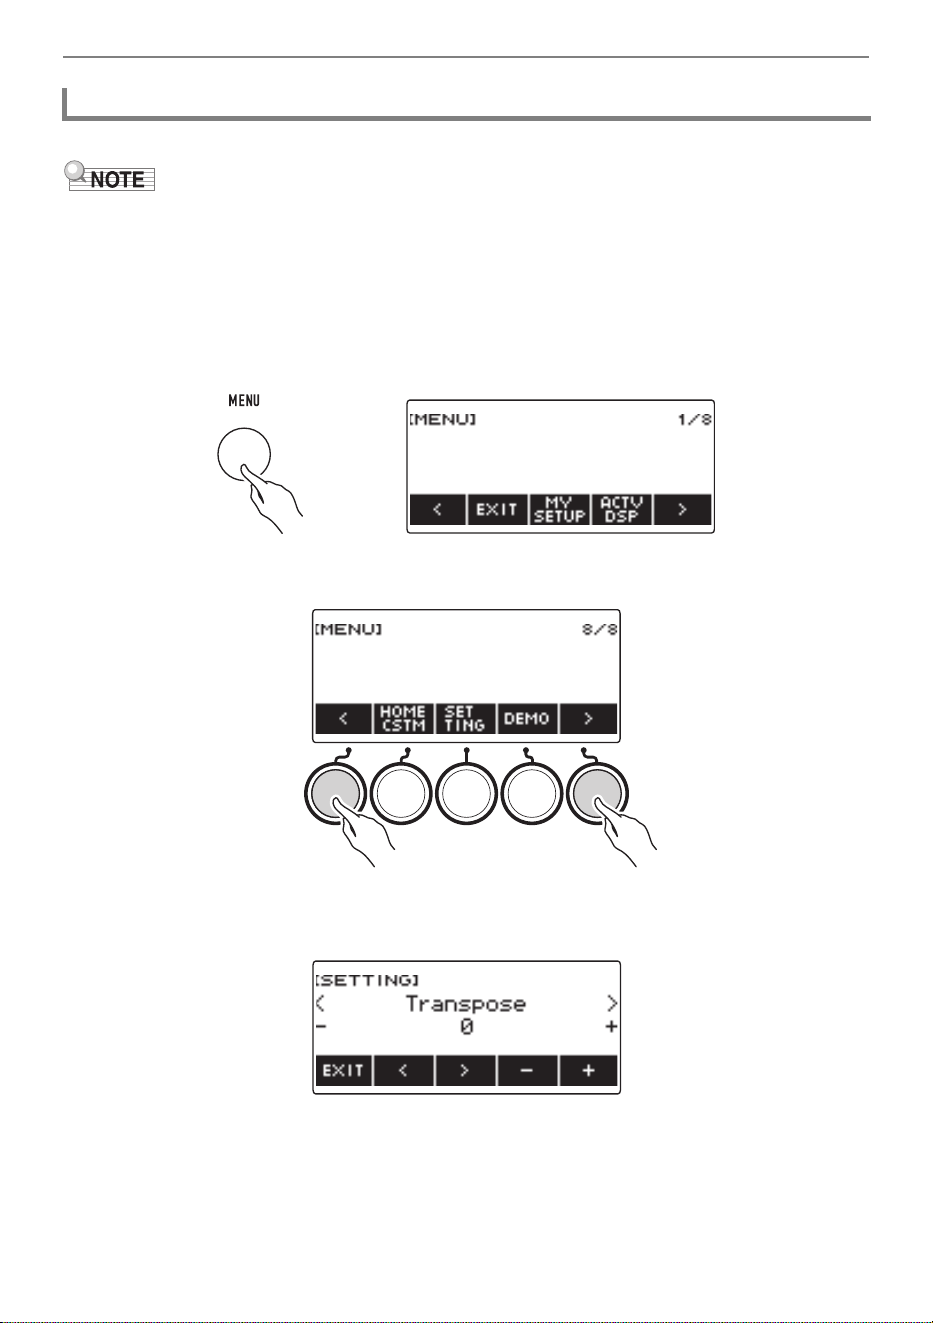
You can use the menu screen to select from a variety of different functions.
1.
Press MENU.
This displays the menu screen.
2.
Use U and I to select the 5 buttons menu that includes the function you want to
select.
• To return to the previous screen or exit the setting operation, press EXIT.
Menu Item List
Selecting a Function from a Menu
Item Display Name
MY SETUP MY SETUP
Active DSP ACTV DSP
Balance BALANCE
Octave shift OCT SHIFT
Sustain SUSTAIN
Portamento PORTAMENTO
Pedal PEDAL
Pitch Bend Wheel PITCH BEND
Knob KNOB
Arpeggiator ARPEGGI
Auto Harmonize AUTO HRM
Sampling SAMPLING
Song SONG
Metronome METRONOME
System Effects SYS FX
Equalizer EQ
Scale Tuning SCALE
MIDI controller MIDI CTRL
Wireless WIRELESS
Media MEDIA
Home Customization HOME CSTM
Setting SETTING
Demo DEMO
Operations Common to All Modes
EN-23
3.
Press the button of the function you want to select.
• This displays the screen of the function you select.
• To exit the menu screen, press MENU, or press EXIT on the first page of the menu screen.
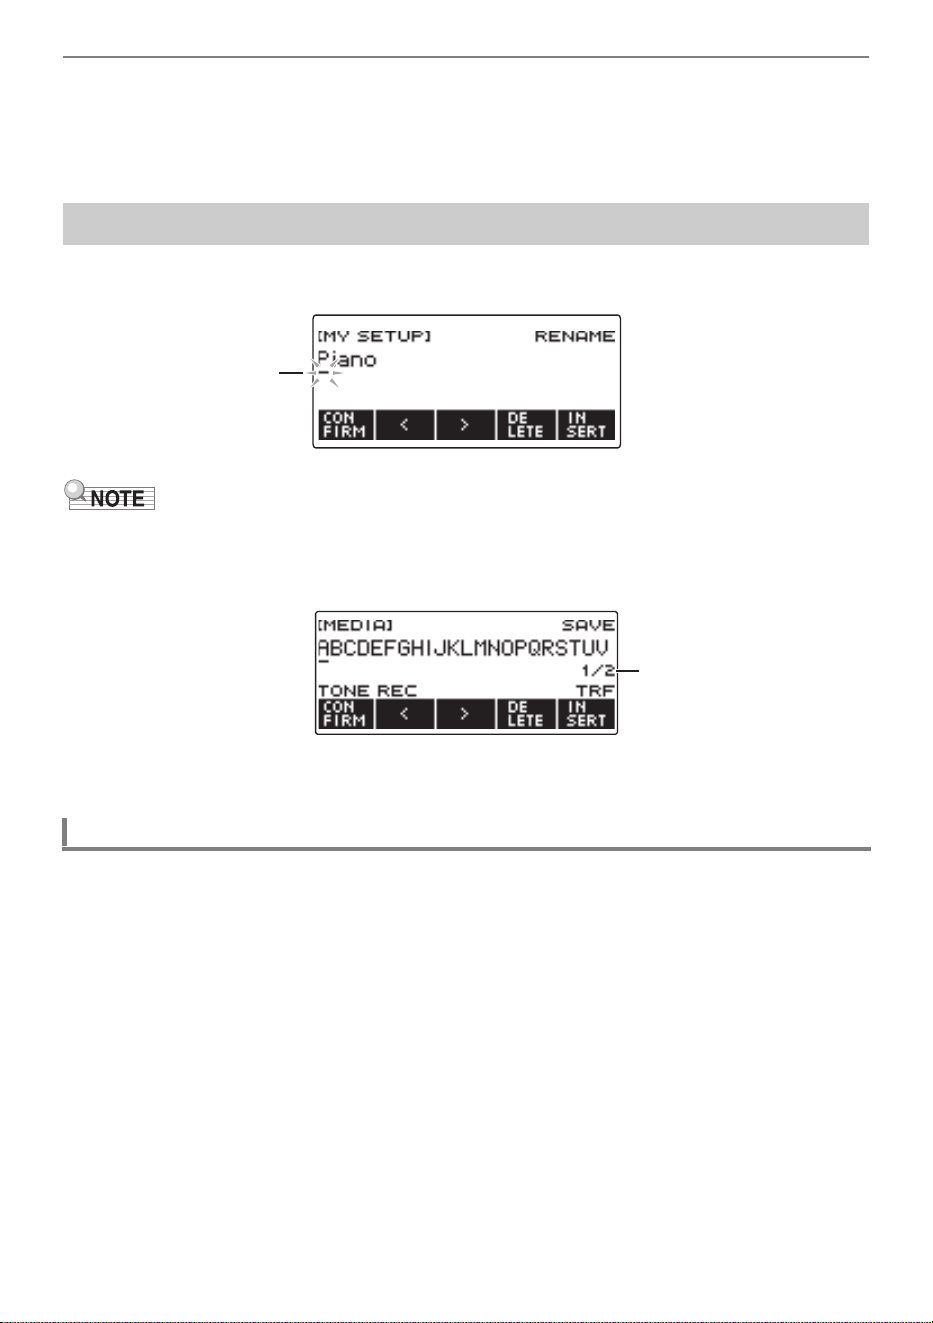
Use the procedures below to edit MY SETUP data names and USB flash drive file names (user data
names).
• USB flash drive (page EN-253) file names can be up to 231 characters long.
• Up to 22 characters can appear on the display at a time. If you input more than 22 characters, the
display will scroll horizontally, and a numeric page indicator (such as 1/11) will appear on the display.
• A file with a name that begins with “.” or “ ” (blank space) cannot be saved.
1.
Use U and I to move the cursor to the right of the location where you want to
insert a character.
2.
Press INSERT.
This inserts “A”.
• If you positioned the cursor to the right of the end of a character string, you can also rotate the
dial or use – and + to insert characters.
Inputting Characters
Inserting Characters
Cursor (flashing)
Page information

Operations Common to All Modes
EN-24
1.
Use U and I to move the cursor to the character you want to replace.
2.
Rotate the dial to change the character.
This displays the –/+ screen.
• After you rotate the dial once to select a character, you can change the selection further using – and +.
• To go back to the previous screen, press BACK.
• Repeat steps 1 and 2 as required.
• The characters shown in the table below are supported for USB flash drive file names.
• The characters shown in the table below are supported for file names on a FAT 32 formatted
USB flash drive.
Replacing a Character with a Different One
0
A
N
[
i
v
!
1
B
O
]
j
w
#
2
C
P
^
k
x
$
3
D
Q
_
l
y
%
4
E
R
`
m
z
&
5
F
S
a
n
{
'
6
G
T
b
o
}
(
7
H
U
c
p
~
)
8
I
V
d
q
+
9
J
W
e
r
,
;
K
X
f
s
-
=
L
Y
g
t
.
@
M
Z
h
u
(First cell in the above table is blank.)
$& ' ( )
-
0123456
7 8 9@ABCDEFGH I
JKLMNOPQRSTUV
WX Y Z ^ _ ` { }
~
Operations Common to All Modes
EN-25
• The characters shown in the table below are supported for user data (MY SETUP) names.
1.
Use U and I to move the cursor to the character you want to delete.
2.
Press DELETE.
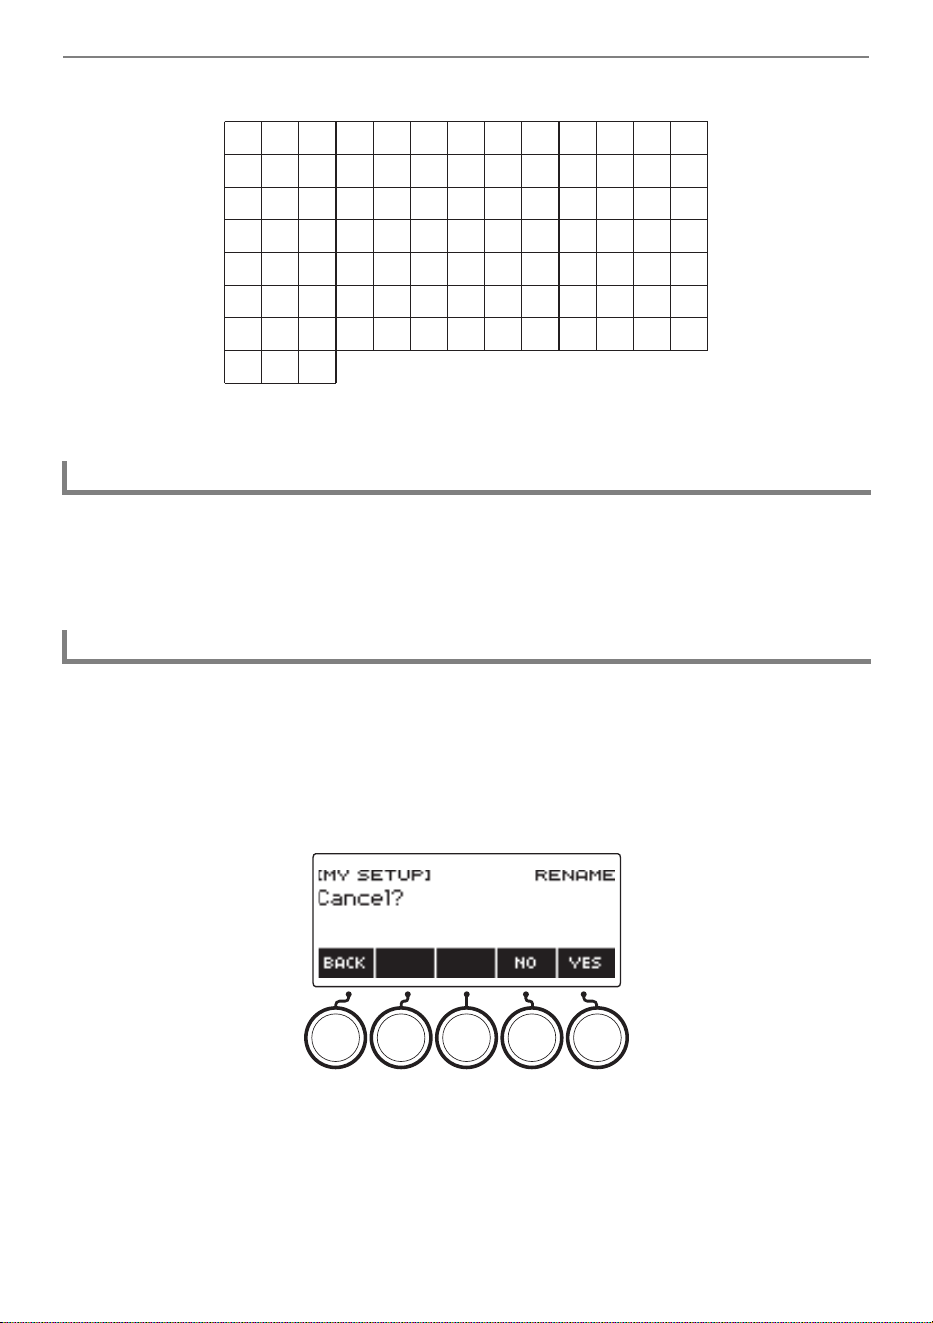
Perform the step below after you are finished editing characters.
1.
Press CONFIRM.
This displays a confirmation screen for the character string you edited.
• Next, the message “Cancel?” appears in the following cases.
– If the current user data or file name has not been changed.
– If the user data or file name does not contain any characters (0 character count)
• To exit character string editing, press YES.
• To continue with character string editing, press NO or BACK to return to the character string
editing screen.
Deleting a Character
Exiting a Character Delete or Edit Operation
!"#$%&'()*+,
-
. / 0123456789
: ; <>=?@ABCDEF
GH I J K LMNOPQRS
T U VWX Y Z [ ] \ ^ _ `
abcdefgh i j k lm
nopqr s t uvwxyz
{}|
(First cell in the above table is blank.)
EN-26
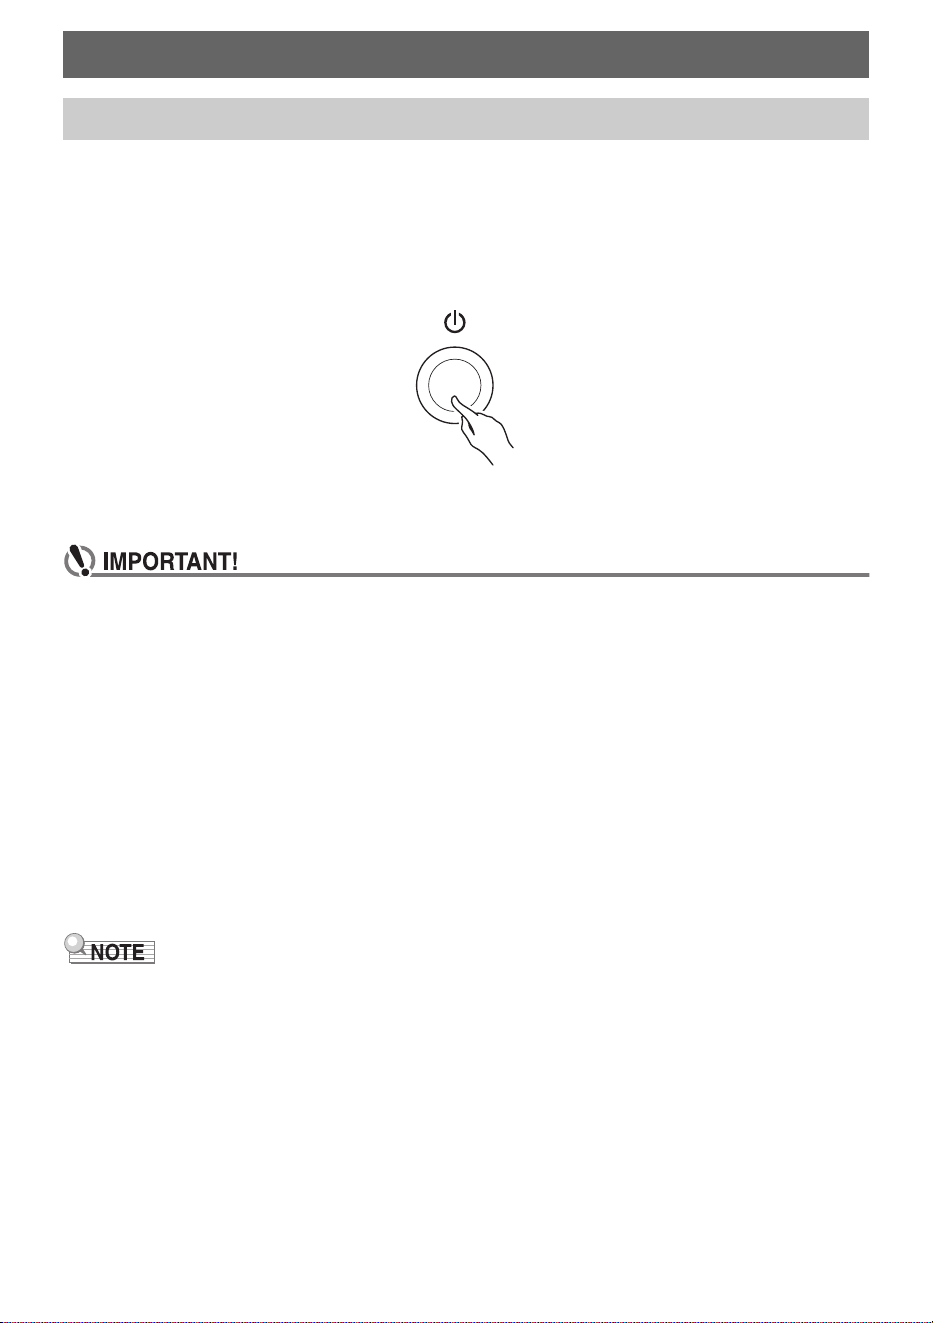
1.
Press P (Power) to turn on Digital Keyboard power.
“Casiotone” is displayed while startup is in progress.
• Your Digital Keyboard is ready to use when the home screen appears on the display after
startup is complete.
• Depending on the user lyric tone addition status, the usage status of samples and other data, it
may take some time for the Digital Keyboard to become ready for use.
2.
To turn off power, long-press P (Power) until the display goes blank.
• Turning off power normally causes the tone and rhythm number and other settings to return
to their initial defaults. However, the settings below are remembered.
– PEDAL2 pedal type
– PEDAL2 calibration
– Sampled melody tone (type, loop note value and repeats)
– Sampled drum tone (note off, type, loop note value and repeats)
– MY SETUP power on recall
– Wireless setting
– MIDI OUT Channel (Upper1, Upper2, Lower)
– MIDI Sync Mode
– Auto Power Off
– Battery type
– Display contrast
– Button long-press time
• Pressing the P (Power) to turn off power actually puts the Digital Keyboard into a standby state.
Minute amounts of current continue to flow within the Digital Keyboard in the standby state. If you do
not plan to use the Digital Keyboard for a long time or if there is a lightning storm in your area, be
sure to unplug the AC adaptor from the power outlet.
• You can configure Digital Keyboard settings so MY SETUP settings are recalled whenever power is
turned on. See “Enabling MY SETUP Power On Recall” (page EN-144).
• Do not touch the PITCH BEND wheel when turning on power.
Playing on the Keyboard
Turning Power On or Off
B
Playing on the Keyboard
EN-27
While Auto Power Off is enabled, power turns off automatically after about 30 minutes of non-operation.
• Auto Power Off is disabled while a song is playing and while the APP function is being used.
■ Disabling Auto Power Off
You can disable Auto Power Off to ensure that power does not turn off automatically during a concert,
etc.
1.
Press MENU.
This displays the menu screen.
2.
Use U and I to select the 5 buttons menu that includes SETTING.
3.
Press SETTING.
This displays the setting screen.
Auto Power Off
Playing on the Keyboard
EN-28
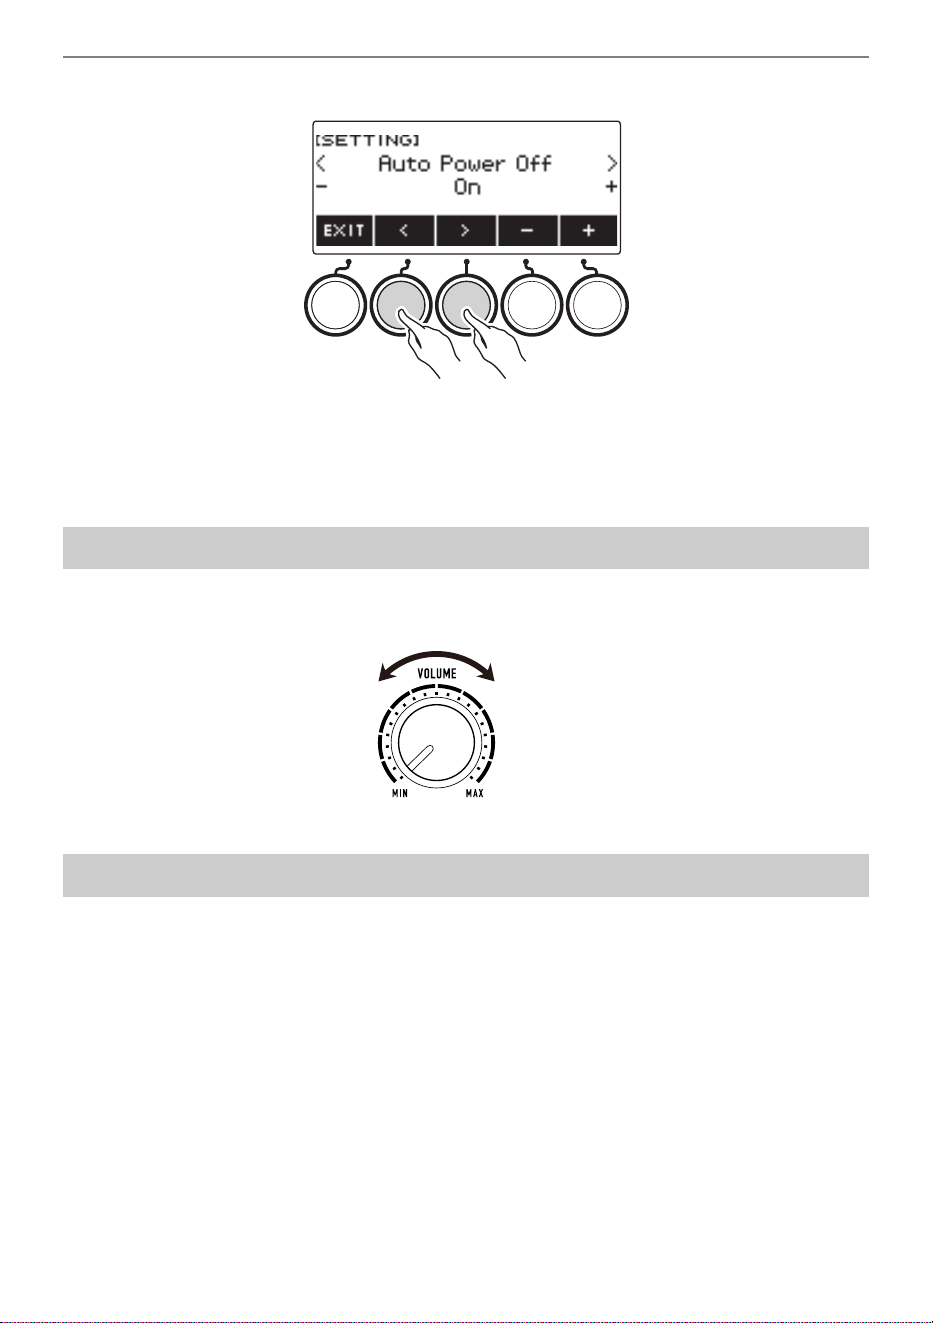
4.
Use U and I to select “Auto Power Off”.
5.
Rotate the dial or use – and + to select “Off”.
6.
To exit the setting operation, press EXIT.
1.
Rotate the VOLUME knob.
This changes the volume level.
Pressing TONE button displays a screen for selecting tones. This is the “tone screen”.
Pressing the TONE MODE SELECT LYRICS button while the tone screen is displayed will display
the lyric tone screen, and pressing INSTRUMENT button will display the instrument tone screen. See
“Playing Lyric Tones (Vocal Synthesis)” (page EN-35) for information about the lyric tone screen and
“Controlling the Sound of a Performance” (page EN-68) for information about the instrument tone
screen.
Adjusting the Volume Level
TONE Button
B
Playing on the Keyboard
EN-29
The metronome lets you play and practice along with a steady beat to help keep you on tempo. You
can also set a tempo that is suitable for your practice.
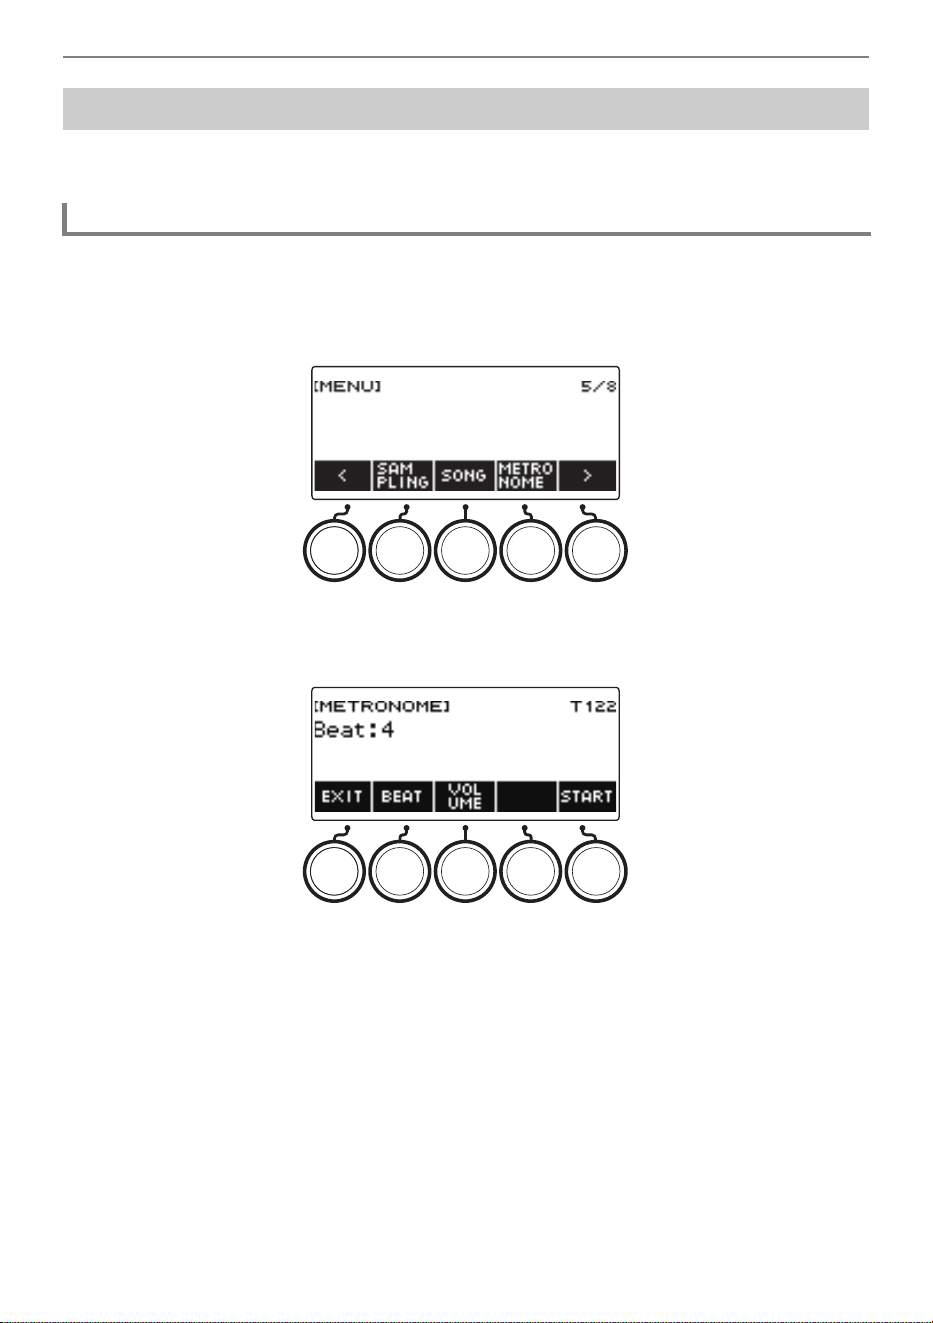
1.
Press MENU.
This displays the menu screen.
2.
Use U and I to select the 5 buttons menu that includes METRONOME.
3.
Press METRONOME.
This displays the metronome screen.
Using the Metronome
Start/Stop
Playing on the Keyboard
EN-30
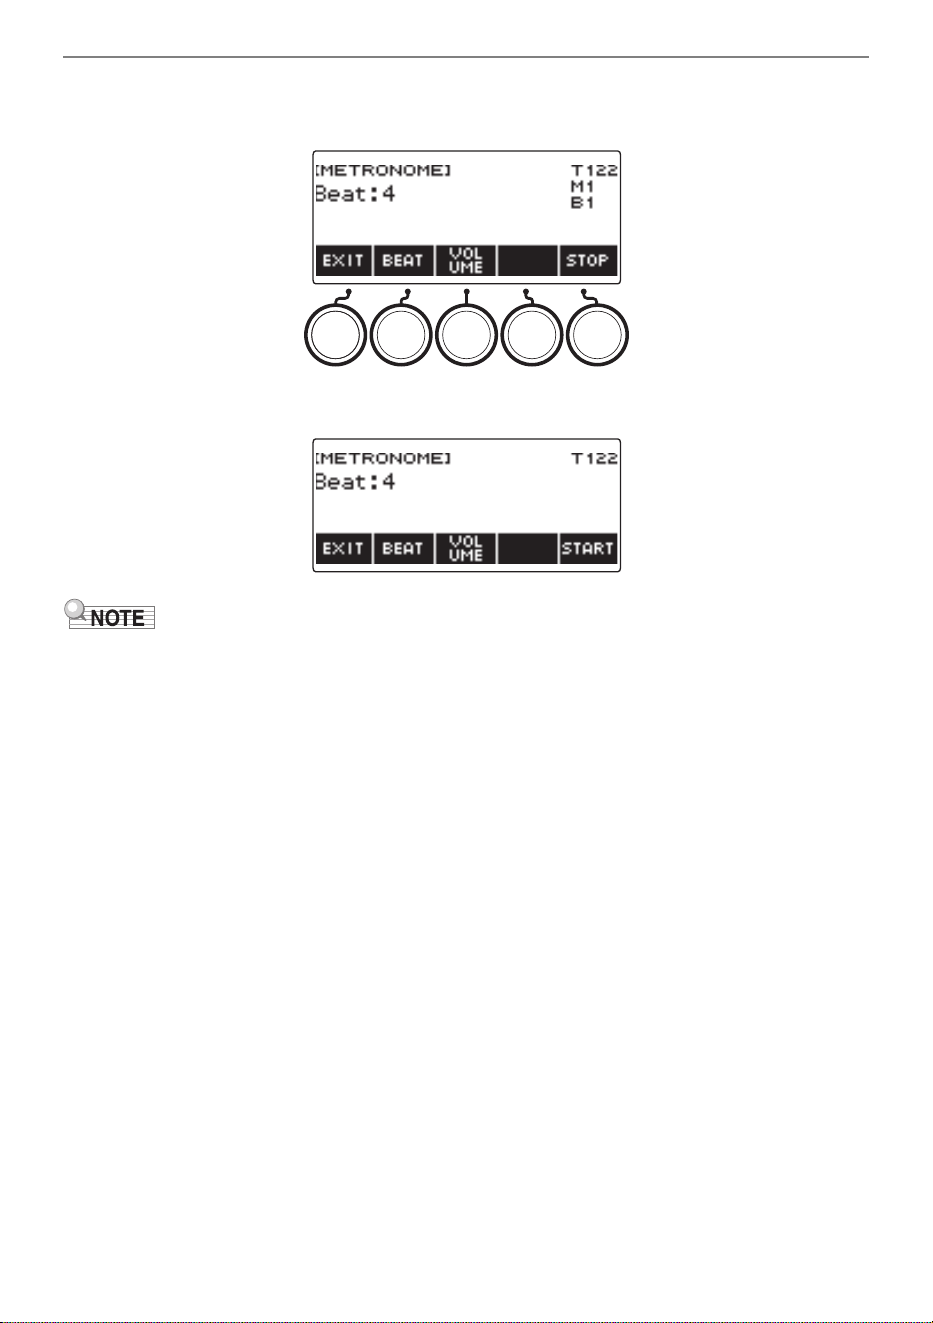
4.
Press START.
This starts the metronome, and displays measure and beat numbers.
5.
To stop the metronome, press STOP.
• If you are using the rhythm function or SONG function, pressing a does not start the metronome.
If you want the metronome to start when you press a, long-press TONE to quit the rhythm
function or SONG function.
• The metronome is disabled while a song is playing.
Playing on the Keyboard
EN-31
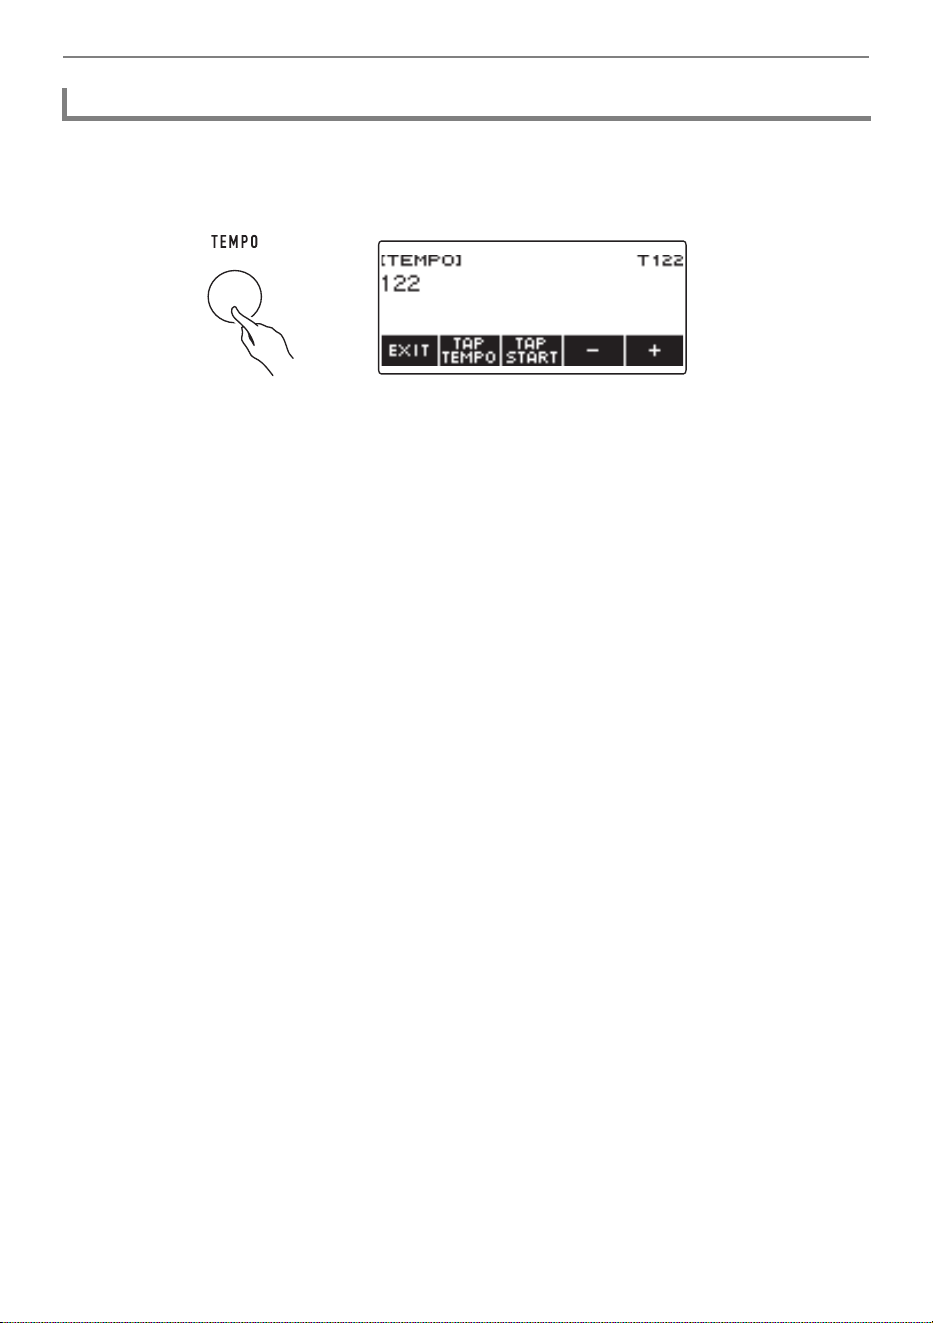
Use the procedure below to change the tempo of the metronome.
1.
Press TEMPO.
This displays the tempo screen.
2.
Rotate the dial or use – and + to change the tempo value.
• You can specify a tempo value in the range of 20 to 255.
• To return to the recommended setting, press – and + at the same time.
3.
To exit the setting operation, press EXIT.
Changing the Metronome Tempo
Playing on the Keyboard
EN-32
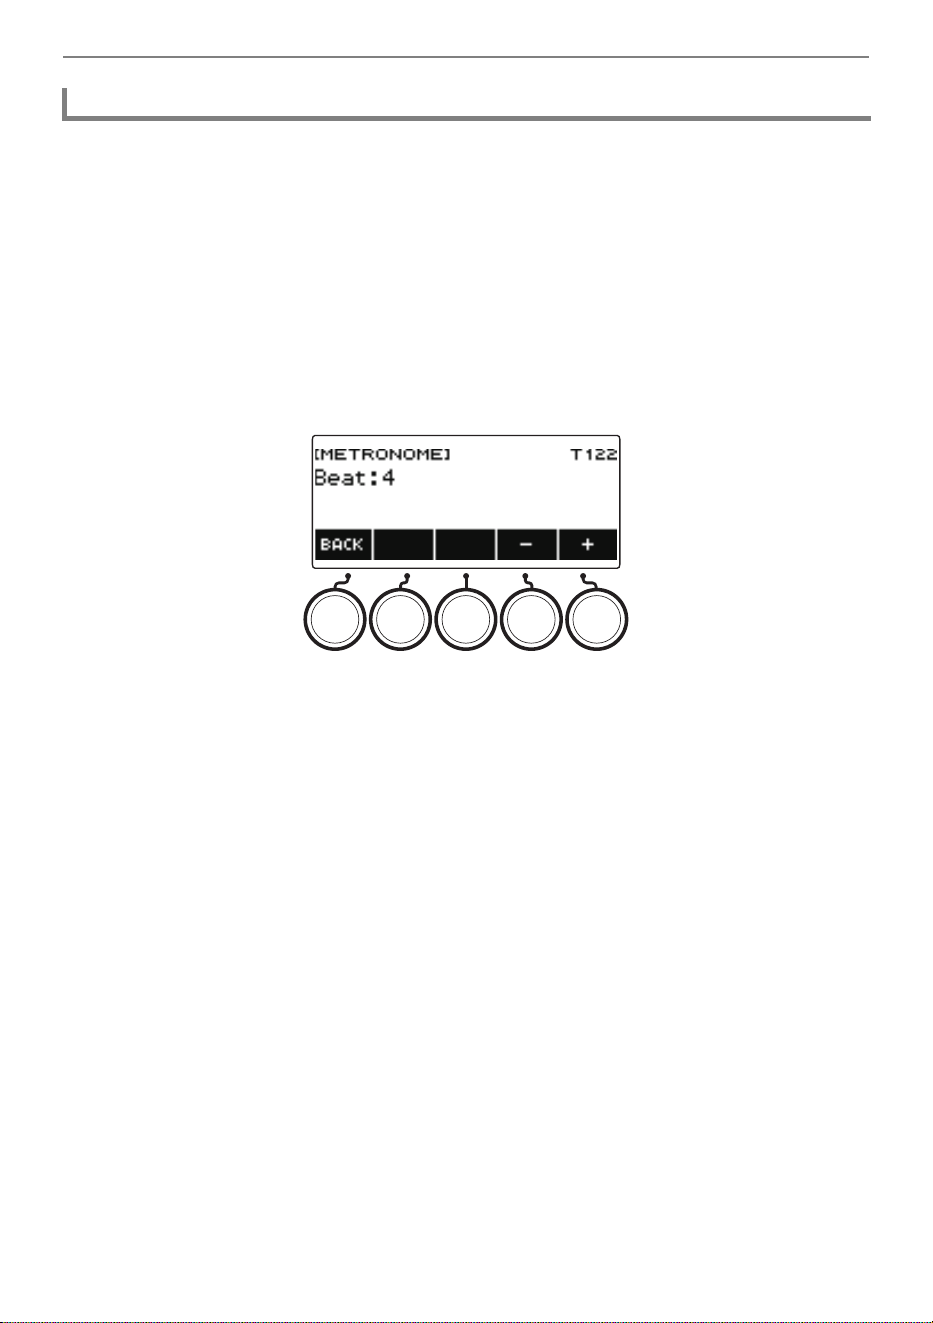
You can use the procedure below to configure a setting that sounds a chime on the first beat of each
measure, and a click for the remaining beats.
• Available settings are Off, or a value of 1 to 16 beats.
1.
Press MENU.
This displays the menu screen.
2.
Use U and I to select the 5 buttons menu that includes METRONOME.
3.
Press METRONOME.
This displays the metronome screen.
4.
Rotate the dial to change the beat value.
• After you rotate the dial once to select a value, you can change the value further using – and +.
• Selecting “Off” disables the chime. Use this setting when you want to practice without worrying
about the first beat of each measure.
• To return the setting to its initial default, press – and + at the same time.
• To go back to the previous screen, press BACK.
Specifying the Metronome Beats Per Measure
Playing on the Keyboard
EN-33
1.
Press MENU.
This displays the menu screen.
2.
Use U and I to select the 5 buttons menu that includes METRONOME.
3.
Press METRONOME.
This displays the metronome screen.
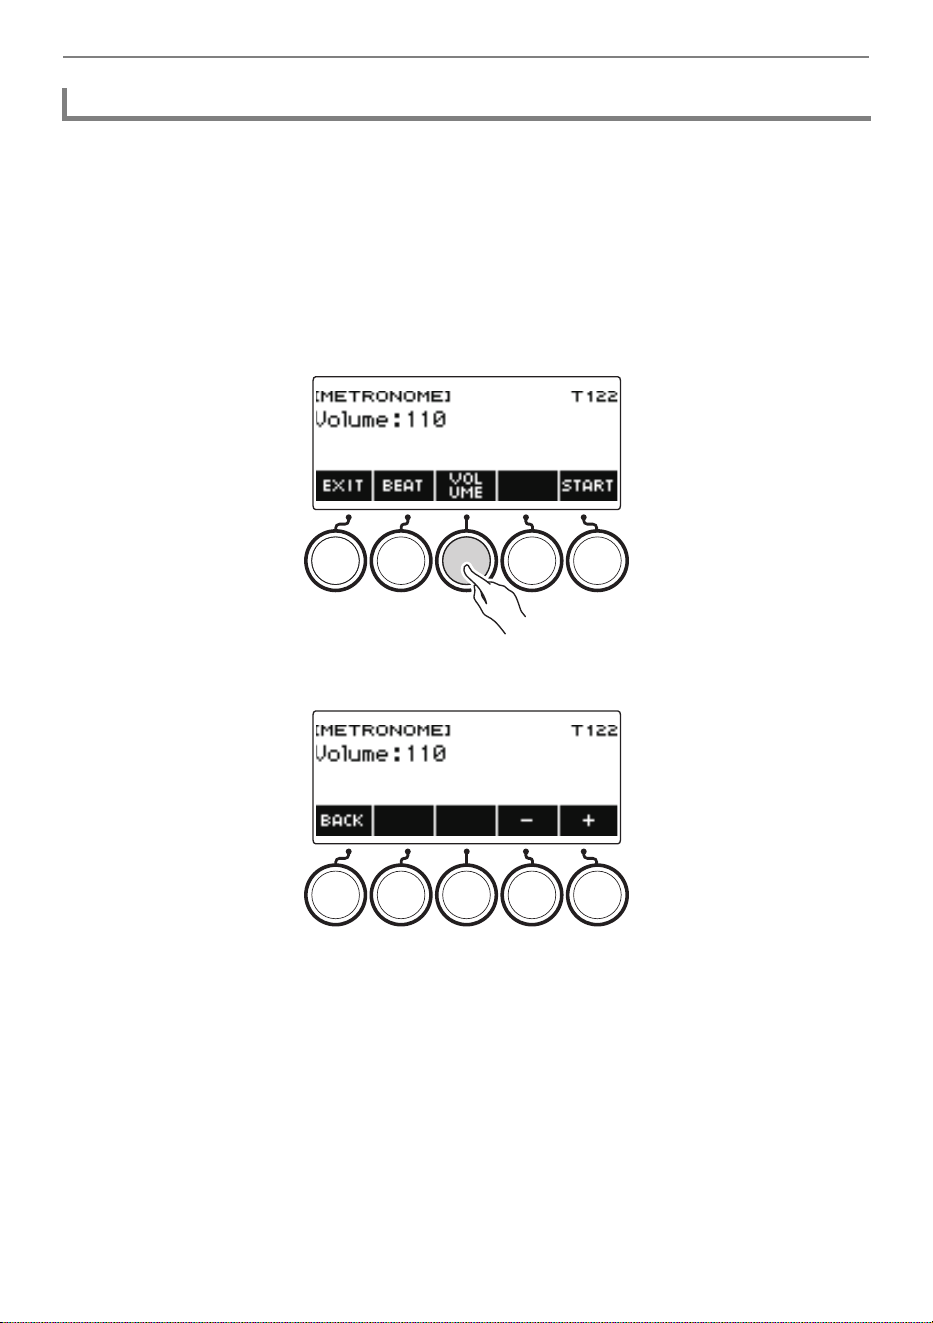
4.
Press VOLUME.
This displays the metronome volume level setting screen.
5.
Rotate the dial to adjust the volume level.
• You can specify a volume level value from 0 to 127.
• After you rotate the dial once to select a value, you can change the selection further using – and +.
• To return the setting to its initial default, press – and + at the same time.
• To go back to the previous screen, press BACK.
• To return to the beat setting screen, press BEAT.
Changing the Metronome Sound Volume Level
Playing on the Keyboard
EN-34
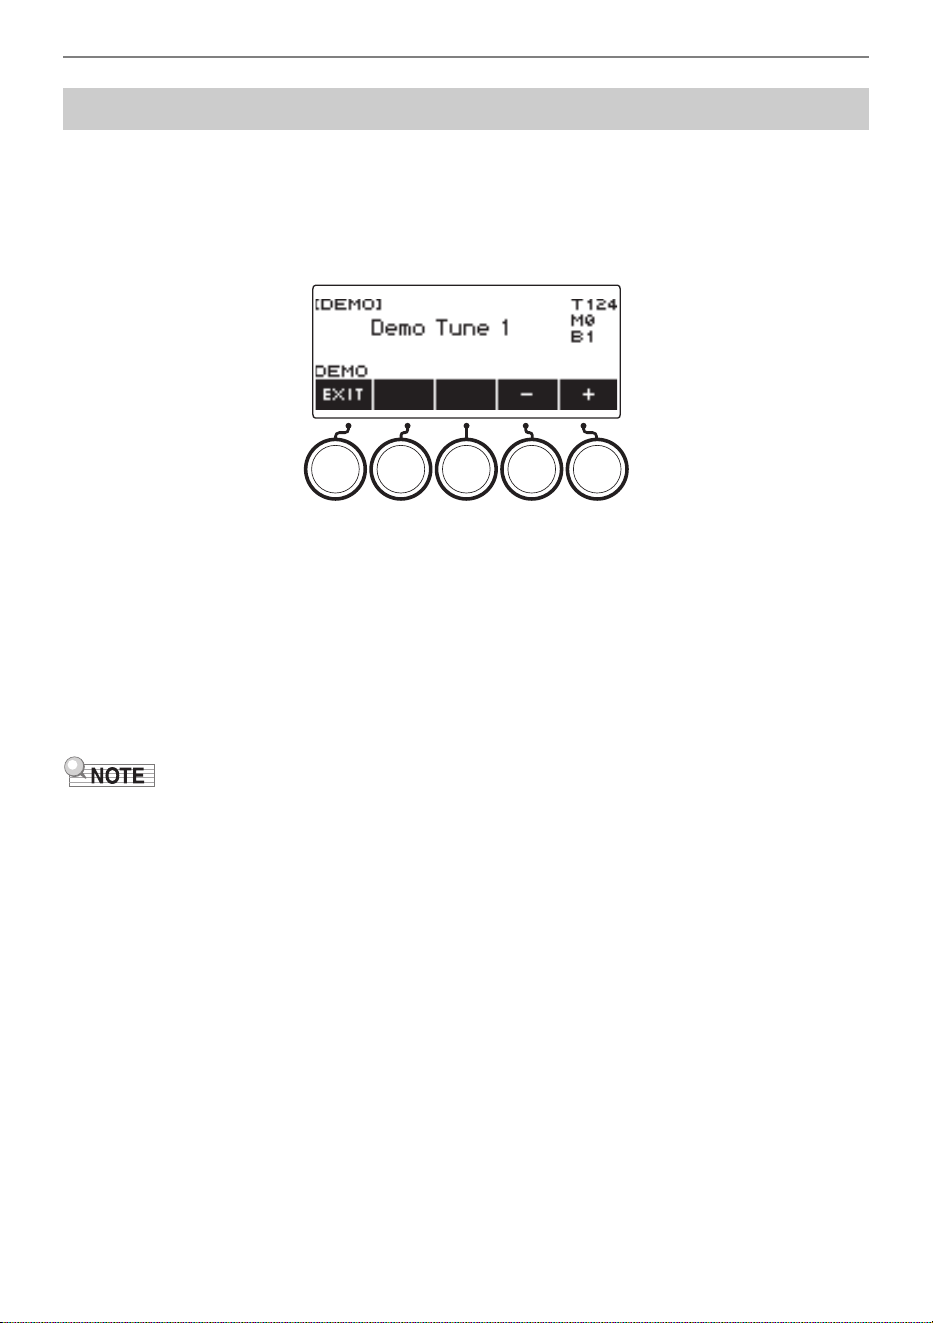
1.
Press HOME.
This displays the home screen.
2.
Press DEMO.
This displays the demo screen and starts demo song play.
• After playback of one song finishes, playback of the next song starts automatically. Playback
returns to the first song after playback of the final song is complete.
• The LYRICS LED flashes while demo play is in progress. This indicates that some of the demo
songs are sounding with lyrics tones.
• The tone assigned to the keyboard changes according to the demo song.
3.
To select a song for demo play, rotate the dial or use – and +.
4.
To stop playback, press EXIT or a.
• This stops playback and exits the demo screen.
• You can also display the demo screen by pressing MENU and then DEMO.
• Depending on Home Customization settings, the DEMO button may not be shown on the display.
Listening to Demo Play
B

EN-35
This digital keyboard has a Vocal Synthesis function that lets you play a singing voice on the keyboard.
You can create various singing voices by selecting the lyrics to be sung and adjusting the voice quality.
You can also configure various performance settings, such as how the performance advances through
the lyrics when playing on the keyboard.
You can use an app running on a phone or tablet to perform with lyrics you created, to perform lyrics
using animal sounds, and more.
■ What is Vocal Synthesis?
Playing Lyric Tones (Vocal Synthesis)
Vocal Synthesis is a function that creates an artificial singing voice.
This digital keyboard has a Vocal Synthesis sound source for singing voices.
The Vocal Synthesis sound source was created using machine learning to statistically model
singing voices based on research by the Nagoya Institute of Technology.
The sound source can synthesize a smooth singing voice using simple lyrics and without any
special adjustment.
The conventional PCM sound source method reproduces pre-recorded instrument sounds in
accordance with the pitch played on the keyboard. Vocal Synthesis sound sources offer a whole
new musical instrument experience that was not possible with conventional methods.
Main Features of the Vocal Synthesis Sound Source
1. Support for English and Japanese
You can create lyrics in either of two languages.
2. Vocal timbre creation in real-time
Simple knob operations let you instantly change singing voice characteristics, such as gender
and age.
3. Lyric play on the keyboard
Not only can you play single notes, but you can also play chorus group-like harmonies using
chords.
Playing Lyric Tones (Vocal Synthesis)
EN-36
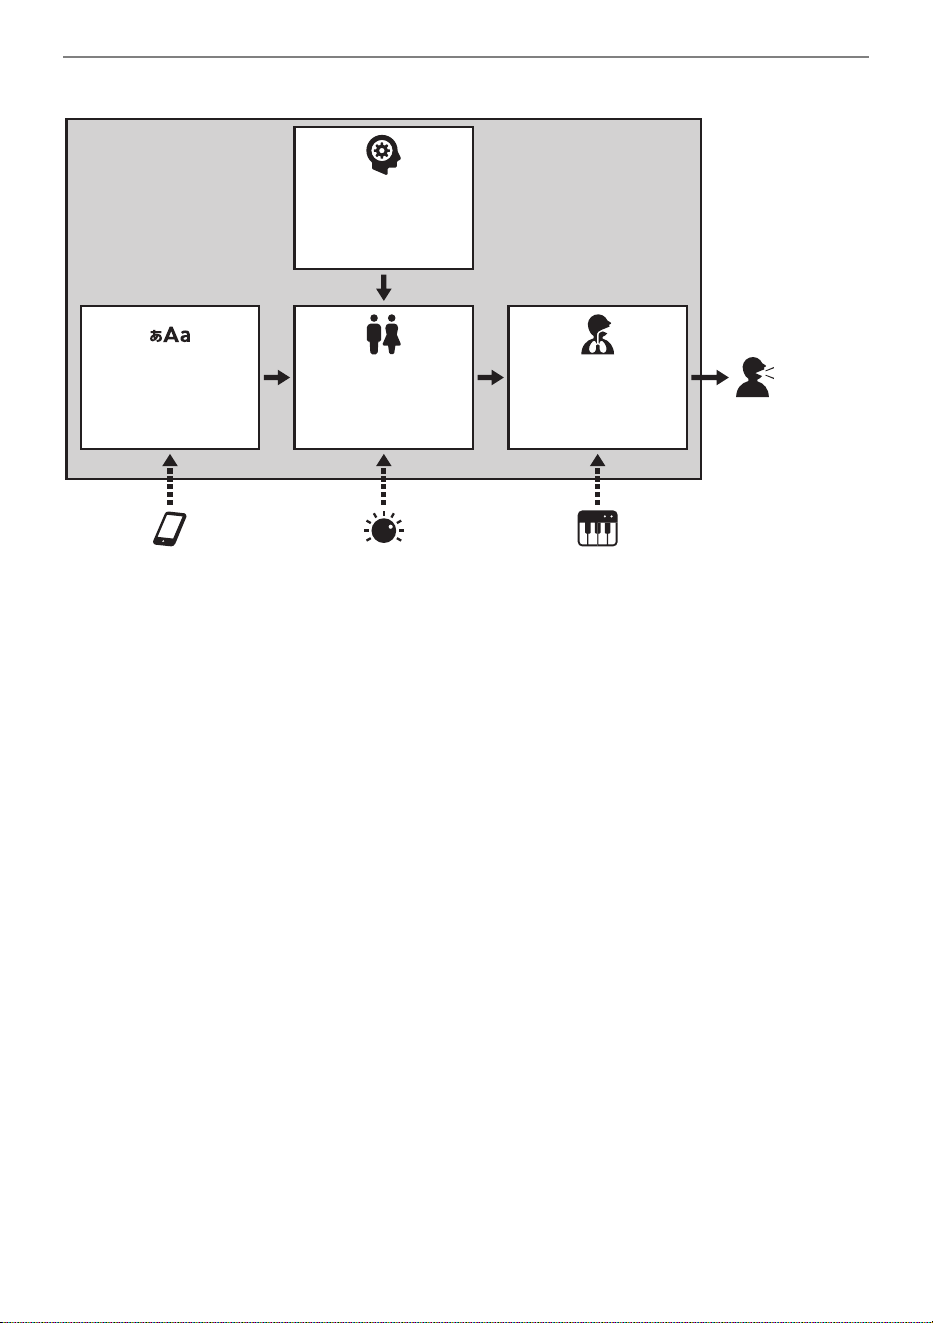
Vocal Synthesis Sound Source Block Diagram
Machine-learning
acoustic model
Singing voice output
Singing voice
parameter generation
(Vocalist)
Lyrics (lyric tone) Vocal cord/vocal tract
simulation
Control knob
(age, gender, etc.)
Lyric Creator app
(English, Japanese)
Keyboard performance
Playing Lyric Tones (Vocal Synthesis)
EN-37
You can produce a singing voice by selecting the lyric tone you want and playing notes on the
keyboard.
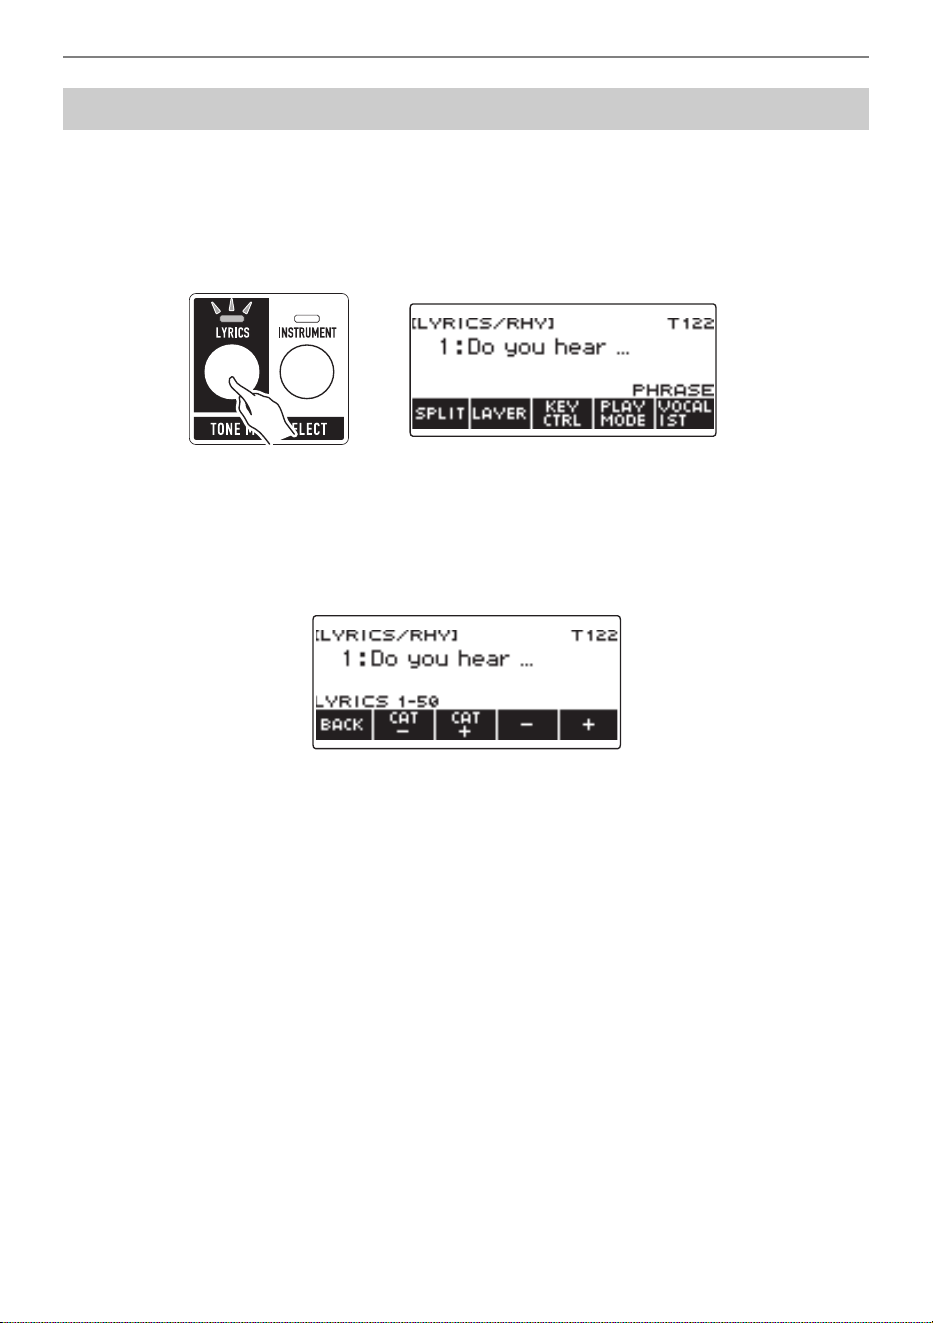
1.
Press LYRICS.
The LYRICS LED of the TONE MODE SELECT buttons lights, and the lyric tone screen appears
on the display.
• The ADVANCED LED of the TONE button will be lit while the digital keyboard is in the Lyric
Tone Mode.
• Knob and pedal functions change in accordance with Lyric Tone Mode settings.
2.
Rotate the dial to select a lyric tone.
This displays the –/+ screen and with the category name displayed.
• The setting range is 1 to 150.
• After you rotate the dial once to select a setting, you can adjust it further using – and +.
• If you want to select a category, use CAT– and CAT+.
• Lyric tones are also divided into categories of 50 lyric tones each: 1 to 50, 51 to 100, and 101 to
150.
• To go back to the previous screen, press BACK.
• You can replace preset lyric tones 1 through 100 with your own user lyric tones*.
• You can also store user lyric tones* in blank areas 101 through 150.
* You can create user lyric tones with the “Lyric Creator” smart device app. You can transfer your
lyric tones to this digital keyboard and enjoy playing with original lyrics. For details, see “Linking
with a Smart Device and Using Lyric Creator” (page EN-262).
Selecting and Playing with a Lyric Tone
B
Playing Lyric Tones (Vocal Synthesis)
EN-38
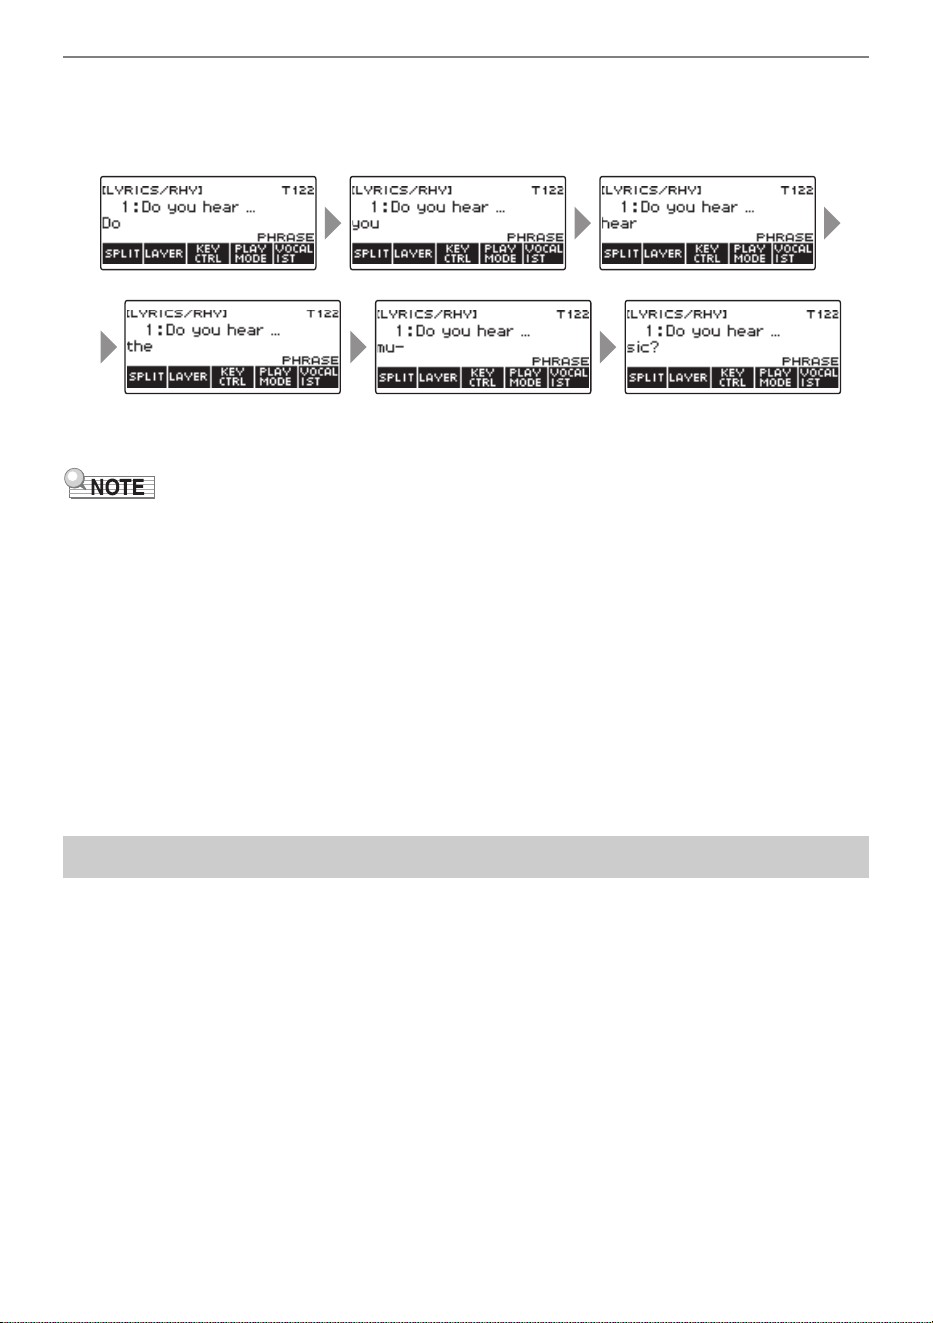
3.
Play something on the keyboard.
Lyrics advance and sound, and the corresponding lyrics appear on the display while keyboard
keys are held down.
• The speed at which lyrics advance depends on the tempo setting. For information about setting
the tempo, see “Changing the Metronome Tempo” (page EN-31).
• If the lyric tone performance mode is NOTE mode, the lyric advance speed does not depend on the
tempo setting. For information about the lyric tone performance modes, see “Changing How Lyric
Advancement is Performed When a Keyboard Key is Pressed” (page EN-47).
• You can use layer and split functions in the same way as you do in the instrument tone mode. For
details, see “Layering and Splitting Tones” (page EN-123).
• Lyric tones can be used for the UPPER1 part only during keyboard play. In addition, of all the parts
that include recorded song playback, MIDI IN sound production, etc., only one part can use a lyric
tone. The lyric tone sounds in the part where the lyric tone is selected last, and the timbre of the part
for which the lyric tone was selected before that is replaced.
• When UPPER1 is a lyric tone, the sound produced by auto-harmonize is equivalent to the sound
produced by the above alternate tone.
• Due to the characteristics of the singing voice, you may hear noise in the sound that is produced due
to plosives, consonants, and overlapping vowels.
You can create lyric tones with the “Lyric Creator” app.
You can transfer lyrics you create to this digital keyboard and enjoy playing with your own original lyrics.
For details, see “Linking with a Smart Device and Using Lyric Creator” (page EN-262).
Adding Lyric Tones (User Lyric Tones)
B
Playing Lyric Tones (Vocal Synthesis)
EN-39
You can change the type of voice (Vocalist) used to sound your lyrics to perform them in various ways.
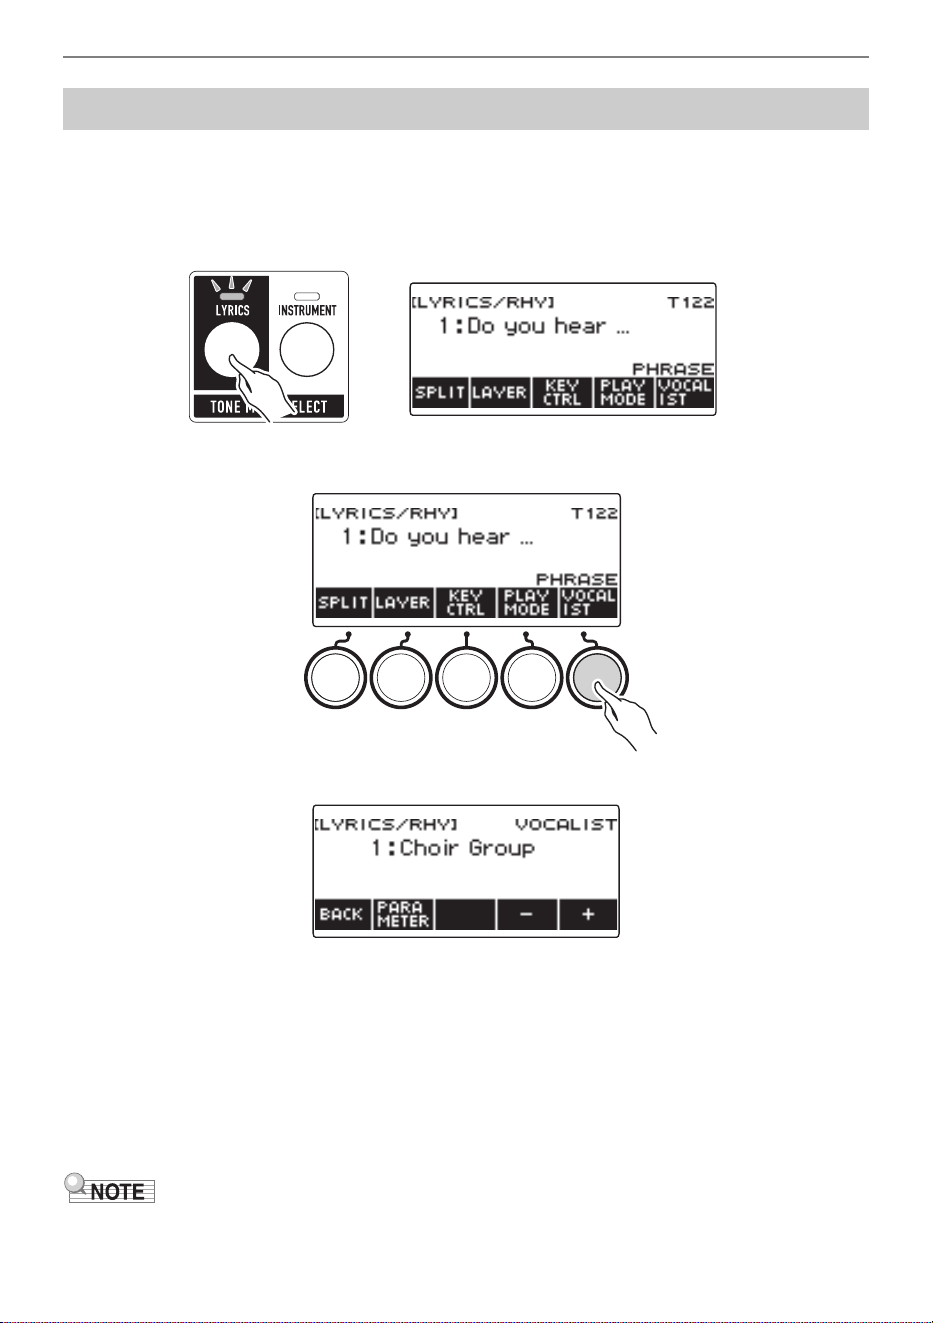
1.
Press LYRICS.
The LYRICS LED of the TONE MODE SELECT buttons lights, and the lyric tone screen appears
on the display.
2.
Press VOCALIST.
This displays the vocalist selection screen.
3.
Rotate the dial or use – and + to change the voice to use for the lyric tone.
• The setting range is 1 to 23.
• Number 23 is a user vocalist*.
* You can create user vocalists with the “Lyric Creator” smart device app. You can transfer a user
vocalist to the digital keyboard and enjoy playing with a singing voice of your own creation. For
details, see “Linking with a Smart Device and Using Lyric Creator” (page EN-262).
4.
To exit the setting operation, press BACK.
• Changing the vocalist resets the gender, age, and other vocalist parameters.
Changing the Voice Use to Sound Lyrics (Vocalist)
B

Playing Lyric Tones (Vocal Synthesis)
EN-40
You can make fine adjustments to a singing voice by changing the vocalist’s gender, age, and other
parameters.
1.
Press LYRICS.
The LYRICS LED of the TONE MODE SELECT buttons lights, and the lyric tone screen appears
on the display.
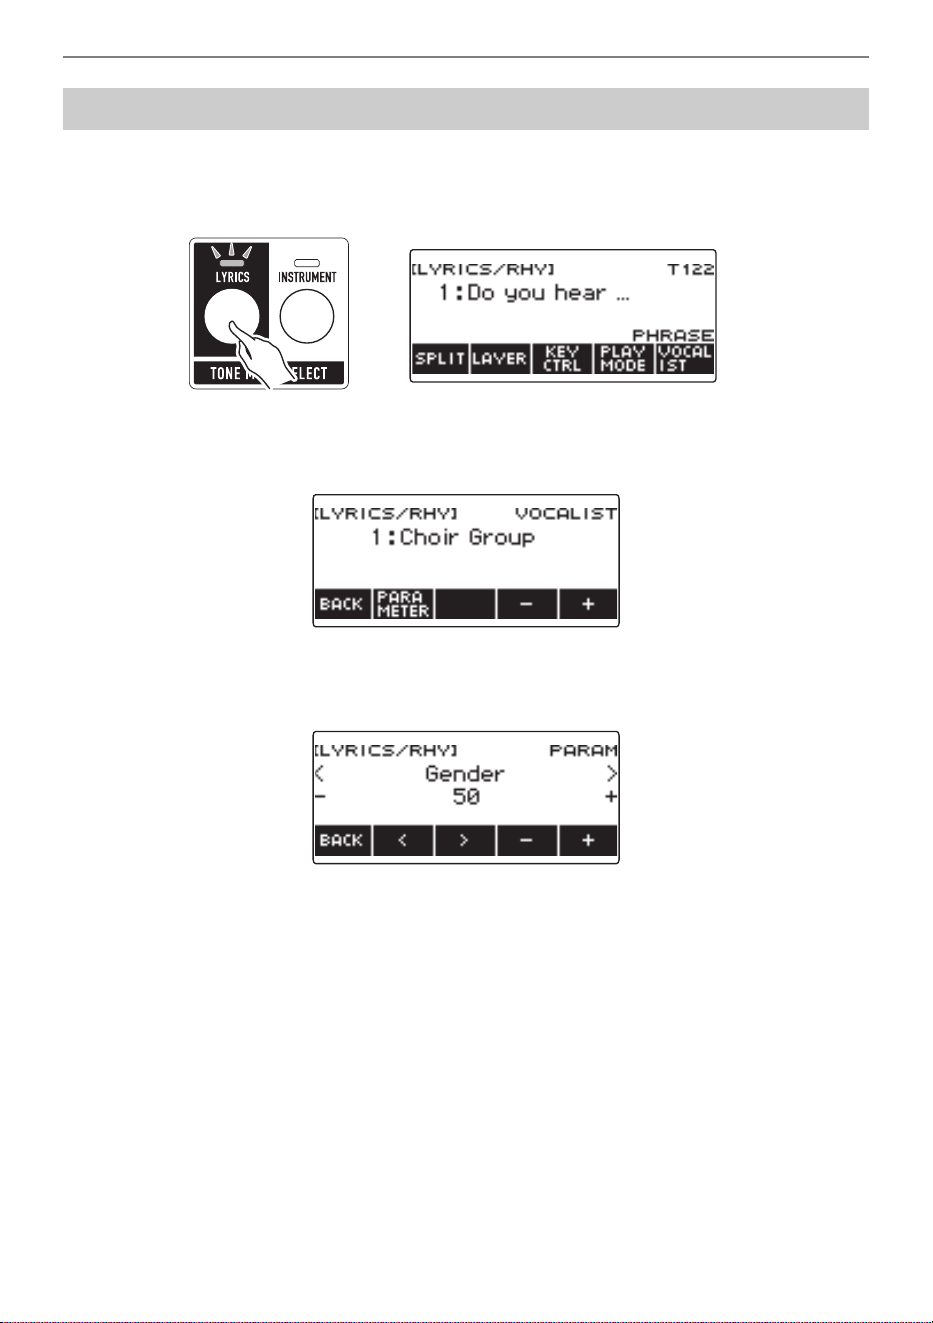
2.
Press VOCALIST.
This displays the vocalist selection screen.
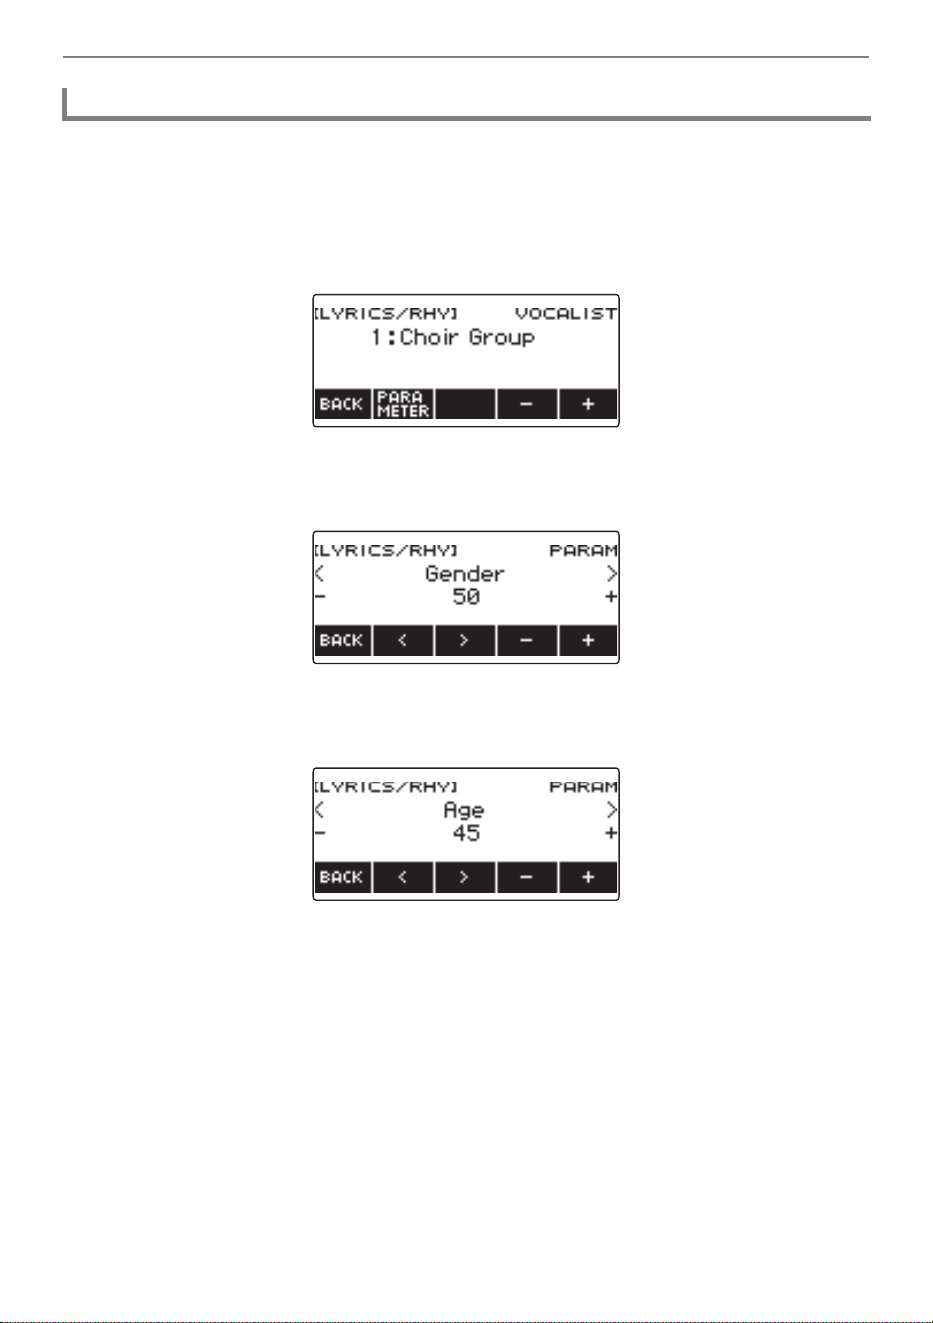
3.
Press PARAMETER.
This displays the vocalist setting screen, with the gender item displayed.
4.
Rotate the dial or use – and + to change the gender setting.
• The setting range is 0 to 50. The closer the setting is to 0, the more masculine the voice, while a
setting closer to 50 produces a more feminine voice.
5.
To exit the setting operation, press BACK.
Adjusting the Voice Used to Sound Lyrics
Changing the Gender Setting
Playing Lyric Tones (Vocal Synthesis)
EN-41
1.
Press LYRICS.
The LYRICS LED of the TONE MODE SELECT buttons lights, and the lyric tone screen appears
on the display.
2.
Press VOCALIST.
This displays the vocalist selection screen.
3.
Press PARAMETER.
This displays the vocalist setting screen, with the gender item displayed.
4.
Use the U and I to select Age.
This displays the age setting screen.
5.
Rotate the dial or use – and + to change the age setting.
• The setting range is 0 to 50. 45 is the standard setting. The closer the setting is to 0, the more
childish the voice, while a setting closer to 50 produces a more adult voice.
6.
To exit the setting operation, press BACK.
Changing the Age Setting
Playing Lyric Tones (Vocal Synthesis)
EN-42
1.
Press LYRICS.
The LYRICS LED of the TONE MODE SELECT buttons lights, and the lyric tone screen appears
on the display.
2.
Press VOCALIST.
This displays the vocalist selection screen.
3.
Press PARAMETER.
This displays the vocalist setting screen, with the gender item displayed.
4.
Use the U and I to select the item whose setting you want to change.
Setting Other Vocalist Parameters
B
Playing Lyric Tones (Vocal Synthesis)
EN-43
5.
Rotate the dial or use – and + to change the setting.
6.
To exit the setting operation, press BACK.
• The Vocal Synthesis sound source work in a way that may cause a preceding sound to affect the
next sound.
This becomes noticeable if, for example, the attack time and release time are set to extreme values.
Experiment with the settings that control the sound production of the Vocal Synthesis sound source
to find the combination that produces the sound you want for your performance.
• For details about how parameters affect the sound, see the table of adjustable functions under “To
change the knob function” (page EN-93).
Parameter Displayed Item Name Displayed Setting Values
Gender Gender 0 to 50
Age Age 0 to 50
Octave shift Octave Shift –3 to 0 to +3
Attack Time Attack Time –64 to 0 to +63
Release Time Release Time –64 to 0 to +63
Cutoff Cutoff –64 to 0 to +63
Modulation Range Modulation Range 0 to 63
Vibrato Rate Vibrato Rate –64 to 0 to +63
Vibrato Depth Vibrato Depth –64 to 0 to +63
Vibrato Delay Vibrato Delay –64 to 0 to +63
Portamento Portamento Off, On
Portamento Time Portamento Time 0 to 127
Playing Lyric Tones (Vocal Synthesis)
EN-44
When playing lyric tones, you can use the knobs to change vocalist parameters. You can also change
the functions assigned to the knob.
1.
Press LYRICS.
The LYRICS LED of the TONE MODE SELECT buttons lights, and the lyric tone screen appears
on the display.
• The ADVANCED LED of the TONE button will be lit while the digital keyboard is in the Lyric
Tone Mode.
• Knob and pedal functions change in accordance with Lyric Tone Mode settings.
2.
Press HOME.
This displays the home screen.
3.
Press KNOB.
This displays the knob screen.
• You can use the knob screen to assign exclusive functions to the knobs on the lyric tone mode.
* Under initial default settings, changing the function of either Knob 1 or Knob 2 also changes the
other knob to a corresponding recommended function.
4.
Change the knob function.
• For information about how to change a knob function, see “To change the knob function” (page
EN-93).
Changing the Functions of the Knobs in the Lyric Tone
Mode
Function
Display
Indicator
Displayed
Setting
Values
Default
Recommended
Function*
Gender and Age Gender & Age 0 to 127 Depends on the
vocalist.
Portamento Time
Gender and Octave
Shift
Gender & Oct
Shift
0 to 127 Depends on the
vocalist.
Age and Modulation
Age and Modulation Age &
Modulation
0 to 127 Depends on the
vocalist.
Gender and Octave
Shift
B

Playing Lyric Tones (Vocal Synthesis)
EN-45
• If you assign a function dedicated to the lyric tone mode to a knob, the knob affects only the UPPER1
part.
• If you change the Gender and Age of a knob function from 0 to 127, the gender setting changes from
0 to 50. The age setting is 0 when the Gender and Age setting is 64. The age setting decreases from
50 to 0 and increases from 0 to 50.
• If the Gender & Octave Shift setting of the knob function is 0 to 63, the octave shift becomes –1
relative to the current value.
• If you change the age & modulation of the knob function from 0 to 127, the age setting will change to
50 and the modulation will change from 0 to 127.
• You can also display the knob screen by pressing MENU and then KNOB.
• KNOB may not be displayed on the home screen due to the Home Customization setting.
• You can also use the lyric tone controller to change this function. For details, refer to “Change knob
functions” under “Controlling a Lyric Tone with the Keyboard (Lyric Tone Controller)” (page EN-49).
Playing Lyric Tones (Vocal Synthesis)
EN-46
You can recall recommended vocalists and performance settings for each lyric tone.
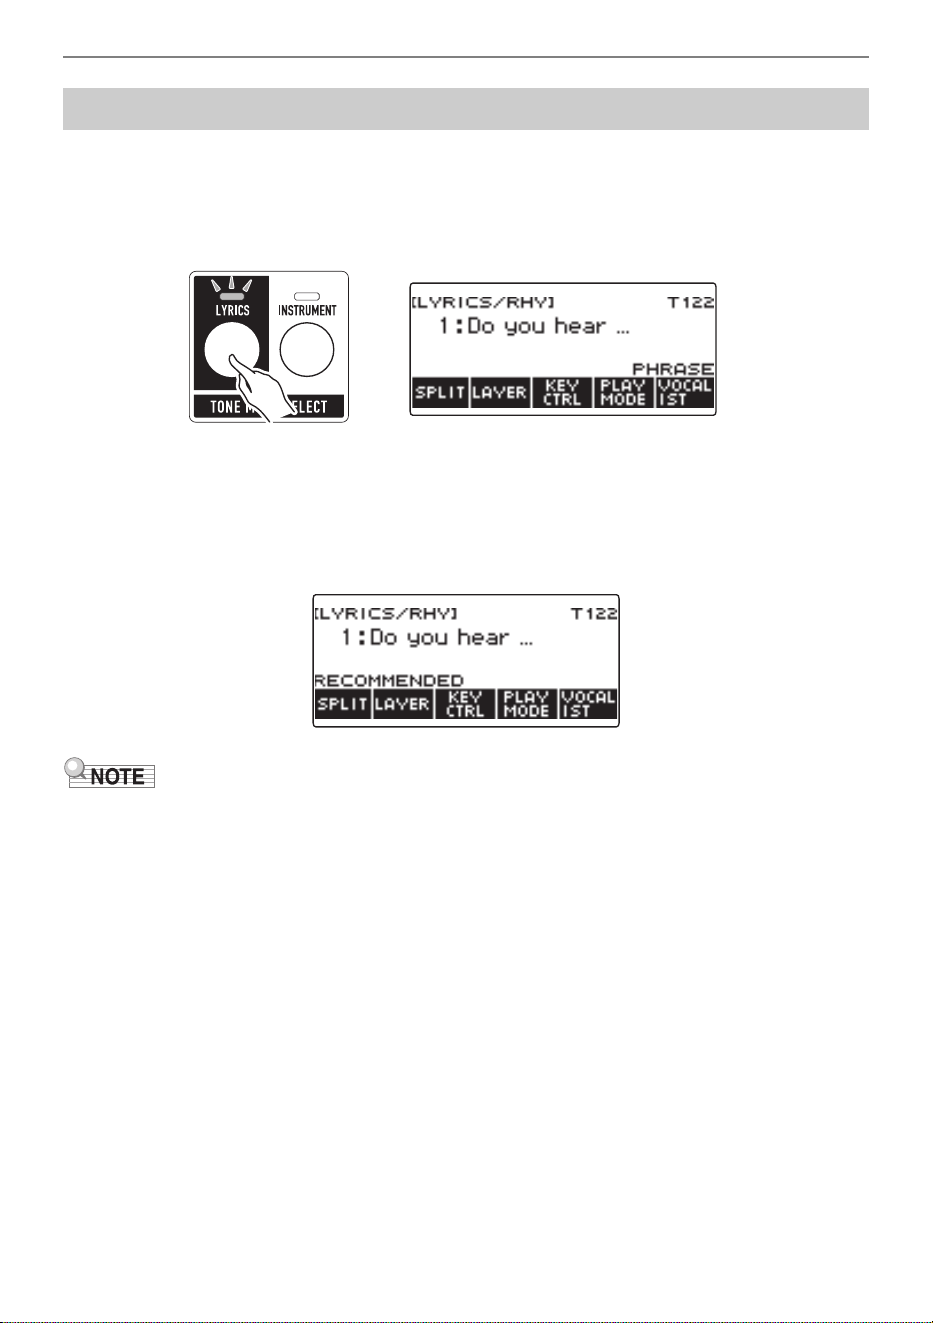
1.
Press LYRICS.
The LYRICS LED of the TONE MODE SELECT buttons lights, and the lyric tone screen appears
on the display.
2.
Rotate the dial to select the lyric tone you want.
3.
Long-press LYRICS.
This momentarily displays “RECOMMENDED” and changes the settings to those recommended
for the lyric tone.
• The recommended settings for preset lyric tones are all the same. When creating user lyric tones
with the “Lyric Creator” smart device app, you can select a recommended vocalist and performance
settings for each lyric tone. For details, see “Linking with a Smart Device and Using Lyric Creator”
(page EN-262).
Using the Recommended Lyric Tone Settings
B
Playing Lyric Tones (Vocal Synthesis)
EN-47
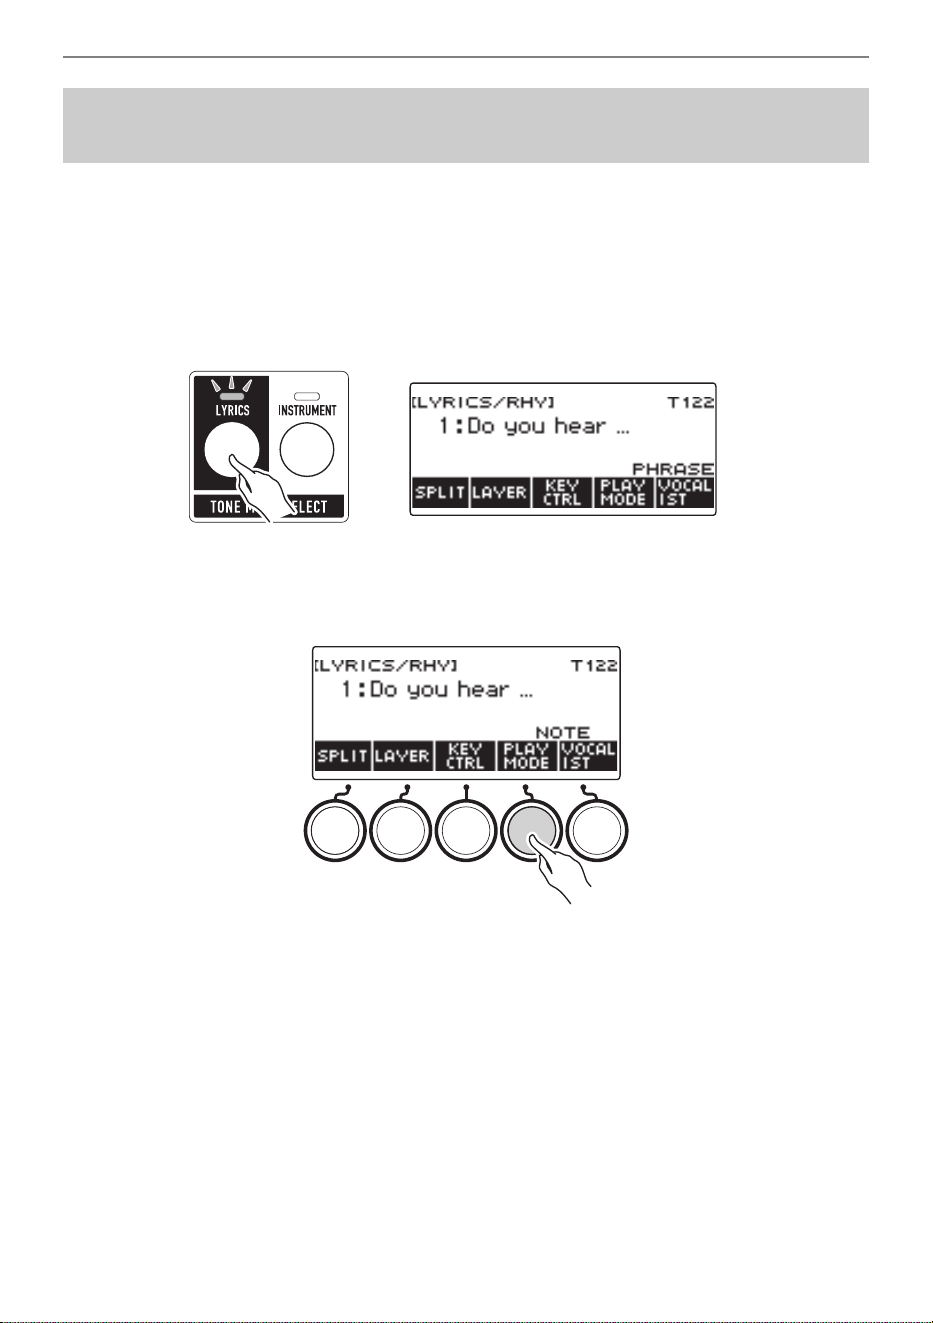
The way the lyrics progress when you press a key depends on your current lyric tone performance
mode setting.
In the PHRASE mode, lyrics continue to advance as long as a keyboard key is depressed, while the
NOTE mode causes lyrics to advance syllable by syllable each time you press a keyboard key.
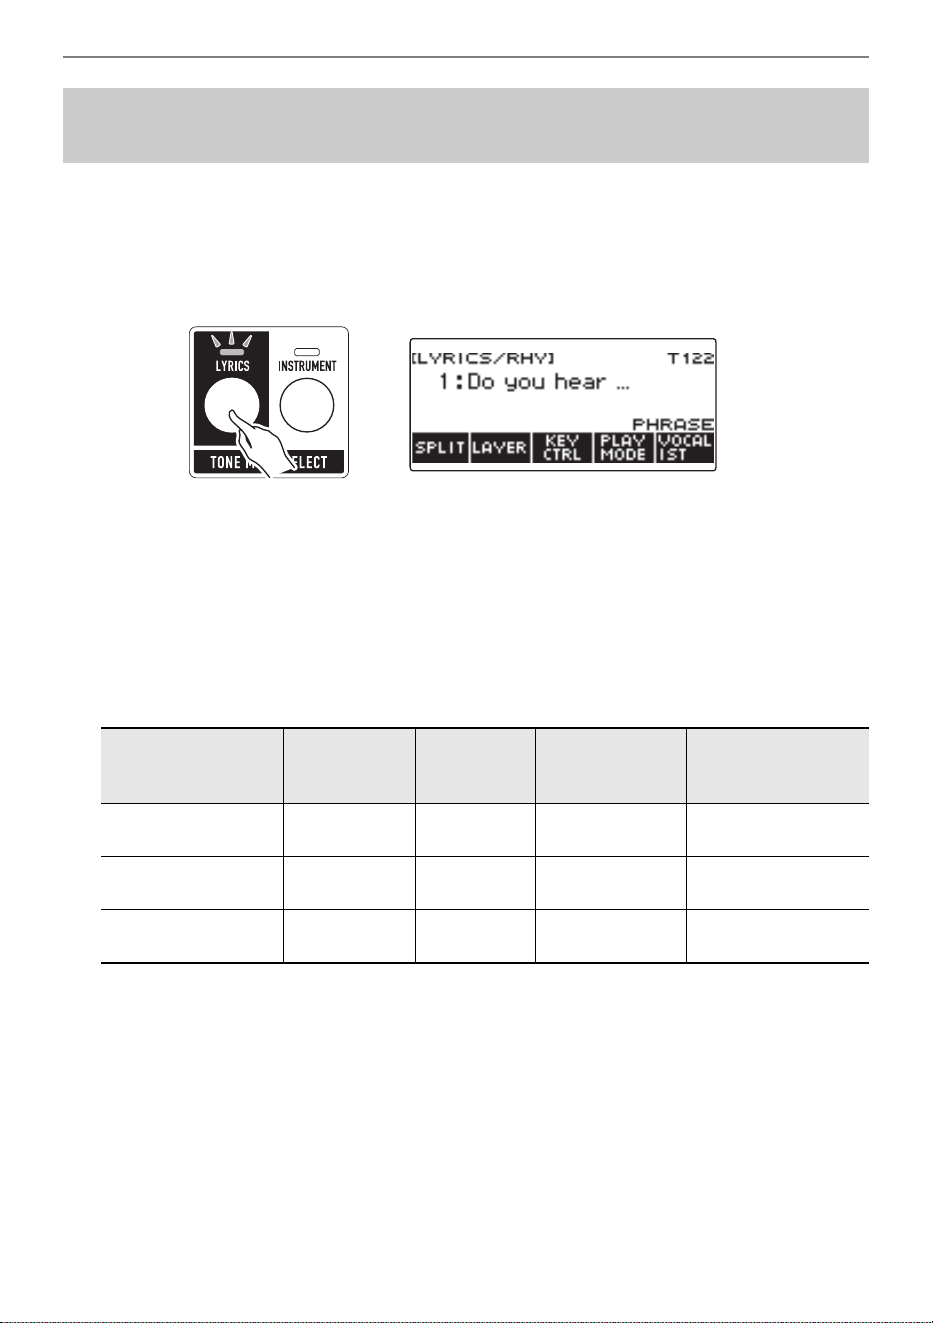
1.
Press LYRICS.
The LYRICS LED of the TONE MODE SELECT buttons lights, and the lyric tone screen appears
on the display.
2.
Press PLAY MODE.
This displays “NOTE” and causes lyrics to advance syllable by syllable each time a keyboard key
is pressed.
• In the NOTE mode, how lyrics advance is affected by how chords are played. Japanese lyrics
advance by mora (beats), not syllables.
3.
Press PLAY MODE again to return the keyboard setting to continue producing
sound when keyboard keys are released.
This displays “PHRASE” and causes lyrics to advance as long as a keyboard key is depressed.
Changing How Lyric Advancement is Performed When a
Keyboard Key is Pressed
B

Playing Lyric Tones (Vocal Synthesis)
EN-48
• The functions below are disabled while PHRASE is selected as the play mode.
– Lyric tone speed
– Lyric syllable attack balancer
– Syllable chord control function
– Random syllable sequence
– Syllable stay notes
• Under initial default settings, if you hold down the highest note keyboard key and hold down three or
more keys, the lyrics will not advance even if you press a keyboard key that is lower than the highest
note. For more information, see “Changing the Number of Chord Component Notes at Which Lyrics
do not Advance (Syllable stay notes)” (page EN-57).
• You can have lyrics advance each time you change to another chord on the low-end keyboard. For
details, see “Making Lyrics Advance With Chord Play on the Low-end Keyboard (Syllable Chord
Control Function)” (page EN-56).
B
Playing Lyric Tones (Vocal Synthesis)
EN-49
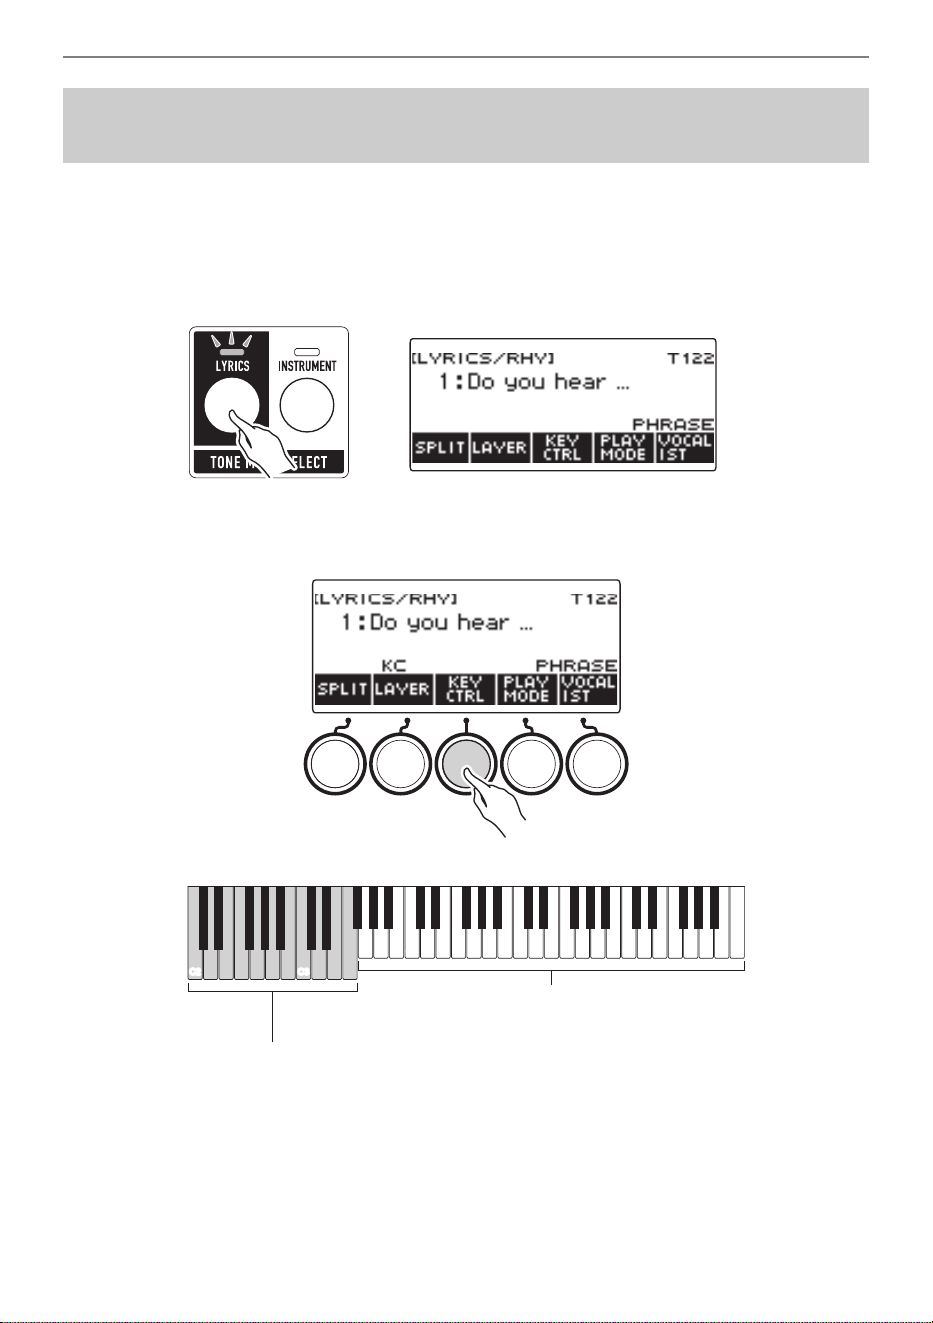
You can use part of the keyboard as switches for specifying the syllable position of a lyric tone and for
controlling various functions.
1.
Press LYRICS.
The LYRICS LED of the TONE MODE SELECT buttons lights, and the lyric tone screen appears
on the display.
2.
Press KEY CTRL.
This causes “KC” to appear on the display and enables the lyric tone controller keyboard.
Controlling a Lyric Tone with the Keyboard
(Lyric Tone Controller)
C2
C3
C4 C5 C6
C7
Lyric Tone controller keyboard
Performance keyboard
B
Playing Lyric Tones (Vocal Synthesis)
EN-50
3.
Play your performance on the keyboard in combination with the lyric tone
controller keyboard.
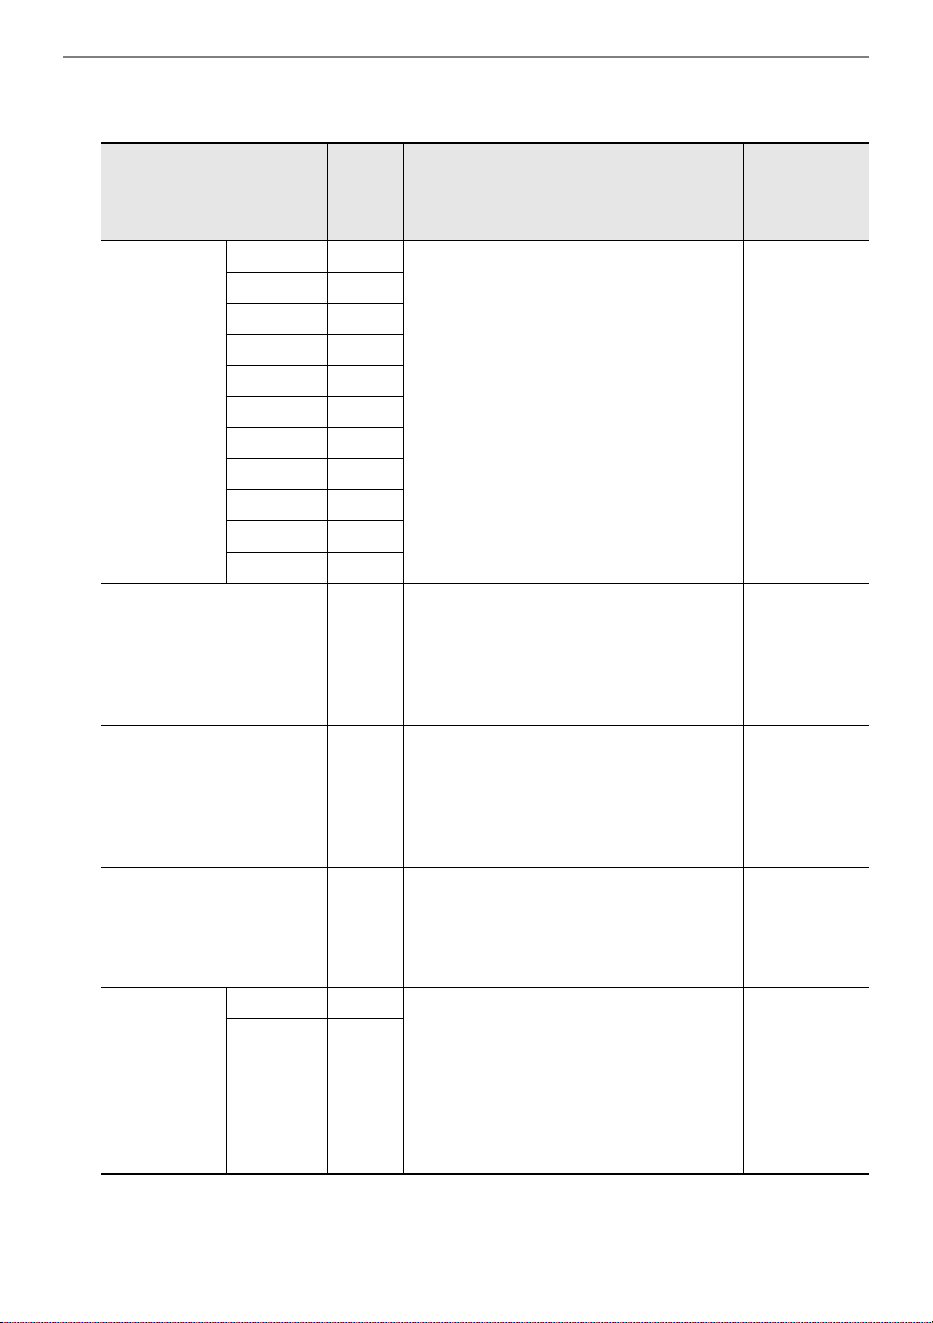
Function
Key-
board
Note
Name
Description Settings
Syllable
Location
Specification
Syllable 1 C2 You can specify the syllable position to be
played next. Sounding is from the
specified syllable position while a
keyboard key is depressed.
Pressing one of these keys causes
“SYLLABLE POSITION:n” (n is a syllable
position number) to appear on the display
momentarily.
Syllable 2 D2
Syllable 3 E2
Syllable 4 F2
Syllable 5 G2
Syllable 6 A2
Syllable 7 B2
Syllable 8 C3
Syllable 9 D3
Syllable 10 E3
Syllable 11 F3
Syllable chord control
function
C{2 Lyrics are advanced when you change
the chord being played on the low-end of
the performance keyboard. While this
function is enabled, “CHD” is shown on
the lyric tone screen. (Disabled in
PHRASE mode.)
Off, On
(Default: Off)
Random syllable sequence E}2 Randomly selects the next syllable to be
played.
Pressing this key causes “RANDOM ON”
or “RANDOM OFF” to appear on the
display momentarily. (Disabled in
PHRASE mode.)
Off, On
(Default: Off)
Retrigger F{2 While performance keyboard keys are
held down, operation is performed as if
keys are periodically played and
released. While this function is enabled,
“RTG” is shown on the lyric tone screen.
Off, On
(Default: Off)
Retrigger
cycle unit note
value
–A}2 Specifies the note values to be used for
the retrigger cycle unit. The rate is
determined by multiplying this unit by the
number of unit note values that can be
set separately.
Pressing one of these keys causes
“RETRIGGER UNIT n” (n is a note value)
to appear on the display momentarily.
1, 1t, 2, 2t, 4,
4t, 8, 8t, 16,
16t, 32, 32t
(Default: 4)
+B}2
B
Playing Lyric Tones (Vocal Synthesis)
EN-51
4.
Press KEY CTRL again to return the keyboard setting to continue producing
sound when keyboard keys are released.
“KC” disappears from the display, and the lyric tone controller keyboard is disabled.
• If both the lyric tone controller function and a function that uses the rhythm chord input keyboard are
enabled, the rhythm function is given priority.
• If both the lyric tone controller function and split are enabled, the lyric tone controller function is given
priority within the lyric tone controller keyboard key range.
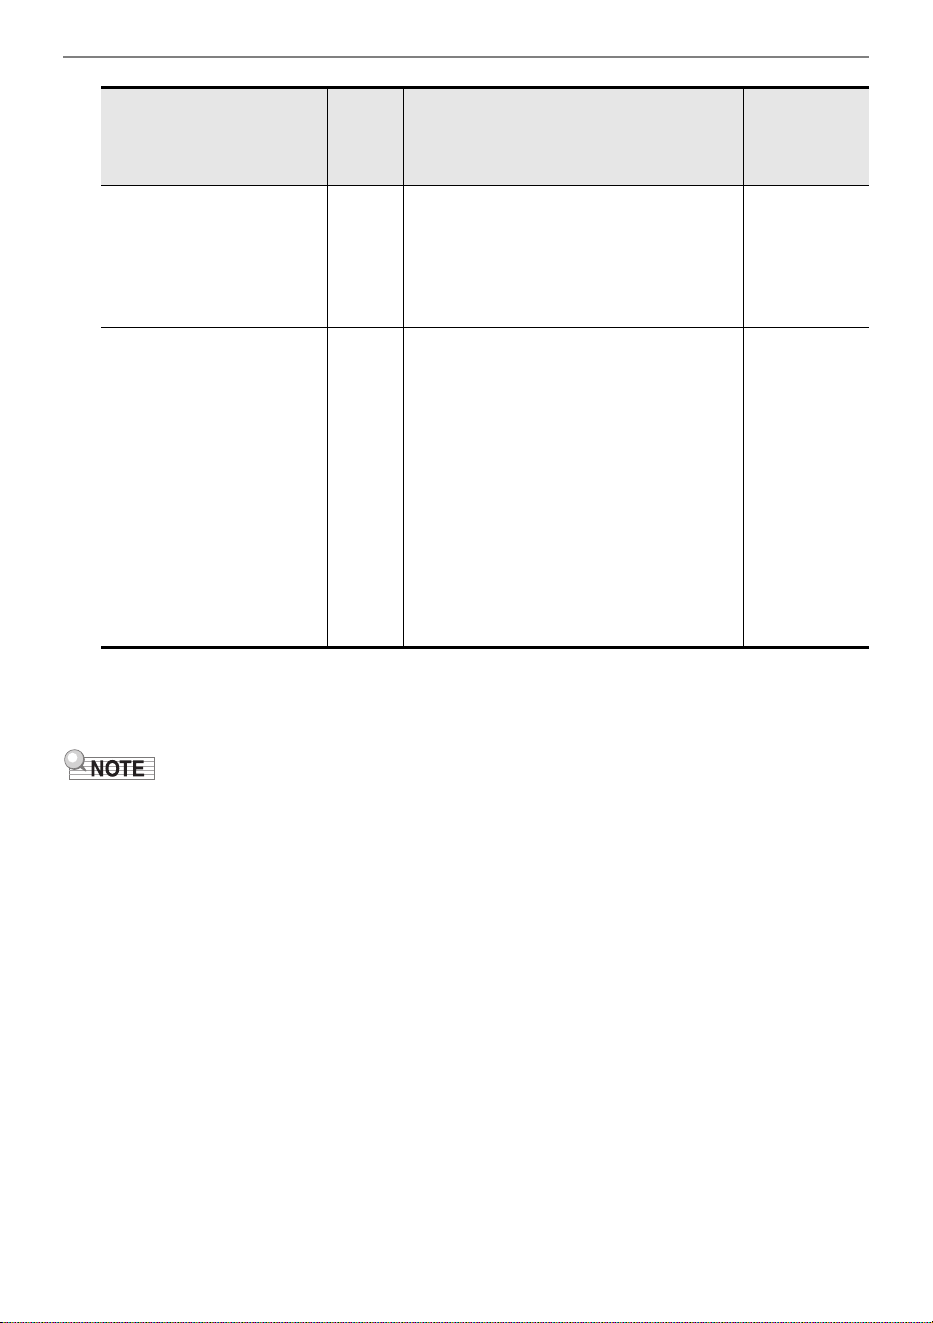
Retrigger Hold C{3 When retrigger is enabled, retrigger
continues to operate even if you release
the keyboard keys you are playing.
Pressing this key causes “RETRIGGER
HOLD ON” or “RETRIGGER HOLD OFF”
to appear on the display momentarily.
Off, On
(Default: Off)
Change knob functions E}3 You can change the functions of the K1
and K2 knobs while playing lyric tones.
Pressing this keyboard key causes one of
the messages below to appear
momentarily.
• K1 knob: Gender and Age
K2 knob: Portamento Time
“K1/2:GENDER&AGE/PORT T”
• K1 knob: Gender & Octave shift
K2 knob: Age & Modulation
“K1/2:GENDER&OCT/AGE&MOD”
• K1 Knob: Vibrato Depth
K2 knob: Vibrato Rate
“K1/2:VIB DEPTH/VIB RATE”
(Default:
K1 knob/
Gender and
age
K2 knob/
Portamento
Time)
Function
Key-
board
Note
Name
Description Settings
B

Playing Lyric Tones (Vocal Synthesis)
EN-52
Lyric tones have the elements of “sounding speed (Lyric Tone Speed)” and “sound attack speed (Lyric
Tone Attack Balancer/Lyric Tone Attack)”. You can adjust these elements if the lyric tone performance
mode is NOTE mode. The lyric tone attack element can also be adjusted in the PHRASE mode.
Whether lyrics are sung slowly or fast affects the length of consonant pronunciation, and the way
syllables are linked. You can achieve a more natural-sounding singing voice by setting the lyric tone
speed to the tempo you will actually play. If the sound when playing the lyric tone is unnatural or if you
are concerned about sound timing, try adjusting the lyric tone speed.
1.
Press LYRICS.
The LYRICS LED of the TONE MODE SELECT buttons lights, and the lyric tone screen appears
on the display.
2.
If the lyric tone performance mode is PHRASE mode, press PLAY MODE to
switch to NOTE mode.
3.
Long-press KEY CTRL.
This displays the Lyric tone setting screen.
4.
Rotate the dial to adjust the lyric tone speed.
This displays the –/+ screen.
• The setting range is 20 to 255.
• After you rotate the dial to select a setting, you can adjust it further using – and +.
• To go back to the previous screen, press BACK.
5.
To exit the setting operation, press BACK.
Adjusting the Timing When Lyrics are Sounded
Adjusting the Speed of Lyric Advancement (Lyric Tone Speed)
B
Playing Lyric Tones (Vocal Synthesis)
EN-53
When playing lyrics that include consonants with the lyric tone, it may take some time for the vowels to
be pronounced and the sound may seem delayed because consonants start to be pronounced after the
keyboard key is pressed.
When the lyric tone attack balancer is enabled, the consonant pronunciation time can be shortened by
a certain percentage to make the singing voice easier to play on the keyboard.
If you have a problem playing a lyric tone due to delayed pronunciation, try enabling the lyric tone
attack balancer.
1.
Press LYRICS.
The LYRICS LED of the TONE MODE SELECT buttons lights, and the lyric tone screen appears
on the display.
2.
If the lyric tone performance mode is PHRASE mode, press PLAY MODE to
switch to NOTE mode.
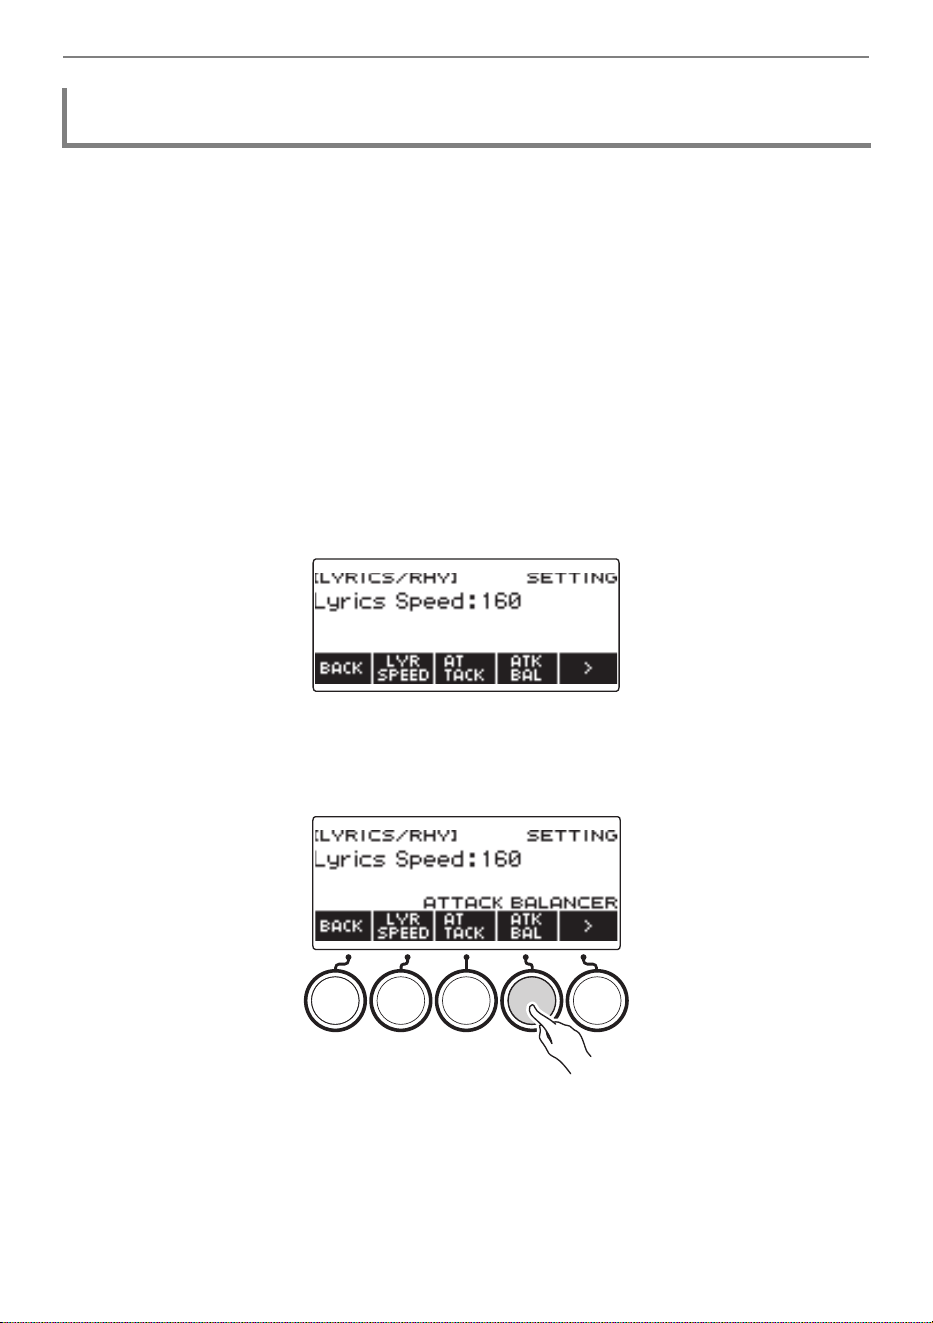
3.
Long-press KEY CTRL.
This displays the lyric tone setting screen.
4.
Press ATK BAL.
This displays “ATTACK BALANCER” and enables the lyric tone attack balancer, which adjusts the
timing of the sounding of lyrics, making it easier to play them on the keyboard.
5.
Press ATK BAL again to disable the lyric tone attack balancer.
“ATTACK BALANCER” disappears from the display.
6.
To exit the setting operation, press BACK.
Making the Timing When Lyrics Sound Easier to Play on the Keyboard
(Lyric Tone Attack Balancer)
B
Playing Lyric Tones (Vocal Synthesis)
EN-54
By changing the lyric tone attack setting, you can adjust the timing when lyrics sound by uniformly
shortening the beginning of the sounding of the lyric tone.
1.
Press LYRICS.
The LYRICS LED of the TONE MODE SELECT buttons lights, and the lyric tone screen appears
on the display.
2.
Long-press KEY CTRL.
This displays the lyric tone setting screen.
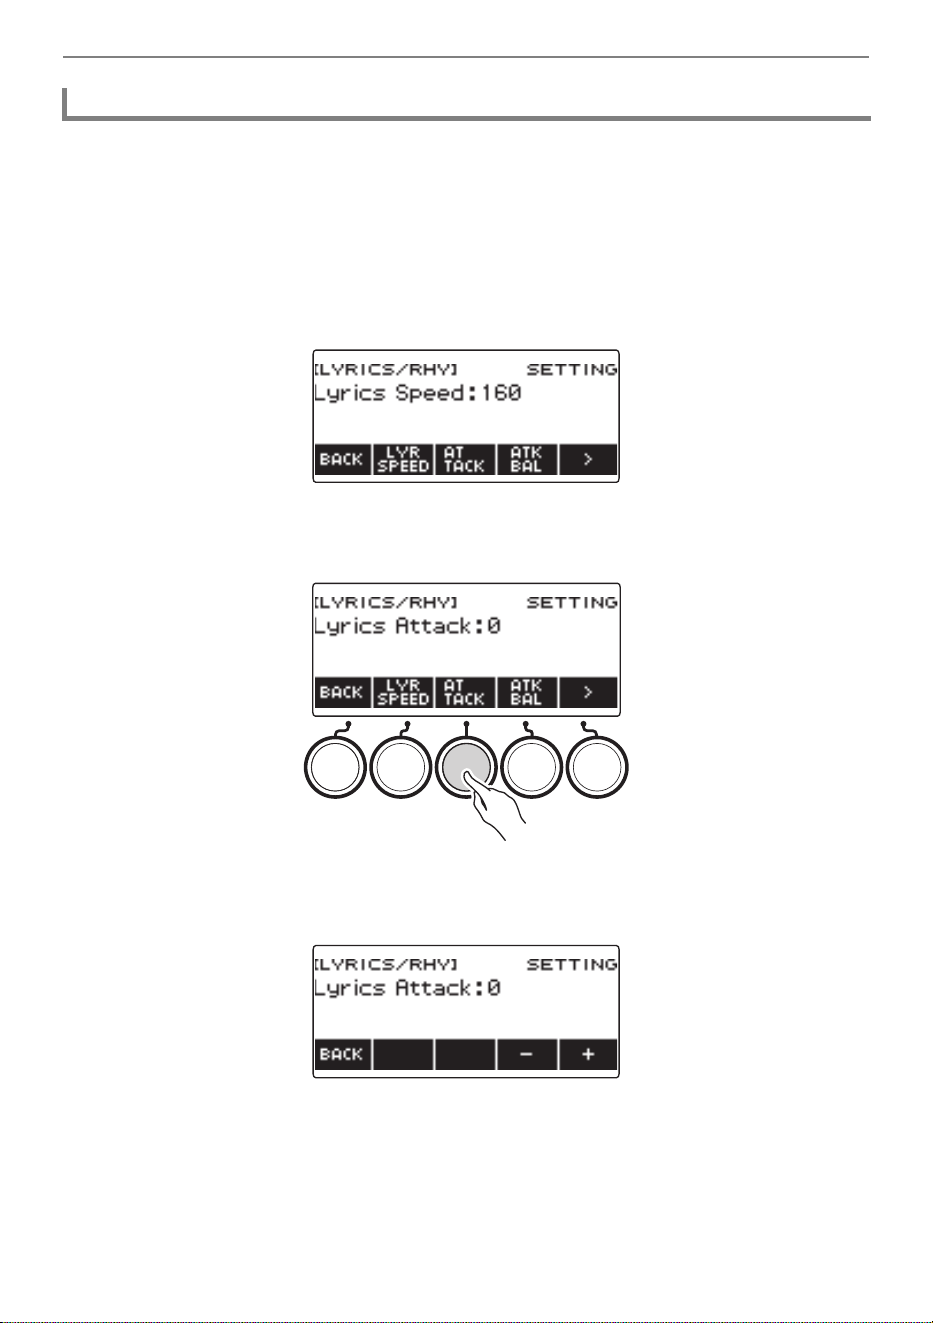
3.
Press ATTACK.
This displays lyric attack setting items.
4.
Rotate the dial to adjust the timing of when lyrics sound.
This displays the –/+ screen.
• The setting range is 0 to 30.
• After you rotate the dial to select a setting, you can adjust it further using – and +.
• To go back to the previous screen, press BACK.
5.
To exit the setting operation, press BACK.
Specifying the Timing of Lyric Sounding (Lyric Tone Attack)
Playing Lyric Tones (Vocal Synthesis)
EN-55
When the lyric tone performance mode is NOTE mode, you can randomly advance the lyrics by playing
on the keyboard and by changing the low side note of chord performance, and you can change the
number of chords that advance the lyrics.
1.
Press LYRICS.
The LYRICS LED of the TONE MODE SELECT buttons lights, and the lyric tone screen appears
on the display.
2.
If the lyric tone performance mode is PHRASE mode, press PLAY MODE to
switch to NOTE mode.
3.
Long-press KEY CTRL.
This displays the lyric tone setting screen.
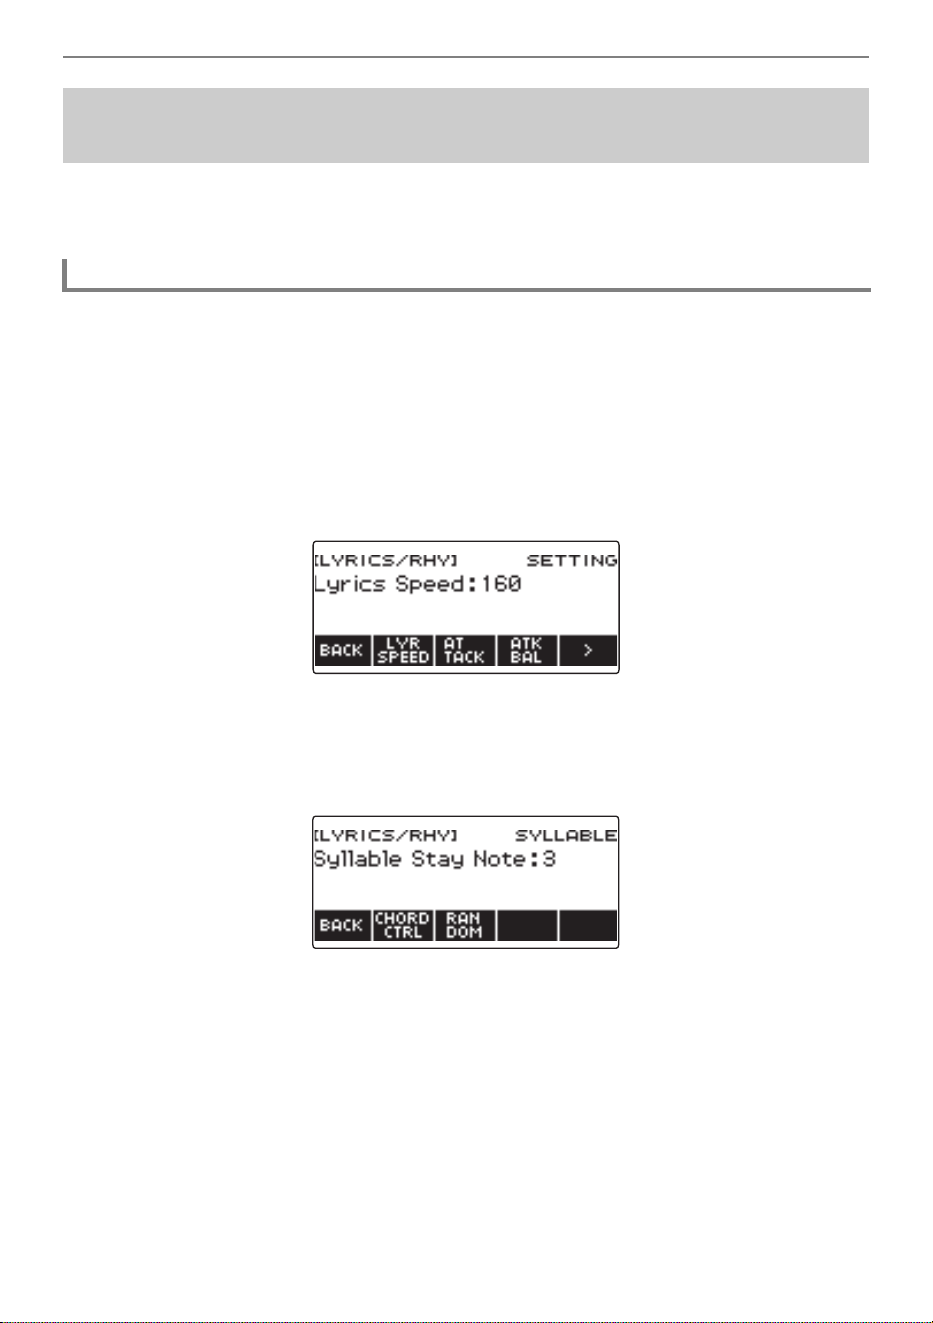
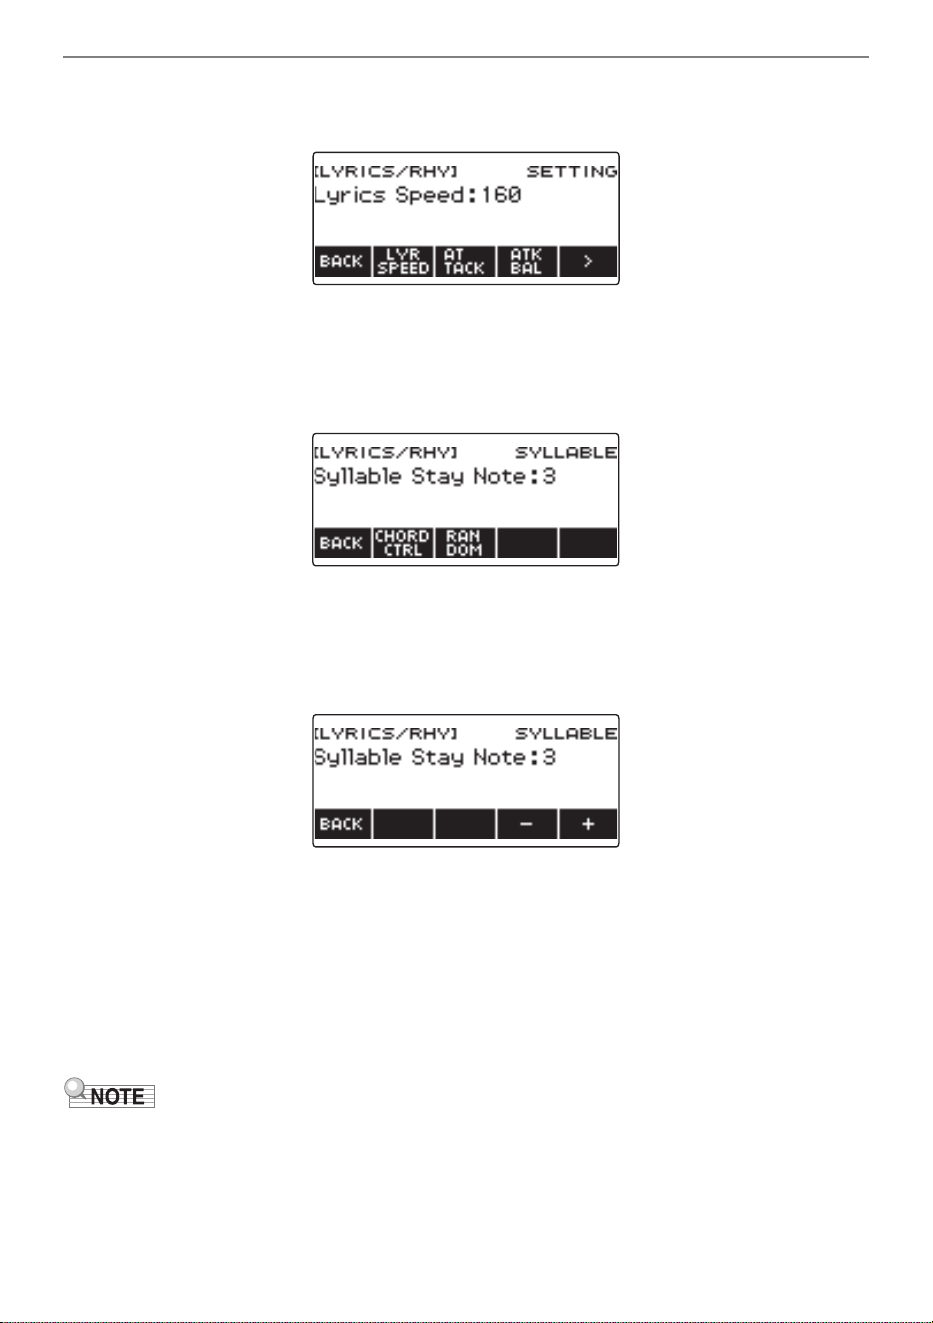
4.
Press I to select the 5 buttons menu that includes SYLLABLE.
5.
Press SYLLABLE.
This displays the syllable progress setting screen.
Changing the Syllable Advancement Control Setting in
NOTE Mode
Making Lyrics Sound Randomly (Random Syllable Sequence)
B
Playing Lyric Tones (Vocal Synthesis)
EN-56
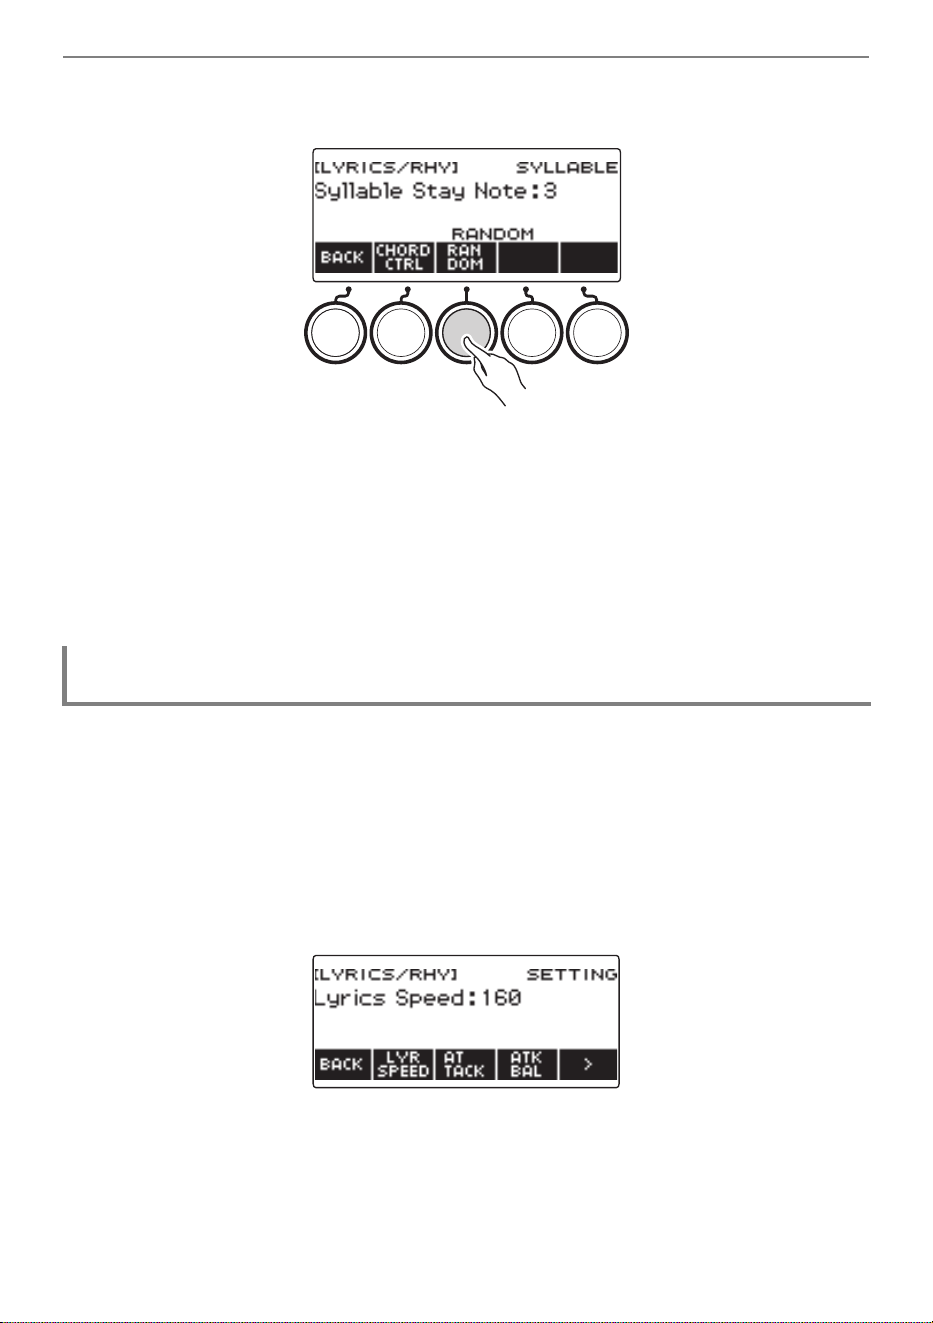
6.
Press RANDOM.
This displays “RANDOM” and causes the next played syllable position to be selected randomly.
• You can also use the lyric tone controller to enable this function. For details, refer to “Random
syllable sequence” under “Controlling a Lyric Tone with the Keyboard (Lyric Tone Controller)”
(page EN-49).
7.
Press RANDOM again to disable the random syllable sequence.
“RANDOM” disappears from the display.
8.
To exit the syllable progress setting screen, press BACK.
1.
Press LYRICS.
The LYRICS LED of the TONE MODE SELECT buttons lights, and the lyric tone screen appears
on the display.
2.
If the lyric tone performance mode is PHRASE mode, press PLAY MODE to
switch to NOTE mode.
3.
Long-press KEY CTRL.
This displays the lyric tone setting screen.
4.
Press I to select the 5 buttons menu that includes SYLLABLE.
Making Lyrics Advance With Chord Play on the Low-end Keyboard
(Syllable Chord Control Function)
B
Playing Lyric Tones (Vocal Synthesis)
EN-57
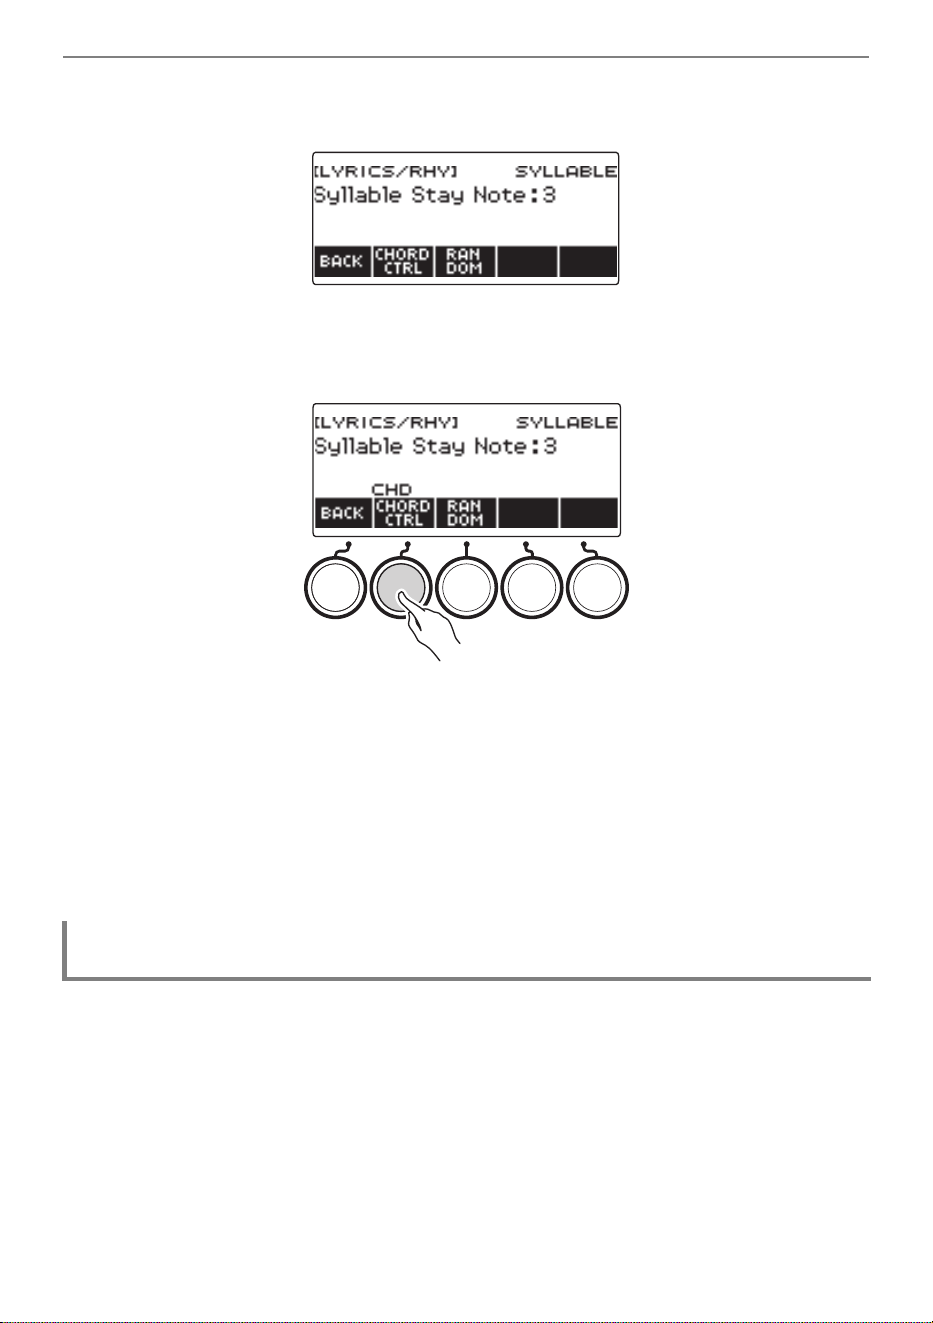
5.
Press SYLLABLE.
This displays the syllable progress setting screen.
6.
Press CHORD CTRL.
This displays “CHD”.
• Lyrics are advanced with a change in the chord being played on the low-end keyboard.
• You can also use the lyric tone controller to enable this function. For details, refer to “Syllable
chord control function” under “Controlling a Lyric Tone with the Keyboard (Lyric Tone
Controller)” (page EN-49).
• While this function is enabled, “CHD” is shown on the lyric tone screen.
7.
Press CHORD CTRL again to disable the syllable chord control function.
“CHD” disappears from the display.
8.
To exit the syllable progress setting screen, press BACK.
1.
Press LYRICS.
The LYRICS LED of the TONE MODE SELECT buttons lights, and the lyric tone screen appears
on the display.
2.
If the lyric tone performance mode is PHRASE mode, press PLAY MODE to
switch to NOTE mode.
Changing the Number of Chord Component Notes at Which Lyrics do not
Advance (Syllable stay notes)
B
Playing Lyric Tones (Vocal Synthesis)
EN-58
3.
Long-press KEY CTRL.
This displays the lyric tone setting screen.
4.
Press I to select the 5 buttons menu that includes SYLLABLE.
5.
Press SYLLABLE.
This displays the syllable progress setting screen.
6.
Rotate the dial to change the number of chord component notes.
This displays the –/+ screen.
• You can change the ease of advancement of the lyrics by changing the number of chord
component notes.
• The setting range is 1 to 5.
• The lyrics will not advance if you are holding down at least the specified number of chord
component notes to play a chord and then change one of the component notes to a note that is
lower than the current component notes. The larger the setting value, the easier it is for lyrics to
advance.
• After you rotate the dial to select a setting, you can adjust it further using – and +.
• To go back to the previous screen, press BACK.
7.
To exit the syllable progress setting screen, press BACK.
• The number of chord constituent notes has no effect when the syllable chord control function is
enabled.
B
Playing Lyric Tones (Vocal Synthesis)
EN-59
With this method, the singing voice sounds as if you are repeatedly pressing keys at preset intervals,
even if you hold down keyboard keys.
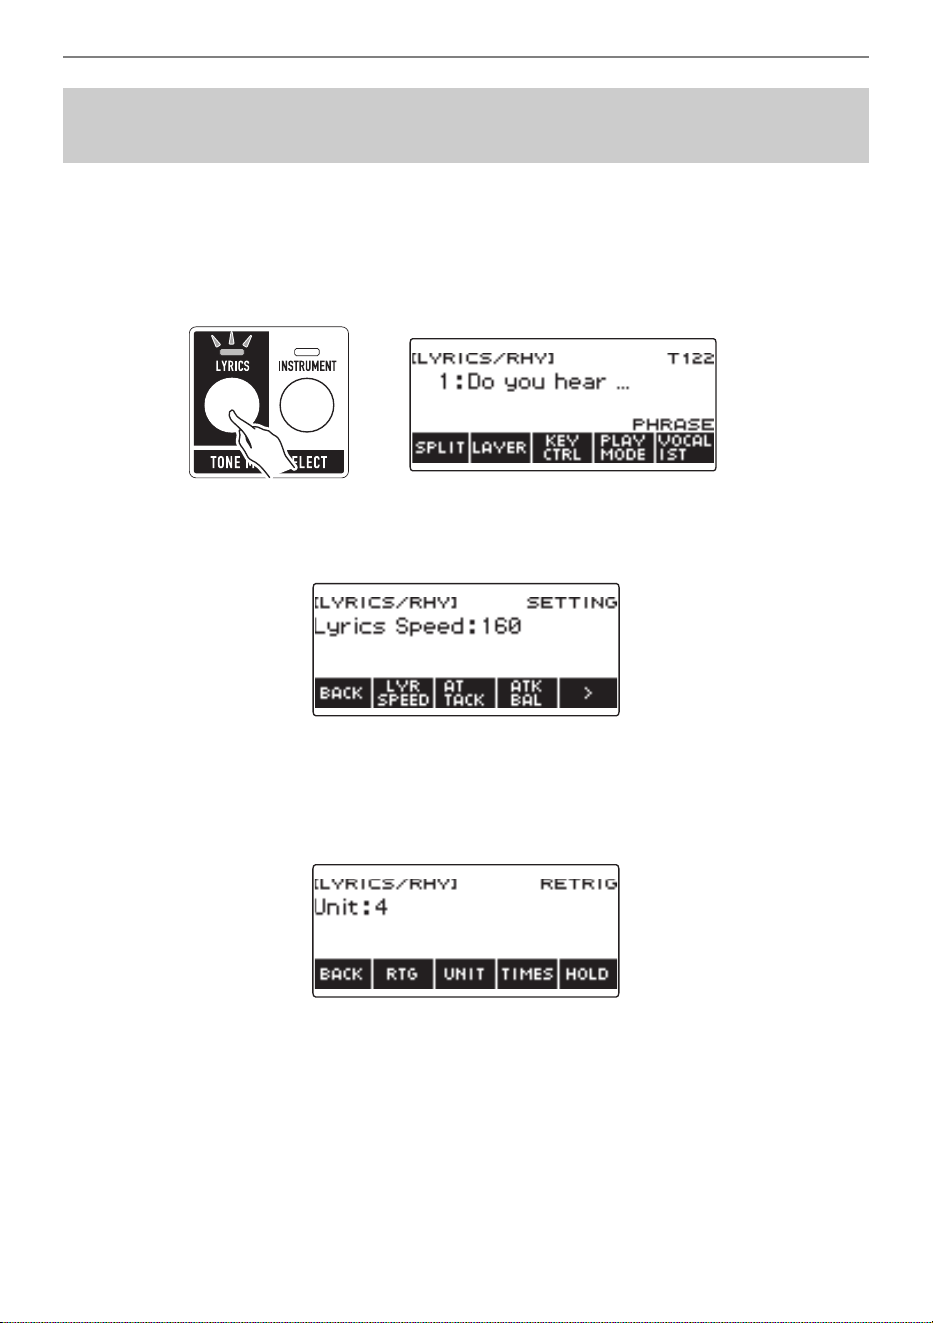
1.
Press LYRICS.
The LYRICS LED of the TONE MODE SELECT buttons lights, and the lyric tone screen appears
on the display.
2.
Long-press KEY CTRL.
This displays the lyric tone setting screen.
3.
Press I to select the 5 buttons menu that includes RETRIG.
4.
Press RETRIG.
This displays the retrigger setting screen.
Making the Lyrics Advance Even if You Hold Down
Keyboard Keys (Retrigger)
B
Playing Lyric Tones (Vocal Synthesis)
EN-60
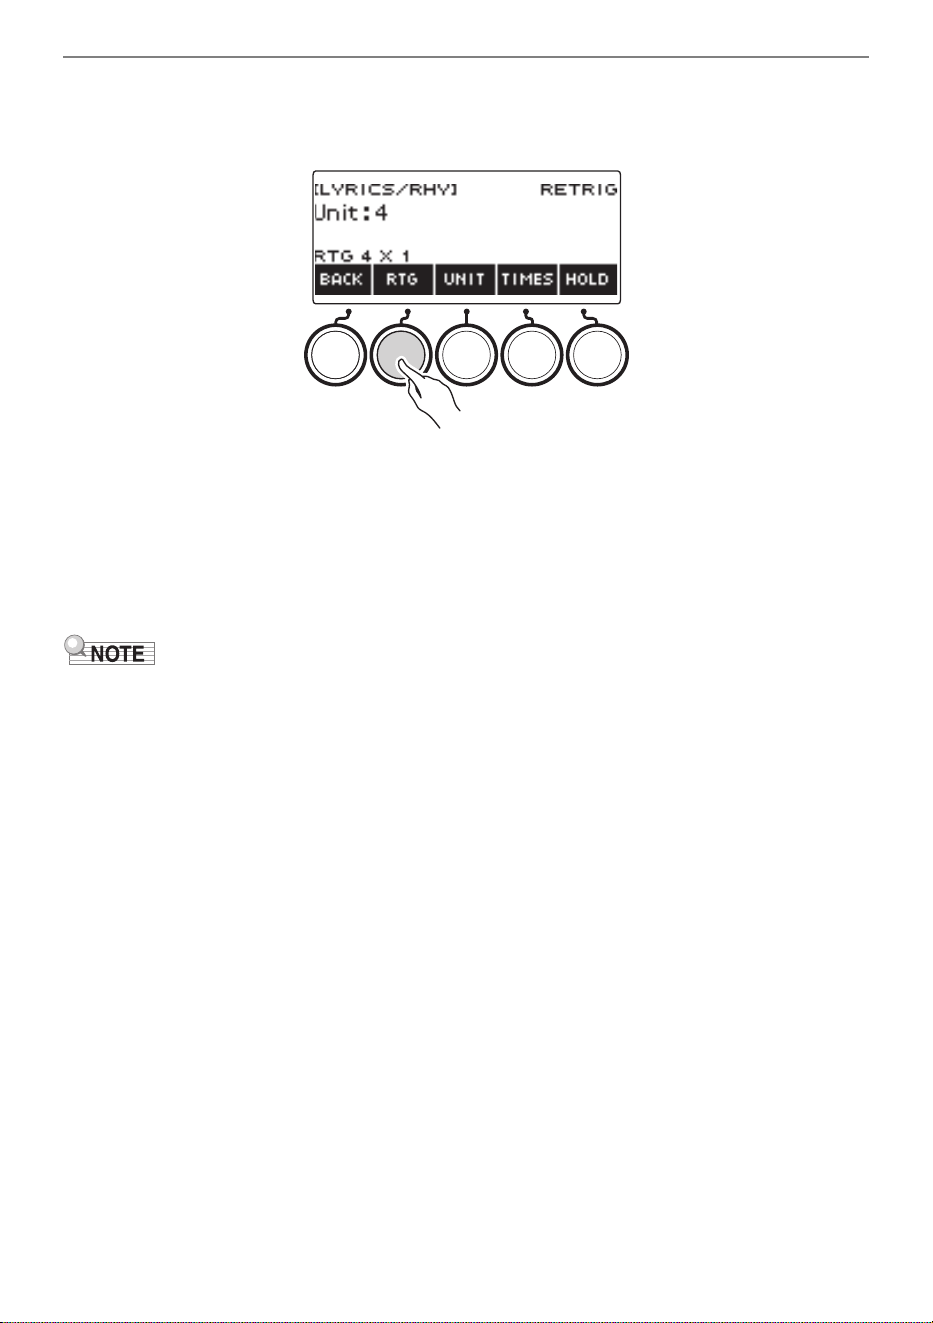
5.
Press RTG.
This displays “RTG” and causes the lyric tone to sound automatically at a fixed interval, as if
keyboard keys are being pressed again.
• You can also use the lyric tone controller to enable this function. For details, see “Retrigger”
under “Controlling a Lyric Tone with the Keyboard (Lyric Tone Controller)” (page EN-49).
• While this function is enabled, “RTG” is shown on the lyric tone screen.
6.
Press RTG again to disable retriggering.
“RTG” disappears from the display.
7.
To exit the retrigger setting screen, press BACK.
• If both the retrigger function and the arpeggiator function are enabled, the arpeggiator function is
given priority.
B
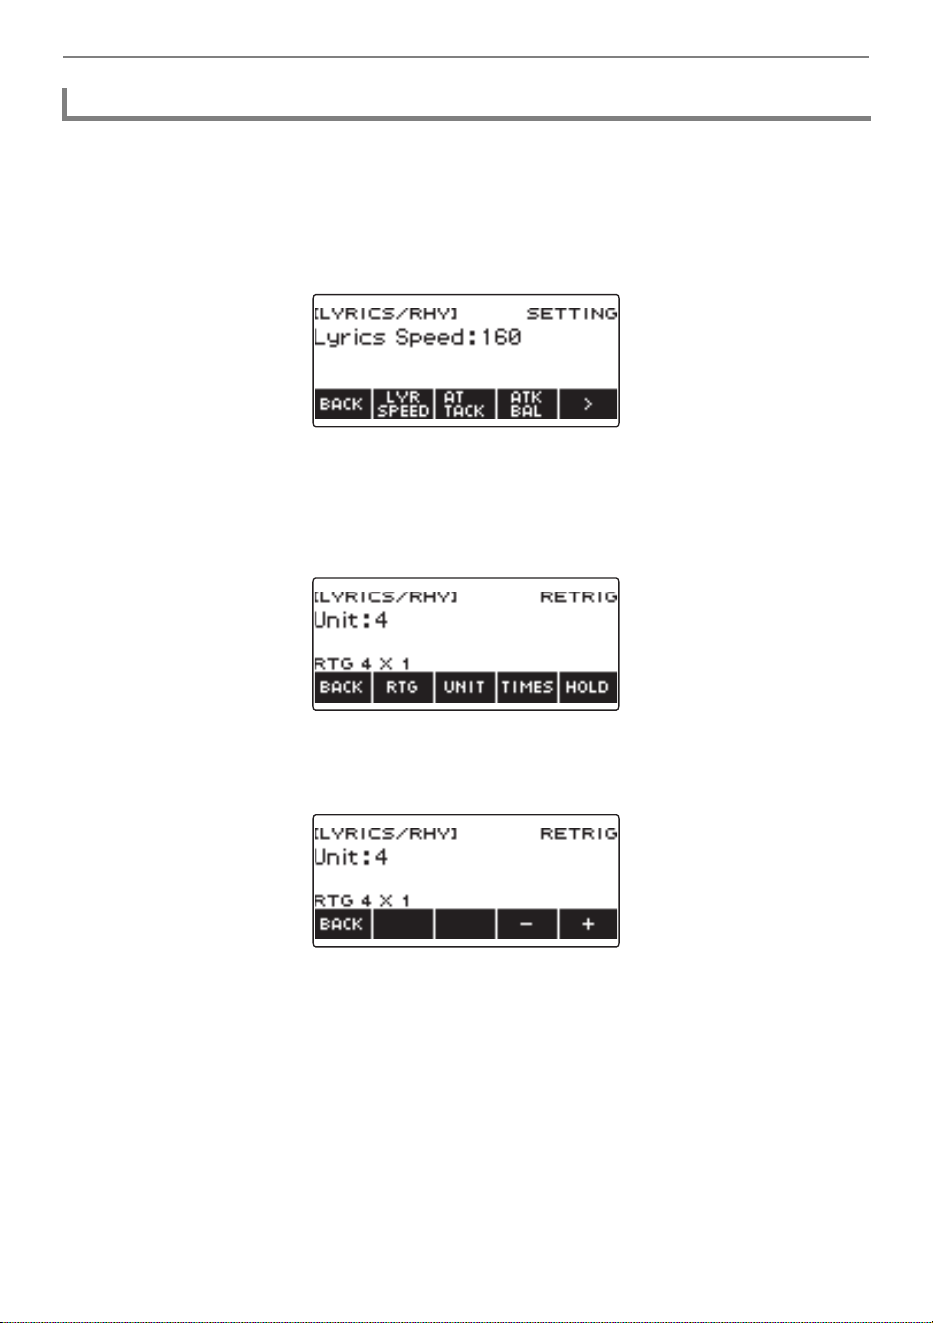
Playing Lyric Tones (Vocal Synthesis)
EN-61
1.
Press LYRICS.
The LYRICS LED of the TONE MODE SELECT buttons lights, and the lyric tone screen appears
on the display.
2.
Long-press KEY CTRL.
This displays the lyric tone setting screen.
3.
Press I to select the 5 buttons menu that includes RETRIG.
4.
Press RETRIG.
This displays the retrigger setting screen.
5.
Rotate the dial to select the note value to be used for the retrigger cycle unit.
This displays the –/+ screen.
• Available settings are “1, 1t, 2, 2t, 4, 4t, 8, 8t, 16, 16t, 32, 32t”.
• After you rotate the dial to select a setting, you can adjust it further using – and +.
• To go back to the previous screen, press BACK.
• You can also use the lyric tone controller to select this setting. For details, refer to “Retrigger
cycle unit note value” under “Controlling a Lyric Tone with the Keyboard (Lyric Tone Controller)”
(page EN-49).
6.
To exit the retrigger setting screen, press BACK.
Selecting the Note Value Cycle Unit
B
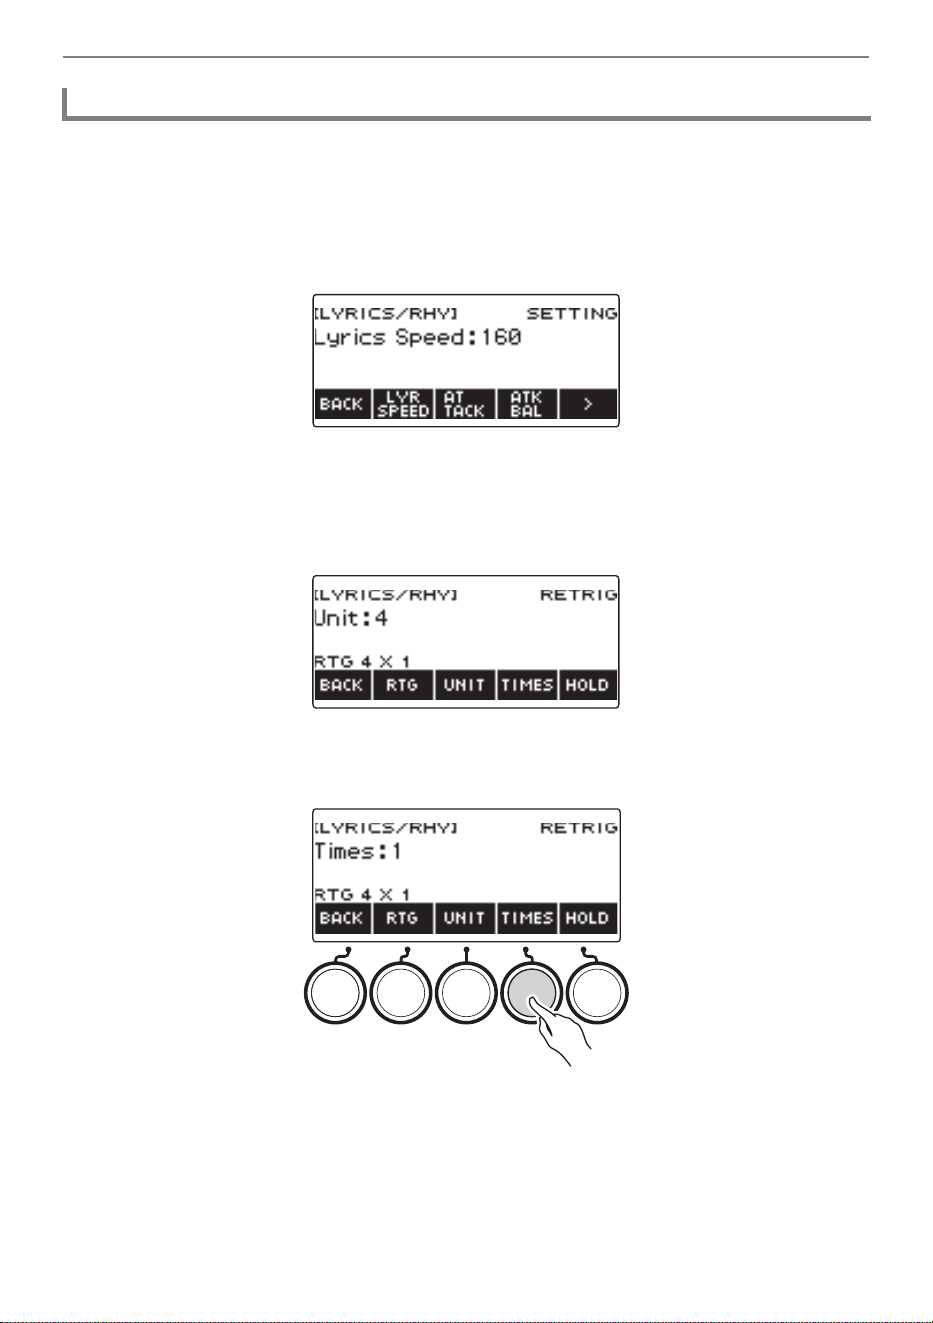
Playing Lyric Tones (Vocal Synthesis)
EN-62
1.
Press LYRICS.
The LYRICS LED of the TONE MODE SELECT buttons lights, and the lyric tone screen appears
on the display.
2.
Long-press KEY CTRL.
This displays the lyric tone setting screen.
3.
Press I to select the 5 buttons menu that includes RETRIG.
4.
Press RETRIG.
This displays the retrigger setting screen.
5.
Press TIMES.
This displays a screen for setting the note value count.
Selecting the Note Value Count
B
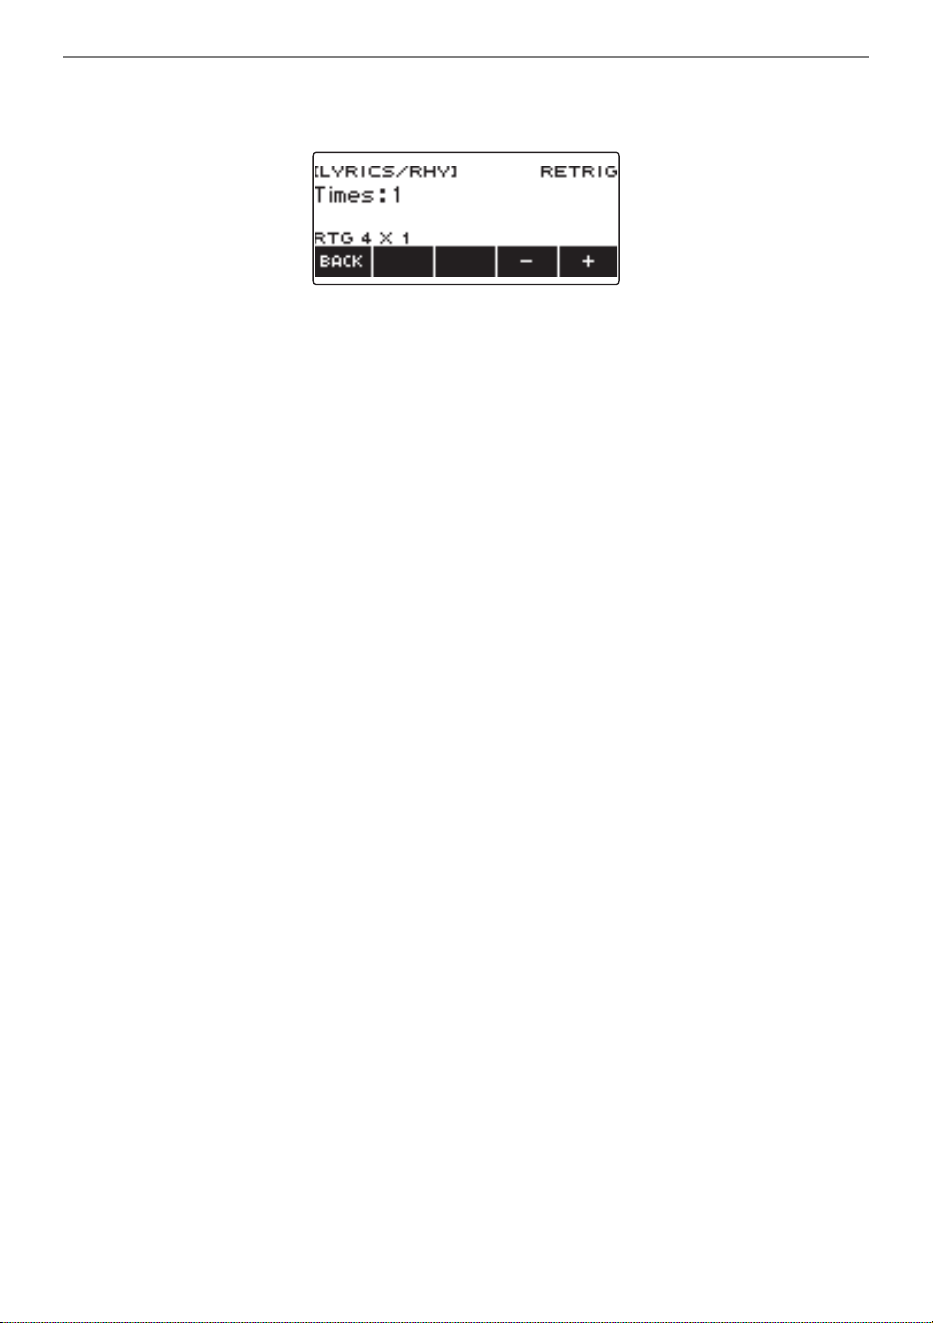
Playing Lyric Tones (Vocal Synthesis)
EN-63
6.
Rotate the dial to select the number of unit note values.
This displays the –/+ screen.
• The setting range is 1 to 9.
• After you rotate the dial to select a setting, you can adjust it further using – and +.
• To go back to the previous screen, press BACK.
7.
To return to the setting screen of the note value, which is the unit of the cycle,
press the UNIT.
8.
To exit the retrigger setting screen, press BACK.
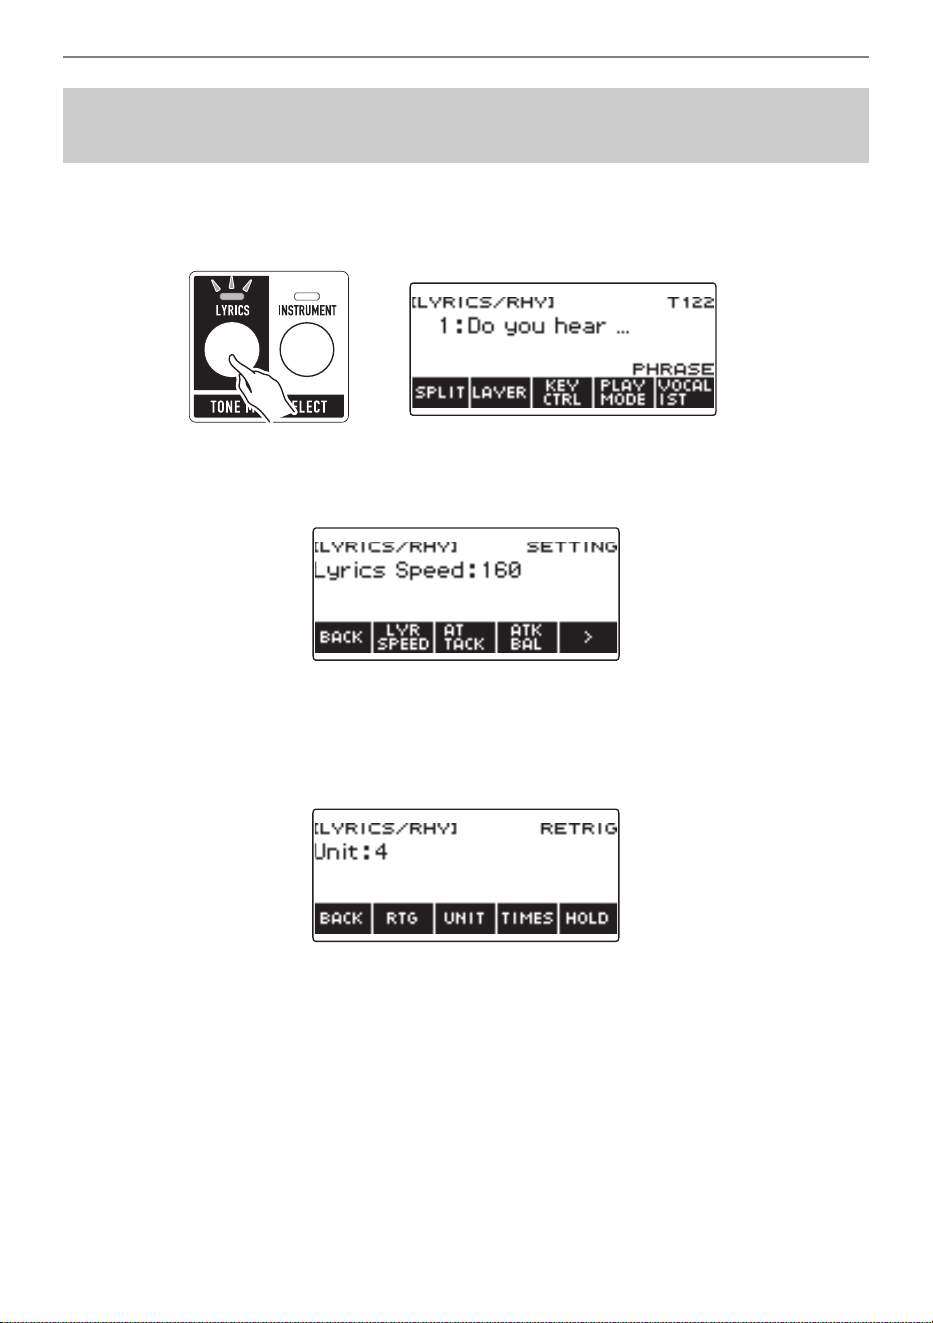
Playing Lyric Tones (Vocal Synthesis)
EN-64
1.
Press LYRICS.
The LYRICS LED of the TONE MODE SELECT buttons lights, and the lyric tone screen appears
on the display.
2.
Long-press KEY CTRL.
This displays the lyric tone setting screen.
3.
Press I to select the 5 buttons menu that includes RETRIG.
4.
Press RETRIG.
This displays the retrigger setting screen.
5.
Press RTG to turn on the retrigger function.
Making the Retrigger Function Notes Continue to Sound
When Keyboard Keys are Released
B
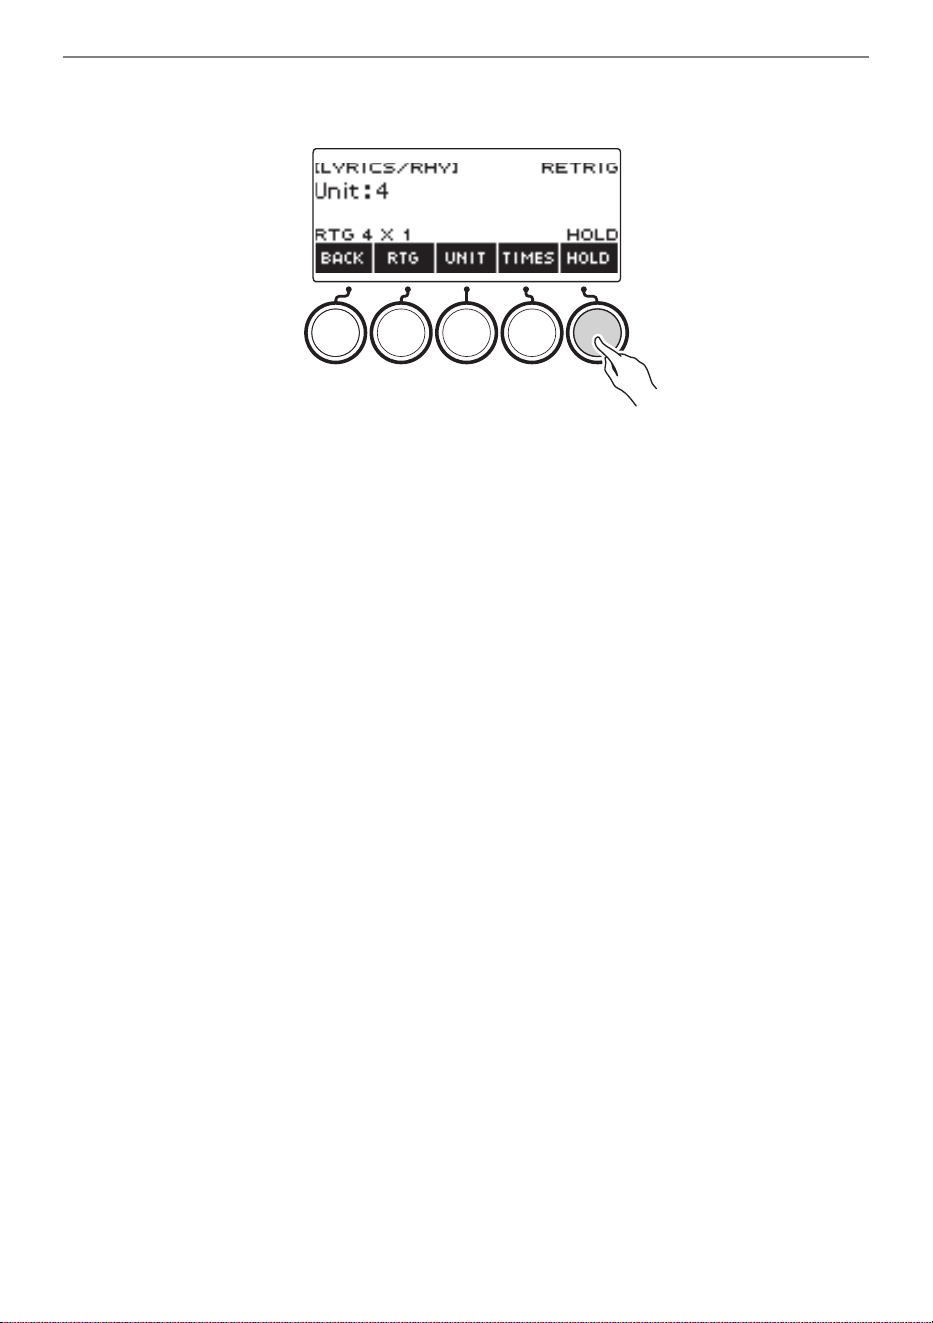
Playing Lyric Tones (Vocal Synthesis)
EN-65
6.
Press HOLD.
This displays “HOLD” and enables retrigger hold.
• You can also use the lyric tone controller to enable this function. For details, refer to “Retrigger
Hold” under “Controlling a Lyric Tone with the Keyboard (Lyric Tone Controller)” (page EN-49).
7.
Press and release a keyboard key.
• Even after you release the key, the retrigger function causes notes to continue to play.
8.
To disable retrigger hold, press HOLD again.
This causes “HOLD” to disappear from the display and stops note play.
9.
To exit the retrigger setting screen, press BACK.
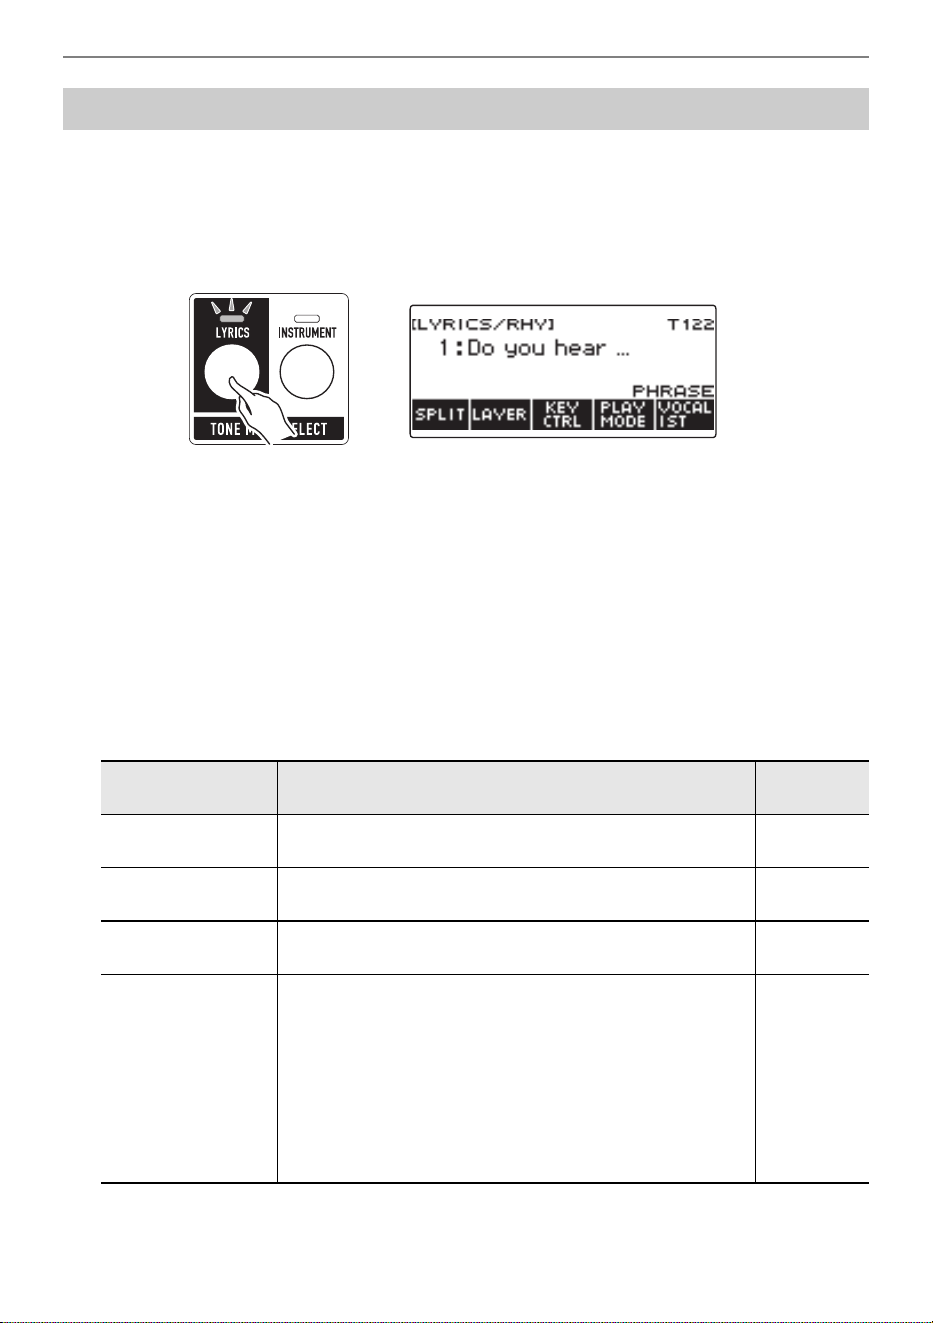
Playing Lyric Tones (Vocal Synthesis)
EN-66
You can change the pedal function to a lyric tone function. For example, lyric tone change, resetting the
syllable position, etc.
1.
Press LYRICS.
The LYRICS LED of the TONE MODE SELECT buttons lights, and the lyric tone screen appears
on the display.
• The ADVANCED LED of the TONE button will be lit while the digital keyboard is in the Lyric
Tone Mode.
• Knob and pedal functions change in accordance with Lyric Tone Mode settings.
2.
Press MENU.
This displays the menu screen.
3.
Use U and I to select the 5 button menu that includes PEDAL.
4.
Press PEDAL.
This displays the pedal screen.
• In addition to functions assigned to the pedal (page EN-74), the following functions can also be
assigned.
Changing the Function of a Pedal in the Lyric Tone Mode
Setting Description
Display
Indicator
Lyric tone forward A short-press advances to the next lyric tone. A long-press
returns to the previous lyric tone.
Next Lyrics
Lyric tone back A short-press returns to the previous lyric tone. A long-
press advances to the next lyric tone.
Prev Lyrics
Lyric syllable reset Resets the tone syllable position to the beginning. Syllable
Reset
Lyric tone hold Depressing the pedal while PHRASE mode is selected as
the lyric tone performance mode will cause lyrics to
continue to sound up to the final syllable even if you release
the keyboard keys, and the vowel of the final syllable will
continue to sound. Depressing the pedal while NOTE mode
is selected as the lyric tone performance mode will cause
the vowel of the current syllable to be retained. Even if you
press a keyboard key, the vowel sounds without advancing
to the next syllable, for a melismatic performance.
Lyrics Hold
B

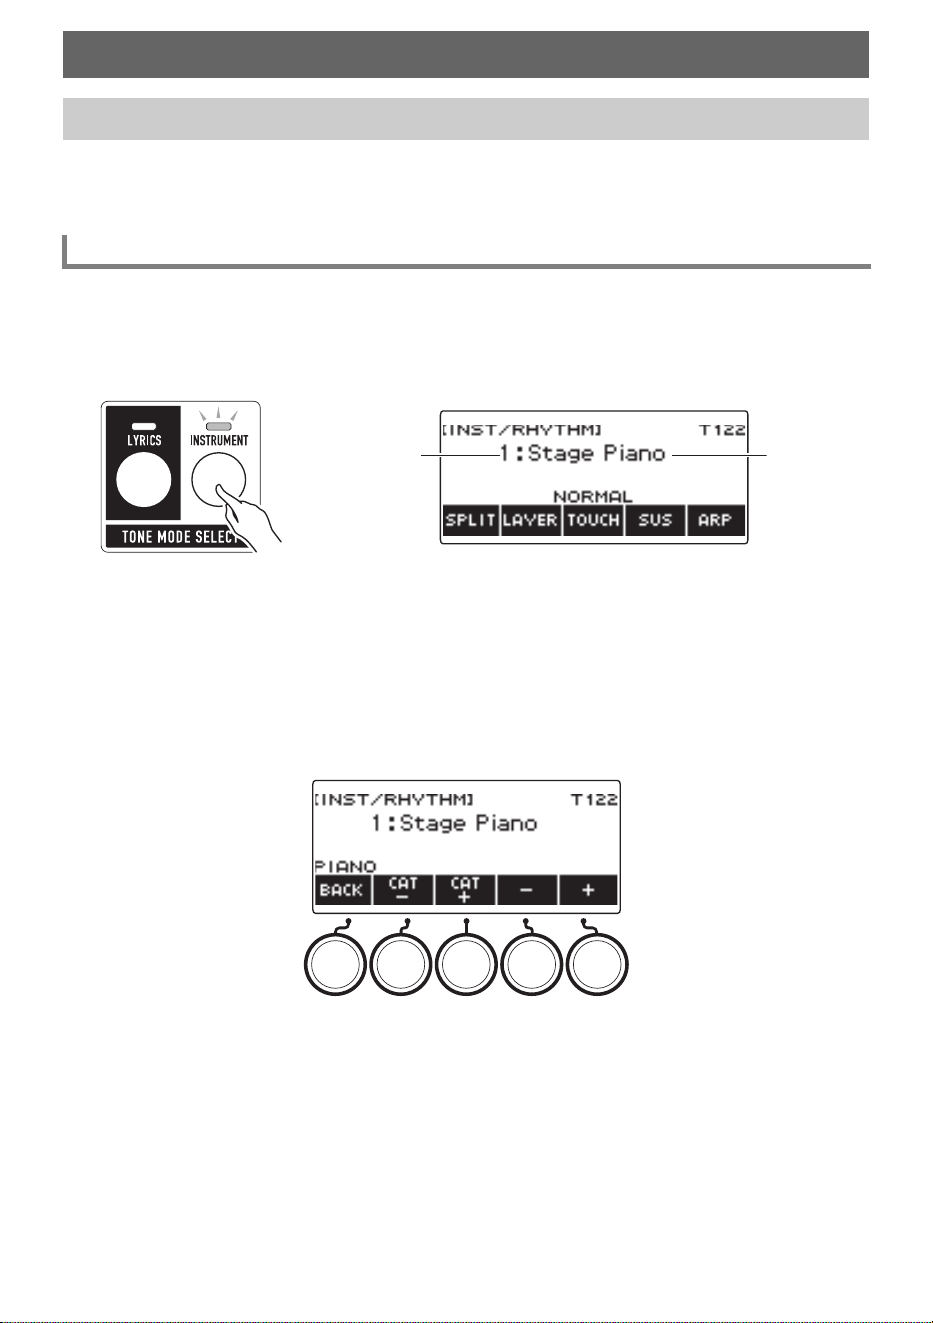
EN-68
Your Digital Keyboard lets you select tones for a wide variety of musical instrument sounds, including
violin, flute, and more. The same song can sound completely different when played with a different
instrument type.
1.
Press INSTRUMENT.
The INSTRUMENT LED of the TONE MODE SELECT buttons lights, and the instrument tone
screen appears on the display.
• The tone number and tone name appear on the display.
2.
Rotate the dial to select a tone.
• For tone information, see the “Tone List” (page EN-288).
• Tone numbers 801 and 802 are for sampled tones. For details, see “Capturing Sounds as
Tones” (page EN-211).
• After you rotate the dial once to select a tone, you can change the selection further using – and +.
• To return to the first tone in the Tone List, press – and + at the same time.
• If you want to select a category, use CAT–/CAT+.
• To go back to the previous screen, press BACK.
Controlling the Sound of a Performance
Selecting a Musical Instrument Tone
Selecting a Tone
Tone nameTone Number
B

Controlling the Sound of a Performance
EN-69
■ Advanced Tones
A tone that causes the ADVANCED LED to light is called an “advanced tone”.
Advanced tones provide enhanced sound source control, and enable advanced expressive techniques,
tone expression, and more.
Lit
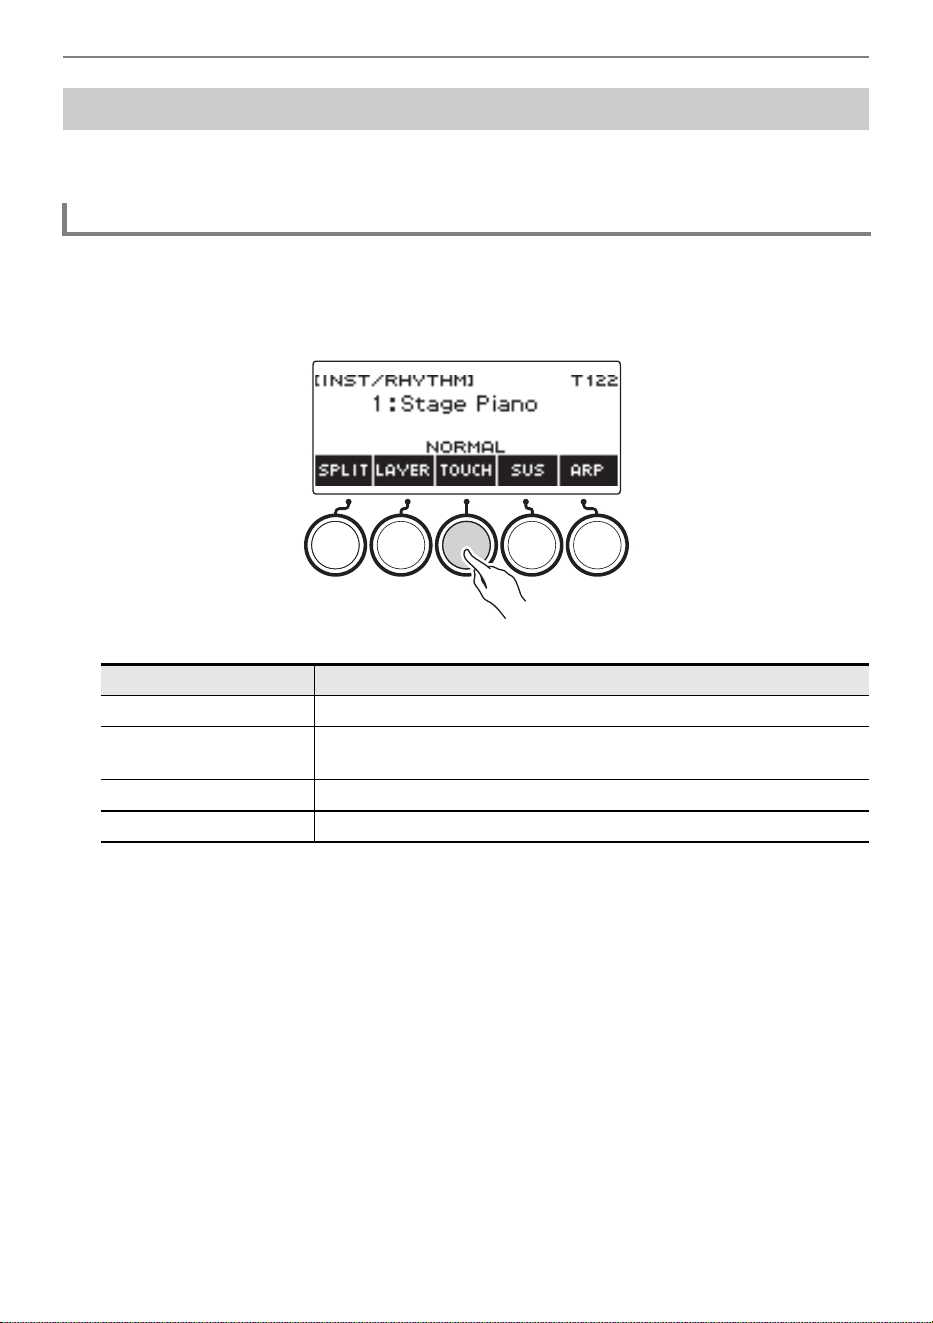
Controlling the Sound of a Performance
EN-70
Touch Response alters tone volume in accordance with keyboard pressure (press velocity). This
provides you some of the same expression capabilities you get on an acoustic piano.
1.
Press INSTRUMENT.
This displays the instrument tone screen.
2.
Press TOUCH and then select the Touch Response setting you want.
Touch Response settings are described in the table below.
Playing with Touch Response
Changing Touch Response Sensitivity
Setting (Display Text) Description
Off (OFF) Keyboard pressure does not affect volume.
Light (LIGHT) Easier to produce a louder sound than the Normal setting, for a
lighter feel.
Normal (NORMAL) Normal Touch Response.
Heavy (HEAVY) More difficult to produce a louder sound, for a heavier feel.
B
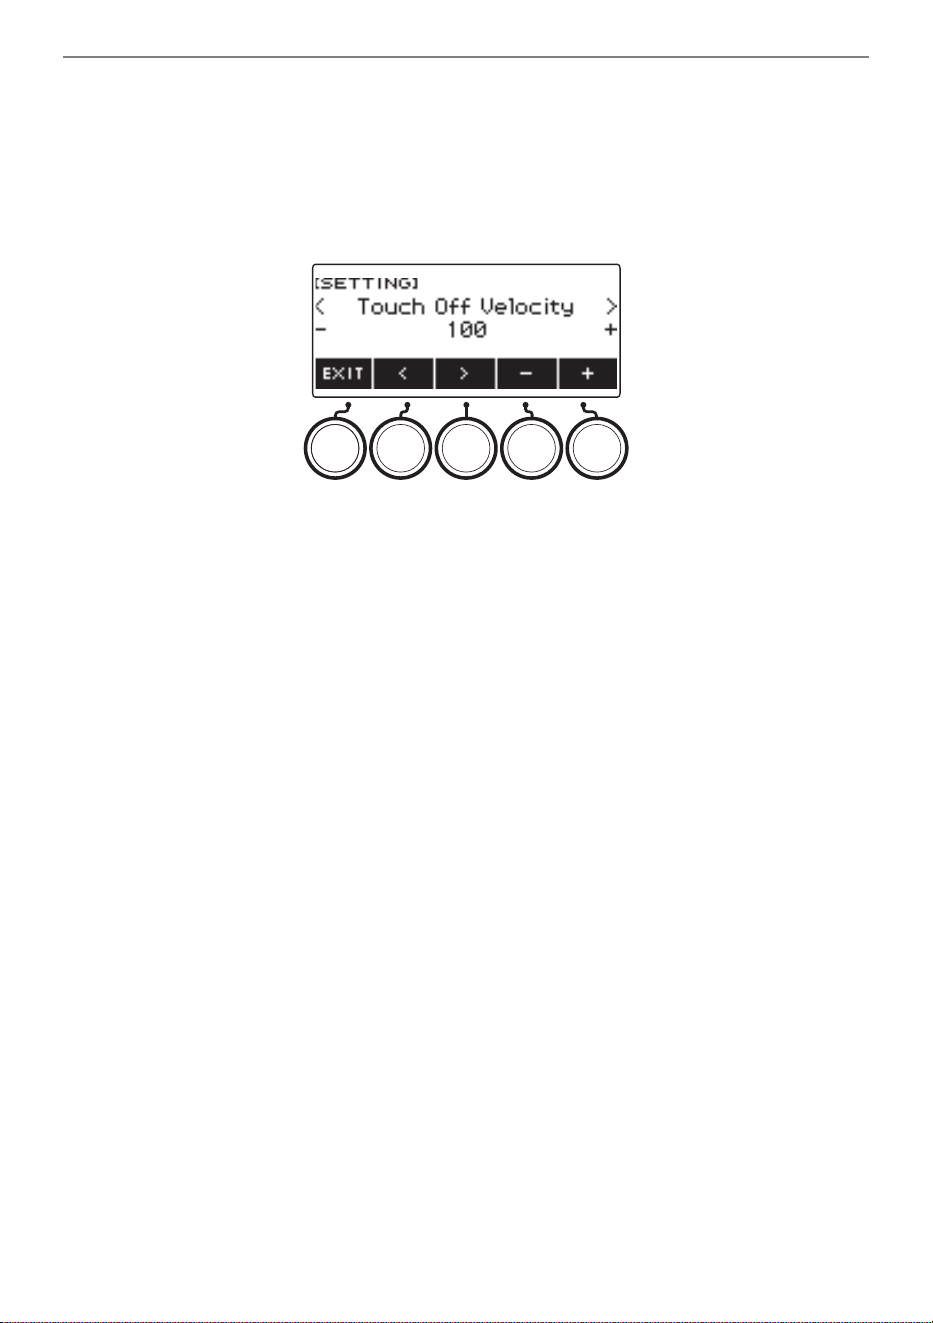
Controlling the Sound of a Performance
EN-71
■ Adjusting Volume When Touch Response is Disabled (Touch off Velocity)
1.
Press INSTRUMENT.
This displays the instrument tone screen.
2.
Long-press TOUCH.
This displays the setting screen, which shows setting items for touch off velocity.
3.
Rotate the dial or use – and + to change the setting.
• You can specify a value from 1 to 127.
4.
To exit the setting operation, press EXIT.
B
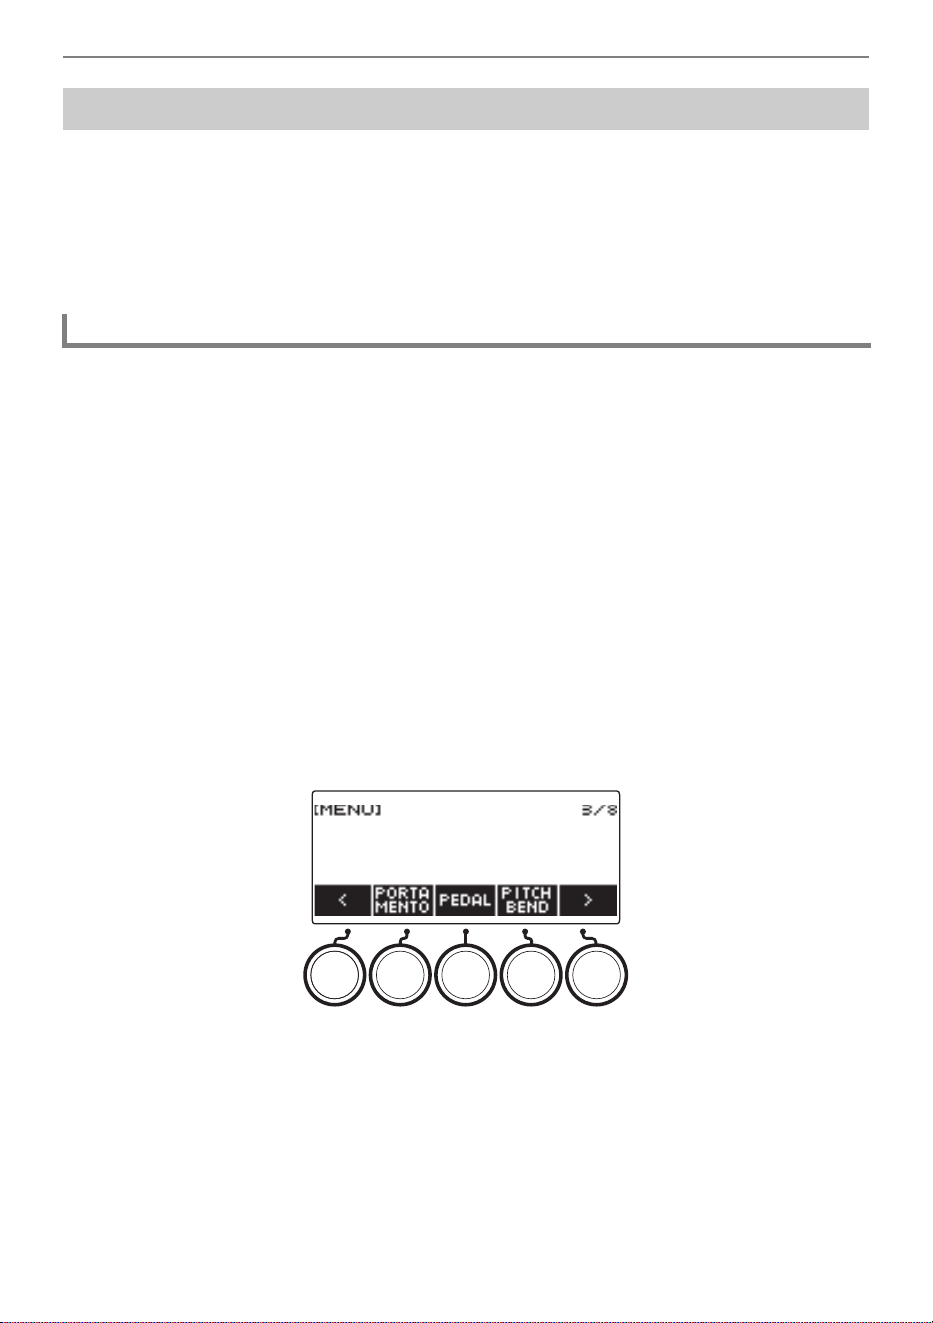
Controlling the Sound of a Performance
EN-72
Connecting a pedal lets you perform pedal operations that add various effects during your
performances. The PEDAL1 jack is compatible with switch pedals that pedal release, and the
PEDAL2/EXPRESSION jack is compatible with both volume pedals and switch pedals that detect the
amount of depression.
This Digital Keyboard does not come with a pedal unit. Purchase one separately.
• You can also use a pedal to change the registration setup. For details, see “Using the Pedal to Recall
the Settings Sequentially (Registration Sequence)” (page EN-177).
1.
Connect a pedal to the PEDAL1 or PEDAL2/EXPRESSION jack.
• Under initial default settings, pedal sustain is assigned to the PEDAL1 jack so it can be used as
a damper pedal.
• Under initial default settings, the soft function is assigned to the PEDAL2/EXPRESSION jack
so it can be used as a soft pedal.
2.
Depress and release the pedal as you play the keyboard.
• With the pedal sustain function, notes are sustained as long as you hold down the pedal, even if
you release the keyboard keys.
• With the soft function, notes become slightly quieter and softer while the pedal is depressed.
■ To change the switch pedal function
1.
Press MENU.
This displays the menu screen.
2.
Use U and I to select the 5 buttons menu that includes PEDAL.
Using a Pedal
Using a Switch Pedal
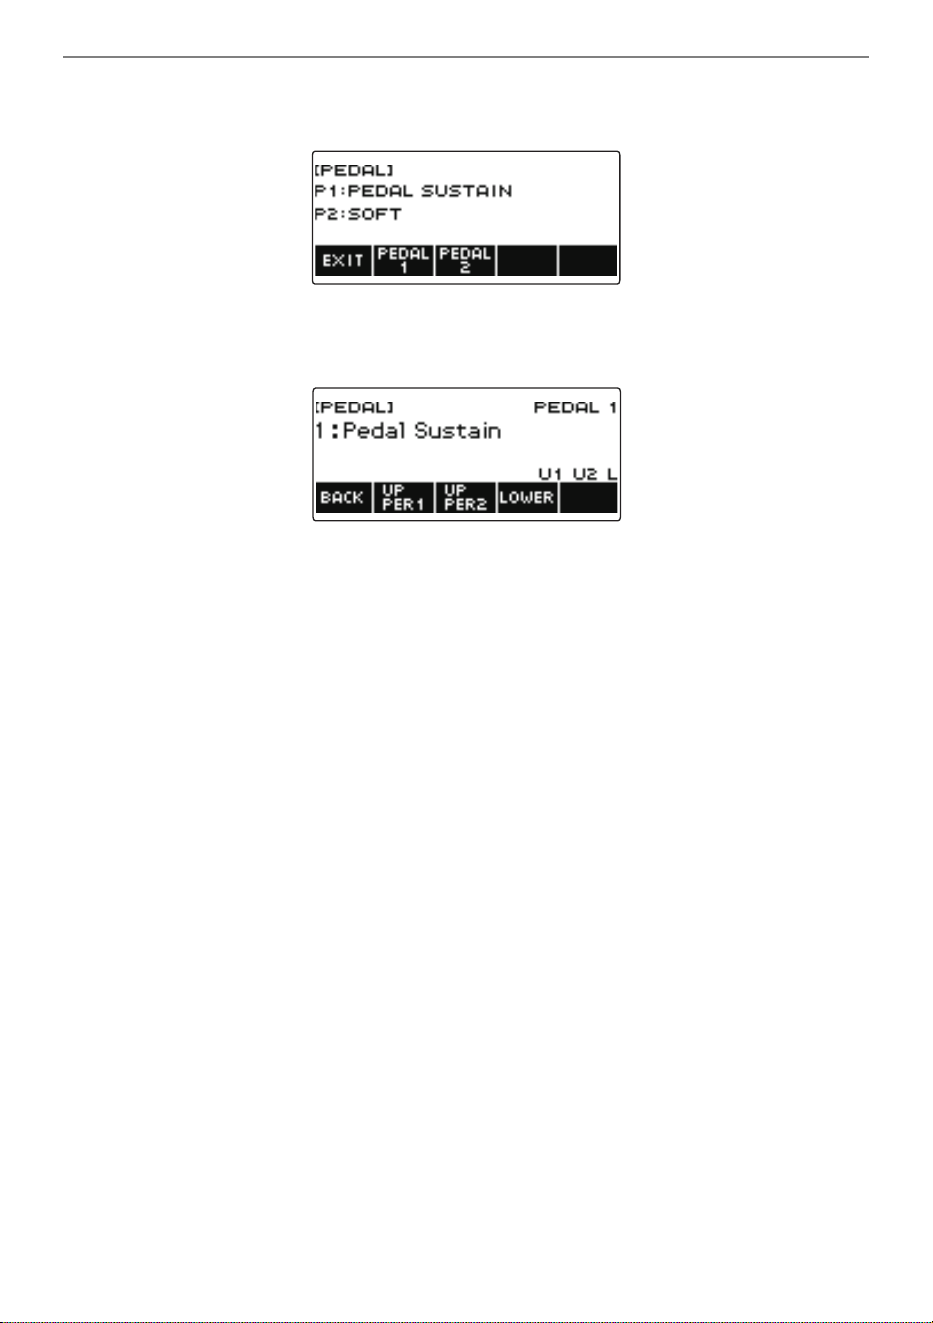
Controlling the Sound of a Performance
EN-73
3.
Press PEDAL.
This displays the pedal screen.
4.
Press the button for the pedal jack whose function you want to change.
This displays the pedal setting screen.
• If SWITCH appears when you press PEDAL2, it means that the pedal type setting is switch
pedal. If the pedal type setting is not switch pedal, refer to “Using a Pedal” (page EN-72) and
change the setting.
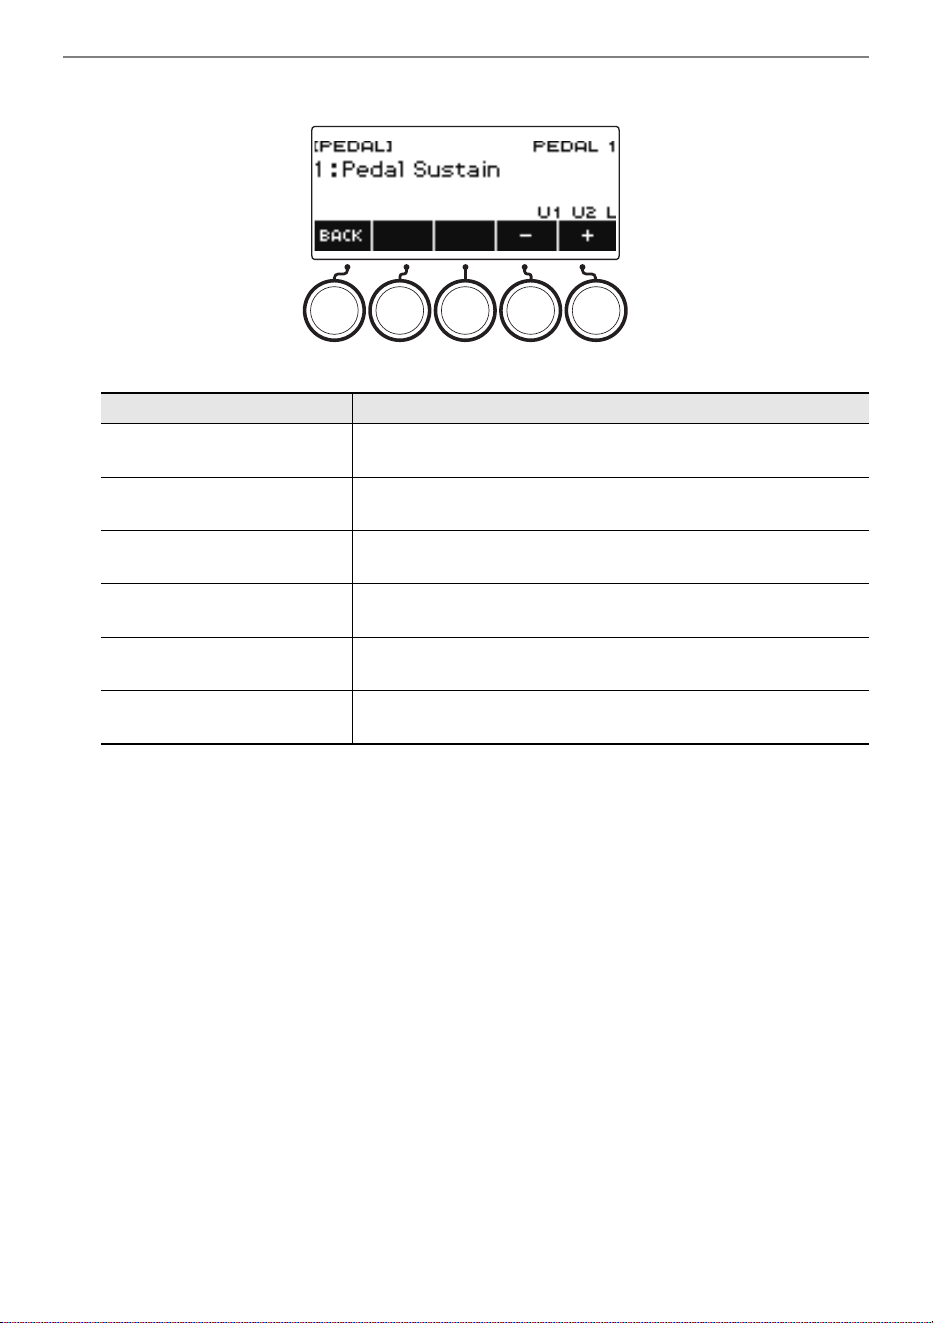
Controlling the Sound of a Performance
EN-74
5.
Rotate the dial to change the pedal function.
The table below shows the available pedal function settings.
• After you rotate the dial once to select an option, you can change the selection further using –
and +.
• To go back to the previous screen, press BACK.
6.
Press BACK to return to the pedal screen.
7.
To exit the setting operation, press EXIT.
Setting (Display Text) Description
Pedal Sustain (Pedal Sustain) Playing notes while the pedal is depressed causes the notes to
be sustained, even if the keyboard keys are released.
Sostenuto (Sostenuto) Playing notes and then pressing the pedal before the keyboard
keys are released causes the notes to be sustained.
Soft (Soft) Pressing the pedal and playing notes causes the notes to be
slightly softened.
Start/Stop (Start/Stop) The pedal has the same functions as a. It can be used to
start and stop the metronome and rhythm play.
Fill-in (Fill-In) Plays a fill-in (page EN-166) when the pedal is depressed while
an Auto Accompaniment is playing.
Arpeggiator Hold
(Arpeggiator Hold)
When the arpeggiator (page EN-239) is turned on, arpeggiator
hold is applied by depressing the pedal.
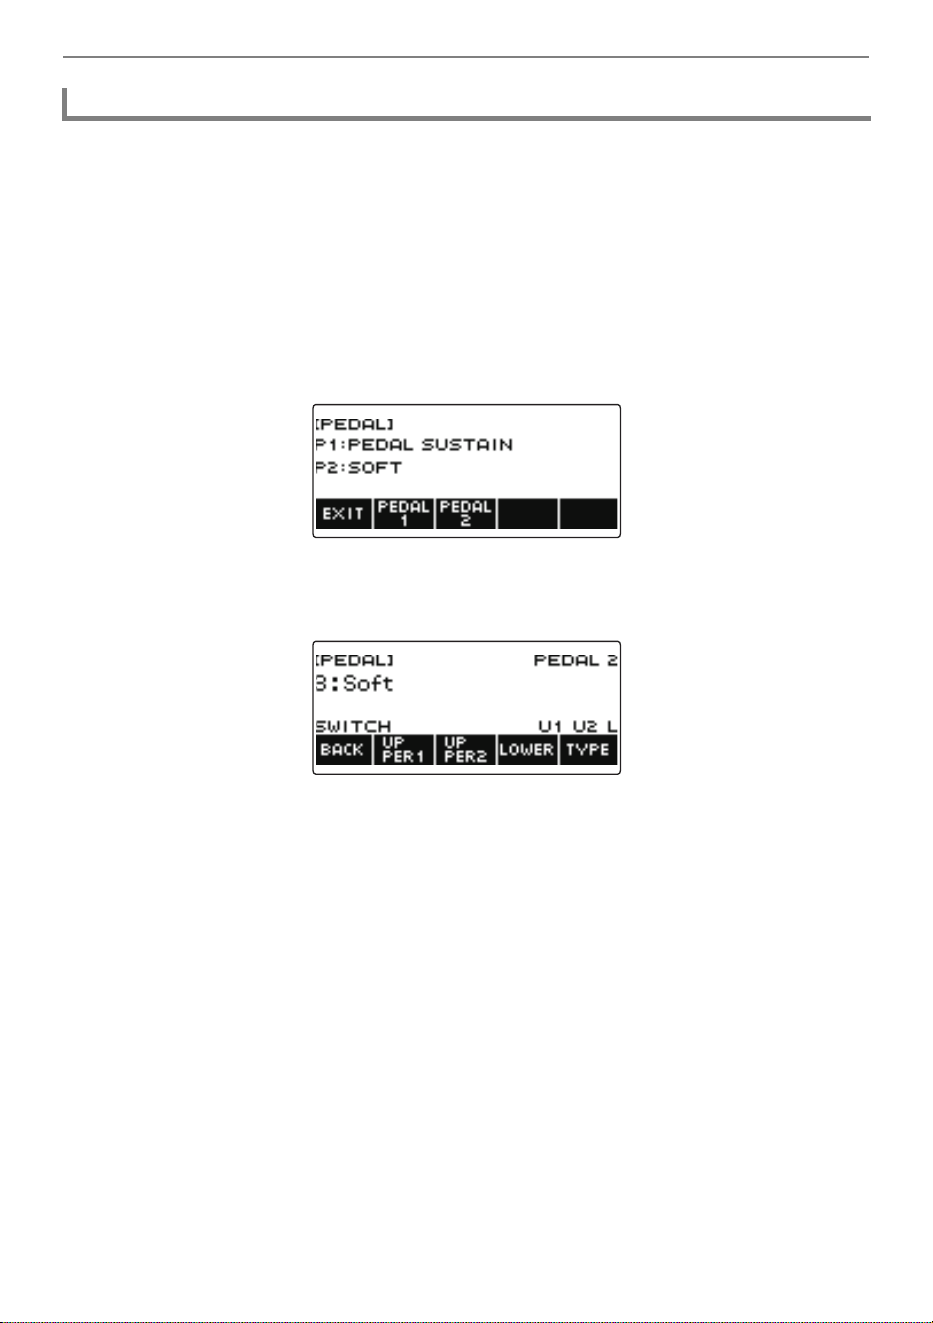
Controlling the Sound of a Performance
EN-75
1.
Connect a volume pedal to the PEDAL2/EXPRESSION jack.
• When connecting a commercially available expression pedal, refer to “Connectable Expression
Pedals” (page EN-16).
2.
Press MENU.
This displays the menu screen.
3.
Use U and I to select the 5 buttons menu that includes PEDAL.
4.
Press PEDAL.
This displays the pedal screen.
5.
Press PEDAL2.
This displays the PEDAL2 pedal setting screen.
Using Volume Pedal
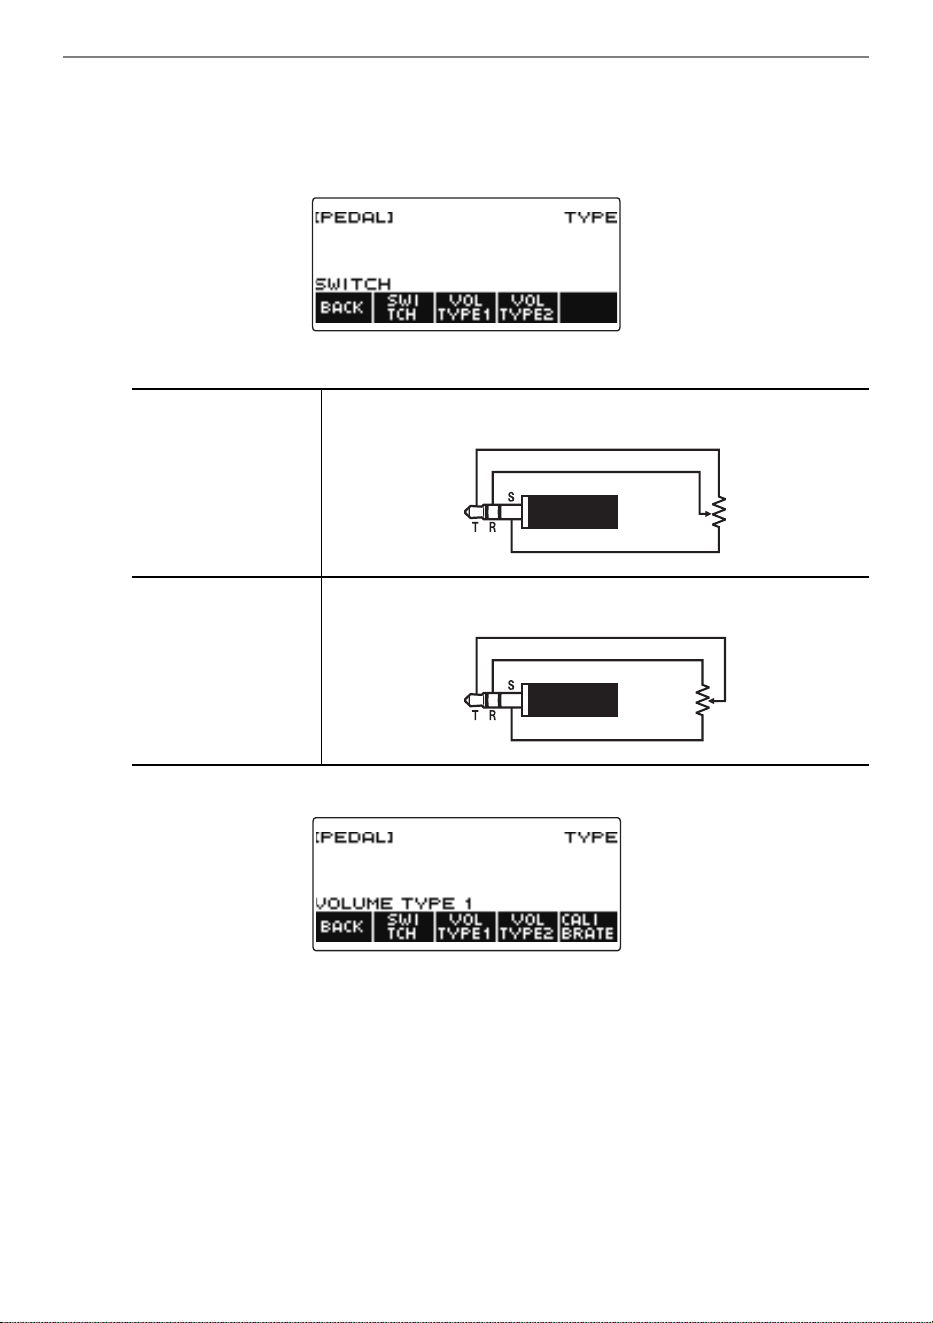
Controlling the Sound of a Performance
EN-76
■ When connecting for the first time, use the procedure below to specify the pedal type and
to calibrate the pedal.
(1) Press TYPE.
This displays the PEDAL2 pedal type setting screen.
(2) Press VOL TYPE1 or VOL TYPE2 according to the polarity of the volume pedal.
This displays “VOLUME TYPE 1” or “VOLUME TYPE 2”.
• Press SWITCH to return the pedal type setting to switch pedal. This displays “SWITCH” and
returns the pedal type setting to switch pedal.
VOL TYPE1 button Select this setting when connecting a Polarity Type 1 expression
pedal.
VOL TYPE2 button Select this setting when connecting a Polarity Type 2 expression
pedal.
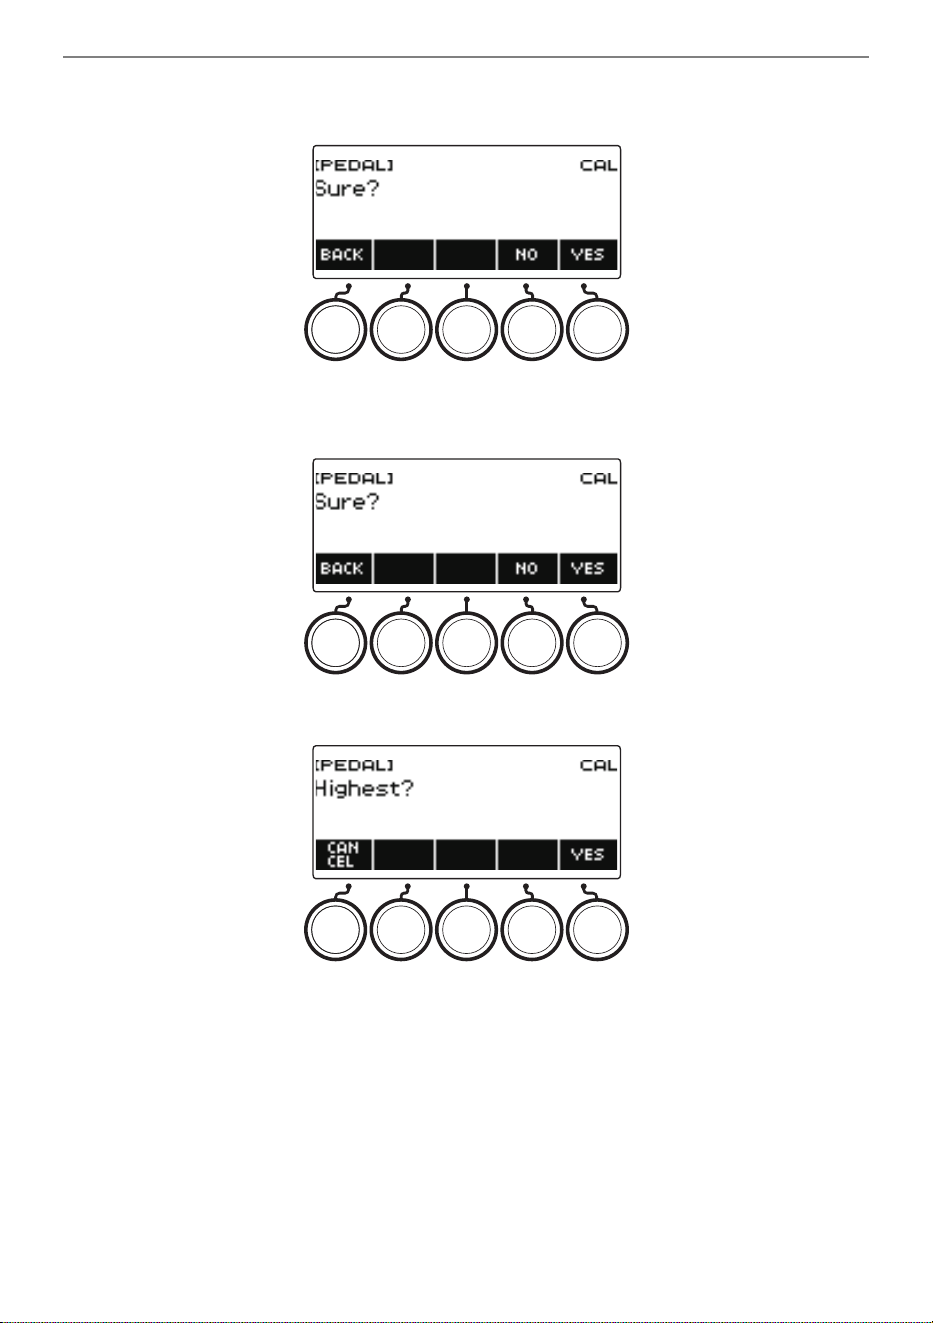
Controlling the Sound of a Performance
EN-77
(3) Press CALIBRATE.
This displays “Sure?”.
(4) Press YES.
(5) Depress the toe end of the volume pedal, and then press YES.
(6) Depress the heel end of the volume pedal and then press YES.
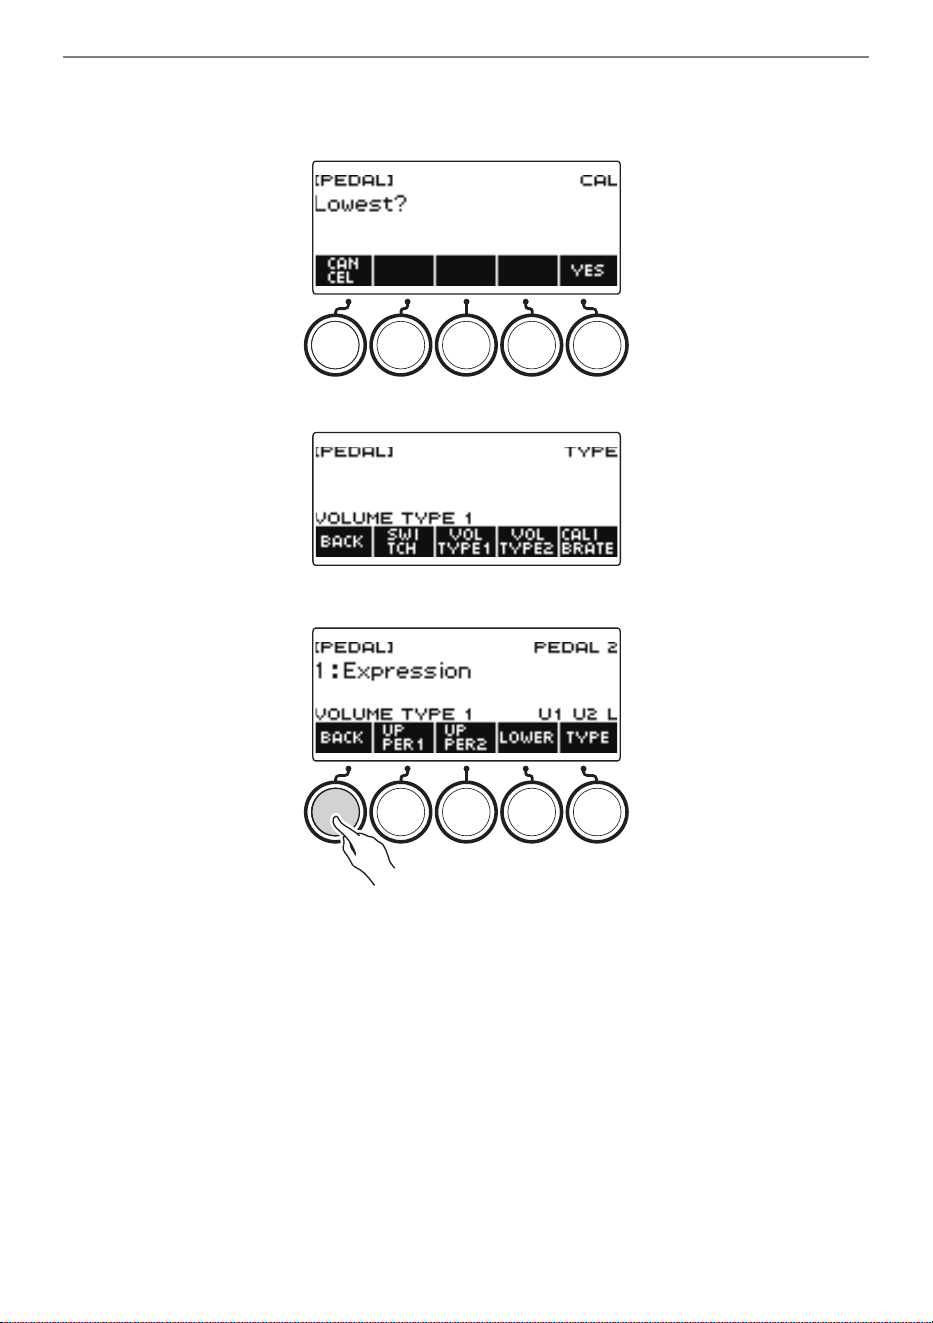
Controlling the Sound of a Performance
EN-78
(7) Press OK.
This displays the PEDAL2 pedal type setting screen.
(8) Press BACK.
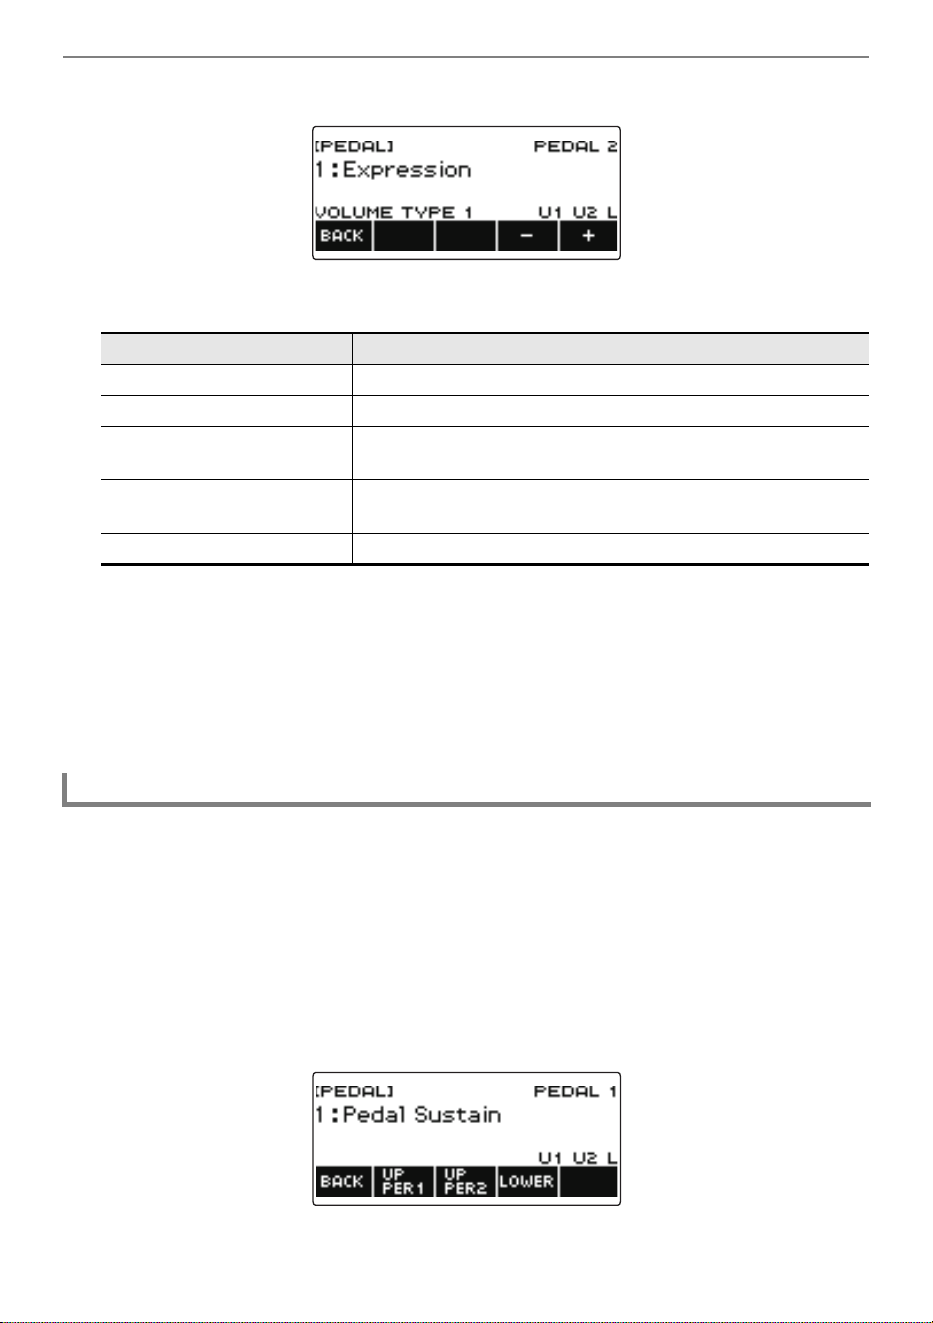
Controlling the Sound of a Performance
EN-79
6.
Rotate the dial to change the pedal function.
The table below shows the available pedal function settings.
• After you rotate the dial once to select an option, you can change the selection further using –
and +.
• To go back to the previous screen, press BACK.
7.
Press BACK to return to the pedal screen.
8.
To exit the setting operation, press EXIT.
1.
Press MENU.
This displays the menu screen.
2.
Use U and I to select the 5 buttons menu that includes PEDAL.
3.
Press PEDAL.
This displays the pedal screen.
4.
Press the button for the pedal jack whose part setting you want to change.
This displays the pedal setting screen.
Setting (Display Text) Description
Expression (Expression) Adjusts the volume level independently of the part volume.
Part Volume (Part Volume) Adjusts the part volume level.
Rhythm Volume
(Rhythm Volume)
Adjusts the rhythm volume level.
Master Volume
(Master Volume)
Adjusts the overall volume of the Digital Keyboard independent
of the volume knob.
Tempo (Tempo) Adjusts the tempo.
Disabling the Pedal Effect for Individual Parts
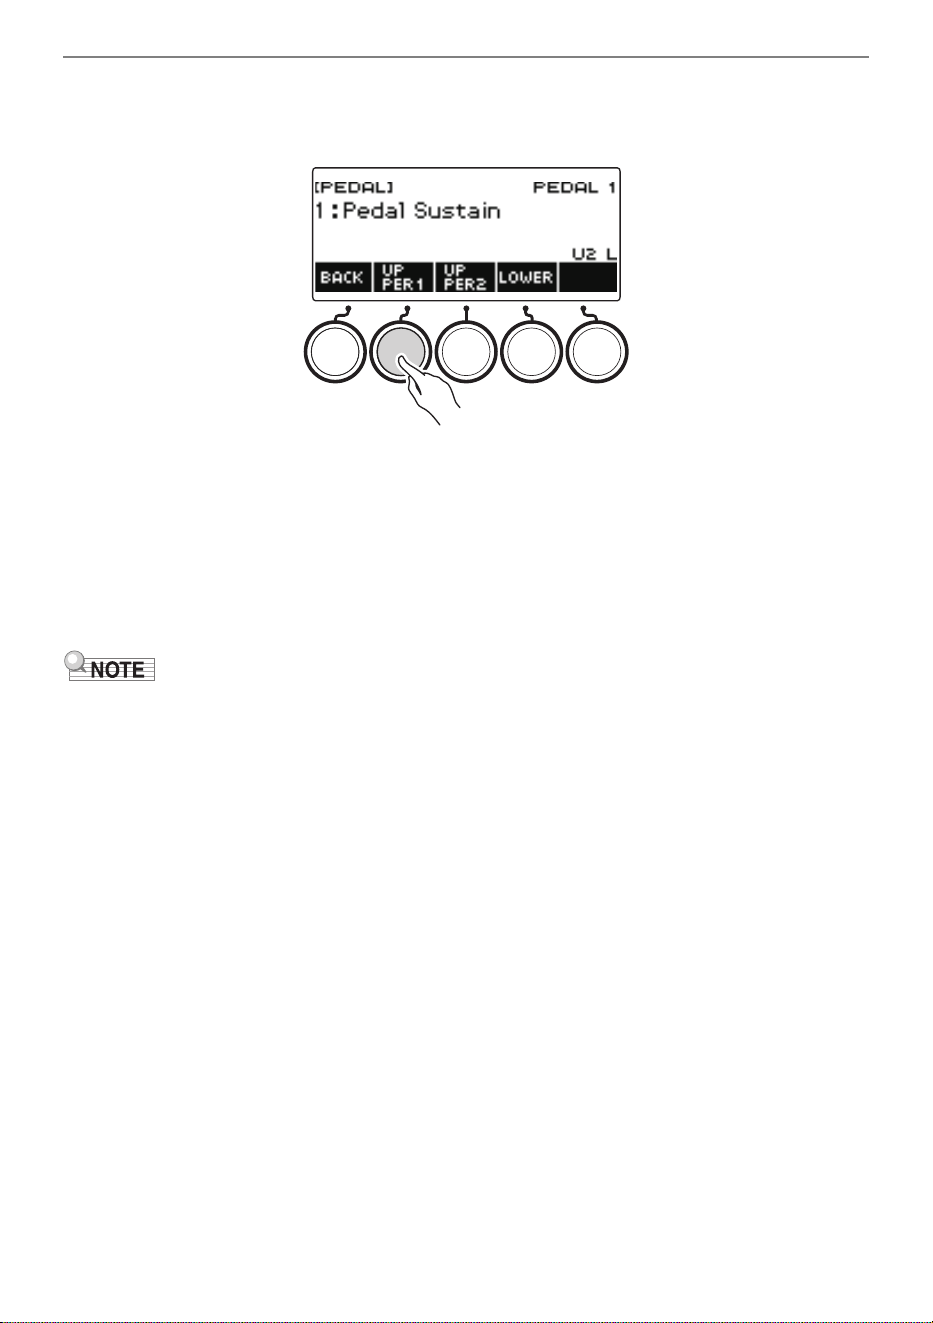
Controlling the Sound of a Performance
EN-80
5.
Press UPPER1.
“U1” disappears from the display, indicating that the pedal effect is no longer applied to the
UPPER 1 part.
6.
To apply the pedal effect to the UPPER1 part, press UPPER1 again.
• In the same way, you can stop the pedal effect from being applied to the note by pressing
UPPER2 and to the LOWER part by pressing LOWER. Pressing UPPER2 causes “U2” to
disappear from the display, while pressing LOWER causes “L” to disappear.
7.
Press BACK to return to the pedal screen.
8.
To exit the setting operation, press EXIT.
• For information about parts, see “Layering and Splitting Tones” (page EN-123).
• Pedal part settings do not affect any of the following settings: start/stop, fill-in, arpeggiator hold,
master volume, tempo.
• When layer and split are enabled, the pedal effect is applied to the corresponding UPPER2 part and
to the LOWER part in accordance with how much the pedal is depressed.
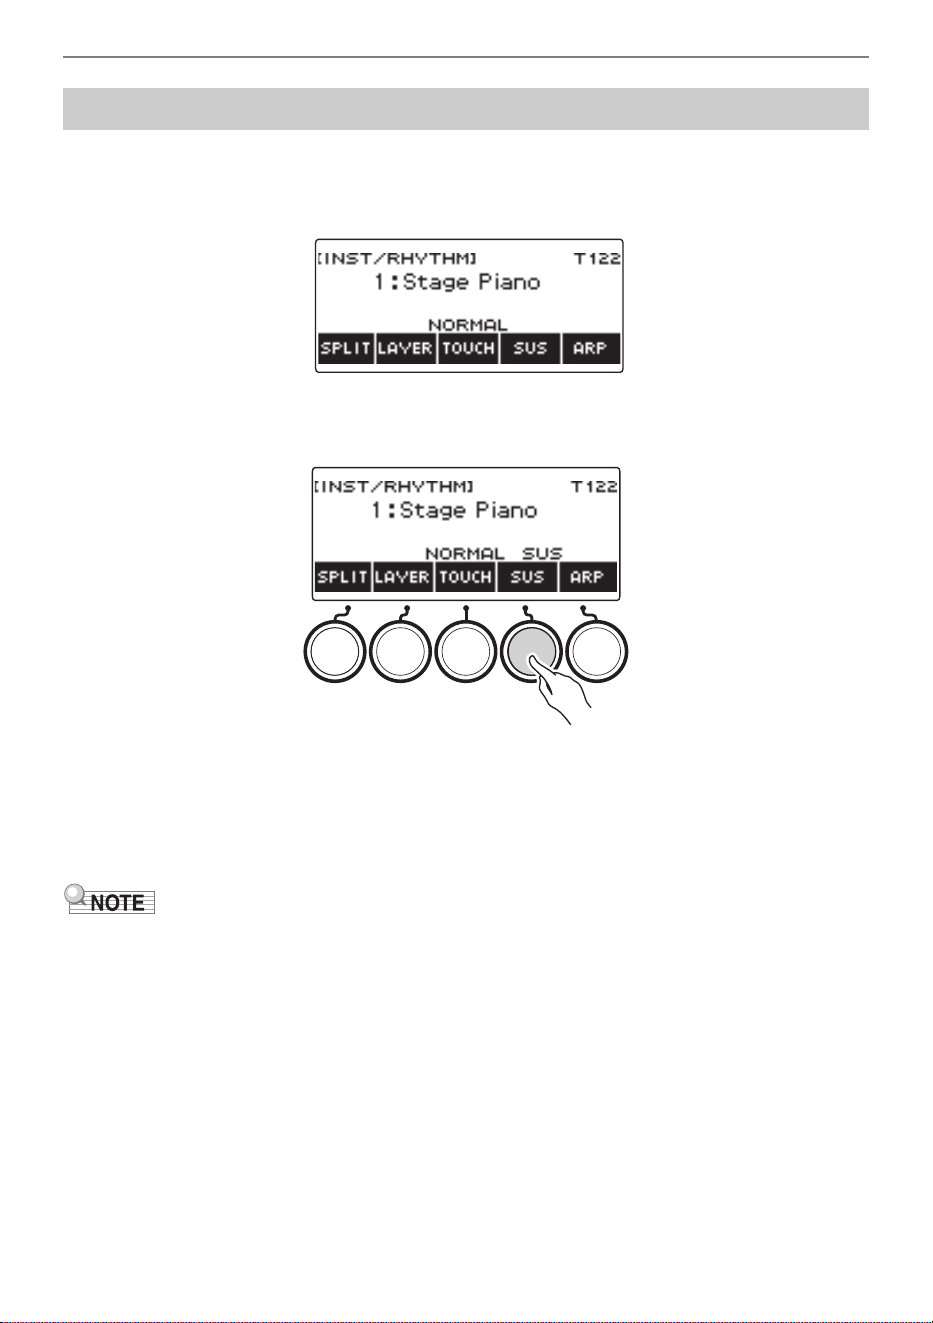
Controlling the Sound of a Performance
EN-81
While sustain is enabled, notes are sustained longer when keyboard keys are released.
1.
Press INSTRUMENT.
This displays the instrument tone screen.
2.
Press SUS.
This displays “SUS”.
• If the UPPER PORT button is displayed, switch it to the SUS button (page EN-84).
3.
Press and release keyboard keys.
The notes are sustained for a relatively long time.
4.
To disable sustain, press SUS again.
• Effects are not applied to drum tones.
Sustaining Notes After Keyboard Keys Are Released
B
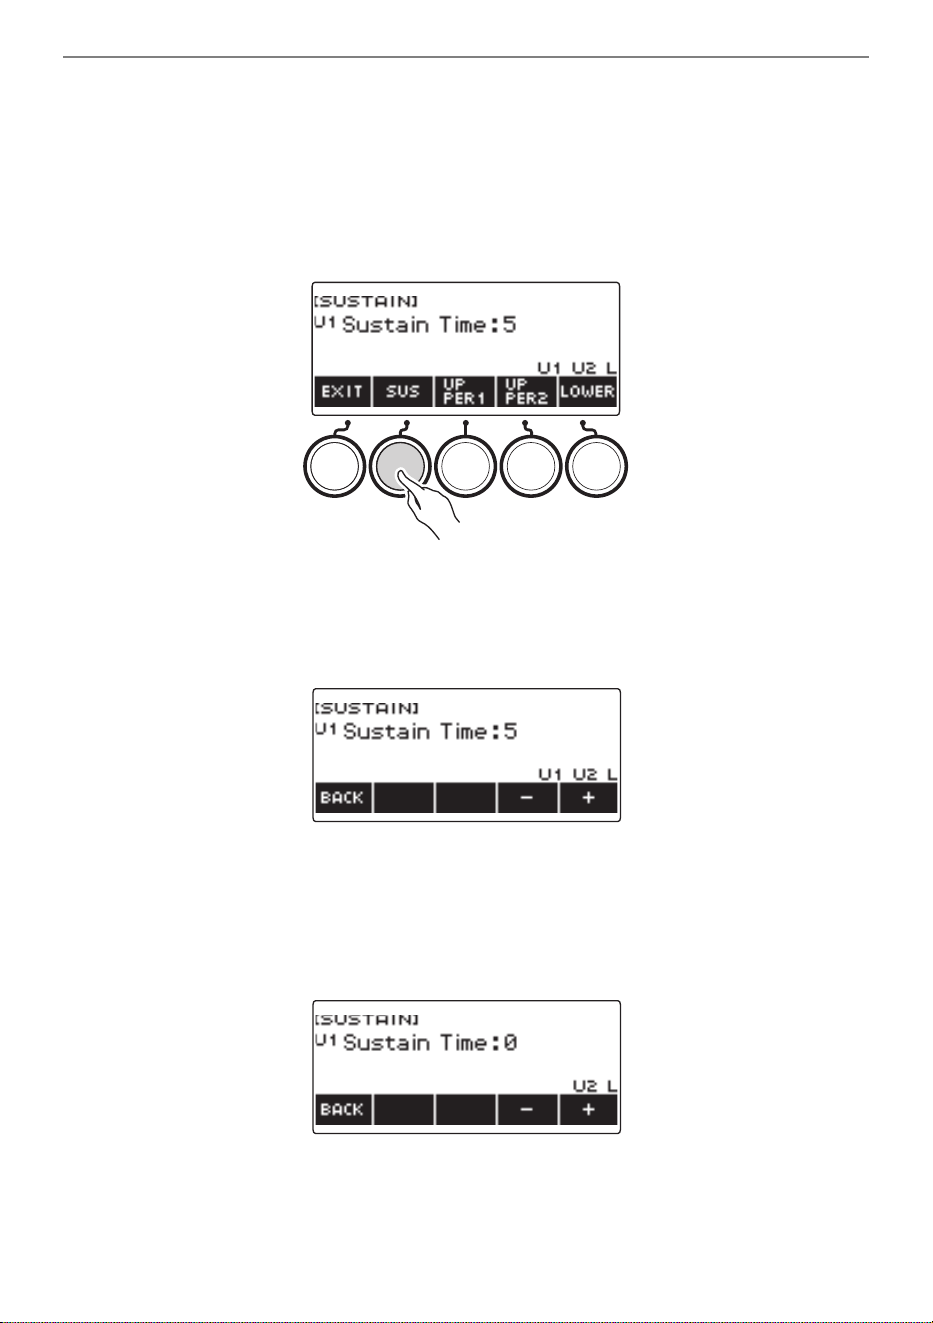
Controlling the Sound of a Performance
EN-82
■ Adjusting the Note Sustain Time
Use the procedure below to change the sustain time when sustain is enabled.
1.
Press INSTRUMENT.
This displays the instrument tone screen.
2.
Long-press SUS.
This displays the sustain screen, which shows setting items for the UPPER1 part sustain time.
3.
If required, press UPPER1, UPPER2, and LOWER to select the part whose setting
you want to configure.
4.
Rotate the dial to change the setting.
• You can set a sustain time within the range of 0 to 9.
• After you rotate the dial once to select a value, you can change the value further using – and +.
• To return the setting to its initial default, press – and + at the same time.
• To go back to the previous screen, press BACK.
• Setting a value of “0” causes the indicator for the applicable part (“U1”, “U2”, “L”) to disappear
from the display.
B

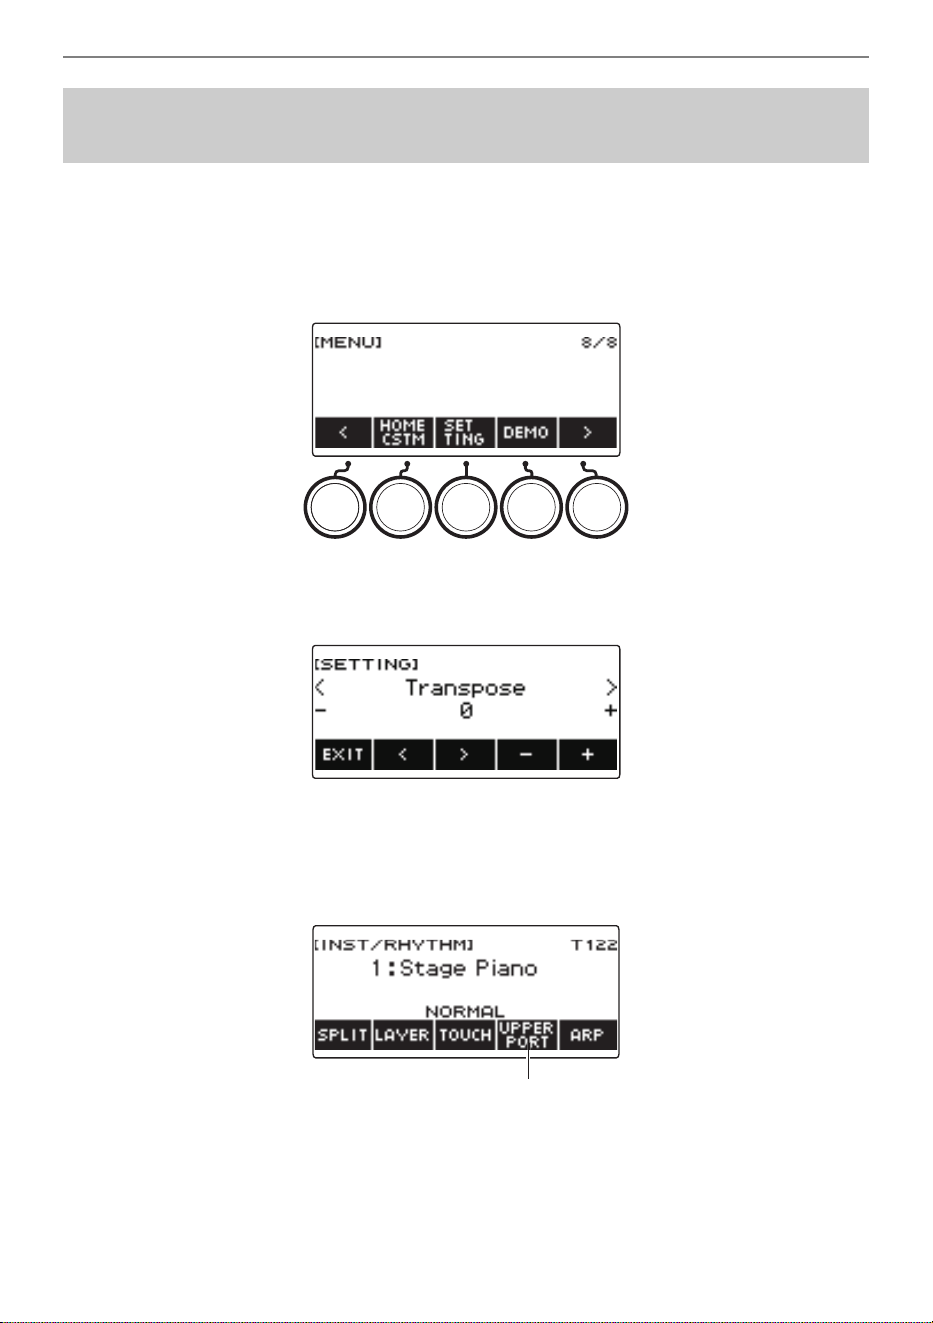
Controlling the Sound of a Performance
EN-84
A single button is used to control sustain (page EN-81) and upper portamento (page EN-85).
1.
Press MENU.
This displays the menu screen.
2.
Use U and I to select the 5 buttons menu that includes SETTING.
3.
Press SETTING.
This displays the setting screen.
4.
Use U and I to select “SUS/UPPER PORT Button”.
5.
Rotate the dial or use – and + to change the button function.
Switching from SUS to UPPER PORT displays UPPER PORT on the instrument tone screen.
6.
To exit the setting operation, press EXIT.
Switching From the SUS (Sustain) Button to the UPPER
PORT (Upper Portamento) Button
UPPER PORT
B
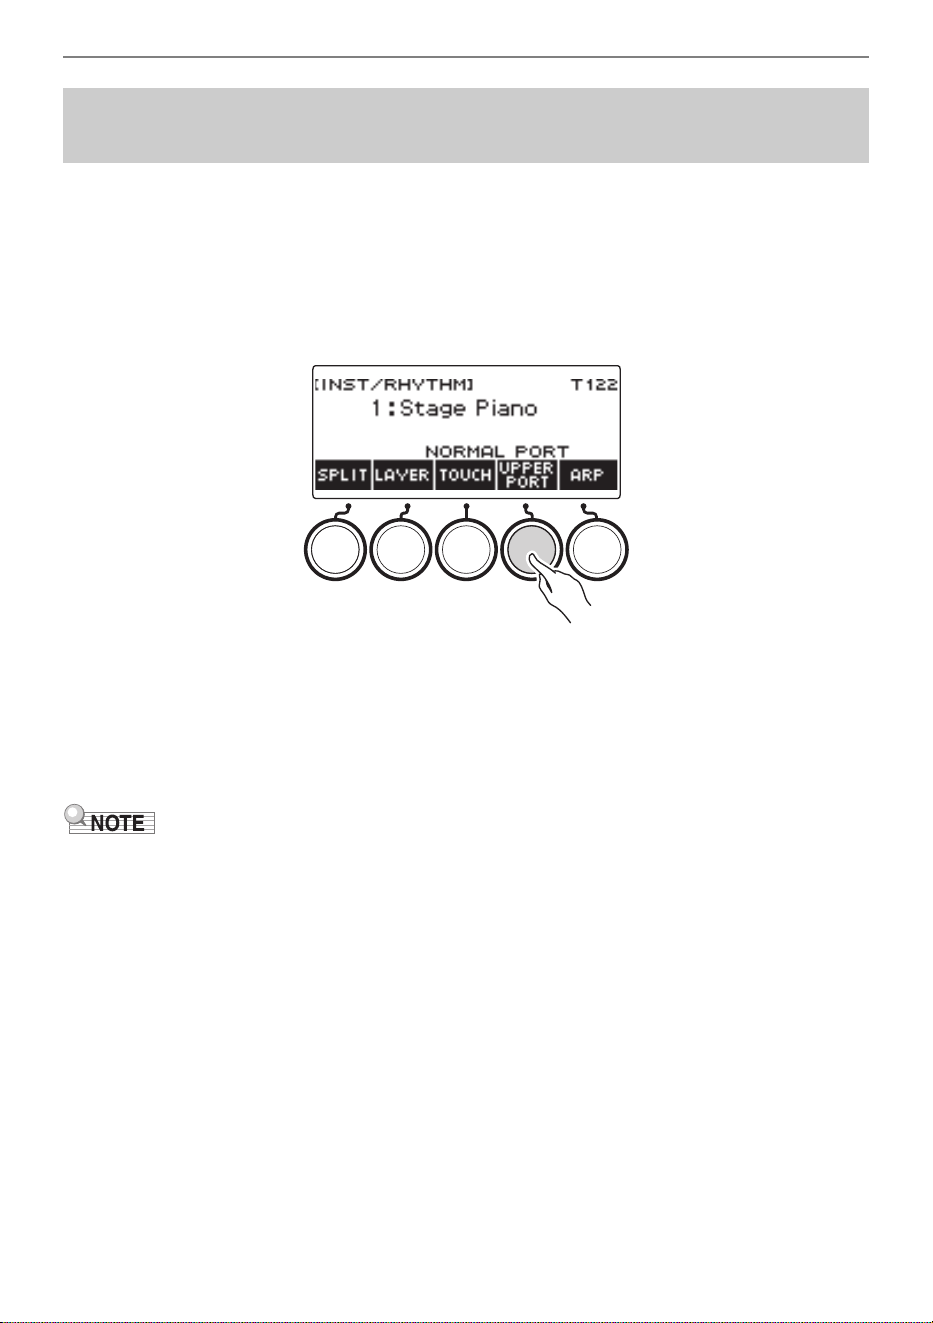
Controlling the Sound of a Performance
EN-85
Portamento makes it possible to slide smoothly between notes, as is done with string and woodwind
instruments.
1.
Press INSTRUMENT.
This displays the instrument tone screen.
2.
Press UPPER PORT.
This displays “PORT”.
• If the SUS button is displayed, switch it to the UPPER PORT button (page EN-84).
3.
After pressing upper keyboard keys, press other upper keyboard keys.
This results in smooth transitions between the upper part notes.
4.
To turn off upper portamento, press UPPER PORT again.
This causes “PORT” to disappear from the display.
• You can also turn on upper portamento by pressing MENU and then PORTAMENTO. Next, on the
portamento screen that appears, press UPPER PORT.
• For information about the Upper Part, see “Layering and Splitting Tones” (page EN-123).
• You can use upper portamento and part portamento (page EN-86) to configure portamento settings.
If you used part portamento to turn on the upper part, the notes of the turned-on upper part transition
smoothly between each other even if upper part portamento is turned off.
• Effects are not applied to drum tones.
Transitioning Smoothly Between Upper Part Notes
(Upper Portamento)
B
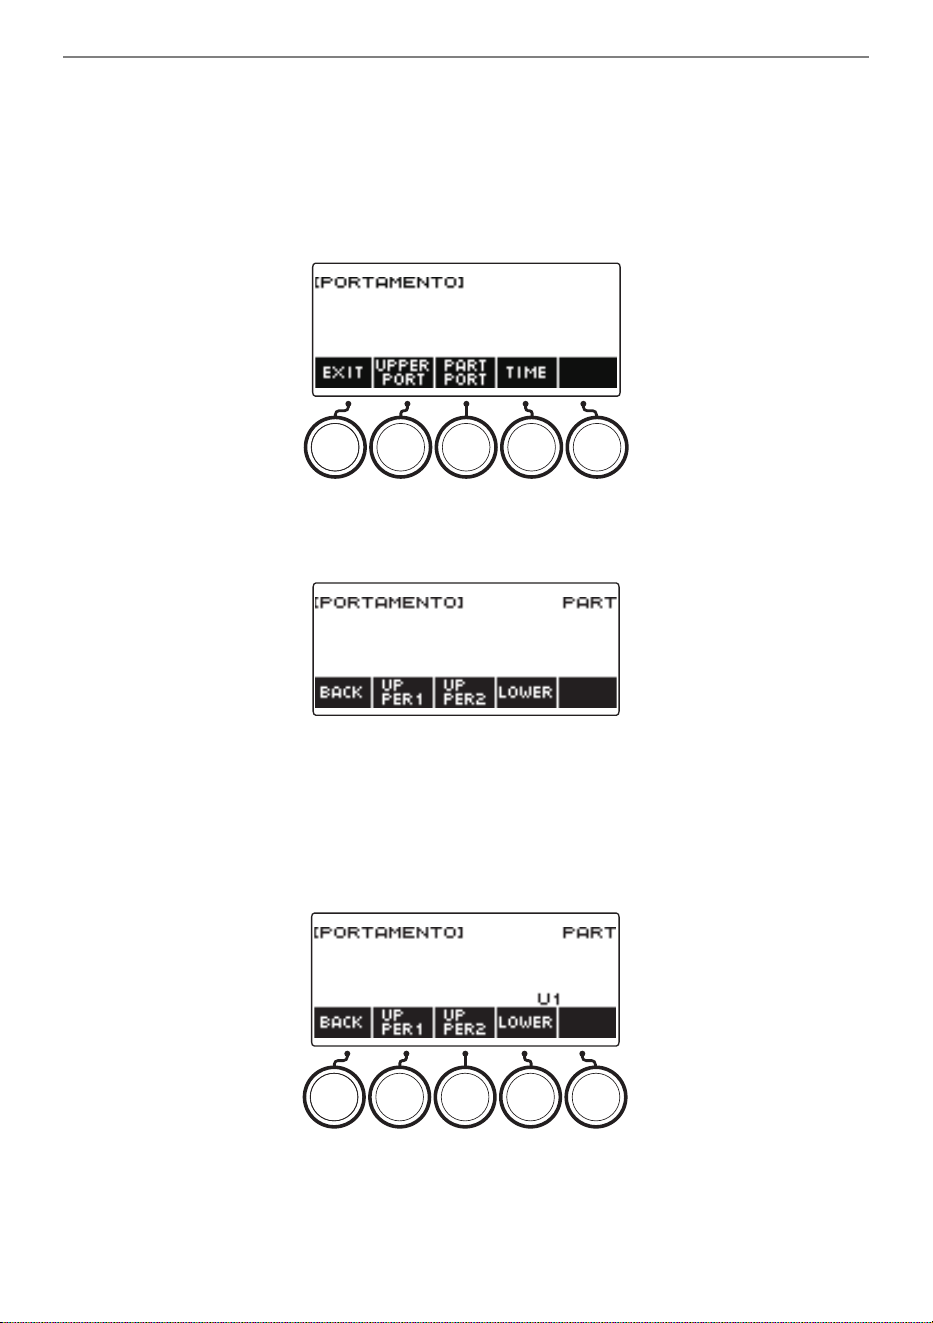
Controlling the Sound of a Performance
EN-86
■ Configuring Portamento Settings for Each Part (Part Portamento)
1.
Press INSTRUMENT.
This displays the instrument tone screen.
2.
Long-press UPPER PORT.
This displays the portamento screen.
3.
Press PART PORT.
This displays the part portamento screen.
4.
Use UPPER1, UPPER2, and LOWER to select the part whose setting you want to
configure.
• “U1”, “U2”, or “L” appear on the display depending on the selected part, and the notes of the
selected part transition smoothly between each other.
• If you press the button of the same part again, “U1”, “U2”, or “L” will disappear from the display,
and the notes of the selected part will no longer transition smoothly between each other.
B
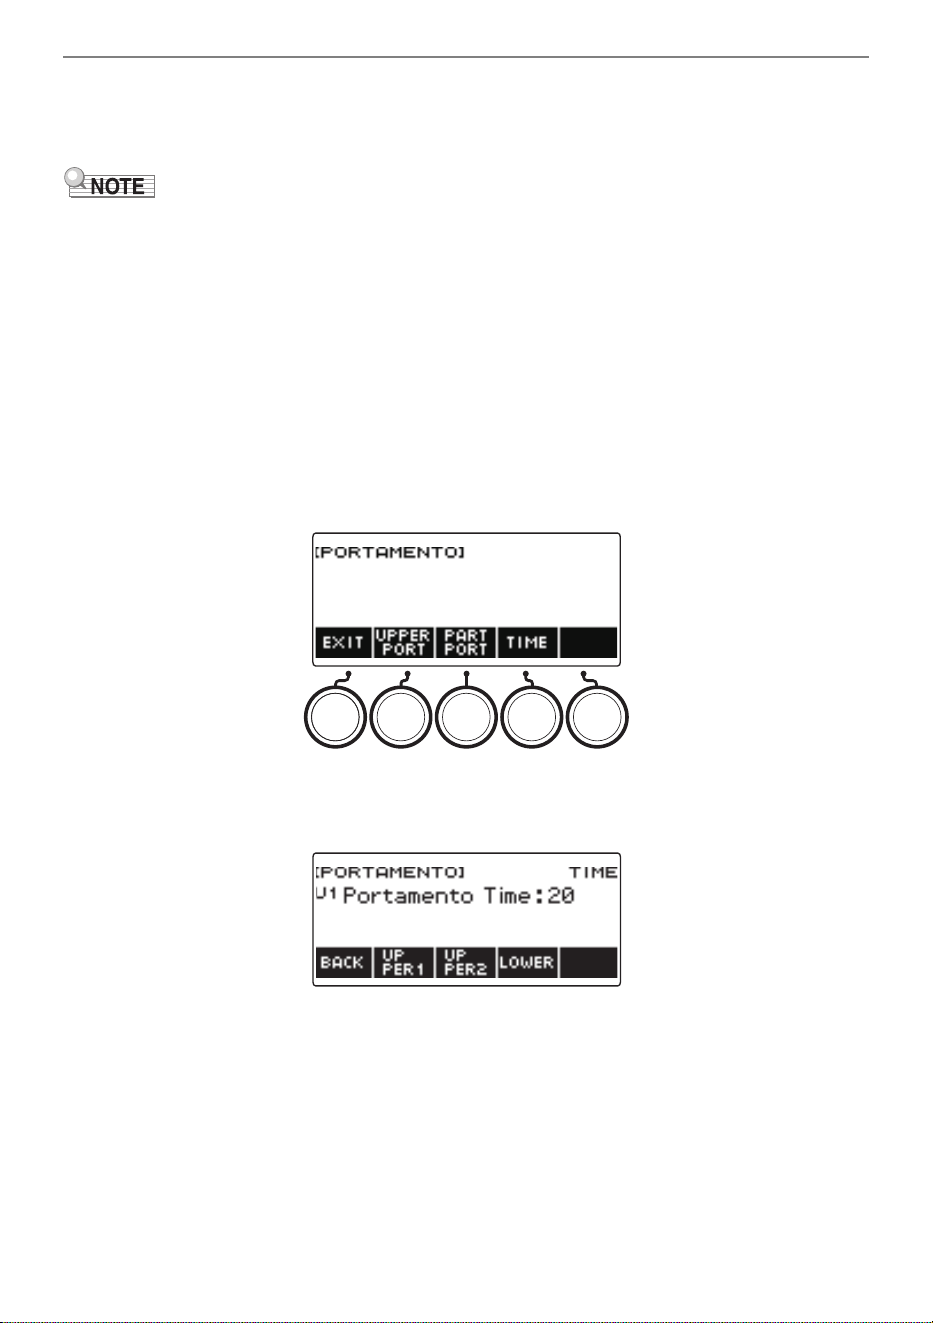
Controlling the Sound of a Performance
EN-87
5.
Press BACK to return to the portamento screen.
6.
To exit the setting operation, press EXIT.
• You can also display the portamento screen by pressing MENU and then PORTAMENTO.
• The part portamento settings for a part whose instrument tone or vocalist has been changed will be
the recommended settings for that instrument tone or vocalist.
• For information about parts, see “Layering and Splitting Tones” (page EN-123).
• Effects are not applied to drum tones.
■ To change the note connection time of each part (Part Portamento Time)
1.
Press INSTRUMENT.
This displays the instrument tone screen.
2.
Long-press UPPER PORT.
This displays the portamento screen.
3.
Press TIME.
This displays the part portamento time screen.
4.
Use UPPER1, UPPER2, and LOWER to select the part whose setting you want to
change.
B
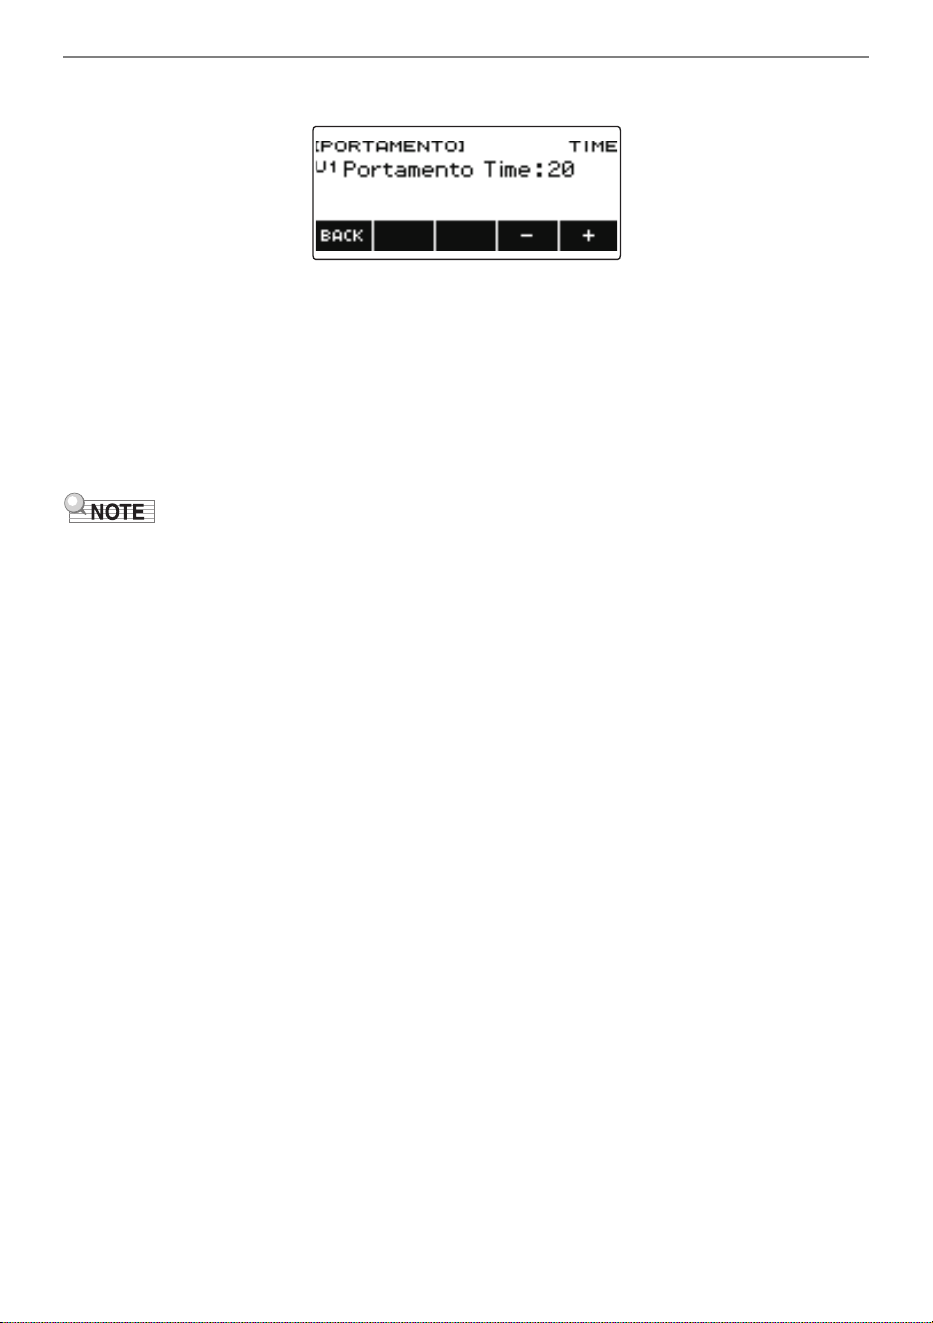
Controlling the Sound of a Performance
EN-88
5.
Rotate the dial to change the setting.
• You can specify a value from 0 to 127.
• After you rotate the dial once to select a setting, you can change the selection further using –
and +.
• To return the setting to its initial default, press – and + at the same time.
• To go back to the previous screen, press BACK.
6.
Press BACK to return to the portamento screen.
7.
To exit the setting operation, press EXIT.
• You can also display the portamento screen by pressing MENU and then PORTAMENTO.
• The part portamento time setting for a part whose instrument tone or vocalist has been changed will
be the recommended setting for that instrument tone or vocalist.
• For information about parts, see “Layering and Splitting Tones” (page EN-123).
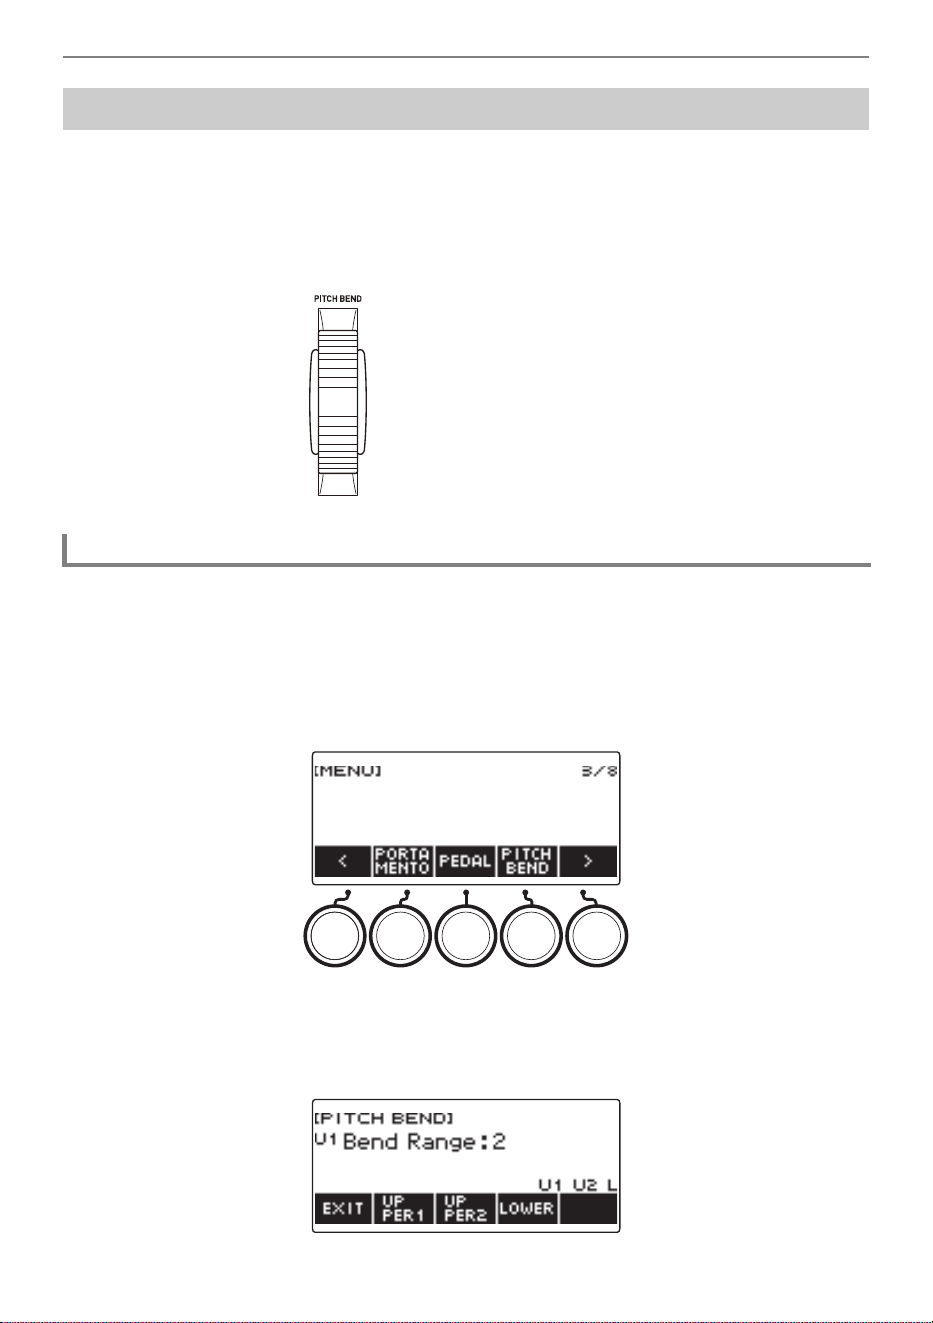
Controlling the Sound of a Performance
EN-89
You can use the pitch bend wheel to smoothly slide the pitch of notes you are playing upwards and
downwards.
1.
While playing a note on the keyboard with your right hand, rotate the PITCH
BEND wheel upwards or downwards with your left hand.
The amount the note bends depends on how much you rotate the pitch bend wheel.
You can use the procedure below to specify, in semitone units, how much the pitch of each part
changes when the PITCH BEND wheel is at maximum rotation in either direction.
1.
Press MENU.
This displays the menu screen.
2.
Use U and I to select the 5 buttons menu that includes PITCH BEND.
3.
Press PITCH BEND.
This displays the pitch bend wheel screen, which shows setting items for the UPPER1 part pitch
bend range.
Using the Pitch Bend Wheel
Changing How Much the Pitch is Affected When the Pitch Bend Wheel is Used
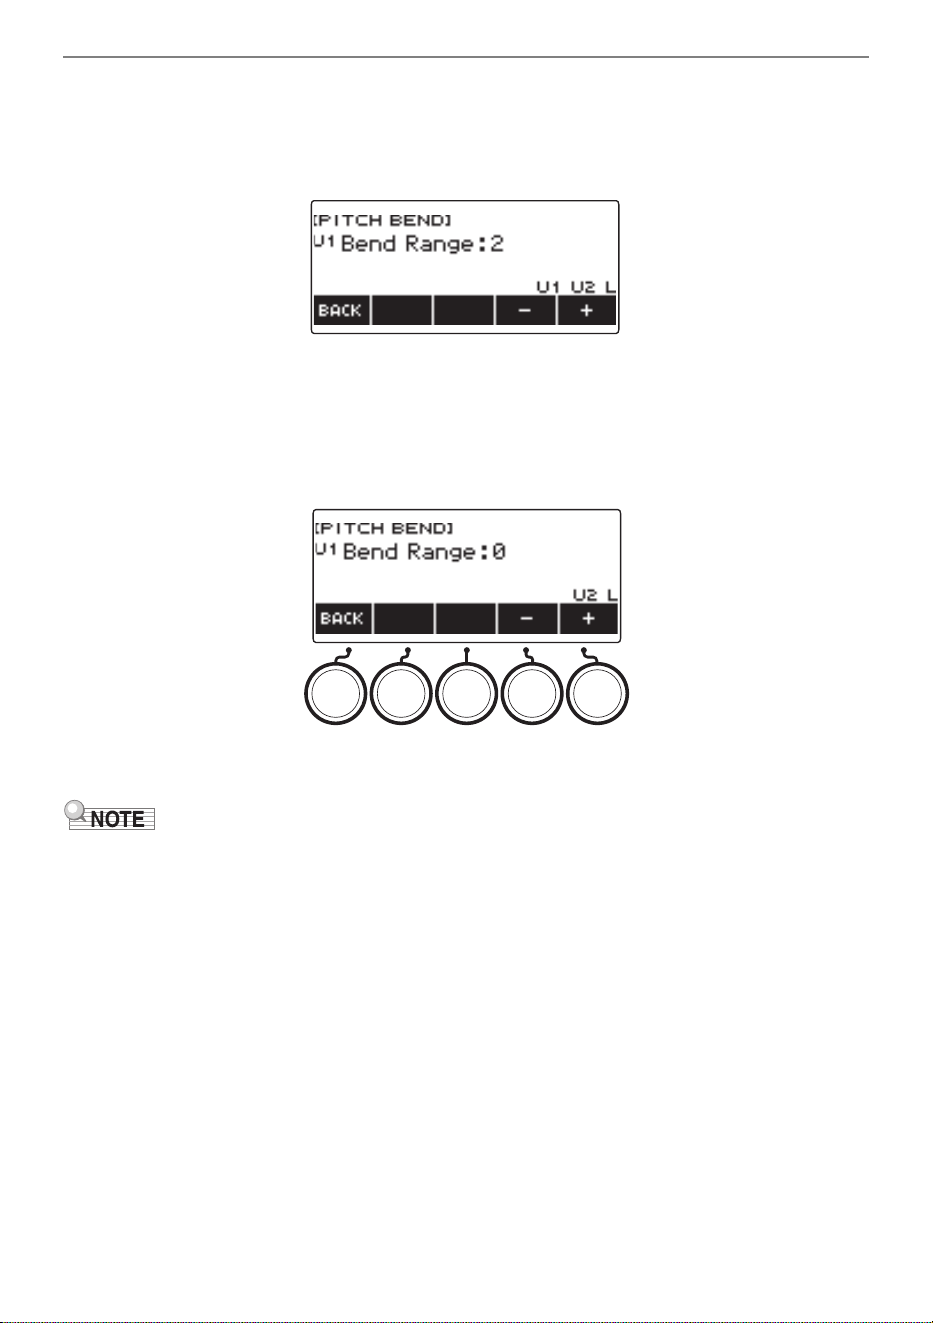
Controlling the Sound of a Performance
EN-90
4.
If required, press UPPER1, UPPER2, or LOWER to select the part whose setting
you want to configure.
5.
Rotate the dial to change the setting.
• You can specify a pitch bend in the range of 0 to 24.
• After you rotate the dial once to select a value, you can change the value further using – and +.
• To return the setting to its initial default, press – and + at the same time.
• To go back to the previous screen, press BACK.
• Setting a value of “0” causes the indicator for the applicable part (“U1”, “U2”, “L”) to disappear
from the display, and disable the pitch bend wheel effect.
6.
To exit the setting operation, press EXIT.
• For details about parts, see “Layering and Splitting Tones” (page EN-123).
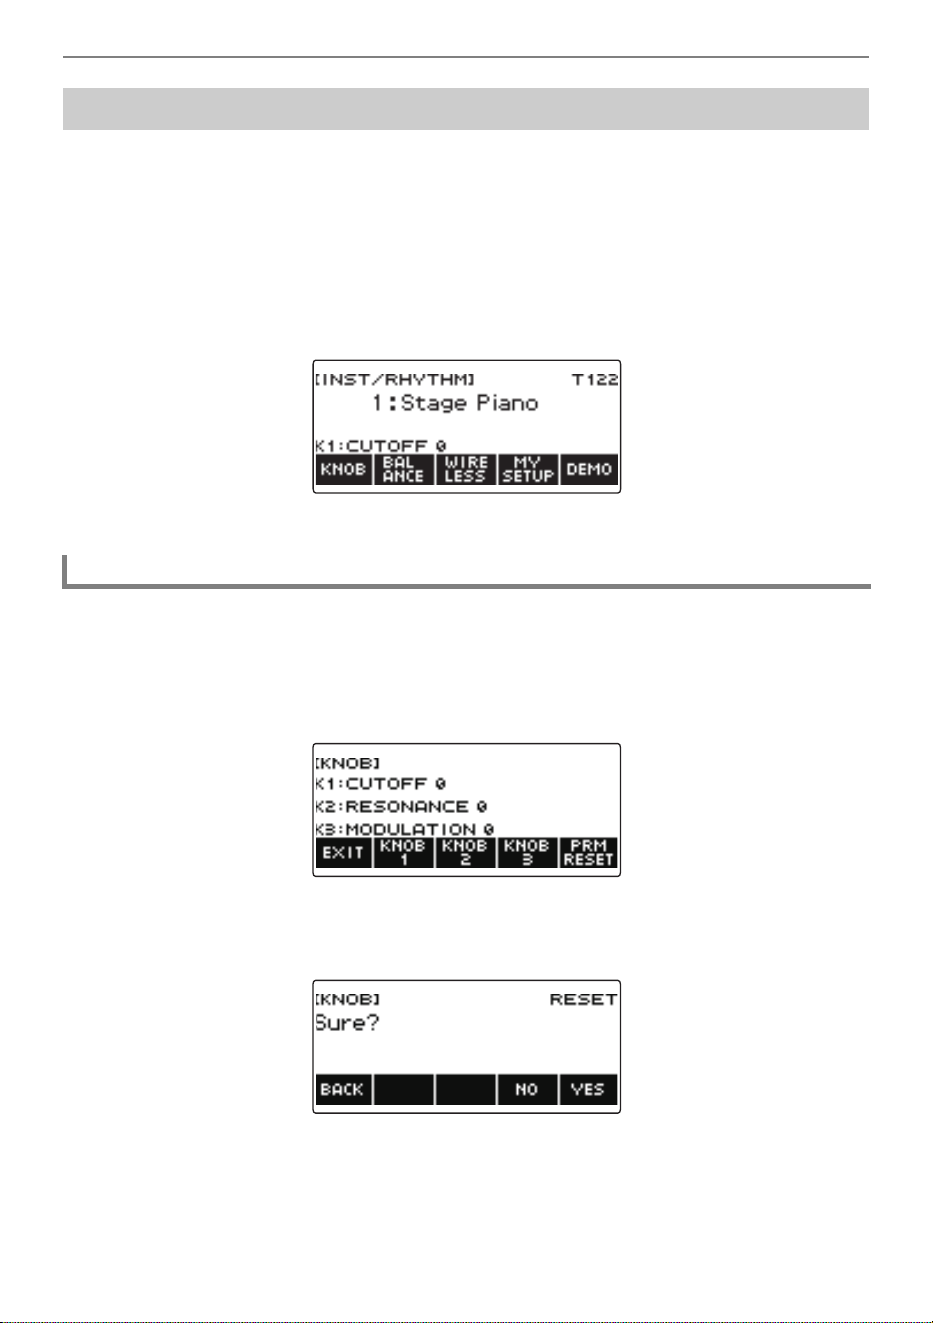
Controlling the Sound of a Performance
EN-91
You can use the Digital Keyboard’s three knobs to change the keyboard sound and add more
expressiveness to your performances.
The example below shows how to change the instrument tone.
For instrument tones, default settings are Cutoff for the K1 knob, Resonance for the K2 knob, and
Modulation for the K3 knob.
1.
Rotate a knob.
This temporarily displays the name of the function and the setting value, and applies the effect in
accordance with how far the knob was rotated.
1.
Press HOME.
This displays the home screen.
2.
Press KNOB.
This displays the knob screen.
3.
Press PRM RESET.
This displays “Sure?”.
Using the Knobs to Change the Sound
To reset the knob effect
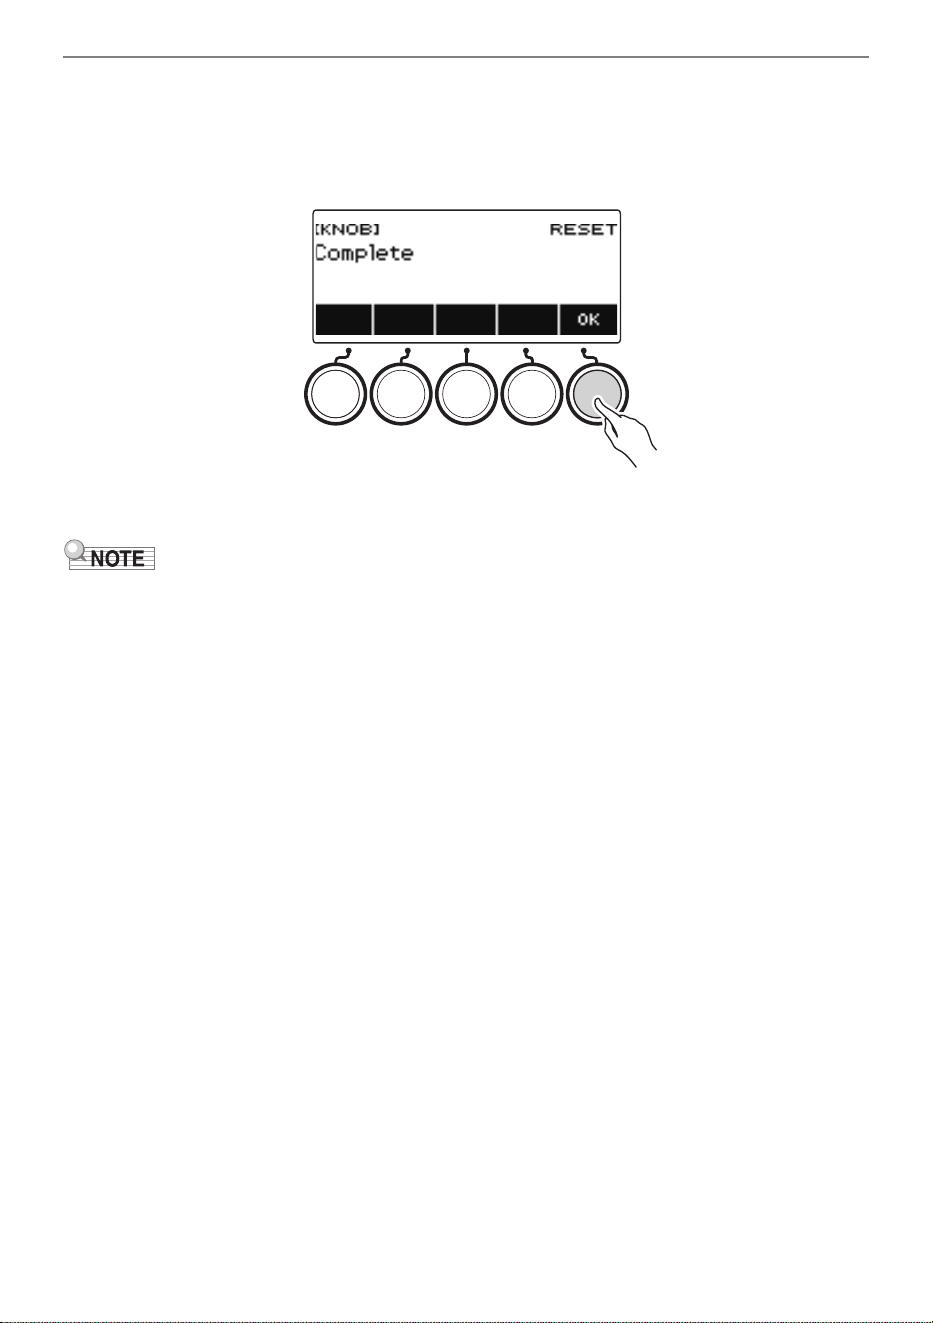
Controlling the Sound of a Performance
EN-92
4.
Press YES.
This resets the knob effect.
• To cancel, press NO.
5.
When “Complete” appears on the display, press OK.
6.
To exit the setting operation, press EXIT.
• You can also display the knob screen by pressing MENU and then KNOB.
• KNOB may not be displayed on the home screen due to the Home Customization setting.
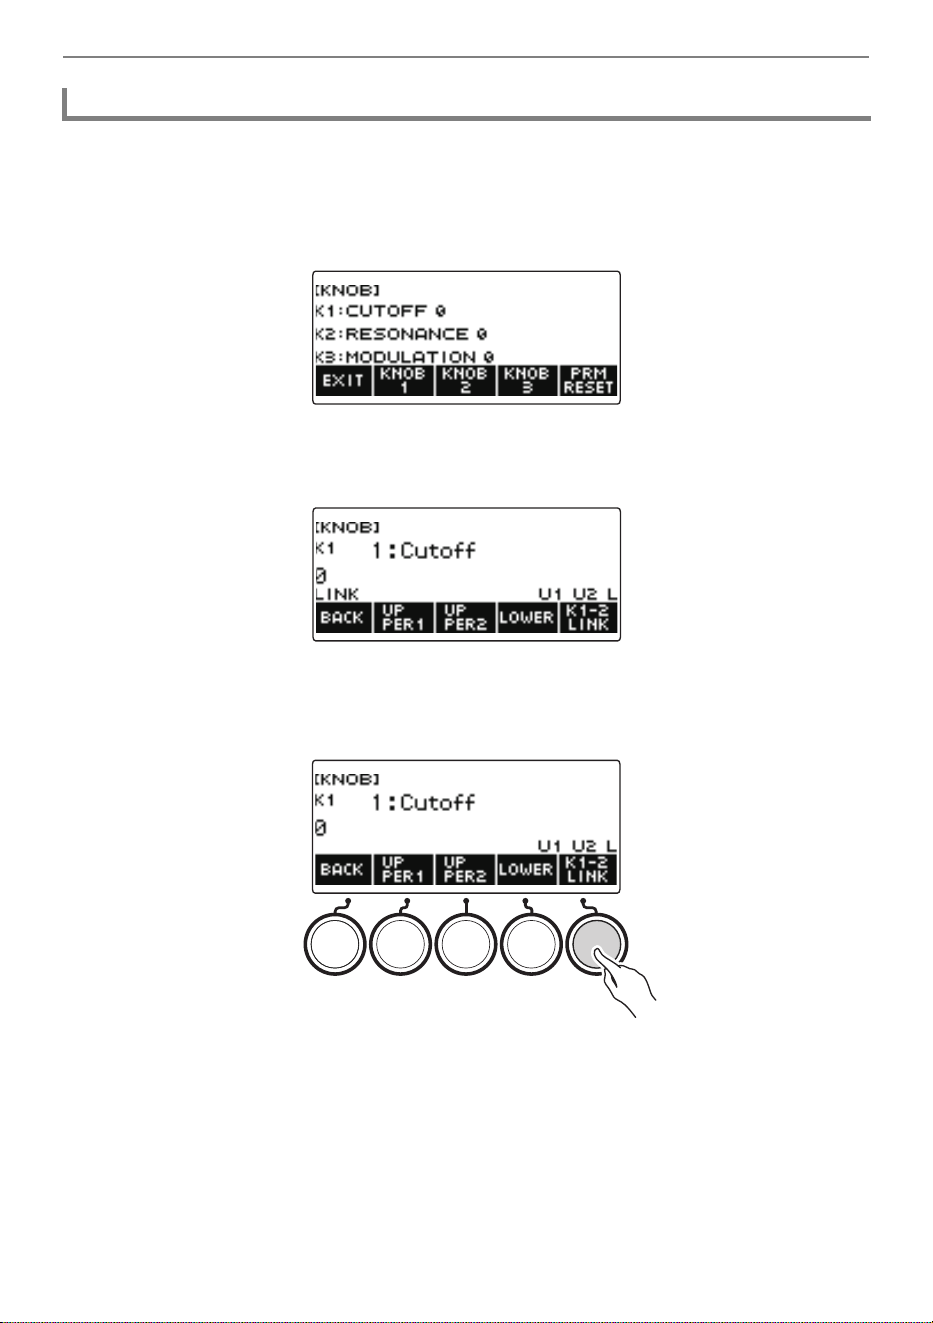
Controlling the Sound of a Performance
EN-93
1.
Press HOME.
This displays the home screen.
2.
Press KNOB.
This displays the knob screen.
3.
Press the button of the knob whose function you want to change.
This displays the knob setting screen.
• Under initial default settings, changing the function of either Knob 1 or Knob 2 will change the
other knob to the corresponding recommended function and turn on Knob K1-K2 linking.
Pressing K1-2 LINK causes “LINK” to disappear from the display and turns off Knob K1-K2
linking.
To change the knob function
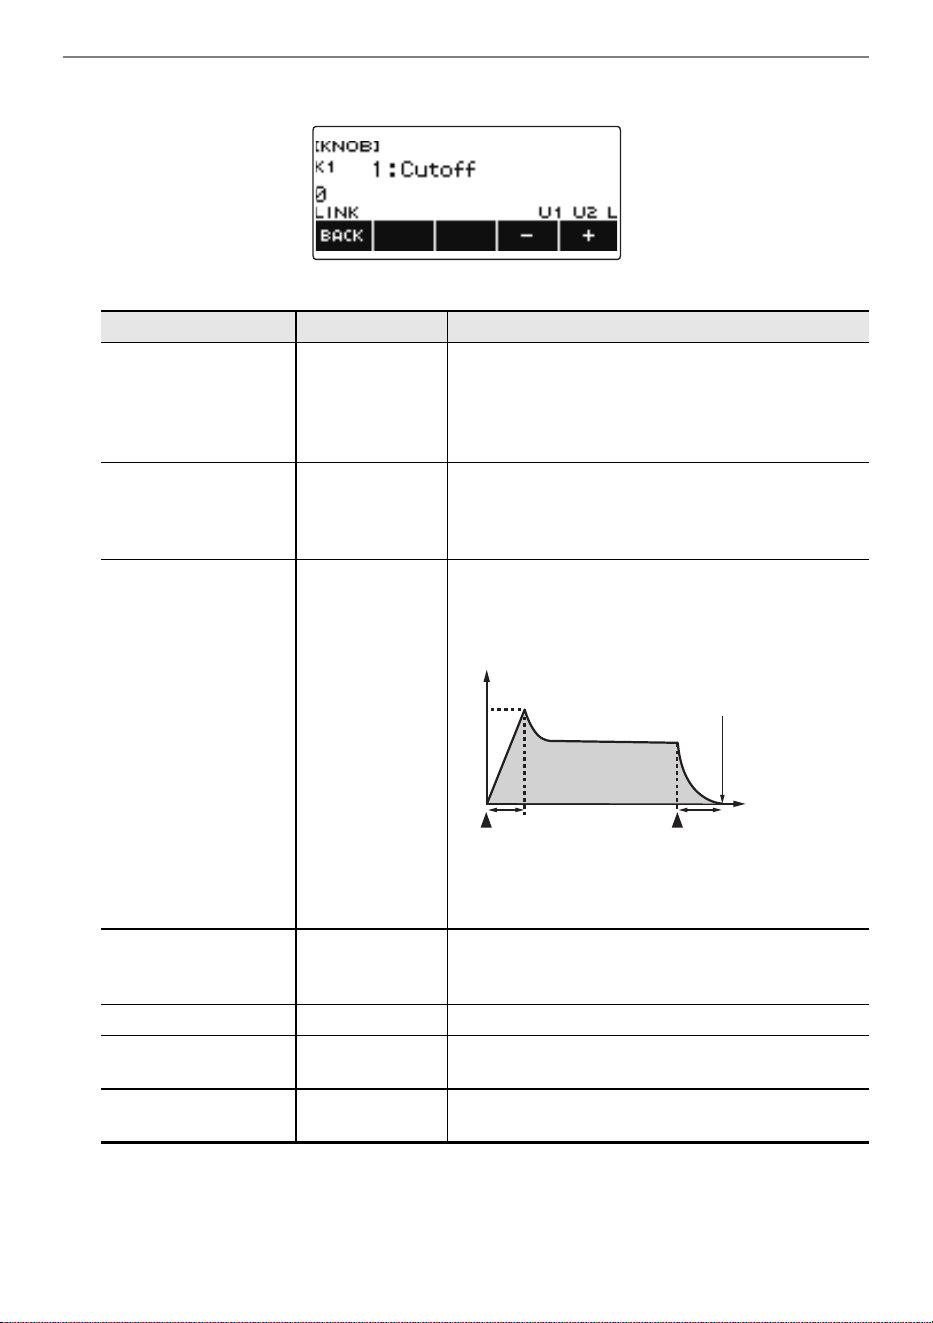
Controlling the Sound of a Performance
EN-94
4.
Rotate the dial to change the function.
Function settings you can select are shown in the table below.
Setting Indicator Description
Cutoff Cutoff Adjusts timbre by attenuating the components of a
note’s frequency characteristics that are higher than
a certain frequency (cutoff frequency). A larger
value specifies a brighter, harder sound, while a
lower value specifies a mellower, softer sound.
Resonance Resonance Adjusts the degree to which the gain of the overtone
component is increased near the frequency
specified by Cutoff. A larger value specifies a more
unusual sound.
Attack Time Attack Time Adjusts the time after a key is pressed from when
the note starts to sound until it reaches maximum
volume. A larger value specifies a slower attack.
Release Time Release Time Adjusts how long notes linger after keyboard keys
are released. A larger value specifies a longer
release.
Part Portamento Time Portamento Time Adjusts the duration of the portamento notes.
Modulation Modulation Adjusts the level of the vibrato effect of the
applicable part.
Modulation Range
Modulation Range
Adjusts the maximum pitch of the vibrato effect of a
tone.
AR
Note Volume
Note End
Time
Key press
Key release
A: Attack Time
R: Release Time
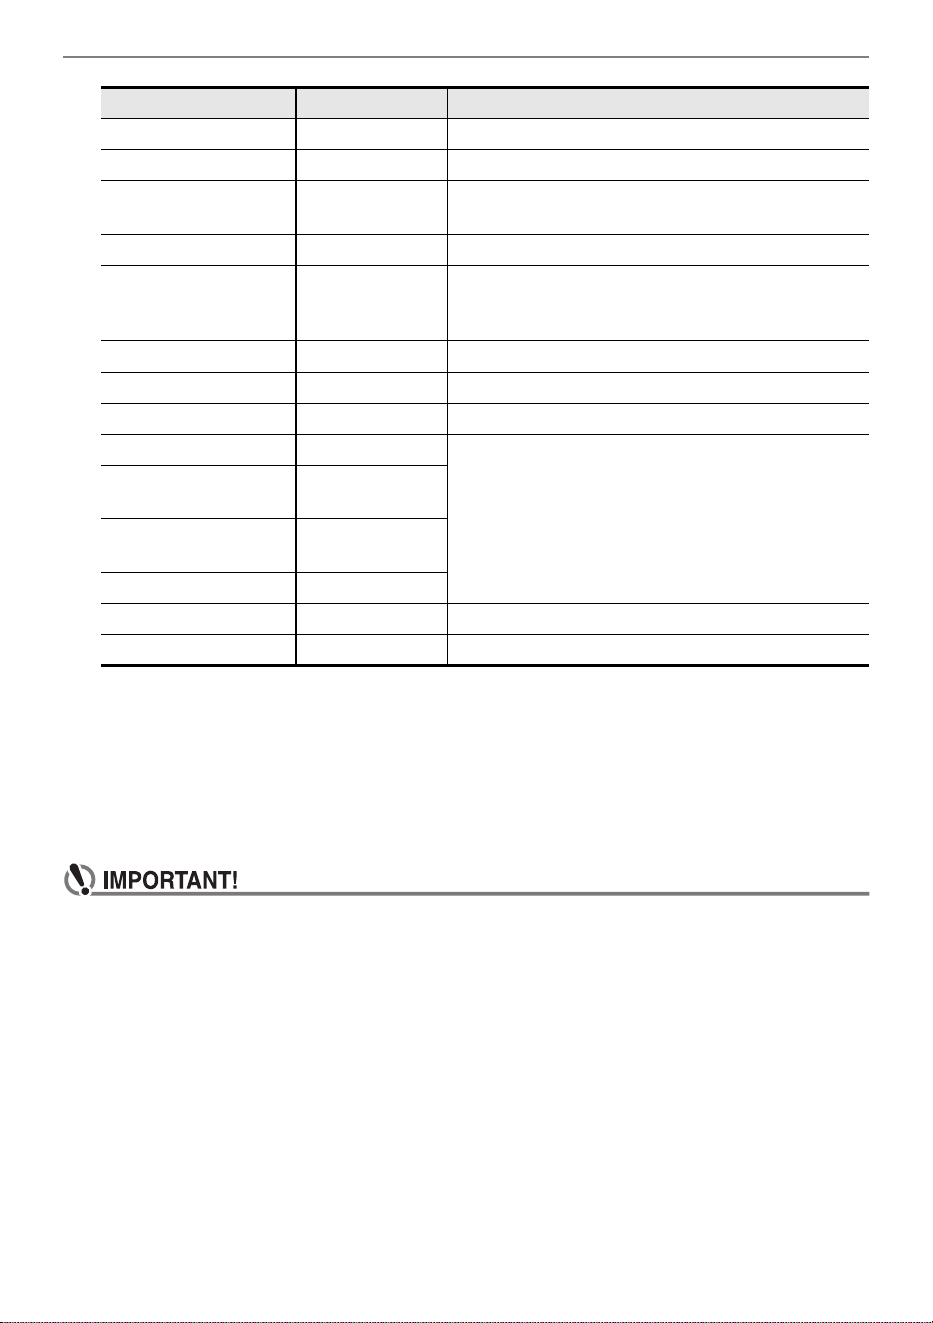
Controlling the Sound of a Performance
EN-95
• After you rotate the dial to select a value, you can change the selection further using – and +.
• To return the setting to its initial default, press – and + at the same time.
• To go back to the previous screen, press BACK.
5.
Press BACK to return to the knob screen.
6.
To exit the setting operation, press EXIT.
• Certain settings may result in strong distortion.
Vibrato Rate Vibrato Rate Adjusts the speed of vibrato of a tone.
Vibrato Depth Vibrato Depth Specifies the depth of vibrato of a tone.
Vibrato Delay Vibrato Delay Adjusts the time until the vibrato of the tone starts
after a note is sounded.
Part Volume Part Volume Adjusts the volume level of a part.
Pan Pan Adjusts the stereo center of the sound. 0 indicates
the middle, while a smaller value shifts to the left
and a larger value shifts to the right.
Reverb Send Reverb Send Specifies how much reverb is applied for each tone.
Chorus Send Chorus Send Specifies how much chorus is applied for each tone.
Delay Send Delay Send Adjusts how delay is applied to a tone.
Equalizer Low Gain EQ Low Gain Adjusts the amplification in each equalizer range.
Equalizer Midrange 1
Gain
EQ Mid1 Gain
Equalizer Midrange 2
Gain
EQ Mid2 Gain
Equalizer High Gain EQ High Gain
Equalizer Input Level EQ Input Level Adjusts the equalizer input level.
Equalizer Output Level EQ Output Level Adjusts the equalizer output level.
Setting Indicator Description

Controlling the Sound of a Performance
EN-96
• Even if you change the function of a knob, the effect applied by the previous knob function remains in
effect. To apply the effects of multiple functions and return the effects to their initial default settings,
see “To reset the knob effect” (page EN-91).
• The effect of the following functions will be the recommended value of the tone when the tone of the
corresponding part is changed.
– Cutoff
– Resonance
– Attack Time
– Release Time
– Part Portamento Time
– Modulation Range
– Vibrato Rate
– Vibrato Depth
– Vibrato Delay
– Reverb Send
– Chorus Send
– Delay Send
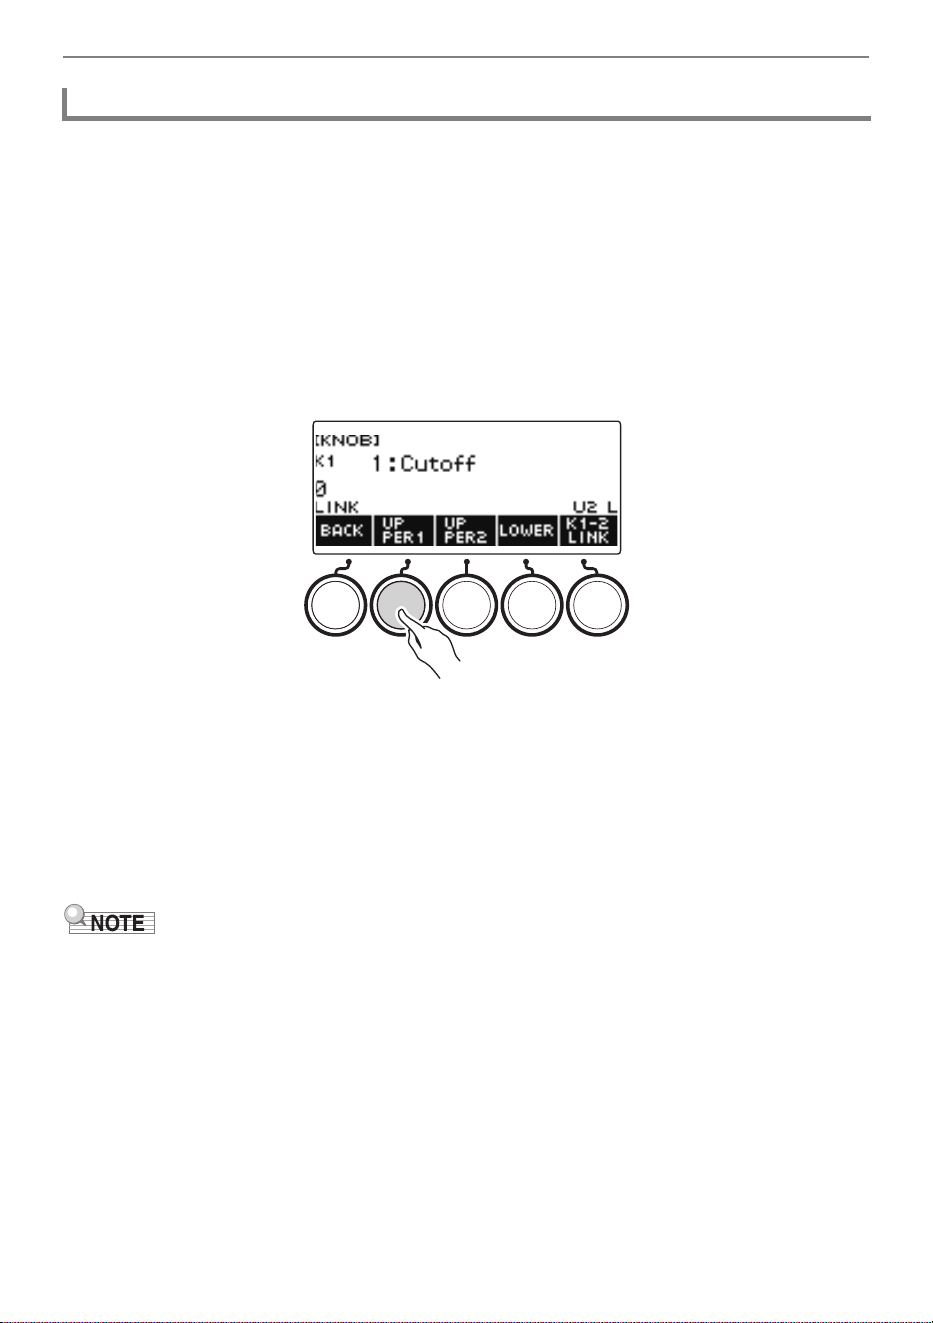
Controlling the Sound of a Performance
EN-97
1.
Press HOME.
This displays the home screen.
2.
Press KNOB.
This displays the knob screen.
3.
Press the button of the knob whose effect you want to disable.
This displays the knob setting screen.
4.
Press UPPER1.
• “U1” disappears from the display, indicating that the Knob effect is no longer applied to the
UPPER 1 part.
5.
Pressing UPPER1 again applies the knob effect to the UPPER1 part.
• In the same way, you can stop the knob effect from being applied to the UPPER2 part or
LOWER part by pressing UPPER2 or LOWER. Pressing UPPER2 causes “U2” to disappear
from the display, while pressing LOWER causes “L” to disappear.
6.
Press BACK to return to the knob screen.
7.
To exit the setting operation, press EXIT.
• For information about parts, see “Layering and Splitting Tones” (page EN-123).
• Turning on Layer and Split causes the effect to be applied to the UPPER2 part and LOWER part in
accordance with the knob rotation position.
Disabling the Knob Effect for Individual Parts

Controlling the Sound of a Performance
EN-98
■ Active DSP
A DSP (Digital Signal Processor) is a type of effect connected between the sound source and output.
DSP types are equalizer, tremolo, limiter, wah, etc. Many of the built-in tones of your Digital Keyboard
are preset with DSPs that are suited for each tone. Such tones are called “DSP tones”. Your Digital
Keyboard is equipped with Active DSP, which allows you to change DSP settings. The Digital Keyboard
DSPs that can be configured using Active DSP are configured as shown below.
• A DSP consists of one or more DSP modules (“Module” in the above illustration).
• Your Digital Keyboard comes with 100 preset DSPs. The number of DSP modules and the module
type (equalizer, tremolo, limiter, wah, etc.) are defined for each DSP.
• You can use the knobs to manipulate DSP parameters in real-time.
For an Active DSP, first you need to select a preset DSP. You can use the knobs to manipulate DSP
parameters in real-time. You can also fine-tune the parameters, if you want.
For details about DSP types, DSP modules, and the parameters of each DSP module, see the “DSP
List” on page EN-323 and the “DSP Effect List” on page EN-326.
The example below shows how to change the instrument tone.
1.
Press MENU.
This displays the menu screen.
2.
Use U and I to select the 5 buttons menu that includes ACTV DSP.
Applying the Effect You Want to a Tone (Active DSP)
Sound Source Output
DSP
Module
Bypass
1
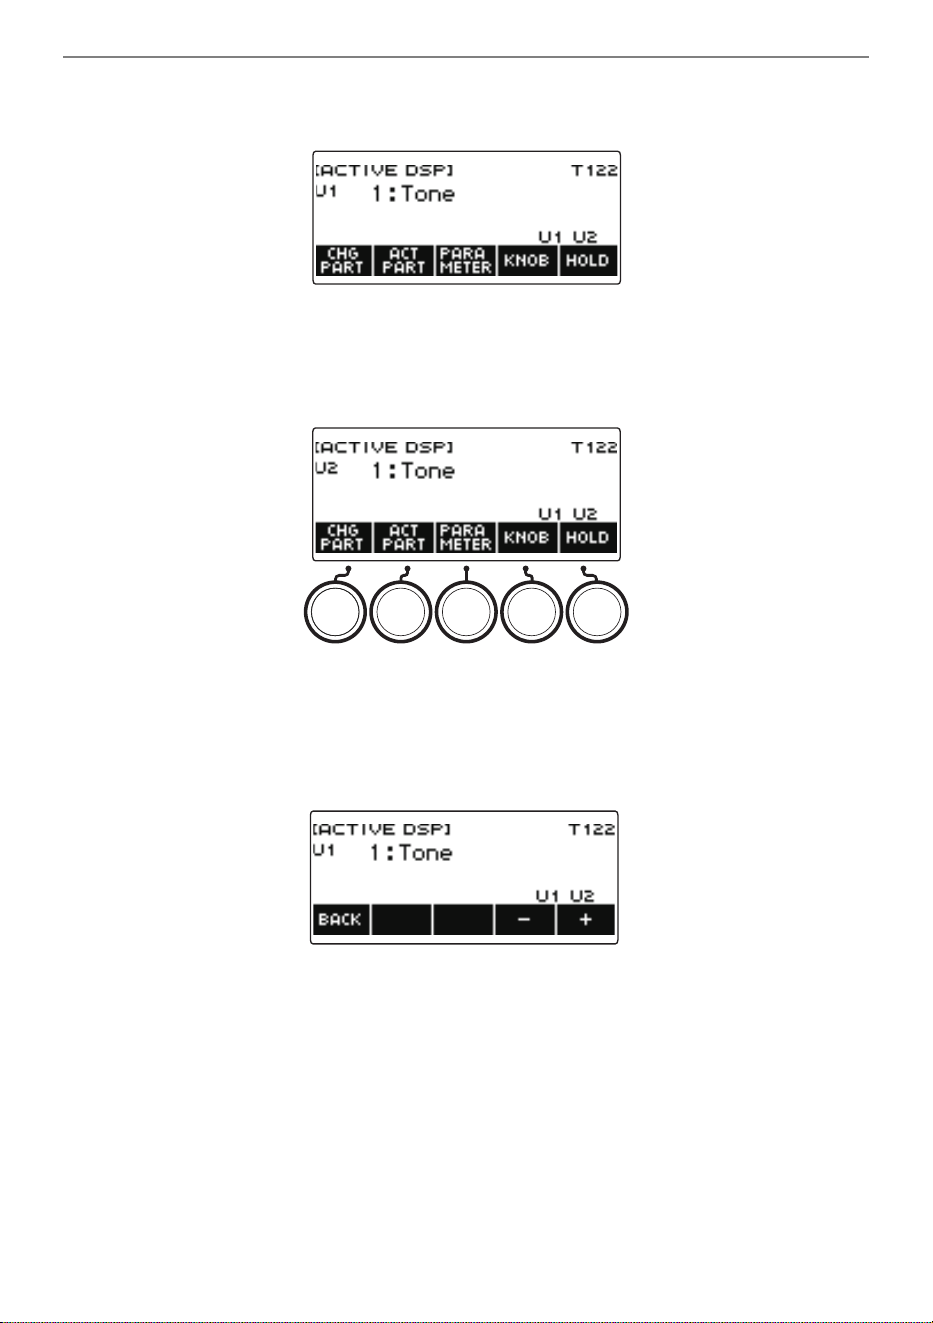
Controlling the Sound of a Performance
EN-99
3.
Press ACTV DSP.
This enables Active DSP and displays the Active DSP screen.
• Keyboard tone effects and knob functions are switched to dedicated Active DSP settings.
4.
Use CHG PART to select the part whose effect you want to change.
This causes the selected part’s indicator (“U1”, “U2”, “L”) to appear in the upper left of the display.
• Each press of CHG PART cycles between parts whose effect will be changed.
• Under initial default settings, effects are applied to the UPPER1 and UPPER2 parts only, so
even if you change the effect for the lower part, that effect is not applied. For information about
applying an effect to the lower part, see “To change the part where the effect is applied” on page
EN-101.
5.
Rotate the dial to change the effect to apply to the part.
• You can select an effect value from 1 to 101.
• The “1:Tone” setting applies effects that depend on the selected keyboard tone. The knob
function also changes to the recommended parameters for that effect.
• After you rotate the dial once to select a value, you can change the value further using – and +.
• To go back to the previous screen, press BACK.

Controlling the Sound of a Performance
EN-100
6.
Active DSP is also turned off if you press HOME or if you exit the Active DSP
screen some other way.
• The effects and knob functions applied to keyboard tones return to the settings in effect before
Active DSP was turned on.
• You can use other functions with Active DSP left turned on. See “To use other functions with
Active DSP turned on” (page EN-106).
• Changing the effect causes the knob functions to change to the parameters recommended for the
effect.
• If the parameters have been changed (page EN-103), changing the effect will reset the parameters
to their initial default settings.
• If the knob functions are recommended parameters for an effect, they will be assigned to the knobs
in recommendation descending order (most recommended to least).
• For information about parts, see “Layering and Splitting Tones” (page EN-123).
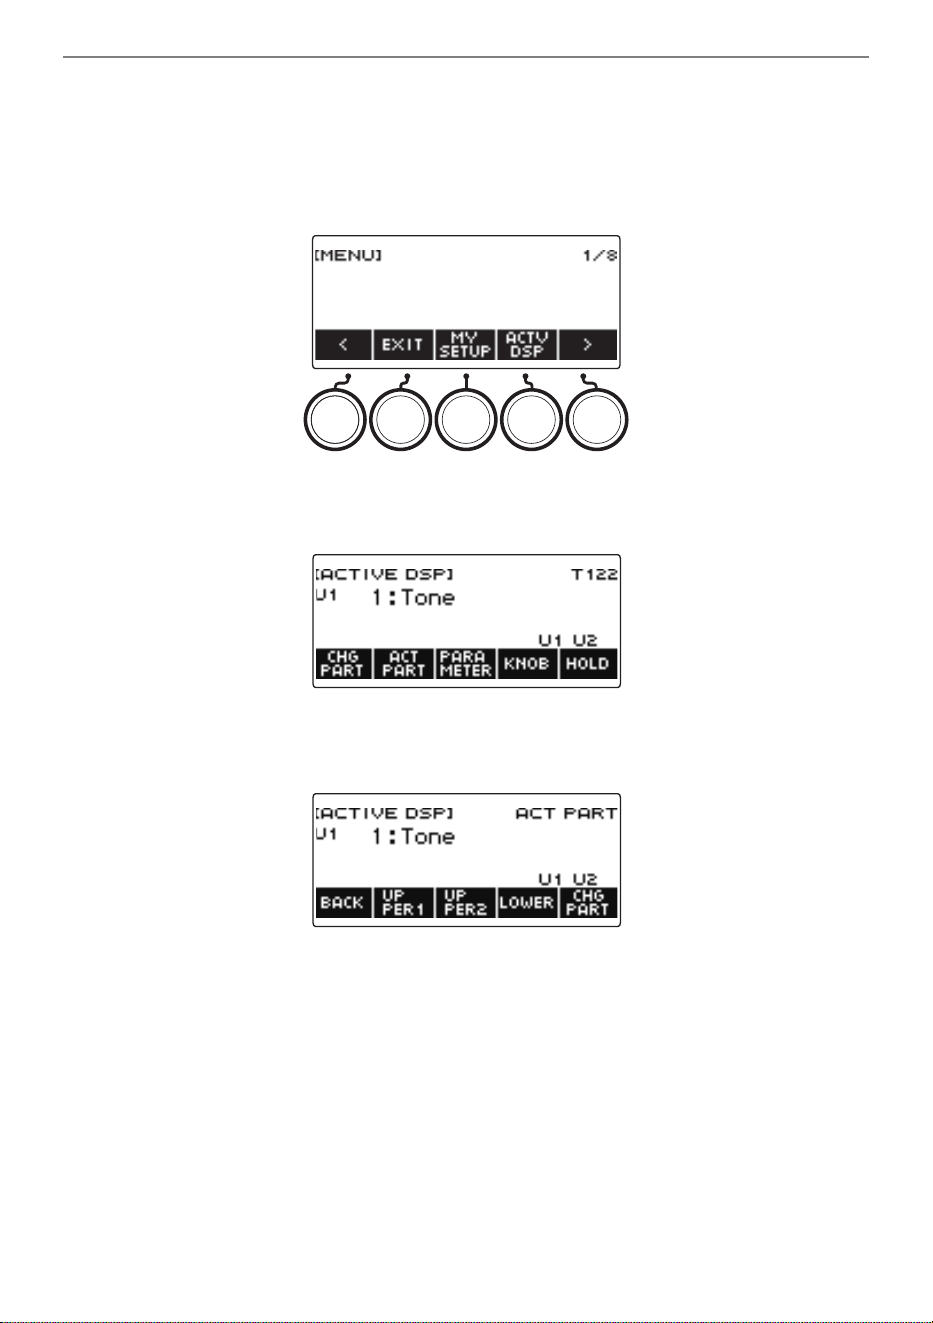
Controlling the Sound of a Performance
EN-101
■ To change the part where the effect is applied
1.
Press MENU.
This displays the menu screen.
2.
Use U and I to select the 5 buttons menu that includes ACTV DSP.
3.
Press ACTV DSP.
This turns on Active DSP and displays the Active DSP screen.
4.
Press ACT PART.
This displays the Active DSP part setting screen.
• On this screen as well, you can press CHG PART to select the part whose effect you want to
change the effect, or you can turn a dial to change the effect applied to the part.
1
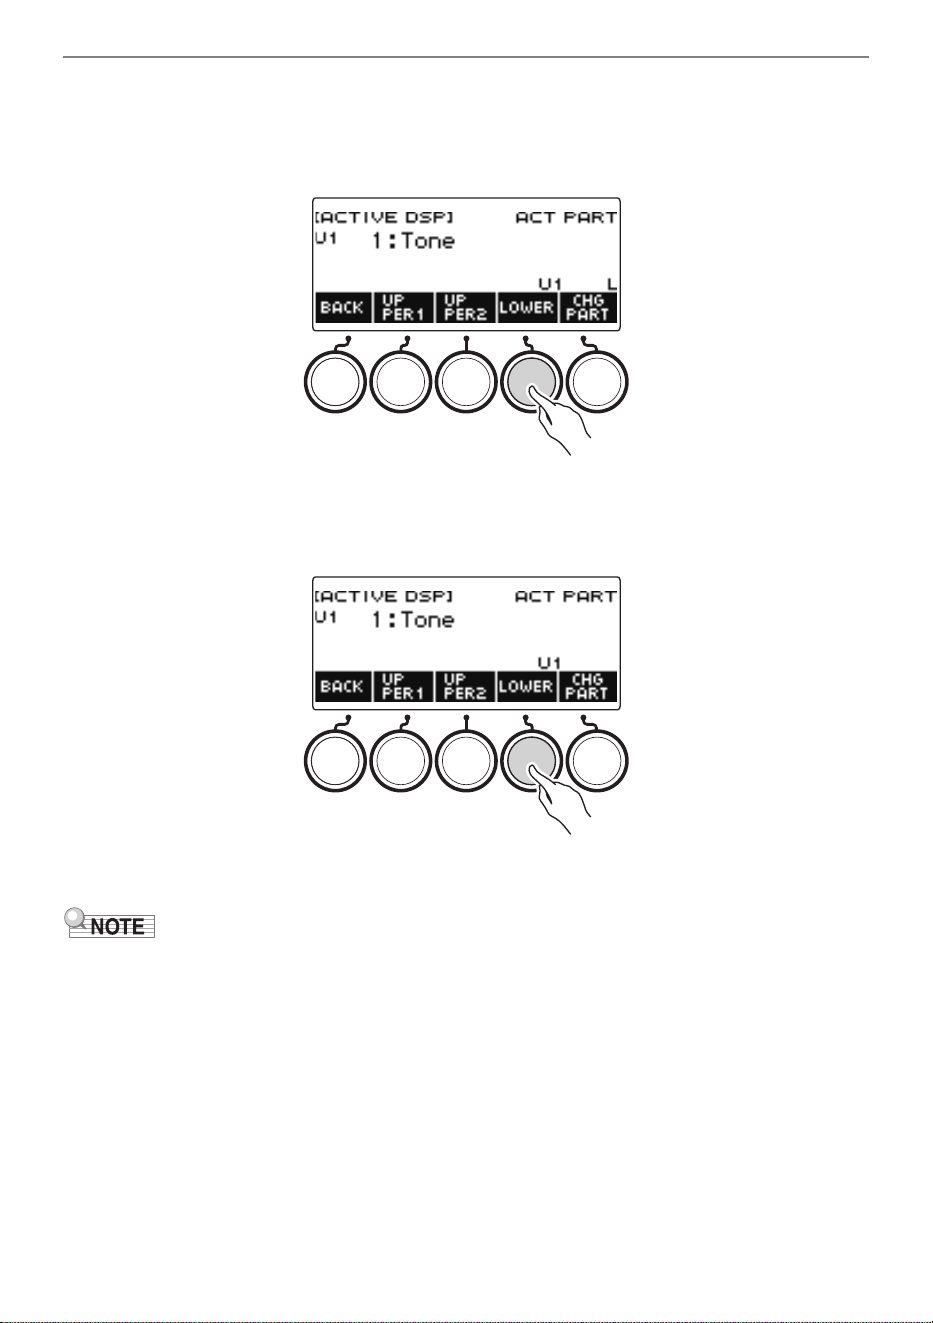
Controlling the Sound of a Performance
EN-102
5.
Press UPPER1, UPPER2, or LOWER to select the parts to which you want to
apply the effect. This causes the selected part indicators (“U1”, “U2”, “L”) to
appear in the lower right of the display.
• Effects can be applied to up to two parts at the same time.
6.
Press UPPER1, UPPER2, or LOWER to select the part for which you want to
disable application of the effect. This causes the selected part indicator (“U1”,
“U2”, “L”) to disappear from the lower right of the display.
7.
To exit the setting operation, press BACK.
• For information about parts, see “Layering and Splitting Tones” (page EN-123).
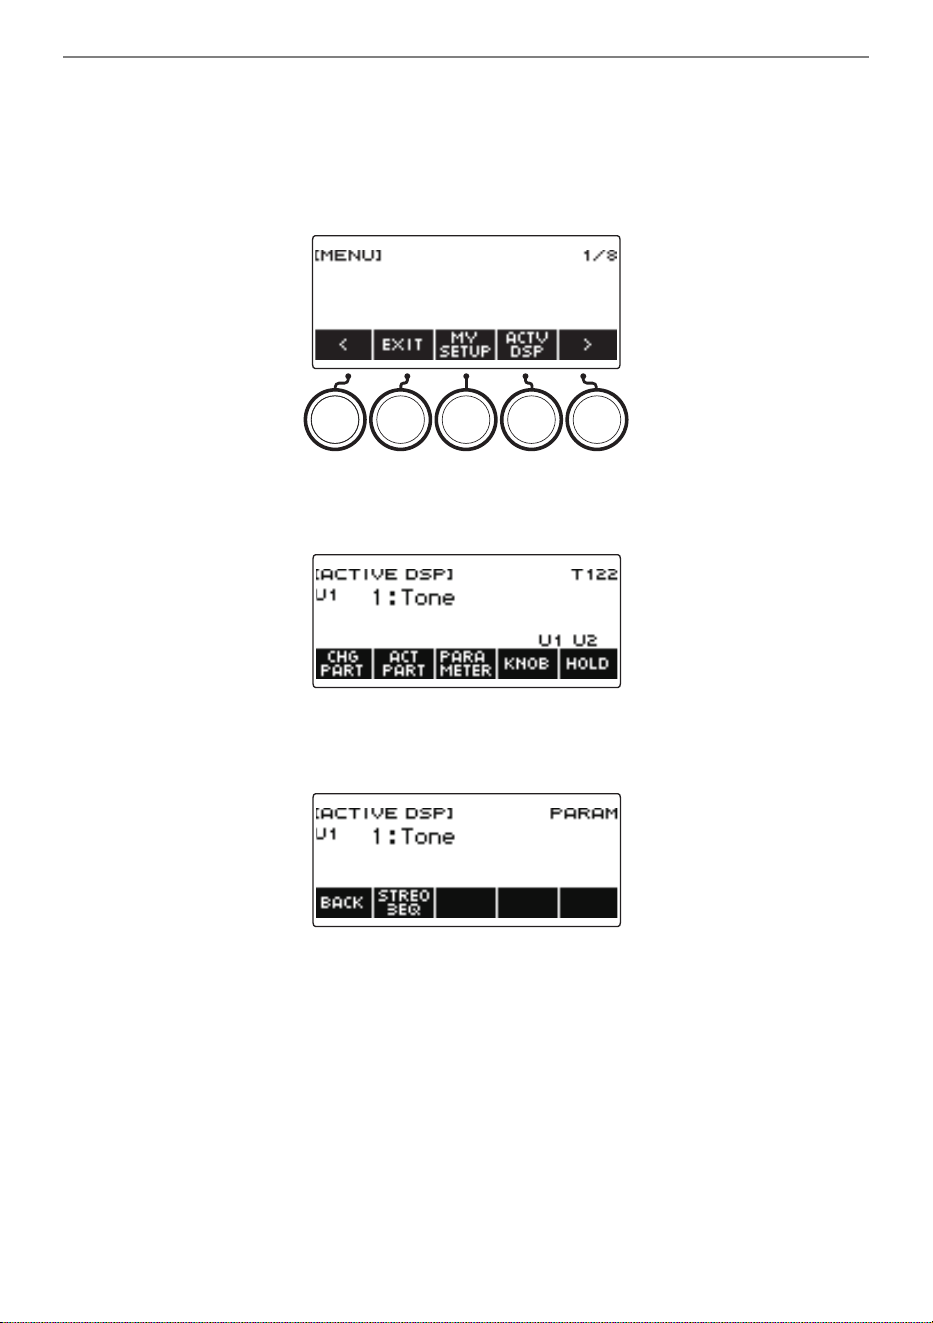
Controlling the Sound of a Performance
EN-103
■ To change effect parameter settings
1.
Press MENU.
This displays the menu screen.
2.
Use U and I to select the 5 buttons menu that includes ACTV DSP.
3.
Press ACTV DSP.
This enables Active DSP and displays the Active DSP screen.
4.
Press PARAMETER.
This displays the module selection screen.
• You can rotate the dial to change the part effect while this screen is displayed.
1
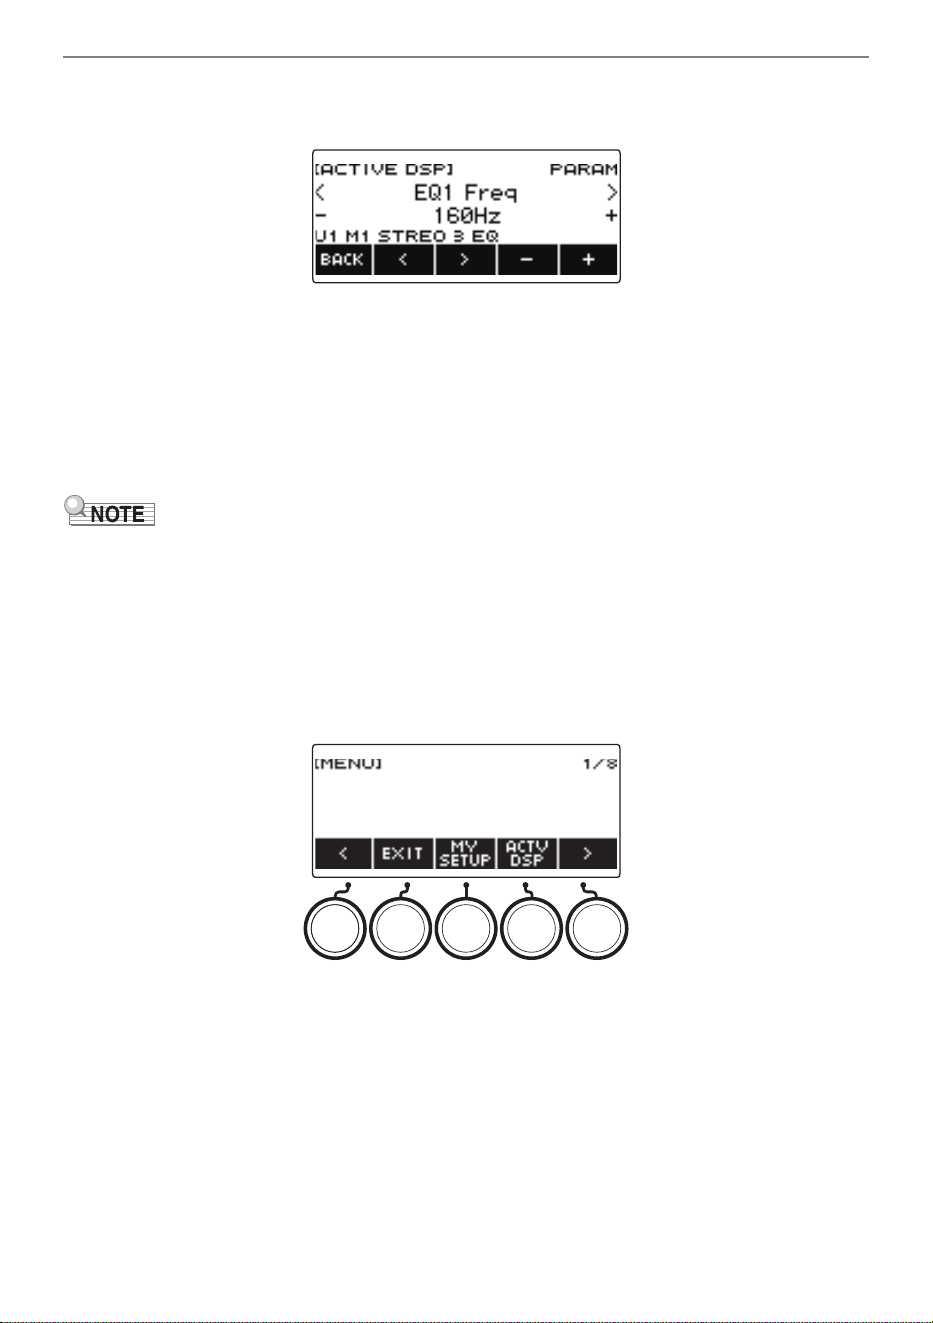
Controlling the Sound of a Performance
EN-104
5.
Press the button of the module whose parameters you want to change.
This displays the module parameter setting screen.
6.
Use U and I to select the parameter you want to change.
7.
Rotate the dial or use – and + to change the setting
8.
Press BACK to return to the module selection screen.
9.
To exit the setting operation, press BACK.
• Bypass is a special parameter. Enabling it stops the effect from being applied to the module.
■ To change knob functions while Active DSP is turned on
1.
Press MENU.
This displays the menu screen.
2.
Use U and I to select the 5 buttons menu that includes ACTV DSP.
1
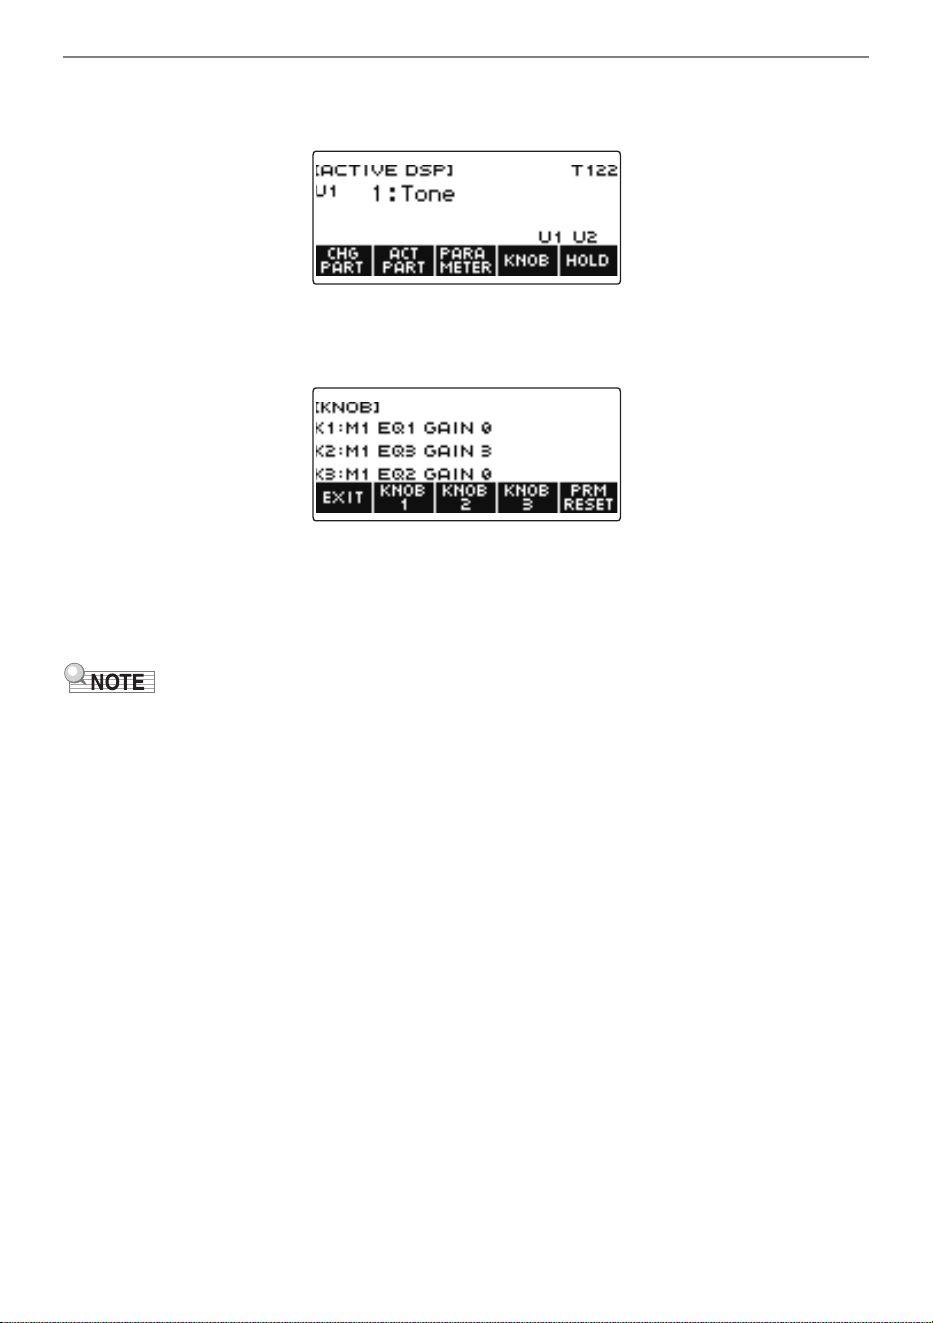
Controlling the Sound of a Performance
EN-105
3.
Press ACTV DSP.
This enables Active DSP and displays the Active DSP screen.
4.
Press KNOB.
This displays the knob screen.
• While Active DSP is turned on, you can configure effect parameter settings in addition to the
functions assigned to the knobs.
5.
Change the knob function.
• For information about to do this, see “To change the knob function” (page EN-93).
• If effect parameters are assigned to the knobs, you can select only one part that has a knob effect
applied.
• When Knob K1-K2 linking is turned on, the part to which the effect is applied is the same part for
Knob 1 and Knob 2. If you change the function of either Knob 1 or Knob 2, the unchanged knob will
have a different recommended function than the one whose function you changed.
• Changing the part to which knob effects are applied while effect parameters are assigned to knobs
causes the knob functions to become the recommended settings of the effect of the changed part.
• You can also display the knob screen by pressing MENU and then KNOB.
• If Active DSP Hold (page EN-106) is enabled, you can also display the dedicated Active DSP knob
setting screen by pressing the KNOB button on the Home Screen.
• The KNOB button may not be displayed on the home screen due to the Home Customization setting.
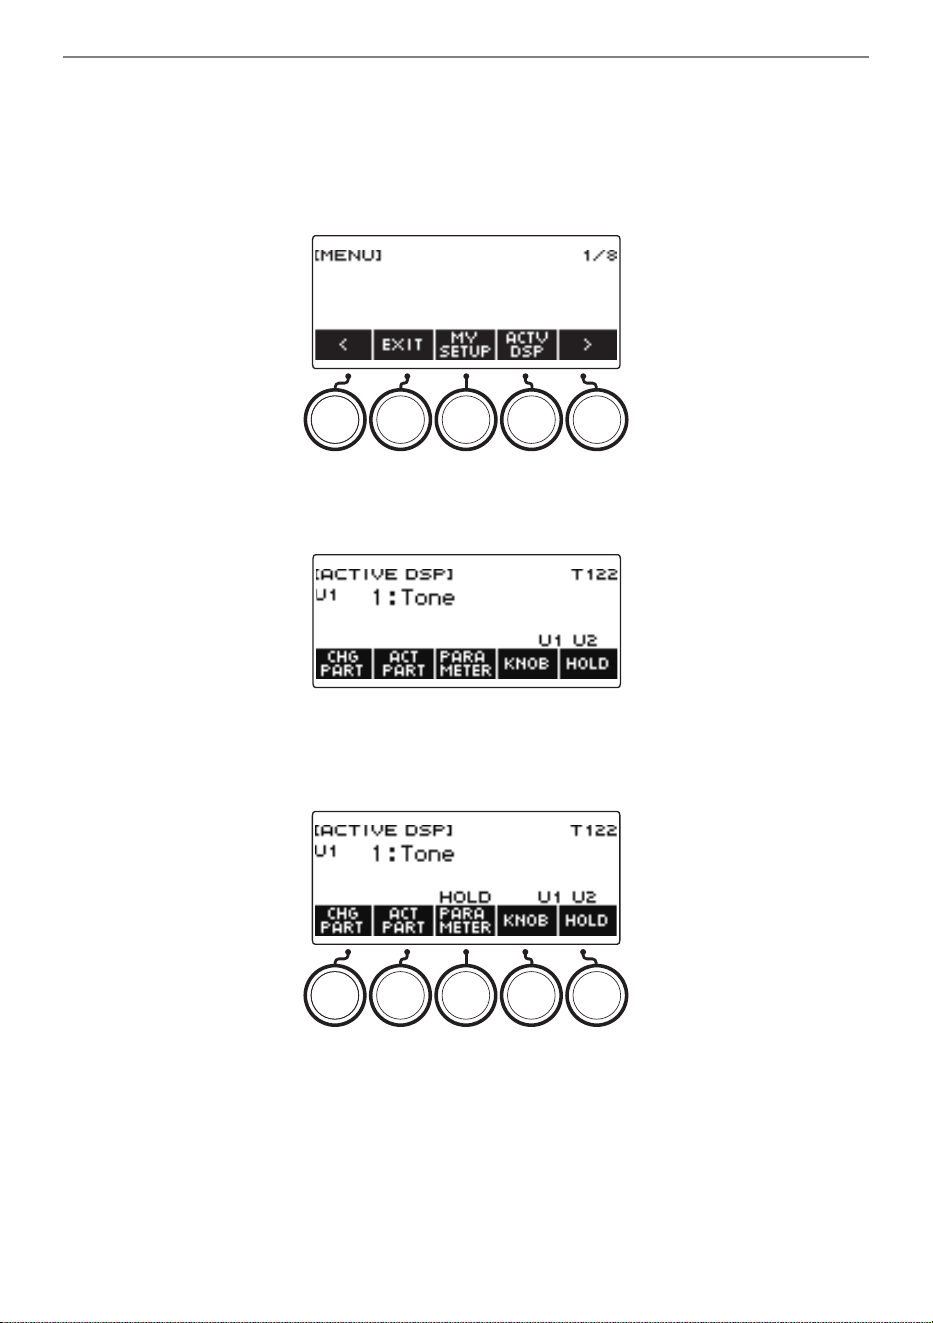
Controlling the Sound of a Performance
EN-106
■ To use other functions with Active DSP turned on
1.
Press MENU.
This displays the menu screen.
2.
Use U and I to select the 5 buttons menu that includes ACTV DSP.
3.
Press ACTV DSP.
This enables Active DSP and displays the Active DSP screen.
4.
Press HOLD.
This displays “HOLD”, which indicates you can configure the settings of other functions while
keeping Active DSP on.
5.
Press HOLD again to return to the DSP screen and turn off Active DSP.
This causes “HOLD” to disappear from the display, indicating that configuring another function’s
setting will turn off Active DSP.
1
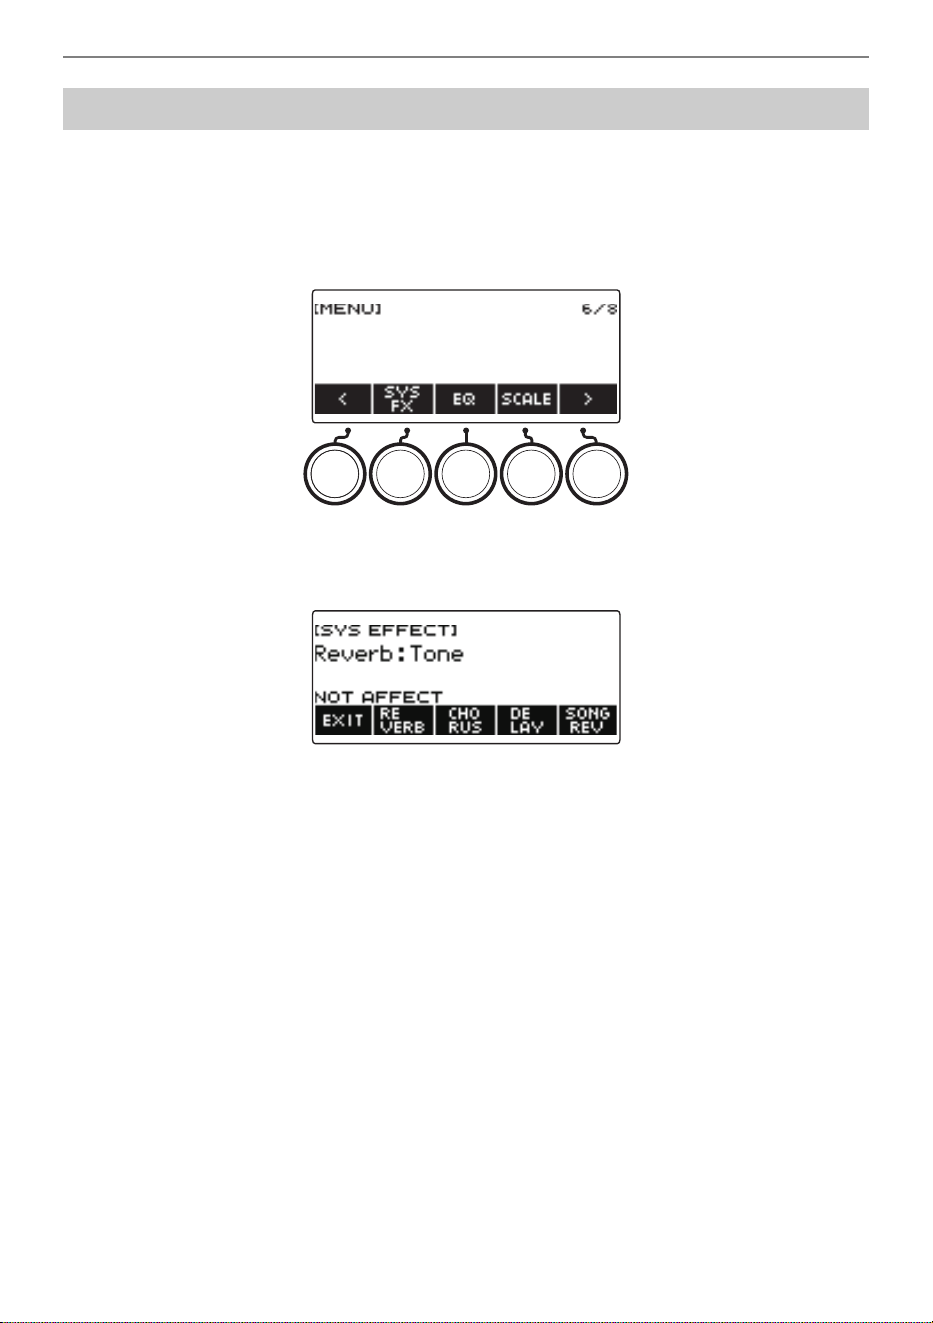
Controlling the Sound of a Performance
EN-107
You can use the procedure below to add reverb to the notes you play.
1.
Press MENU.
This displays the menu screen.
2.
Use U and I to select the 5 buttons menu that includes SYS FX.
3.
Press SYS FX.
This displays the system effect screen.
Playing with Reverb
Controlling the Sound of a Performance
EN-108
4.
Rotate the dial to select the reverb type.
The following shows the available reverb type settings.
• After you rotate the dial once to select a reverb type, you can change the selection further using
– and +.
• To return the setting to its initial default, press – and + at the same time.
• To go back to the previous screen, press BACK.
5.
To exit the setting operation, press EXIT.
• You can also use the knobs to adjust how reverb is applied to a tone. For more information, see
“Using the Knobs to Change the Sound” (page EN-91).
Setting Display Name
Off Off
Reverb Recommended for Each Tone Tone
Room 1 to 5 Room 1 to 5
Large Room 1 or 2 Large Room 1 or 2
Hall 1 to 6 Hall 1 to 6
Stadium 1 to 3 Stadium 1 to 3
Plate 1 or 2 Plate 1 or 2
Delay Delay
Pan Delay Pan Delay
Long Delay 1, 2 Long Delay 1, 2
Church Church
Cathedral Cathedral
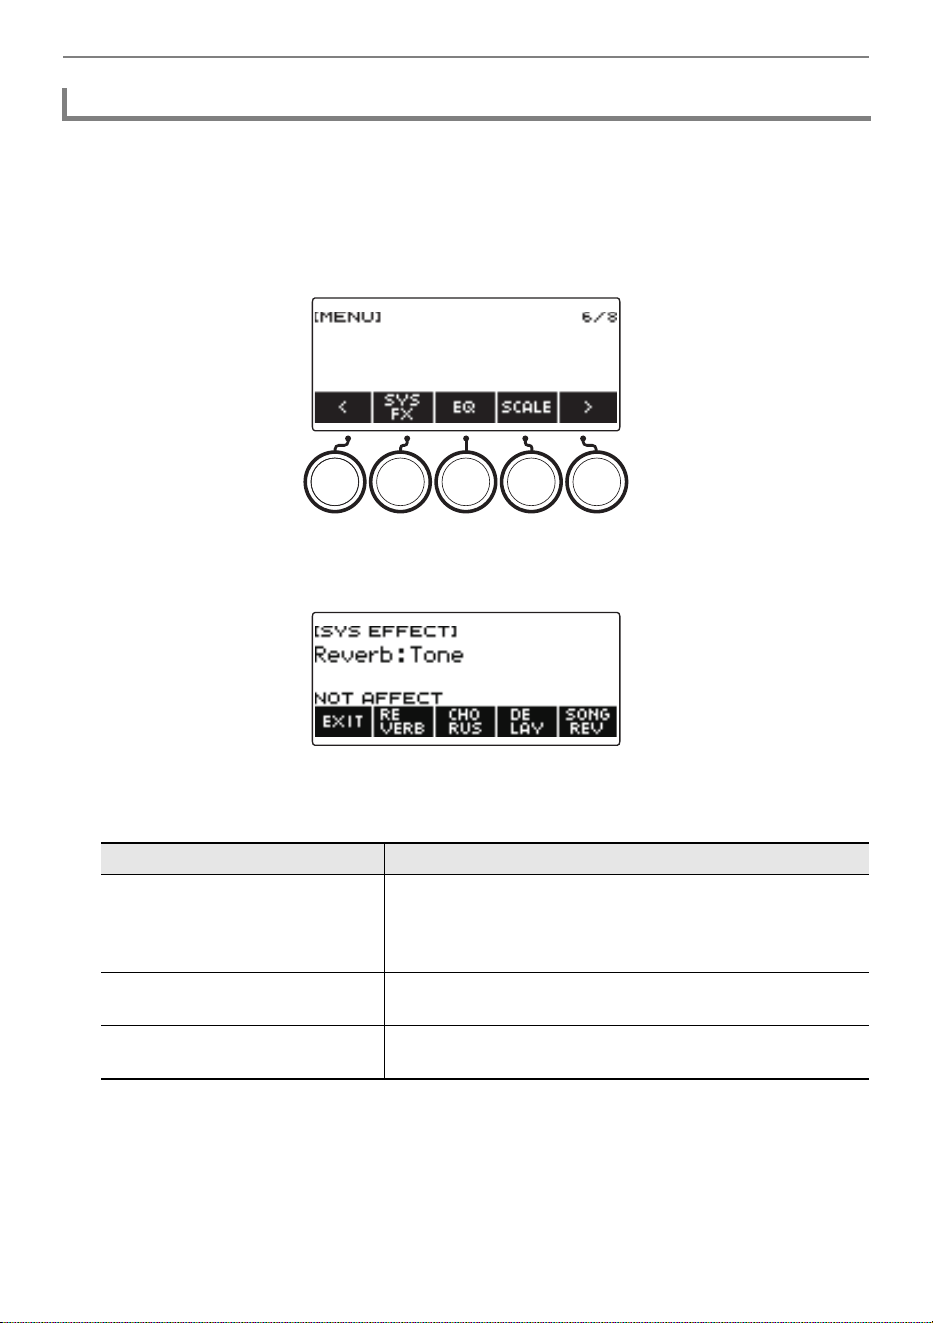
Controlling the Sound of a Performance
EN-109
You can use this procedure to sync the reverb effect of keyboard play and built-in song playback so
they do not clash with each other.
1.
Press MENU.
This displays the menu screen.
2.
Use U and I to select the 5 buttons menu that includes SYS FX.
3.
Press SYS FX.
This displays the system effect screen.
4.
Press SONG REV to change the setting.
Available settings are shown in the table below.
Changing the Relationship of Keyboard and Song Reverb Effects
Setting (Display Text) Description
Synchronize (SYNC) When a reverb setting is configured for the keyboard, the
same reverb effect is also applied to songs. Conversely, any
change in the reverb effect of a song is also applied to the
keyboard reverb.
Keyboard reverb priority
(FORCE KEYBOARD)
Song reverb effects are always the same as those of the
keyboard reverb settings.
No effect (NOT AFFECT) There is no change in keyboard reverb settings based on
song reverb.
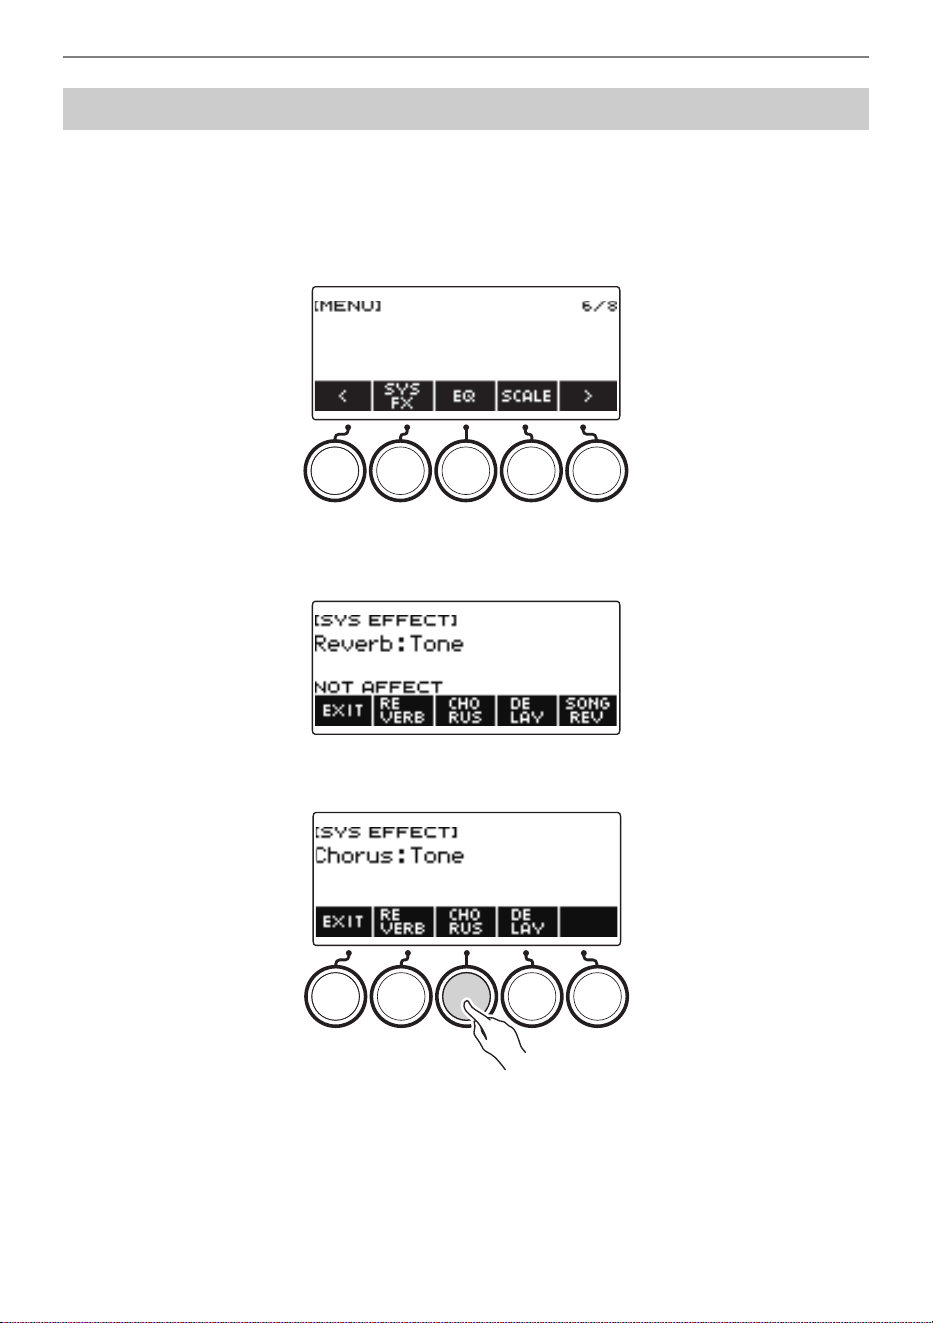
Controlling the Sound of a Performance
EN-110
Chorus is a function that adds depth and breadth to notes.
1.
Press MENU.
This displays the menu screen.
2.
Use U and I to select the 5 buttons menu that includes SYS FX.
3.
Press SYS FX.
This displays the system effect screen.
4.
Press CHORUS.
Adding the Chorus Effect to a Tone
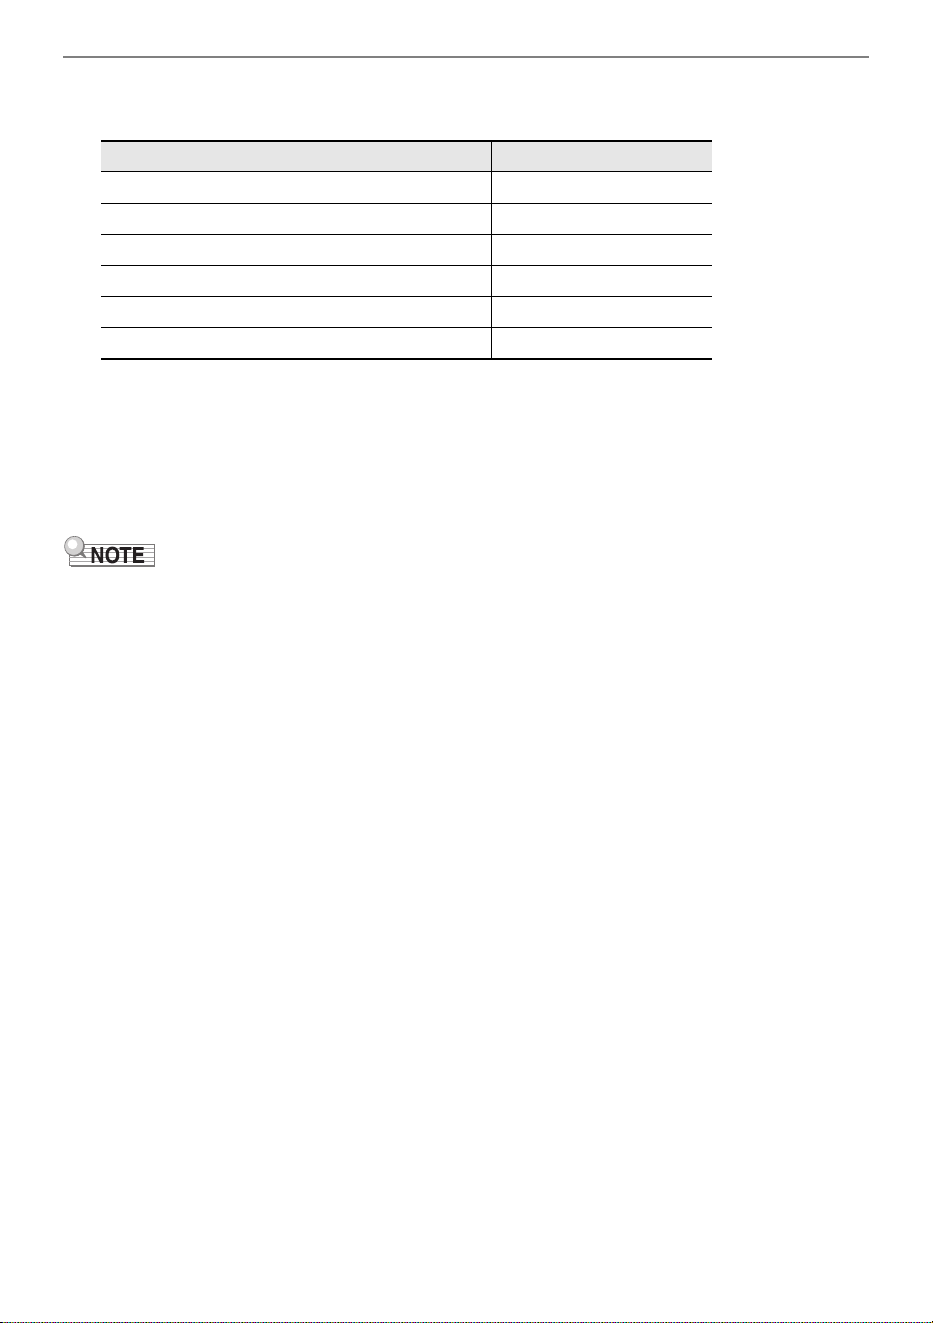
Controlling the Sound of a Performance
EN-111
5.
Rotate the dial to select the chorus type.
Available chorus type settings are shown in the table below.
• After you rotate the dial once to select a chorus type, you can change the selection further using
– and +.
• To return the setting to its initial default, press – and + at the same time.
• To go back to the previous screen, press BACK.
• To return to the Reverb screen, press REVERB.
6.
To exit the setting operation, press EXIT.
• Selecting a chorus type other than Tone increases the Chorus Send of the keyboard part.
• You can also use the knobs to adjust how chorus is applied to a tone. For more information, see
“Using the Knobs to Change the Sound” (page EN-91).
Setting Display Name
Chorus setting recommended for each tone Tone
Chorus 1 to 4 Chorus 1 to 4
Feedback Chorus Feedback Chorus
Deep Chorus Deep Chorus
Flanger 1 to 4 Flanger 1 to 4
Short Delay 1, 2 Short Delay 1, 2
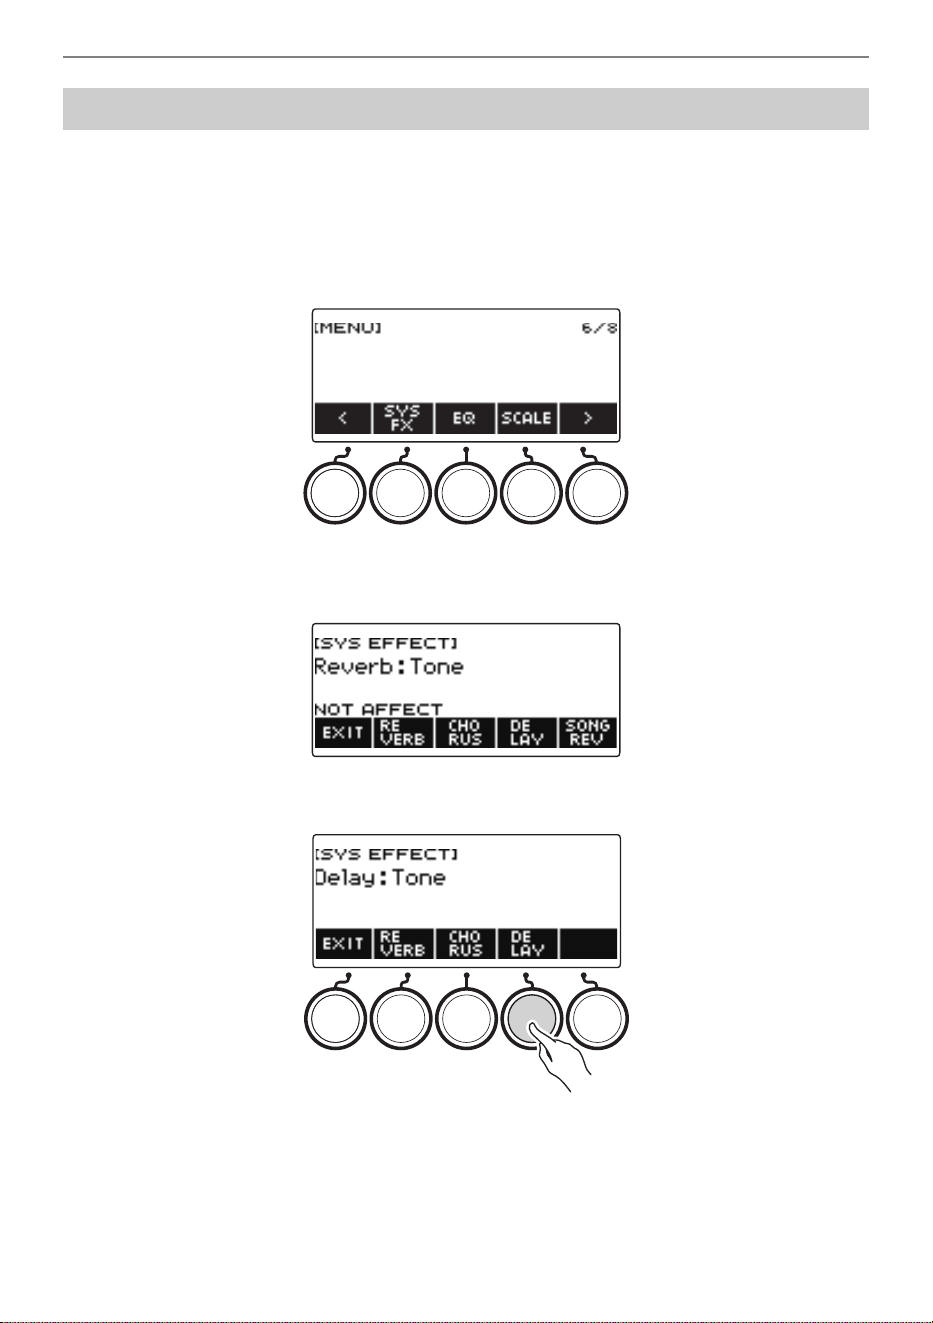
Controlling the Sound of a Performance
EN-112
Delay stores a sound and repeats it periodically with a slight delay before each repeat, which creates
an echo effect. Delay is different from reverb, which creates a reverberation effect.
1.
Press MENU.
This displays the menu screen.
2.
Use U and I to select the 5 buttons menu that includes SYS FX.
3.
Press SYS FX.
This displays the system effect screen.
4.
Press DELAY.
Delaying Notes (Delay)
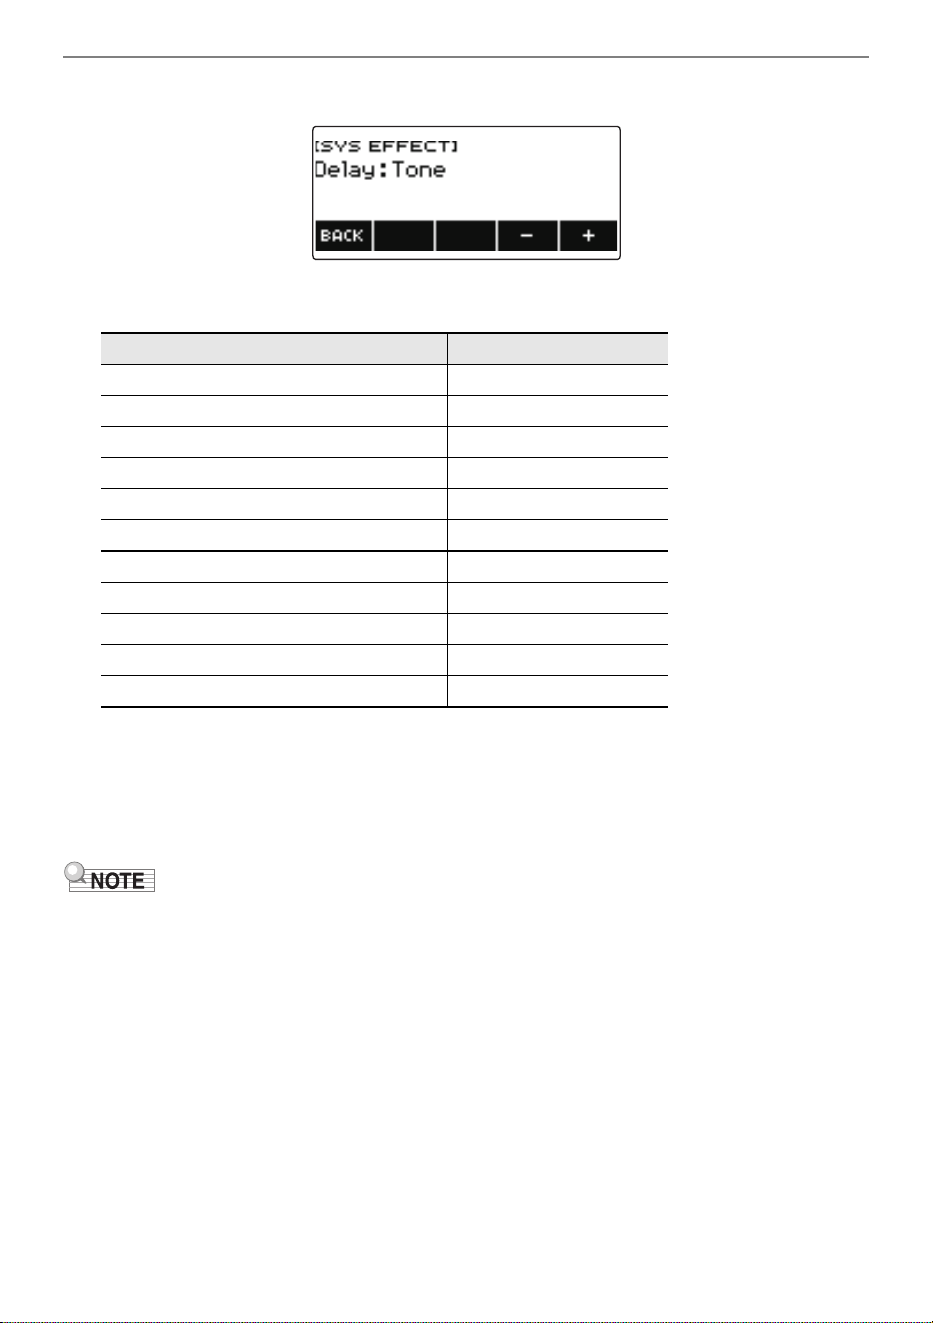
Controlling the Sound of a Performance
EN-113
5.
Rotate the dial to select the delay type.
Delay types are shown in the table below.
• After you rotate the dial once to select a delay type, you can change the selection further using
– and +.
• To return the setting to its initial default, press – and + at the same time.
• To go back to the previous screen, press BACK.
6.
To exit the setting operation, press EXIT.
• Selecting a delay type other than Tone increases the Delay Send the keyboard part.
• You can also use the knobs to adjust how delay is applied to a tone. For more information, see
“Using the Knobs to Change the Sound” (page EN-91).
Setting Type Display Name
Recommended Delay for Each Tone Tone
Short 1, 2 Short 1, 2
Echo Echo
Tempo Sync Short Tempo Sync Short
Tempo Sync Middle Tempo Sync Middle
Tempo Sync Long Tempo Sync Long
Ambiance Ambiance
Middle 1, 2 Middle 1, 2
Long 1, 2 Long 1, 2
Middle Pan Middle Pan
Long Pan 1 to 3 Long Pan 1 to 3
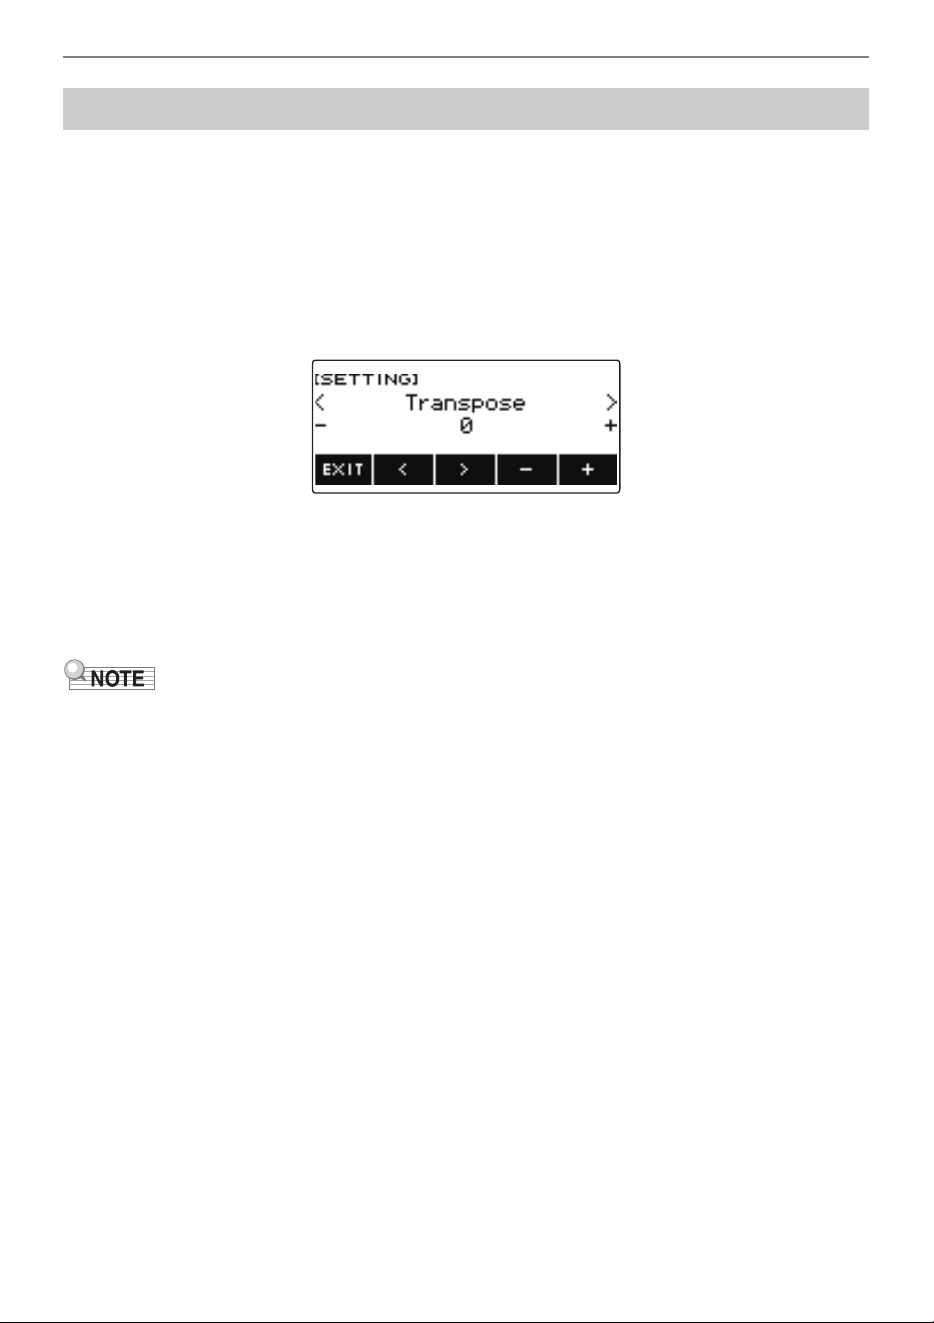
Controlling the Sound of a Performance
EN-114
Enabling surround creates a virtual surround effect.
1.
Press MENU.
This displays the menu screen.
2.
Use U and I to select the 5 buttons menu that includes SETTING.
3.
Press SETTING.
This displays the setting screen.
4.
Use U and I to select “Surround”.
5.
Rotate the dial or use – and + to select “On”.
6.
To exit the setting operation, press EXIT.
• Effects of the surround function are not applied to the LINE OUT jack outputs.
• The surround effect is not applied while you are listening over headphones.
• Connecting headphones disables the surround effect.
Playing with a More Expanded Sound (Surround)
B
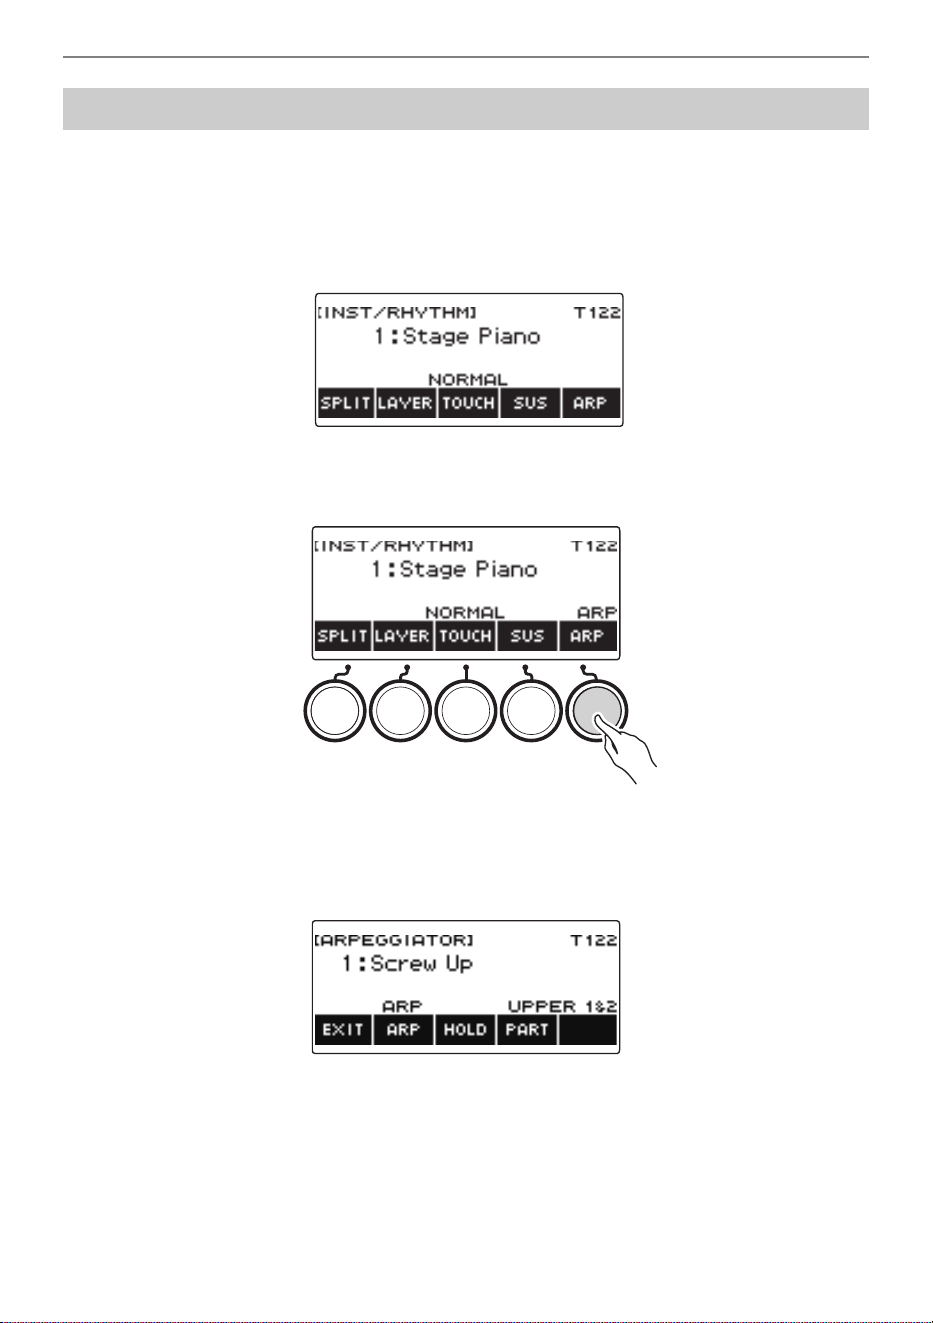
Controlling the Sound of a Performance
EN-115
With the arpeggiator, you can play various arpeggios and other phrases automatically by simply
pressing keys on the keyboard. You can select from several different arpeggio options, including
playing arpeggios from a chord, playing various phrases automatically, and more.
1.
Press INSTRUMENT.
This displays the instrument tone screen.
2.
Press ARP.
This displays “ARP” and enables the arpeggiator.
• If AH is displayed, switch it to ARP (page EN-120).
3.
Long-press ARP.
This displays the arpeggiator screen, which shows the currently selected arpeggiator type number
and name.
Sounding Arpeggio Phrases Automatically (Arpeggiator)
B
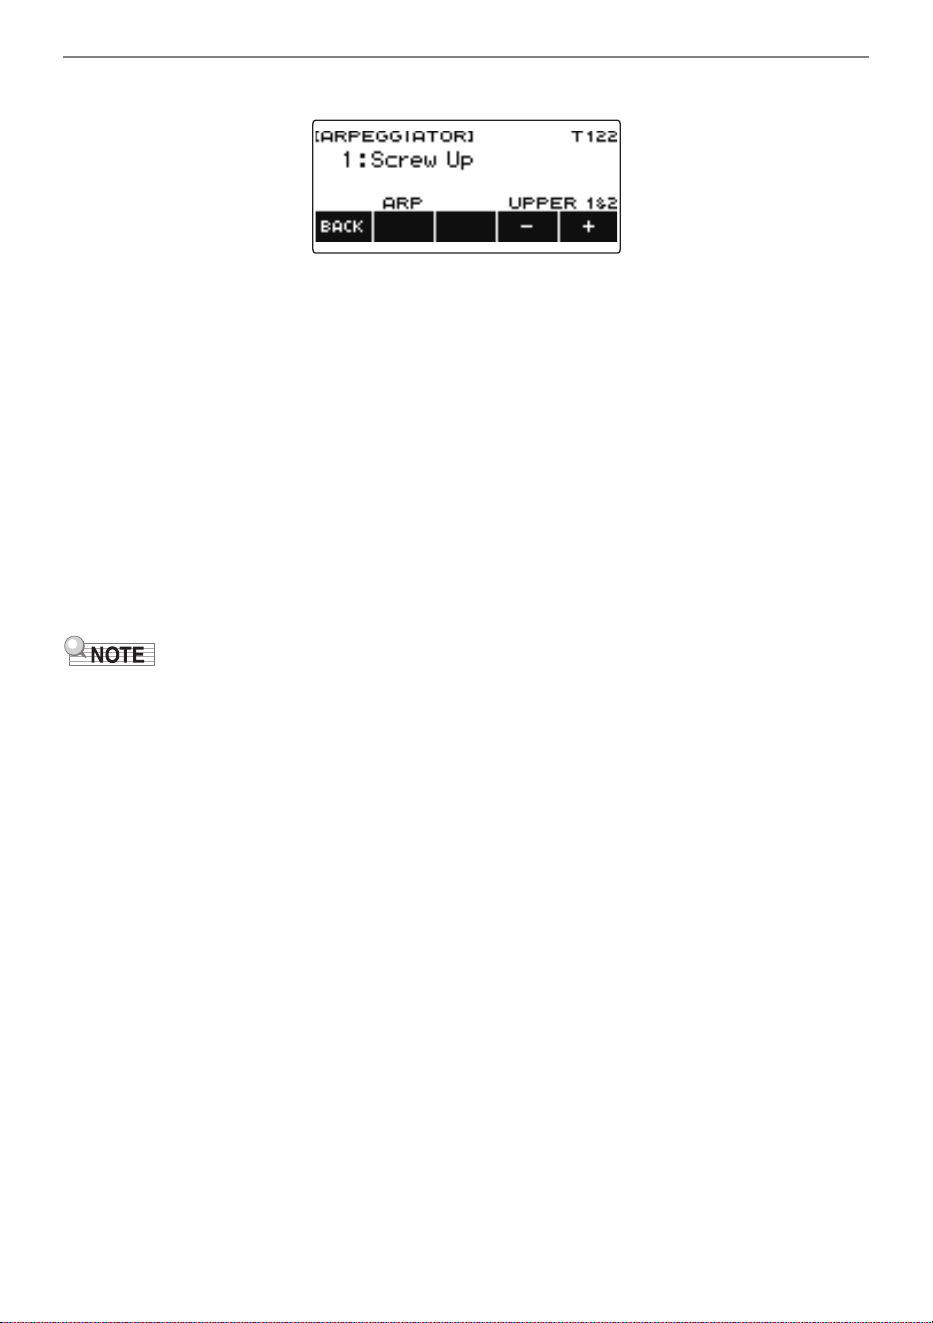
Controlling the Sound of a Performance
EN-116
4.
Rotate the dial to select the arpeggiator type.
• You can specify an arpeggiator type within the range of 1 to 150. See “Arpeggiator List” (page
EN-313).
• After you rotate the dial once to select a type, you can change the selection further using – and +.
• To go back to the previous screen, press BACK.
5.
Hold down a key of the accompaniment keyboard.
The arpeggiator starts to play in accordance with the keys you press.
6.
Remove your fingers from the keyboard keys.
This stops arpeggiator play.
7.
To disable the arpeggiator, press ARP.
“ARP” disappears from the display.
• You can also enable and disable the arpeggiator by pressing ARP on the arpeggiator screen.
8.
To exit the setting operation, press EXIT.
• You can also display the arpeggiator screen by pressing MENU and then ARPEGGI.
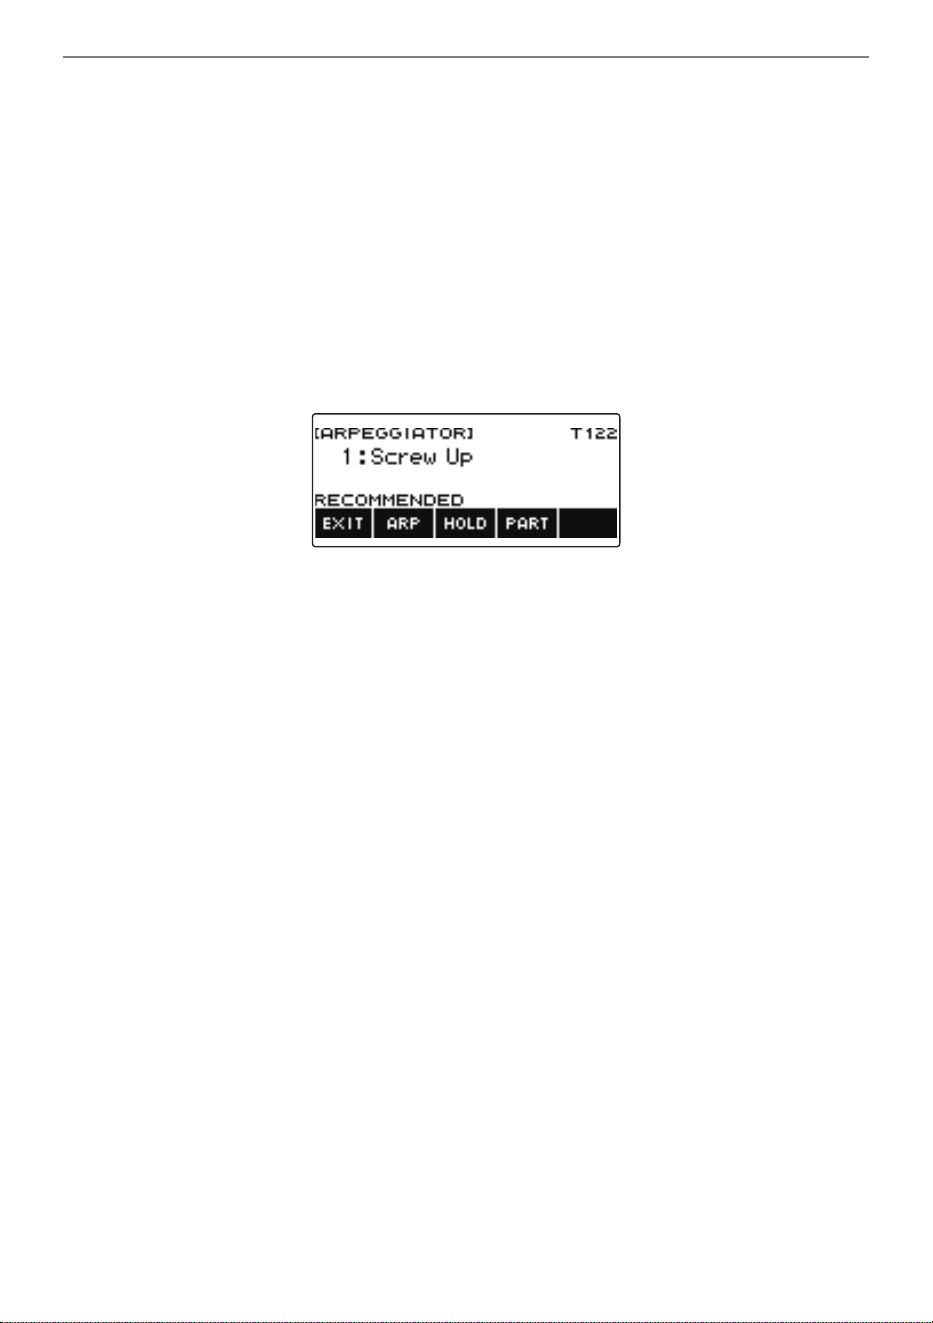
Controlling the Sound of a Performance
EN-117
■ Configuring Recommended Arpeggiator Settings
1.
Press INSTRUMENT.
This displays the instrument tone screen.
2.
Press ARP.
This displays “ARP” and enables the arpeggiator.
3.
Long-press ARP.
This displays the arpeggiator screen.
4.
Long-press ARP.
This momentarily displays “RECOMMENDED” and changes the tone to its recommended
arpeggiator type setting.
B
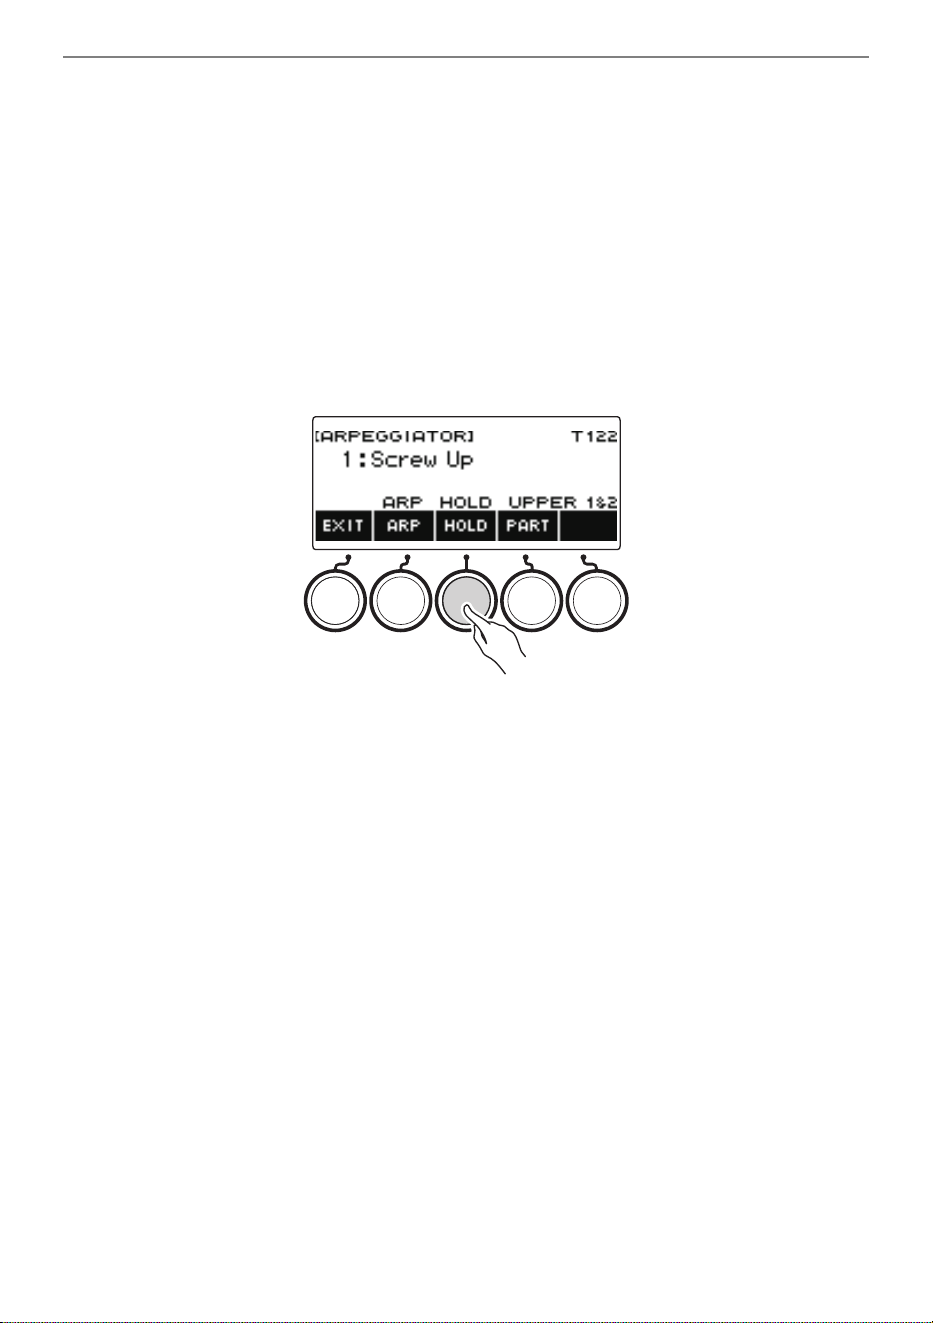
Controlling the Sound of a Performance
EN-118
■ Configuring Settings so the Arpeggiator Pattern Keeps Playing After You Release
Keyboard Keys
1.
Press INSTRUMENT.
This displays the instrument tone screen.
2.
Press ARP.
This displays “ARP”, which indicates the arpeggiator is enabled.
3.
Long-press ARP.
This displays the arpeggiator screen.
4.
Press HOLD.
This displays “HOLD”, which indicates arpeggiator hold is enabled.
5.
Press and release a keyboard key.
Even after you release the keys, the arpeggiator continues to play.
6.
To stop arpeggio play, press HOLD again.
“HOLD” disappears from the display and turns off arpeggiator hold. The note you are playing stops
sounding at this time.
B
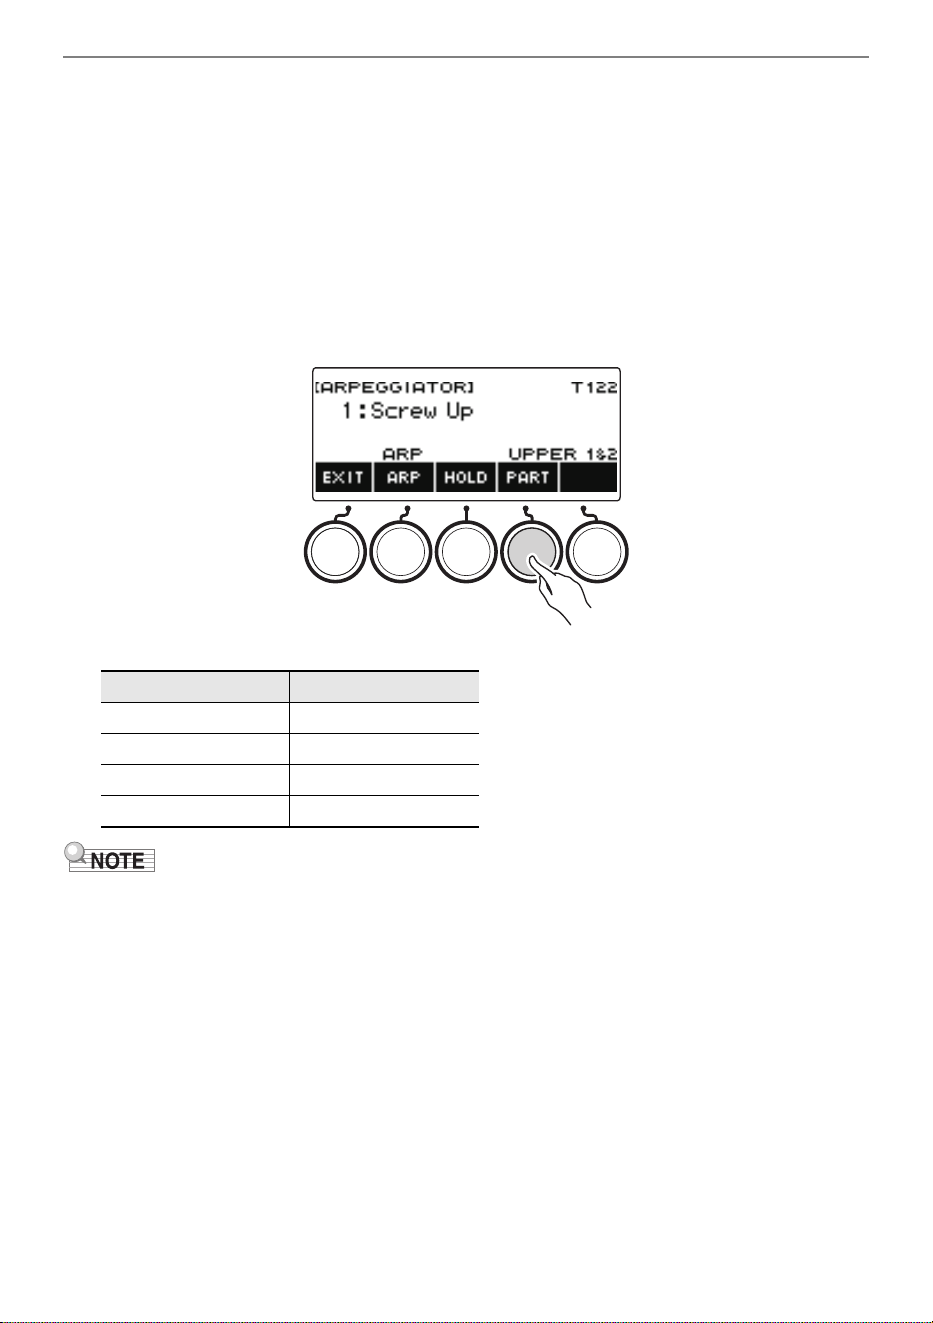
Controlling the Sound of a Performance
EN-119
■ Changing the Part that Sound Arpeggiator Play
1.
Press INSTRUMENT.
This displays the instrument tone screen.
2.
Press ARP.
This displays “ARP”, which indicates the arpeggiator is enabled.
3.
Long-press ARP.
This displays the arpeggiator screen.
4.
Press PART and then select the part you want to sound with the arpeggiator.
Parts you can select are shown in the table below.
• For details about parts, see “Layering and Splitting Tones” (page EN-123).
Setting Display Name
Upper1, Upper2 UPPER 1&2
Upper1 UPPER 1
Upper2 UPPER 2
Lower LOWER
B
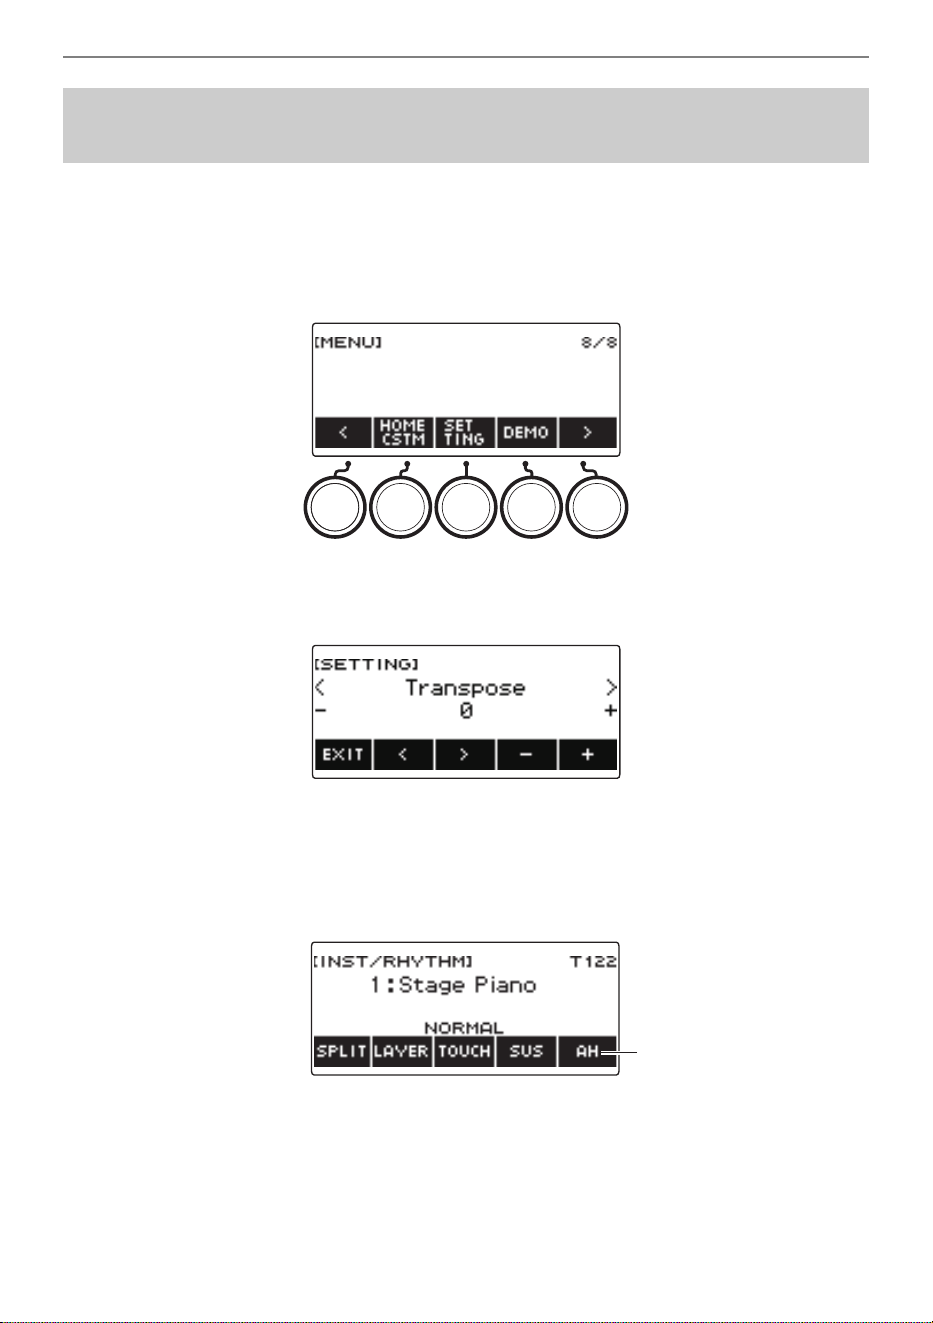
Controlling the Sound of a Performance
EN-120
A single button is used to control the arpeggiator (page EN-115) and auto harmonize (page EN-121).
1.
Press MENU.
This displays the menu screen.
2.
Use U and I to select the 5 buttons menu that includes SETTING.
3.
Press SETTING.
This displays the setting screen.
4.
Use U and I to select “ARP/AH Button”.
5.
Rotate the dial or use – and + to toggle between button functions.
Switching the button function from ARP to AH displays the AH button label on the instrument tone
screen.
6.
To exit the setting operation, press EXIT.
Switching the Button Function from ARP (Arpeggiator) to
AH (Auto Harmonize)
AH button
B
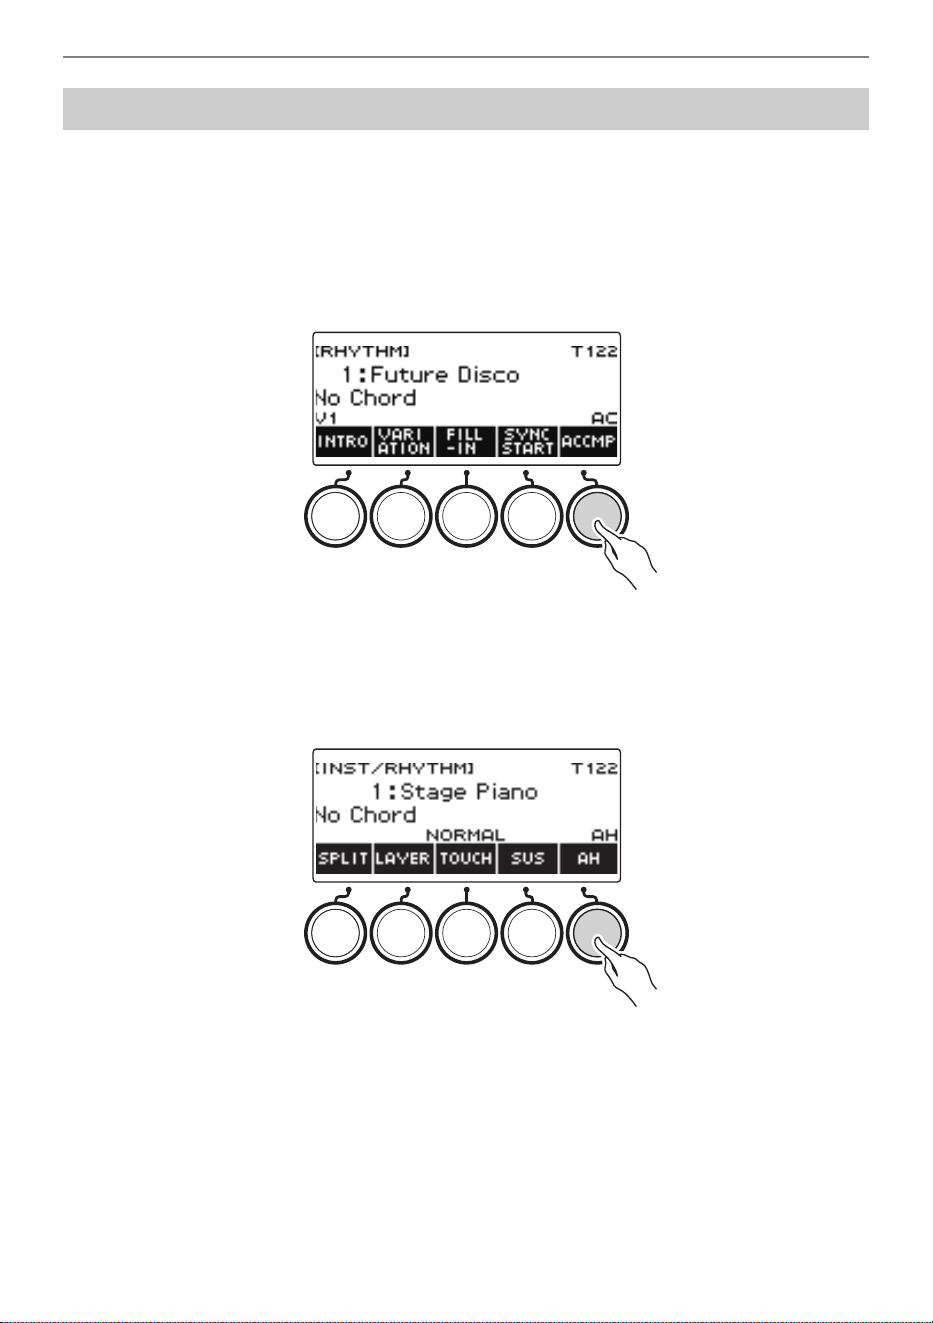
Controlling the Sound of a Performance
EN-121
This function adds harmony to the melody sound when a chord is specified, such as when a chord is
input by the rhythm function.
1.
Press RHYTHM.
This displays the currently selected rhythm number and name.
2.
Press ACCMP.
This enables chord play.
3.
Press INSTRUMENT.
This displays the instrument tone screen.
4.
Press AH.
This displays “AH”, which indicates auto harmonize is enabled.
• If ARP is displayed, switch it to AH (page EN-120).
Adding Harmony to Melody Notes (Auto Harmonize)
B
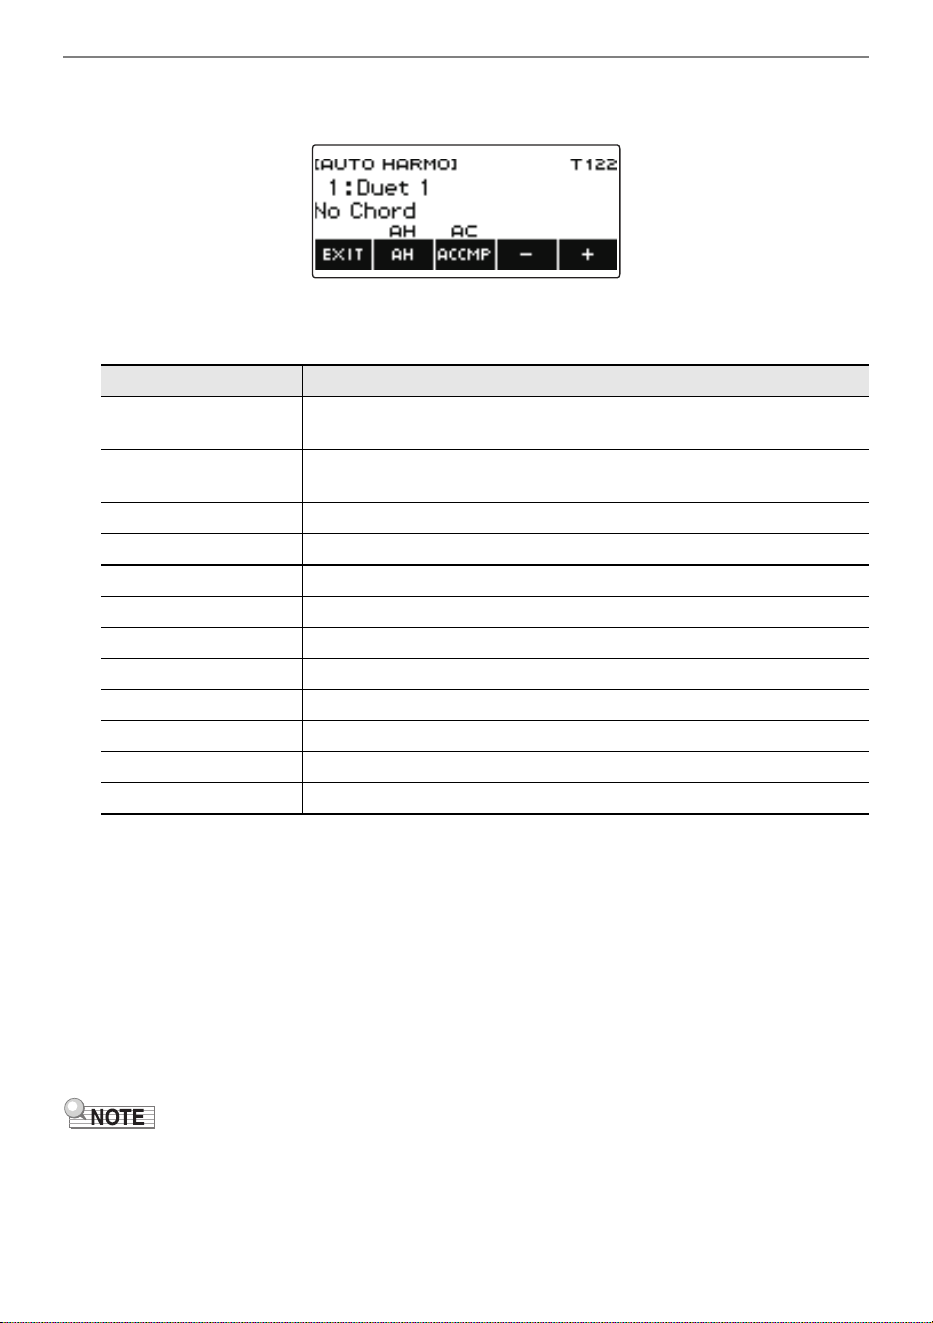
Controlling the Sound of a Performance
EN-122
5.
Long-press AH.
This displays the auto harmonize screen.
6.
Rotate the dial or use – and + to select an auto harmonize type.
• You can specify an auto harmonize type from 1 to 12.
7.
Play chords on the accompaniment keyboard and the melody on the standard
keyboard.
Harmony is added to your melody notes based on the chords you play.
8.
To disable auto harmonize, press AH.
“AH” disappears from the display.
• You can also enable and disable auto harmonize by pressing AH on the auto harmonize screen.
• While the rhythm function is in use, you can also enable or disable the accompaniment
keyboard by pressing ACCMP while the auto harmonize screen is displayed.
9.
To exit the setting operation, press EXIT.
• You can also display the auto harmonize screen by pressing MENU and then AUTO HRM.
Type (displayed) Description
1: Duet 1 Adds closed (separated by 2 to 4 degrees) 1-note harmony below the
melody note.
2: Duet 2 Adds open (separated by more than 4 to 6 degrees) 1-note harmony
below the melody note.
3: Country Adds country style harmony.
4: Octave Adds the note from the next lower octave.
5: 5th Adds the fifth degree note.
6: 3-Way Open Adds 2-note open harmony, for a total of three notes.
7: 3-Way Close Adds 2-note closed harmony, for a total of three notes.
8: Strings Adds harmony that is optimal for strings.
9: 4-Way Open Adds 3-note open harmony, for a total of four notes.
10: 4-Way Close Adds 3-note closed harmony, for a total of four notes.
11: Block Adds block chord notes.
12: Big Band Adds big band style harmony.
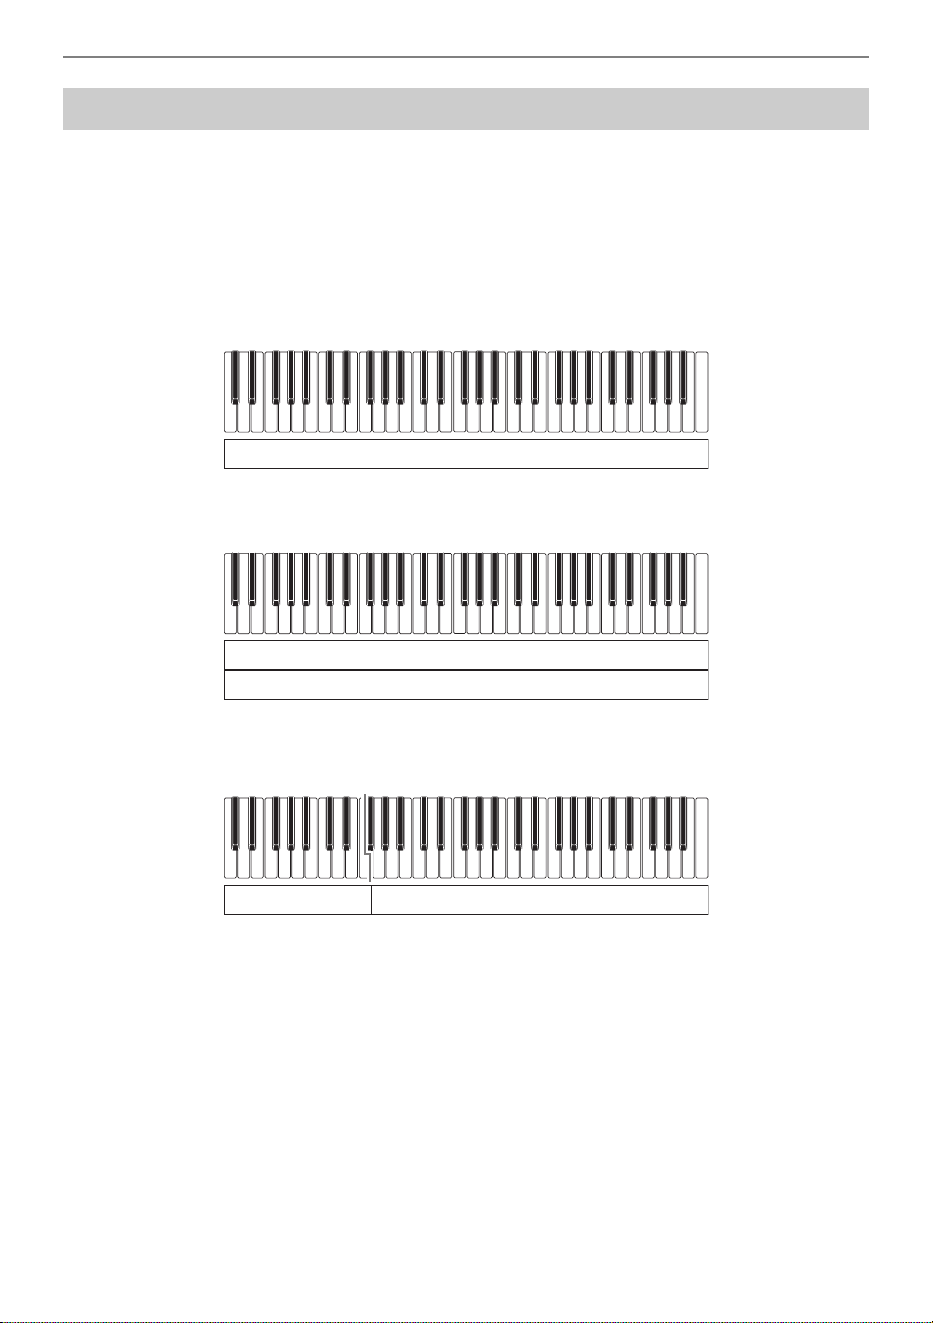
Controlling the Sound of a Performance
EN-123
You can configure the keyboard to play two different tones at the same time (Layer) or to play different
tones in the left and right ranges (Split). You can even use Layer and Split in combination with each
other and play three different tones at the same time.
The part that is used when playing a single tone is called the UPPER1 part. If you layer two parts, the
layered part is the UPPER2 part. If the keyboard is split between two tones, the low-range part is called
the LOWER part.
• Sounding a single tone across the entire keyboard (page EN-68)
With this configuration, only the UPPER1 part is used (Layer: Off, Split: Off).
• Layering two tones across the entire keyboard (page EN-125)
With this configuration, the UPPER1 and UPPER2 parts are both used (Layer: On, Split: Off).
• Splitting the keyboard into two ranges (left, right), and assigning different tones to each range
(page EN-126)
With this configuration, the UPPER1 part and LOWER part are both used (Layer: Off, Split: On).
Layering and Splitting Tones
UPPER1
UPPER1
UPPER2
LOWER
UPPER1
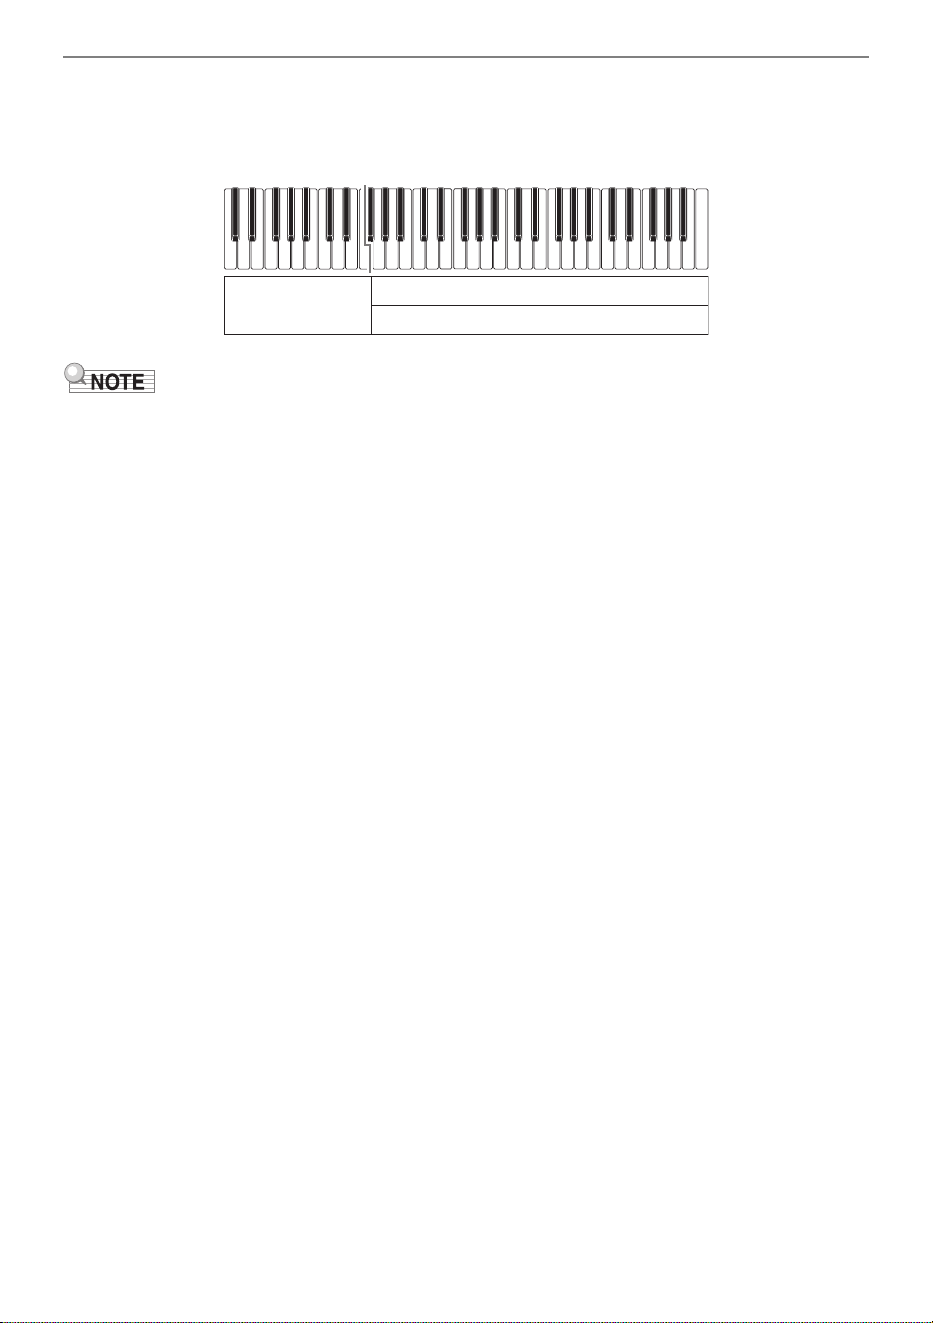
Controlling the Sound of a Performance
EN-124
• Splitting the keyboard into two ranges (left, right), and assigning two layered tones to the
right side and a single tone to the left side (pages EN-125, EN-126)
With this configuration, the UPPER1, UPPER2, and LOWER parts are all used (Layer: On, Split:
On).
• Changing the tone setting affects the UPPER2 part when layer is turned on, and the LOWER part
when split is turned on.
• While you are using split and layer together, you can select the tone of the keyboard’s LOWER part.
LOWER
UPPER1
UPPER2
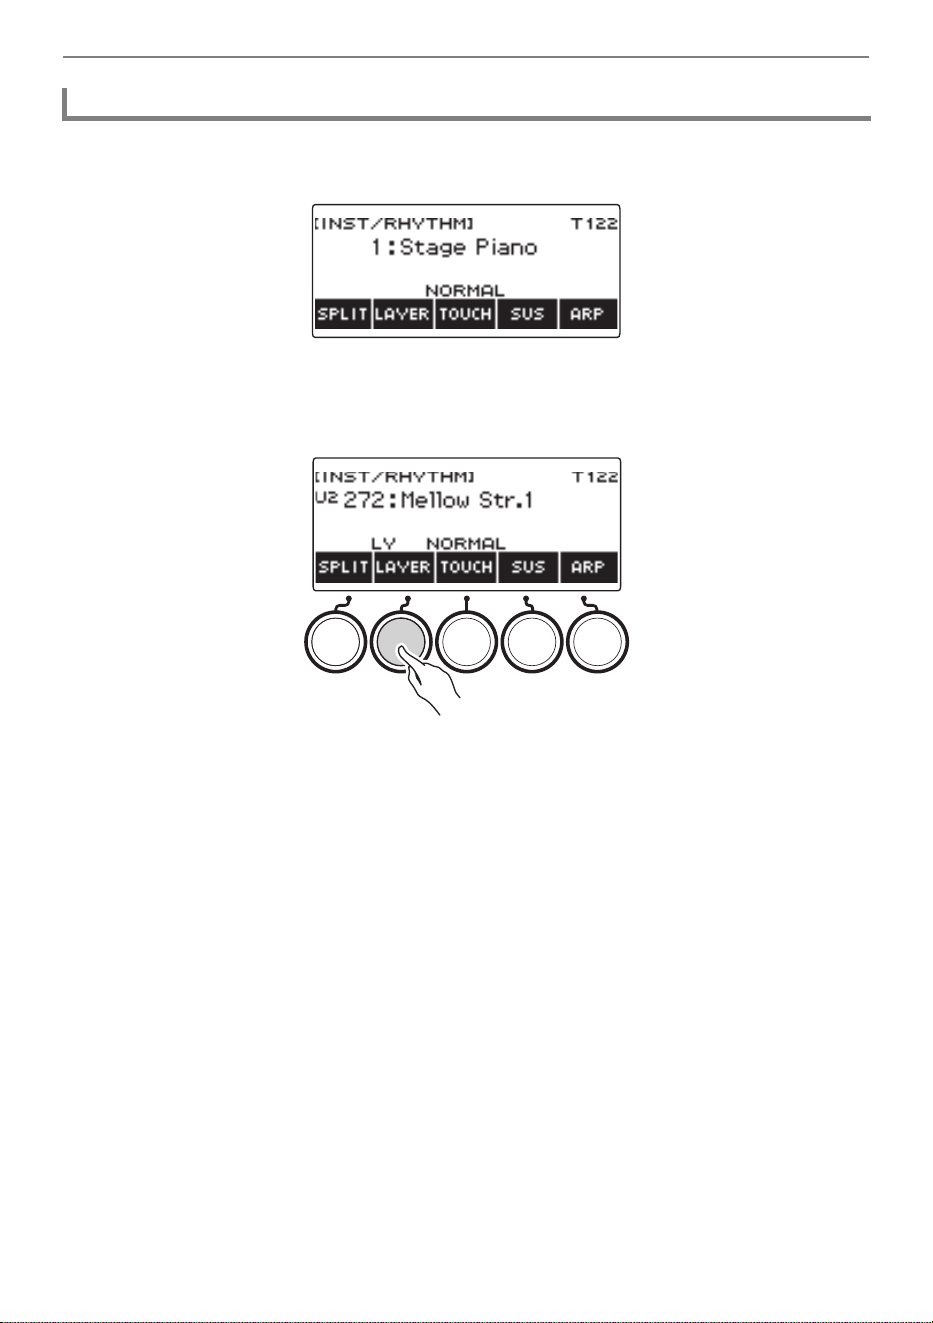
Controlling the Sound of a Performance
EN-125
1.
Press TONE.
This displays the tone screen.
2.
Press LAYER.
This displays “U2” to the left of the tone number and “LY” below it. “U2” is short for the UPPER2
part.
3.
Rotate the dial to select the layer tone.
• For tone information, see the “Tone List” (page EN-288).
• After you rotate the dial once to select a tone, you can change the selection further using – and
+.
• To return to the first tone in the Tone List, press – and + at the same time.
• If you want to select a category, use CAT–/CAT+.
• To go back to the previous screen, press BACK.
4.
Play something on the keyboard.
This layers the tone you select here on the tone you selected in step 3.
• Pressing LAYER again turns layering off.
Layering Two Tones
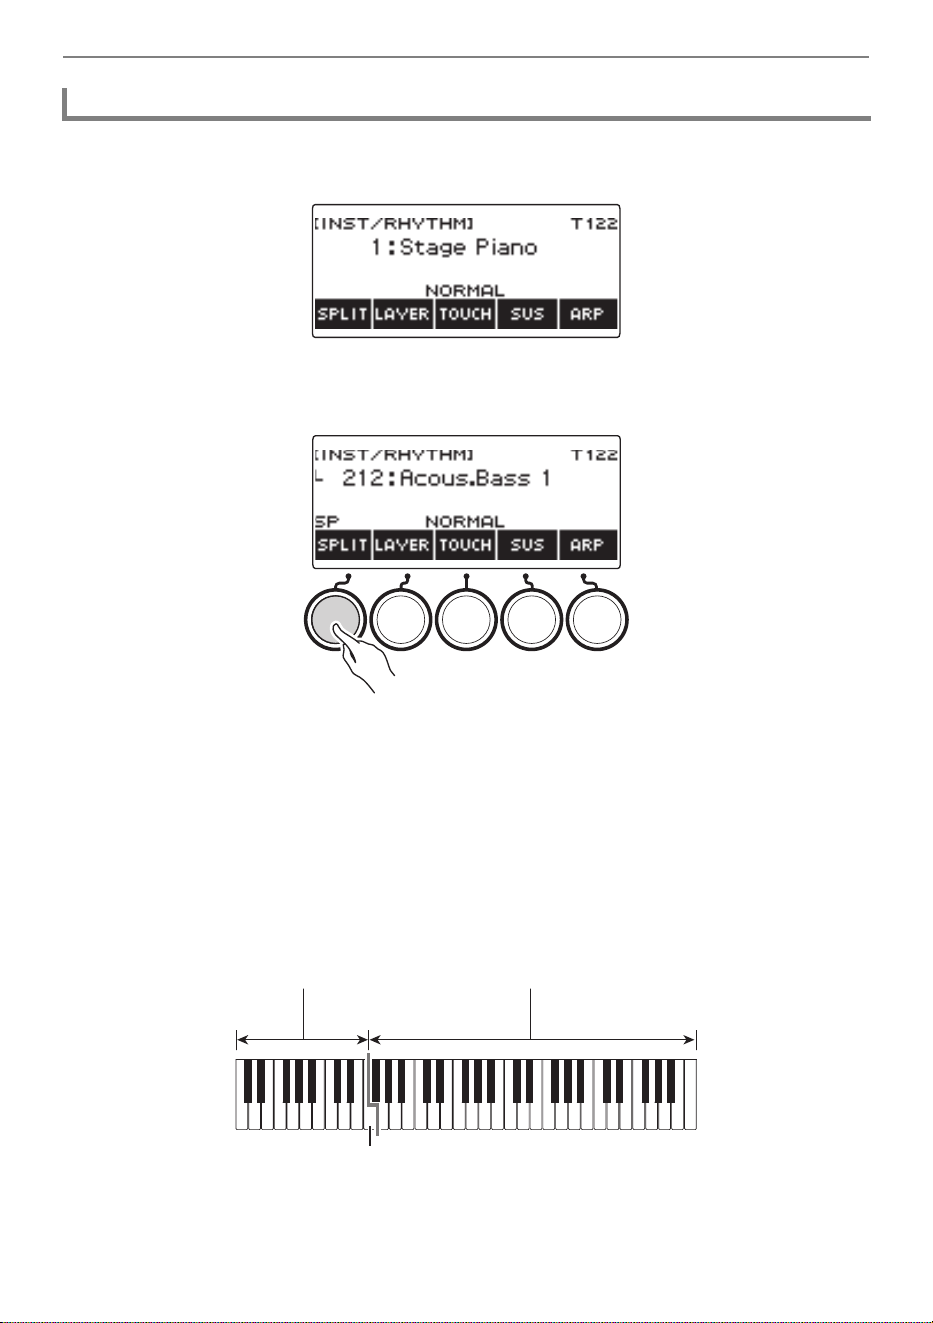
Controlling the Sound of a Performance
EN-126
1.
Press TONE.
This displays the tone screen.
2.
Press SPLIT.
This displays “L” to the left of the tone number and “SP” below it. “L” indicates the LOWER part.
3.
Rotate the dial to select the tone to be assigned to the low range keyboard.
• For tone information, see the “Tone List” (page EN-288).
• After you rotate the dial once to select a tone, you can change the selection further using – and
+.
• To return to the first tone in the Tone List, press – and + at the same time.
• If you want to select a category, use CAT–/CAT+.
• To go back to the previous screen, press BACK.
4.
Play something on the low range of the keyboard.
This sounds the selected tone.
• To turn off split, press SPLIT again.
Splitting the Keyboard Between Two Different Tones
LOWER UPPER1
F3
Split point
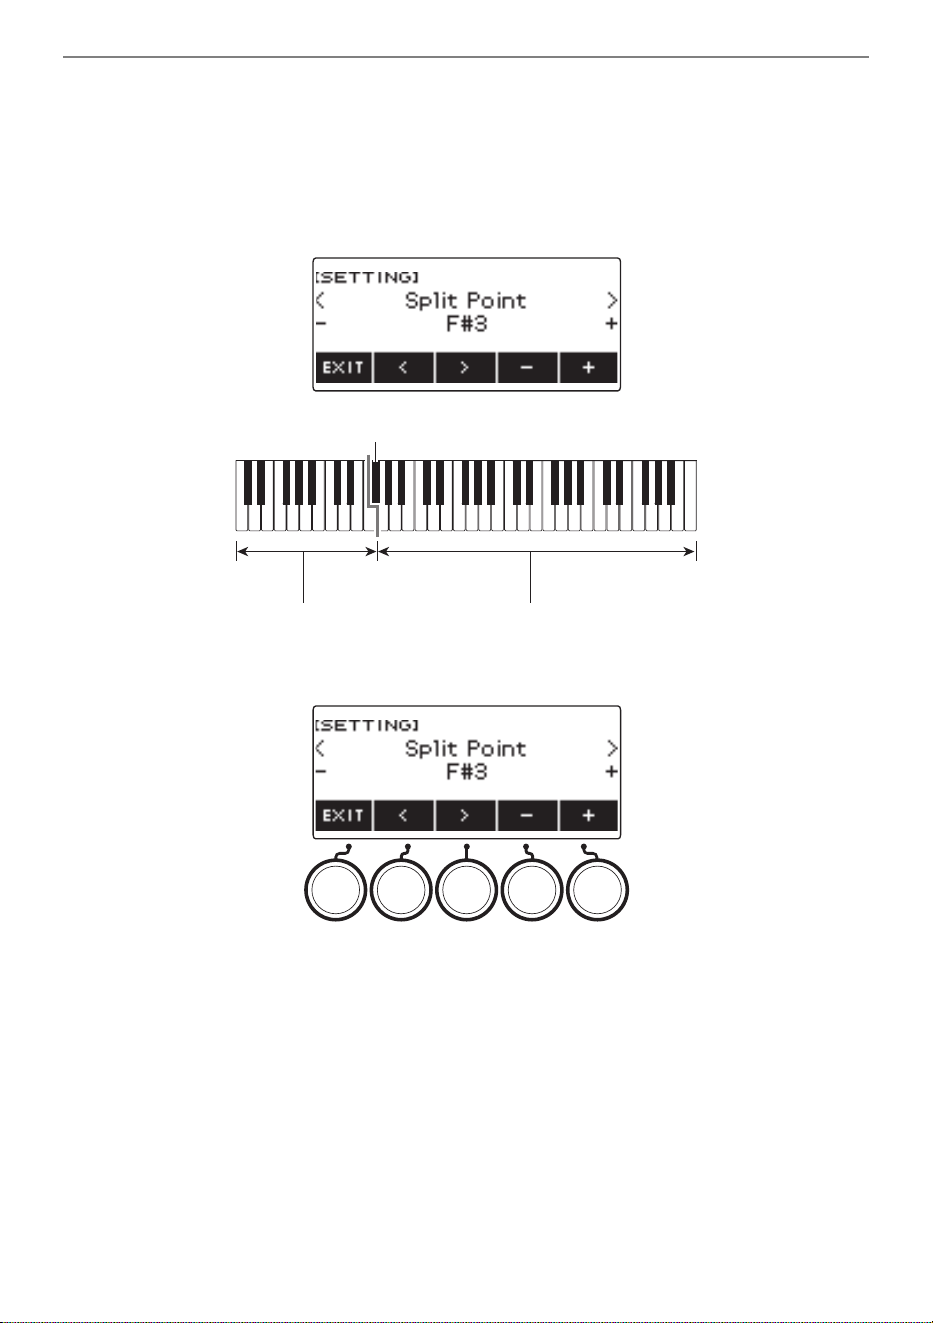
Controlling the Sound of a Performance
EN-127
■ Changing the Split Point
1.
Press TONE.
This displays the tone screen.
2.
Long-press SPLIT.
This displays the setting screen, which shows setting items for the split point.
3.
Rotate the dial or use – and + to specify the split point.
4.
To exit the setting operation, press EXIT.
LOWER UPPER1
F{3
Split point
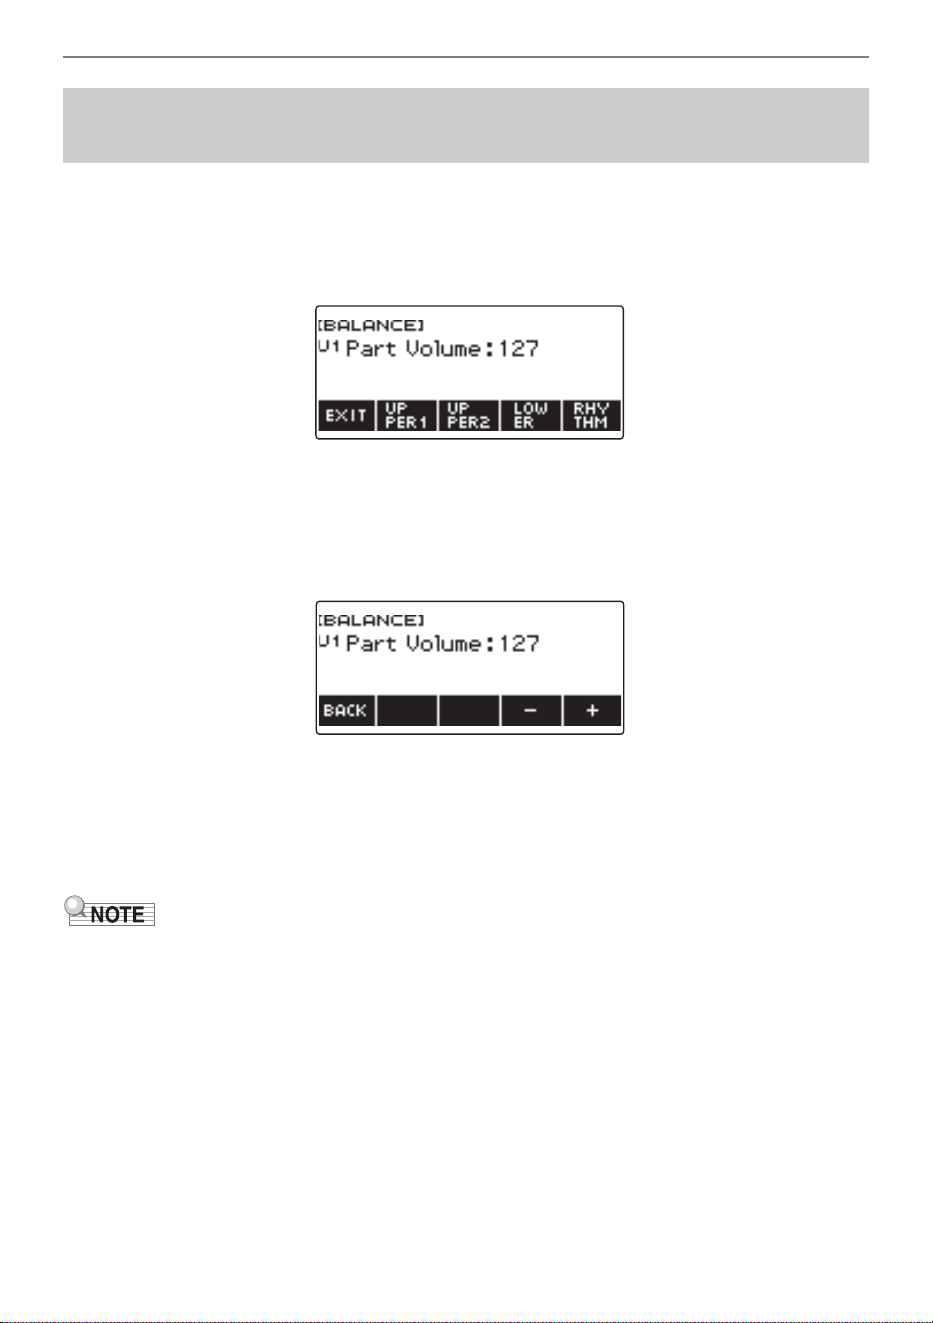
Controlling the Sound of a Performance
EN-128
1.
Press HOME.
This displays the home screen.
2.
Press BALANCE.
This displays the balance screen, which shows volume level setting items for the UPPER1 part.
3.
Press UPPER1, UPPER2, LOWER, or RHYTHM as required to select the item
whose volume level you want to adjust.
4.
Rotate the dial to change the setting value.
This displays the –/+ screen.
• You can specify a value in the range of 0 to 127.
• After you rotate the dial once to select a setting, you can change the setting further using – and
+.
• To go back to the previous screen, press BACK.
5.
To exit the setting operation, press EXIT.
• You can also display the balance screen by pressing MENU and then BALANCE.
• The BALANCE button may not be displayed on the home screen due to the Home Customization
setting.
• You can also change the rhythm volume level using the procedure under “Changing the Volume
Level of a Rhythm” (page EN-151).
Changing the Volume Balance Between Keyboard Play
and Rhythm Play (Balance)
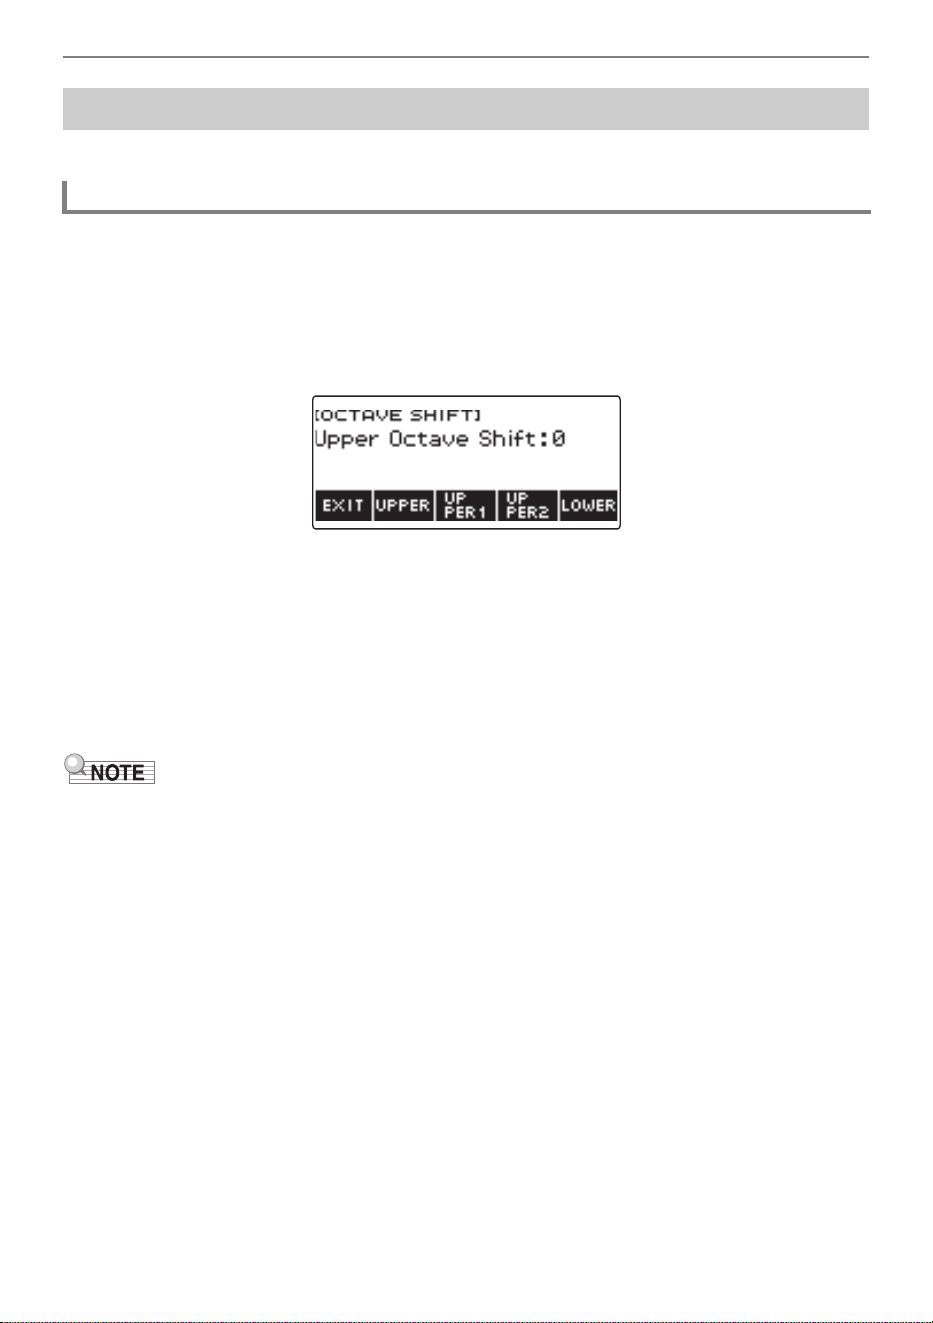
Controlling the Sound of a Performance
EN-129
You can use the procedure below to raise or lower pitch in octave units.
You can use the procedure below to raise or lower the pitch of the UPPER part in octave units.
1.
Press TONE.
This displays the tone screen.
2.
Long-press LAYER.
This displays the octave shift screen, which shows setting items for the upper octave shift.
3.
Rotate the dial to change the shift amount.
• You can specify a value in the range of –3 to +3 octaves.
• After you rotate the dial once to select a shift amount, you can change the shift amount further
using – and +.
• To return the setting to its initial default, press – and + at the same time.
• To go back to the previous screen, press BACK.
4.
To exit the setting operation, press EXIT.
• You can also display the octave shift screen by pressing MENU and then OCT SHIFT.
• With the home custom function, you can display the upper octave shift –/+ buttons on the home
screen.
• For information about the Upper Part, see “Layering and Splitting Tones” (page EN-123).
Changing the Pitch in Octave Units (Octave Shift)
Shifting the Pitch of the UPPER Tone in Octave Units (Upper Octave Shift)
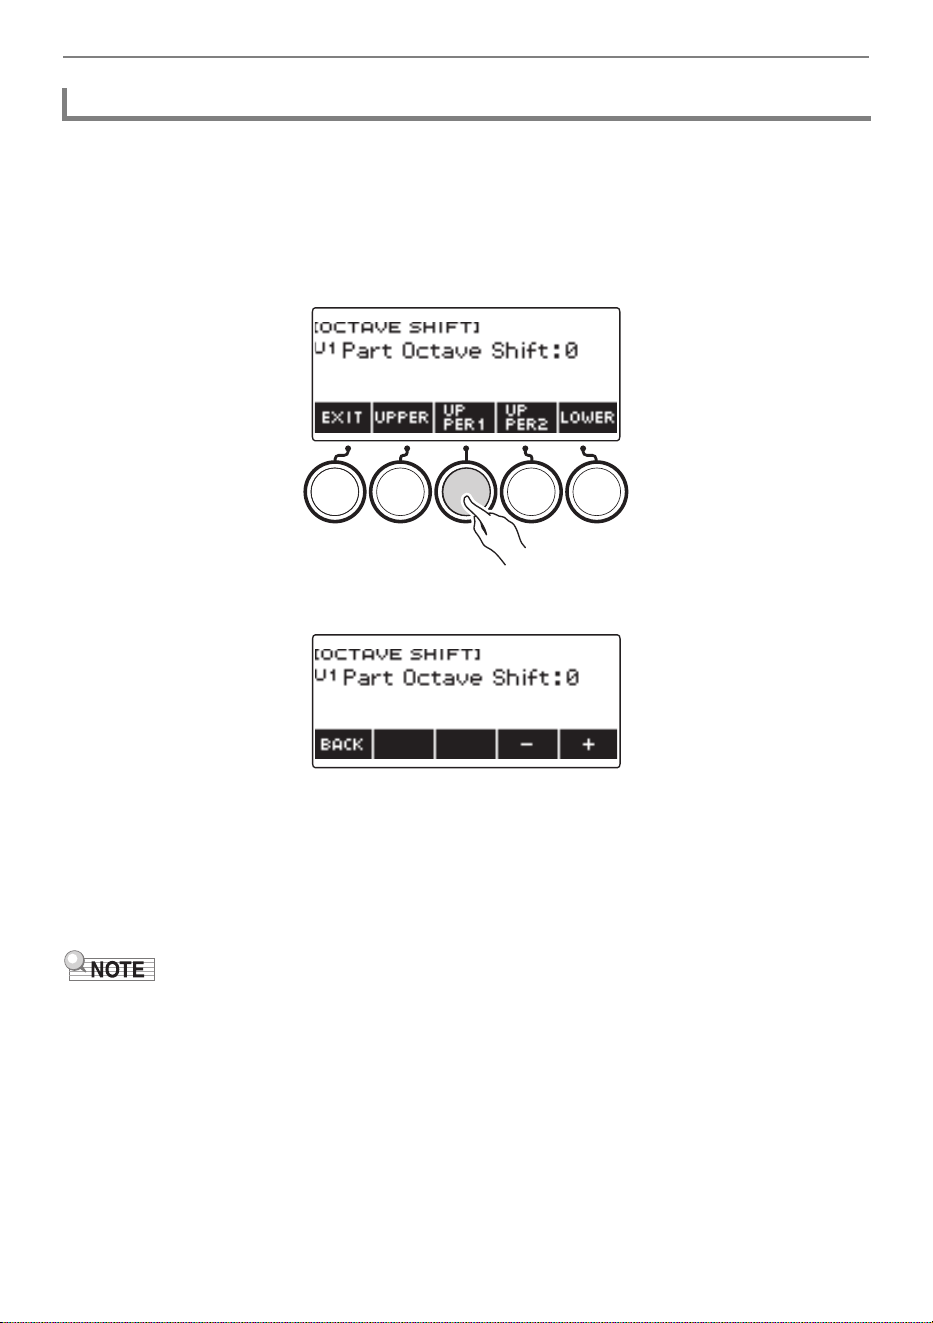
Controlling the Sound of a Performance
EN-130
1.
Press TONE.
This displays the tone screen.
2.
Long-press LAYER.
This displays the octave shift screen.
3.
Press the button that corresponds to the part whose pitch you want to change.
4.
Rotate the dial to change the shift amount.
• You can specify a value in the range of –3 to +3 octaves.
• After you rotate the dial once to select a shift amount, you can further change the shift amount
using the – and +.
• To return the setting to its initial default, press – and + at the same time.
• To go back to the previous screen, press BACK.
5.
To exit the setting operation, press EXIT.
• The part octave shift setting of the part whose tone or vocalist has been changed will be the
recommended value for that instrument tone or vocalist. For information about tone recommended
values, see the “Tone List” (page EN-288).
• You can also display the octave shift screen by pressing MENU and then OCT SHIFT.
Changing the Pitch of Each Part in Octave Units (Part Octave Shift)
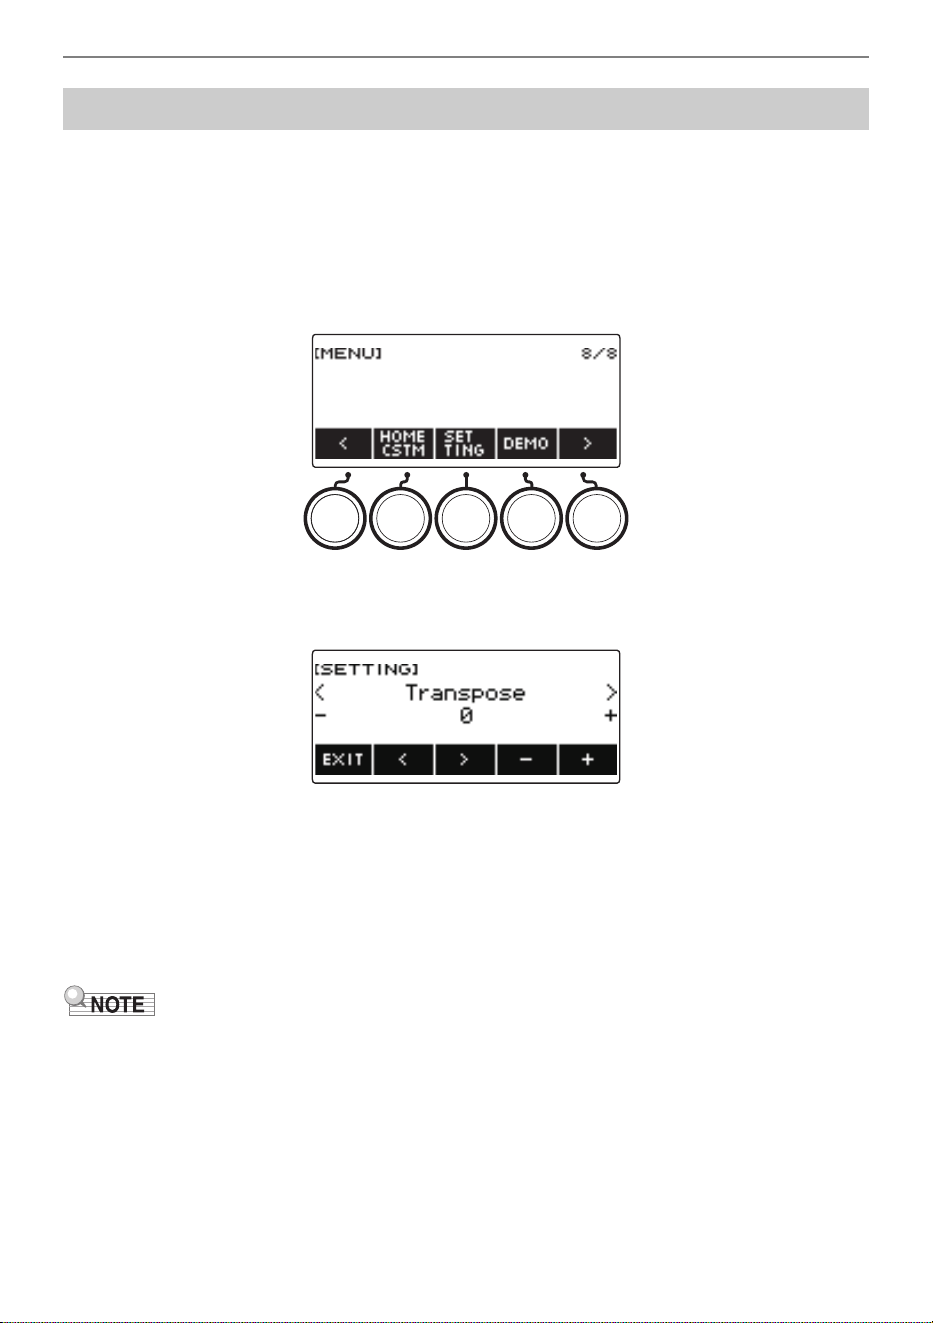
Controlling the Sound of a Performance
EN-131
You can use the procedure below to raise the overall pitch in semitone steps. You can use this feature
to raise or lower the key of the keyboard to make it easier to play a piece written in a difficult key, or to
adjust to a key that better matches a vocalist, or another musical instrument.
1.
Press MENU.
This displays the menu screen.
2.
Use U and I to select the 5 buttons menu that includes SETTING.
3.
Press SETTING.
This displays the setting screen.
4.
Use U and I to select “Transpose”.
5.
Rotate the dial or use – and + to change the setting.
• The setting range is from one octave up (+12 semitones) to one octave down (–12 semitones).
• To return the setting to its initial default, press – and + at the same time.
6.
To exit the setting operation, press EXIT.
• With the home custom function, you can display the Transpose –/+ buttons on the home screen.
Changing the Pitch in Semitone Units (Transpose)
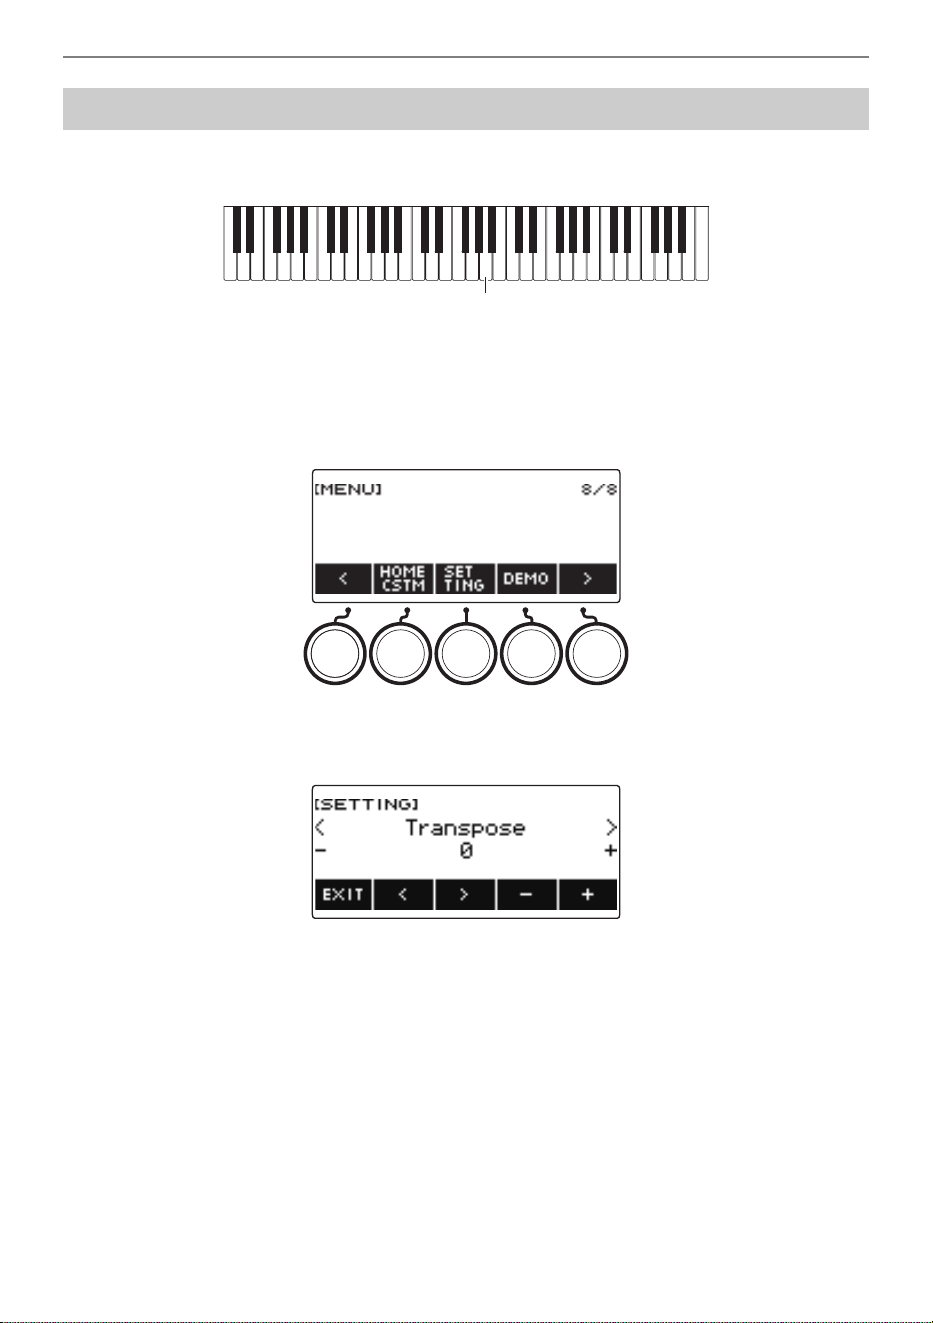
Controlling the Sound of a Performance
EN-132
You can use the procedure below to adjust the overall pitch by changing the frequency of A4. (0.1Hz
units)
1.
Press MENU.
This displays the menu screen.
2.
Use U and I to select the 5 buttons menu that includes SETTING.
3.
Press SETTING.
This displays the setting screen.
4.
Use U and I to select “Tuning”.
5.
Rotate the dial or use – and + to adjust the tuning.
• You can specify a frequency in the range of 415.5 to 465.9 Hz.
• To return the setting to its initial default, press – and + at the same time.
6.
To exit the setting operation, press EXIT.
Fine Tuning (Tuning)
A4
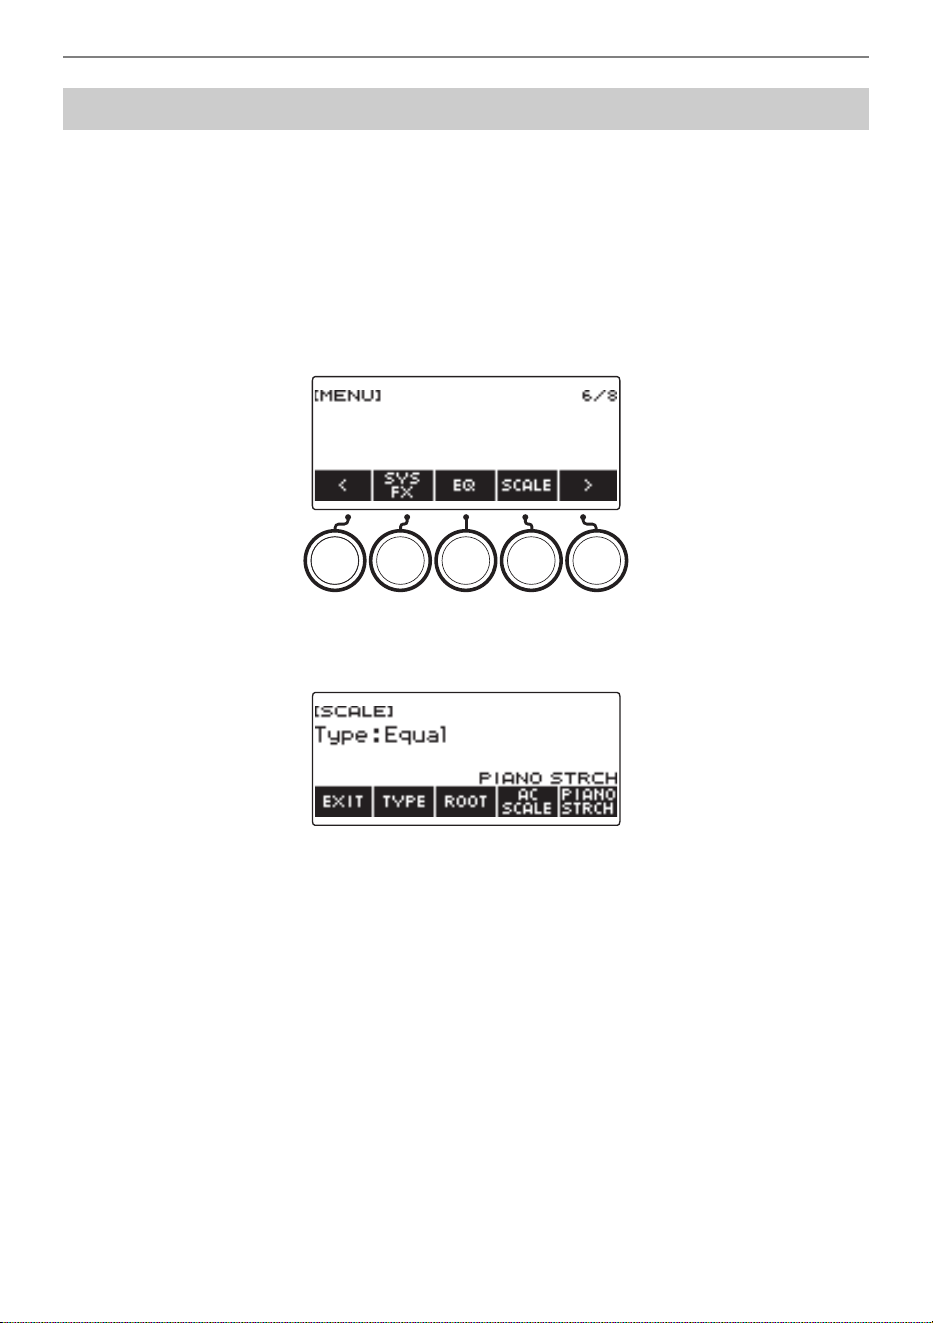
Controlling the Sound of a Performance
EN-133
You can change the scale tuning of the keyboard from the standard equal temperament to another
tuning that is more suitable for playing Indian music, Arabic music, classical music, etc. You can select
from among 17 preset scale tunings.
■ Changing the Scale Tuning
1.
Press MENU.
This displays the menu screen.
2.
Use U and I to select the 5 buttons menu that includes SCALE.
3.
Press SCALE.
This displays the scale tuning screen.
Changing the Keyboard Scale Tuning
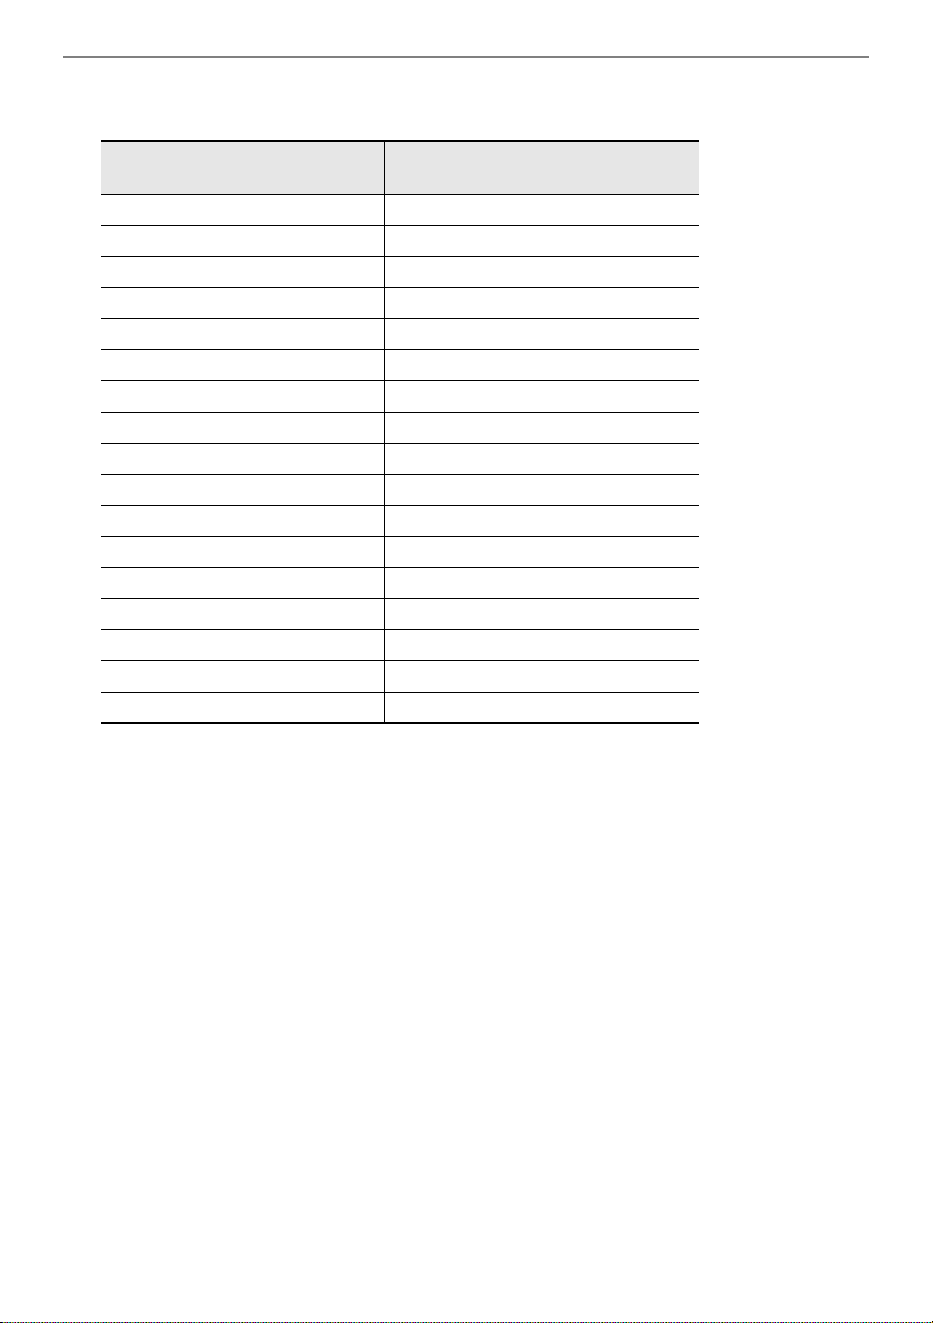
Controlling the Sound of a Performance
EN-134
4.
Rotate the dial to select the scale.
Scale settings you can select are shown in the table below.
• After you rotate the dial once to select a scale, you can change the selection further using – and +.
• To return the setting to its initial default, press – and + at the same time.
• To go back to the previous screen, press BACK.
5.
To exit the setting operation, press EXIT.
Setting
(Displayed Setting Name)
Scale Tuning Name
Equal Equal temperament
Pure Major Just major intonation
Pure Minor Just minor intonation
Pythagorean Pythagorean tuning
Kirnberger 3 Kirnberger III
Werckmeister Werckmeister 1-3(III)
Mean-Tone Mean-tone tuning
Rast Rast
Bayati Bayati
Hijaz Hijaz
Saba Saba
Dashti Dashti
Chahargah Chahargah
Segah Segah
Gurjari Todi Gurjari Todi
Chandrakauns Chandrakauns
Charukeshi Charukeshi
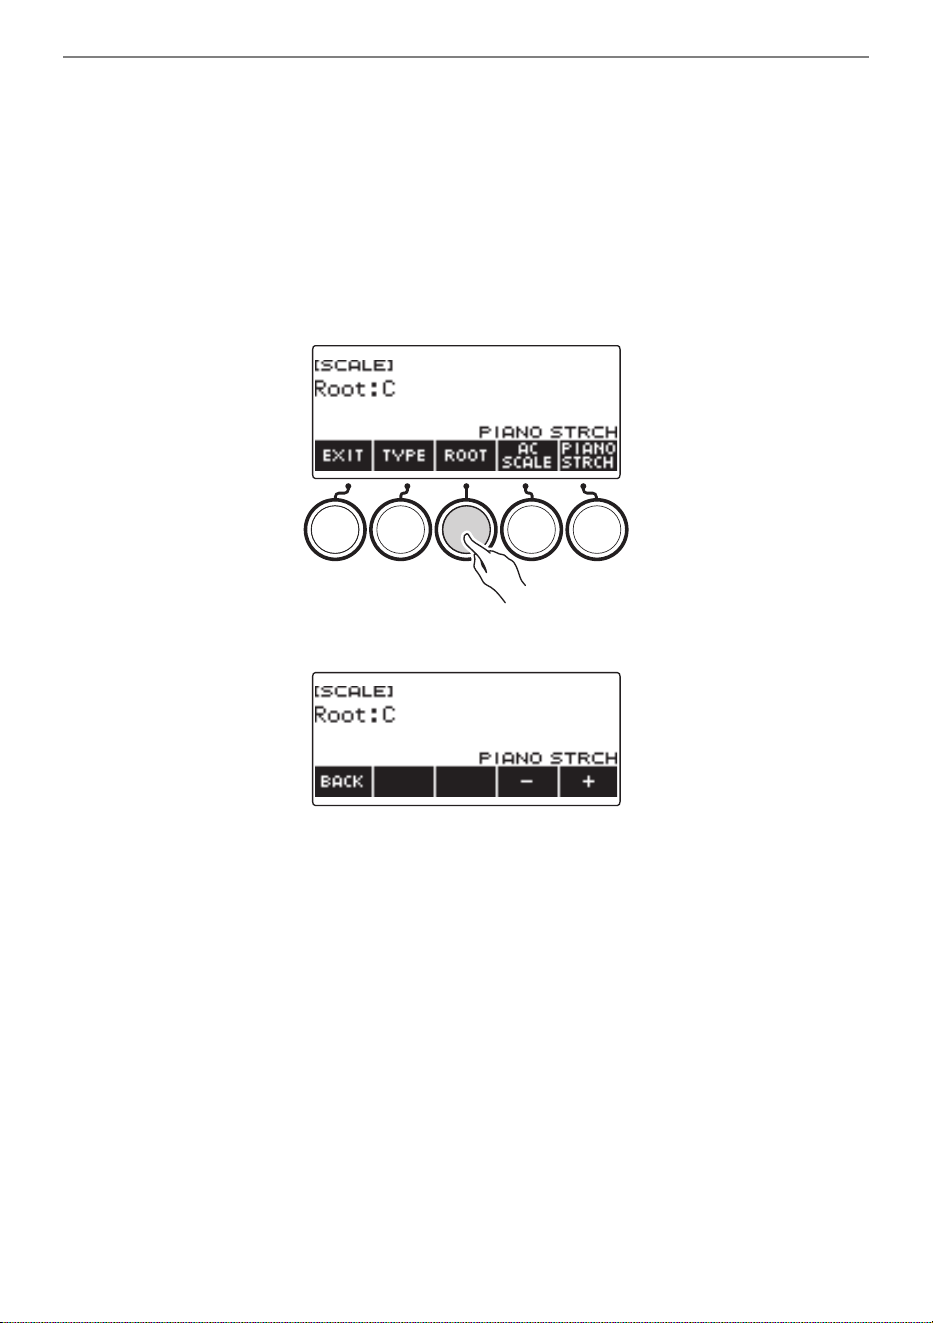
Controlling the Sound of a Performance
EN-135
■ Specifying the Base Note of the Scale Tuning
1.
Press MENU.
This displays the menu screen.
2.
Use U and I to select the 5 buttons menu that includes SCALE.
3.
Press SCALE.
This displays the scale tuning screen.
4.
Press ROOT.
5.
Rotate the dial to change the setting.
• You can specify a base note in the range of C to B.
• After you rotate the dial once to select a setting, you can change the selection further using –
and +.
• To return the setting to its initial default, press – and + at the same time.
• To go back to the previous screen, press BACK.
6.
To exit the setting operation, press EXIT.
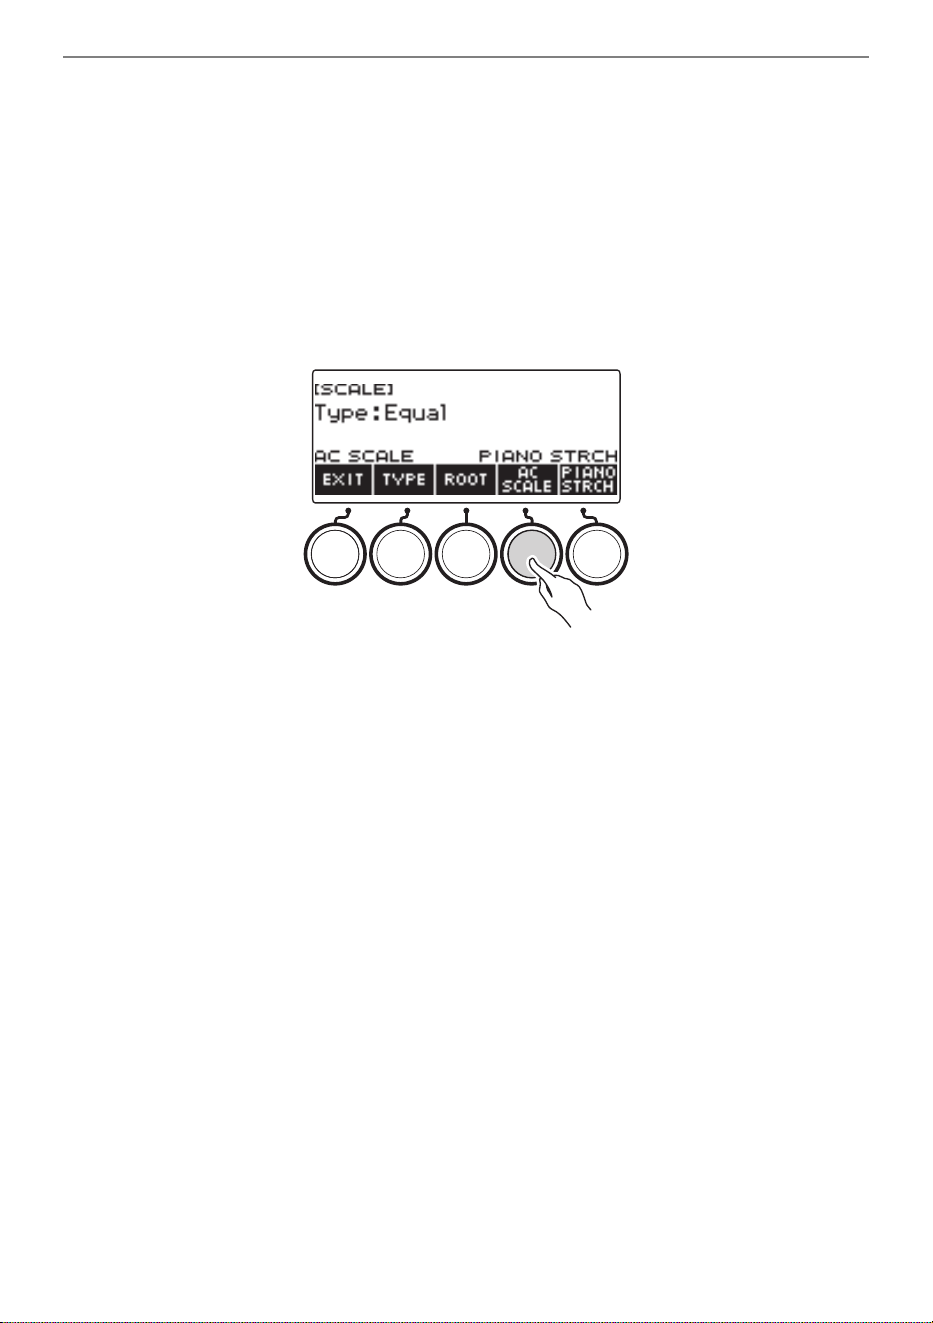
Controlling the Sound of a Performance
EN-136
■ Reflecting the Scale Setting in the Rhythm Accompaniment as Well
1.
Press MENU.
This displays the menu screen.
2.
Use U and I to select the 5 buttons menu that includes SCALE.
3.
Press SCALE.
This displays the scale tuning screen.
4.
Press AC SCALE.
This displays “AC SCALE”, and reflects the scale setting in rhythm accompaniment as well.
5.
To cancel the scale setting for rhythm accompaniment, press AC SCALE again.
This causes “AC SCALE” to disappear from the display.
6.
To exit the setting operation, press EXIT.
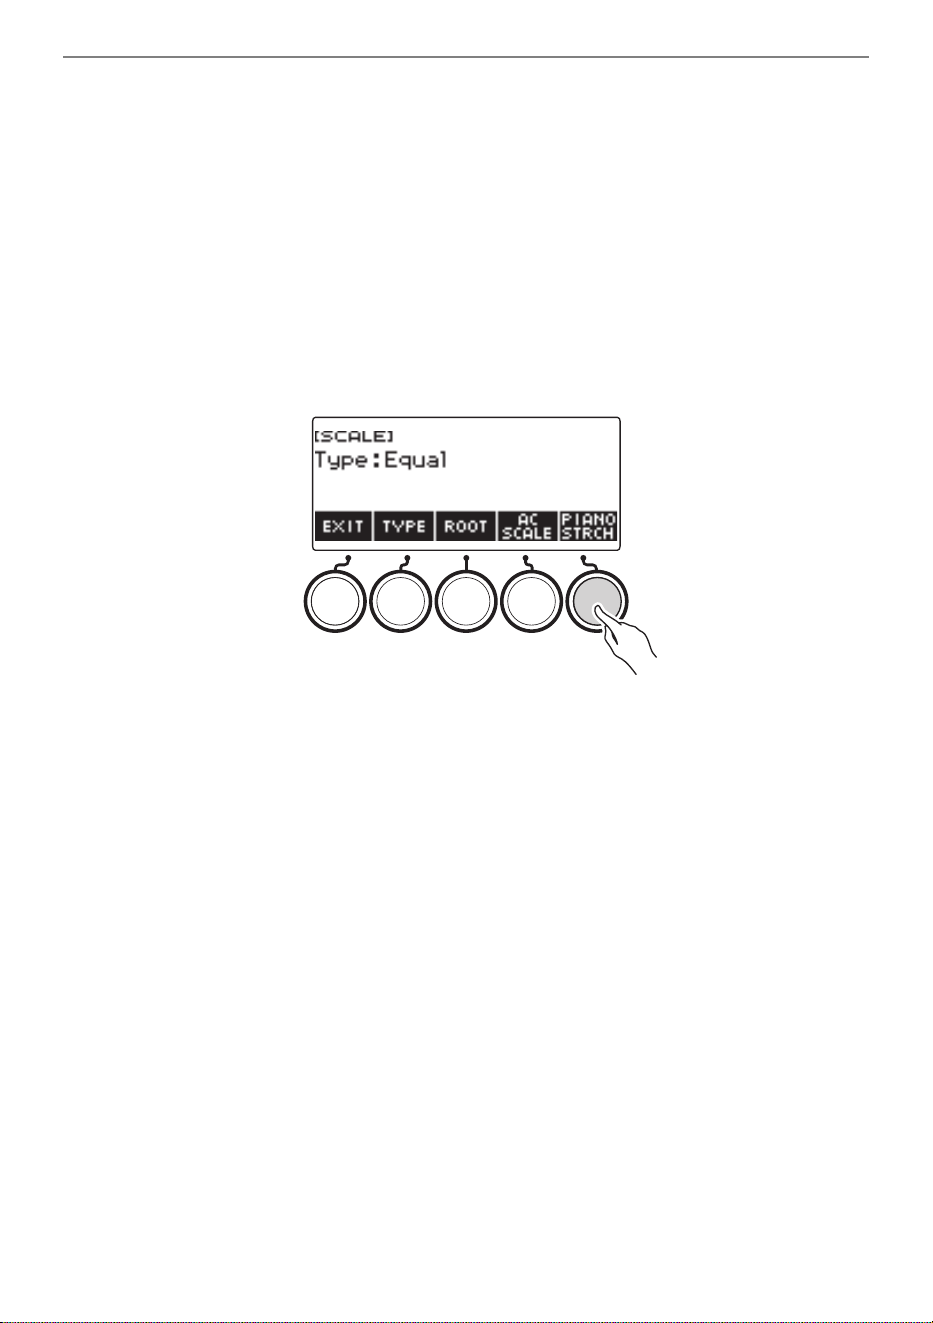
Controlling the Sound of a Performance
EN-137
■ Disabling Piano Stretch Tuning
Stretch tuning makes high notes relatively higher and low notes relatively lower than equal
temperament tuning for a wider frequency differential between high and low notes.
1.
Press MENU.
This displays the menu screen.
2.
Use U and I to select the 5 buttons menu that includes SCALE.
3.
Press SCALE.
This displays the scale tuning screen.
4.
Press PIANO STRCH.
“PIANO STRCH” disappears from the display and piano stretch tuning is disabled.
5.
To enable piano stretch tuning, press PIANO STRCH again.
This displays “PIANO STRCH”.
6.
To exit the setting operation, press EXIT.

Controlling the Sound of a Performance
EN-138
You can use the equalizer to configure settings that boost or cut specific frequency components.
1.
Press MENU.
This displays the menu screen.
2.
Use U and I to select the 5 buttons menu that includes EQ.
3.
Press EQ.
This displays the equalizer screen.
4.
Rotate the dial or use – and + to change the setting.
The table below shows available equalizer settings.
Using the Equalizer
Setting (Display Text) Description
Standard (Standard) Standard setting
Loudness (Loudness) Boosts all ranges.
Treble + (Treble +) Boosts the high range.
Bass + (Bass +) Boosts the low range.
Mellow (Mellow) Produces a mellow sound.
Bright (Bright) Produces a bright sound.
Rock (Rock) Produces a sound optimized for rock music.
Jazz (Jazz) Produces a sound optimized for jazz music.
Dance (Dance) Produces a sound optimized for dance music.
Classic (Classic) Produces a sound optimized for classical music.
User Equalizer (User) Produces a sound in accordance with equalizer settings
adjusted by you.
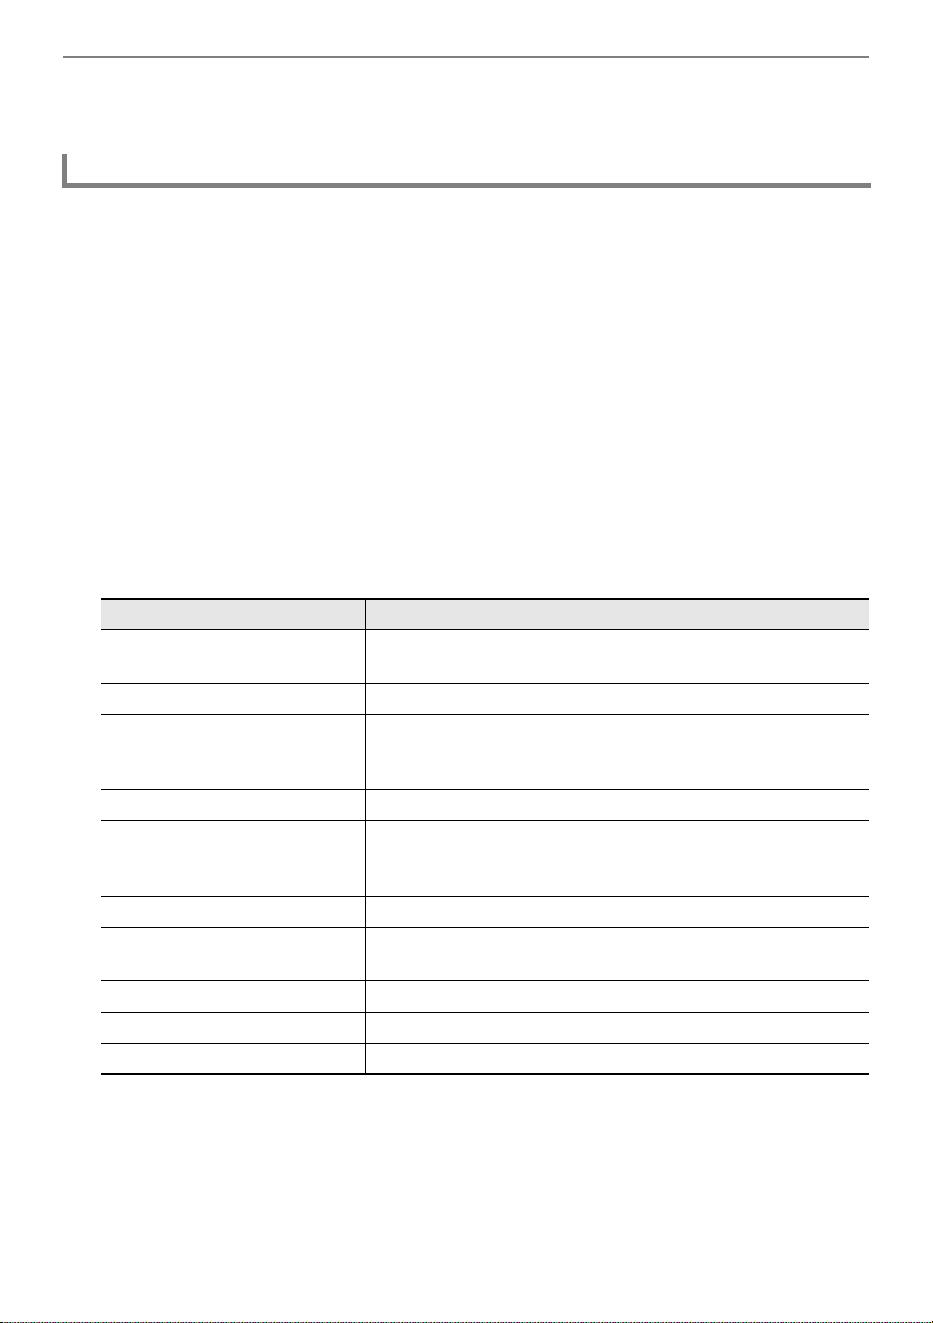
Controlling the Sound of a Performance
EN-139
5.
To exit the setting operation, press EXIT.
1.
Press MENU.
This displays the menu screen.
2.
Use U and I to select the 5 buttons menu that includes EQ.
3.
Press EQ.
This displays the equalizer screen.
4.
Rotate the dial or use – and + to change the user setting.
5.
Press PARAMETER.
This displays the user equalizer setting screen.
6.
Use U and I to select the item.
7.
Rotate the dial or use – and + to change the setting.
The table below shows available equalizer settings.
8.
To return to the equalizer screen, press BACK.
9.
To exit the setting operation, press EXIT.
Configuring Your Own Equalizer Settings (User Equalizer)
Setting (Display Text) Settings
Low-range Cutoff Frequency
(Low Cutoff Frequency)
50 Hz, 63 Hz, 80 Hz, 100 Hz, 125 Hz, 160 Hz, 200 Hz, 250 Hz,
315 Hz, 400 Hz, 500 Hz, 630 Hz, 800 Hz
Low Gain (Low Gain) –12 to +12
Midrange 1 Center Frequency
(Mid1 Center Frequency)
100 Hz, 125 Hz, 160 Hz, 200 Hz, 250 Hz, 315 Hz, 400 Hz,
500 Hz, 630 Hz, 800 Hz, 1.0 kHz, 1.3 kHz, 1.6 kHz, 2.0 kHz,
2.5 kHz, 3.2 kHz, 4.0 kHz, 5.0 kHz, 6.3 kHz, 8.0 kHz
Midrange 1 Gain (Mid1 Gain) –12 to +12
Midrange 2 Center Frequency
(Mid2 Center Frequency)
100 Hz, 125 Hz, 160 Hz, 200 Hz, 250 Hz, 315 Hz, 400 Hz,
500 Hz, 630 Hz, 800 Hz, 1.0 kHz, 1.3 kHz, 1.6 kHz, 2.0 kHz,
2.5 kHz, 3.2 kHz, 4.0 kHz, 5.0 kHz, 6.3 kHz, 8.0 kHz
Midrange 2 Gain (Mid2 Gain) –12 to +12
High-range Cutoff Frequency
(High Cutoff Frequency)
2.0 kHz, 2.5 kHz, 3.2 kHz, 4.0 kHz, 5.0 kHz, 6.0 kHz, 8.0 kHz,
10 kHz, 13 kHz, 16 kHz
High Gain (High Gain) –12 to +12
Input Level (Input Level) 0 to 127
Output Level (Output Level) 0 to 127
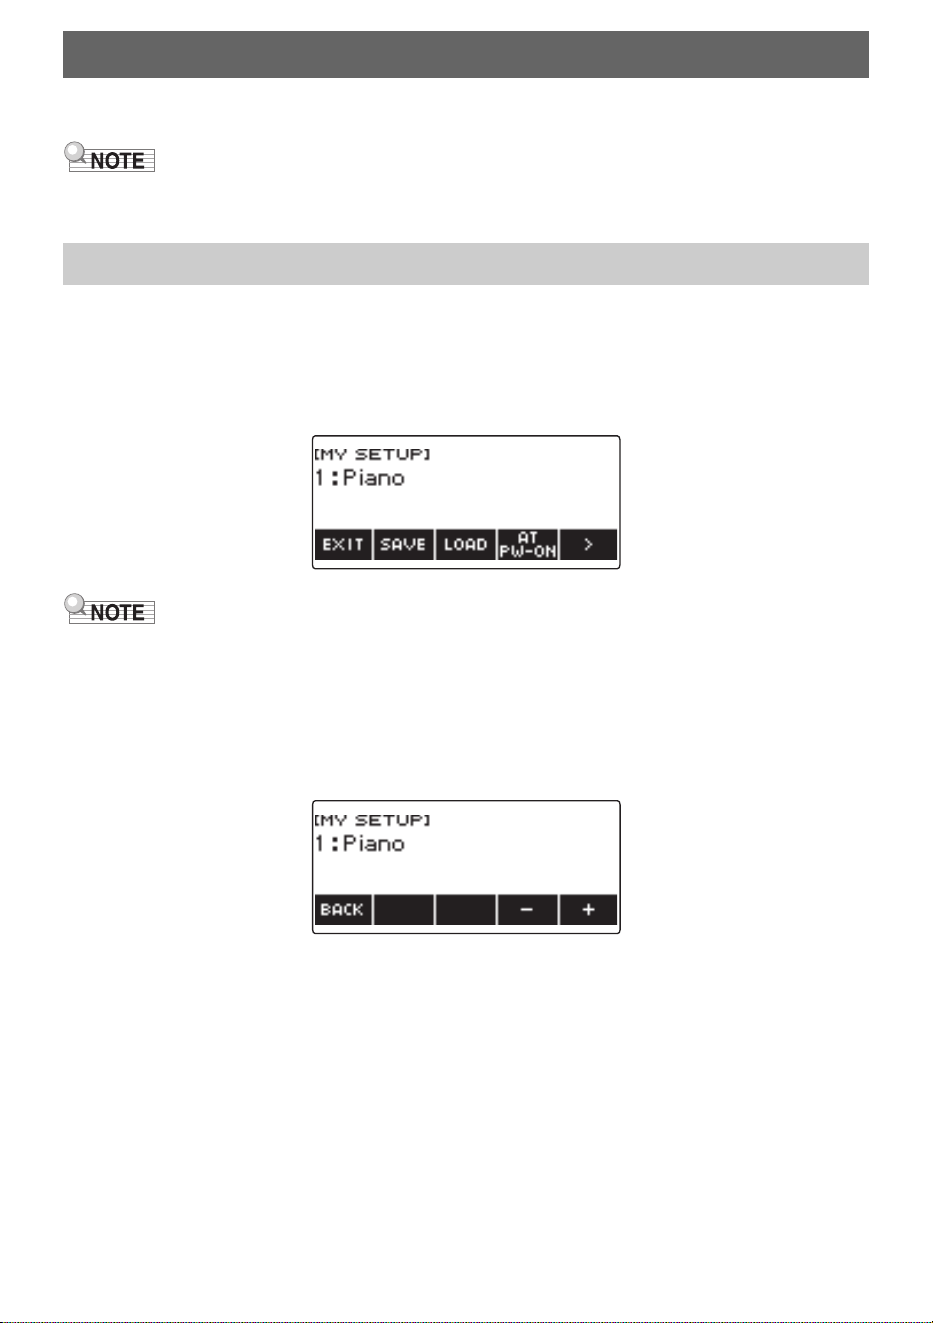
EN-140
You can up to four setups (tone, rhythm, and other settings) of the Digital Keyboard. You can recall a
saved setup when you need it to perform a particular song, etc.
• Four setups are pre-stored in MY SETUP by default. If you store setups, they replace the pre-stored
setups.
1.
Press MENU.
This displays the menu screen.
2.
Press MY SETUP.
This displays the MY SETUP screen.
• You can also display the MY SETUP screen from the home screen.
• Depending on Home Customization settings, the MY SETUP button may not be shown on the
display.
3.
Rotate the dial to select the setup number you want to specify as the storage
destination.
This displays the –/+ screen.
• You can select a setup number from 1 to 4.
• After you rotate the dial once to select a setup number, you can change the selection further
using – and +.
• To go back to the previous screen, press BACK.
Saving and Recalling a Setup (MY SETUP)
Saving to MY SETUP
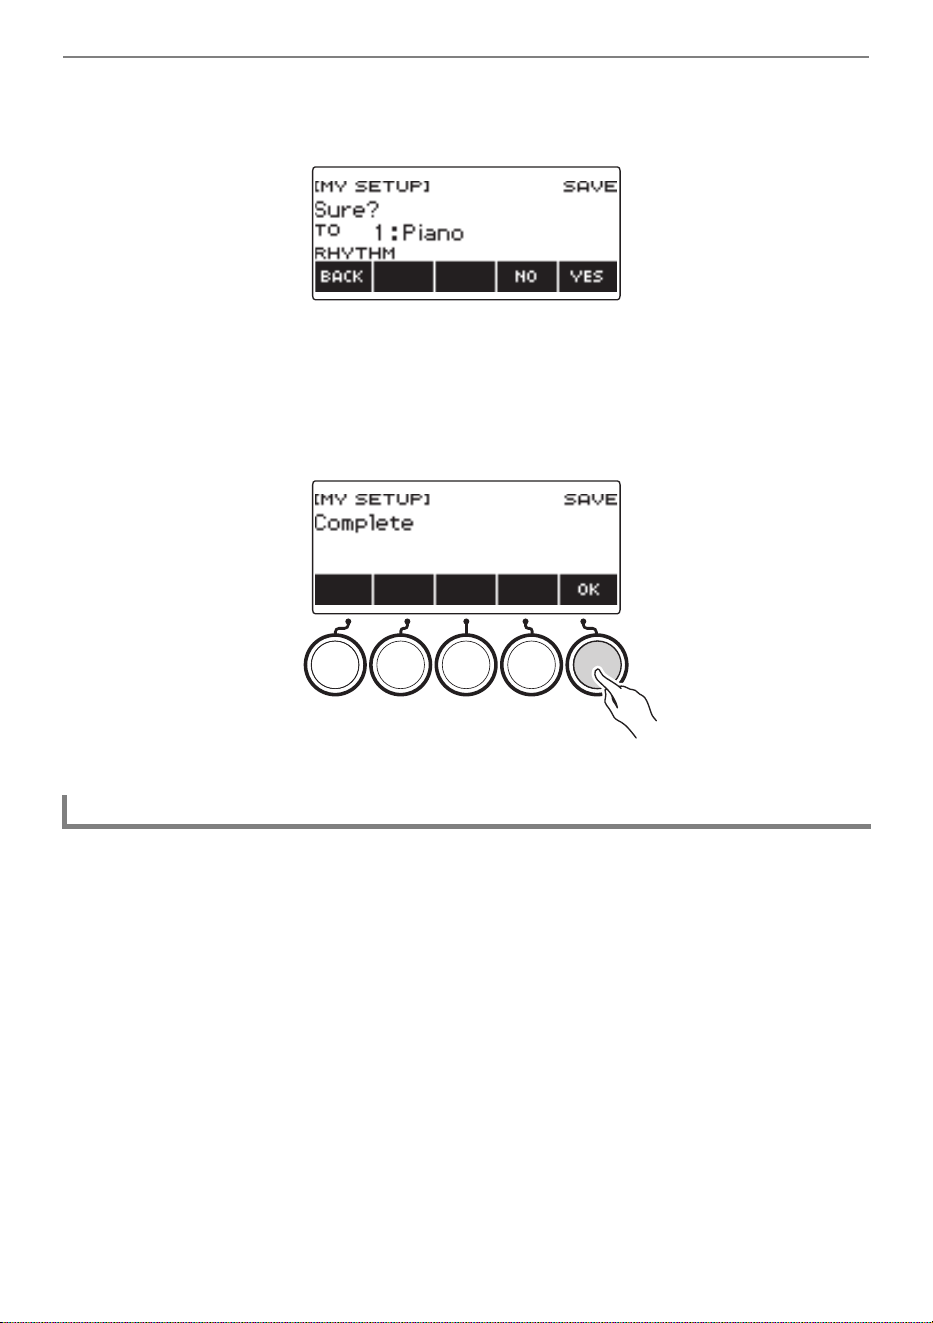
Saving and Recalling a Setup (MY SETUP)
EN-141
4.
Press SAVE.
This displays “Sure?”. The name of the main setting (TONE, RHYTHM, SONG, Registration) you
are using also appears.
5.
Press YES.
This saves the current setup to MY SETUP.
• To cancel, press NO. This returns to the MY SETUP screen at the beginning of the procedure.
6.
When “Complete” appears on the display, press OK.
This exits the save operation.
The settings listed below can be saved with MY SETUP.
• Functions currently in use (TONE, RHYTHM, SONG, REGISTRATION)
• Tones (UPPER1, UPPER2, LOWER)
• Vocal Synthesis (Lyric tone, Lyric tone sequence, Lyric tone performance mode,
Lyric tone controller, Lyric tone speed, Lyric syllable attack balancer, Lyric syllable attack,
Random syllable advance, Syllable chord control function, Syllable stay notes, Lyric tone retrigger,
Vocalist)
• Touch Response
• Touch off velocity
• Pedal (PEDAL1, PEDAL2)
• Pedal Effect Part (UPPER1, UPPER2, and LOWER for PEDAL1 and PEDAL2)
• Sustain
• Sustain times (UPPER1, UPPER2, LOWER)
• Upper Portamento
• Part Portamento (UPPER1, UPPER2, LOWER)
• Portamento Time (UPPER1, UPPER2, LOWER)
• Pitch Bend Range (UPPER1, UPPER2, LOWER)
• Knob Type (K1, K2, K3)
Savable Settings
B

Saving and Recalling a Setup (MY SETUP)
EN-142
• Knob Effect Part (UPPER1, UPPER2, and LOWER for each of the knobs: K1, K2, K3)
• Knob K1-K2 Link
• Layer
• Split
• Split point
• Balance (UPPER1, UPPER2, LOWER, Rhythm)
• Upper octave shift
• Part Octave Shift (UPPER1, UPPER2, LOWER)
• Transpose
• SUS/UPPER PORT button
• Surround
• Reverb
• Song Reverb
• Delay
• Chorus
• Equalizer (Type, User Equalizer settings)
• Scale tuning type
• Scale tuning base note
• Accompaniment scale
• Piano Stretch Tuning
• Tuning
• Arpeggiator (type, hold, part)
• Auto Harmonize
• ARP/AH button
• Active DSP* (Effect Change Part, Effect, Effect Part, Parameter, Active DSP Hold)
• Metronome beat
• Metronome volume level
• Tempo
• Tempo tap start
• AUDIO IN center cancel
• Rhythm (number, pattern, fill, accompaniment, chord mode, Synchro Start, Synchro Stop,
volume level, auto setting, operation type)
• Registration (bank, Freeze, Freeze item, auto exit, Registration sequence)
• Song (number, count, part off, volume level, SMF part)
• Multi-track recording settings (track mute, mixing)
• Recording settings (beat, count, track)
• MIDI Controller (Program Change, Control Change)
• Home Customization
• Speaker
• Speaker enabled when PHONES connected
* Active DSP settings can be saved only when Active DSP Hold is enabled.
B
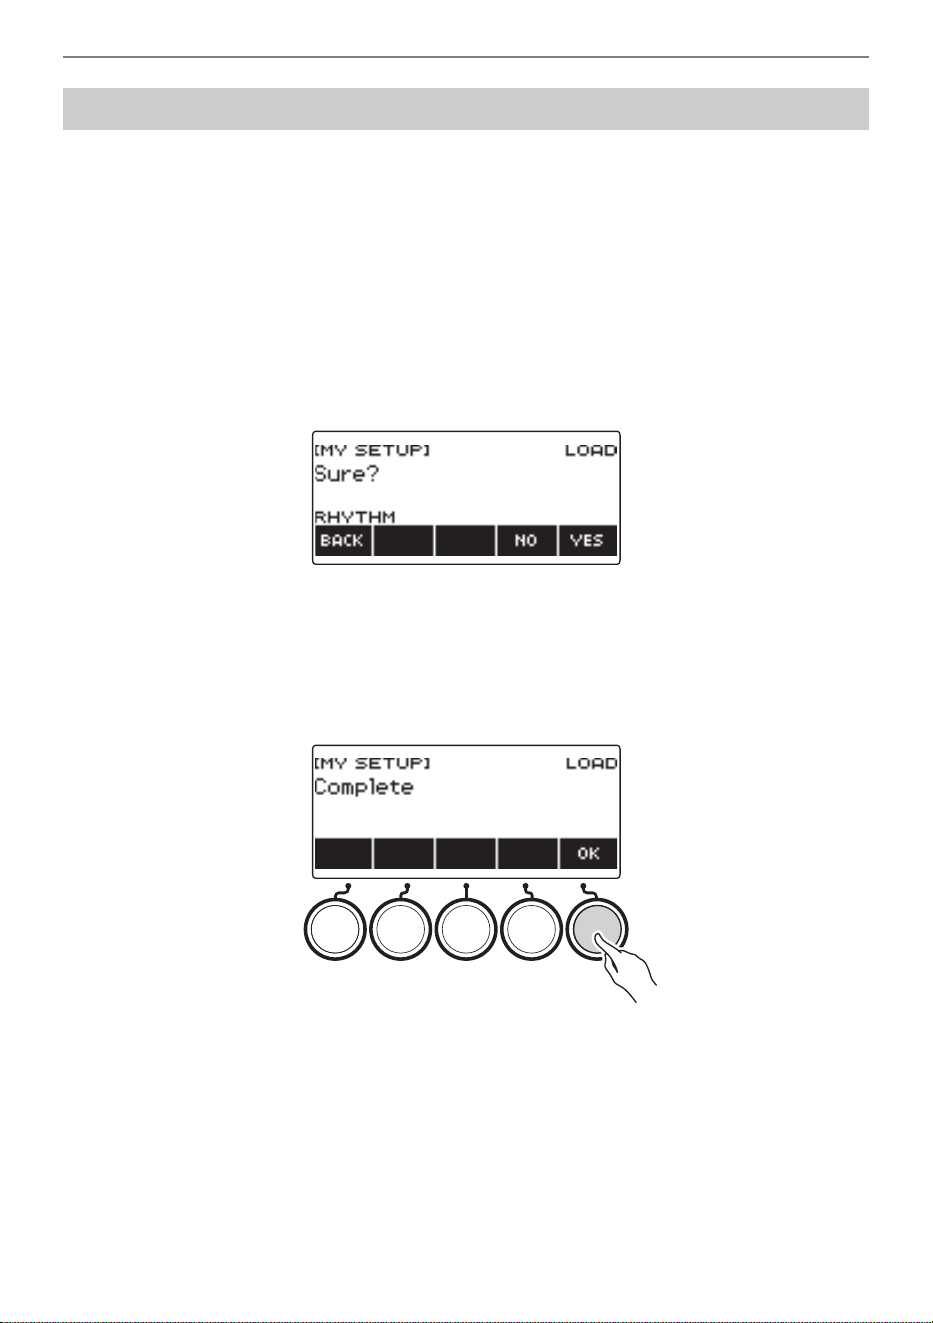
Saving and Recalling a Setup (MY SETUP)
EN-143
1.
Press MENU.
This displays the menu screen.
2.
Press MY SETUP.
This displays the MY SETUP screen.
3.
Rotate the dial to select the setup number you want to recall.
• If you rotated the dial, press BACK.
4.
Press LOAD.
This displays “Sure?” and the main setting’s name (TONE, RHYTHM, SONG, REGISTRATION)
saved to the setup.
5.
Press YES.
This recalls the saved settings.
• To cancel, press NO. This returns to the MY SETUP screen at the beginning of the procedure.
6.
When “Complete” appears on the display, press OK.
This exits the recall operation.
Recalling a MY SETUP
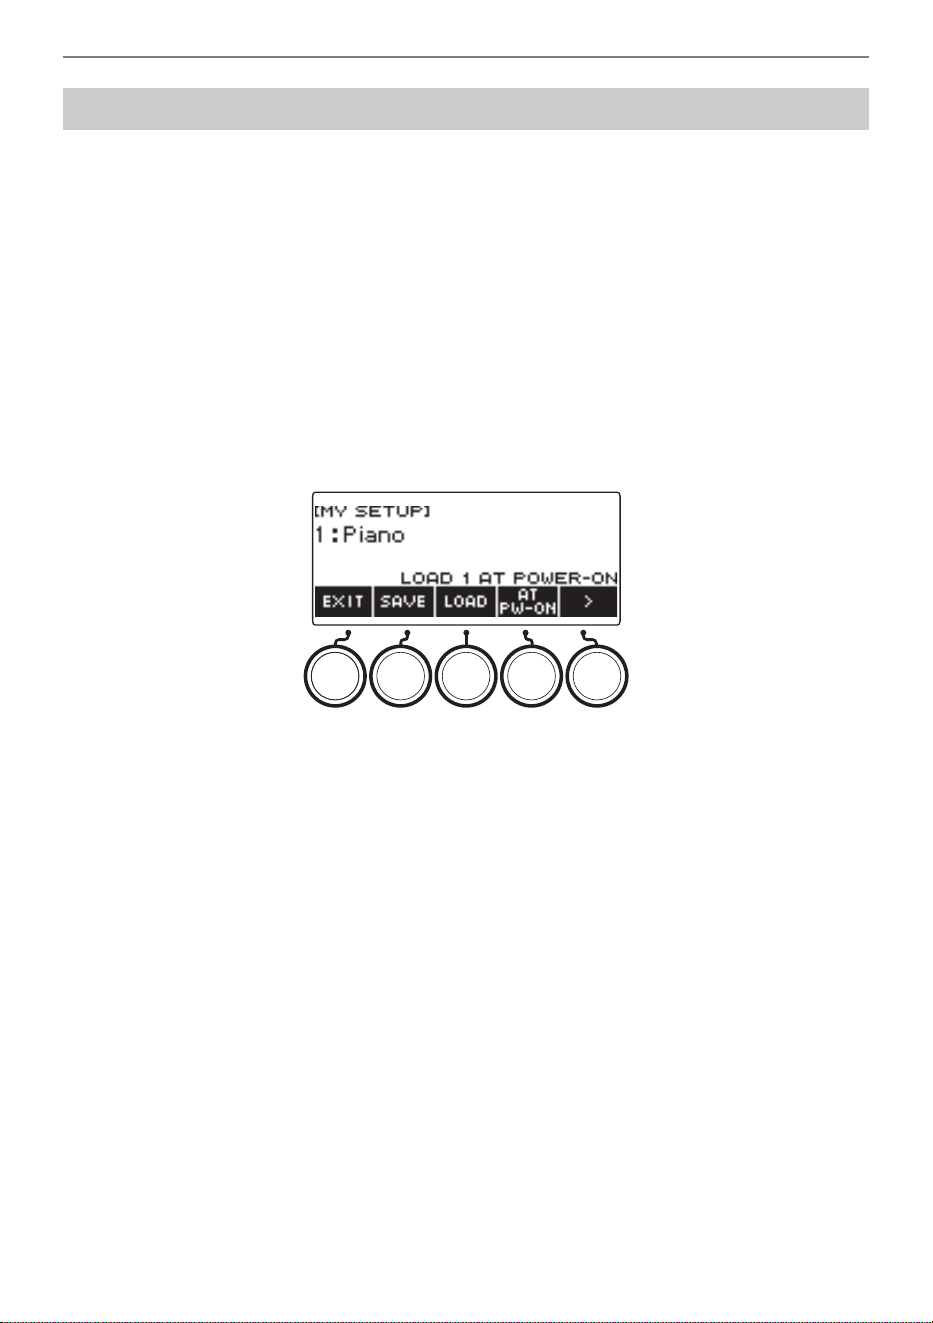
Saving and Recalling a Setup (MY SETUP)
EN-144
Use the procedure below to enable MY SETUP power on recall, which causes MY SETUP settings to
be recalled whenever power is turned on.
1.
Press MENU.
This displays the menu screen.
2.
Press MY SETUP.
This displays the MY SETUP screen.
3.
Rotate the dial to select the setup number you want to recall at startup.
• If you rotated the dial, press BACK.
4.
Press AT PW-ON.
This specifies that the MY SETUP number you selected in step 3 of this procedure should be
recalled and applied when the Digital Keyboard is turned on.
5.
To cancel MY SETUP power on recall, select the currently set MY SETUP setup
number and then press AT PW-ON again.
6.
To exit the setting operation, press EXIT.
Enabling MY SETUP Power On Recall
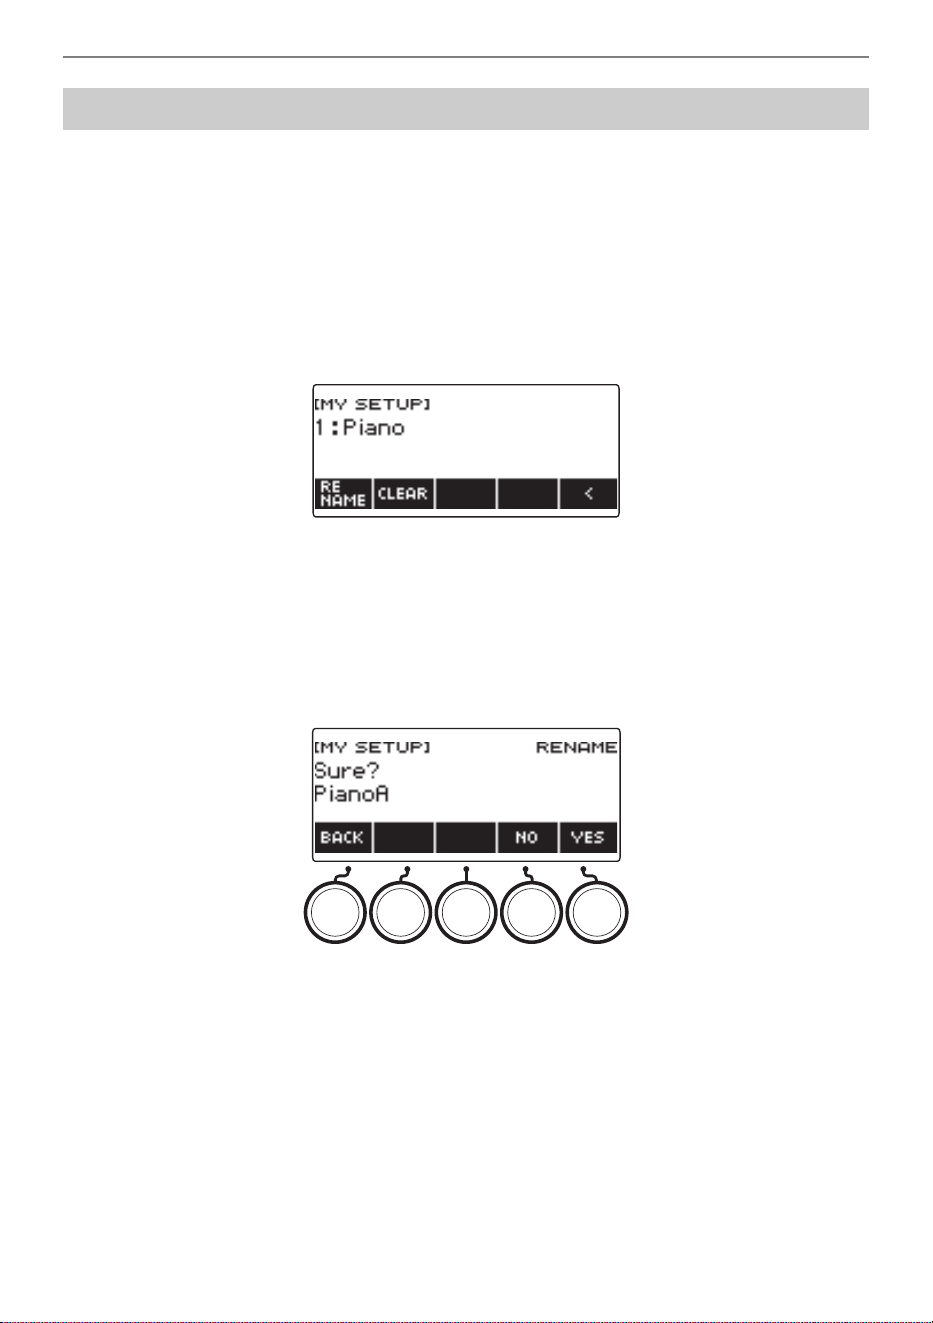
Saving and Recalling a Setup (MY SETUP)
EN-145
1.
Press MENU.
This displays the menu screen.
2.
Press MY SETUP.
This displays the MY SETUP screen.
3.
Rotate the dial to select the setup number you want to rename.
• If you rotated the dial, press BACK.
4.
Use I to select the 5 buttons menu that includes RENAME.
5.
Press RENAME.
6.
Edit the data name.
• For information about viewing and editing text, see “Inputting Characters” (page EN-23).
7.
To confirm the data name, press CONFIRM.
This displays “Sure?”.
8.
Press YES.
This changes the name.
• To return to the data name editing screen, press NO.
Renaming a MY SETUP
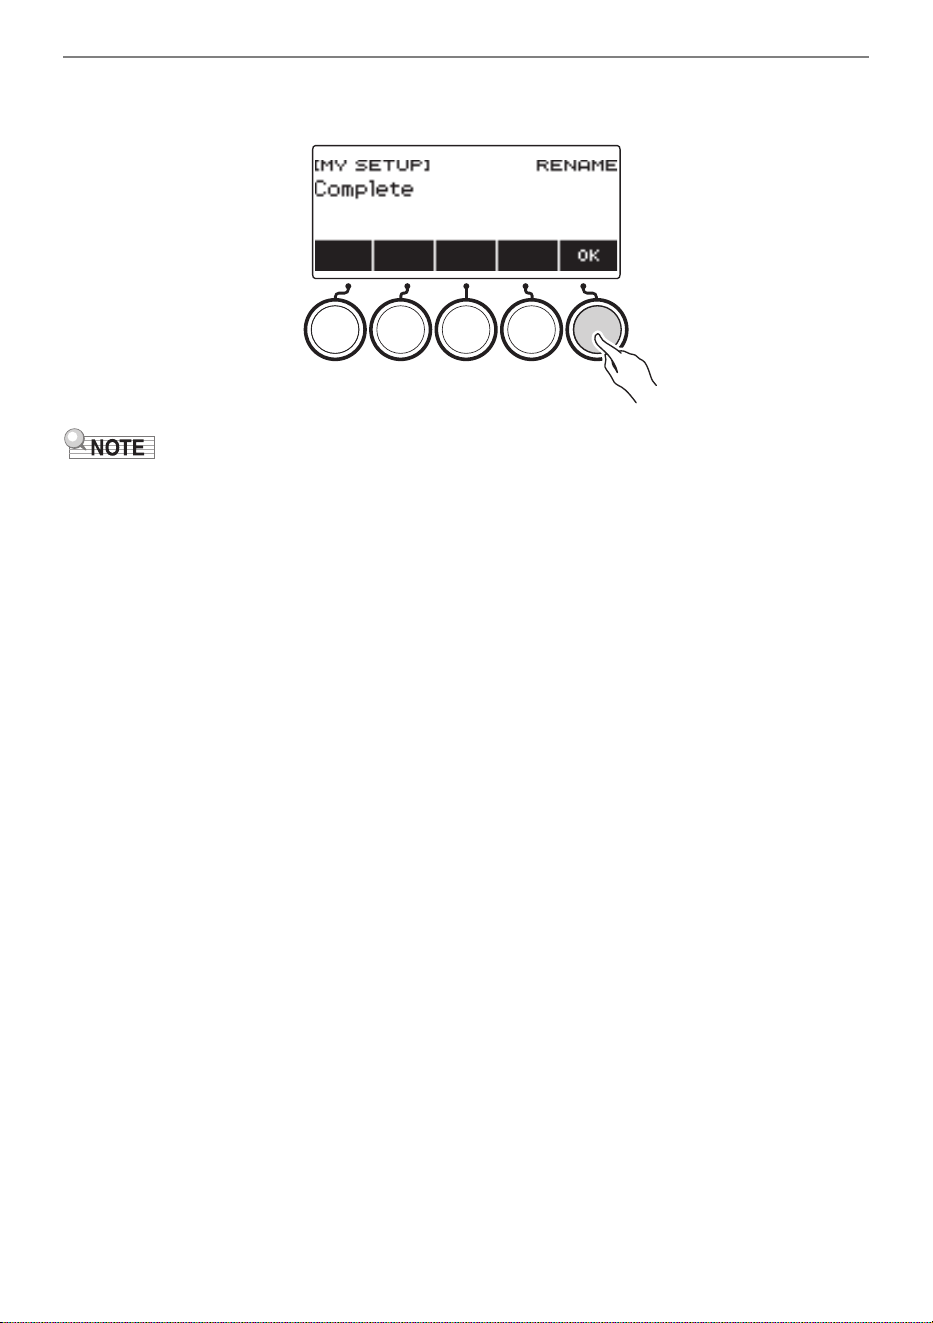
Saving and Recalling a Setup (MY SETUP)
EN-146
9.
When “Complete” appears on the display, press OK.
This exits the rename operation.
• A MY SETUP name can have up to 12 characters.
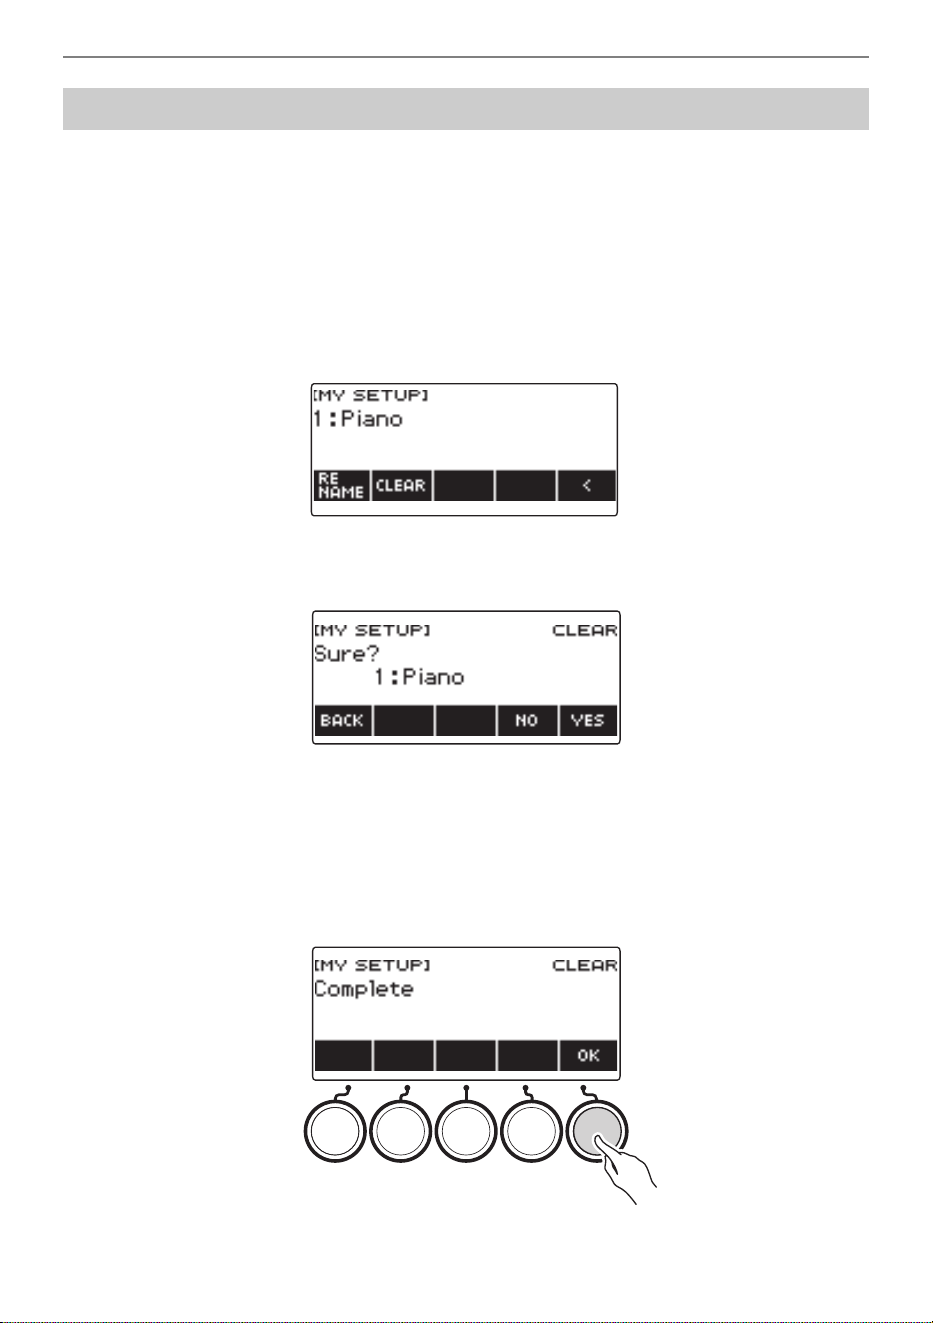
Saving and Recalling a Setup (MY SETUP)
EN-147
1.
Press MENU.
This displays the menu screen.
2.
Press MY SETUP.
This displays the MY SETUP screen.
3.
Rotate the dial to select the setup number you want to delete.
• If you rotated the dial, press BACK.
4.
Use I to select the 5 buttons menu that includes CLEAR.
5.
Press CLEAR.
This displays “Sure?”.
• You can also delete a MY SETUP by long-pressing MENU.
6.
Press YES.
This deletes the currently selected MY SETUP.
• To cancel, press NO.
7.
When “Complete” appears on the display, press OK.
This exits the MY SETUP delete operation.
Deleting a MY SETUP
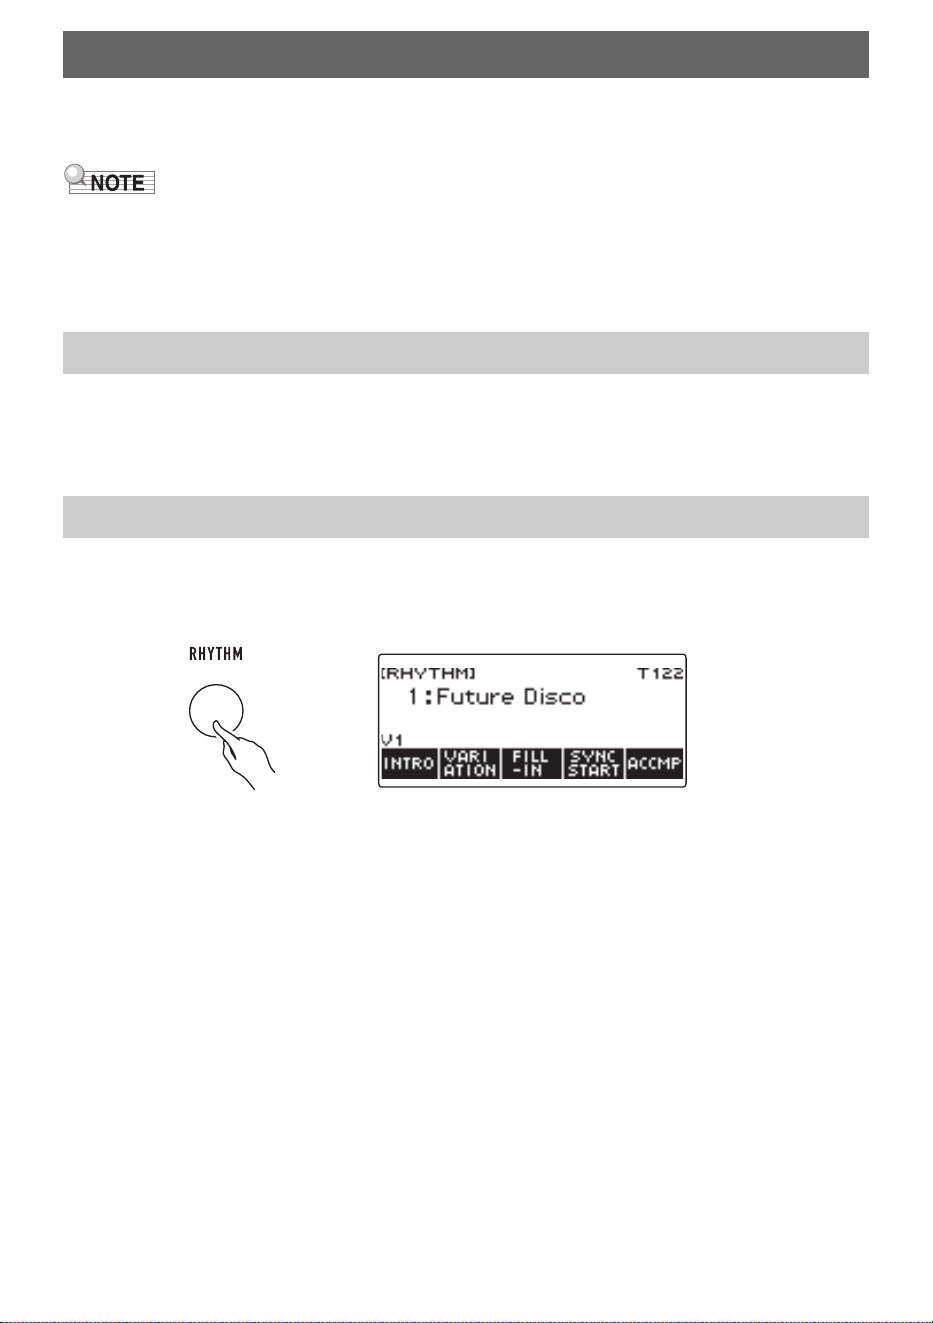
EN-148
You can use the procedures in this section to select the rhythm you want, and then automatically play
accompaniments to suit it simply by playing chords with your left hand. It’s like having a personal
backup group along with you wherever you go.
• Auto Accompaniments are made up of the parts (instruments) below.
– Rhythm (percussion instruments)
– Bass (bass instruments)
– Harmony (other instruments)
You can have only the rhythm part play, or you can have all three parts play at the same time.
The rhythm part is the foundation of each Auto Accompaniment.
Your Digital Keyboard comes with a variety of built-in rhythms, including 8-beat and waltz. Use the
procedure below to play the basic rhythm part.
1.
Press RHYTHM.
This displays the currently selected rhythm number and name, indicating that the rhythm function
is enabled.
• To exit the rhythm function, long-press TONE.
Playing with a Rhythm Backing
Rhythm
Using the Rhythms
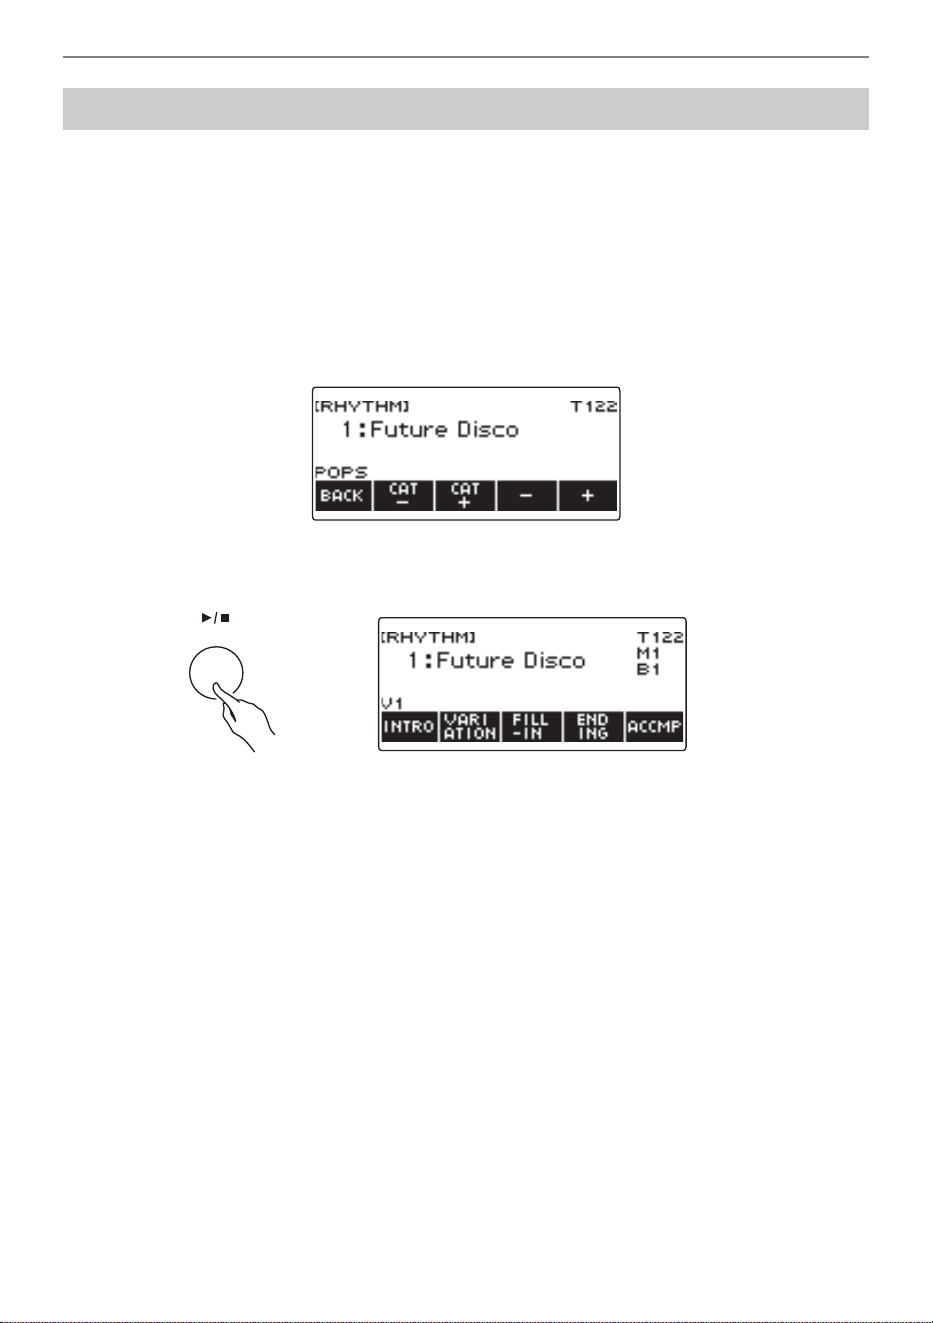
Playing with a Rhythm Backing
EN-149
1.
Press RHYTHM.
This displays the currently selected rhythm number and name.
2.
Rotate the dial to select a rhythm.
This displays the category name of the selected rhythm.
• For information about rhythm types, see the “Rhythm List” (page EN-310).
• After you rotate the dial once to select an option, you can change the selection further using –
and +.
• If you want to select a category, use CAT–/CAT+.
• To go back to the previous screen, press BACK.
3.
Press a.
This starts the rhythm and displays the beat number.
4.
To stop playback, press a again.
Playing a Rhythm
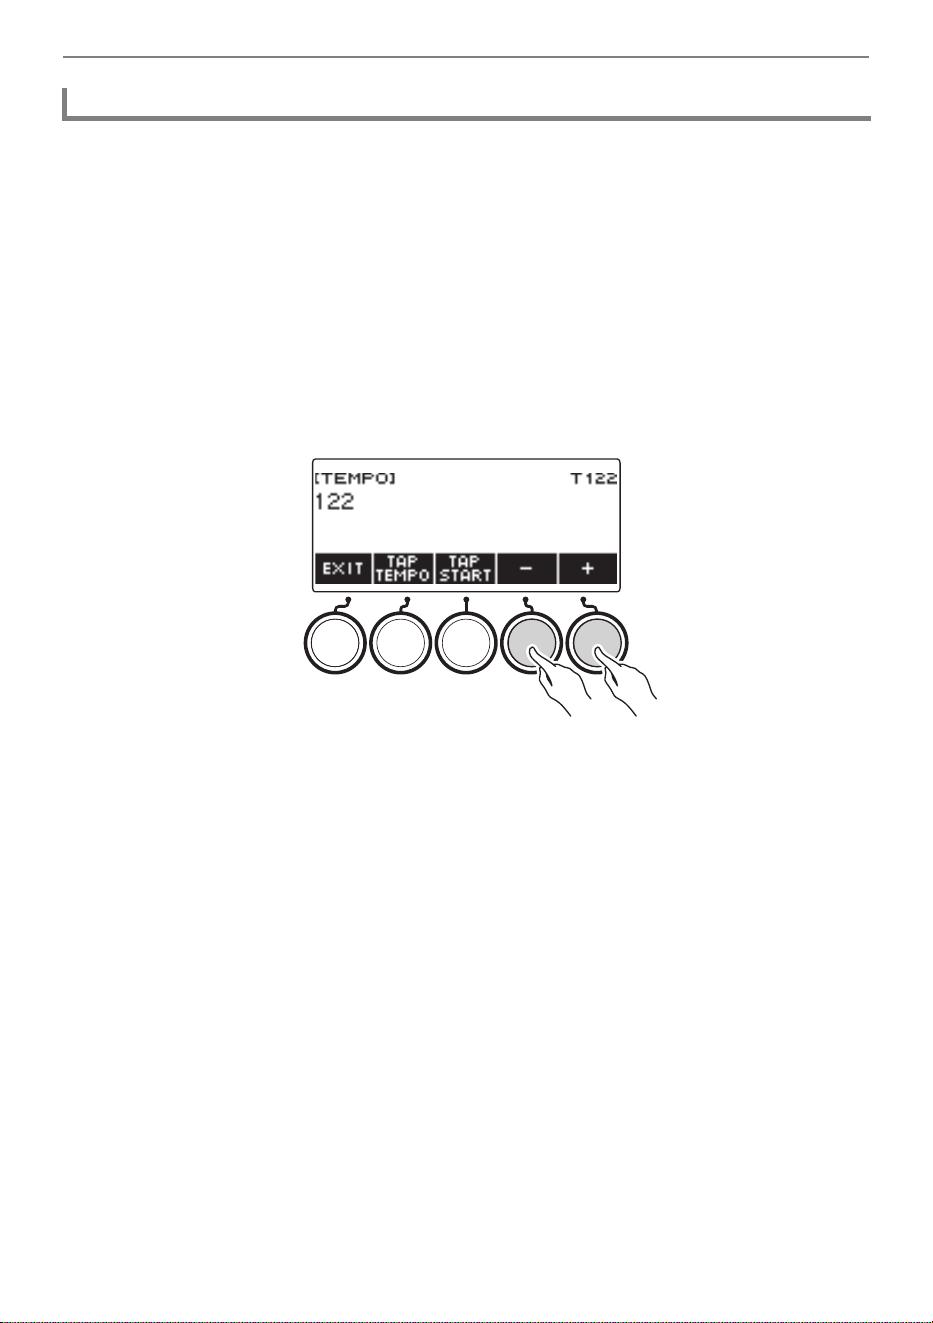
Playing with a Rhythm Backing
EN-150
Use the procedure below to change tempo to a speed that suits you.
1.
Press RHYTHM.
This displays the currently selected rhythm number and name.
2.
Rotate the dial to select the name of the rhythm whose tempo you want to
change.
3.
Press TEMPO.
This displays the tempo screen.
4.
Rotate the dial or use – and + to change the tempo value.
• You can specify a tempo value in the range of 20 to 255.
• To return to the recommended setting, press – and + at the same time.
5.
To exit the setting operation, press EXIT.
Changing the Tempo
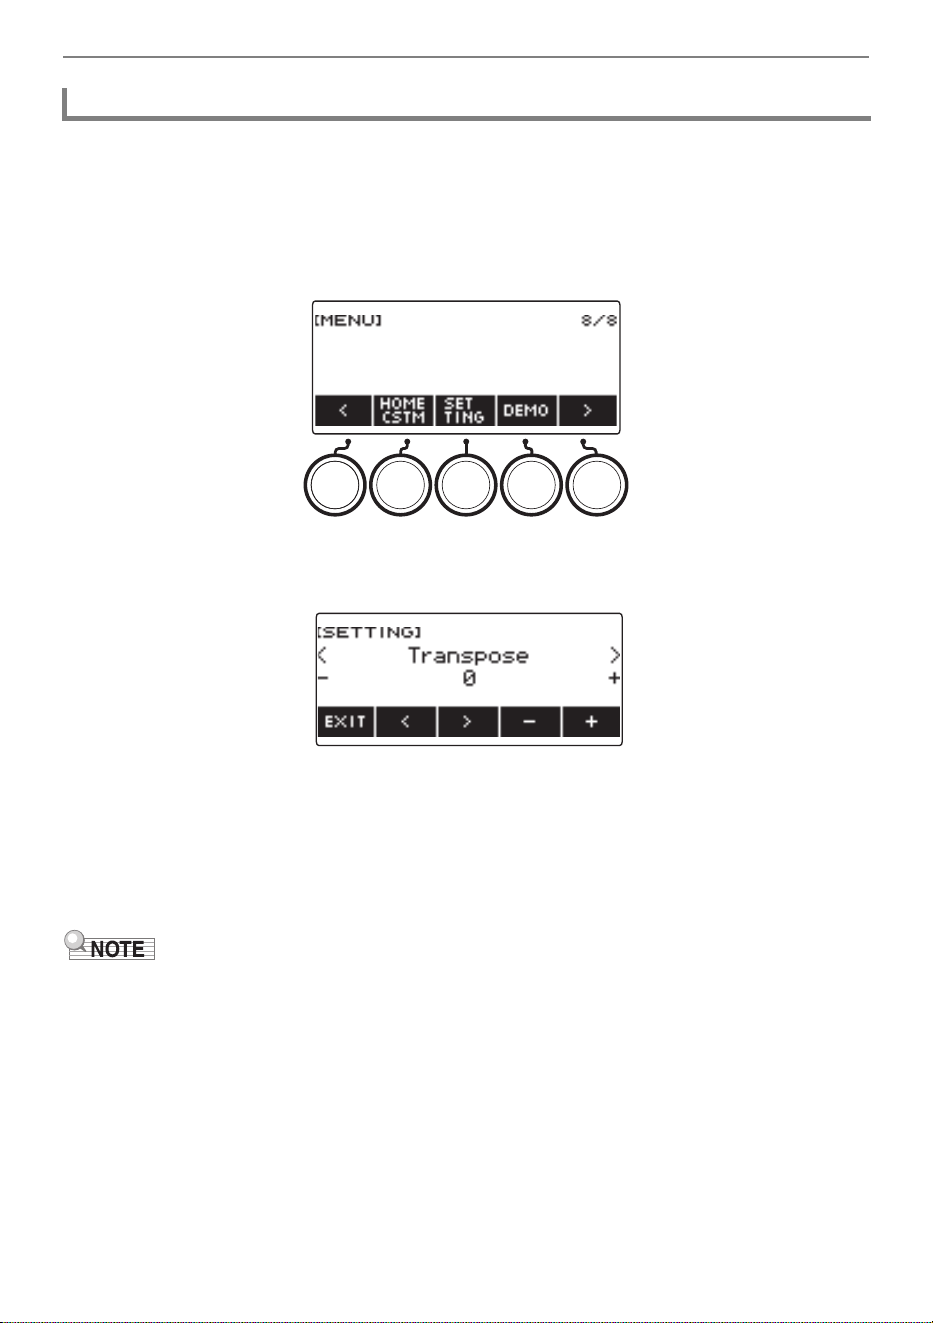
Playing with a Rhythm Backing
EN-151
Use the procedure below to adjust the balance between the volume levels of keyboard play and the
rhythm.
1.
Press MENU.
This displays the menu screen.
2.
Use U and I to select the 5 buttons menu that includes SETTING.
3.
Press SETTING.
This displays the setting screen.
4.
Use U and I to select “Rhythm Volume”.
5.
Rotate the dial or use – and + to change the rhythm volume level.
• You can specify a volume value from 0 to 127.
6.
To exit the setting operation, press EXIT.
• You can also adjust the volume level of the rhythm using the procedure under “Changing the Volume
Balance Between Keyboard Play and Rhythm Play (Balance)” (page EN-128).
Changing the Volume Level of a Rhythm
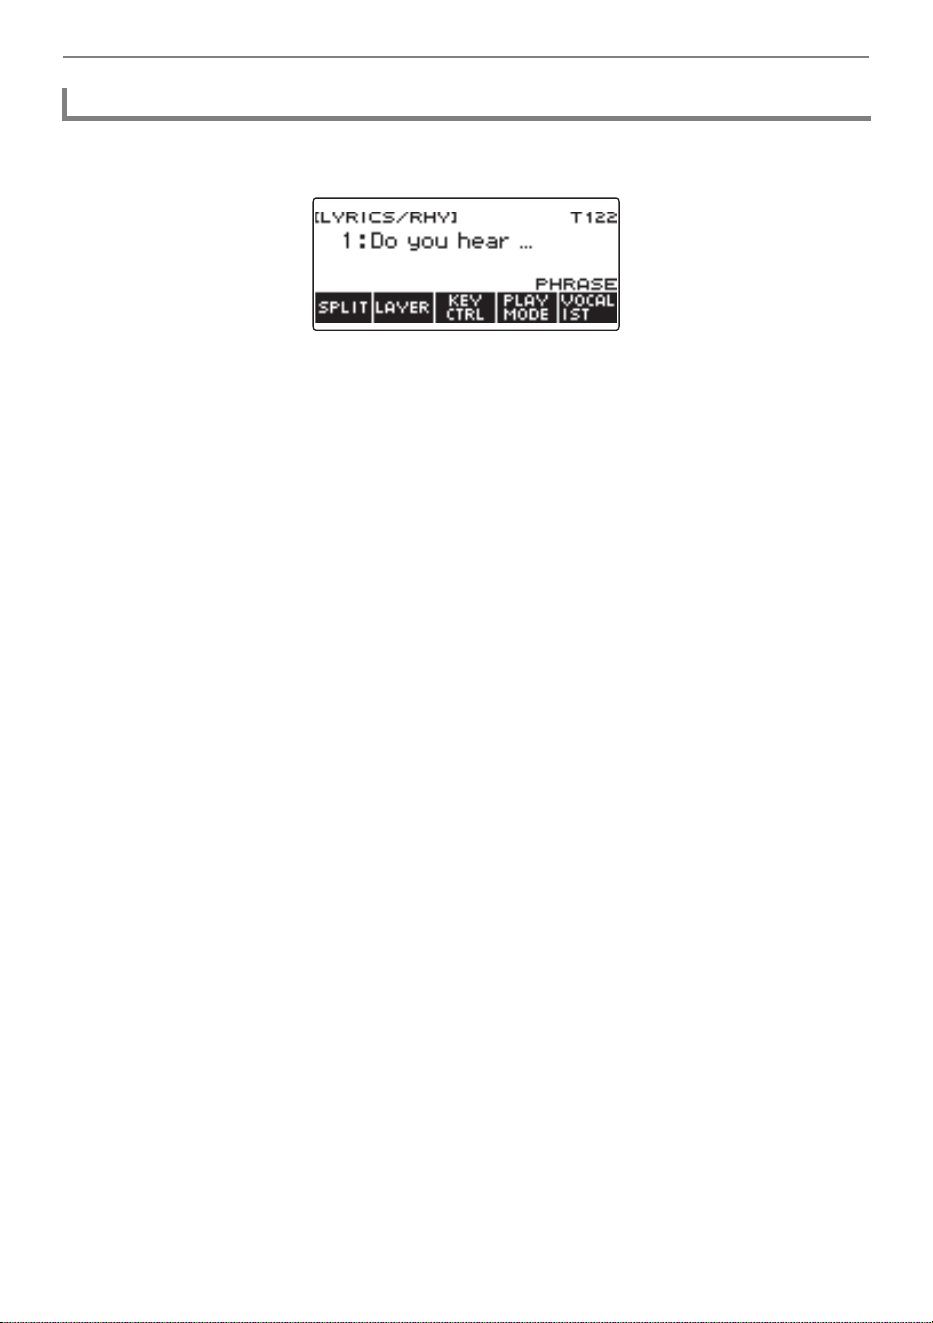
Playing with a Rhythm Backing
EN-152
1.
While a rhythm is playing, press TONE.
This displays the currently selected tone number and name.
2.
Rotate the dial to select a tone.
• For tone information, see the “Lyric Tone List” (page EN-307) and the “Tone List” (page
EN-288).
• After you rotate the dial once to select an option, you can change the selection further using –
and +.
• To return the setting to its initial default, press – and + at the same time.
• To go back to the previous screen, press BACK.
Changing the Keyboard Tone While a Rhythm is Playing
B
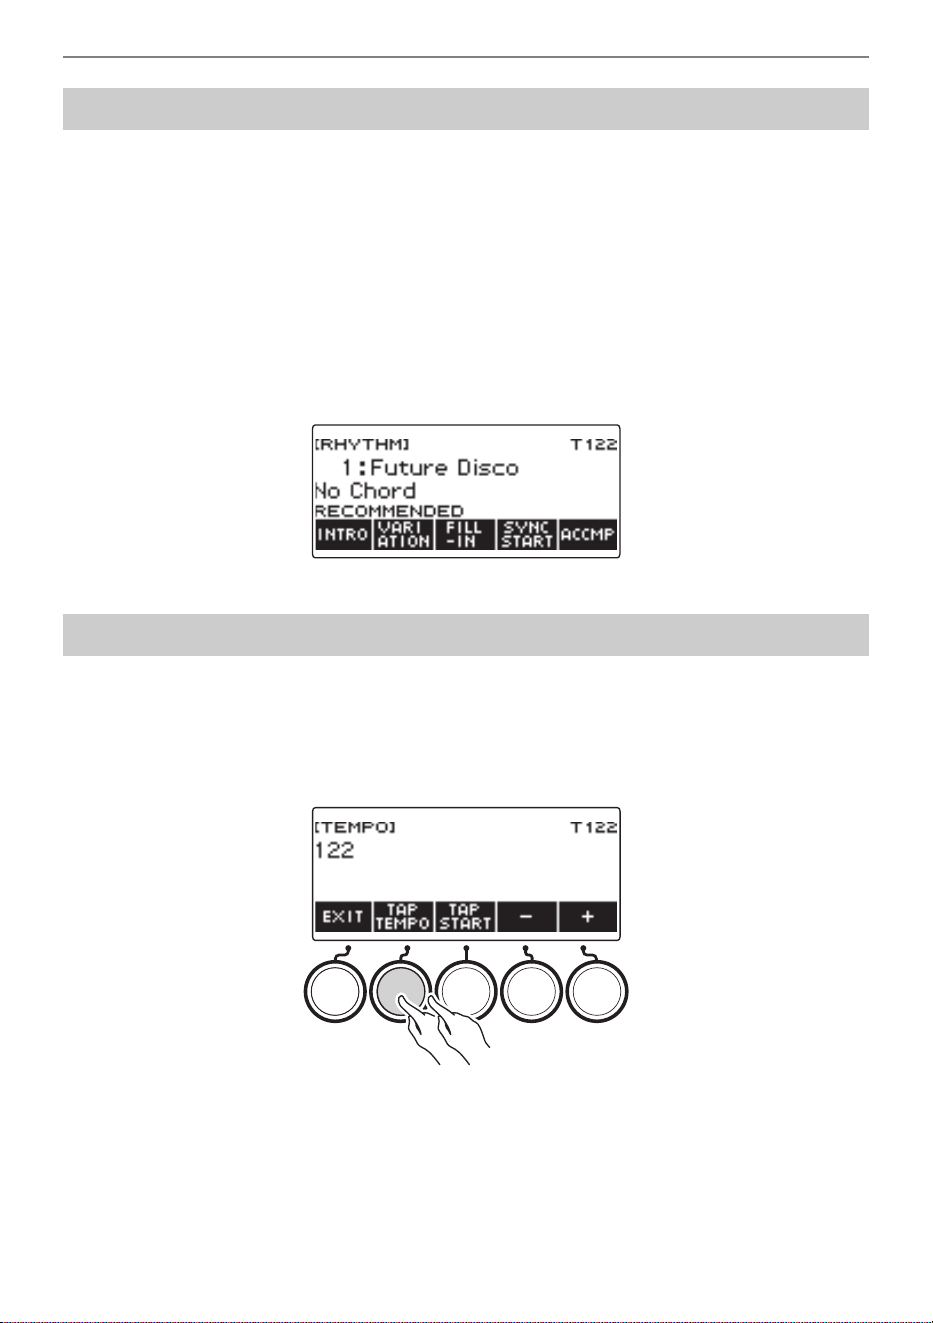
Playing with a Rhythm Backing
EN-153
You can use the procedure below to configure tone and tempo settings that are most suitable for a
particular rhythm pattern.
1.
Press RHYTHM.
This displays the currently selected rhythm number and name.
2.
Rotate the dial to select the name of the rhythm whose setting you want to
configure.
3.
Long-press RHYTHM.
This momentarily displays “RECOMMENDED”, which indicates the recommended rhythm settings
are configured.
1.
Press TEMPO.
This displays the tempo screen.
2.
Tap the TAP TEMPO button at least twice at a steady pace.
This sets the tempo in accordance with your tapping.
Using Recommended Rhythm Settings (One Touch Presets)
Adjusting the Tempo by Tapping (Tap Tempo)
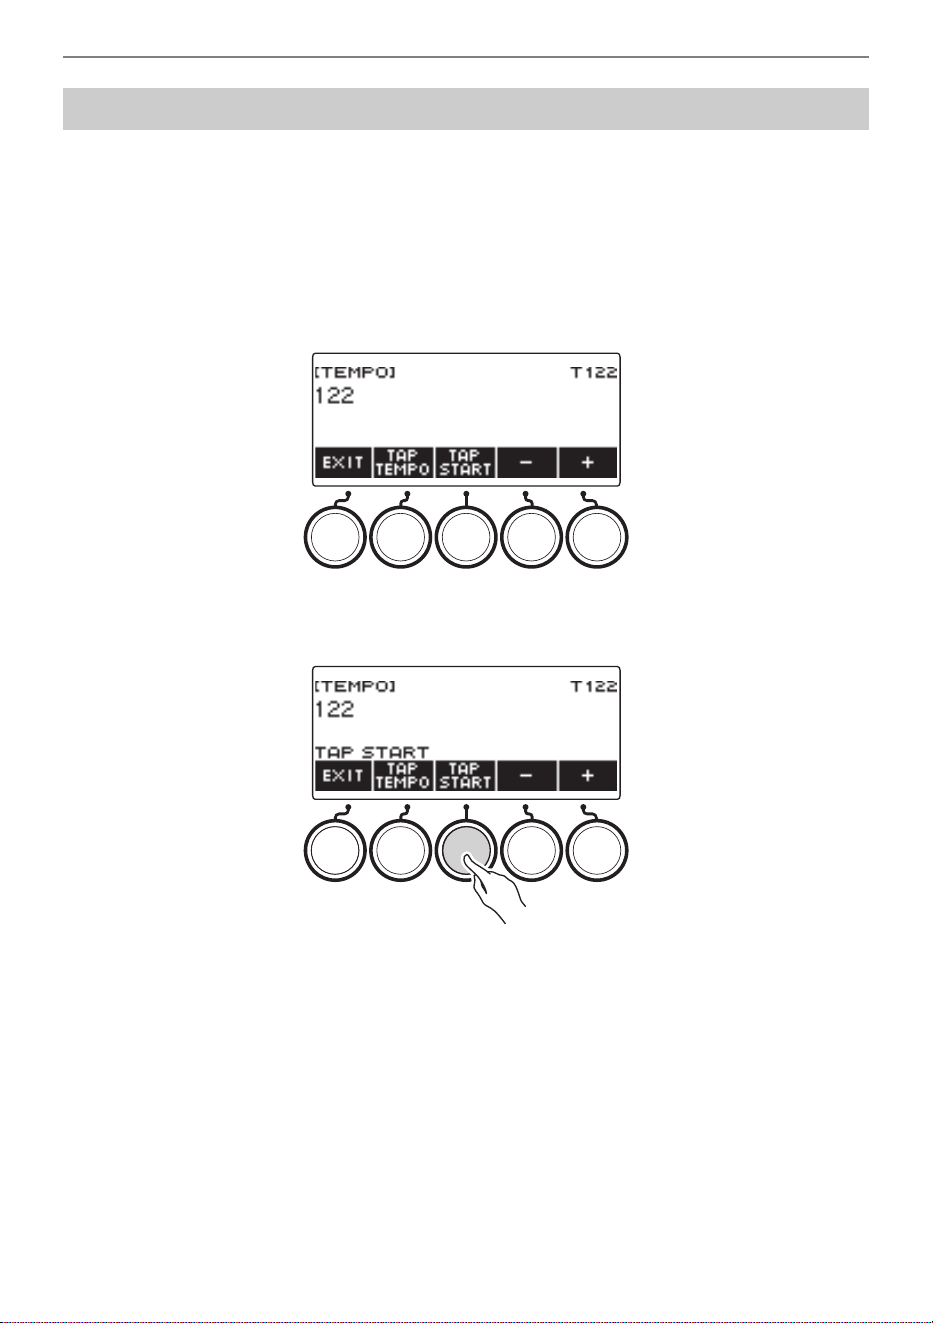
Playing with a Rhythm Backing
EN-154
1.
Press RHYTHM.
This displays the currently selected rhythm number and name.
2.
Rotate the dial to select the name of the rhythm whose setting you want to
configure.
3.
Press TEMPO.
This displays TAP START above one of the 5 buttons.
4.
Press TAP START.
This displays “TAP START”.
5.
Tap the TAP TEMPO button at least twice at a steady pace that matches the
rhythm beat.
The rhythm starts playing from the first beat of the next measure.
Sounding Rhythm as You Use Tap Tempo
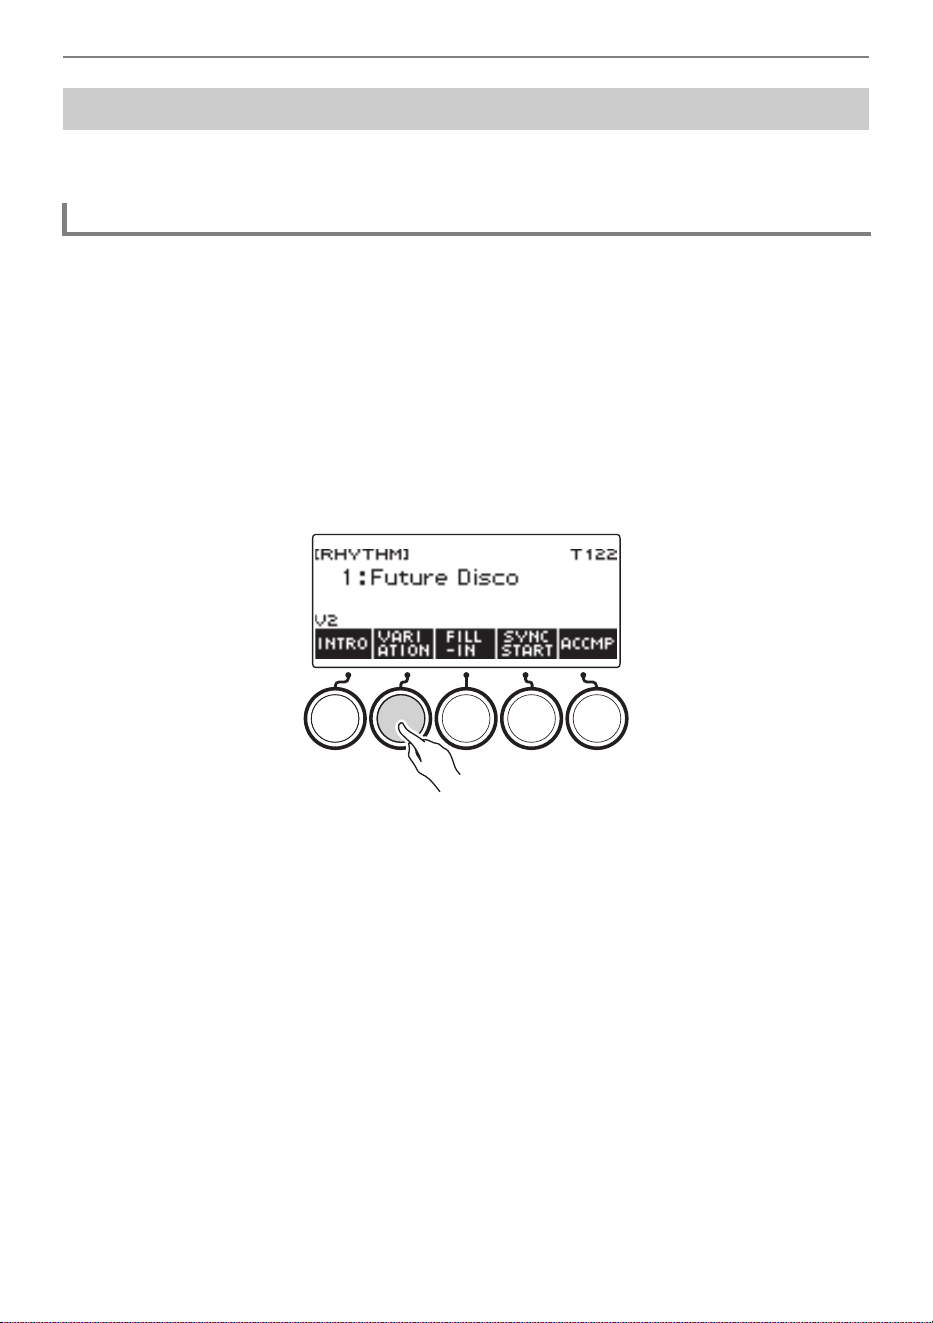
Playing with a Rhythm Backing
EN-155
You can use the procedure below to add liveliness to your rhythm pattern. Use the procedure below to
play intro and ending patterns, to play fill-in patterns, and to play variations of basic rhythm patterns.
Each rhythm number has a basic pattern (V1) and a variation pattern (V2). You can switch to the
variation pattern to add a bit of variation to your performances.
1.
Press RHYTHM.
This displays the currently selected rhythm number and name.
2.
Rotate the dial to select the name of the rhythm whose setting you want to
configure.
• If you rotated the dial, press BACK.
3.
Press VARIATION.
This displays “V2”.
• To return to “V1”, press VARIATION again.
• Pressing VARIATION while a rhythm is playing, the rhythm toggles between V1 and V2 from the
next measure.
4.
Press a.
This starts the currently selected rhythm pattern.
Changing the Rhythm Pattern
Switching Between the Basic Pattern and Variation Pattern
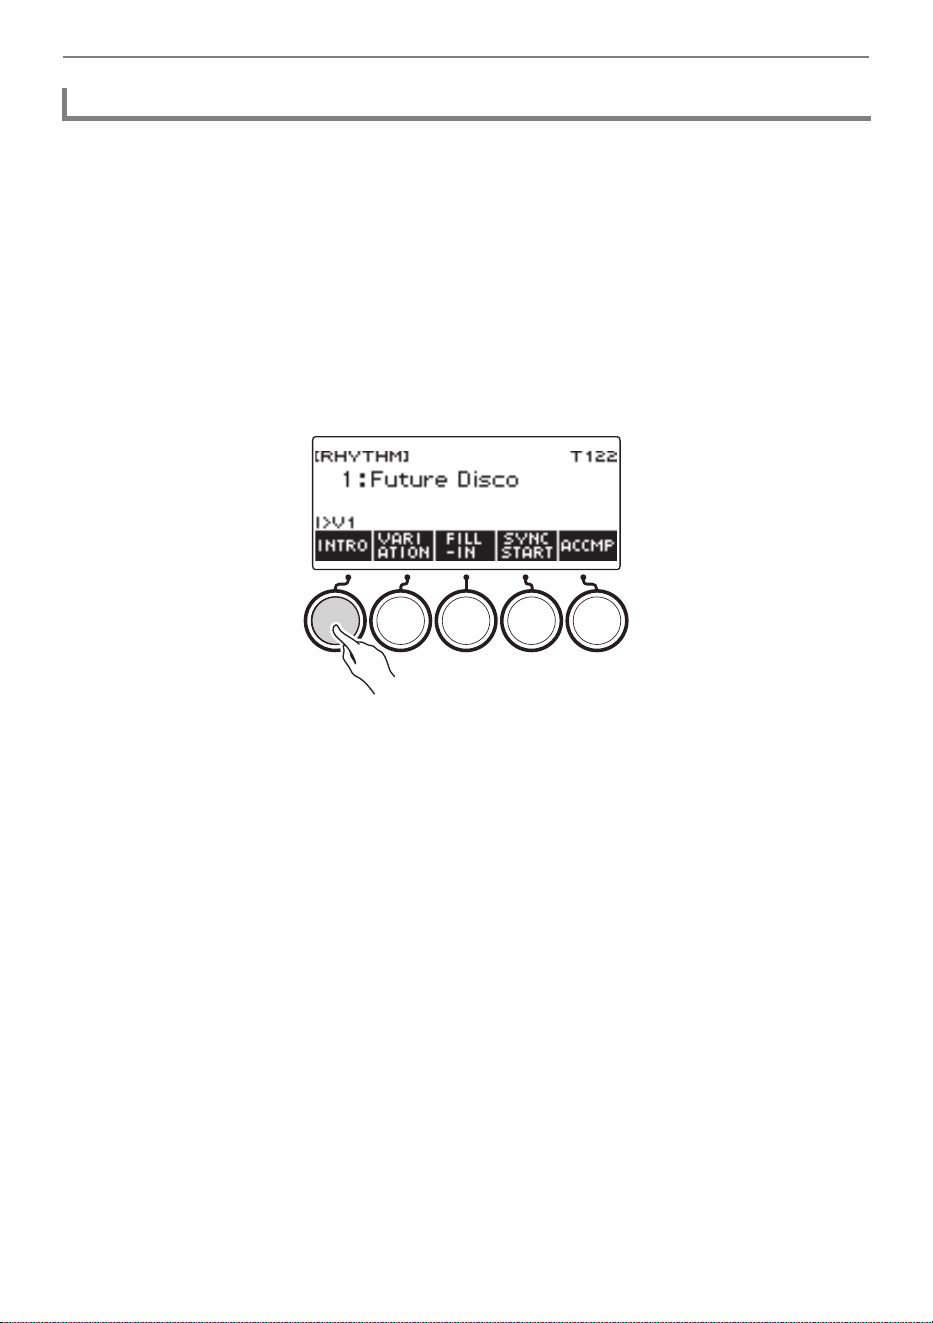
Playing with a Rhythm Backing
EN-156
The intro you insert at the beginning of a song is followed by the basic pattern (V1) or variation pattern
(V2).
1.
Press RHYTHM.
This displays the currently selected rhythm number and name.
2.
Rotate the dial to select the name of the rhythm whose setting you want to
configure.
• If you rotated the dial, press BACK.
3.
Press INTRO.
This displays “I >V1”.
• “I >V1” indicates that “V1” starts to play following the introduction.
• To remove an intro, press VARIATION.
• If you press INTRO while a rhythm is playing, the rhythm changes to the intro from the next
measure.
4.
To change the rhythm pattern that is played after the intro from the basic pattern
(V1) to the variation pattern (V2), press INTRO again.
This displays “I >V2”.
• Press INTRO again to return to “I >V1”.
5.
Press a.
This plays the intro. After the intro is complete, the rhythm pattern you selected in steps 3 and 4
starts to play.
• Pressing VARIATION while an intro is playing interrupts the intro play up to the current measure
and then plays the rhythm pattern you specified in steps 3 and 4.
• To play the other rhythm pattern while the intro is playing, press VARIATION twice in quick
succession.
Inserting an Intro
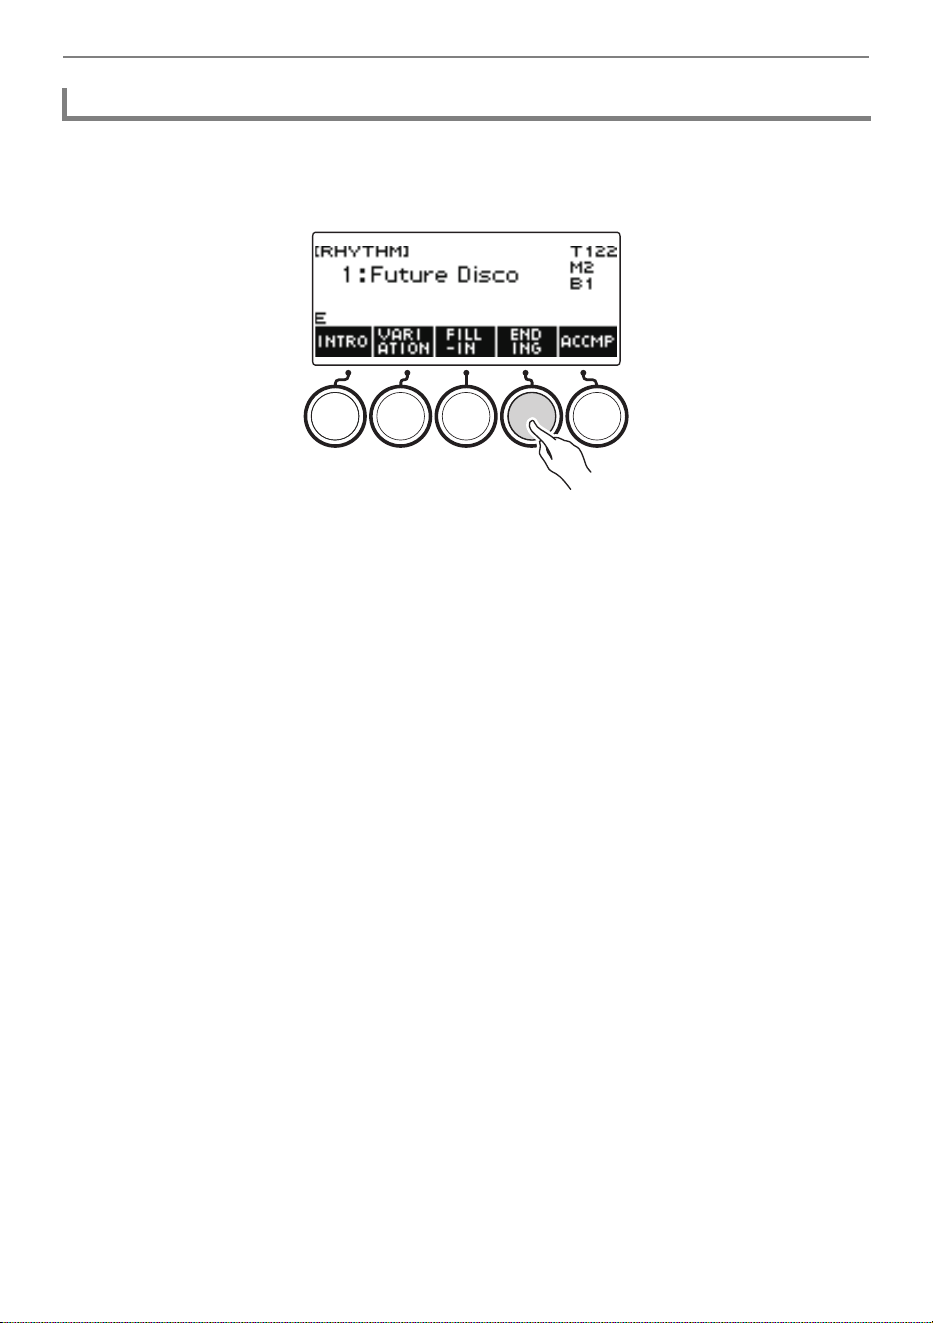
Playing with a Rhythm Backing
EN-157
Inserting an ending causes it to play for the final measures of a song.
1.
While a rhythm is playing, press ENDING.
This displays “E”. The ending plays from the next measure and then the rhythm stops.
• Pressing VARIATION while an ending is playing interrupts the ending play up to the current
measure and then plays the current rhythm pattern (V1 or V2).
• To play the other rhythm pattern while the ending is playing, press VARIATION twice in quick
succession.
Inserting an Ending
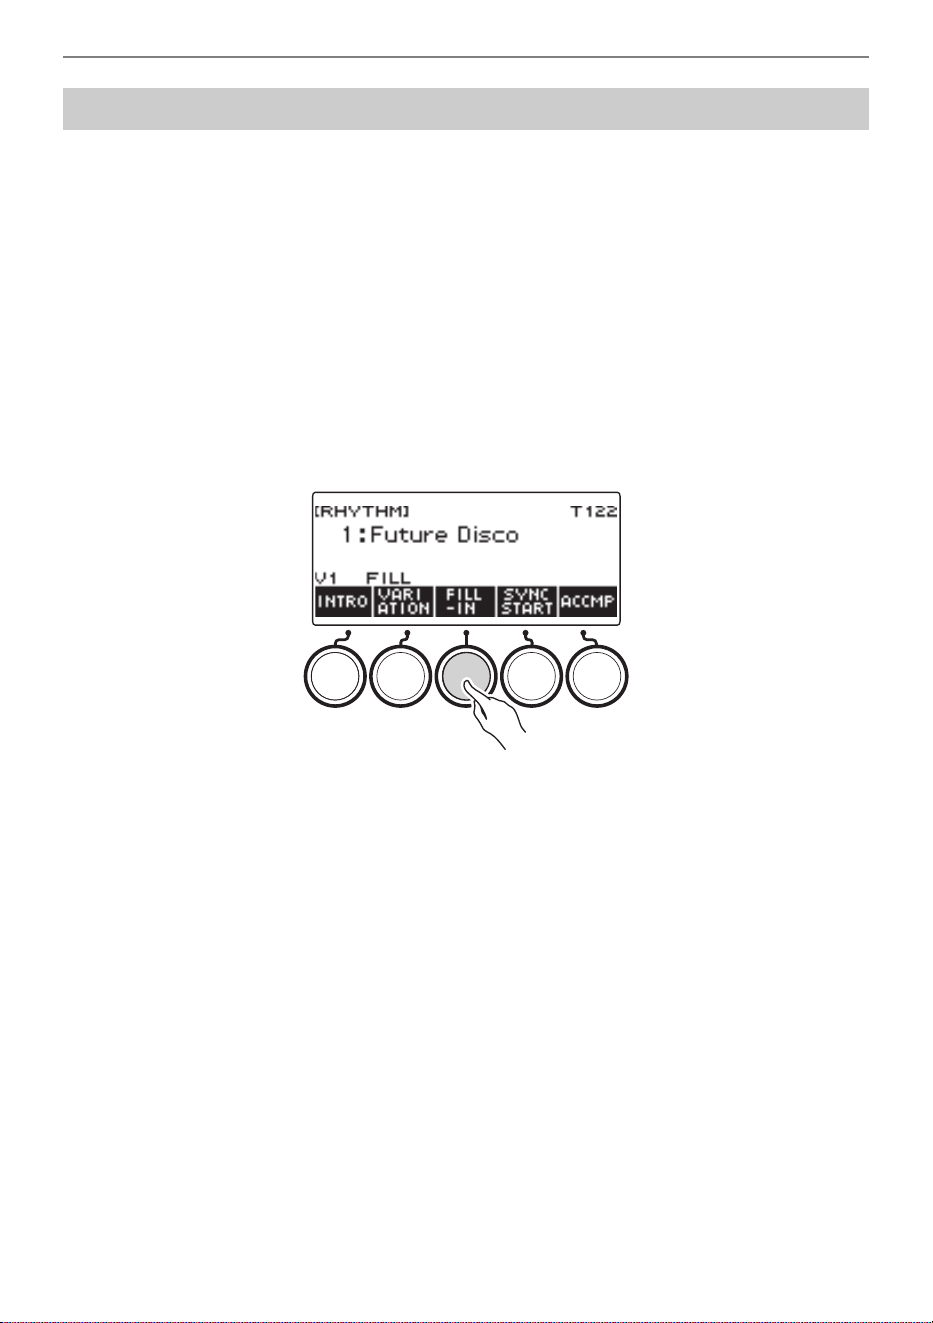
Playing with a Rhythm Backing
EN-158
A “fill-in” is a short phrase played where you want to change the mood of a song. A fill-in pattern can be
used to create a link between two melodies or as an accent.
1.
While a rhythm is playing, press VARIATION and then select a rhythm pattern (V1
or V2).
2.
Press FILL-IN.
This inserts a fill-in phrase that matches the current rhythm pattern (V1 or V2). The phrase
continues to the end of the measure, and “FILL” is displayed at the bottom of the screen while the
fill-in is playing.
• To extend the fill-in into the next measure, keep FILL-IN depressed until rhythm play enters the
next measure.
• Pressing FILL-IN while a rhythm is stopped inserts the fill-in and causes it to be played when
rhythm play is started.
To cancel the inserted fill-in before starting rhythm play, press FILL-IN again.
Inserting a Fill-in Phrase
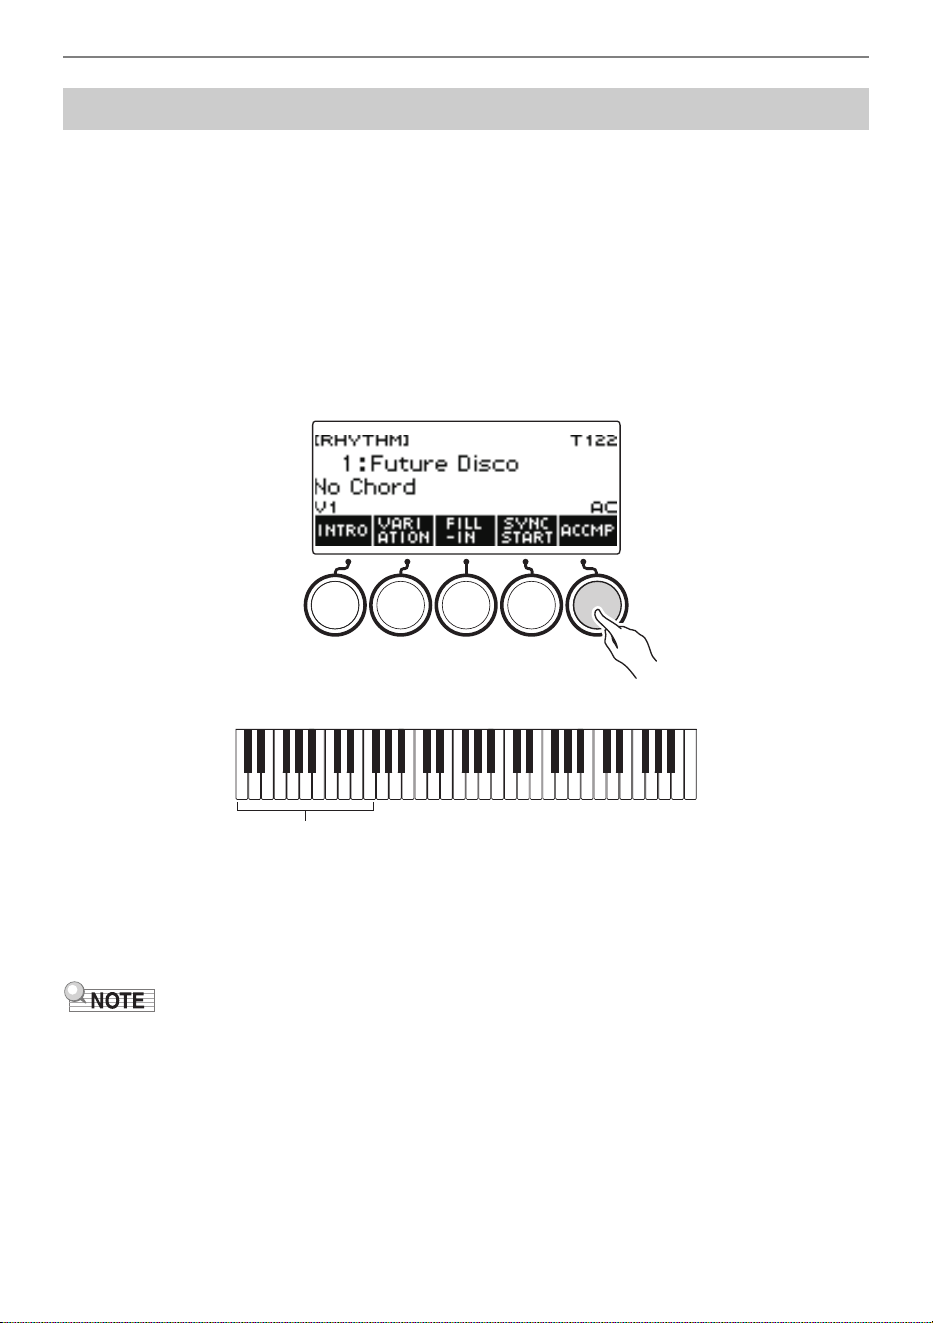
Playing with a Rhythm Backing
EN-159
Playing a chord with your left hand automatically adds bass and harmony accompaniment parts to the
currently selected rhythm. It is just like having a personal back up group on call.
1.
Press RHYTHM.
This displays the currently selected rhythm number and name.
2.
Rotate the dial to select the name of the rhythm whose chords you want to input.
• If you rotated the dial, press BACK.
3.
Press ACCMP.
“AC” and “No Chord” appear on the display, indicating that the accompaniment keyboard is
enabled for accompaniment play.
4.
Press a to start the rhythm.
5.
Play a chord on the accompaniment keyboard.
This sounds the bass, harmony, and other non-rhythm part instruments.
• The accompaniment keyboard range is the same as the Split Point (page EN-127).
• Playing a chord while rhythm play is stopped sounds the chord only as long as the keyboard keys are
pressed.
• You can use Synchro Start (page EN-163) to start rhythm play when you play a chord.
6.
Press ACCMP again to stop the accompaniment.
Fingering a Chord to Play a Rhythm Accompaniment
Accompaniment keyboard
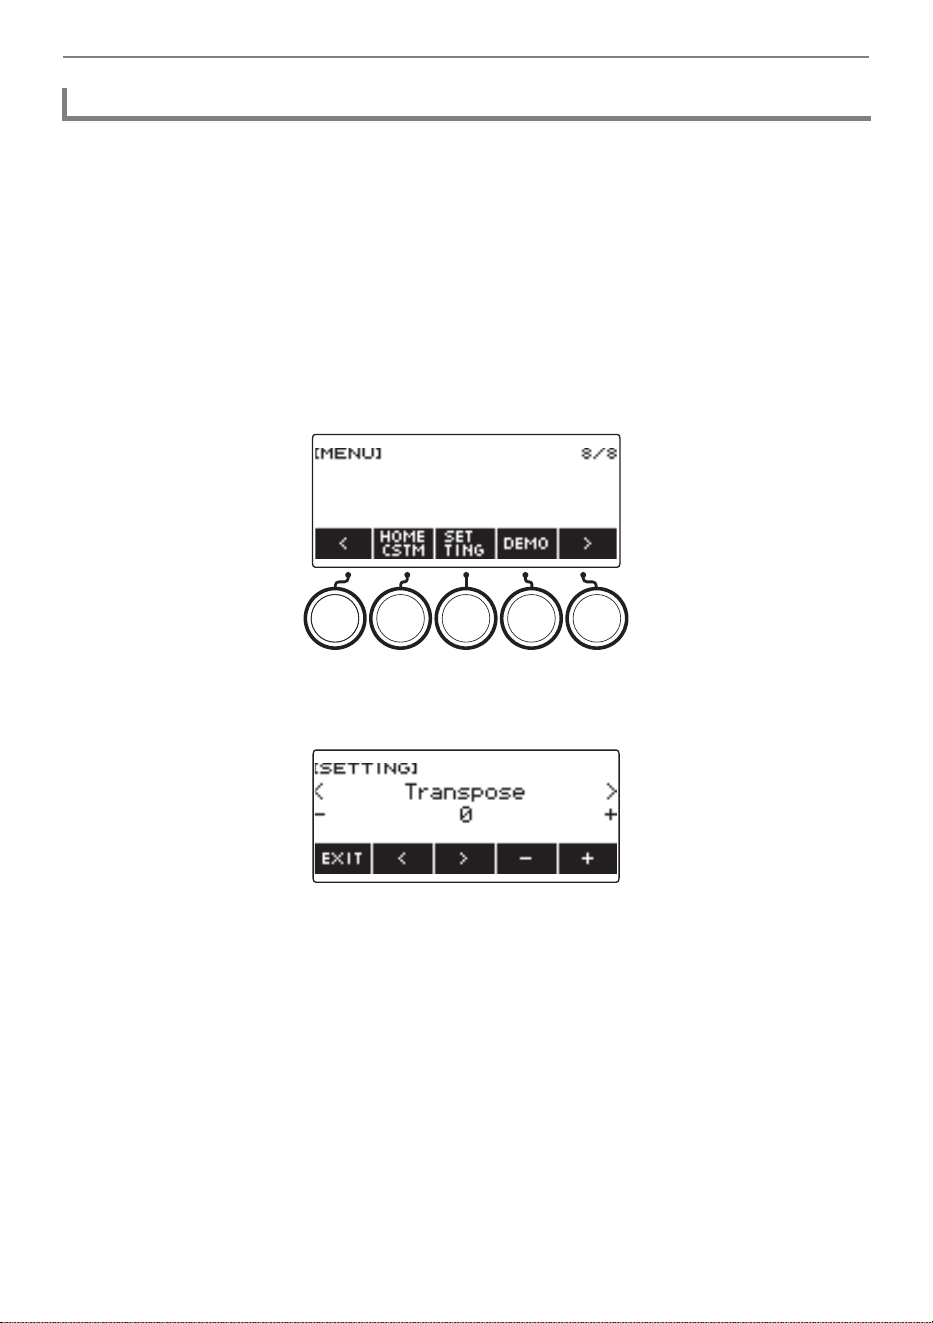
Playing with a Rhythm Backing
EN-160
You can select from among the six chord fingering modes below.
• CASIO CHORD
• FINGERED 1
• FINGERED 2
• FINGERED ON BASS
• FINGERED ASSIST
• FULL RANGE CHORD
1.
Press MENU.
This displays the menu screen.
2.
Use U and I to select the 5 buttons menu that includes SETTING.
3.
Press SETTING.
This displays the setting screen.
4.
Use U and I to select “Chord Mode”.
5.
Rotate the dial or use – and + to select the chord fingering mode.
6.
To exit the setting operation, press EXIT.
Selecting a Chord Fingering Mode
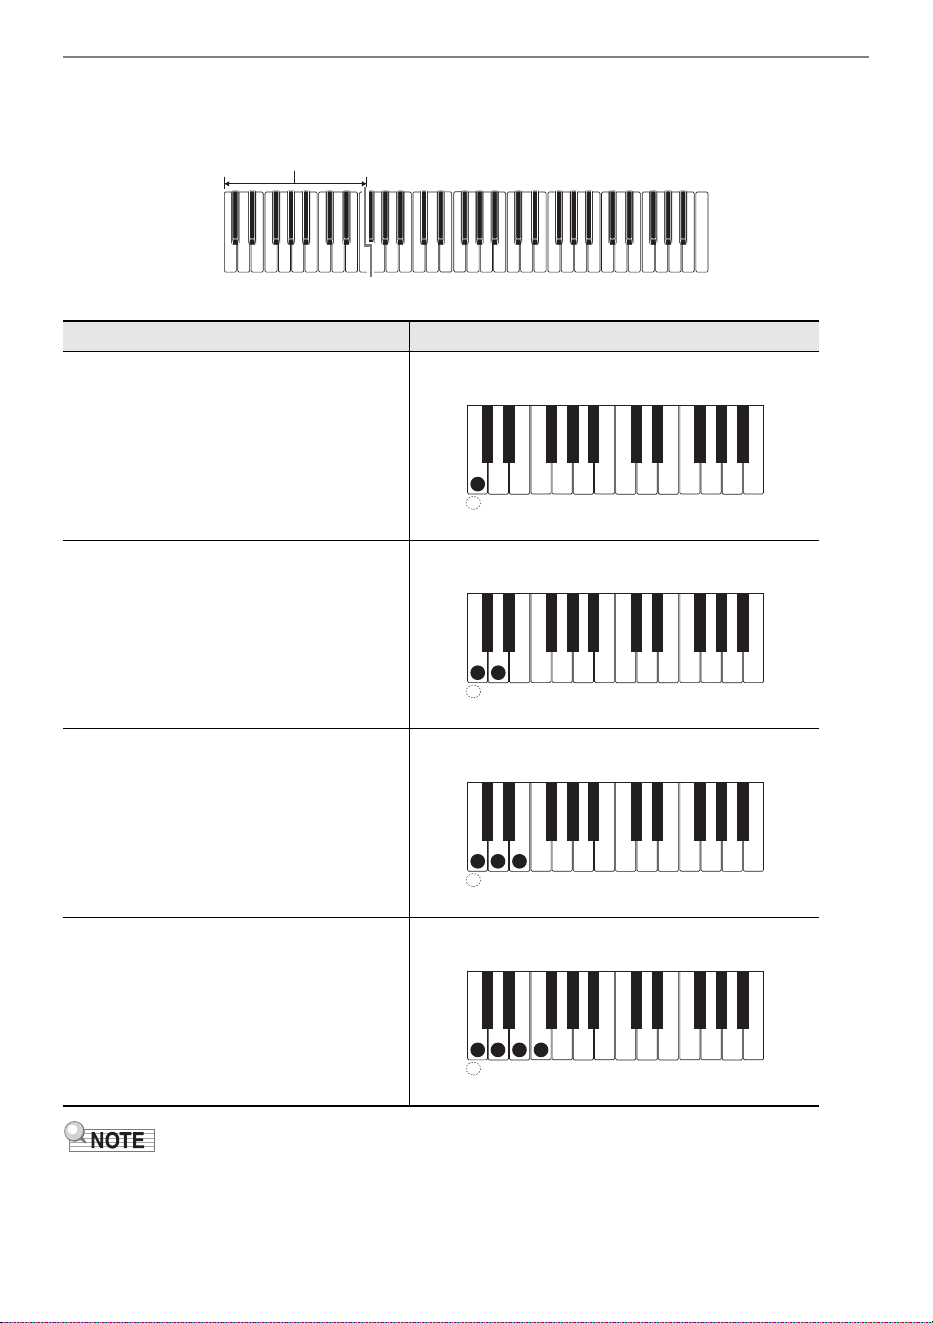
Playing with a Rhythm Backing
EN-161
■ CASIO CHORD
With CASIO CHORD, you can use simplified fingerings to play the four types of chords described below
• When playing a minor, seventh, or minor seventh chord on the accompaniment keyboard, it makes
no difference whether the additional keys you press are black or white.
Chord Type Example
Major Chords
Letters below the accompaniment
keyboard indicate the name of the chord
assigned to each key.
Accompaniment keyboard keys marked
with the same chord name play exactly the
same chord.
C (C Major)
Minor Chords
Press the key that corresponds to the
major chord, while also pressing one other
accompaniment area key to the right.
Cm (C Minor)
Seventh Chords
Press the key that corresponds to the
major chord, while also pressing two other
accompaniment area keys to the right.
C7 (C Seventh)
Minor Seventh Chords
Press the key that corresponds to the
major chord, while also pressing three
other accompaniment area keys to the
right.
Cm7 (C Minor Seventh)
Accompaniment keyboard
A
C
C
DE F F
#
D
E
#
G
D
AB
B
D
C
C
DE F
E
#
D
A
C
C
DE F F
#
D
E
#
G
D
AB
B
D
C
C
DE F
E
#
D
A
C
C
DE F F
#
D
E
#
G
D
AB
B
D
C
C
DE F
E
#
D
A
C
C
DE F F
#
D
E
#
G
D
AB
B
D
C
C
DE F
E
#
D
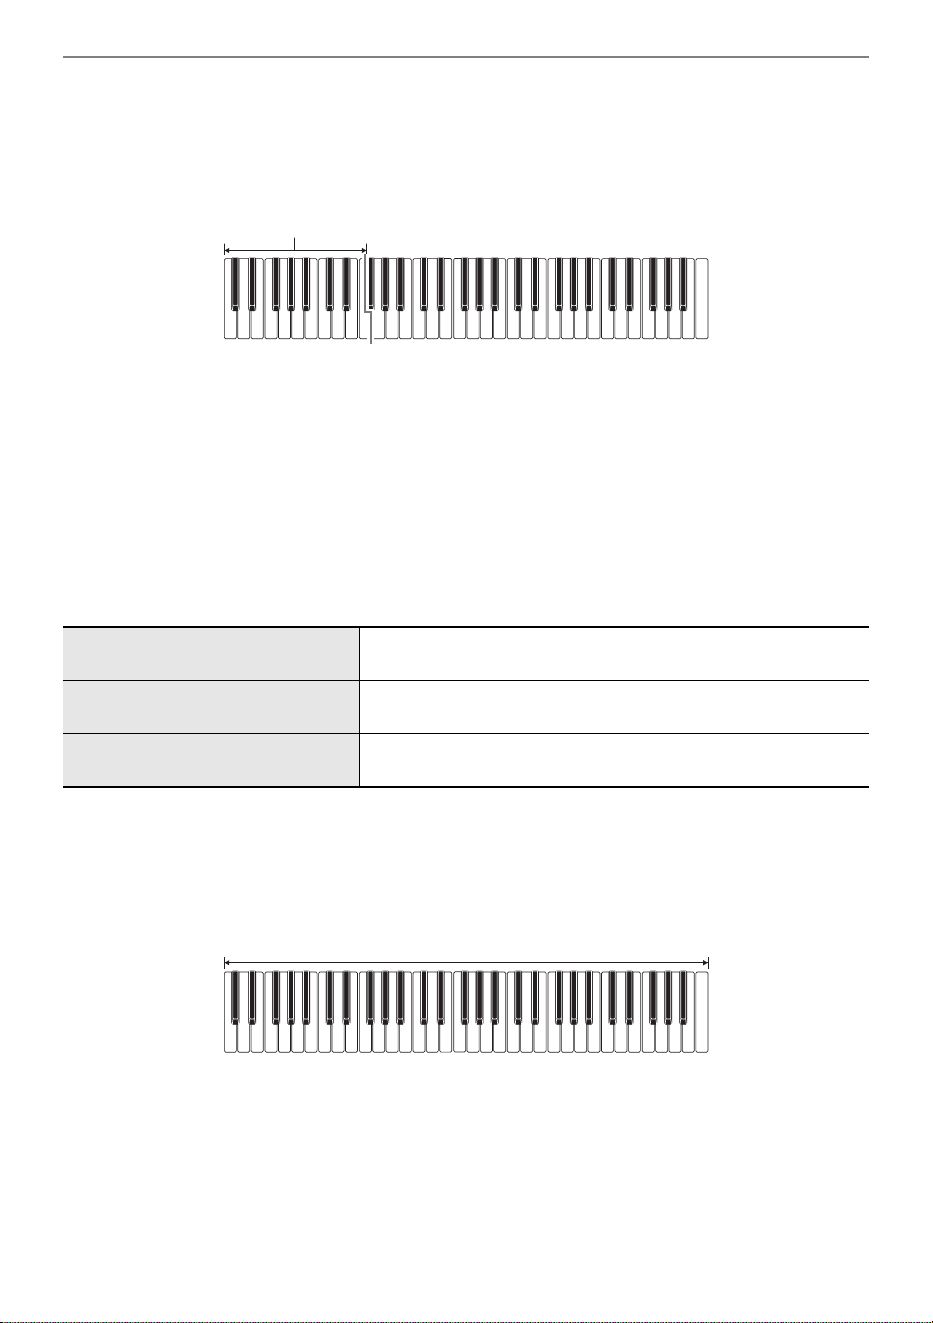
Playing with a Rhythm Backing
EN-162
■ FINGERED
With this chord fingering mode, you play chords on the accompaniment keyboard using their normal
chord fingerings. Note that some chords can also be formed using abbreviated fingerings of one or two
keys. For information about the types of chords you can finger and their fingerings, see the “Fingering
Guide” (page EN-345).
● FINGERED 1
Play the component notes of the chord on the keyboard.
● FINGERED 2
Unlike Fingered 1, 6th input is not possible with this mode.
● FINGERED ON BASS
Play the component notes of the chord on the keyboard. This mode allows input of fraction chords with
the lowest keyboard note as the base note.
● FINGERED ASSIST
In addition to FINGERED 1 input, you can also use the fingerings below to play the three chord types.
■ FULL RANGE CHORD
With this chord fingering mode, you can use the full range of the keyboard to play chords and the
melody.
Minor Chords (Cm) One keyboard key for the base note and the nearest black key
to the left.
Seventh Chords (C7) One keyboard key for the base note and the nearest white key
to the left.
Minor Seventh Chords (Cm7) One keyboard key for the base note and the nearest black key
and white key to the left.
Accompaniment keyboard
Accompaniment Keyboard/Melody Keyboard
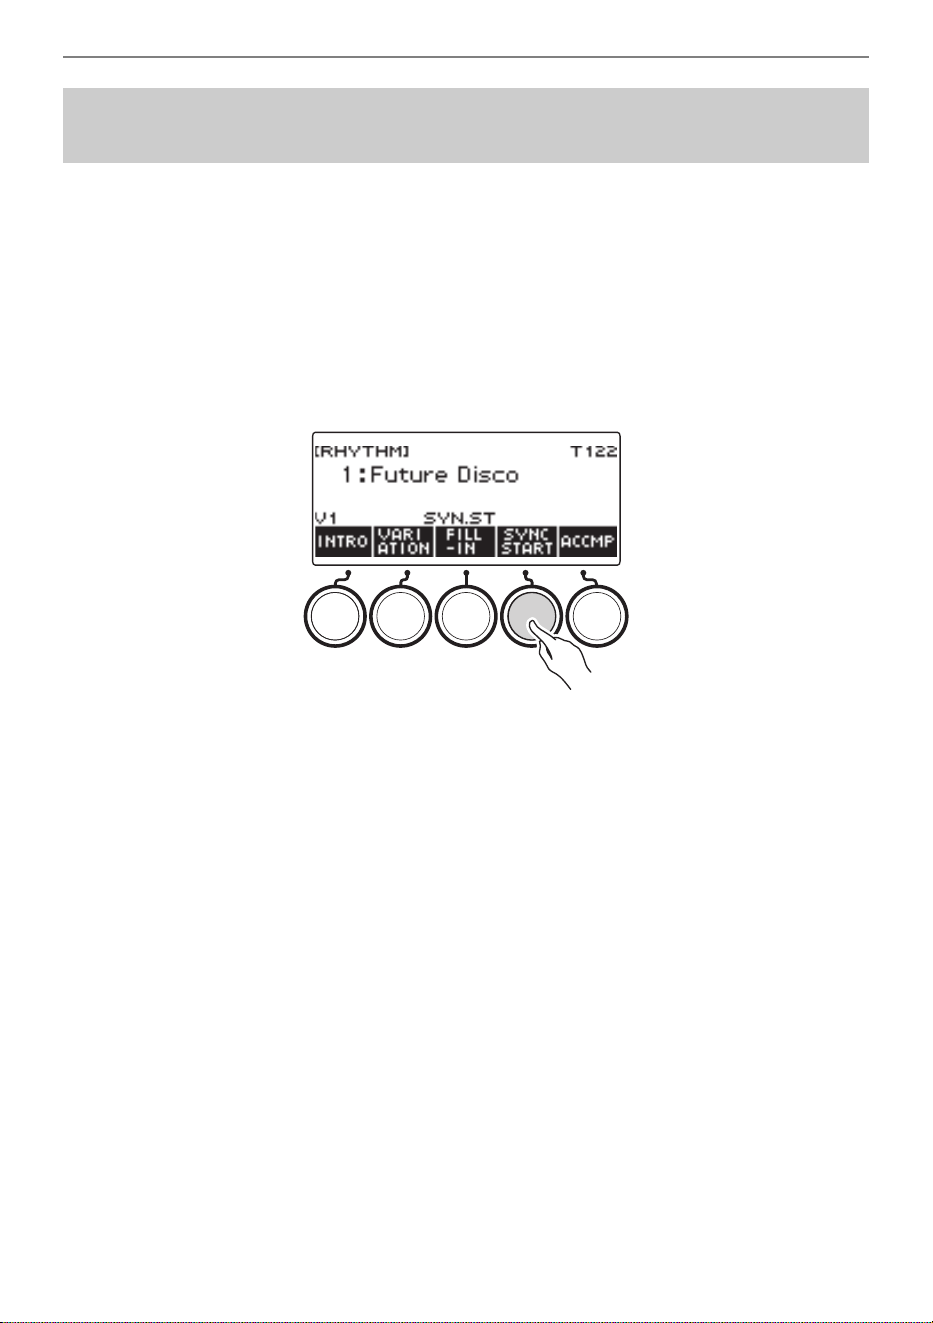
Playing with a Rhythm Backing
EN-163
Synchro Start automatically starts the rhythm when something is played on the keyboard.
1.
Press RHYTHM.
This displays the currently selected rhythm number and name.
2.
Rotate the dial to select the name of the rhythm you want to synchro start with.
• If you rotated the dial, press BACK.
3.
Press SYNC START.
This enters the synchro start standby state, with “SYN.ST” flashing on the display in time with the
currently set tempo.
4.
Play a chord on the accompaniment keyboard.
This causes “SYN.ST” to disappear from the display and starts rhythm play.
• Pressing ACCMP to display “AC” causes rhythm and accompaniment to sound simultaneously.
Starting Rhythm Play when a Chord is Played
(Synchro Start)
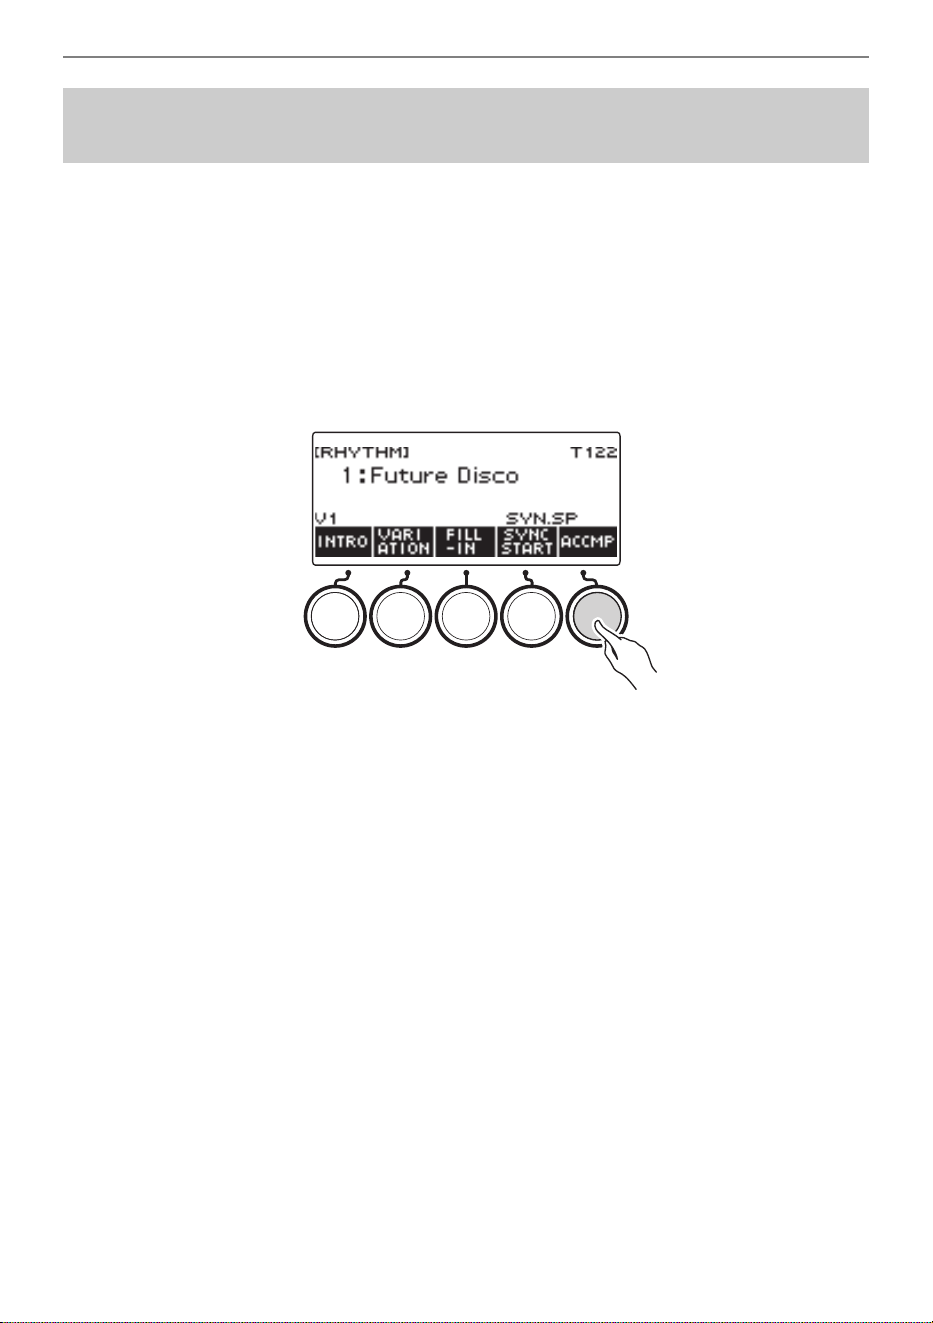
Playing with a Rhythm Backing
EN-164
Releasing the accompaniment keyboard keys stops rhythm play and automatically enables Synchro
Start.
1.
Press RHYTHM.
This displays the currently selected rhythm number and name.
2.
Rotate the dial to select the name of the rhythm you want to synchro stop with.
• If you rotated the dial, press BACK.
3.
Long-press ACCMP.
This displays “SYN.SP”, which indicates Synchro Stop is enabled.
4.
Press ACCMP to enable chord input.
5.
Press SYNC START to enter synchro start playback standby.
6.
Hold down a chord on the accompaniment keyboard.
This starts the rhythm.
7.
Remove your fingers from the keyboard keys.
This stops the rhythm and enters synchro start standby.
8.
The rhythm pattern repeats as long as accompaniment keyboard keys are
depressed.
Configuring Rhythm Play to Stop Automatically when
Chord Play is Stopped (Synchro Stop)
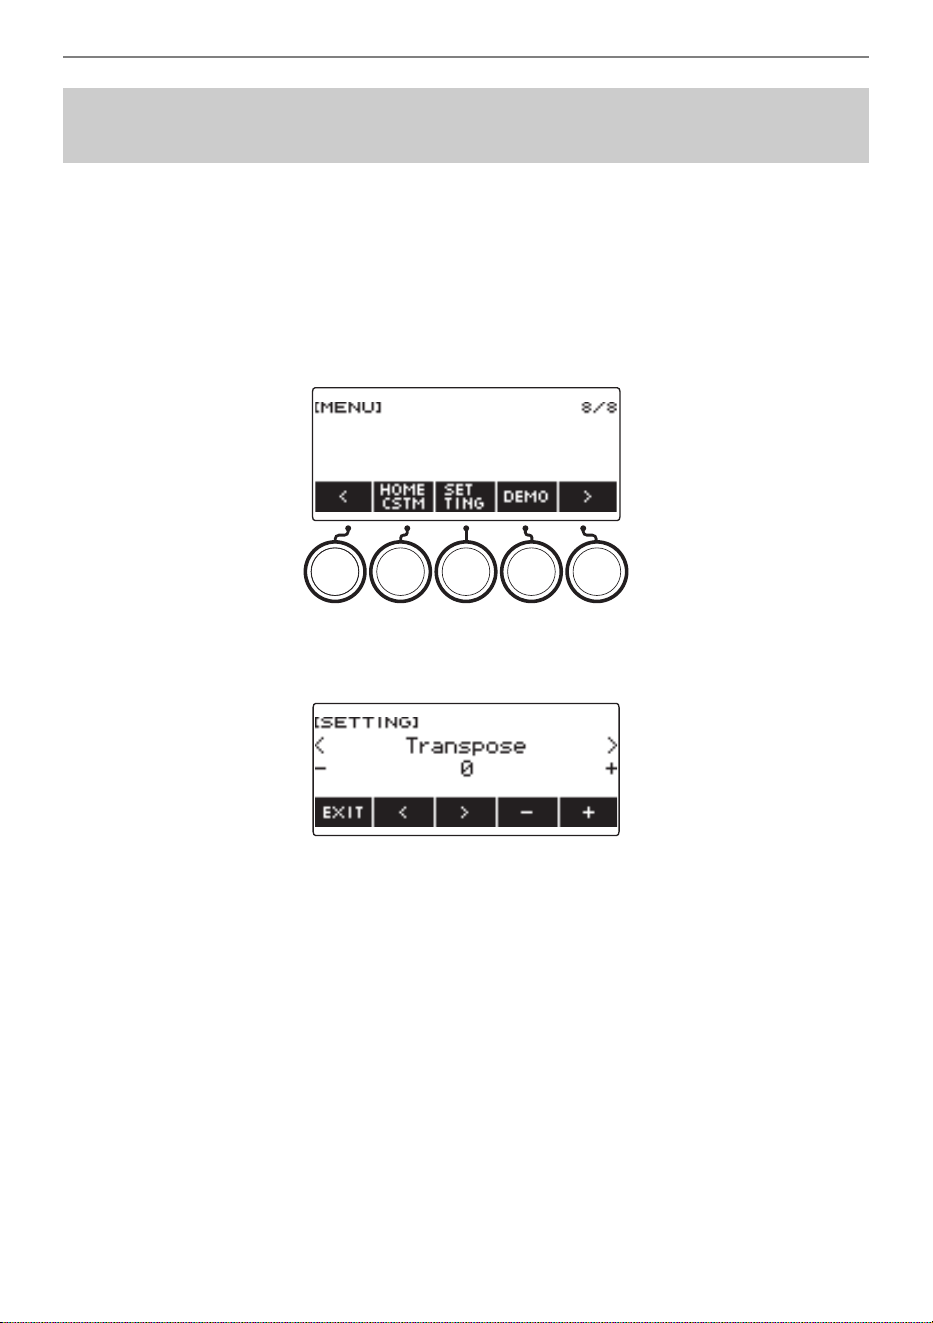
Playing with a Rhythm Backing
EN-165
You can use the procedure below to change the rhythm pattern change operation method and fill-in
operation method.
■ Changing the rhythm operation type to Type 2
1.
Press MENU.
This displays the menu screen.
2.
Use U and I to select the 5 buttons menu that includes SETTING.
3.
Press SETTING.
This displays the setting screen.
4.
Use U and I to select “Rhythm Controller Type”.
5.
Rotate the dial or use – and + to select the rhythm operation type.
• You can change the rhythm operation type to Type 2.
6.
To exit the setting operation, press EXIT.
Changing the Rhythm Pattern and the Fill-in Operation
Type
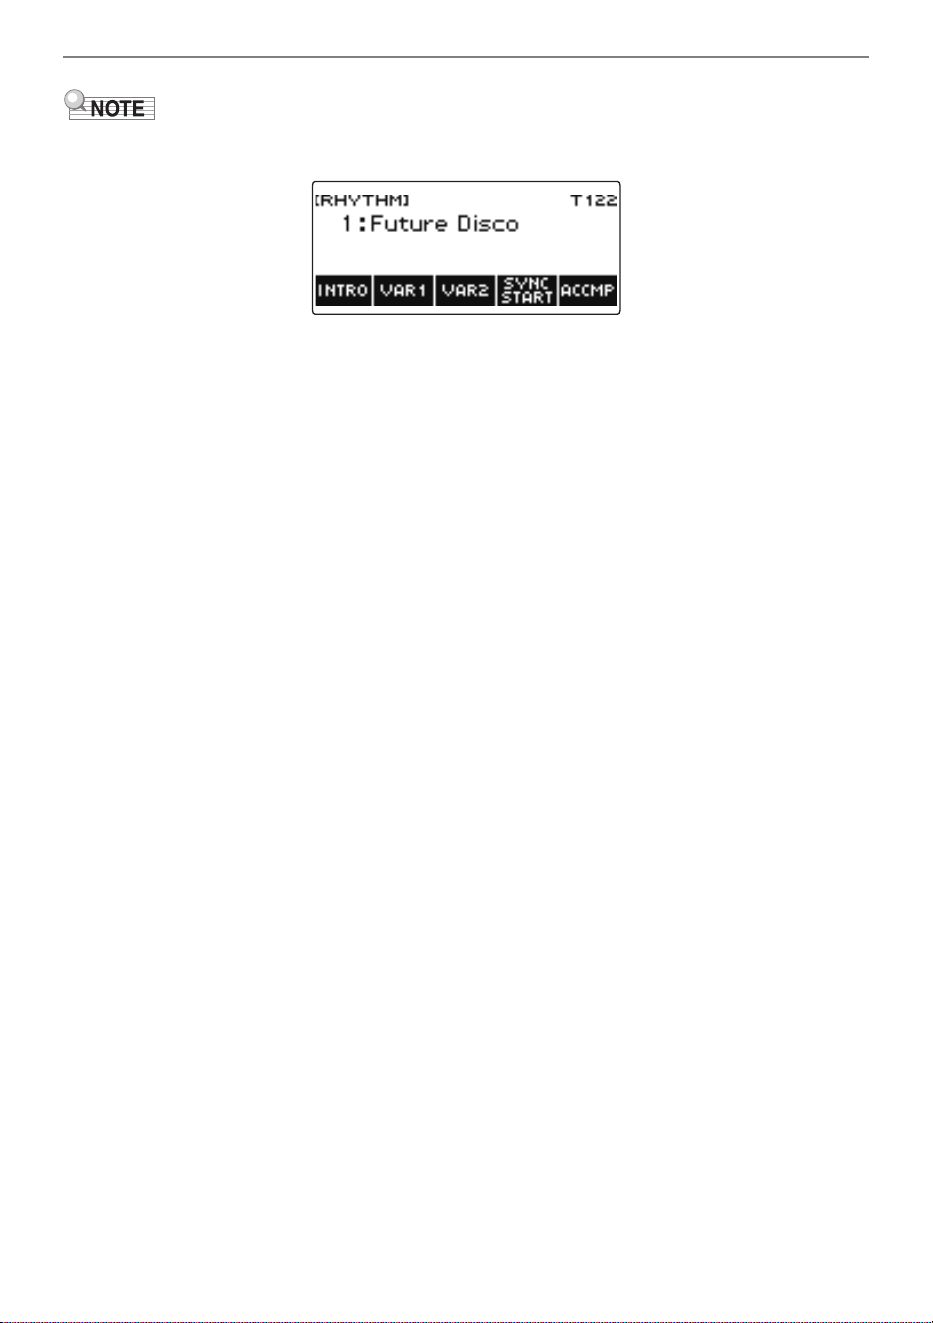
Playing with a Rhythm Backing
EN-166
• Changing the rhythm operation type to Type 2 causes the 5 buttons menu on the rhythm screen to
appear as shown below.
• Changing the rhythm operation type can cause the rhythm to stop and/or the rhythm to be reset to its
initial default setting.
• In the case of rhythm operation Type 2, the rhythm pattern is not set when a rhythm is selected, even
if rhythm auto setting (page EN-168) is enabled.
■ Switching Between the Basic Pattern and Variation Pattern
1.
Press a to start rhythm play.
This plays the “V1” rhythm.
• While rhythm play is stopped, pressing VAR1 plays “V1”, while pressing VAR2 plays “V2”.
• Pressing VAR2 while “V1” is being played changes to the “V2” rhythm pattern from the next
measure. Pressing VAR1 while “V2” is being played changes to the “V1” rhythm pattern.
■ Fill-in
1.
While “V1” is playing press VAR1, or while “V2” is playing press VAR2.
This displays “FILL” and inserts a fill-in at the end of the current measure.
• To extend the fill-in into the next measure, keep VAR1 or VAR2 depressed until rhythm play
enters the next measure.
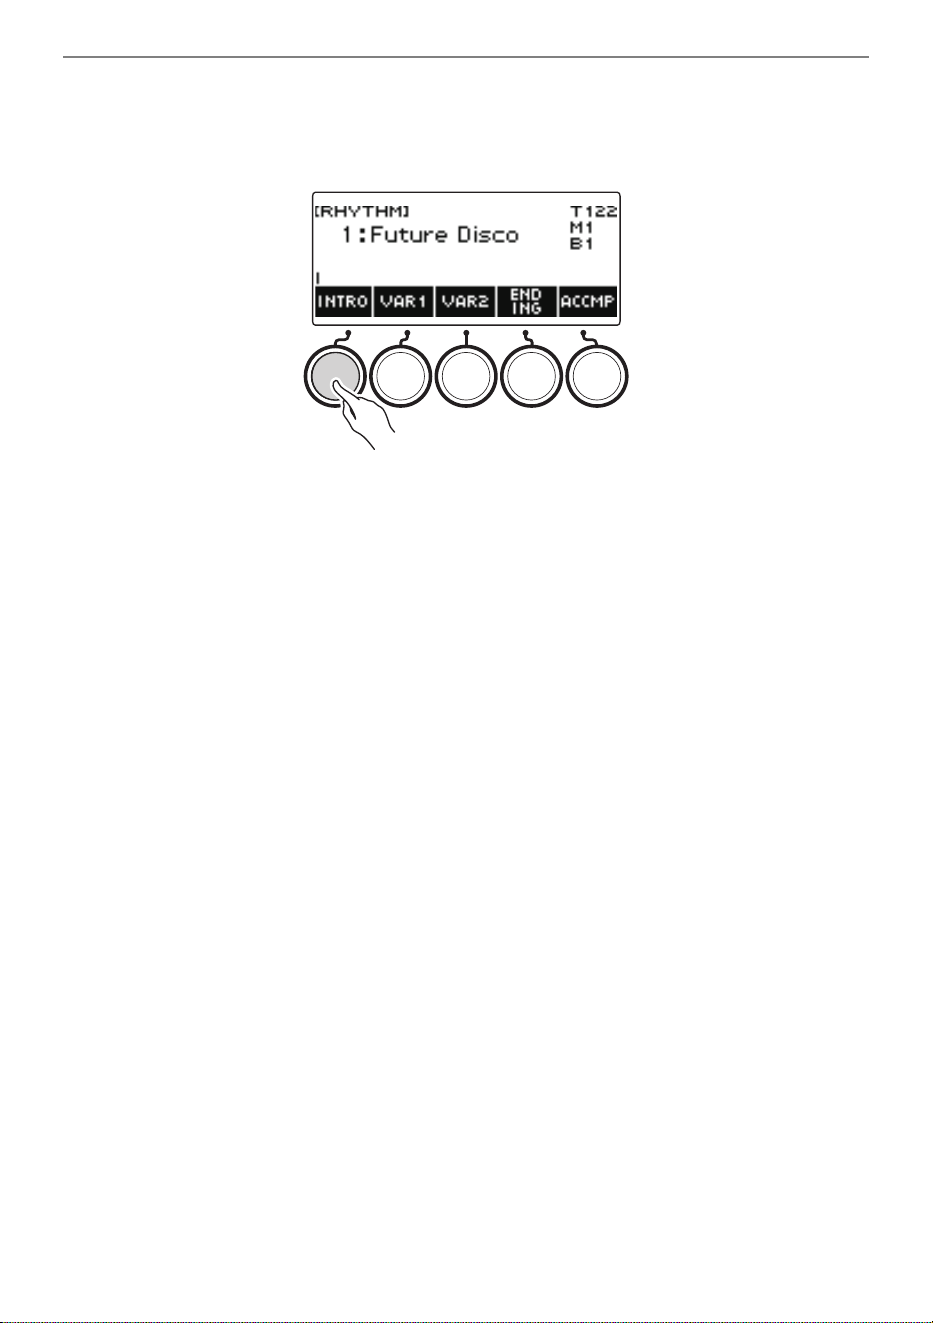
Playing with a Rhythm Backing
EN-167
■ Intro
1.
While rhythm play is stopped, press INTRO.
This displays “I” and plays the intro.
• Pressing VAR1 while an intro is playing displays “I >V1”. Pressing VAR2 displays “I >V2”.
• If “I” is left on the display without changing it, “V1” starts to play following the introduction.
• After you press VAR1 (“I >V1” displayed) or VAR2 (“I >V2” displayed), pressing the same button
(VAR1 or VAR2) again interrupts the intro play up to the current measure and then plays the
current rhythm pattern (V1 or V2).
• If you press INTRO while a rhythm is playing, the rhythm changes to the intro from the beginning
of the next measure, and “I” appears on the display.
■ Ending
1.
While a rhythm is playing, press ENDING.
When rhythm play enters the next measure, “
E
” appears on the display to indicate that an ending is
being played. After the ending, rhythm play stops.
• Pressing VAR1 while an ending is playing switches to “V1” from the next measure. Pressing
VAR2 switches to “V2”.
■ Synchro Start
While in Synchro Start standby, you can preset the pattern that plays when rhythm play starts by
pressing INTRO (“I” flashes), VAR1 (“V1” flashes), or VAR2 (“V2” flashes).
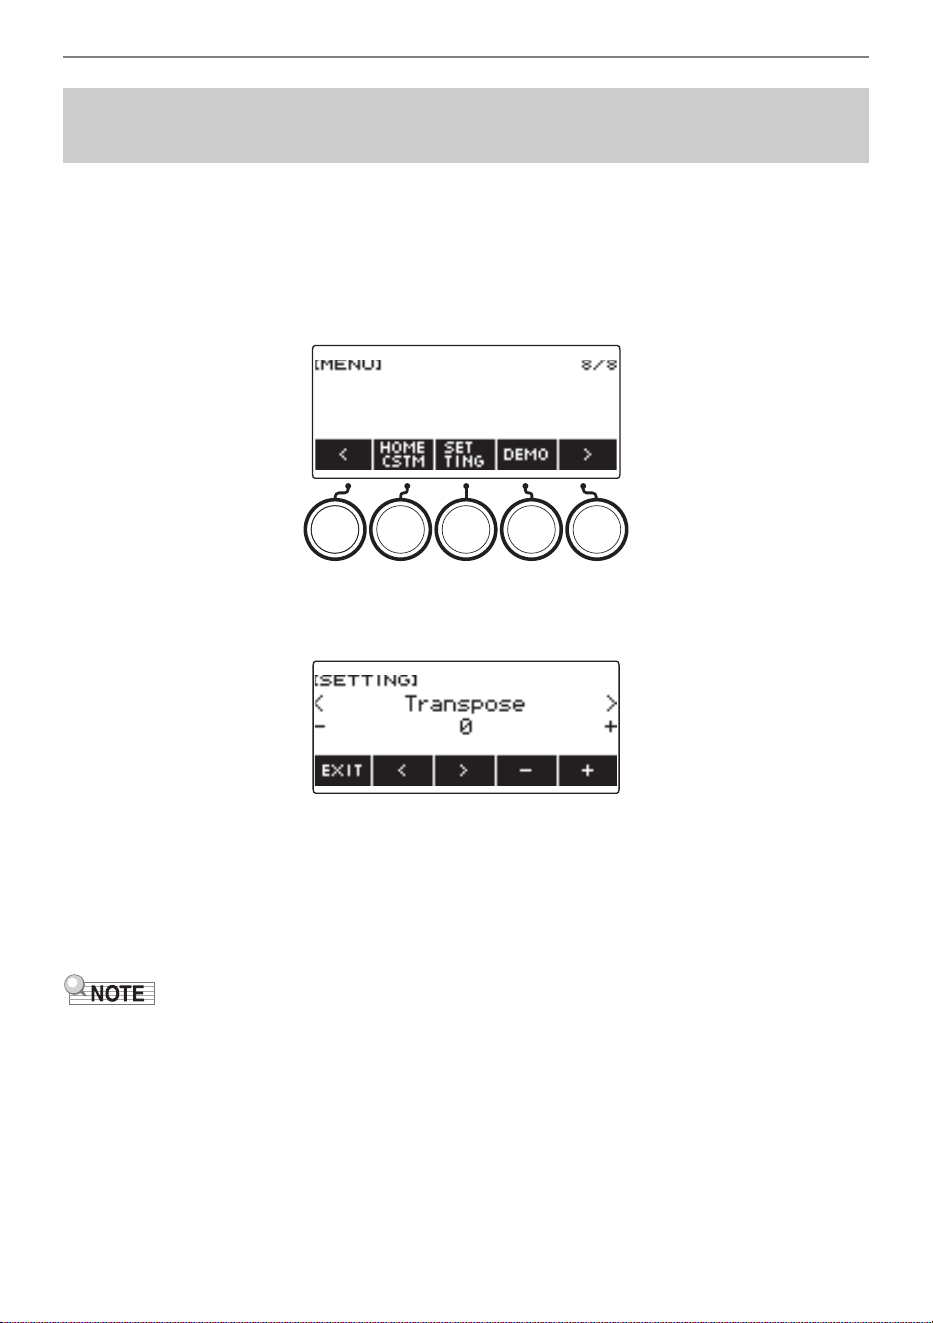
Playing with a Rhythm Backing
EN-168
Selecting a rhythm causes its recommended tempo and pattern to be automatically applied. You can
disable auto setting, if you want.
1.
Press MENU.
This displays the menu screen.
2.
Use U and I to select the 5 buttons menu that includes SETTING.
3.
Press SETTING.
This displays the setting screen.
4.
Use U and I to select “Rhythm Auto Set”.
5.
Rotate the dial or use – and + to select “Off”.
• To enable auto setting, select “On” for this setting.
6.
To exit the setting operation, press EXIT.
• When Type 2 is selected as the rhythm operation type (page EN-165), selecting a rhythm will not
automatically set the pattern to the recommended value when the rhythm is selected, even if rhythm
auto setting is enabled.
Disabling Automatic Setting of the Tempo and Pattern
when a Rhythm is Selected
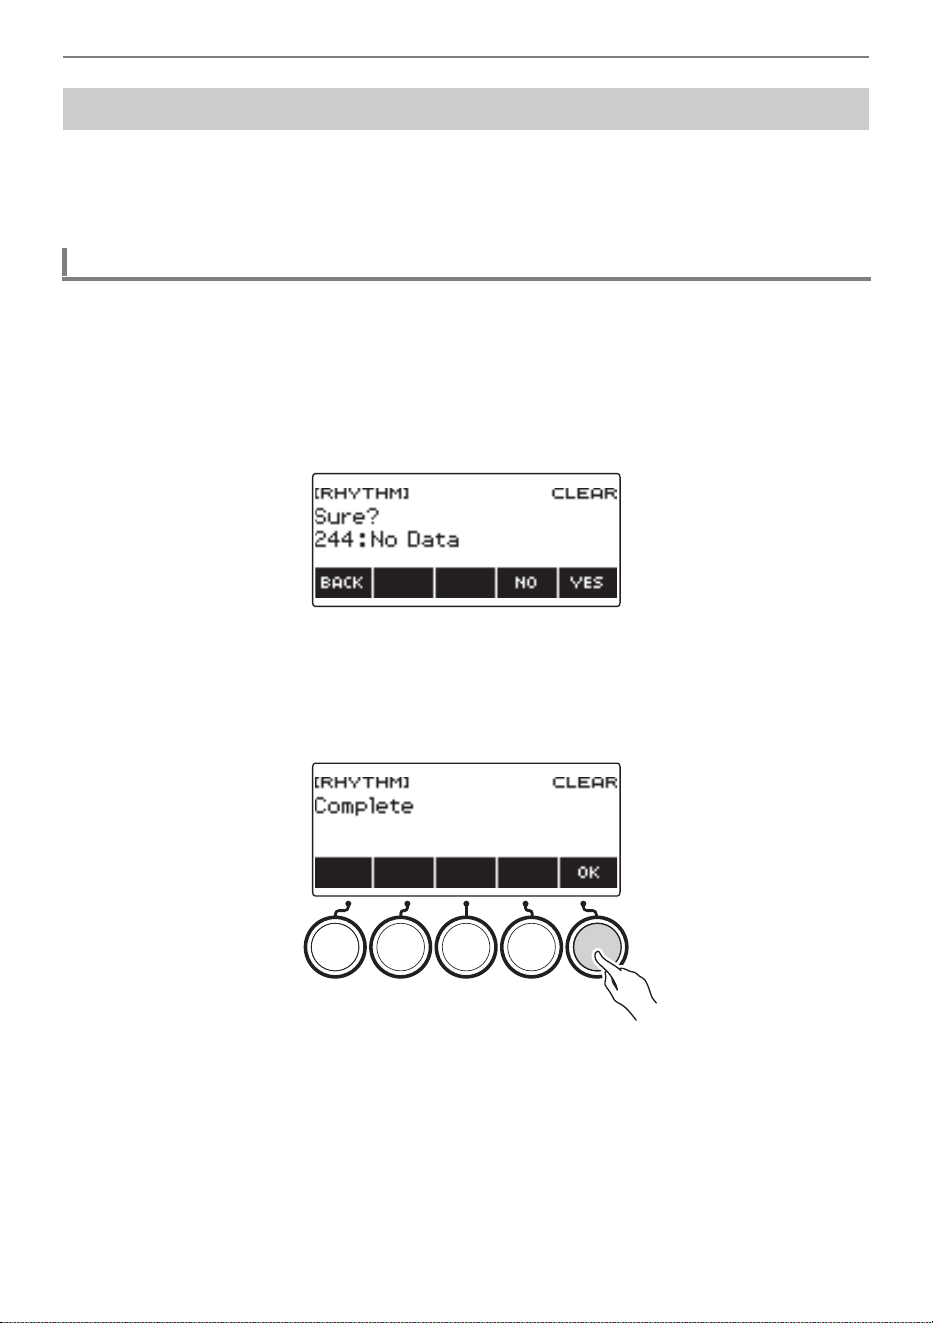
Playing with a Rhythm Backing
EN-169
A USB flash drive song can be loaded as a user rhythm. (Rhythm number: 244 to 293)
The file name extensions for loaded rhythms are AC7, CKF, and Z00.
– For information about loading a USB flash drive rhythm data as a user rhythm, see “USB Flash
Drive Operations” on page EN-253.
1.
Press RHYTHM.
This displays the currently selected rhythm number and name.
2.
Rotate the dial to select the user rhythm you want to delete.
3.
Long-press MENU.
This displays “Sure?”.
4.
Press YES.
This deletes the user rhythm.
• To cancel, press NO.
5.
When “Complete” appears on the display, press OK.
Increasing the Number of Rhythms (User Rhythms)
Deleting User Rhythm Data Stored in Digital Keyboard Memory

EN-170
Registration memory lets you store keyboard setups (tone, rhythm, etc.) for instant recall whenever you
need them. When recalling a setup, you can specify items that you do not want to include in the recall
(Freeze). Registration memory simplifies performance of complex pieces that require successive tone
and rhythm changes.
■ Registration Memory Setup Data Contents
• Tones (UPPER1, UPPER2, LOWER)
• Vocal Synthesis (Lyric tone, Lyric tone sequence, Lyric tone performance mode,
Lyric tone controller, Lyric tone speed, Lyric syllable attack balancer, Lyric syllable attack,
Random syllable advance, Syllable chord control function, Syllable stay notes, Lyric tone retrigger,
Vocalist)
• Touch Response
• Touch off velocity
• Pedal (PEDAL1, PEDAL2)
• Pedal effect part (UPPER1, UPPER2, LOWER)
• Sustain
• Sustain times (UPPER1, UPPER2, LOWER)
• Upper Portamento
• Part Portamento (UPPER1, UPPER2, LOWER)
• Portamento Time (UPPER1, UPPER2, LOWER)
• Pitch Bend Range (UPPER1, UPPER2, LOWER)
• Knob Type (K1, K2, K3)
• Knob Effect Part (UPPER1, UPPER2, LOWER)
• Knob K1-K2 Link
• Layer
• Split
• Split point
• Balance (UPPER1, UPPER2, LOWER, Rhythm)
• Upper octave shift
• Part Octave Shift (UPPER1, UPPER2, LOWER)
• Transpose
• SUS/UPPER PORT button
• Reverb
• Chorus
• Delay
• Scale tuning type
• Scale tuning base note
• Accompaniment scale
• Piano Stretch Tuning
• Arpeggiator (type, hold, part)
• Auto Harmonize
• ARP/AH button
• Active DSP* (Effect Change Part, Effect, Effect Part, Parameter, Active DSP Hold)
• Tempo
• Rhythm (number, pattern, fill, accompaniment, chord mode, Synchro Start, Synchro Stop,
volume level)
* Active DSP settings can be saved only when Active DSP Hold is enabled.
Saving and Recalling Setups (Registration)
B
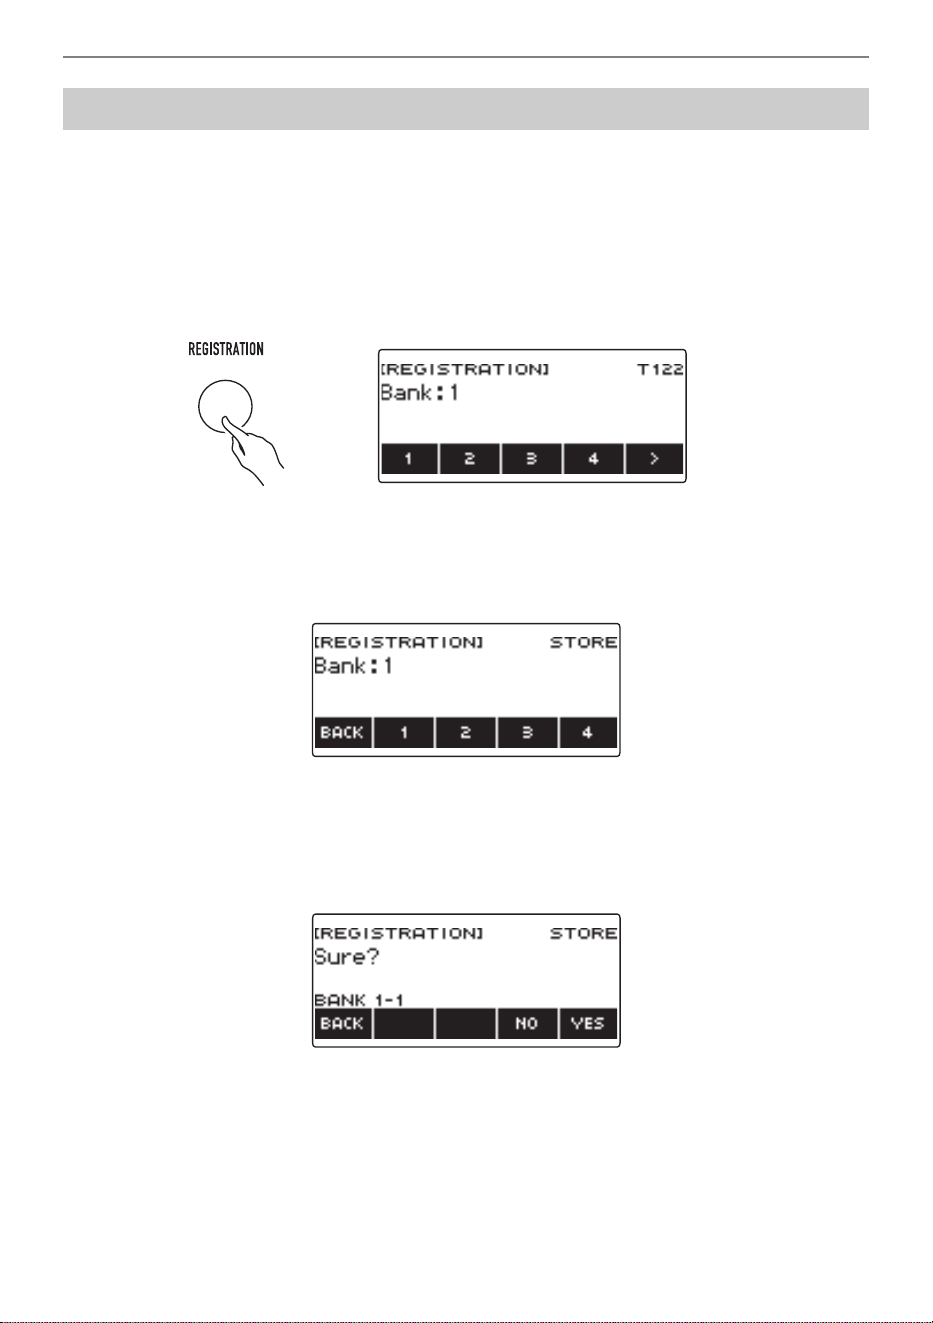
Saving and Recalling Setups (Registration)
EN-171
Setup registrations are stored in a memory location that is divided into 16 banks.
Each bank has four storage areas, which means you can register up to 64 (16 banks × 4 areas) setups.
1.
Set up the Digital Keyboard with the tone, rhythm and other settings you want to
save to the setup.
2.
Press REGISTRATION.
This displays the registration screen.
3.
Use I to select the 5 buttons menu that includes STORE.
4.
Press STORE.
This displays a screen for selecting the destination bank number and area number.
5.
Rotate the dial to select a bank number.
• You can specify a bank number in the range of 1 to 16.
6.
Use buttons 1 through 4 to select an area.
This displays “Sure?” along with the selected destination bank number and area number.
7.
Press YES.
This saves the setup to registration memory.
• To cancel, press NO.
Saving a Setup
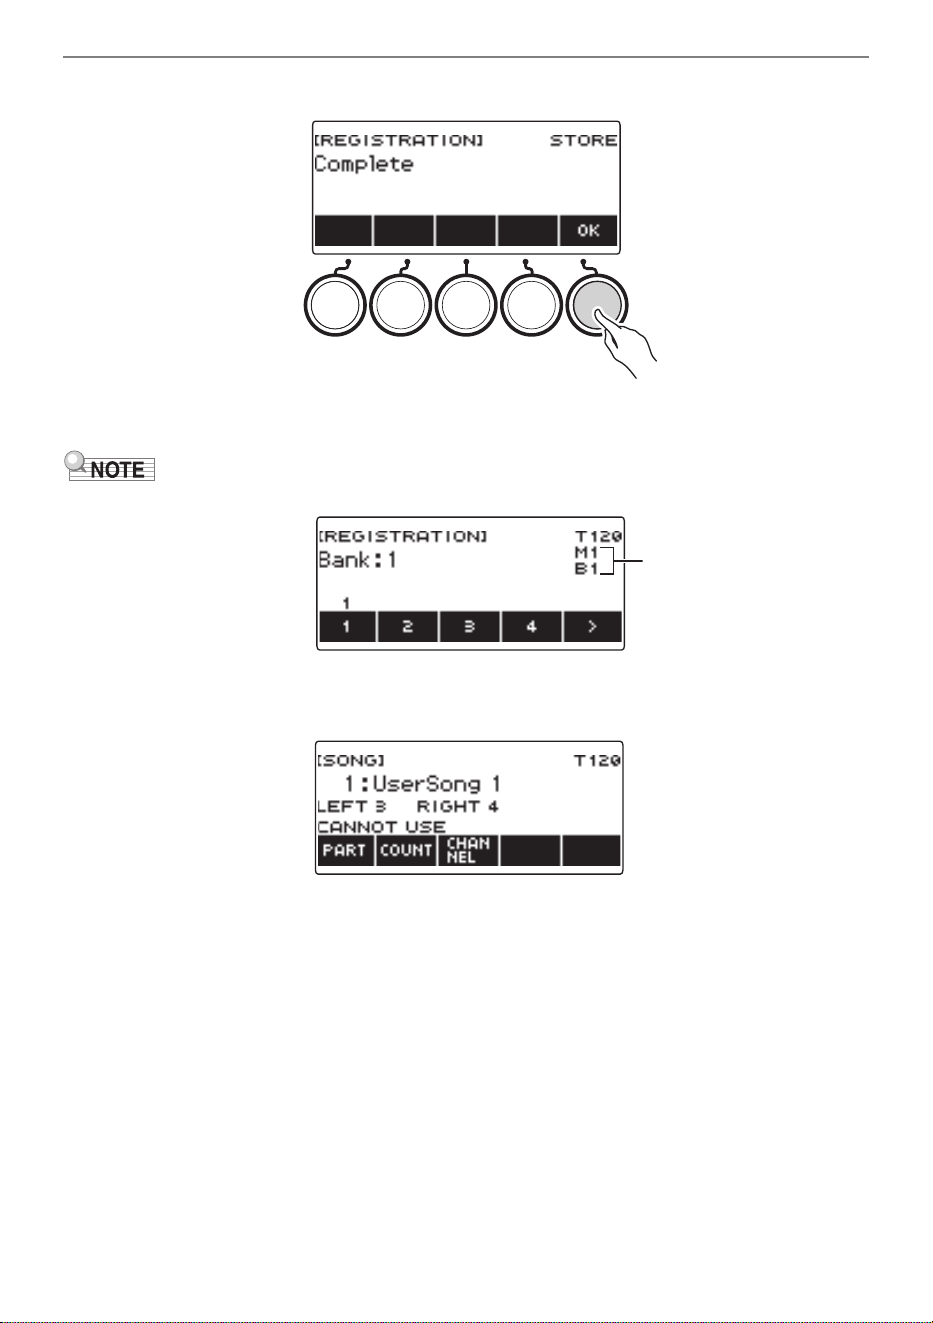
Saving and Recalling Setups (Registration)
EN-172
8.
When “Complete” appears on the display, press OK.
9.
To exit the setting operation, press REGISTRATION.
• During any type of playback, the display shows the current measure and beat numbers.
• Note that registration operation memory operations are not supported while the SONG function is
being used. Pressing REGISTRATION in this case causes the message “CANNOT USE” to appear
momentarily.
Measure, Beat
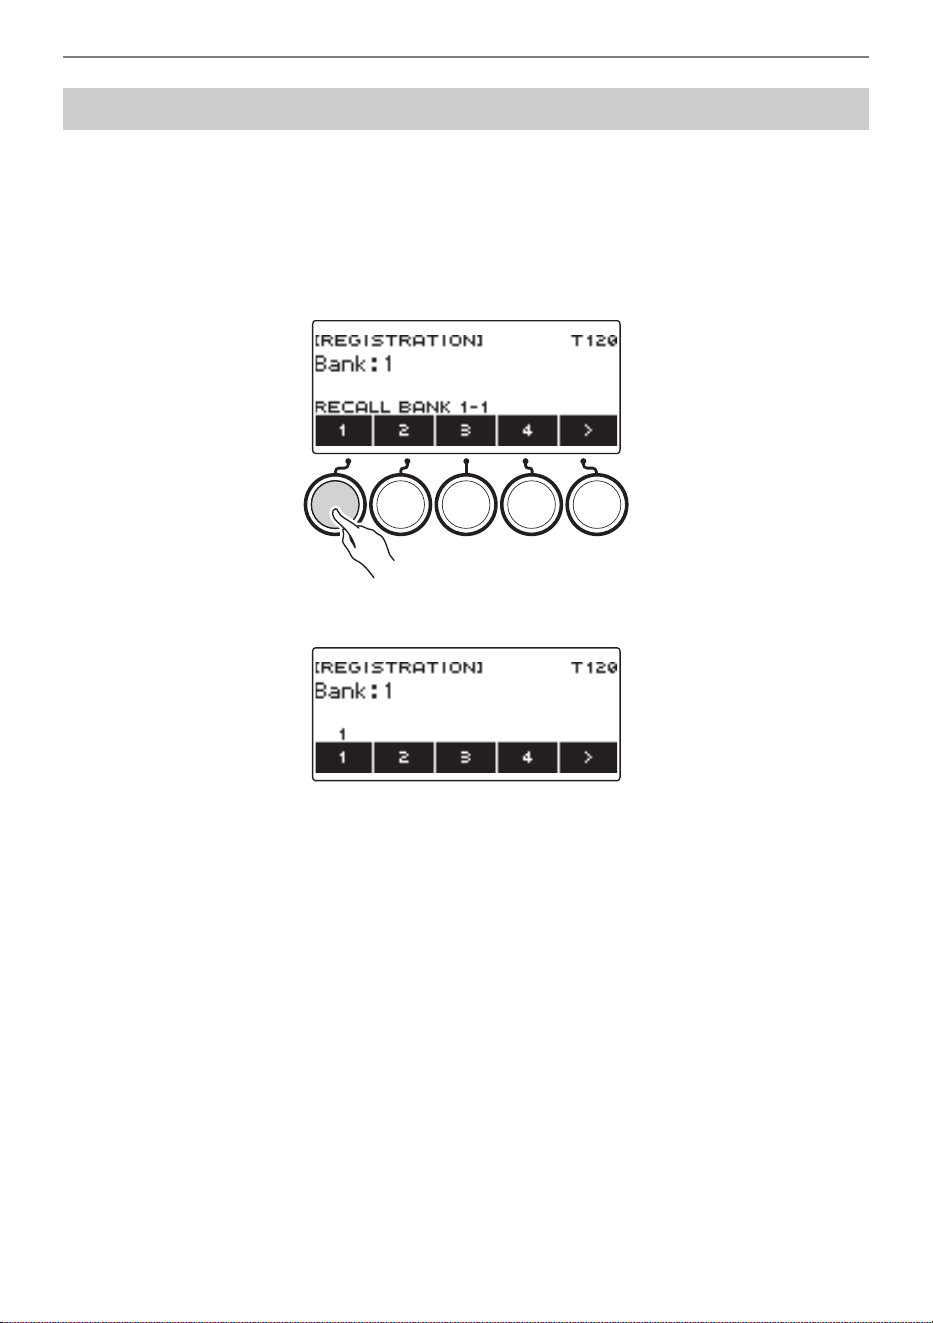
Saving and Recalling Setups (Registration)
EN-173
1.
Press REGISTRATION.
This displays the registration screen.
2.
Rotate the dial to select a bank number.
3.
Use buttons 1 through 4 to select an area.
This causes the bank number and area number to appear momentarily.
• If the last recalled bank number is selected, the area number will be displayed at the bottom of
the LCD.
Recalling a Saved Setup
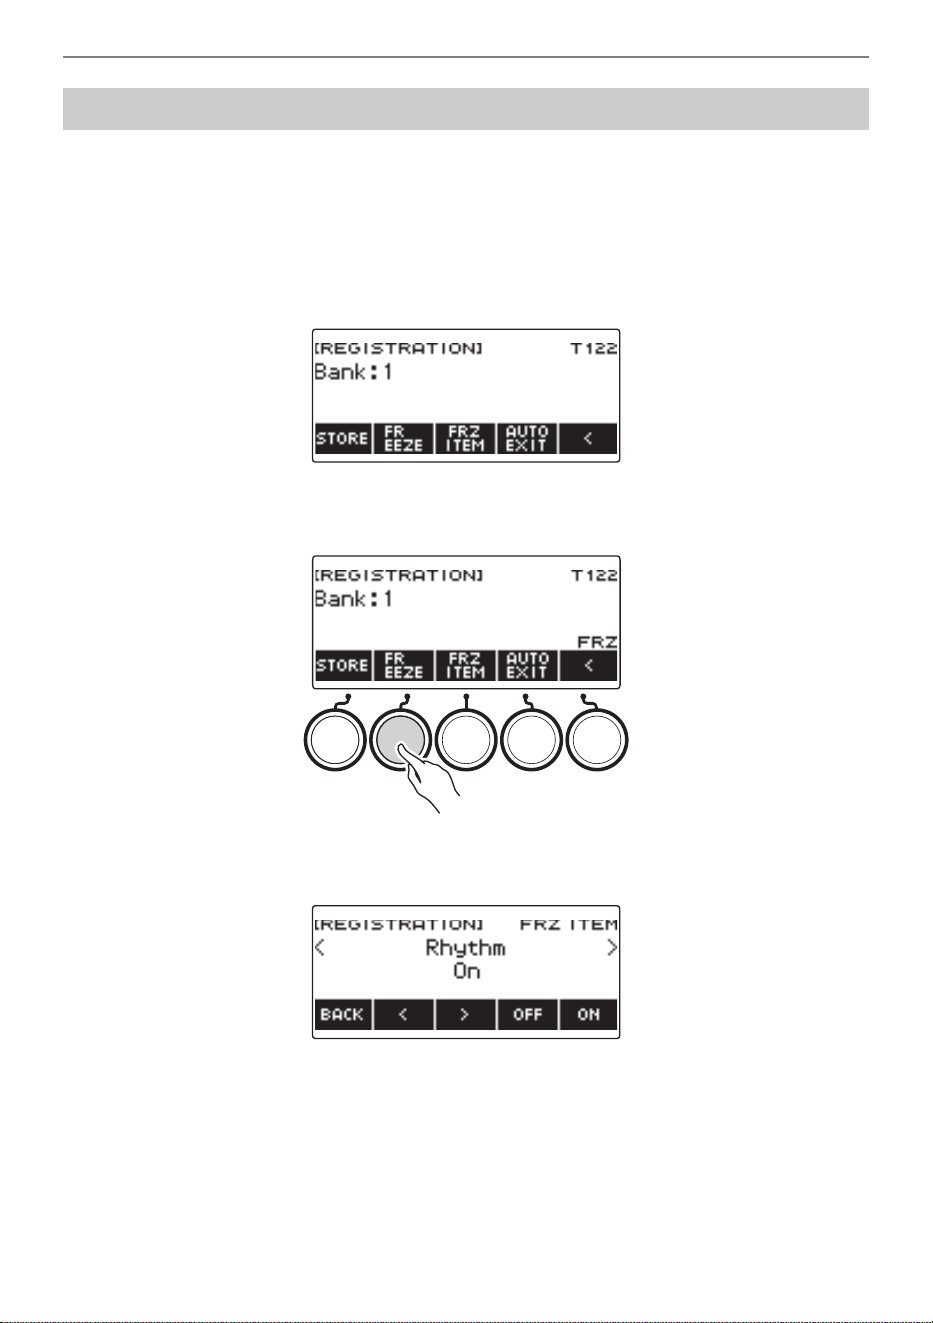
Saving and Recalling Setups (Registration)
EN-174
Recalling a setup normally causes all settings that can be modified by a recall to be replaced by the
recalled settings. With the Freeze Function, you can disable overwriting of specific setting items
whenever setup data is recalled.
1.
Press REGISTRATION.
This displays the registration screen.
2.
Use I to select the 5 buttons menu that includes FREEZE.
3.
Press FREEZE.
This displays “FRZ” and enables the freeze function.
4.
Press FRZ ITEM.
This displays a freeze item settings screen.
5.
Use U and I to select the items you do not want recalled.
Disabling Recall of Specific Settings (Freeze)
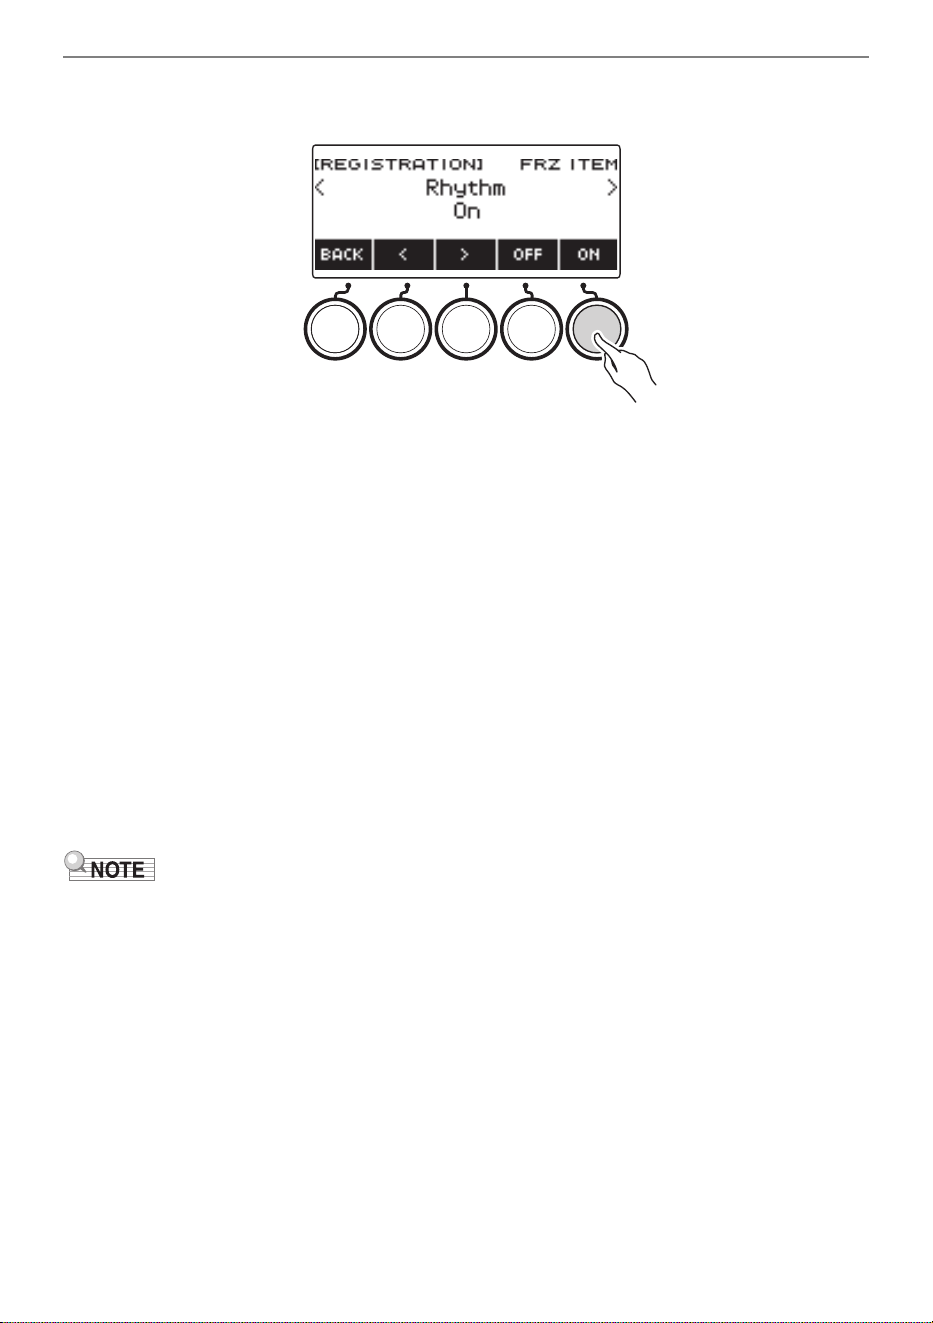
Saving and Recalling Setups (Registration)
EN-175
6.
Rotate the dial to the right or press ON.
This displays “On”, which indicates the displayed item is not recalled and applied to the setup.
• If an item’s status is currently FRZ ITEM ON (not recalled), you can change it back to FRZ ITEM
OFF (recalled) by rotating the dial to the left or by pressing OFF. This displays “Off” for the
setting.
7.
To disable freeze, return to the registration screen and then press FREEZE.
This causes “FRZ” to disappear from the display, indicating that freeze is disabled.
■ Freeze Item List
• Rhythm (Rhythm)
• Tempo (Tempo)
• Tone (Tone)
• Split Point (Split Point)
• Arpeggiator/Auto Harmonize (ARP/AH)
• Transpose (Transpose)
• Scale Tuning (Scale Tuning)
• Touch Response (Touch Response)
• Effect (Effect)
• Controller (Controller)
• Changing the tone resets some settings classified as controllers. If you want to freeze the controller
settings, also freeze the tone setting.
• Settings that can be frozen by turning on the effect of the freeze item are: Reverb Type, Chorus
Type, and Delay Type. If you want to freeze Reverb Send, Chorus Send, or Delay Send, also freeze
Controller and Tone.
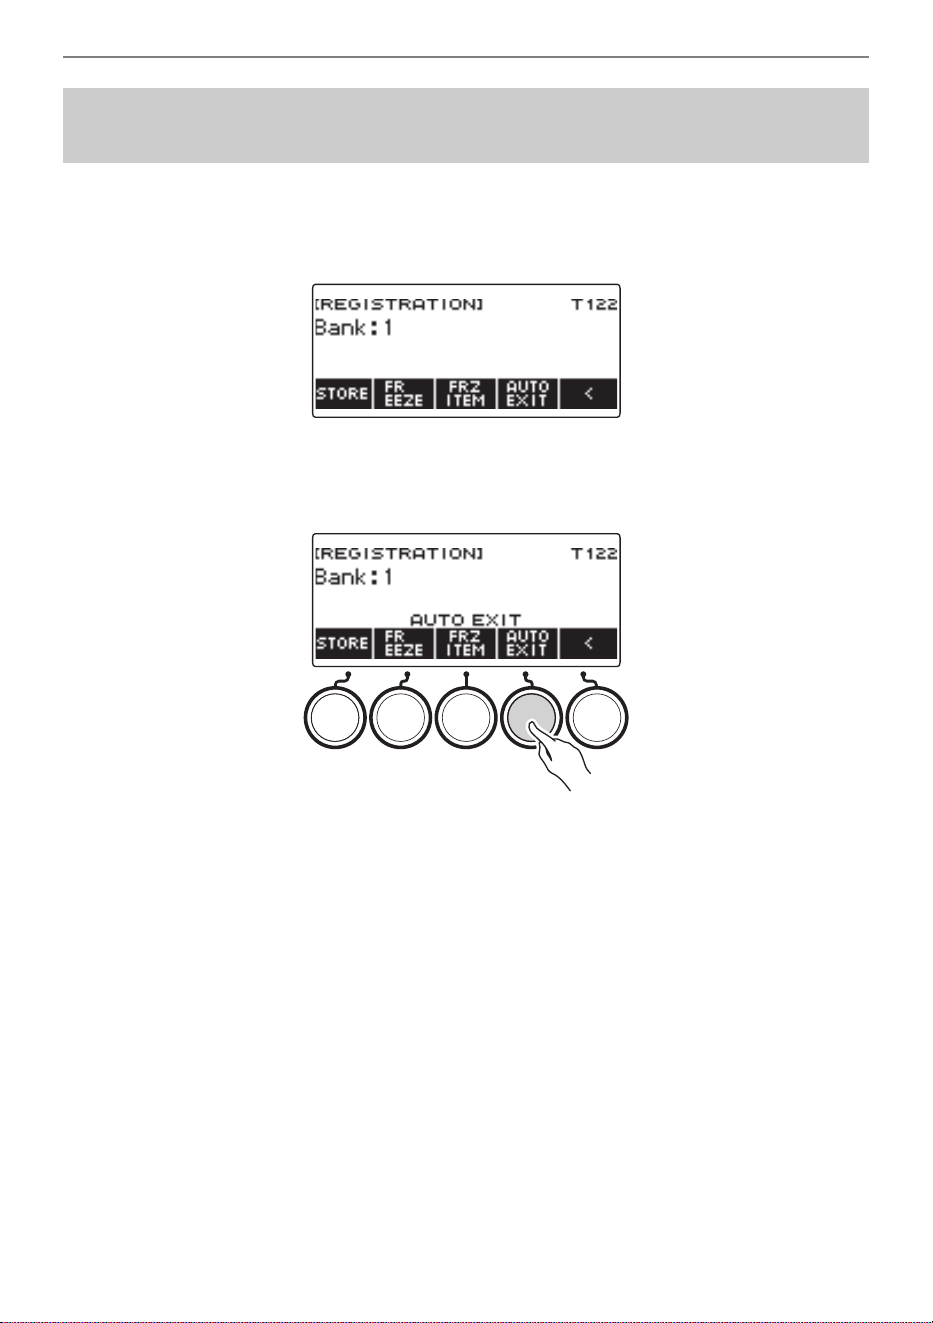
Saving and Recalling Setups (Registration)
EN-176
1.
Press REGISTRATION.
This displays the registration screen.
2.
Use I to select the 5 buttons menu that includes AUTO EXIT.
3.
Press AUTO EXIT.
This displays “AUTO EXIT”, which indicates the registration screen will be exited automatically
when you recall a setup.
4.
To disable auto exit, press AUTO EXIT again.
This causes “AUTO EXIT” to disappear, which indicates the registration screen is not exited
automatically when you recall a setup.
Enabling Auto Exit of the Registration Screen when a
Setup is Recalled
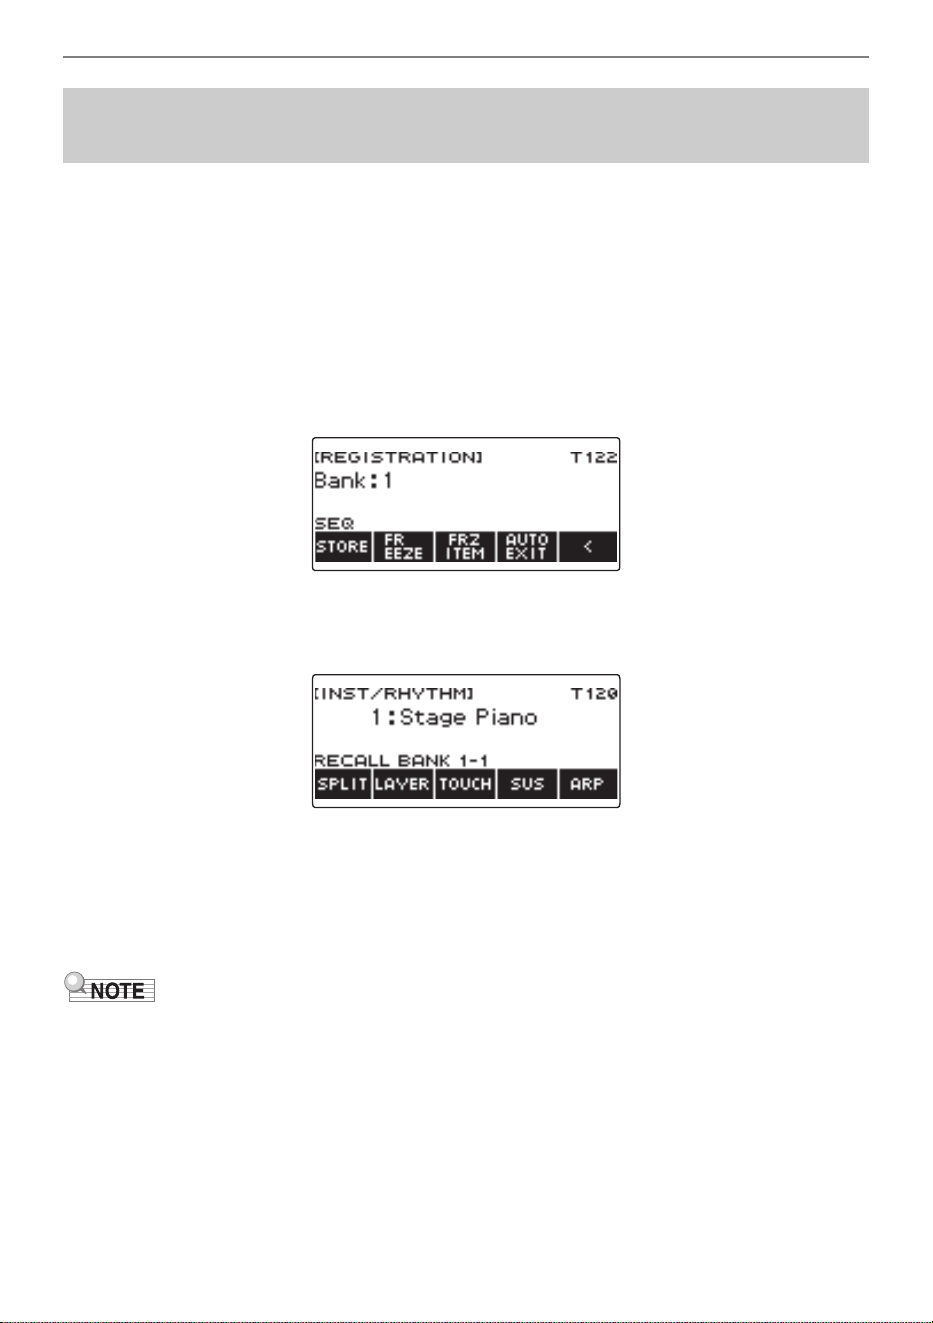
Saving and Recalling Setups (Registration)
EN-177
Each press of the pedal cycles through the currently selected bank’s registrations (setups) in area
number sequence.
1.
Press REGISTRATION.
This displays the registration screen.
2.
Use I to select the 5 buttons menu that includes AUTO EXIT.
3.
Long-press AUTO EXIT.
This causes “SEQ” to appear on the display and makes the Pedal 1 function the registration
sequence function.
4.
Press Pedal 1.
This recalls the settings of the next area and displays the recalled bank number and area number.
• If the last area recalled from is Area 4, pressing Pedal 1 recalls the settings from Area 1.
5.
If you want to move back to the previous area for recall, long-press the Pedal 1.
This recalls the settings of the previous area and displays the recalled bank number and area
number.
• If the last area recalled from is Area 1, long-pressing Pedal 1 recalls the settings from Area 4.
• If you have not yet recalled a registration setup, the initial setup to be recalled is Bank 1 Area 1.
Using the Pedal to Recall the Settings Sequentially
(Registration Sequence)
B
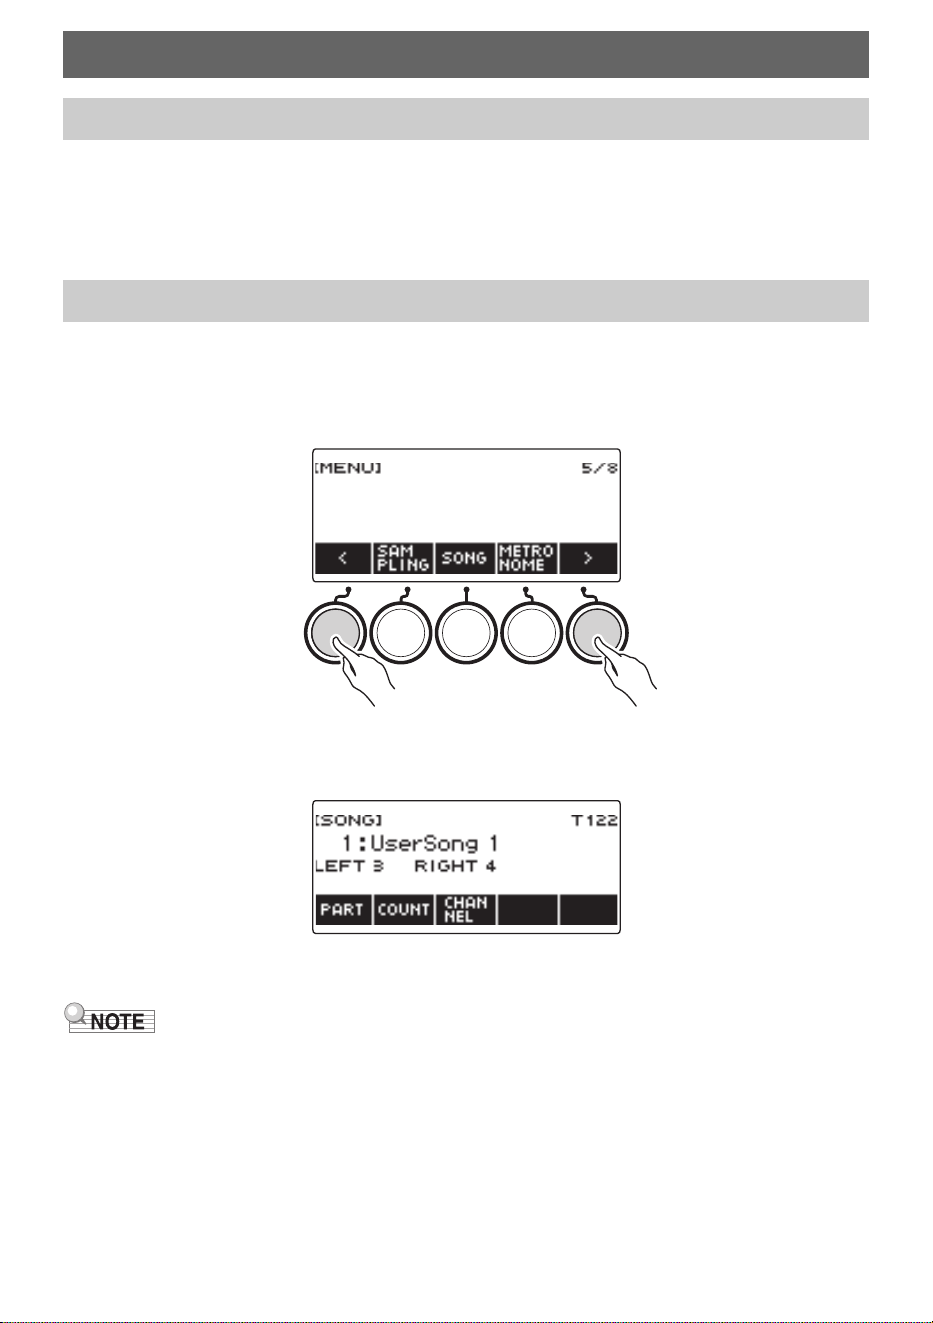
EN-178
Normally, the word “song” means a musical piece with lyrics. Your Digital Keyboard uses the term
“song” (SONG) to mean a set of song data. With this unit, you can play back and listen to songs stored
on a USB flash drive and songs imported into Digital Keyboard memory. In addition to playing songs for
your listening pleasure, you can also practice along with song playback.
1.
Press MENU.
This displays the menu screen.
2.
Use U and I to select the 5 buttons menu that includes SONG.
3.
Press SONG.
This displays the song screen.
4.
To exit the SONG function, press HOME or long-press TONE.
• You can also display the song screen by long-pressing REGISTRATION.
Playing a Song
Songs
Using the SONG Function
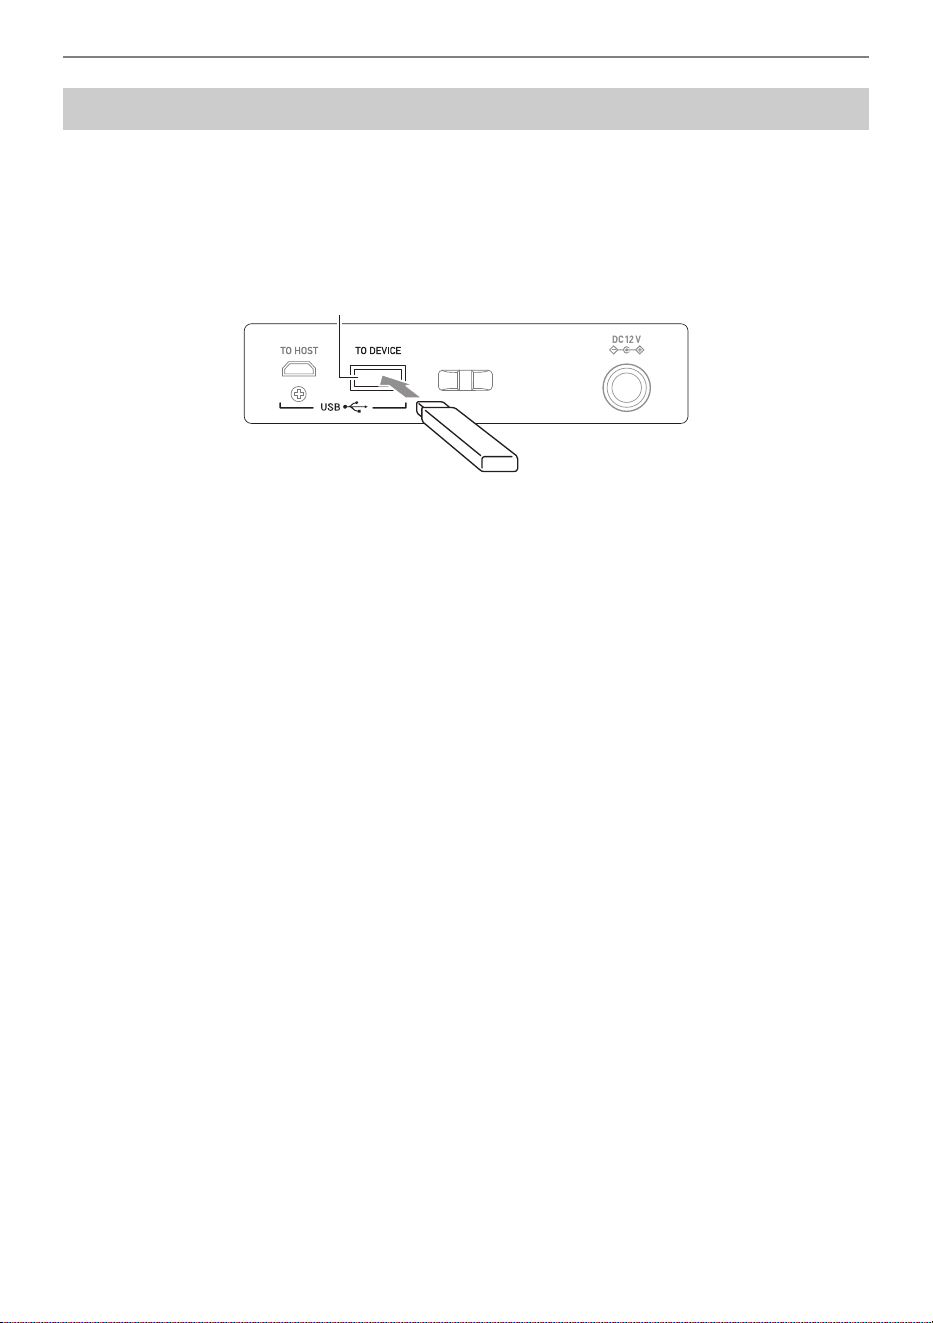
Playing a Song
EN-179
You can use the same operations as those for built-in songs to play back MIDI files* stored in the
“MUSICDAT” folder on a USB flash drive. For information about the procedure for saving a MIDI file to
a USB flash drive, see “Saving Digital Keyboard Data to a USB Flash Drive” (page EN-254).
* Standard MIDI files (SMF format 0/1) and CASIO MIDI files (CMF format)
1.
Insert the USB flash drive into the Digital Keyboard’s USB TO DEVICE port.
• When you perform a USB flash drive operation or turn on the Digital Keyboard while a USB flash
drive is plugged in, the Digital Keyboard initially needs to perform a “mounting” process to prepare for
data exchange with the USB flash drive. Digital Keyboard operations are momentarily disabled while
a mounting process is being performed.
• “MOUNTING” is shown on the display while the USB flash drive mounting process is being
performed.
• Do not attempt to perform any operation on the Digital Keyboard while a mounting process is in
progress.
• After the mounting process is complete, it may take up to 10 or 20 seconds or even longer before you
can perform any operation on the Digital Keyboard. “LISTING” is shown on the display during this
period of non-operation.
• The USB flash drive mounting process needs to be performed each time it is connected to the Digital
Keyboard.
2.
Press MENU.
This displays the menu screen.
3.
Use U and I to select the 5 buttons menu that includes SONG.
4.
Press SONG.
This displays the song screen.
Selecting a Song on a USB Flash Drive
USB TO DEVICE port
USB flash drive
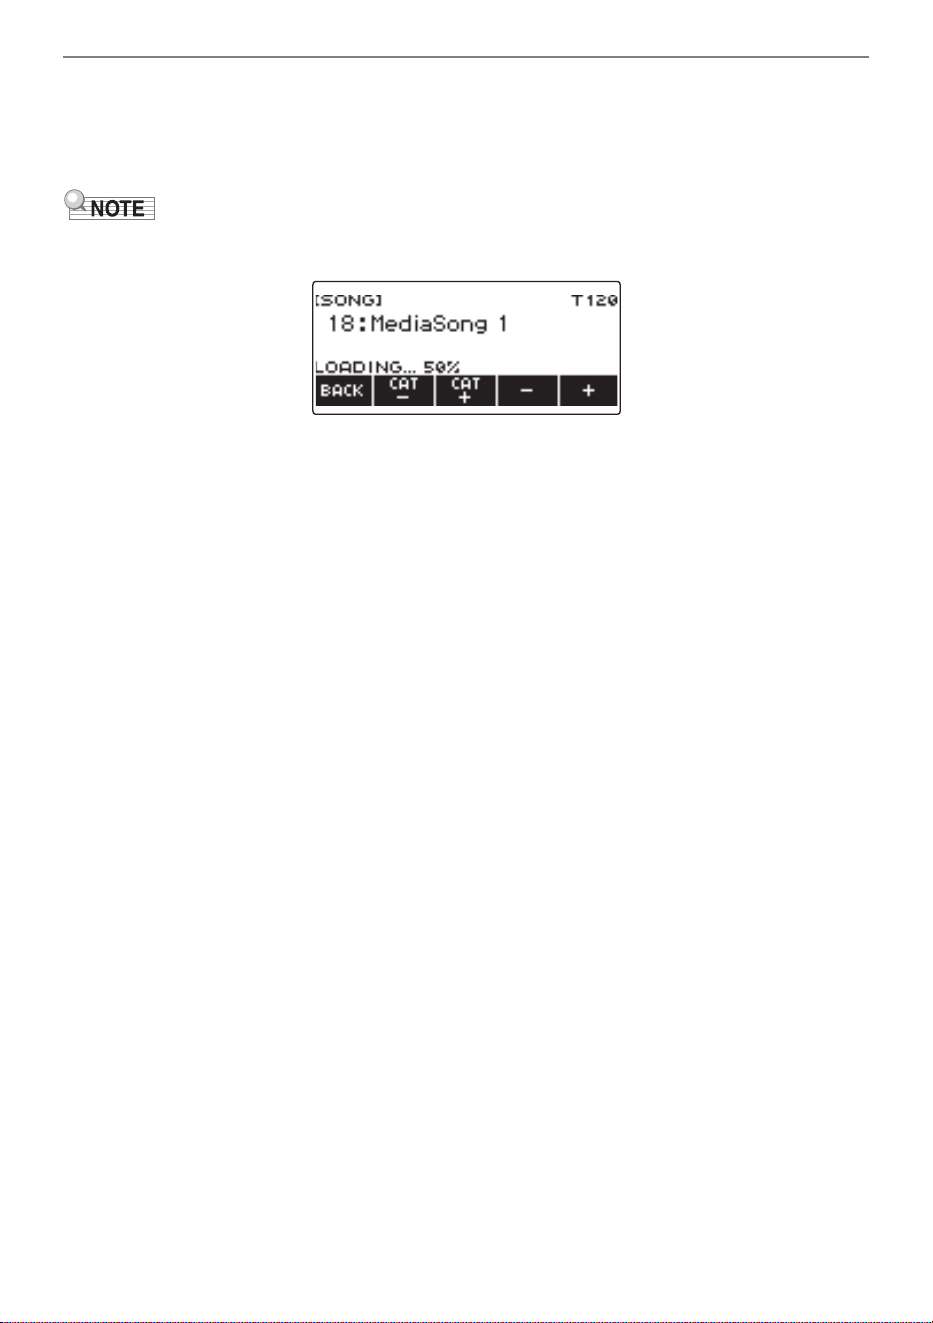
Playing a Song
EN-180
5.
Rotate the dial to select a song.
• Song numbers are assigned automatically in sequence to MIDI files on the USB flash drive. The
files are sorted in file name sequence. The first MIDI file (file name sequence) is assigned song
number 18.
• Certain songs can take time to load. During a load operation, the message “LOADING” is displayed
along with a progress percentage.
• Only numbers that are allocated to the USB flash drive can be selected.
• Only songs that can be displayed in the USB flash drive song category can be selected.
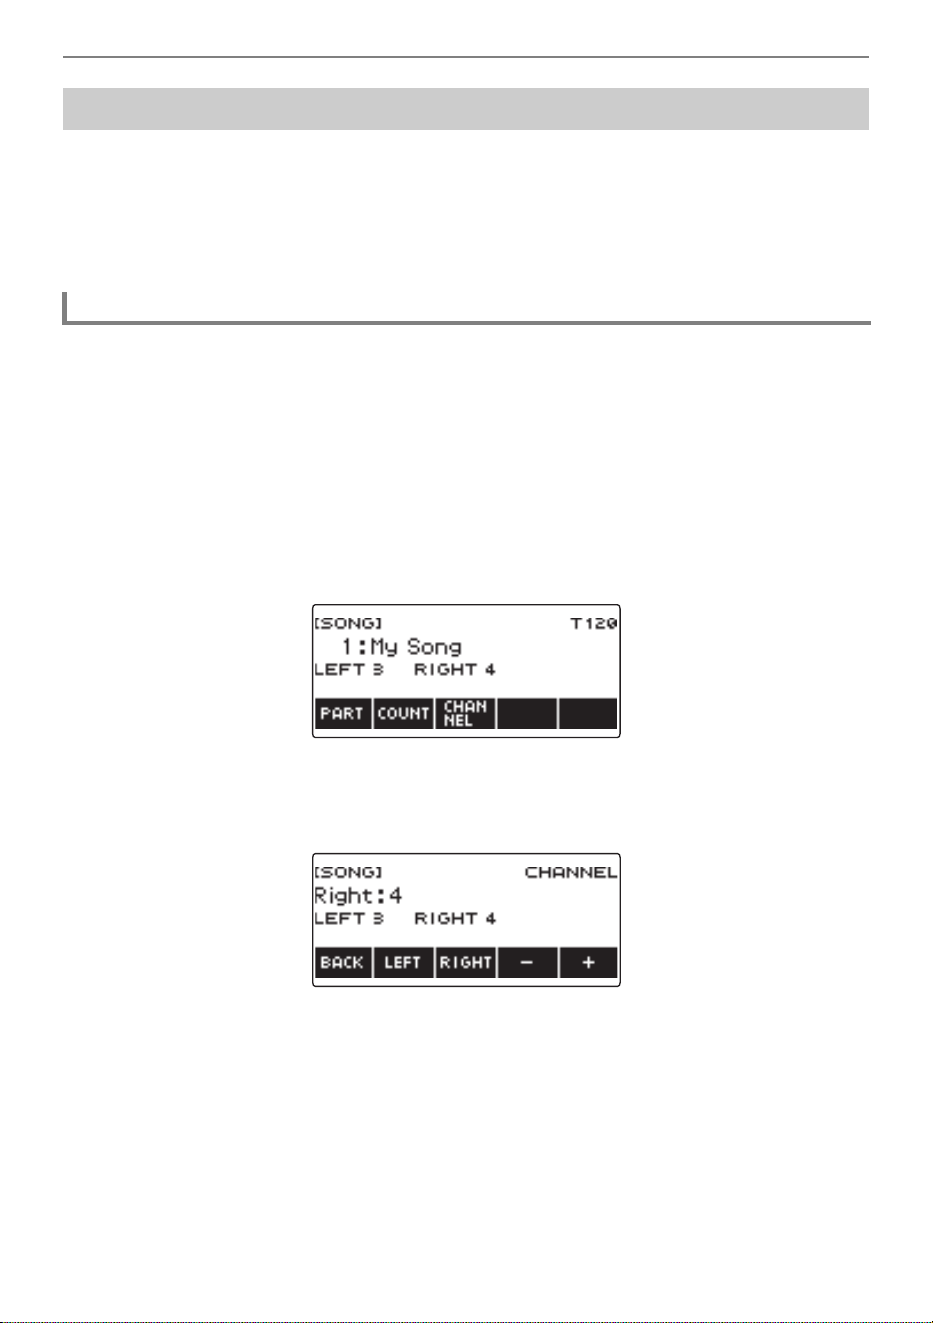
Playing a Song
EN-181
Song data transferred to the Digital Keyboard from a USB flash drive or the APP function can be
recalled and played as Song Bank user songs (numbers 1 to 10). For details, see “Loading Data From
a USB Flash Drive to Digital Keyboard Memory” (page EN-256), and “Connecting with External
Devices” (page EN-262).
CMF (CASIO MIDI files) and SMF (standard MIDI files) can be imported into Digital Keyboard memory.
Supported formats for SMF songs are 0 and 1.
1.
Press MENU.
This displays the menu screen.
2.
Use U and I to select the 5 buttons menu that includes SONG.
3.
Press SONG.
This displays the song screen.
4.
Rotate the dial to select an SMF user song.
5.
Press BACK.
• A channel cannot be specified for a song for which the CHANNEL button is not displayed.
6.
Press CHANNEL.
This displays channel setting items for the right-hand part.
7.
Rotate the dial or use – and + to change the setting.
• You can specify a value from 1 to 16.
• To return the setting to its initial default, press – and + at the same time.
• To specify a channel for the left-hand part, press LEFT and then repeat the same operation as above.
Increasing the Selection of Songs (User Songs)
Specifying a Channel for an SMF User Song Part
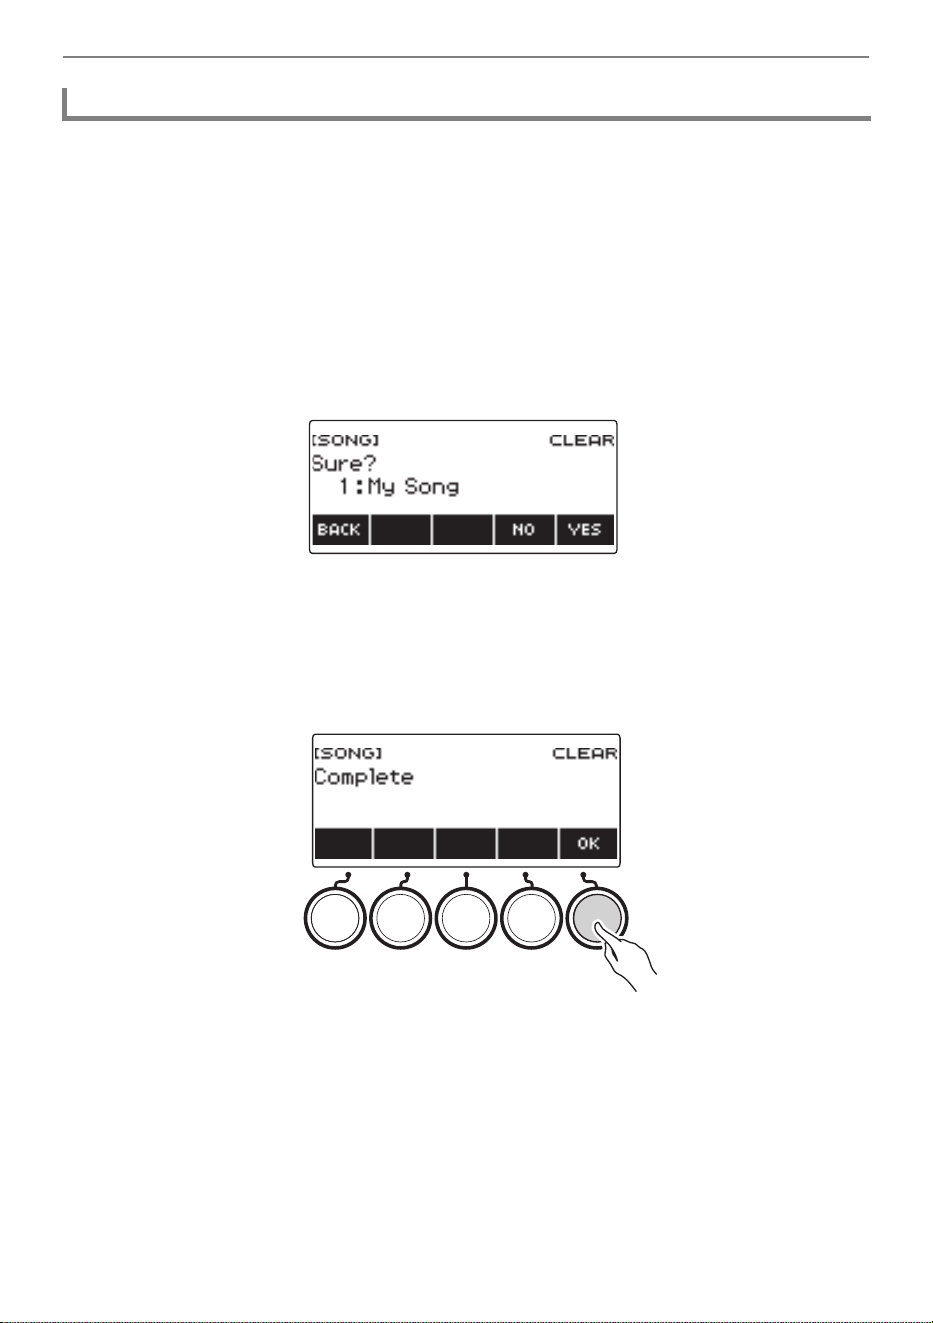
Playing a Song
EN-182
1.
Press MENU.
This displays the menu screen.
2.
Use U and I to select the 5 buttons menu that includes SONG.
3.
Press SONG.
This displays the song screen.
4.
Rotate the dial to select the user song you want to delete.
5.
Long-press MENU.
This displays “Sure?”.
6.
Press YES.
This deletes the user song.
• To cancel, press NO.
7.
When “Complete” appears on the display, press OK.
This exits the user song delete operation.
Deleting a User Song
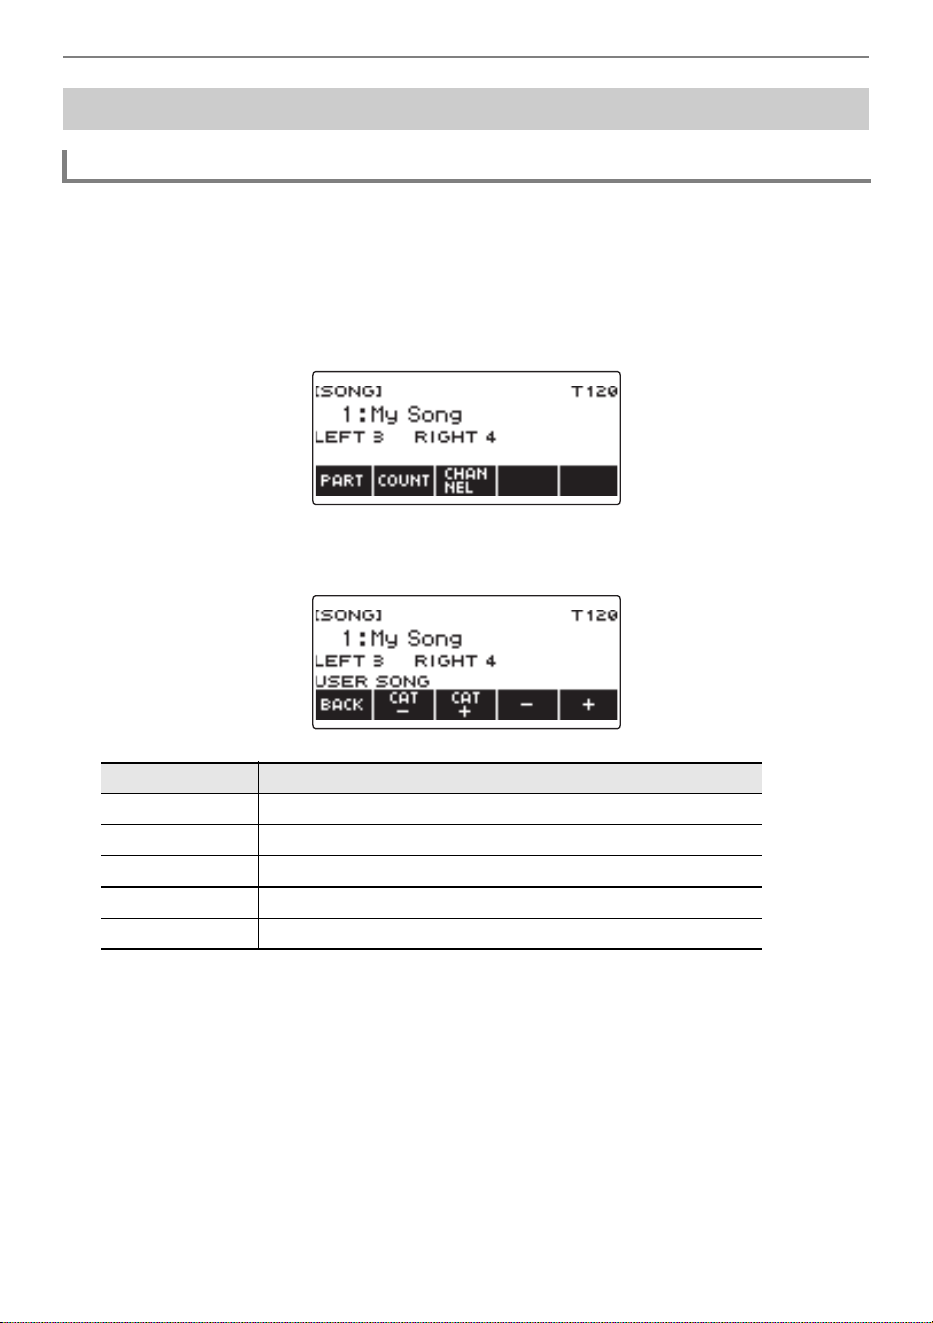
Playing a Song
EN-183
1.
Press MENU.
This displays the menu screen.
2.
Use U and I to select the 5 buttons menu that includes SONG.
3.
Press SONG.
This displays the song screen.
4.
Rotate the dial to select a song.
This displays the –/+ screen.
• After you rotate the dial once to select a song, you can change the selection further using – and +.
• To return to the initial song, press – and + at the same time.
• If you want to select a category, use CAT–/CAT+.
• To go back to the previous screen, press BACK.
5.
Press a to start playback.
This displays current measure and beat numbers.
• If the song includes chord information, a chord also appears on the display.
6.
To stop playback, press a again.
Playing Songs
Starting or Stopping Song Play
No. Category
1 to 10 User Songs (page EN-181)
11 Tone Recording Songs (page EN-190)
12 Rhythm Recording Songs (page EN-190)
13 to 17 Multi-track Recording Songs (page EN-190)
18 to 999 USB Memory Songs (page EN-179)
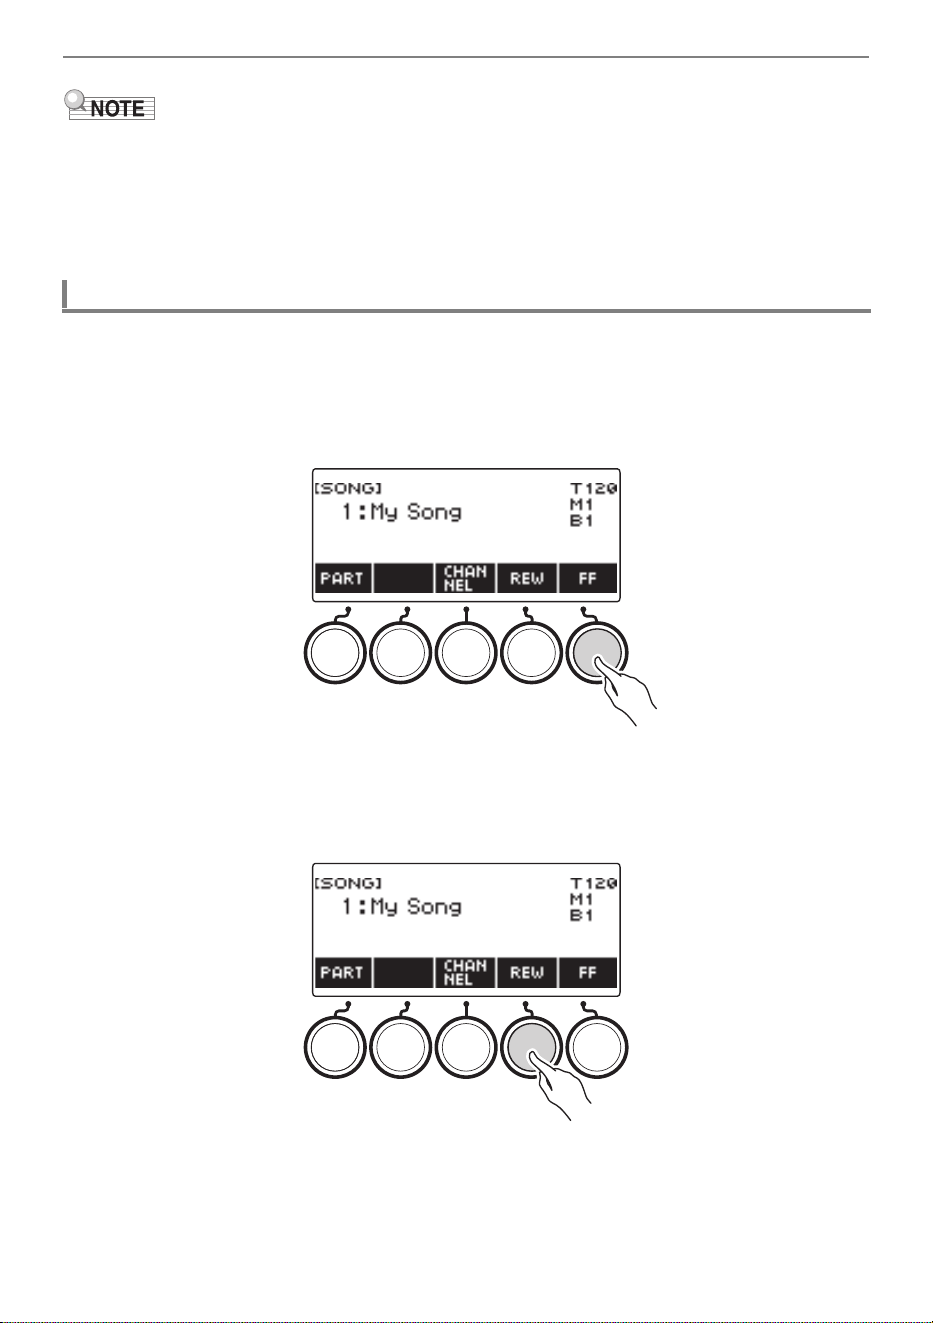
Playing a Song
EN-184
• Starting to use the SONG function while the metronome is sounding stops the metronome. Or you can
sound a count in time with a song. See “Sounding a Count in Time with a Song” (page EN-189).
• To make the keyboard reverb have the same effect as the song reverb during song playback, select
“SYNC” for the reverb setting. See “Changing the Relationship of Keyboard and Song Reverb
Effects” (page EN-109).
Use the operations in this section to skip forward and skip back.
■ Skip Forward
While a song is playing, press FF to skip forward.
• Pressing FF once skips forward one measure, while long-pressing it skips until the button is
released.
■ Skip Back
While a song is playing, press REW button to skip back.
• Pressing REW once skips back one measure, while long-pressing it skips back until the button is
released.
Skip Forward and Skip Back
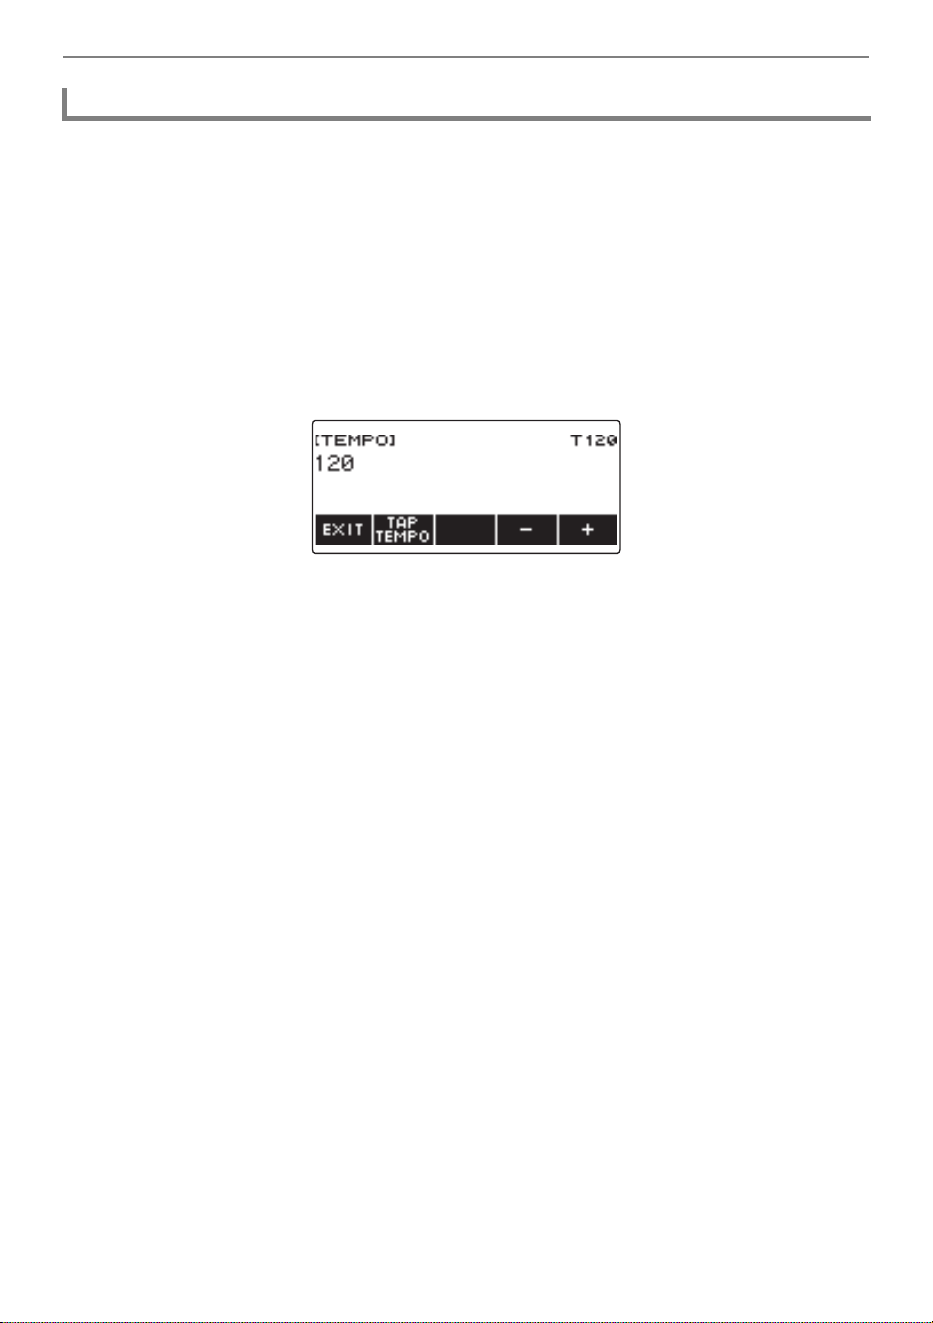
Playing a Song
EN-185
1.
Press MENU.
This displays the menu screen.
2.
Use U and I to select the 5 buttons menu that includes SONG.
This displays the song screen.
3.
Press SONG.
4.
Rotate the dial to select the song whose tempo you want to change.
5.
Press TEMPO.
This displays the tempo screen.
6.
Rotate the dial or use – and + to change the tempo value.
• You can specify a tempo value in the range of 20 to 255.
• To return to the recommended setting for the current song, press – and + at the same time.
7.
To exit the setting operation, press EXIT.
Changing a Song’s Tempo (Speed)
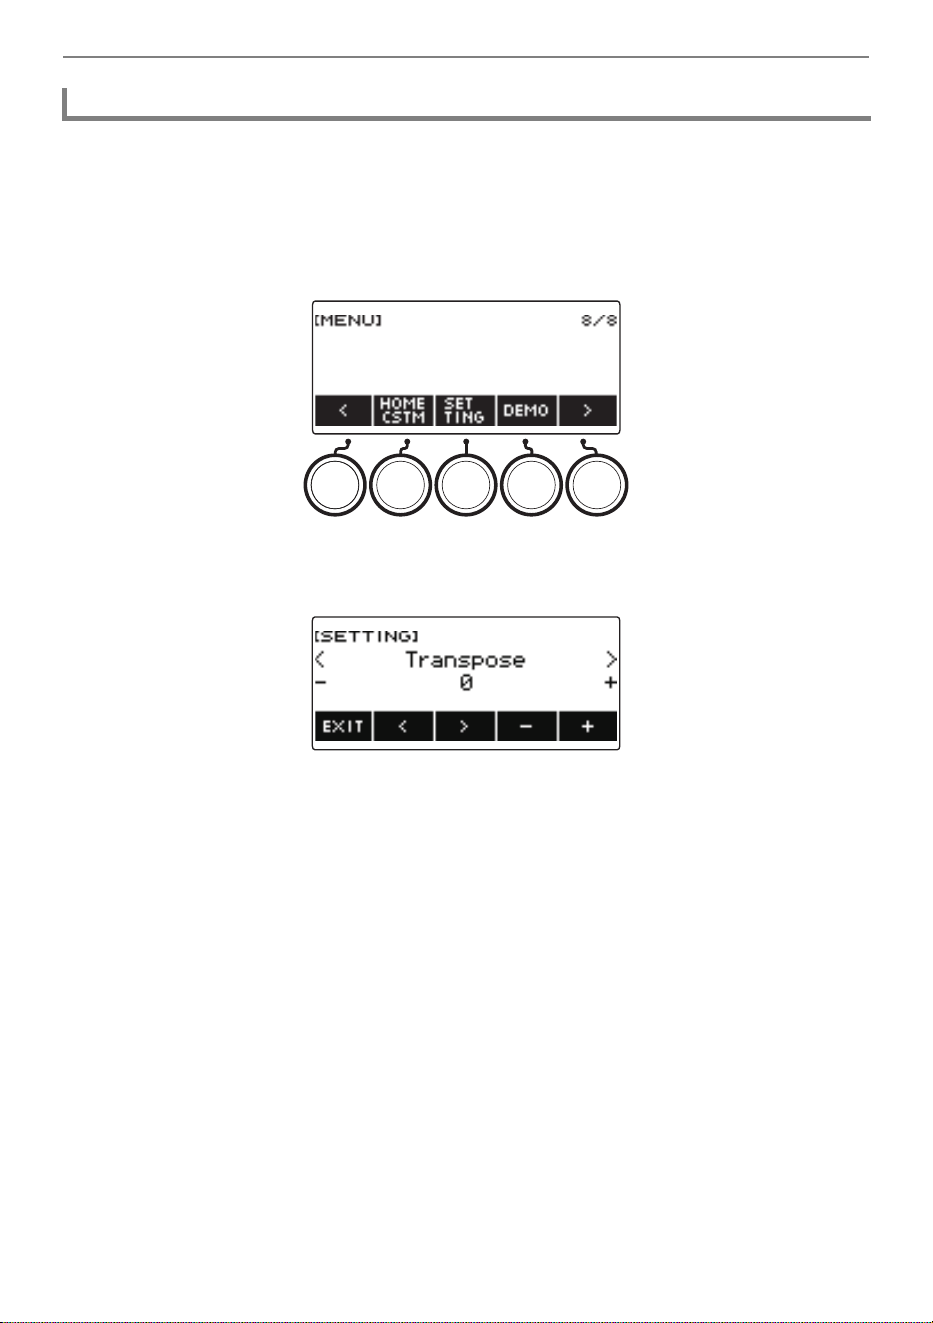
Playing a Song
EN-186
Use the procedure below to adjust the balance between the volume levels of song play and what you
play on the keyboard.
1.
Press MENU.
This displays the menu screen.
2.
Use U and I to select the 5 buttons menu that includes SETTING.
3.
Press SETTING.
This displays the setting screen.
4.
Use U and I to select “Song Volume”.
5.
Rotate the dial or use – and + to change the SONG volume level.
• You can specify a volume value from 0 to 127.
• To return the setting to its initial default, press – and + at the same time.
6.
To exit the setting operation, press EXIT.
Adjusting the Song Volume Level
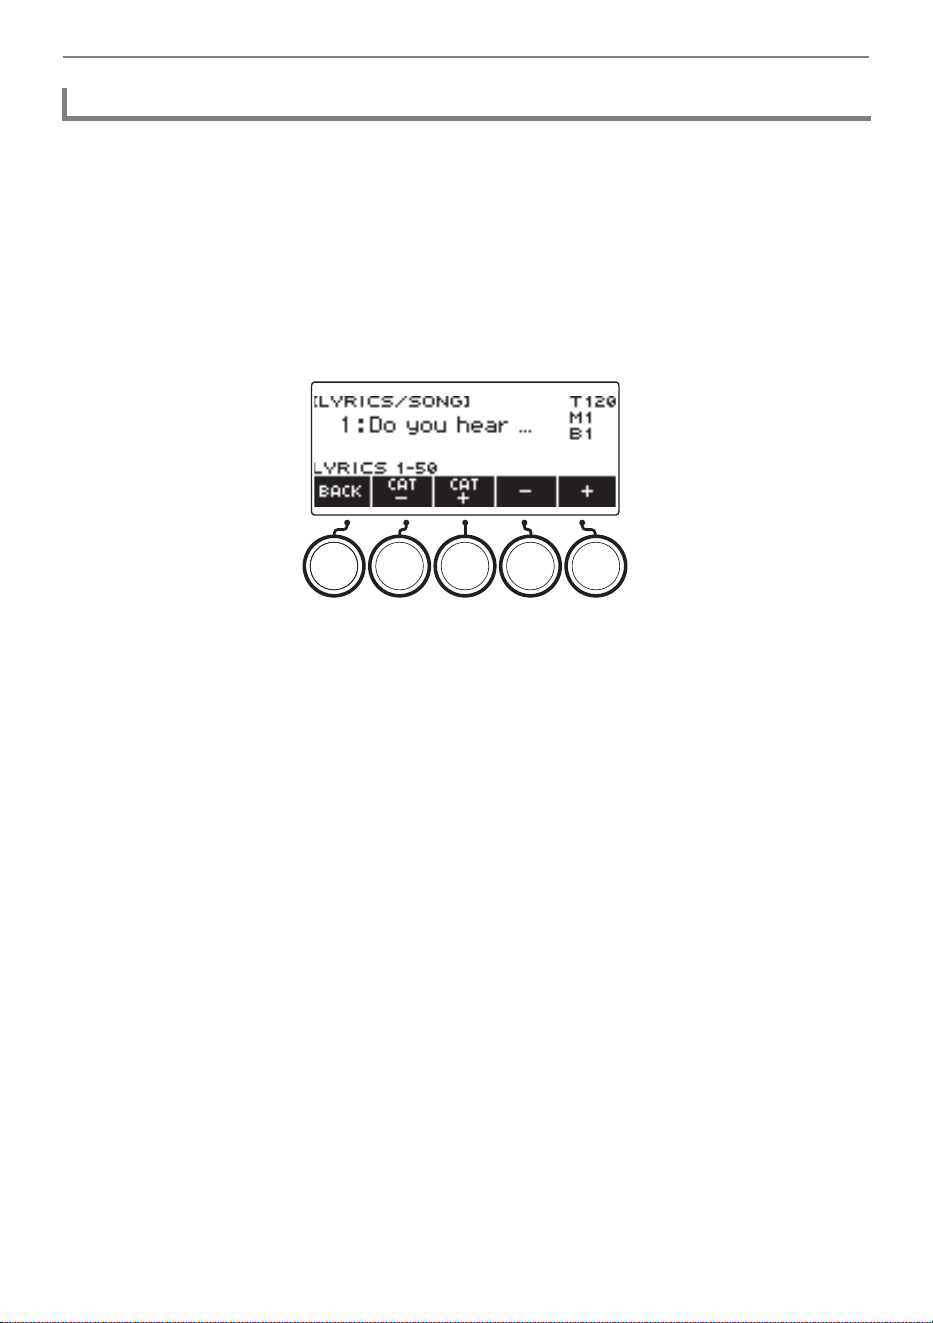
Playing a Song
EN-187
1.
While a song is playing, press TONE.
The selected tone number and instrument name appears on the display.
2.
Rotate the dial to select a tone.
• For tone information, see the “Lyric Tone List” (page EN-307) and the “Tone List” (page
EN-288).
• After you rotate the dial once to select an option, you can change the selection further using –
and +.
• To return to the first tone in the Tone List, press – and + at the same time.
• To go back to the previous screen, press BACK.
Changing the Keyboard Tone While a Song Playing
B
Playing a Song
EN-188
You can turn off the right-hand part or the left-hand part of a song you are playing and practice along
with the remaining part. Use this when you feel that a song is initially too difficult for you to play with
both hands at the same time.
1.
While a song is playing or stopped, press PART.
Each press of PART cycles between the lesson parts.
• For SMF user songs, the part specified under “Specifying a Channel for an SMF User Song Part”
(page EN-181) is changed.
Practicing a Song Part (Part Off)
Setting Display Name Description
Normal Normal playback
Right-hand part off RIGHT OFF Inserts one blank measure at the beginning of the song,
and mutes the right-hand part.
Left-hand part off LEFT OFF Inserts one blank measure at the beginning of the song,
and mutes the left-hand part.
Both off BOTH OFF Inserts one blank measure at the beginning of the song,
and mutes both hand parts.
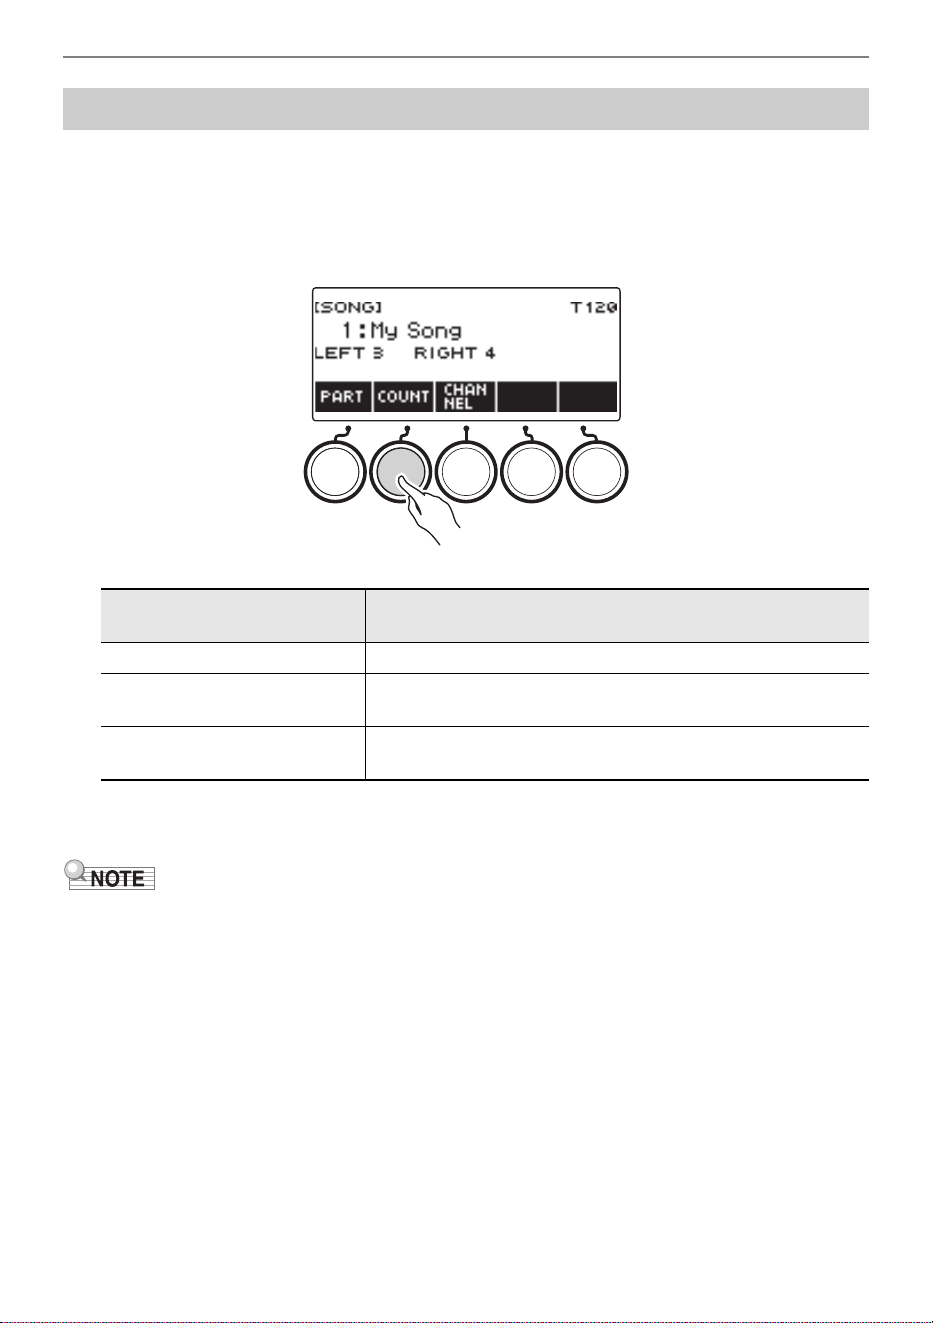
Playing a Song
EN-189
You can configure count settings to sound a count in time with a song and to sound a pre-count before
a song starts.
If pre-count is enabled, a pre-count sounds to help you determine when to start playing along.
1.
While the song stopped, press COUNT.
This displays a count setting item.
Each press of COUNT changes the setting.
2.
Press a to start playback.
If you selected the COUNT option, a count sounds as the song plays.
• When PRE-COUNT is selected as the count setting for built-in songs and CMF (CASIO MIDI file)
songs, the count sounds for the first measure, and it continues to sound for any rests in the measure
after that.
• When COUNT or PRE-COUNT is selected for Tone recordings, Rhythm recordings or Multi-track
recordings, a blank measure is not inserted as the first measure.
• When PRE-COUNT is selected as the count setting for SMF (standard MIDI files), tone recordings,
rhythm recordings, and multi-track recordings, the count sounds for the rests in the first measure.
Sounding a Count in Time with a Song
Setting
(Displayed Setting Name)
Description
Off Count does not sound.
Count (COUNT) Inserts one blank measure at the beginning of the song and
sounds a count.
Pre-count (PRECOUNT) Inserts one blank measure at the beginning of the song and
sounds a count for that measure only.

EN-190
You can use the procedures in this section to record your keyboard play for later playback.
There are two ways to record: Easy Recording, which simplifies recording of your performances, and
Multi-track Recording, which lets you overdub record performances.
Your recordings can be saved to Song Bank locations 11 through 17 (Tone Recordings: 11, Rhythm
Recording: 12, Multi-track Recording: 13 to 17).
■ Easy Recording
For Easy Recording, you can specify Tone Recording, and Rhythm Recording.
• You can use the tone screen to save a recorded performance as a Tone Recording.
• You can use the rhythm screen to save a recorded performance as a Rhythm Recording.
■ Multi-track Recording
A Multi-track Recording consists of a single system track to which a performance that uses layer, split,
and rhythm function can be recorded, and five solo tracks for recording with the UPPER1 part.
• There is memory for up to five multi-track recordings.
Also, you can copy a Tone Recording and Rhythm Recording as a Multi-track Recording (page
EN-196).
■ Recorded Information
The recorder records information about the operations of the functions listed below.
– Keyboard play
– Pitch Bend Wheel
– Tone
– Vocal Synthesis*
1
– Touch Response
– Pedal*
2
– Knob*
2
– Sustain
– Portamento
– Layer*
3
– Split*
3
– Balance
– Active DSP*
4
– Octave shift
– System Effects*
3
(Reverb, Chorus, Delay)
– Scale Tuning*
3
– Arpeggiator
– Auto Harmonize*
3
– Tempo*
3
– Rhythm*
3
– Registration*
3
– Recording settings beat*
3
*1 Of all the parts, including keyboard play, recorded song playback, MIDI-in sound production, etc.,
only one part can use the lyric tone. The part for which the lyric tone was selected last is given
priority, and the tone of the part for which the lyric tone was selected previously becomes the
alternate tone.
*2 Some assigned functions cannot be recorded.
*3 Cannot be recorded to the solo track.
*4 Using Active DSP with multiple tracks may remove tone effects and change the timbre of the tone.
• The Multi-track Recording solo track does not record UPPER2 part and LOWER part operations.
Recording Your Keyboard Play
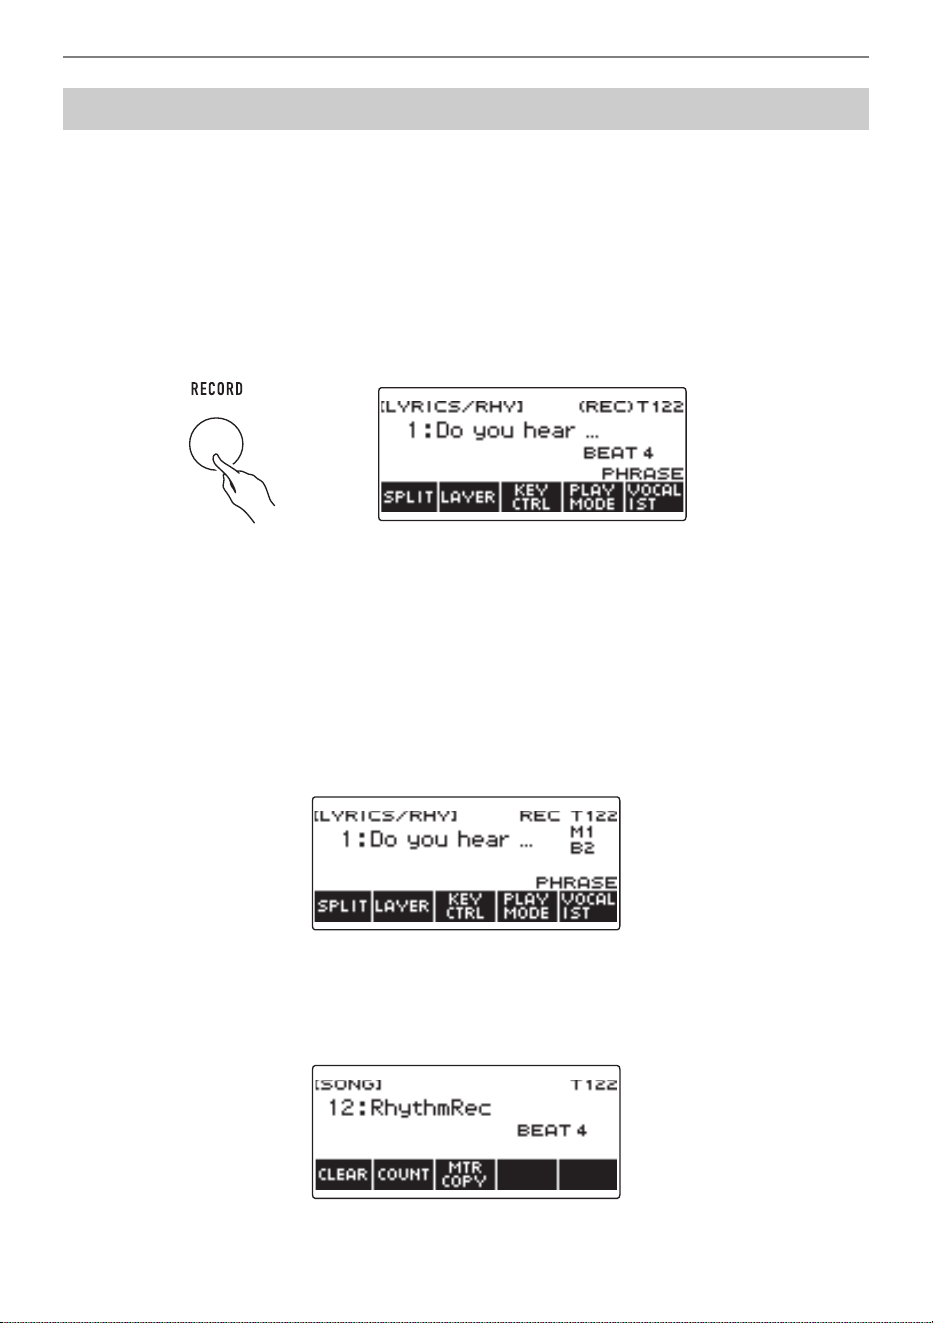
Recording Your Keyboard Play
EN-191
Use the procedure below to record a performance using tone and rhythm functions.
1.
Press TONE or RHYTHM.
• To record as a tone recording, press and hold TONE to exit the rhythm function.
• If you are using the SONG function, exit the function.
2.
Rotate the dial to select a tone or rhythm.
3.
Press RECORD.
This displays “(REC)” and enters record standby.
• With Tone Recording, the initial default beat setting is the metronome beat setting.
• With Rhythm Recording, the initial default time signature setting is the rhythm time signature
setting.
• For information about changing the beat setting to be used for recording, see “Changing the
Beat Setting for Recording” (page EN-193).
• When the panic function is enabled, pressing RECORD will display the Base Display you
selected with Home Customization.
4.
Play something on the keyboard.
This displays “REC” along with the current measure and beat numbers, indicating that recording
has started.
5.
To exit the recording operation, press RECORD again.
After recording is complete, the song screen appears with the saved song recording displayed.
• A Tone Recording is displayed in the case of Tone Recording, while a Rhythm Recording is
displayed in the case of Rhythm Recording.
Easy Keyboard Play Recording
B

Recording Your Keyboard Play
EN-192
6.
To start playback of what you recorded, press a.
Each press of a starts and stops playback.
• The maximum size of a single song recording is approximately 40,000 notes or 999 measures.
“(REC)” appears on the display when there are 100 or fewer notes or 32 or fewer measures of free
space remaining in memory. “(REC)” disappears from the display, and recording stops automatically
when memory becomes full.
• When the panic function is enabled, pressing HOME exits recording standby or recording. Exiting an
ongoing record operation causes any data recorded during that operation to be deleted.
• Tone Recording, and Rhythm Recording cannot be combined within a single recording operation.
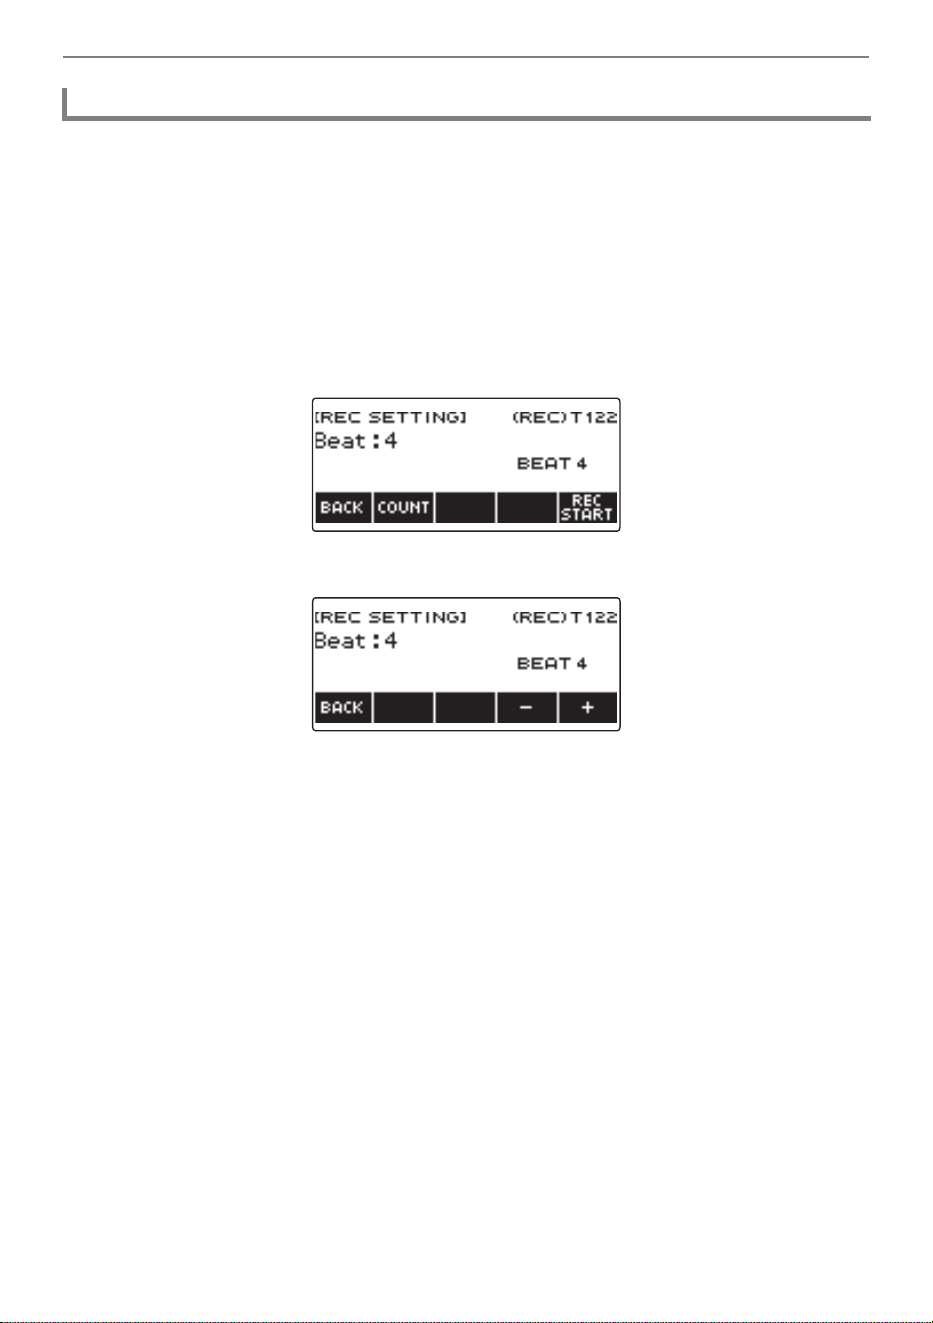
Recording Your Keyboard Play
EN-193
1.
Press TONE or RHYTHM.
• To record as a tone recording, press and hold TONE to exit the rhythm function.
• If you are using the SONG function, exit the function.
2.
Rotate the dial to select a tone or rhythm.
3.
Press RECORD.
This displays “(REC)” and enters record standby.
4.
Long-press RECORD.
This displays a record settings screen.
5.
Rotate the dial to change the beat value.
• For the beat setting, you can select Off, or a value of 1 to 16.
• After you rotate the dial once to select a value, you can change the value further using – and +.
• To go back to the previous screen, press BACK.
6.
To exit the setting operation, press BACK.
Changing the Beat Setting for Recording
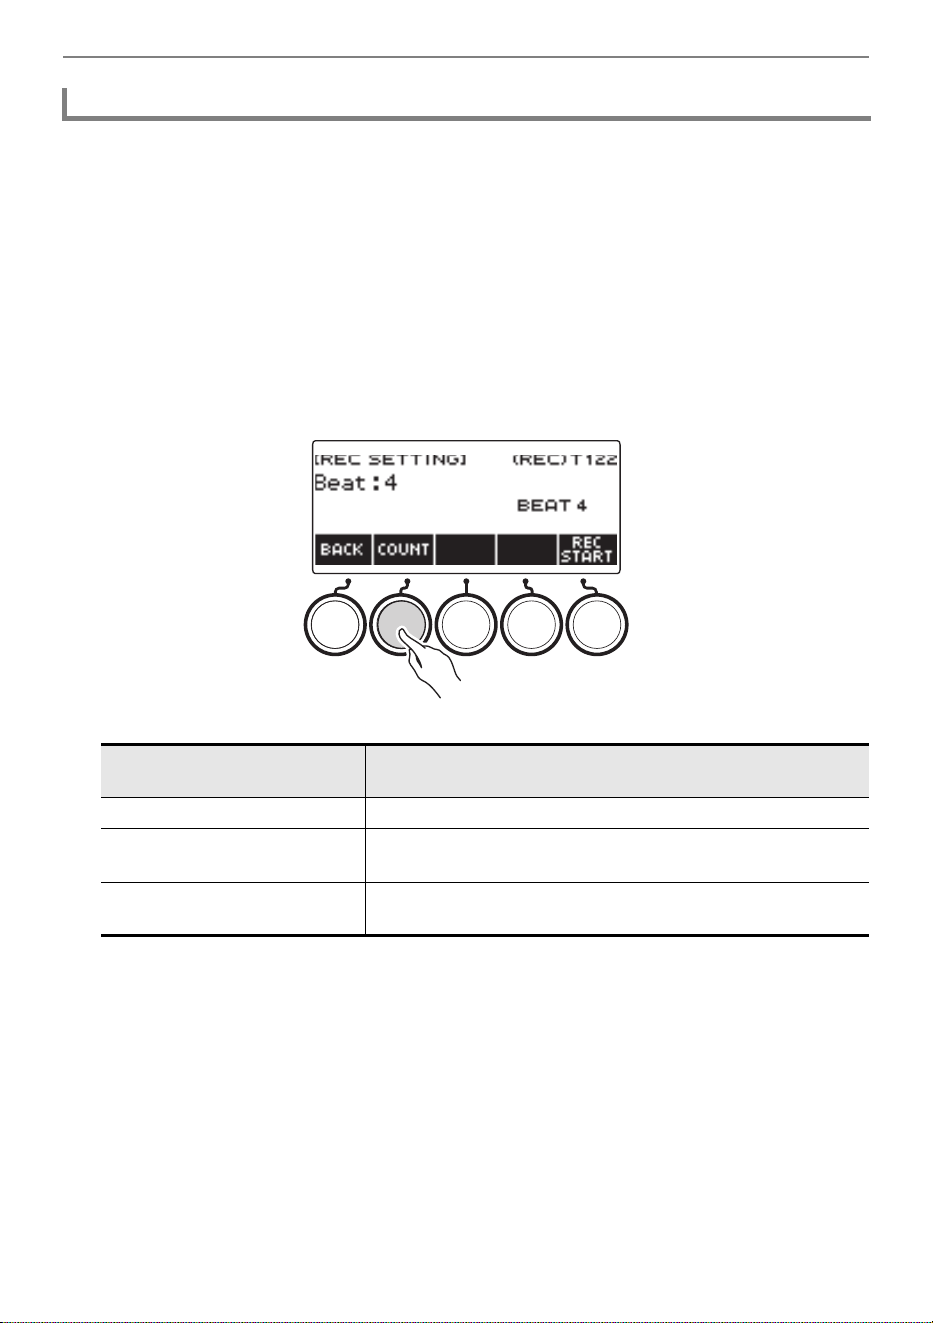
Recording Your Keyboard Play
EN-194
1.
Press TONE or RHYTHM.
• To record as a tone recording, press and hold TONE to exit the rhythm function.
• If you are using the SONG function, exit the function.
2.
Rotate the dial to select a tone or rhythm.
3.
Press RECORD.
This displays “(REC)” and enters record standby.
4.
Long-press RECORD.
This displays a record settings screen.
5.
Press COUNT and then select a count operation.
Each press of COUNT changes the setting.
6.
To exit the setting operation, press BACK.
Sounding a Count While Recording
Setting
(Displayed Setting Name)
Description
Off Count does not sound.
Count (COUNT) Inserts one blank measure before recording starts, and sounds
a count.
Pre-count (PRECOUNT) Inserts one blank measure before recording starts, and sounds
a count for that measure only.
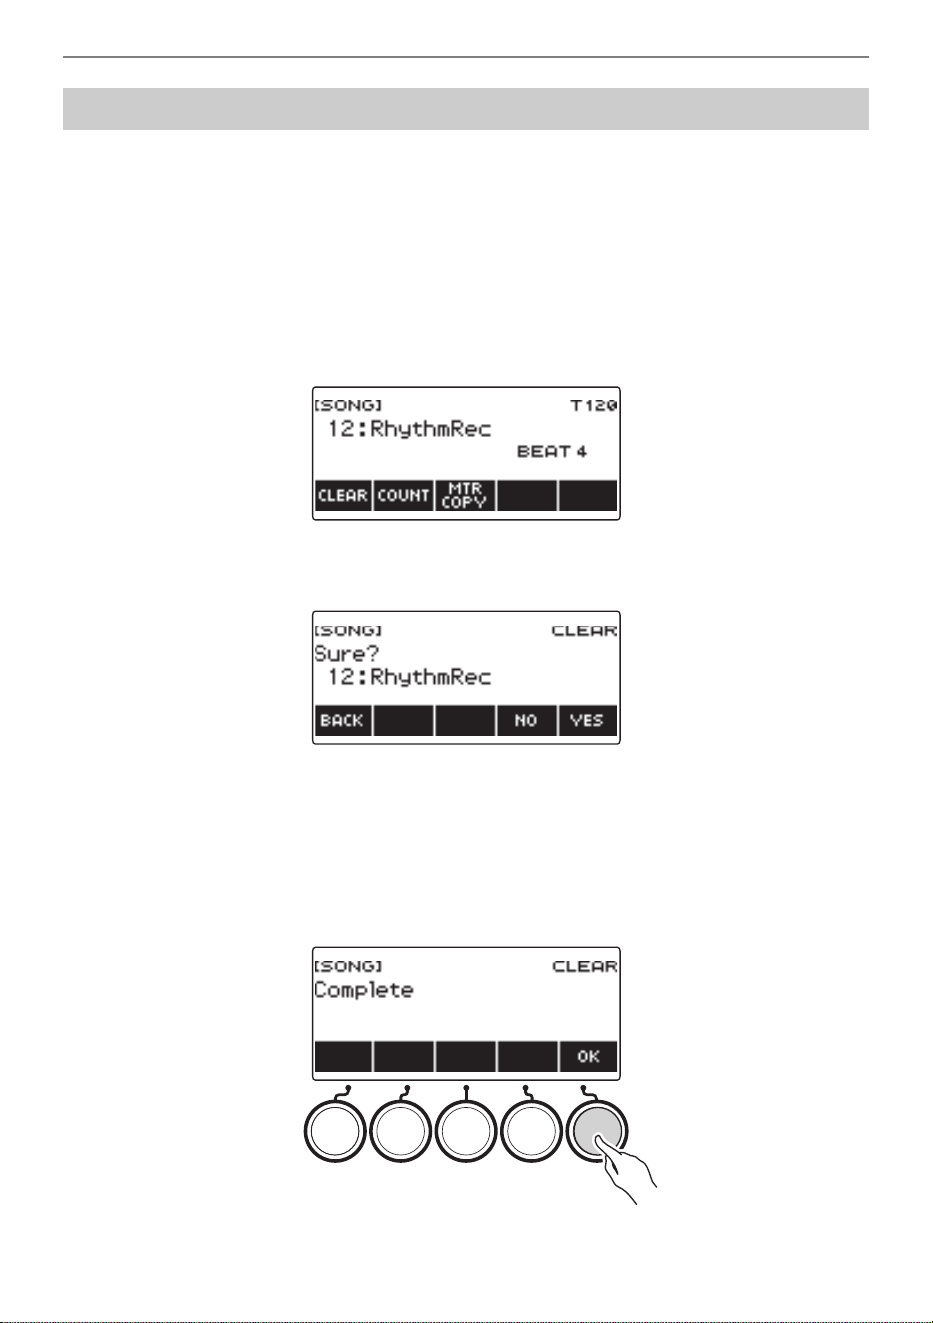
Recording Your Keyboard Play
EN-195
1.
Press MENU.
This displays the menu screen.
2.
Use U and I to select the 5 buttons menu that includes SONG.
3.
Press SONG.
This displays the song screen.
4.
Rotate the dial to select the Easy Recording you want to delete.
• If you rotated the dial, press BACK.
5.
Press CLEAR.
This displays “Sure?”.
• You can also delete an Easy Recording by long-pressing MENU.
6.
Press YES.
This deletes the Easy Recording.
• To cancel, press NO.
7.
When “Complete” appears on the display, press OK.
This exits Easy Recording delete.
Deleting an Easy Recording
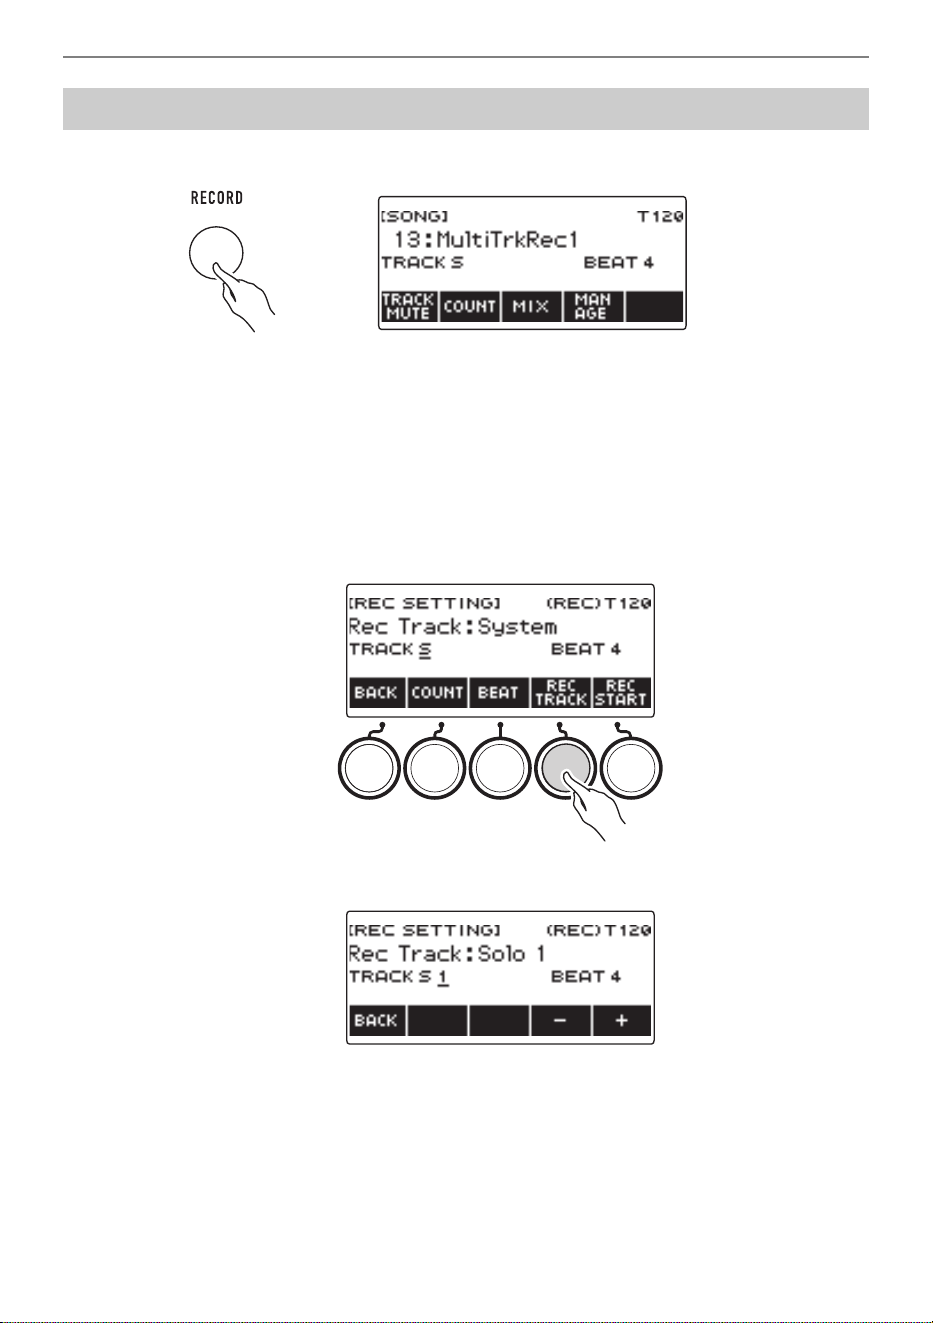
Recording Your Keyboard Play
EN-196
1.
Long-press RECORD.
2.
Rotate the dial to select the Multi-track Recording you want to overdub.
3.
Press RECORD.
This enters record standby.
4.
Long-press RECORD.
This displays a record settings screen.
5.
Press REC TRACK.
6.
Rotate the dial to select the record destination track.
• After you rotate the dial once to select a record destination track, you can change the selection
further using – and +.
• To go back to the previous screen, press BACK.
• The beat can be changed only when the record destination is the system track.
Overdub Recording (Multi-track Recording)
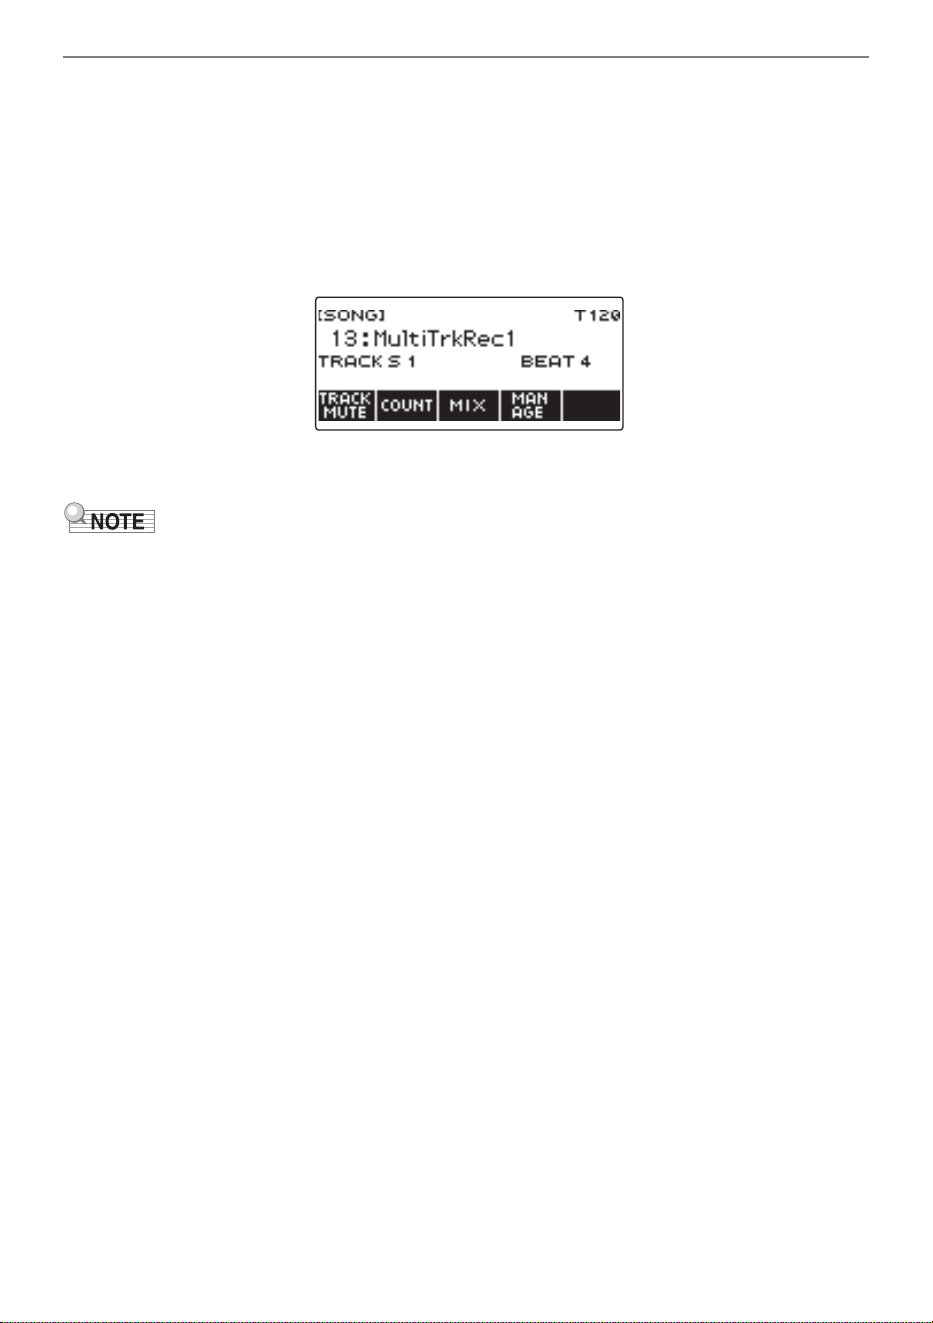
Recording Your Keyboard Play
EN-197
7.
Press REC START.
Recording starts from the first measure, which is a preparation measure. Playback of the recorded
track starts simultaneously. Now you can play along with the playback.
• If you want to record your performance from the beginning without a preparation measure, start
playing without pressing REC START.
8.
Press RECORD to exit the recording operation.
Exiting the recording operation displays the song screen, which shows the Multi-track Recording
you just saved.
9.
Repeat steps 3 through 8 of the procedure to overdub your play.
• If the lyric tone setting is recorded at the same timing as multi-track recording, it will play starting from
the system track, and then from solo track 1 through solo track 5. Because of this, making
adjustments beforehand as to which track you want to play the lyric tone.
• Regarding the lyric tone number setting recorded at the start of recording, the first recorded track has
priority, and the later recorded tracks are recorded with the above alternative tone numbers.
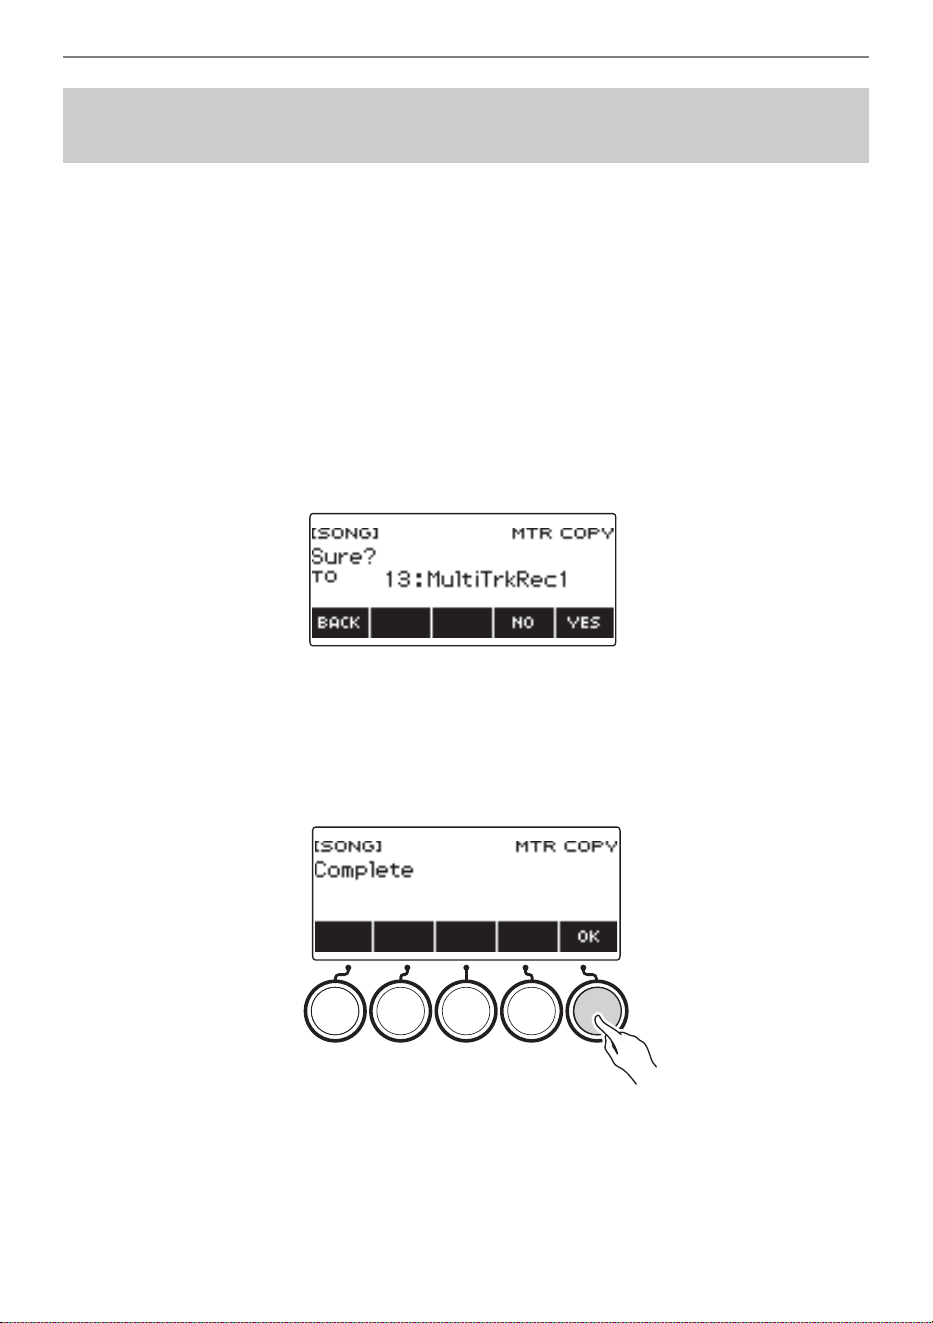
Recording Your Keyboard Play
EN-198
1.
Press MENU.
This displays the menu screen.
2.
Use U and I to select the 5 buttons menu that includes SONG.
3.
Press SONG.
This displays the song screen.
4.
Rotate the dial to select the Tone Recording or Rhythm Recording you want to
copy as a multi-track recording.
• If you rotated the dial, press BACK.
5.
Press MTR COPY.
This displays “Sure?”.
6.
Press YES.
This copies the data to a blank Multi-track Recording number.
• To cancel, press NO.
7.
When “Complete” appears on the display, press OK.
This exits the copy operation.
Copying a Tone Recording or Rhythm Recording as a
Multi-track Recording
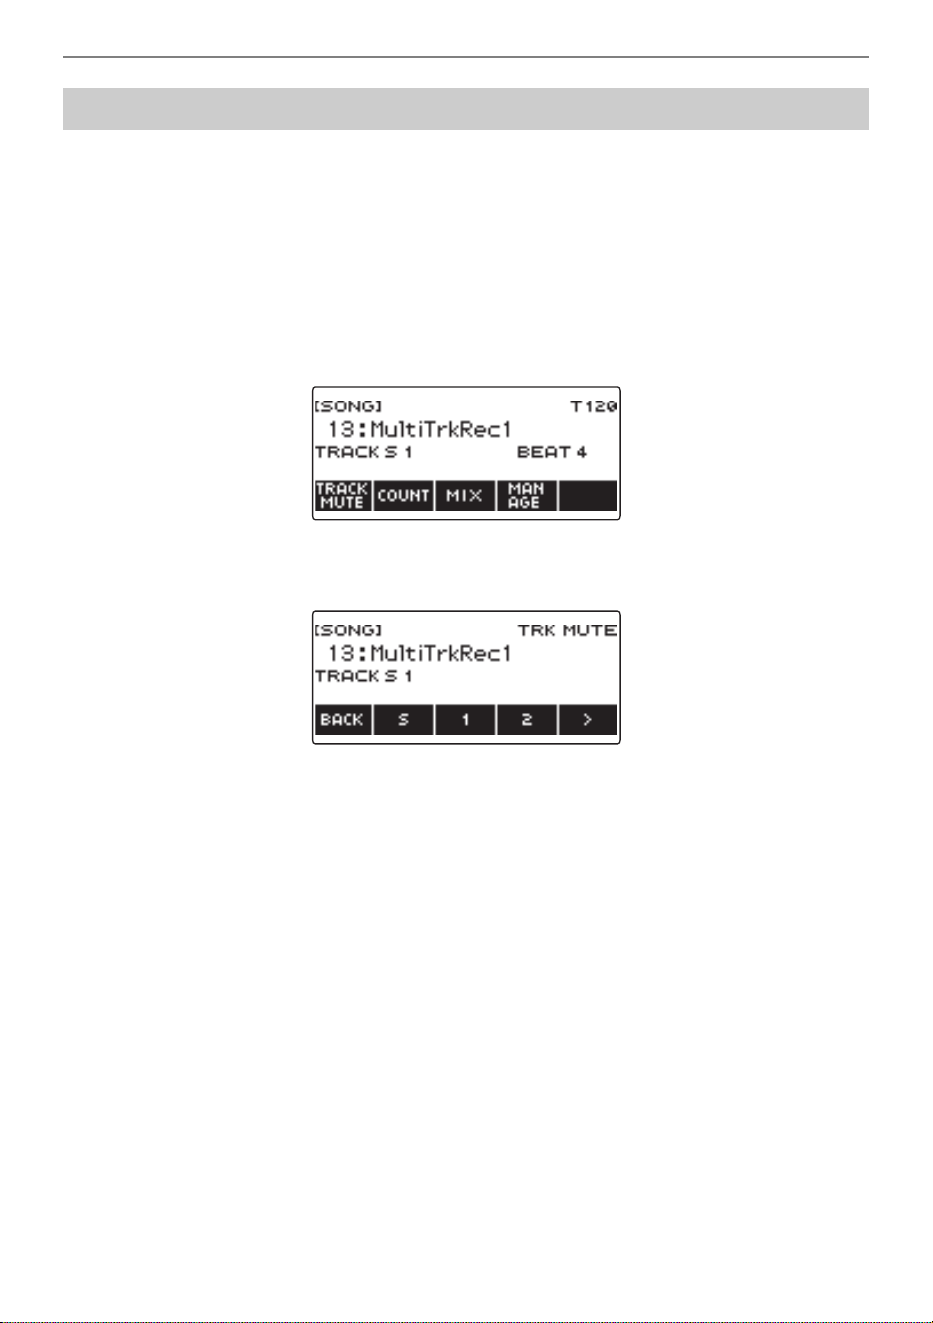
Recording Your Keyboard Play
EN-199
1.
Press MENU.
This displays the menu screen.
2.
Use U and I to select the 5 buttons menu that includes SONG.
3.
Press SONG.
This displays the song screen.
4.
Rotate the dial to select the Multi-track Recording you want to mute.
• If you rotated the dial, press BACK.
5.
Press TRACK MUTE.
This displays the track mute setting screen.
6.
Use U and I to select the 5 buttons menu that includes the number of the track
you want to mute.
Muting a Multi-track Recording Track
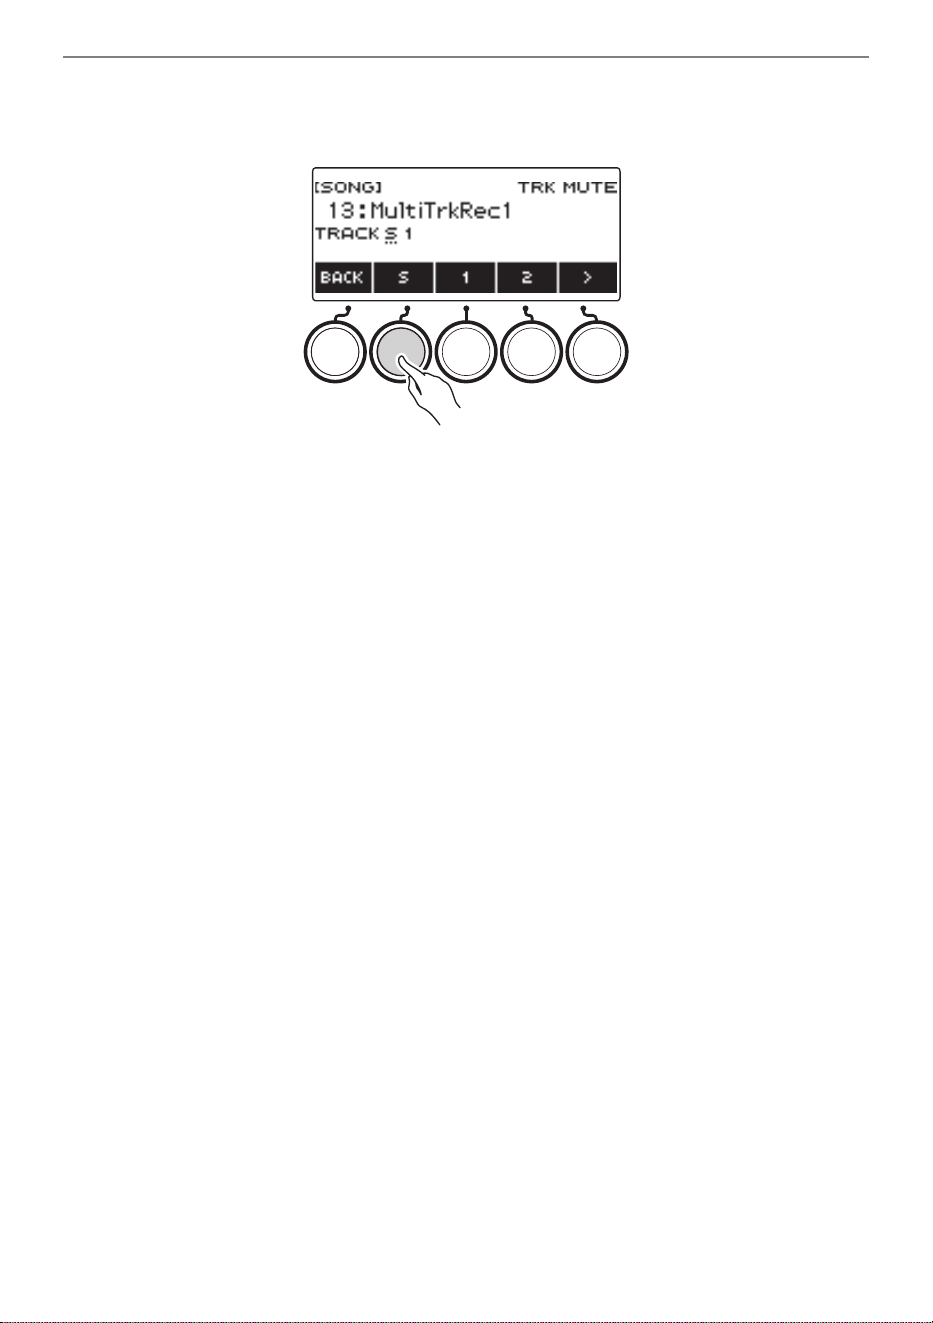
Recording Your Keyboard Play
EN-200
7.
Press the button for the number of the track you want to mute.
The track that corresponds to the button you press is muted, which is indicated by a broken line
under its track number.
• To unmute a track, press its track number button again.
8.
Press BACK to exit the setting operation.
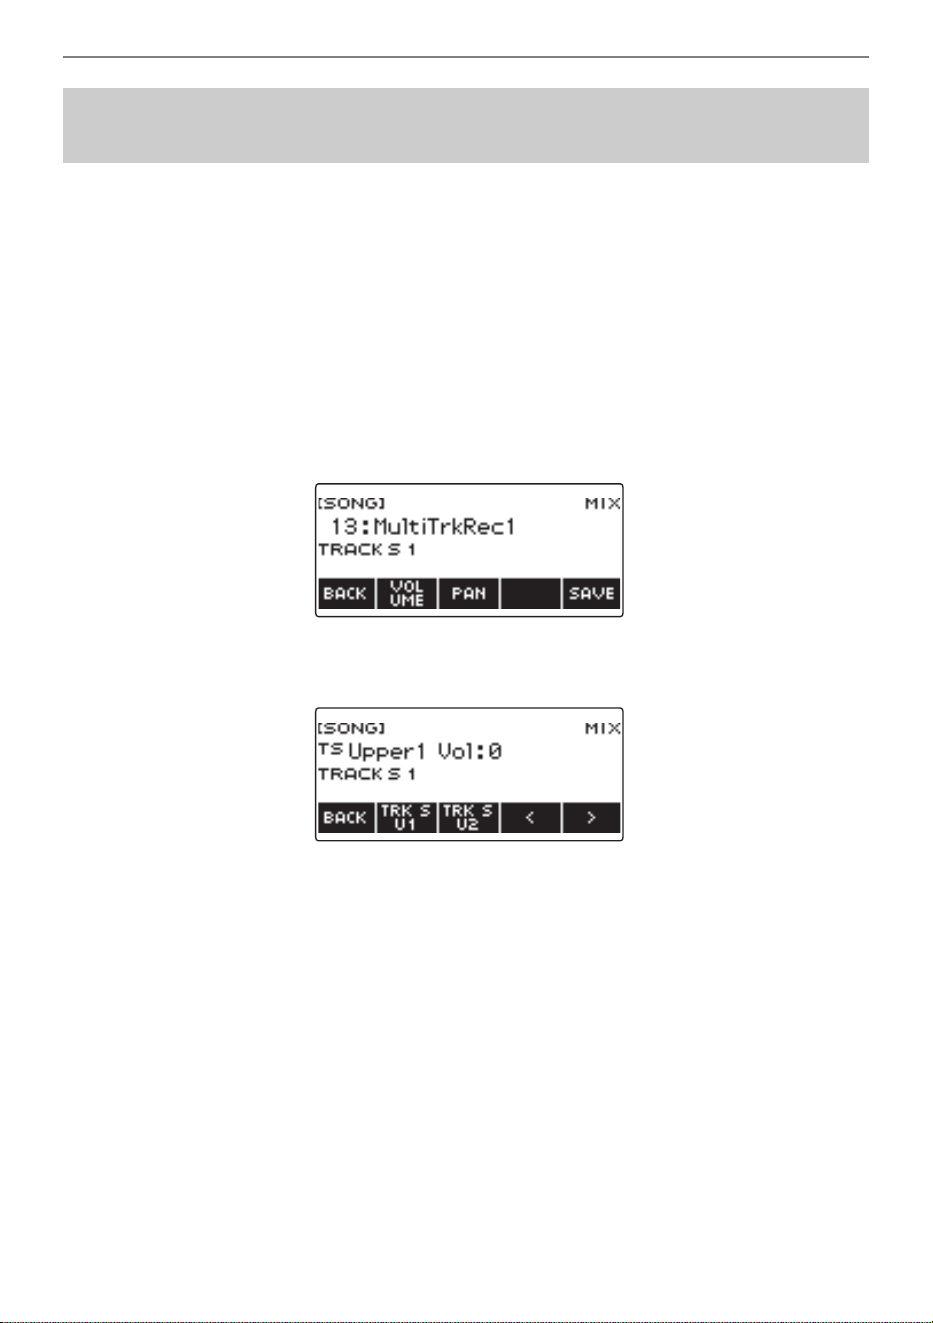
Recording Your Keyboard Play
EN-201
1.
Press MENU.
This displays the menu screen.
2.
Use U and I to select the 5 buttons menu that includes SONG.
3.
Press SONG.
This displays the song screen.
4.
Rotate the dial to select the Multi-track Recording you want to adjust.
• If you rotated the dial, press BACK.
5.
Press MIX.
This displays the parameter selection screen.
6.
To adjust the volume level, press VOLUME. To adjust the pan, press PAN.
This displays the track selection screen.
VOLUME: Adjusts the volume level.
PAN: Adjusts the stereo center. 0 indicates the middle, while a smaller value shifts to the left and a
larger value shifts to the right.
7.
Use U and I to select the 5 buttons menu that includes the track you want to
adjust.
• System track consists of UPPER1, UPPER2, LOWER, and rhythm parts. Each part can be
adjusted individually.
• The pan of system track rhythm cannot be adjusted.
8.
Press the button that corresponds to the track you want to adjust.
Adjusting the Volume Level and Pan of Each Track of a
Multi-track Recording (Mixing)
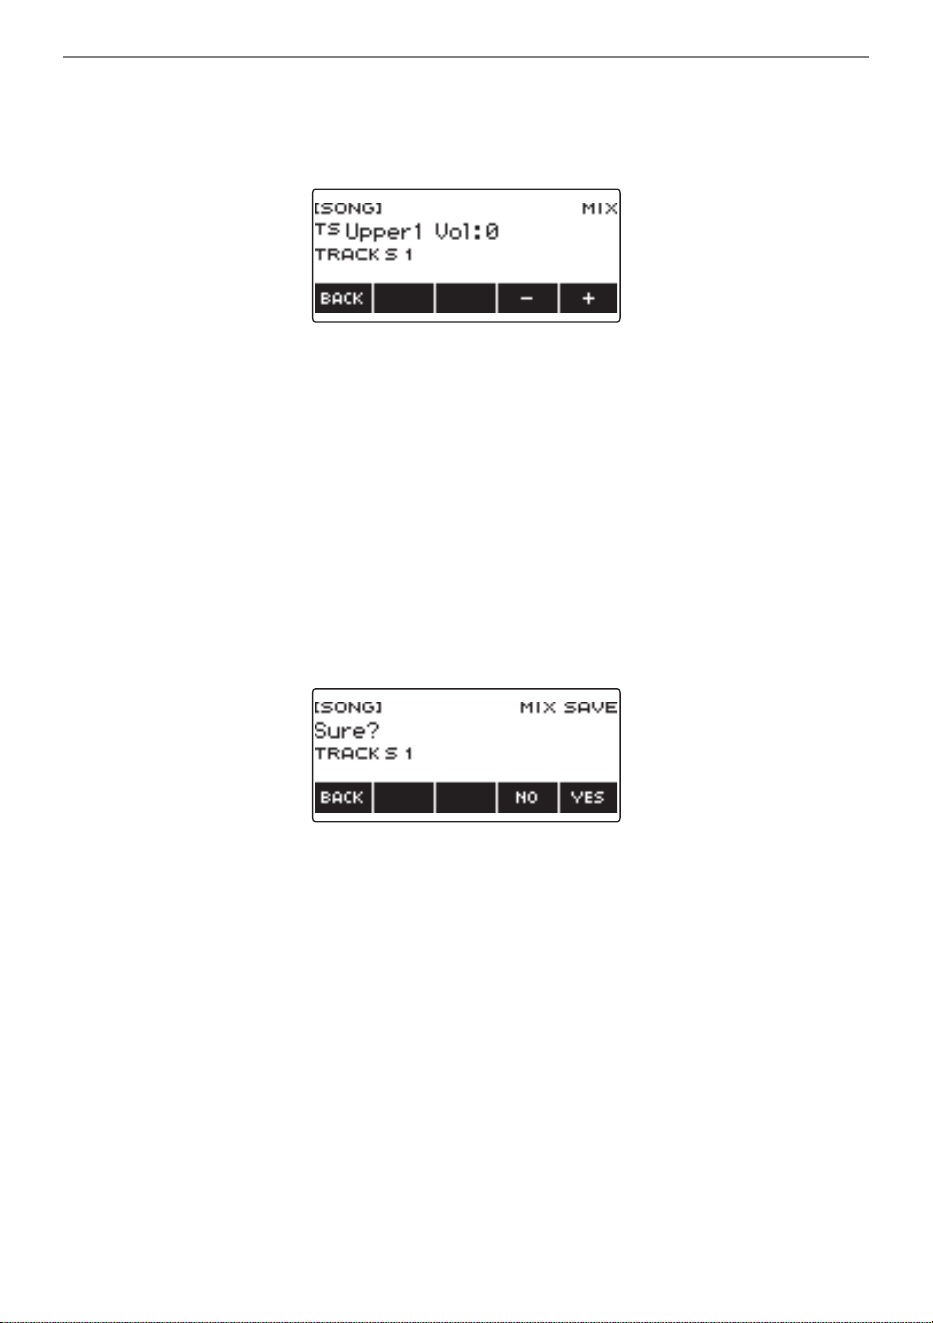
Recording Your Keyboard Play
EN-202
9.
Rotate the dial to adjust.
• The original (pre-adjusted) track is retained until you save your adjustments in steps 12 and 13
below. If you want to discard your adjustments and revert to the original (pre-adjusted) track,
select press NO in step 13.
• Recorded volume values range from 0 to 127, and pan values range from –64 to +63. You can
adjust the volume and pan values relative to this value in the range –127 to +127. You cannot
adjust a value so it is outside its recorded value range.
• After you rotate the dial once to adjust, you can adjust further using – and +.
• To return the setting to its initial default, press – and + at the same time.
• To go back to the previous screen, press BACK.
10.
To adjust other tracks, repeat the steps of this procedure from step 7.
11.
To adjust the settings of other parameters, use the U and I buttons to display
page 1 of the menu, press the BACK button to return to the parameter selection
screen, and then repeat this procedure from step 6.
12.
Press SAVE to save your adjustments.
This displays “Sure?”.
13.
Press YES.
This saves your adjustments.
• To cancel, press NO.
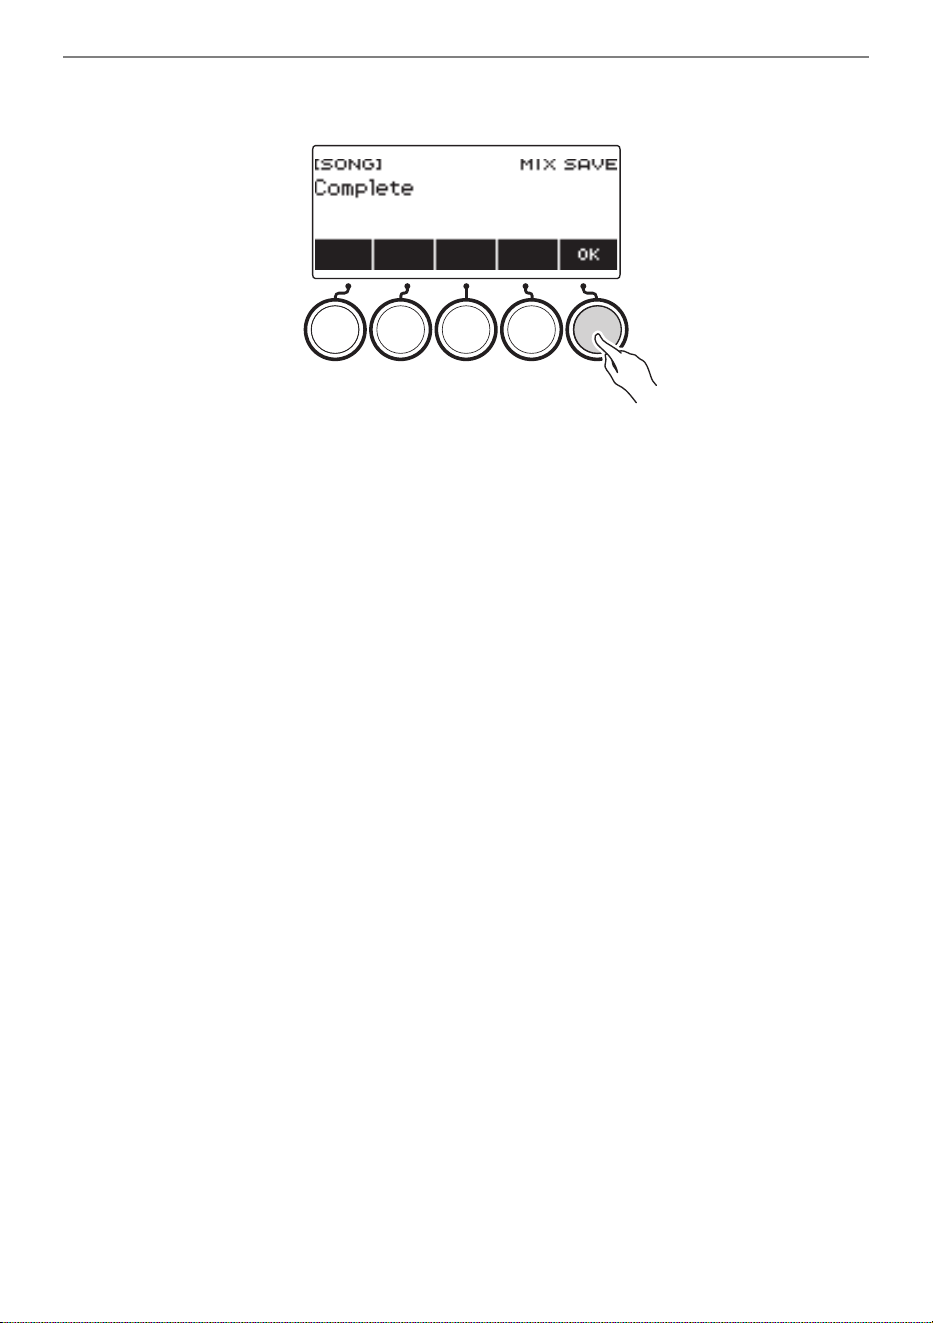
Recording Your Keyboard Play
EN-203
14.
When “Complete” appears on the display, press OK.
This displays the parameter selection screen.
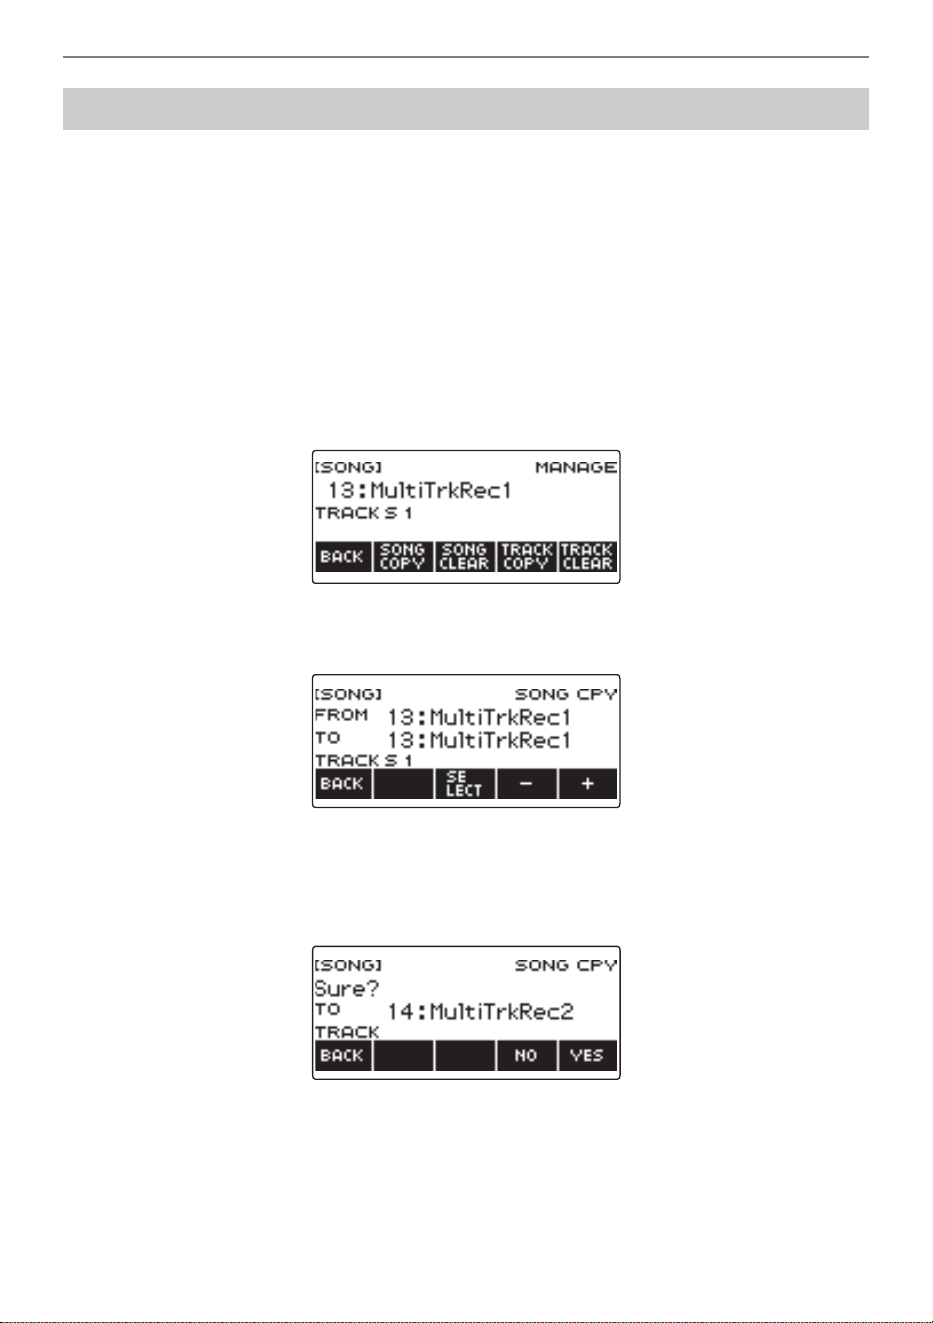
Recording Your Keyboard Play
EN-204
1.
Press MENU.
This displays the menu screen.
2.
Use U and I to select the 5 buttons menu that includes SONG.
3.
Press SONG.
This displays the song screen.
4.
Rotate the dial to select the Multi-track Recording you want to copy.
• If you rotated the dial, press BACK.
5.
Press MANAGE.
This displays the Multi-track Recording management screen.
6.
Press SONG COPY.
This displays the multi-track copy destination selection screen.
7.
Rotate the dial or use – and + to select the copy destination.
8.
Press SELECT.
This displays “Sure?”.
9.
Press YES.
This copies the multi-track recording.
• To cancel, press NO.
Copying a Multi-track Recording

Recording Your Keyboard Play
EN-205
10.
When “Complete” appears on the display, press OK.
This completes the multi-track copy operation.
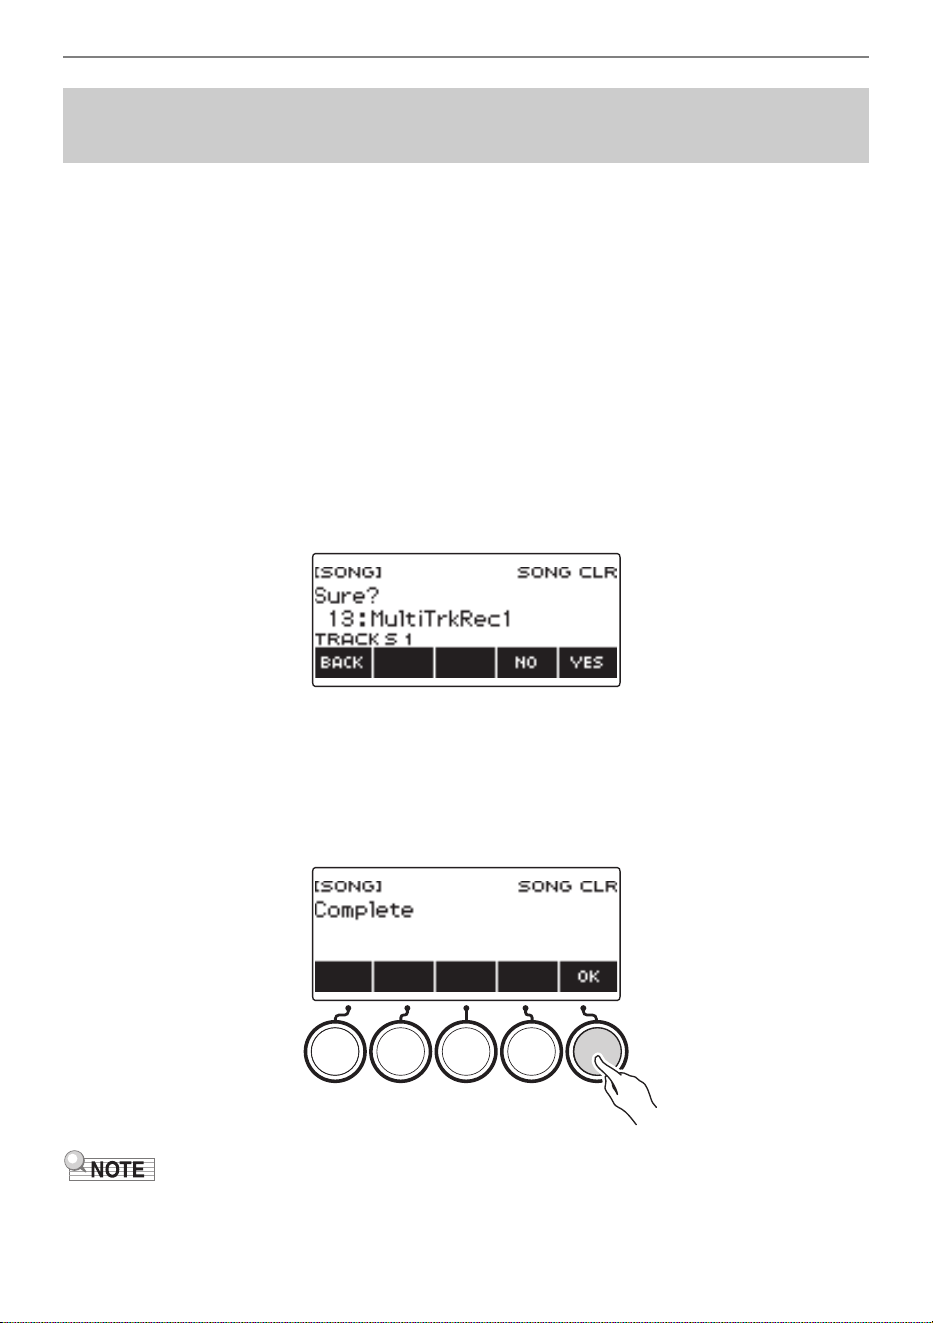
Recording Your Keyboard Play
EN-206
1.
Press MENU.
This displays the menu screen.
2.
Use U and I to select the 5 buttons menu that includes SONG.
3.
Press SONG.
This displays the song screen.
4.
Rotate the dial to select the Multi-track Recording you want to delete.
• If you rotated the dial, press BACK.
5.
Press MANAGE.
This displays the Multi-track Recording management screen.
6.
Press SONG CLEAR.
This displays “Sure?”.
7.
Press YES.
This deletes the multi-track recording.
• To cancel, press NO.
8.
When “Complete” appears on the display, press OK.
This completes the multi-track delete operation.
• In place of steps 5 and 6, you can also long-press MENU to delete the multi-track recording.
Deleting One or More of the Multi-track Recordings in
Memory
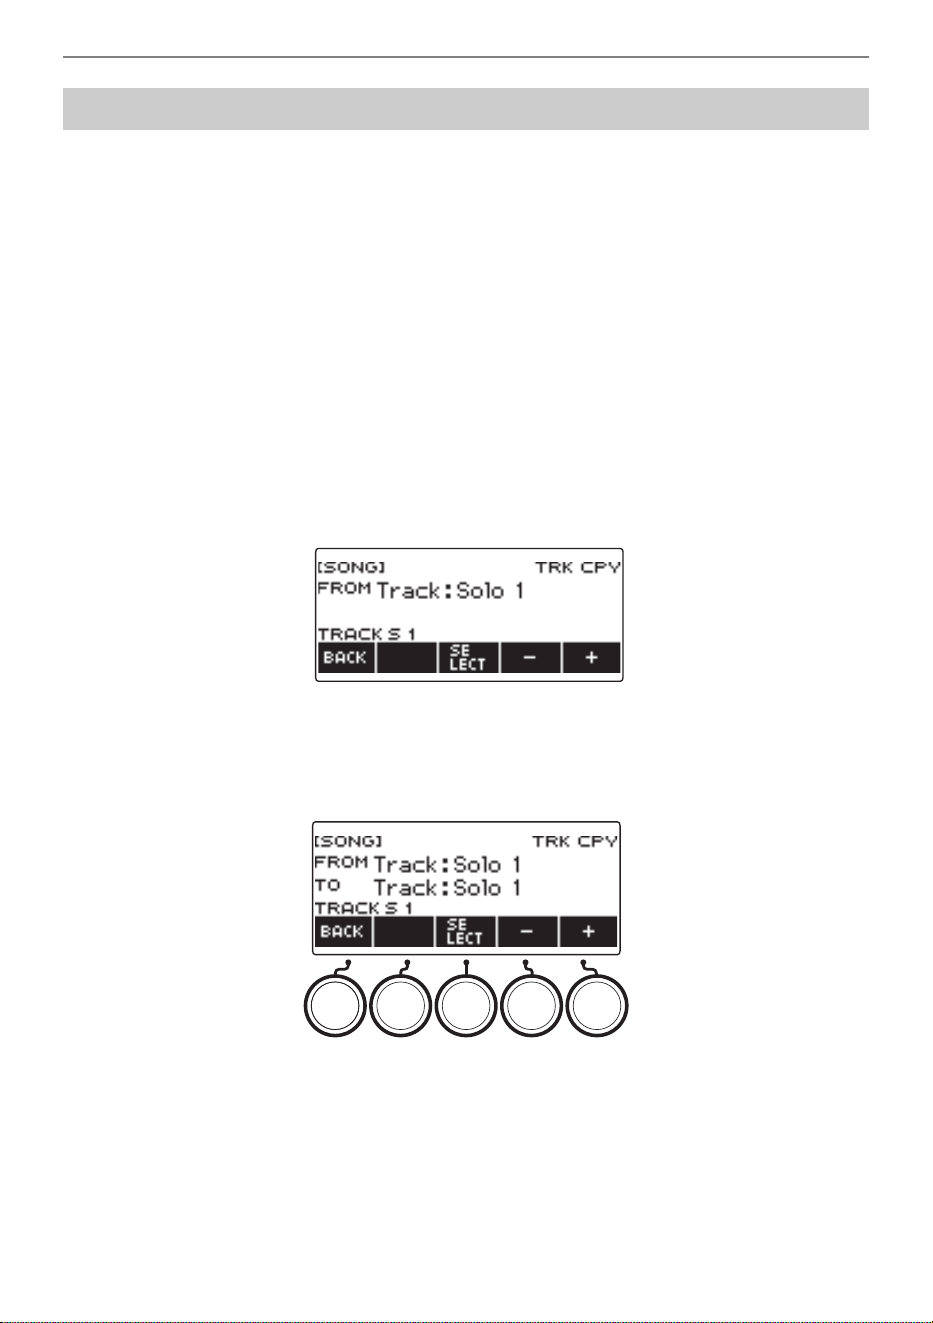
Recording Your Keyboard Play
EN-207
1.
Press MENU.
This displays the menu screen.
2.
Use U and I to select the 5 buttons menu that includes SONG.
3.
Press SONG.
This displays the song screen.
4.
Rotate the dial to select the Multi-track Recording whose solo track you want to
copy.
• If you rotated the dial, press BACK.
5.
Press MANAGE.
This displays the Multi-track Recording management screen.
6.
Press TRACK COPY.
This displays the solo track copy source selection screen.
7.
Rotate the dial or use – and + to select the copy source.
8.
Press SELECT.
This displays the solo track copy destination selection screen.
9.
Rotate the dial or use – and + to select the copy destination.
Copying the Solo Track of a Multi-track Recording
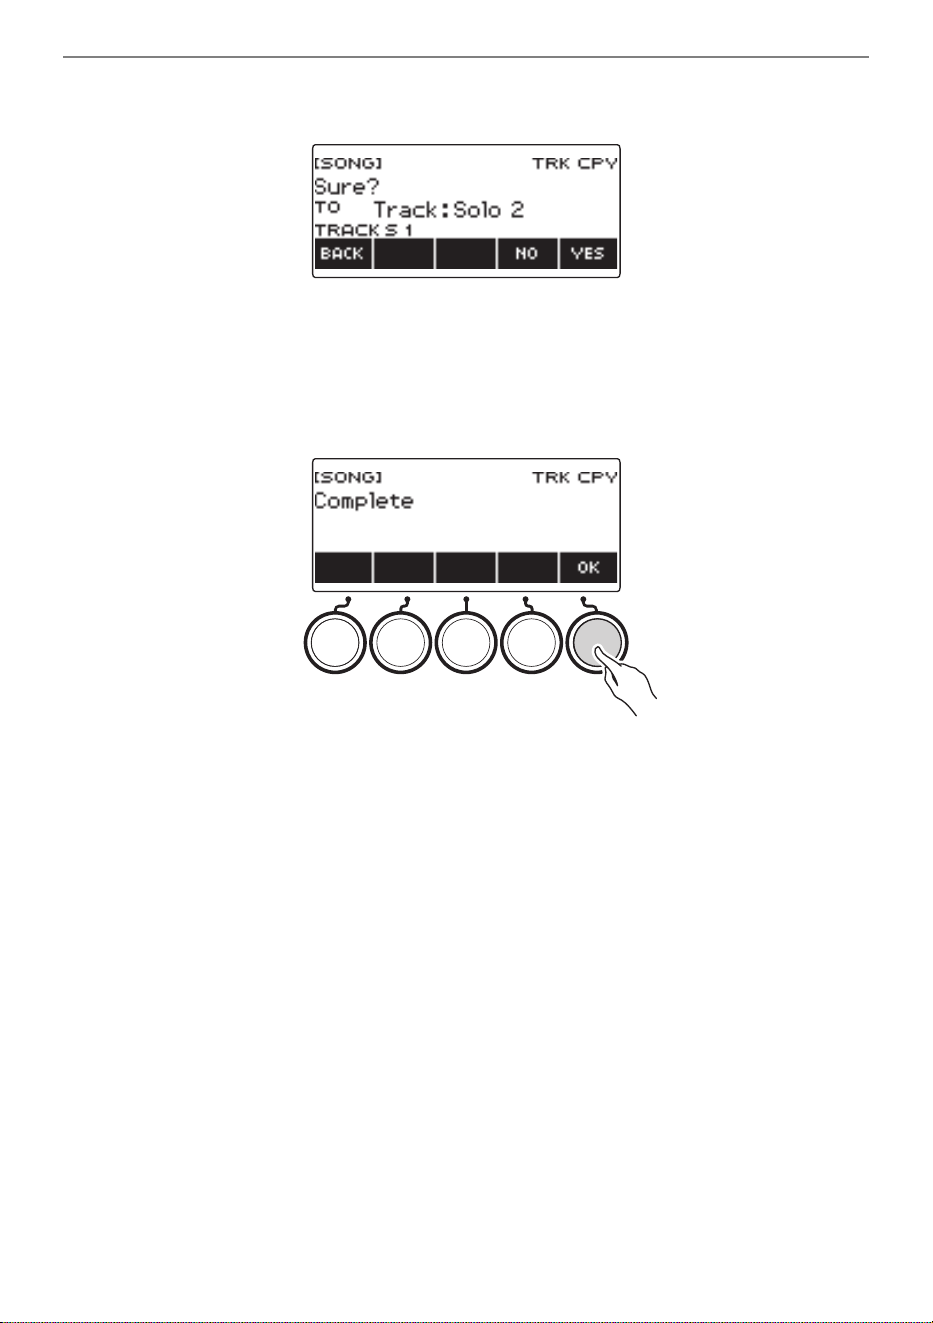
Recording Your Keyboard Play
EN-208
10.
Press SELECT.
This displays “Sure?”.
11.
Press YES.
This copies the solo track.
• To cancel, press NO.
12.
When “Complete” appears on the display, press OK.
This exits the solo track copy operation.
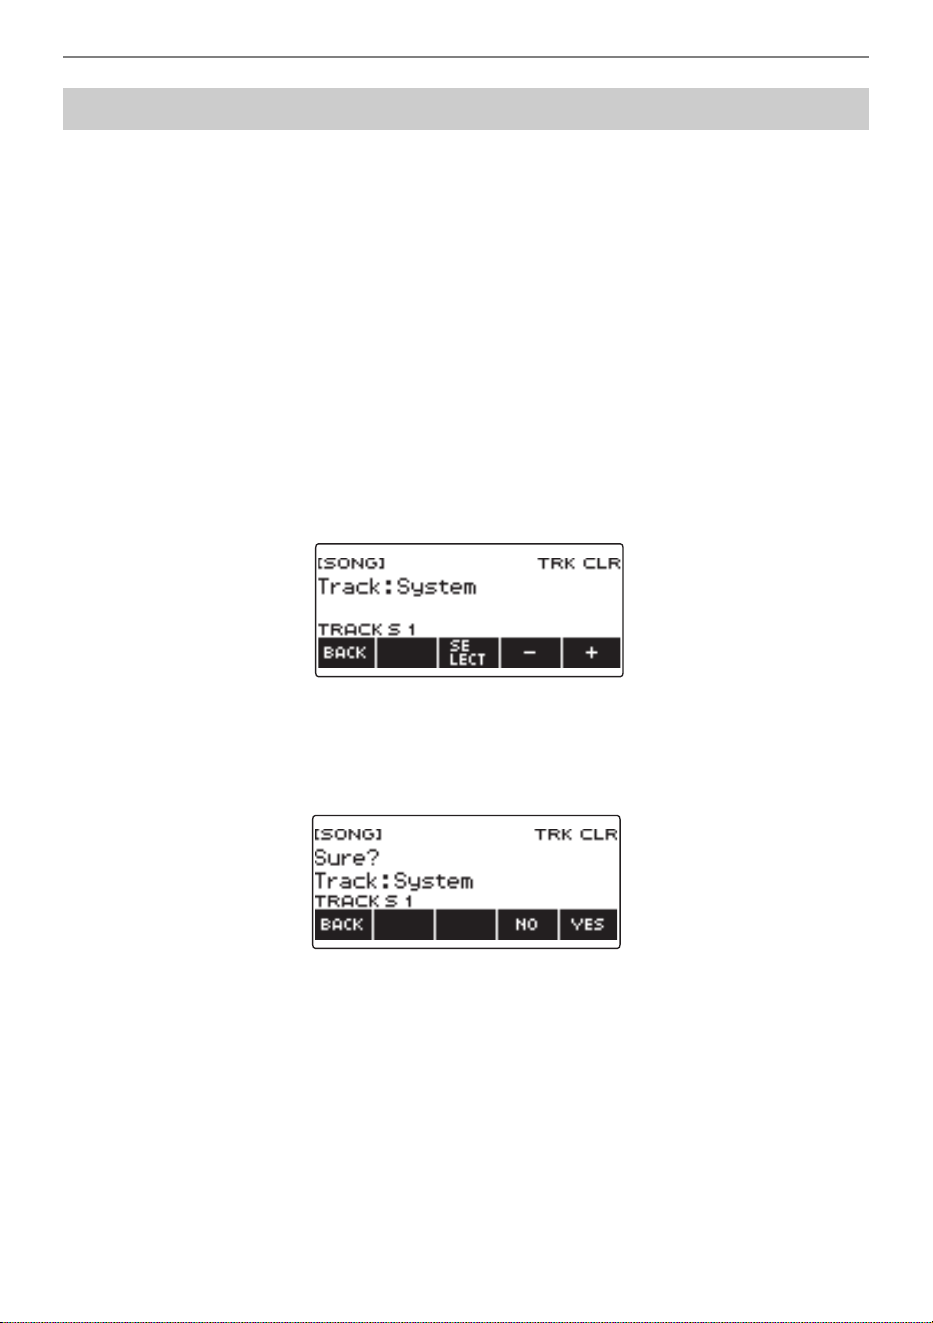
Recording Your Keyboard Play
EN-209
1.
Press MENU.
This displays the menu screen.
2.
Use U and I to select the 5 buttons menu that includes SONG.
3.
Press SONG.
This displays the song screen.
4.
Rotate the dial to select the Multi-track Recording whose track you want to
delete.
• If you rotated the dial, press BACK.
5.
Press MANAGE.
This displays the Multi-track Recording management screen.
6.
Press TRACK CLEAR.
This displays the track delete selection screen.
7.
Rotate the dial or use – and + to select a track.
8.
Press SELECT.
This displays “Sure?”.
9.
Press YES.
This deletes the track.
• To cancel, press NO.
Deleting a Multi-track Recording Track
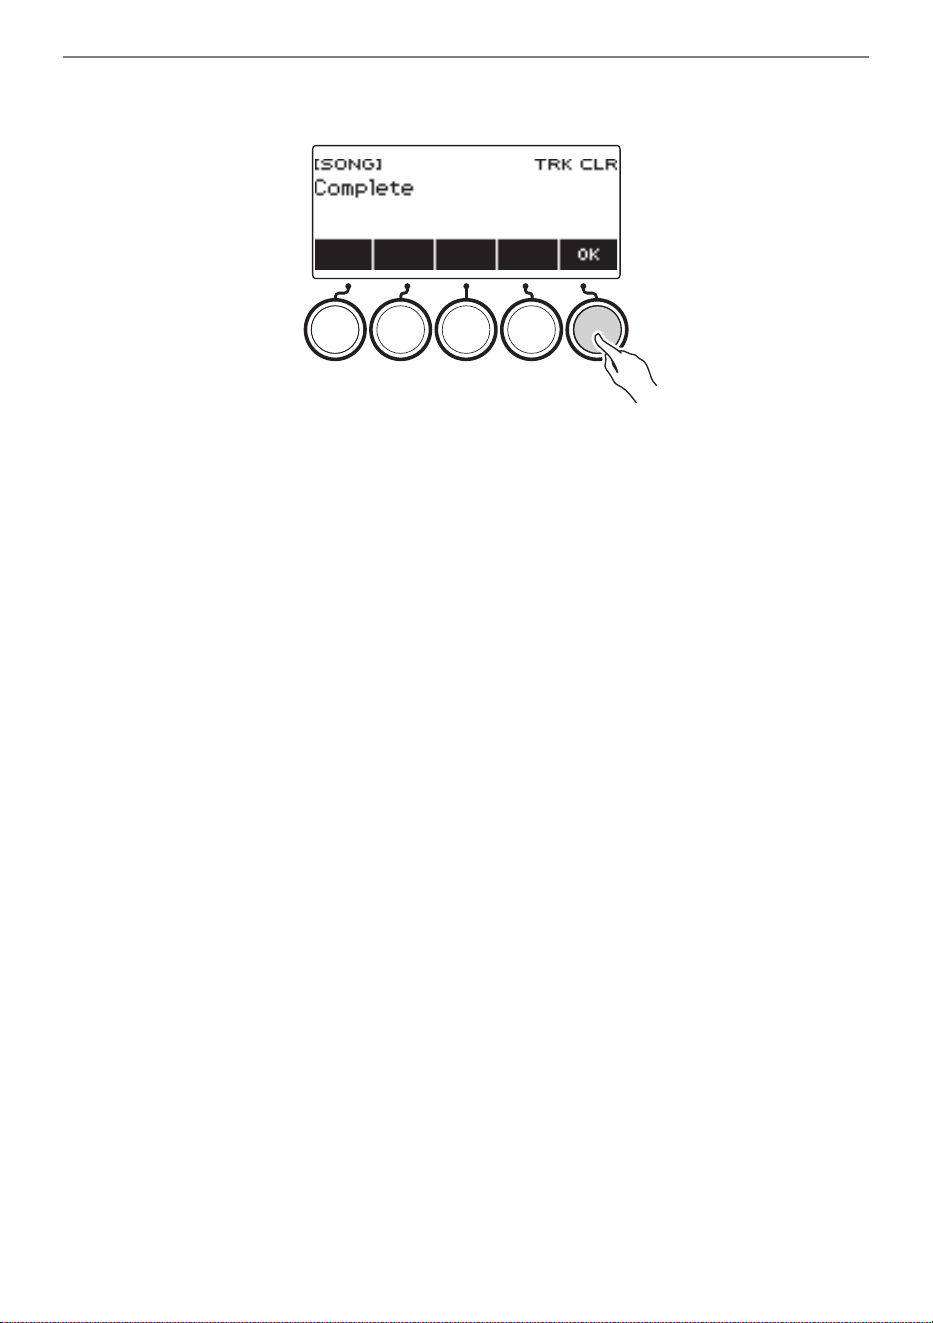
Recording Your Keyboard Play
EN-210
10.
When “Complete” appears on the display, press OK.
This exits the track delete operation.
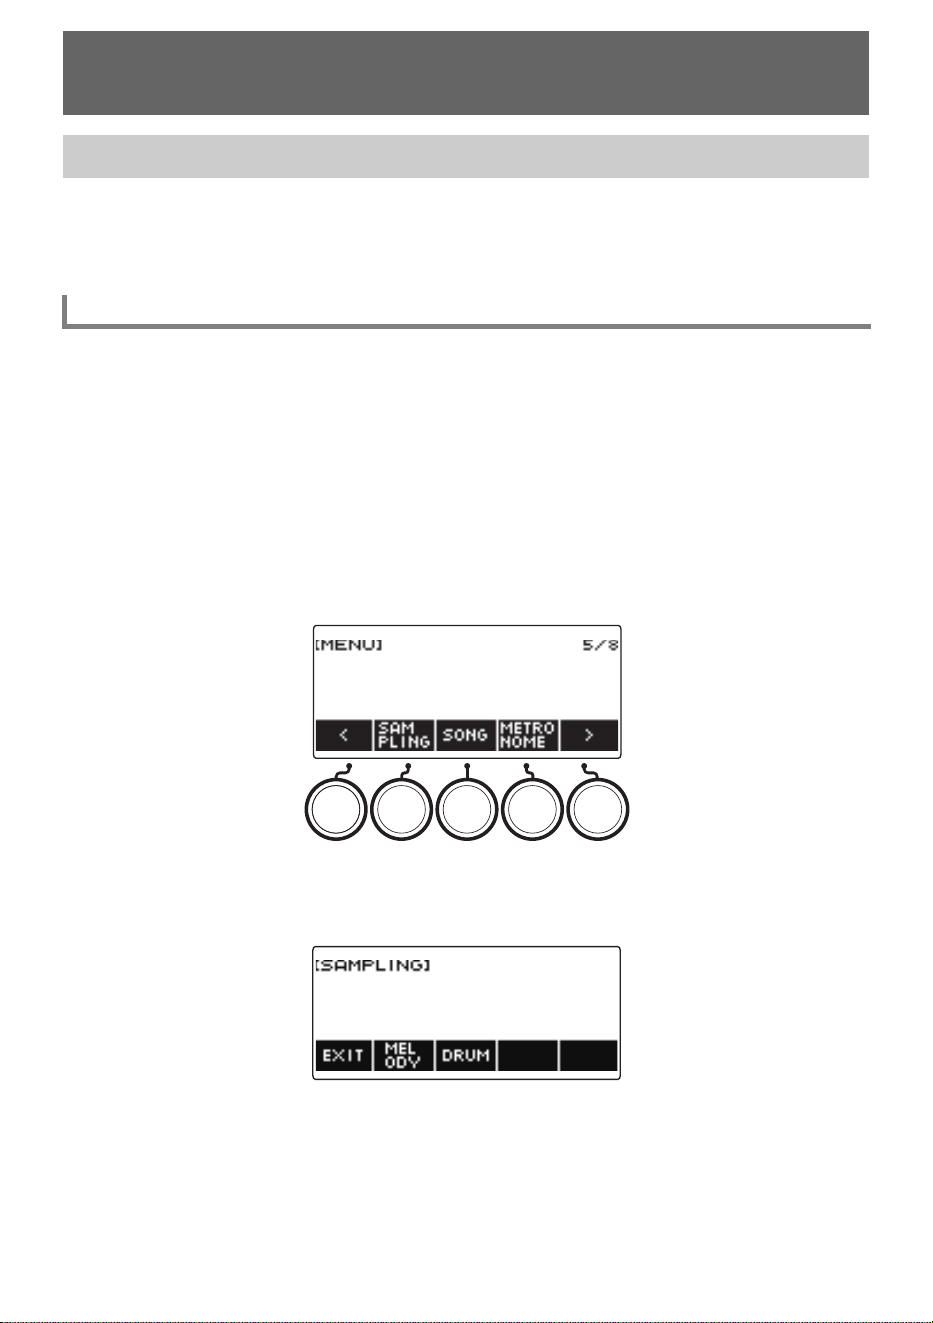
EN-211
Your Digital Keyboard lets you record any sounds you like from a portable audio player or smart device,
and play them on the keyboard. For example, if you record the bark of a dog, you will be able to play an
entire melody of dog barks. The sampling feature is a great way to create new sounds that are highly
creative.
Two types of sampled sounds can be captured: a sampled melody tone and sampled drum tone.
• Sampled Melody Tone (Tone Number 801)
Playing in the high range of the keyboard produces a high captured sound, while playing in the low
range, plays a low sound. You can play melodies with the captured sound.
• Sampled Drum Tone (Tone Number 802)
You can change each of the keyboard keys of the drum set to sampled sounds. You can add multiple
different sampled sounds to a single drum set.
1.
Press MENU.
This displays the menu screen.
2.
Use U and I to select the 5 buttons menu that includes SAMPLING.
3.
Press SAMPLING.
This displays the sampling screen.
Recording and Playing the Sounds You Want
(Sampling)
Capturing Sounds as Tones
Selecting the Sampled Tone Type
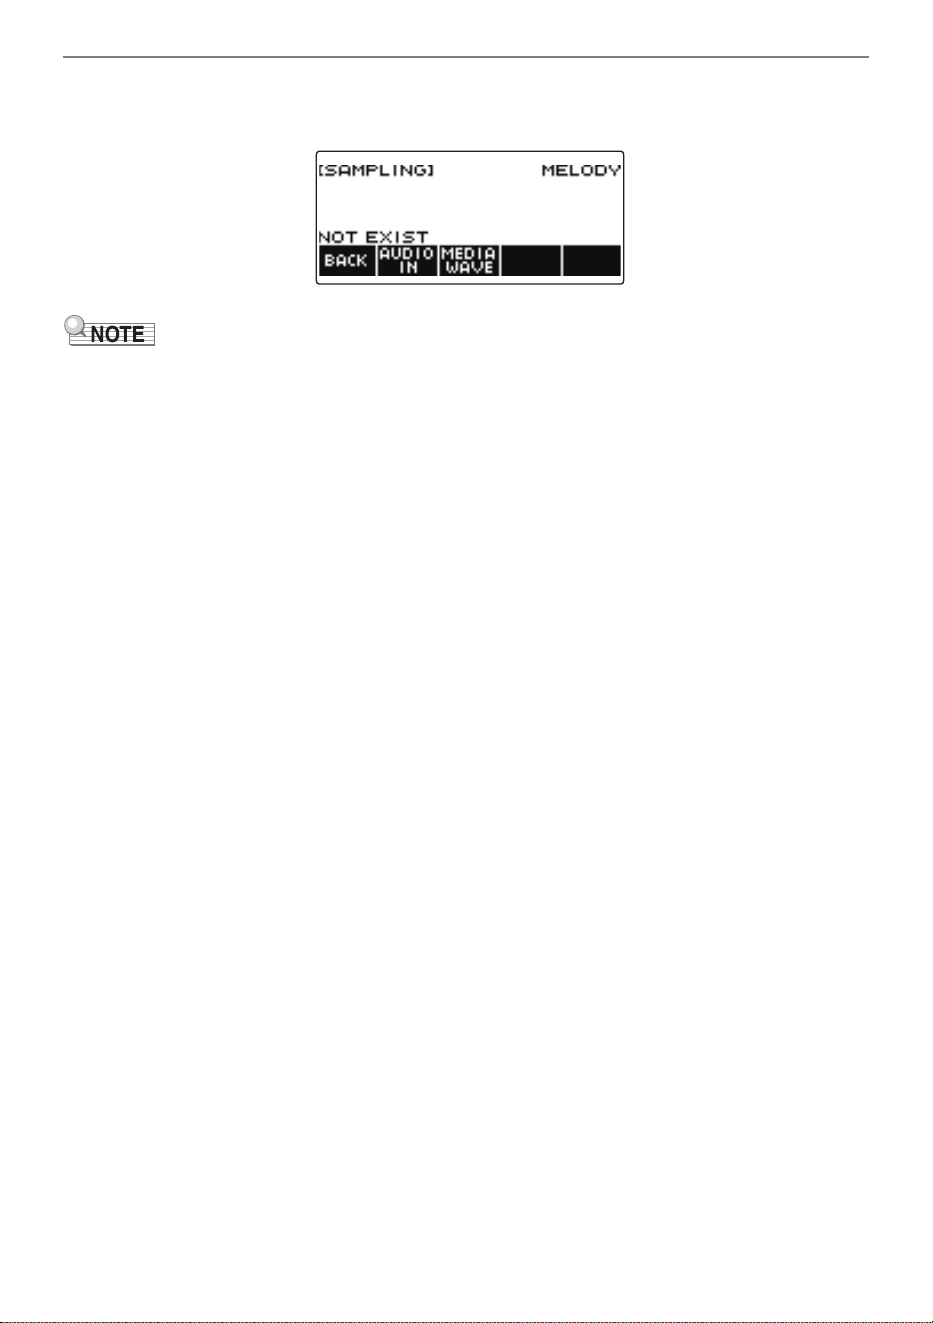
Recording and Playing the Sounds You Want (Sampling)
EN-212
4.
Press the button that corresponds to the melody sampling tone type.
This displays a sampling tone setting screen.
• When you display each sampling tone setting screen, the upper octave shift, upper 1 part octave
shift, layer, and split settings are reset to their initial default settings.
• You cannot use octave shift while the sampling screen is displayed.
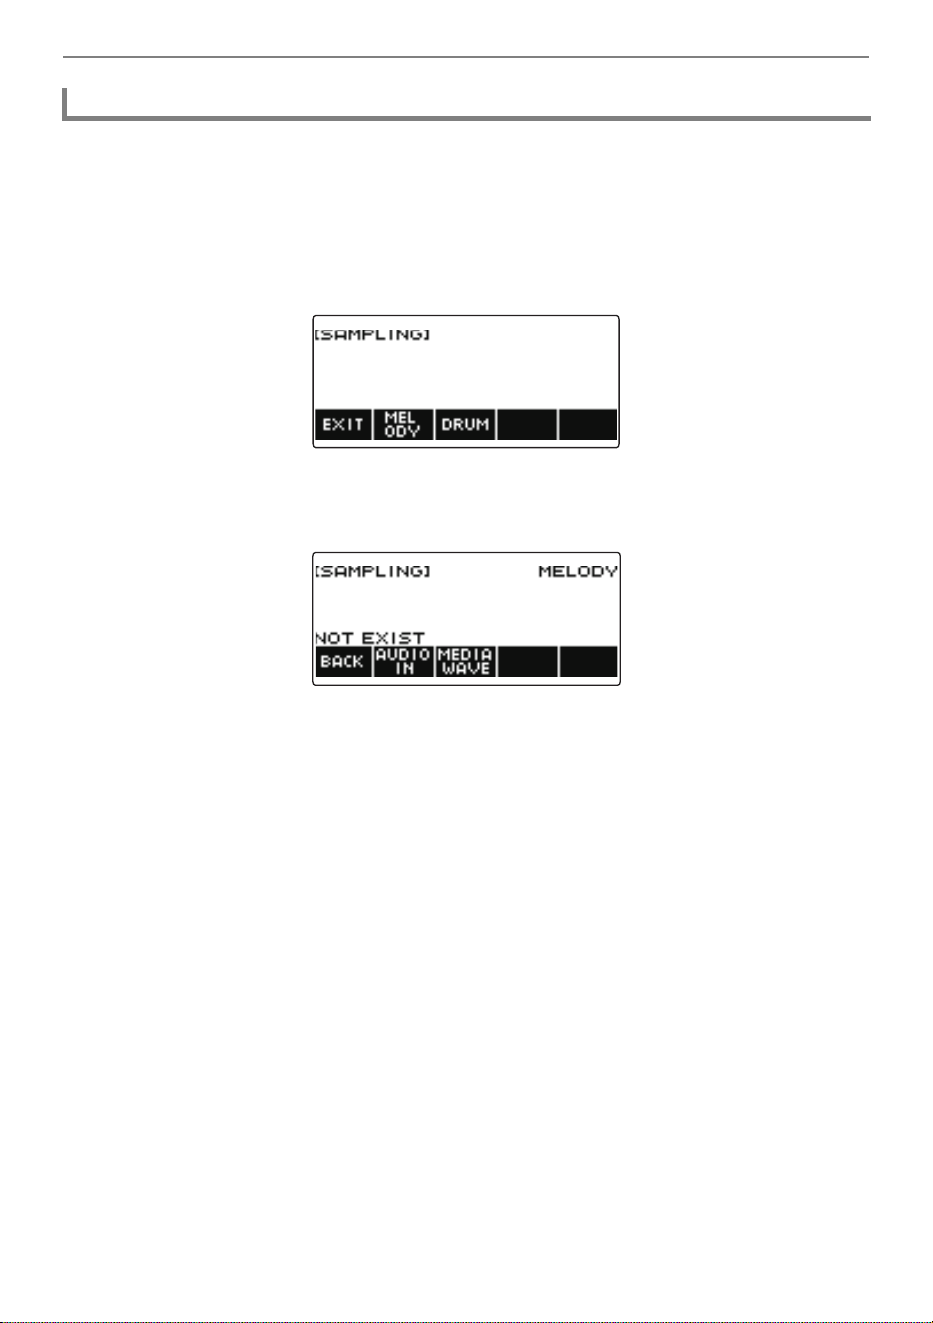
Recording and Playing the Sounds You Want (Sampling)
EN-213
1.
Press MENU.
This displays the menu screen.
2.
Use U and I to select the 5 buttons menu that includes SAMPLING.
3.
Press SAMPLING.
This displays the sampling screen.
4.
Press the button that corresponds to the melody sample tone type.
This displays a sampling tone setting screen.
• If there are no sampled sounds, “NOT EXIST” appears on the display.
5.
If you selected a sampled drum tone, you can select the import destination by
rotating the dial or by pressing a keyboard key.
• In the case of a note of a built-in drum tone that is a base, “BASE DRUM INST” appears on the
display.
6.
Connect the external device to the AUDIO IN jack and prepare to play the sound
you want to capture.
• When connecting with an external device, refer to “Sounding Input From an External Device on
This Digital Keyboard” (page EN-272).
• Before pressing AUDIO IN in step 7, do not produce a sound by pressing a keyboard key.
To sample sound from an external device connected to the AUDIO IN jack
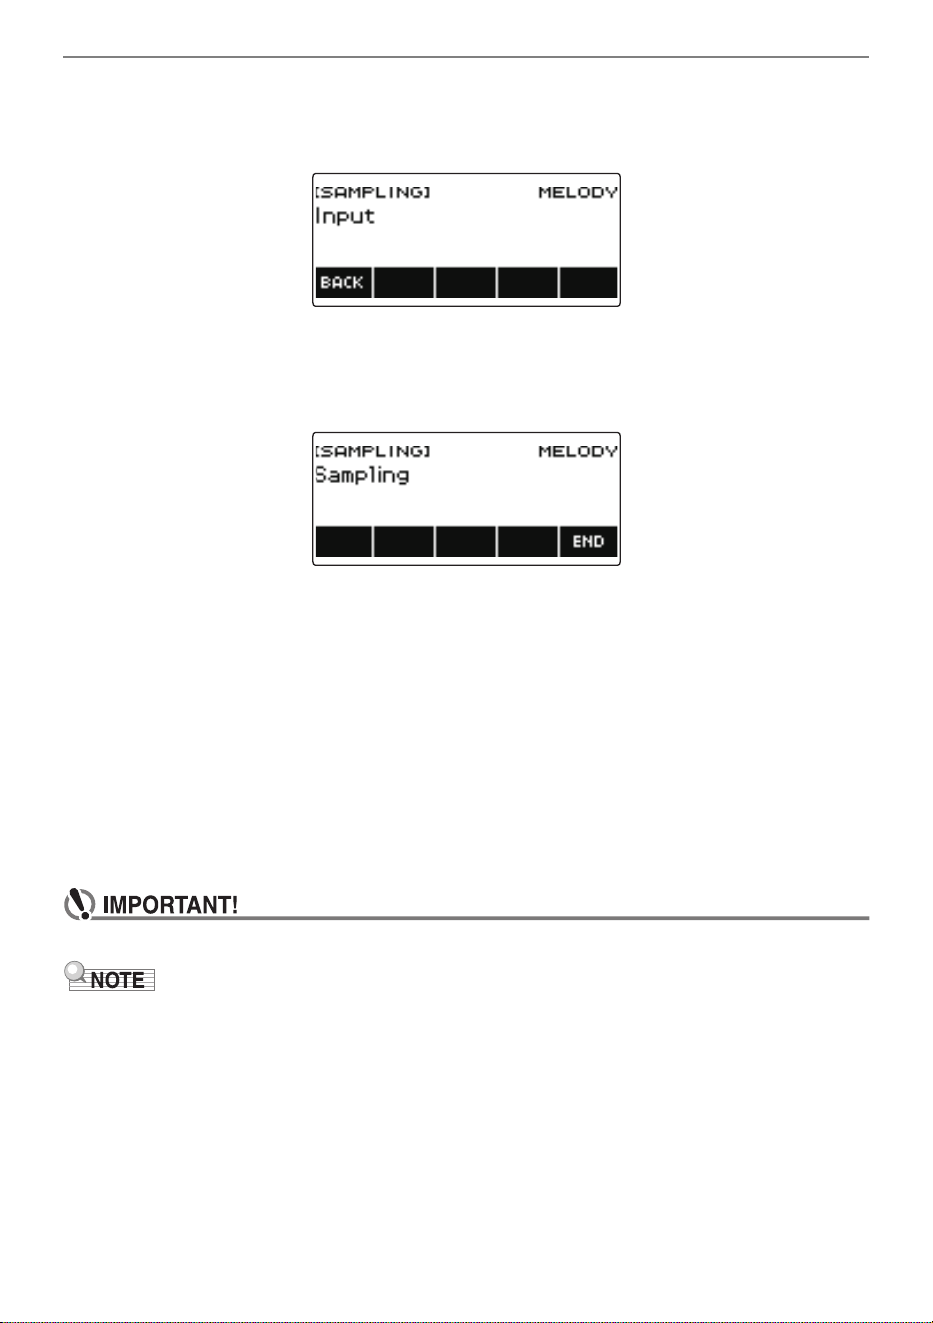
Recording and Playing the Sounds You Want (Sampling)
EN-214
7.
Press AUDIO IN.
“Input” appears on the display, indicating that the Digital Keyboard is in the sampling standby
mode.
• For sampled drum tones, the maximum number of sounds that can be sampled is 16.
8.
On the external device, produce the sound you want to capture.
“Sampling” appears on the display, indicating that sampling has started.
• Sampling may not start if the volume of the external device is low.
9.
To exit the sampling operation, press END.
This displays a sample tone setting screen.
• The maximum sampling time is about 10 seconds for a melody tone and about three seconds
for a drum tone. Sampling stops automatically after the maximum sampling time.
10.
Play something on the keyboard.
• In the case of sampled melody tones, pressing the C4 key sounds the original sound (the actual
sampled sound). Pressing any other key sounds the sampled sound with its pitch adjusted
accordingly.
• For sampled drum tones, the sampled sound is be played when you press the sample import
destination key.
• When you capture sound, the data previously recorded at the capture destination is deleted.
• The sound quality of sampled sounds is linear PCM, 16bit, 44.1kHz, stereo.
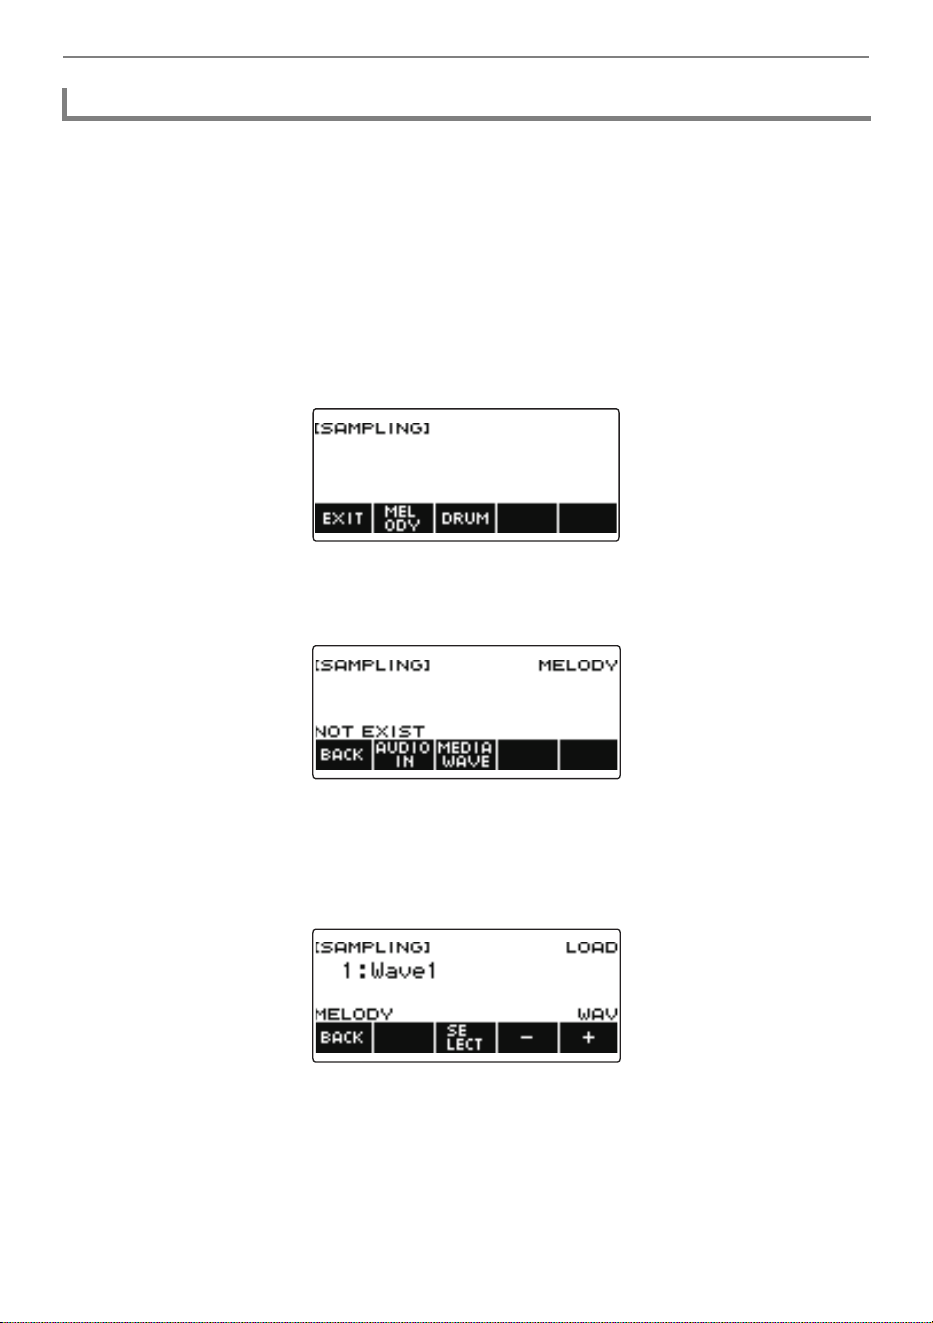
Recording and Playing the Sounds You Want (Sampling)
EN-215
1.
Insert the USB flash drive where the WAV file you want to import is stored into
the USB TO DEVICE port of the Digital Keyboard.
• For information about USB flash drives, see “Using a USB Flash Drive” (page EN-248).
2.
Press MENU.
This displays the menu screen.
3.
Use U and I to select the 5 buttons menu that includes SAMPLING.
4.
Press SAMPLING.
This displays the sampling screen.
5.
Press the button that corresponds to the melody sample tone type.
This displays a sample tone setting screen.
6.
If you selected a sample drum tone, you can select the import destination by
rotating the dial or by pressing a keyboard key.
7.
Press MEDIA WAVE.
• For sampled drum tones, the maximum number of sounds that can be imported is 16.
8.
Rotate the dial or use the – or + button to select the WAV file you want to import.
To import WAV files from a USB flash drive

Recording and Playing the Sounds You Want (Sampling)
EN-216
9.
Press SELECT.
This displays “Sure?”.
• “Replace?” appears if data already exists in the destination.
10.
Press YES.
This imports the file.
• To cancel, press NO.
11.
When “Complete” appears on the display, press OK.
This completes the file import operation.
• When importing a WAV file, it takes up to about 10 seconds for a sampled melody tone and about
3 seconds for a sampled drum tone.
• Importing a WAV file that exceeds the maximum time causes the part that is in excess of the
maximum time to be deleted.
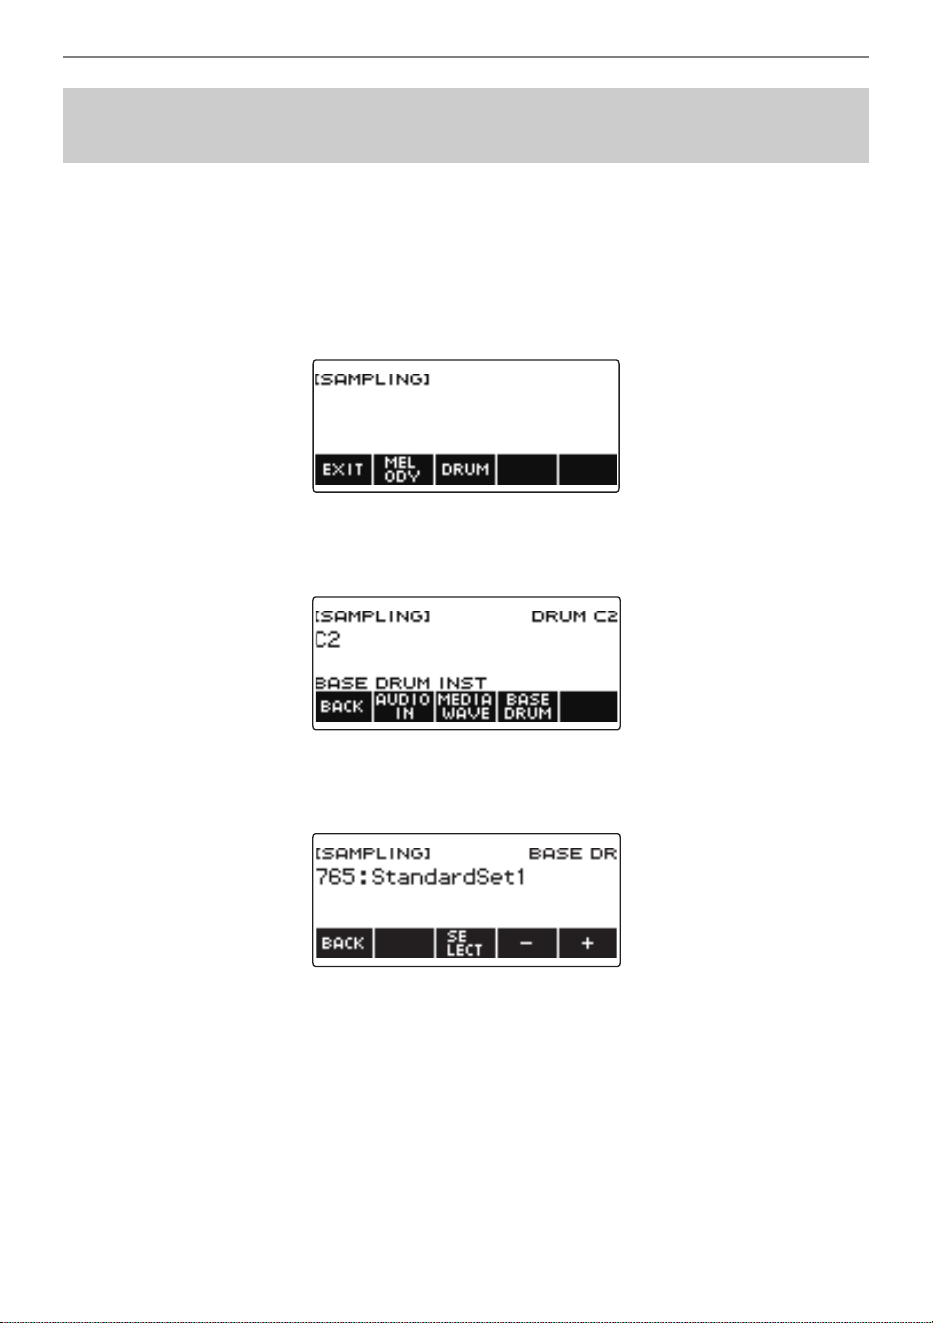
Recording and Playing the Sounds You Want (Sampling)
EN-217
1.
Press MENU.
This displays the menu screen.
2.
Use U and I to select the 5 buttons menu that includes SAMPLING.
3.
Press SAMPLING.
This displays the sampling screen.
4.
Press DRUM.
This displays the sampled drum tone setting screen.
5.
Press BASE DRUM.
This displays the bass built-in drum tone selection screen.
6.
Rotate the dial or use – and + to select the built-in drum tone you want to use as
the base.
7.
Press SELECT.
This selects the built-in drum tone to be used as the base and displays the sampled drum tone
setting screen.
To select a built-in drum tone as a base for the sampled
drum tone
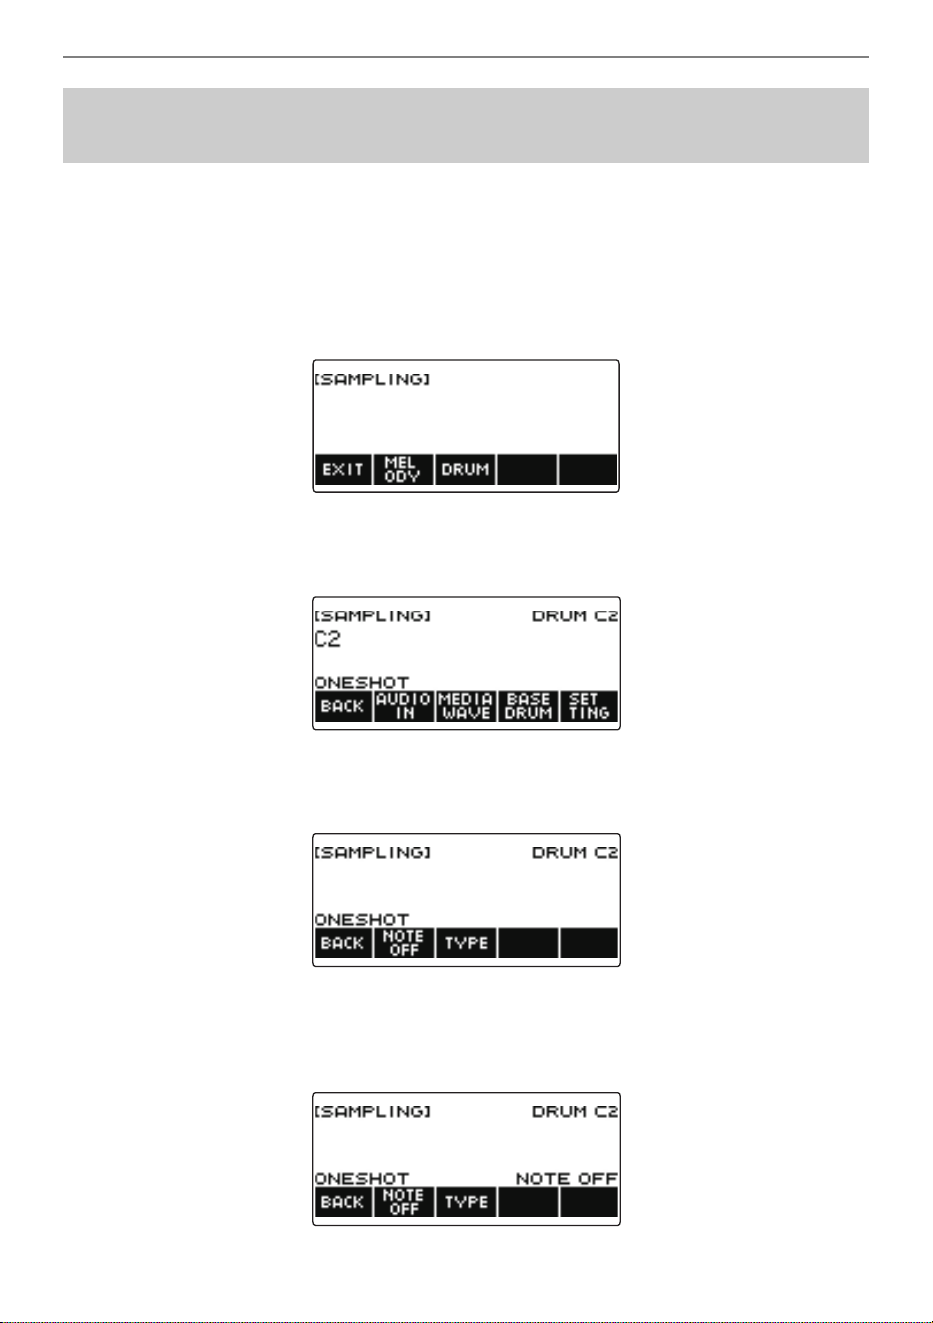
Recording and Playing the Sounds You Want (Sampling)
EN-218
1.
Press MENU.
This displays the menu screen.
2.
Use U and I to select the 5 buttons menu that includes SAMPLING.
3.
Press SAMPLING.
This displays the sampling screen.
4.
Press DRUM.
This displays the sampled drum tone setting screen.
5.
Press SETTING.
This displays the keyboard operation setting screen.
6.
Press NOTE OFF.
This displays “NOTE OFF”, which means that the sound will stop when you release the keyboard
key.
To configure the keyboard setting so the sound stops
playing when you release the keyboard key

Recording and Playing the Sounds You Want (Sampling)
EN-219
7.
Press and release a keyboard key.
The sound will stop when you release the keyboard key.
8.
Press NOTE OFF again to return the keyboard setting to continue producing
sound when keyboard keys are released.
This causes “NOTE OFF” to disappear from the display.
• The sound also stops when you release the keyboard key in the case of a looped sound (page
EN-220).
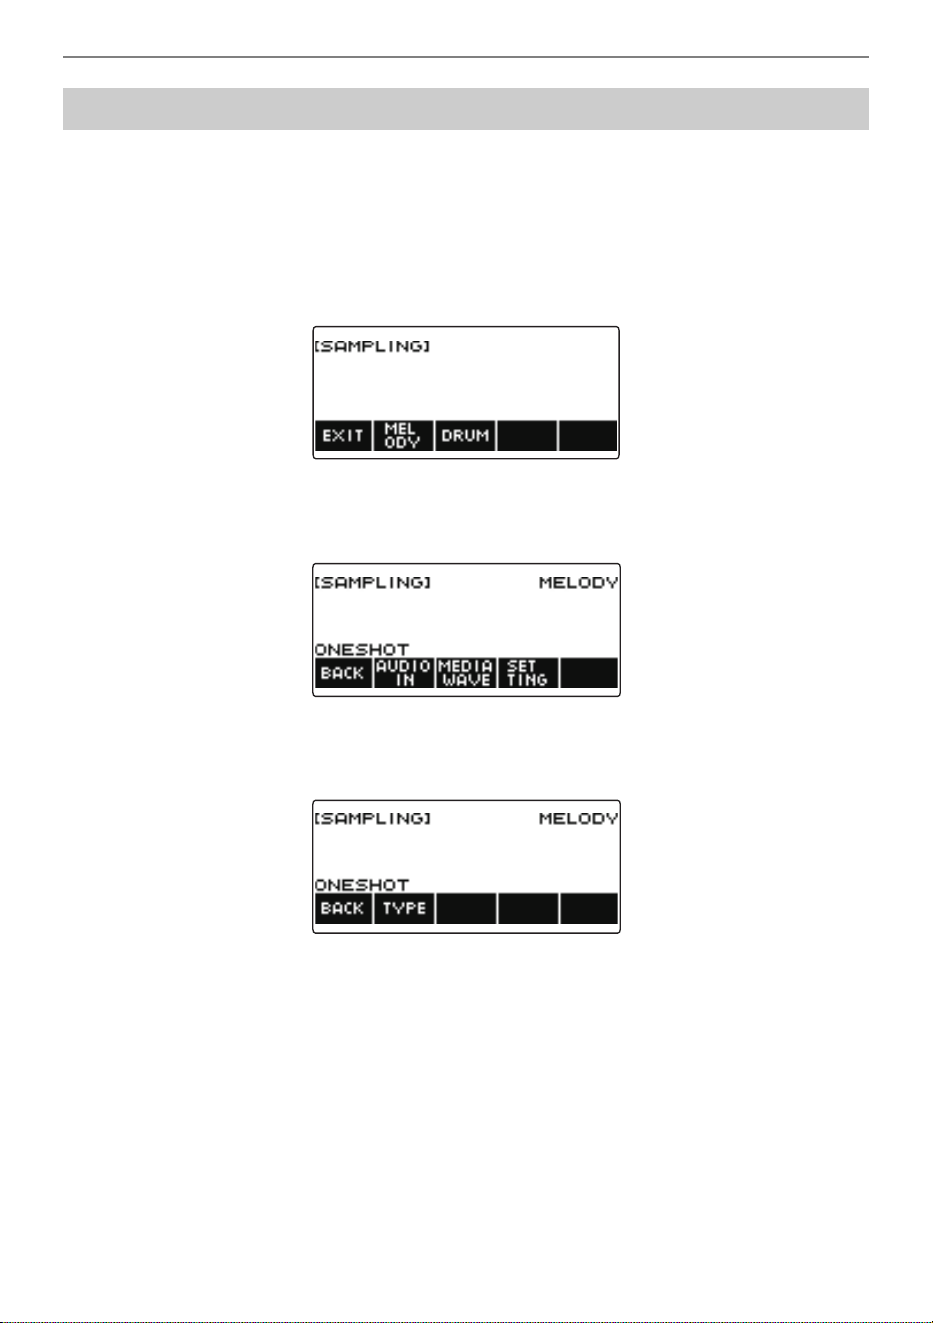
Recording and Playing the Sounds You Want (Sampling)
EN-220
1.
Press MENU.
This displays the menu screen.
2.
Use U and I to select the 5 buttons menu that includes SAMPLING.
3.
Press SAMPLING.
This displays the sampling screen.
4.
Press the button that corresponds to the melody sample tone type.
This displays a sample tone setting screen.
5.
Press SETTING.
This displays the keyboard operation setting screen.
Sounding a Looped Sound
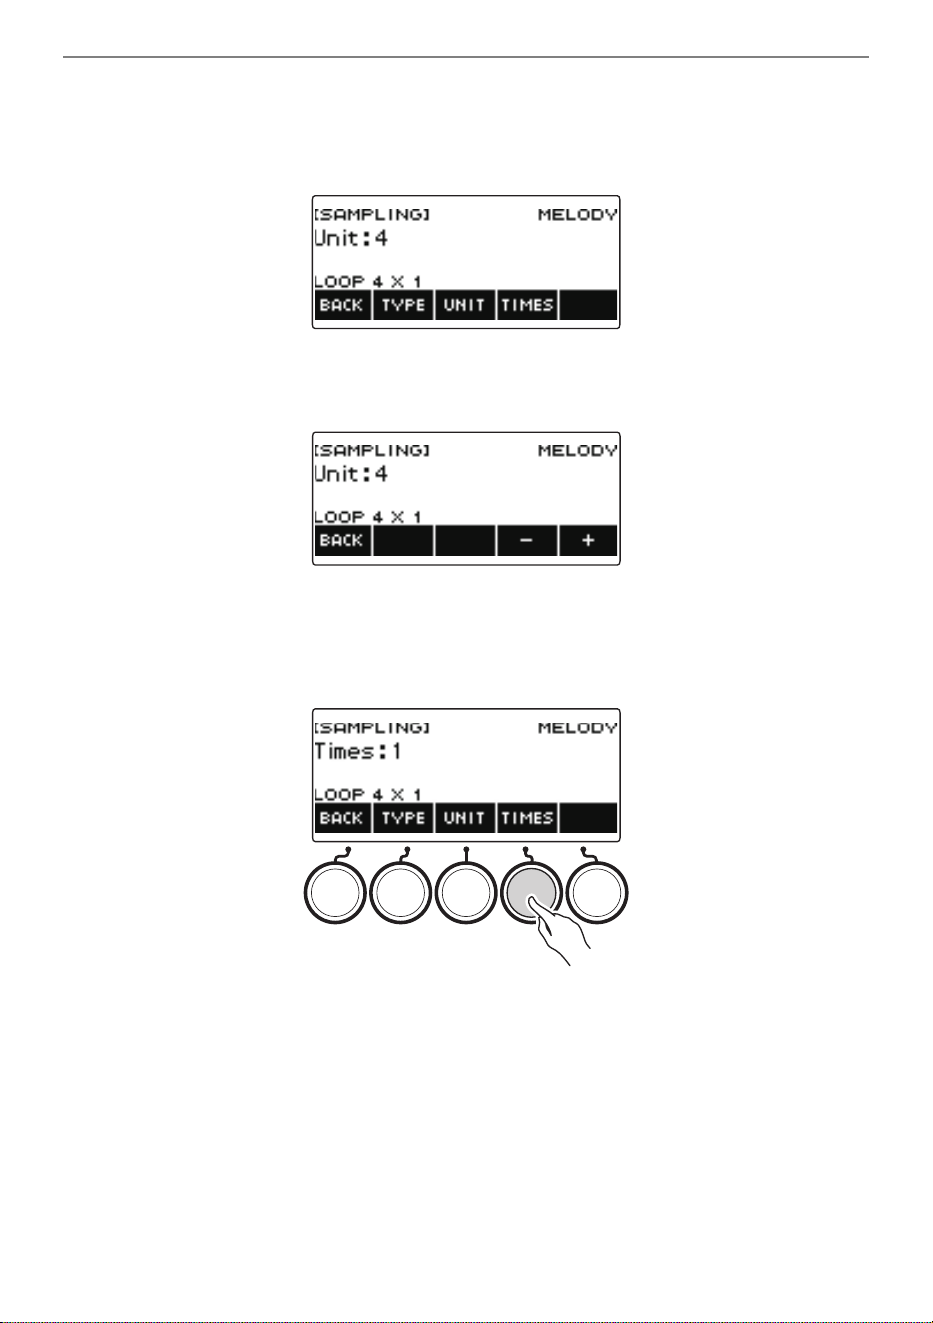
Recording and Playing the Sounds You Want (Sampling)
EN-221
6.
Press TYPE.
This displays “LOOP”, which means that the sound will loop.
• In the case of a looped sound, the loop time is determined according to the note value used as
the unit and the number of loops.
7.
Rotate the dial to select the note value.
This displays the –/+ screen.
• After you rotate the dial once to select a note value, you can change the selection further using
– and +.
• To go back to the previous screen, press BACK.
8.
Press TIMES.
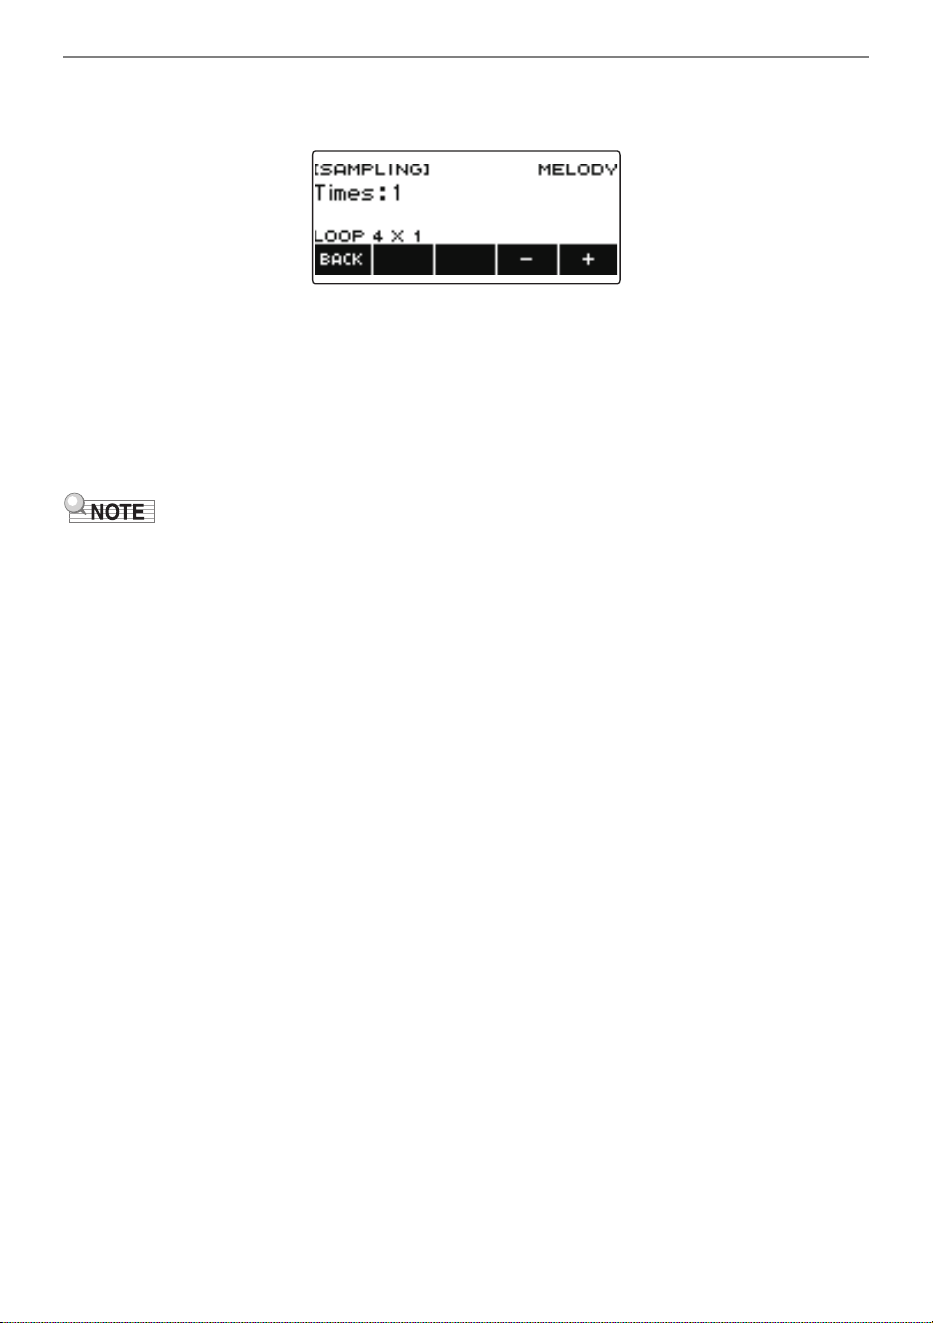
Recording and Playing the Sounds You Want (Sampling)
EN-222
9.
Rotate the dial to select the unit note value loops.
This displays the –/+ screen.
• After you rotate the dial once to select a number of loops, you can change the selection further
using – and +.
• To go back to the previous screen, press BACK.
10.
Press a keyboard key.
• For sampled melody tones, the sound loops as long as the keyboard key is depressed.
• For sampled drum tones, the sampled sound is played as a loop when you press a keyboard
key. To stop the loop, press the keyboard key again.
• If both the loop function and the arpeggiator are turned on, the arpeggiator is given priority.
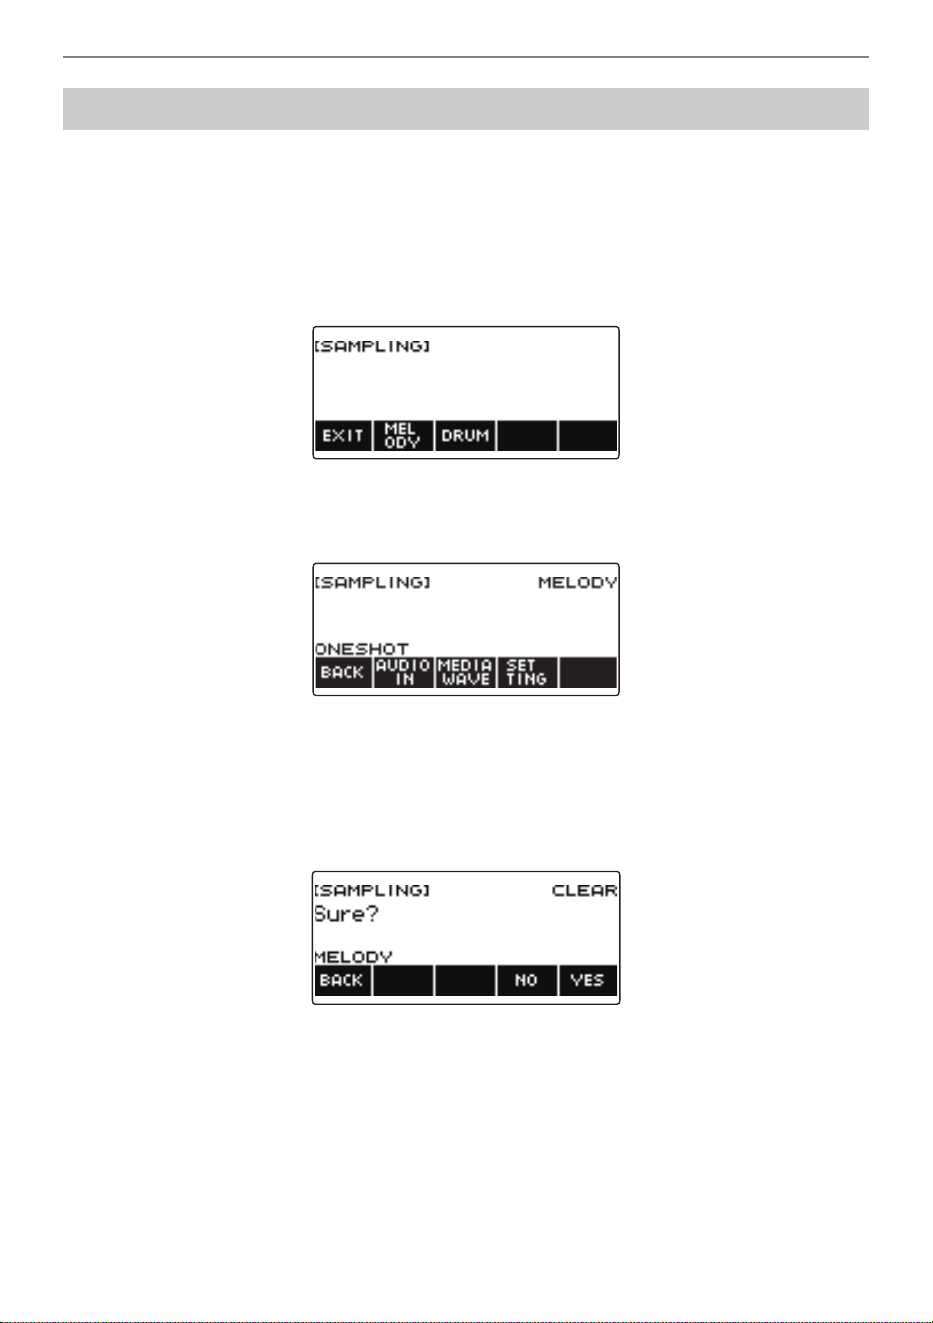
Recording and Playing the Sounds You Want (Sampling)
EN-223
1.
Press MENU.
This displays the menu screen.
2.
Use U and I to select the 5 buttons menu that includes SAMPLING.
3.
Press SAMPLING.
This displays the sampling screen.
4.
Press the button that corresponds to the melody sample tone type.
This displays a sample tone setting screen.
5.
If you sampled a drum tone, rotate the dial or press the applicable keyboard key
to select the sampled data you want to delete.
6.
Long-press MENU.
This displays “Sure?”.
7.
Press YES.
This deletes the sample data.
• To cancel, press NO.
To delete sampled data
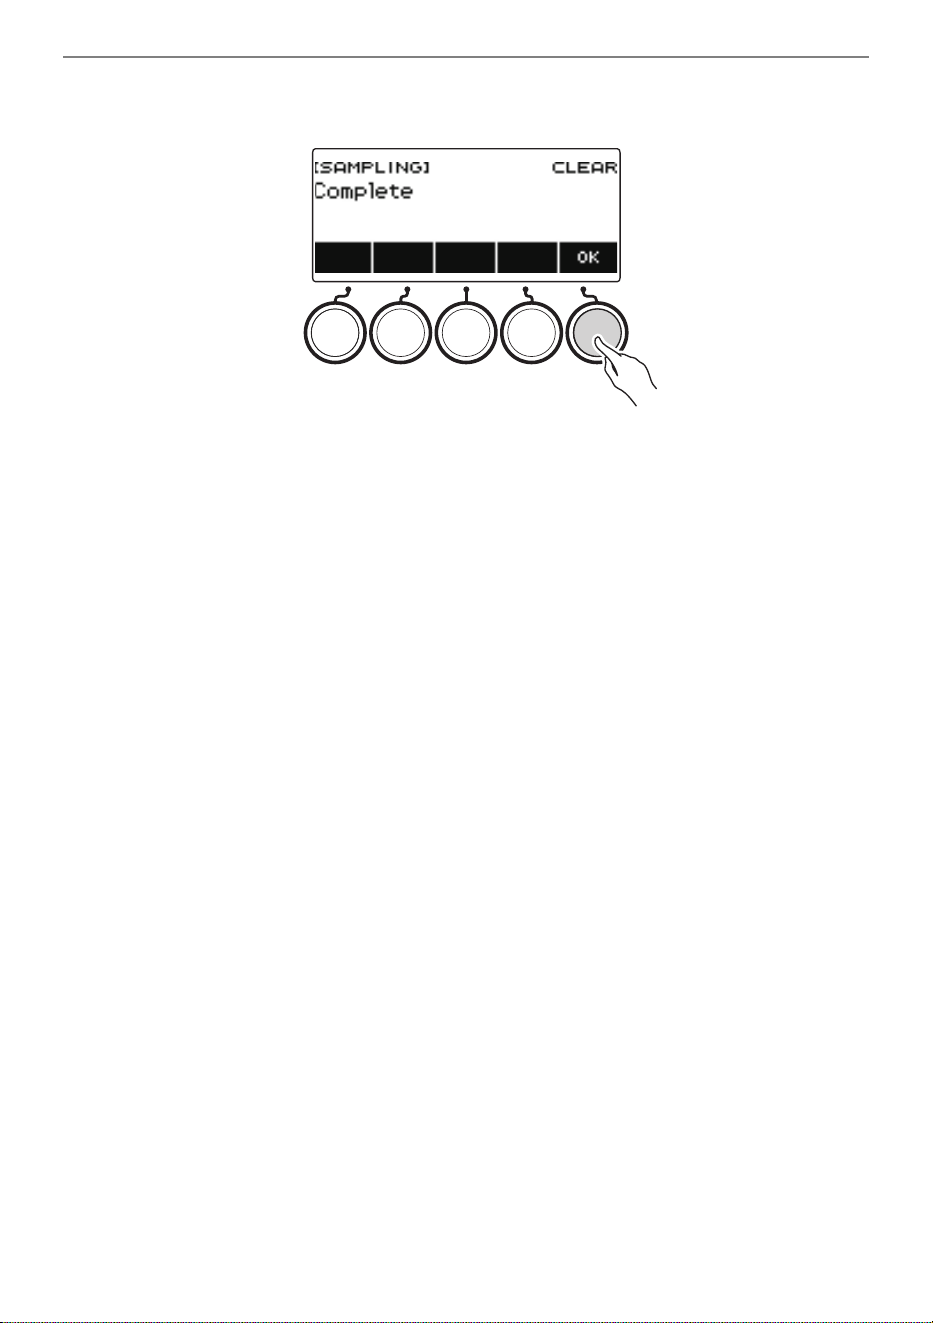
Recording and Playing the Sounds You Want (Sampling)
EN-224
8.
When “Complete” appears on the display, press OK.
This exits the sample data delete operation.
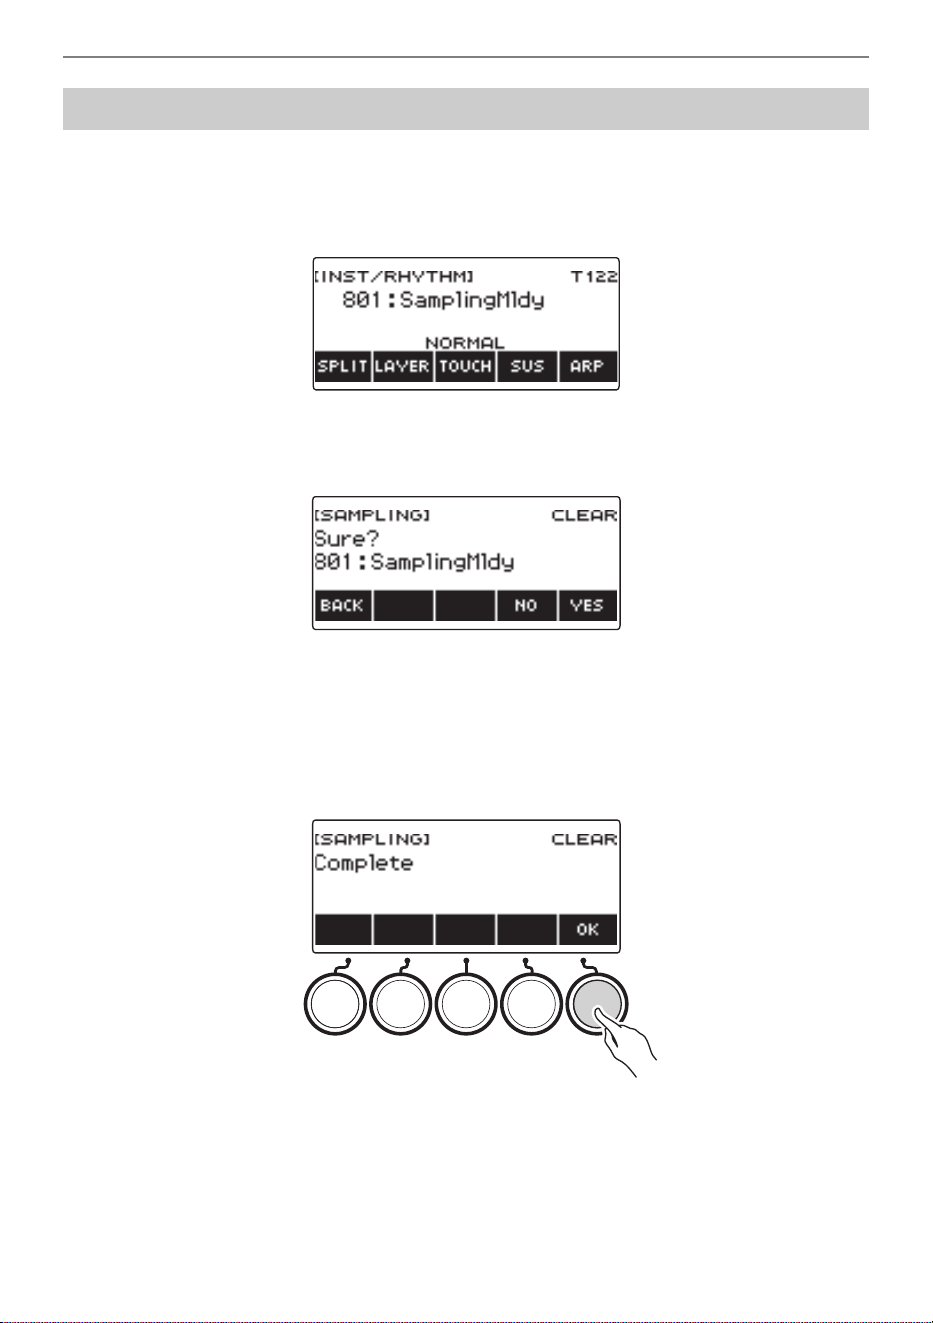
Recording and Playing the Sounds You Want (Sampling)
EN-225
1.
Press INSTRUMENT.
This displays the instrument tone screen.
2.
Rotate the dial to select a sampled tone.
3.
Long-press MENU.
This displays “Sure?”.
4.
Press YES.
This deletes the sample data.
• To cancel, press NO.
5.
When “Complete” appears on the display, press OK.
This exits the sample data delete operation.
To delete a sampled tone
B
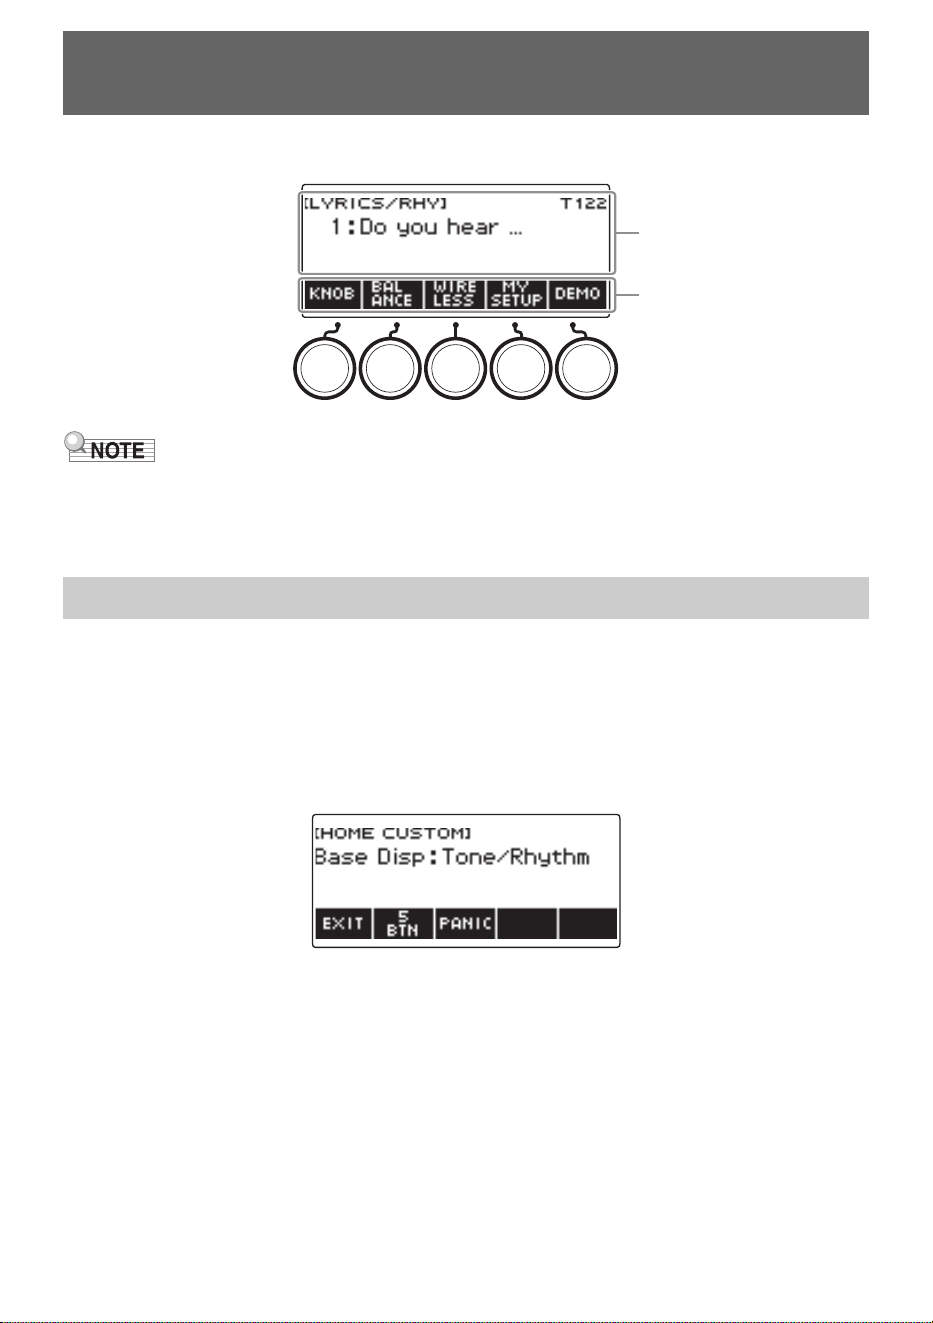
EN-226
You can change the Home Screen’s Base Display and/or the 5 buttons to customize the screen as you
like. You can also configure a setting so various type of playback do not stop when you press HOME.
• Saving Customize contents in MY SETUP keeps them from being deleted when the Digital Keyboard
is turned off. You also can configure Digital Keyboard settings so MY SETUP settings are recalled
whenever Digital Keyboard power is turned on (page EN-144).
1.
Press MENU.
This displays the menu screen.
2.
Use U and I to select the 5 buttons menu that includes HOME CSTM.
3.
Press HOME CSTM.
This displays the Home Customization screen, which shows Base Display items.
Customizing the Home Screen
(Home Customization)
Changing the Home Screen Base Screen
Base display
5 buttons menu items
Customizing the Home Screen (Home Customization)
EN-227
4.
Rotate the dial to change the Base Display.
Screens you can select are shown in the table below.
• After you rotate the dial once to select a setting, you can change the setting further using – and +.
• To go back to the previous screen, press BACK.
5.
To exit the setting operation, press EXIT.
Setting Display Name
Tone screen Tone
Rhythm screen Rhythm
Tone/rhythm screen Tone/Rhythm

Customizing the Home Screen (Home Customization)
EN-228
1.
Press MENU.
This displays the menu screen.
2.
Use U and I to select the 5 buttons menu that includes HOME CSTM.
3.
Press HOME CSTM.
This displays the Home Customization screen, which shows Base Display items.
4.
Press 5 BTN (5 buttons).
This displays the 5 buttons (5 BTN) setting screen.
5.
Use U and I to select the button whose function you want to change.
6.
Rotate the dial or use – and + to change the function.
For information about the functions that can be assigned to the 5 buttons see “Home
Customization 5 buttons Function List” (page EN-340).
7.
Press BACK to exit the setting operation.
• With some functions, the current settings of its parameters will appear above the corresponding
5 buttons. In some cases, the current setting name will be abbreviate due to space limitations.
• The target part of recommended functions 1, 2 and 3 of the active DSP that can be assigned to the
5 buttons is the part specified by the effect change part.
• The target part of the active DSP bypass change module that can be assigned to the 5 buttons is the
part specified by the effect change part.
Changing the Function of Each 5 buttons
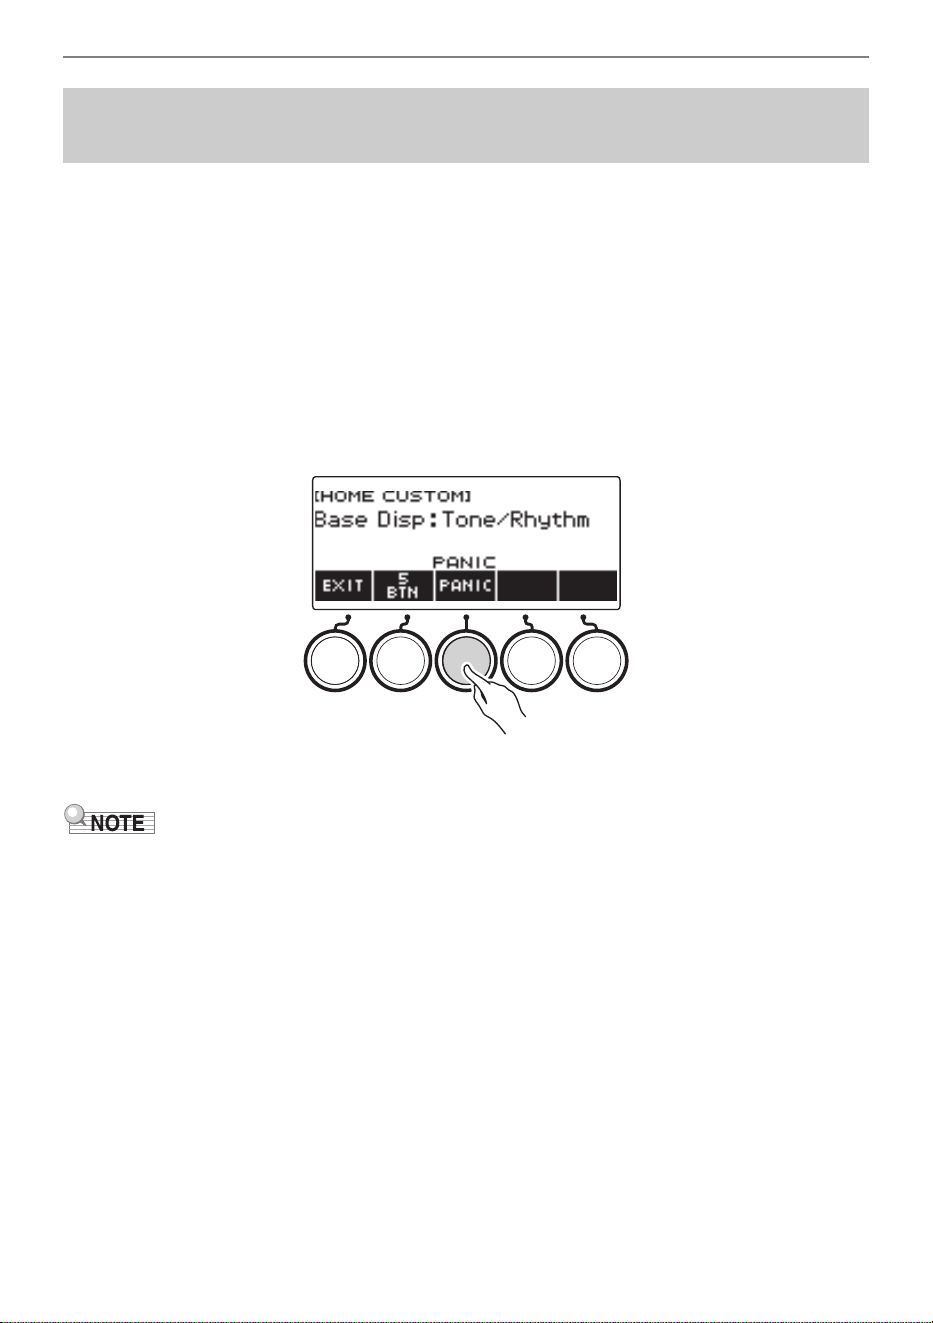
Customizing the Home Screen (Home Customization)
EN-229
Pressing the HOME normally stops all types of playback. This is the “PANIC function”. This lets you
stop playback instantly, even if you do not know how to stop a particular type of playback.
1.
Press MENU.
This displays the menu screen.
2.
Use U and I to select the 5 buttons menu that includes HOME CSTM.
3.
Press HOME CSTM.
This displays the Home Customization screen, which shows base screen items.
4.
Press PANIC.
This displays “PANIC” and enables the panic function.
5.
To disable the PANIC function, press PANIC again.
• Playback may stop even when the PANIC function is disabled.
Stopping All Types of Playback when HOME is Pressed
(PANIC function)
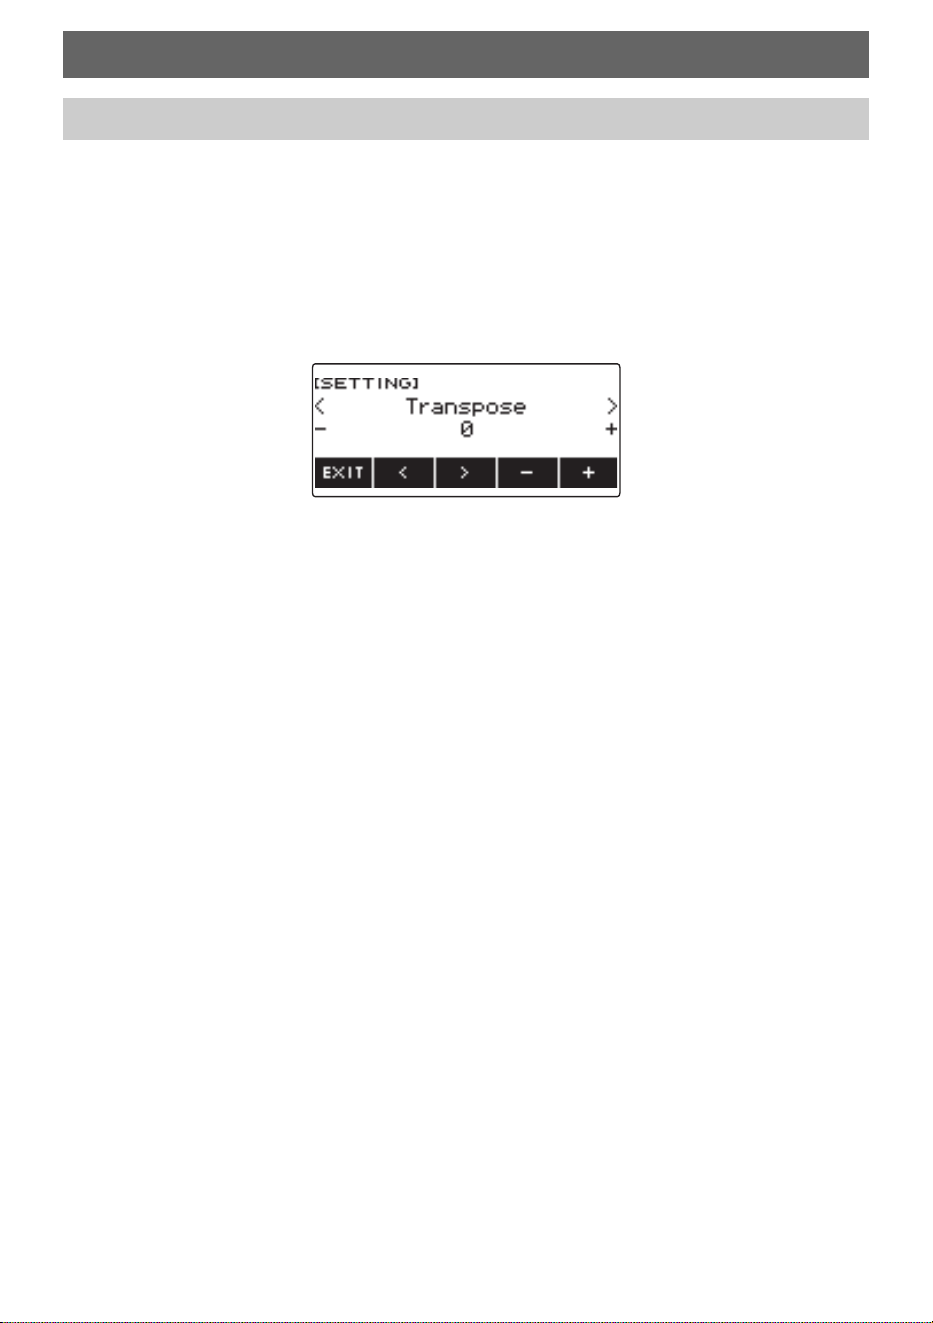
EN-230
Use the procedure below to configure settings.
1.
Press MENU.
This displays the menu screen.
2.
Use U and I to select the 5 buttons menu that includes SETTING.
3.
Press SETTING.
This displays the setting screen.
4.
Use U and I to select a setting item.
5.
Rotate the dial or use – and + to change the setting.
6.
To exit the setting operation, press EXIT.
Configuring Settings
Setting Operation
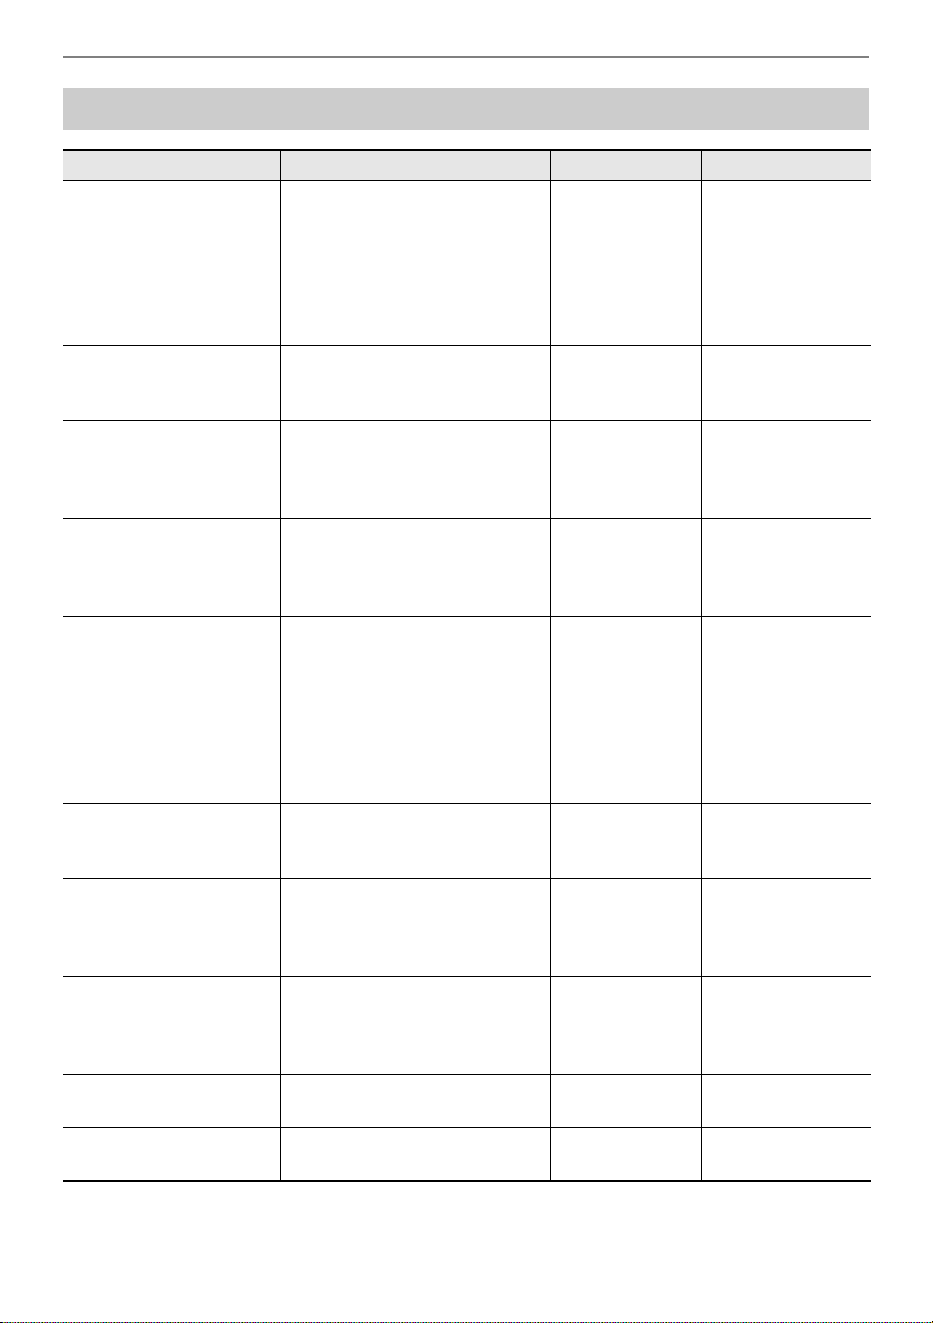
Configuring Settings
EN-231
Setting Item List
Function Name Description Display Name Setting
Transpose Can be used to raise the overall
pitch in semitone steps to make
it easier to play a piece written in
a difficult key, or to adjust to a
key that better matches a
vocalist, another musical
instrument, etc.
Transpose –12 to 0 to +12
(Initial Default: 0)
Touch off velocity Can be used to specify the
velocity value when Touch
Response is disabled.
Touch Off
Velocity
1 to 127
(Initial Default: 100)
Split point Can be used to change the
range of the lower keyboard
and/or the accompaniment
keyboard.
Split Point C2 to C7
(Initial Default: F#3)
Rhythm auto setting Can be used to disable
automatic setting of the tempo
and pattern when a rhythm is
selected.
Rhythm Auto Set Off, On
(Initial Default: On)
Chord fingering mode Can be used to specify the
chord fingering mode.
Chord Mode CASIO Chord,
Fingered 1,
Fingered 2,
Fingered on Bass,
Fingered Assist,
Full Range Chord
(Initial Default:
Fingered 1)
Rhythm Controller Type Can be used to change the
control method of rhythm
patterns and fill-ins.
Rhythm
Controller Type
Type 1, Type 2
(Initial Default:
Type 1)
Sustain/Upper
Portamento Button
You can assign sustain or upper
portamento to one of the
5 buttons on the tone screen.
SUS/UPPER
PORT Button
SUS, UPPER
PORT
(Initial Default:
SUS)
Arpeggiator/Auto
Harmonize Button
Can be used to assign
arpeggiator or auto harmonize to
one of the 5 buttons on the tone
screen.
ARP/AH Button ARP, AH
(Initial Default:
ARP)
Rhythm volume level Can be used to adjust the
rhythm volume level.
Rhythm Volume 0 to 127
(Initial Default: 115)
Song volume level Can be used to adjust the song
volume level.
Song Volume 0 to 127
(Initial Default: 127)
Configuring Settings
EN-232
Tuning Can be used to fine tune the
overall pitch by changing the
frequency of A4 in 0.1Hz units.
Tuning 415.5Hz to 440.0Hz
to 465.9Hz
(Initial Default:
440.0)
Surround Can be used to create a more
expansive sound.
Surround Off, On
(Initial Default: Off)
AUDIO IN center cancel Can be used to cancel the
center part of audio input using
the AUDIO IN jack or Bluetooth
audio.
Audio In Center
Cancel
Off, On
(Initial Default: Off)
MIDI OUT Channel
UPPER1
Can be used to change the
channel of MIDI messages that
are MIDI output by UPPER1
play.
MIDI Out Ch
Upper1
Off, 1 to 16
(Initial Default: 1)
MIDI OUT Channel
UPPER2
Can be used to change the
channel of MIDI messages that
are MIDI output by UPPER2
play.
MIDI Out Ch
Upper2
Off, 1 to 16
(Initial Default: 2)
MIDI OUT Channel
LOWER
Can be used to change the
channel of MIDI messages that
are MIDI output by LOWER play.
MIDI Out Ch
Lower
Off, 1 to 16
(Initial Default: 3)
Local Control Selecting “Off” disables output of
sound when something is played
on the Digital Keyboard.
Local Control Off, On
(Initial Default: On)
MIDI Sync Mode You can synchronize the tempo
with an external MIDI device or
music software running on your
computer.
MIDI Sync Mode Off, Master, Slave
(Initial Default: Off)
Auto Power Off Can be used to enable/disable
Auto Power Off.
Auto Power Off Off, On
(Initial Default: On)
Battery type Can be used to specify the type
of batteries being used.
Battery Alkaline, Ni-MH
(Initial Default:
Alkaline)
Display Contrast Can be used to adjust display
contrast.
LCD Contrast 1 to 12
(Initial Default: 7)
Button long-press time Can be used to adjust the button
long-press time.
Button Long
Press Time
Short, Normal,
Long
(Initial Default:
Normal)
Speaker You can disable speaker output. Speaker Off, On
(Initial Default: On)
Speaker enabled when
PHONES connected
With this setting, you can
continue sound output from the
speaker when something is
connected to the PHONES jack.
Phone Speaker Off, On
(Initial Default: Off)
Function Name Description Display Name Setting
B
Configuring Settings
EN-233
• Some settings are retained even when the Digital Keyboard is turned off. See “Turning Power
On or Off” (page EN-26).
Initialize Can be used to return settings to
their initial factory defaults.
Setting Initialize
Initialize All Can be used to return the entire
Digital Keyboard to its initial
factory default state.
All Initialize
Version Information Can be used to view version
information.
Version
Function Name Description Display Name Setting
B
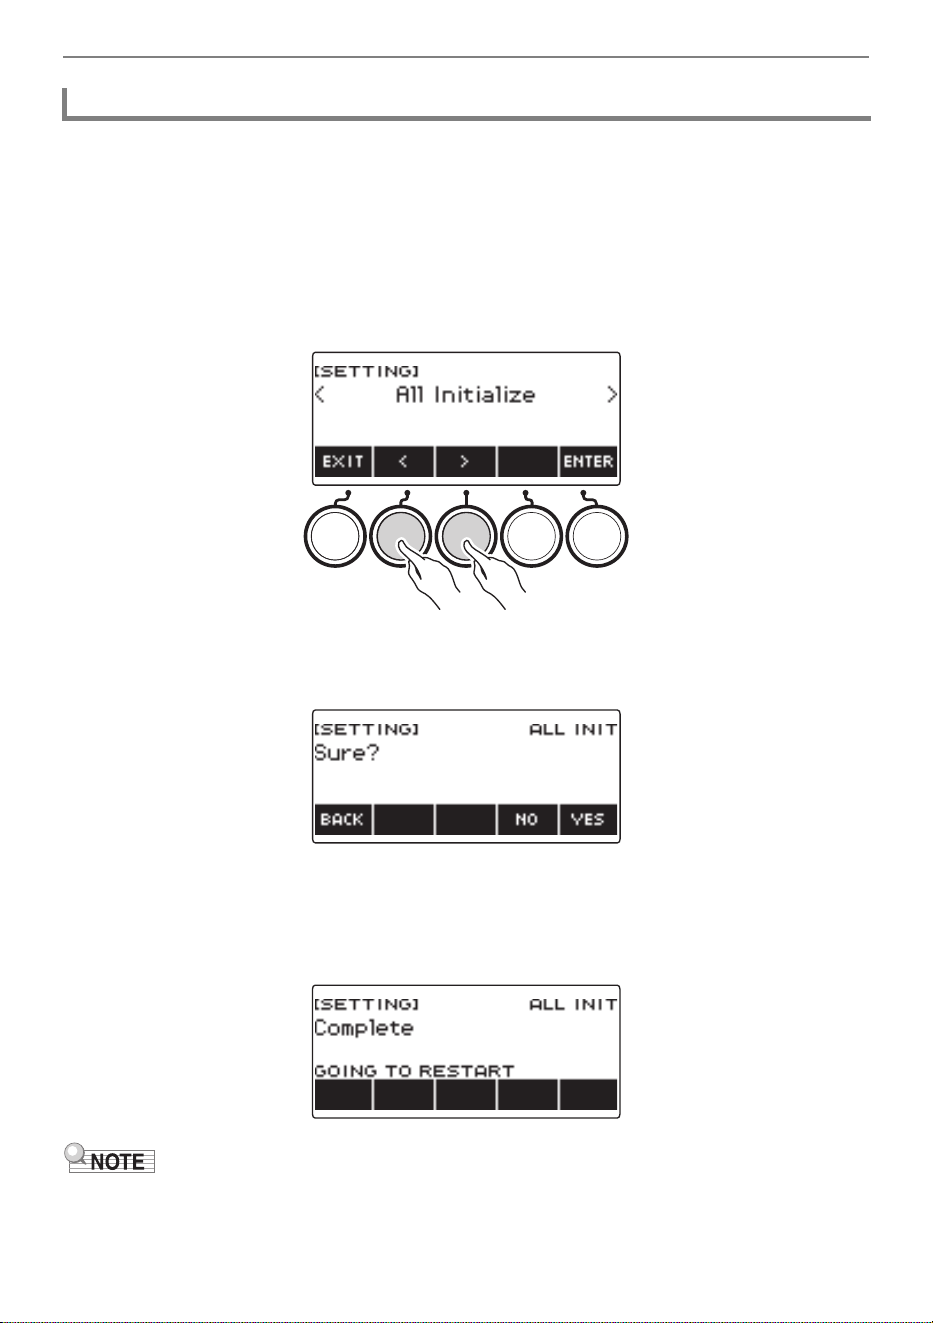
Configuring Settings
EN-234
1.
Press MENU.
This displays the menu screen.
2.
Use U and I to select the 5 buttons menu that includes SETTING.
3.
Press SETTING.
This displays the setting screen.
4.
Use U and I to select “All Initialize”.
5.
Press ENTER.
This displays “Sure?”.
6.
Press YES.
After initialization is complete, the message “Complete” appears for a few seconds, and then the
Digital Keyboard restarts.
• To cancel, press NO.
• Initializing the Digital Keyboard will no restore preset lyric tones to their factory defaults.
Returning Settings to Their Initial Factory Defaults

EN-235
■ MIDI Controllers
Your Digital Keyboard has a MIDI controller function that allows you to connect to an external device
such as a personal computer and send a variety of performance information (MIDI data) to the
composition software of the computer. You can also output performance information and other data
that is not output during normal performance of this Digital Keyboard by operating knobs and buttons.
For information about connecting with a computer, see “Connecting to a Computer and Using MIDI”
(page EN-267).
1.
Press MENU.
This displays the menu screen.
2.
Use U and I to select the 5 buttons menu that includes MIDI CTRL.
3.
Press MIDI CTRL.
This displays the MIDI controller screen.
4.
To exit the MIDI Controller screen, press HOME.
• Sound output from the Digital Keyboard is disabled while the MIDI Controller is being used.
Using the MIDI Controller
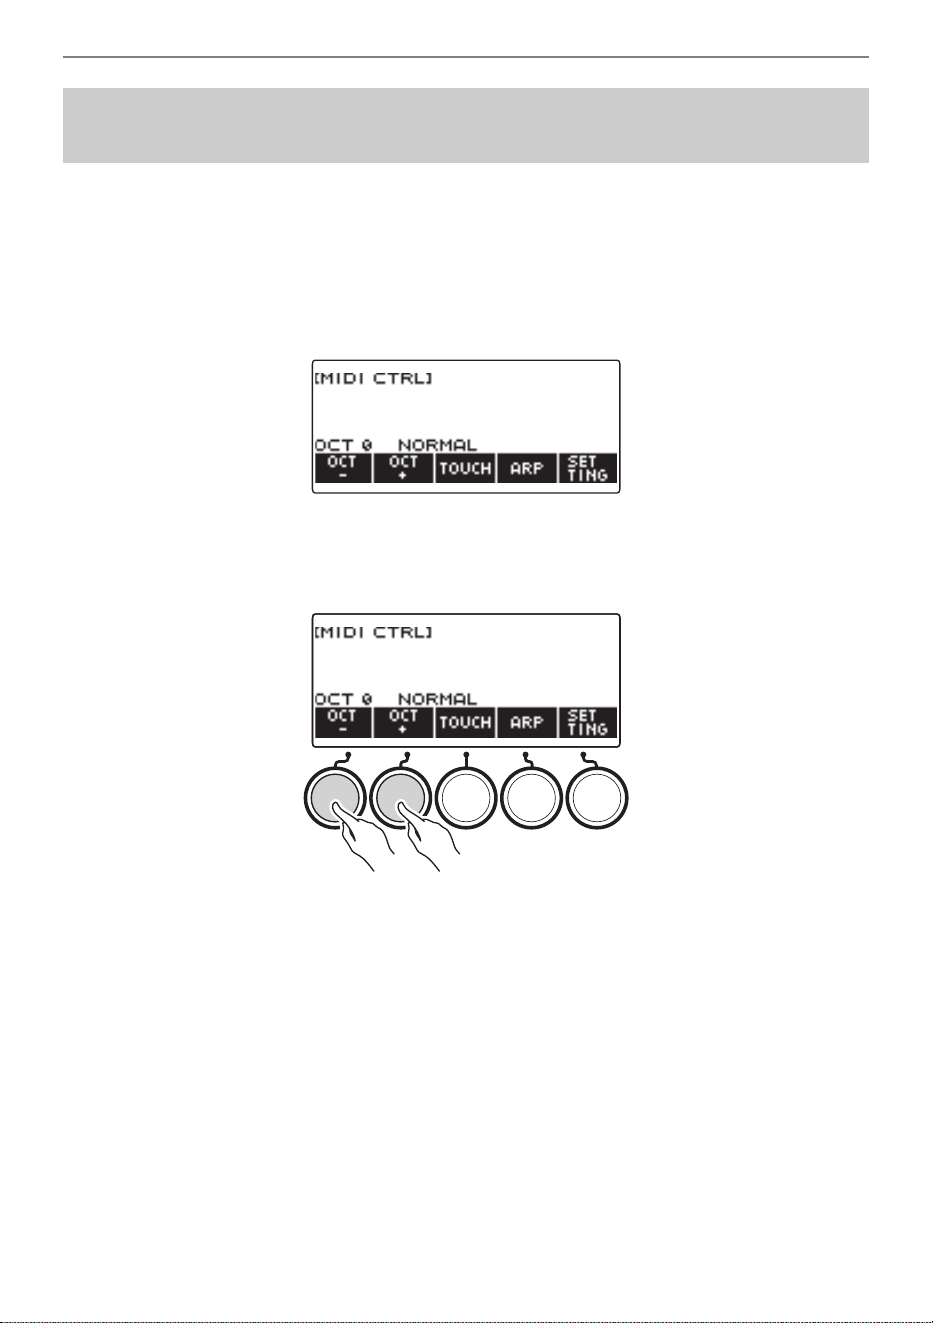
Using the MIDI Controller
EN-236
1.
Press MENU.
This displays the menu screen.
2.
Use U and I to select the 5 buttons menu that includes MIDI CTRL.
3.
Press MIDI CTRL.
This displays the MIDI controller screen.
4.
Use OCT– and OCT+ to change the shift amount.
The displayed “OCT” value changes in accordance with your setting and the NOTE message note
pitch changes in octave units.
• You can specify a value in the range of –3 to +3 octaves.
• To restore the “OCT” value to zero, press OCT– and OCT+ at the same time.
To change the pitch of NOTE message notes in octave
units
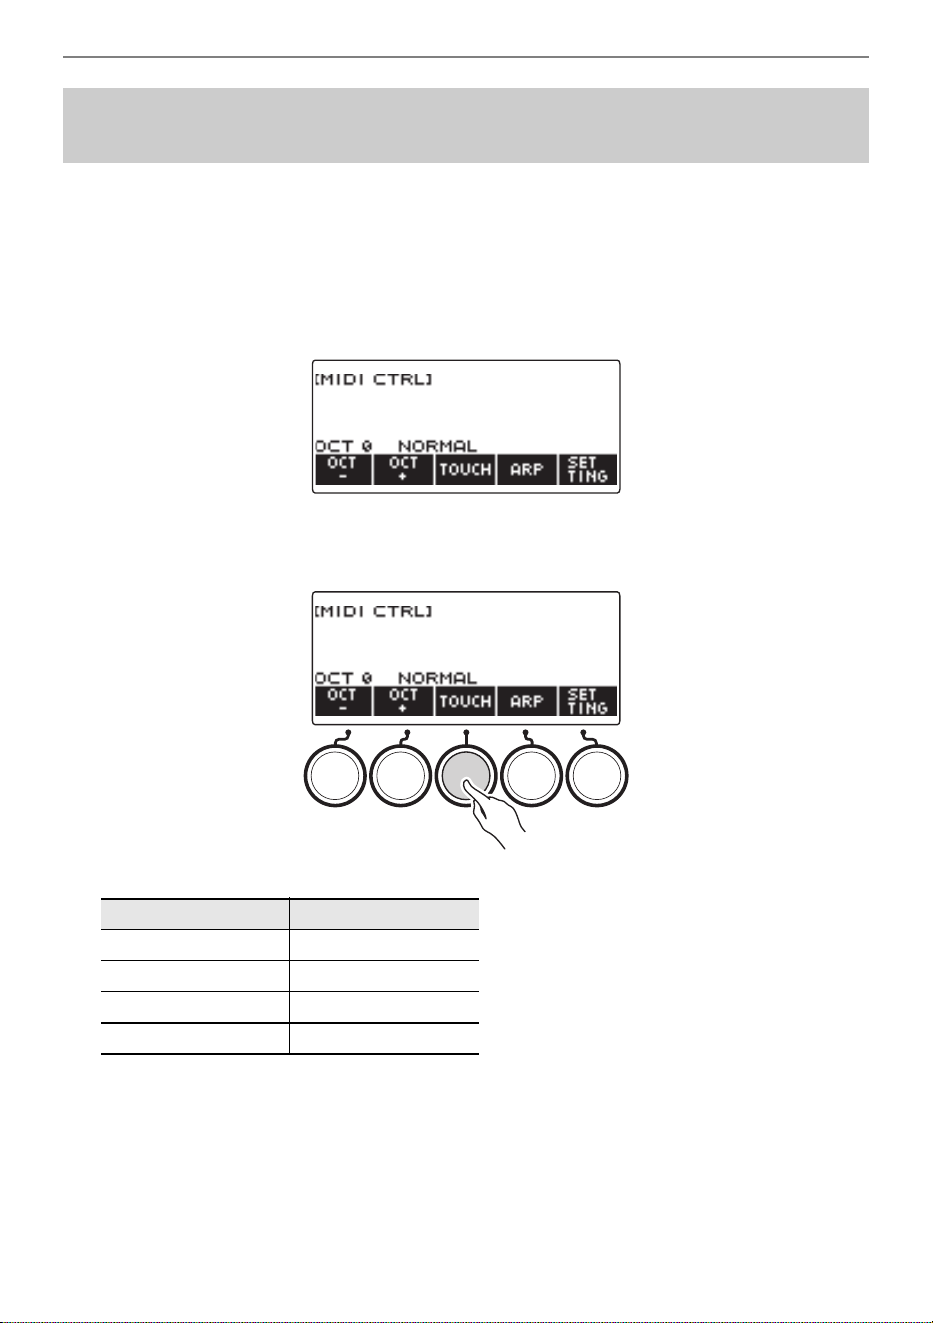
Using the MIDI Controller
EN-237
1.
Press MENU.
This displays the menu screen.
2.
Use U and I to select the 5 buttons menu that includes MIDI CTRL.
3.
Press MIDI CTRL.
This displays the MIDI controller screen.
4.
Press TOUCH and then select the setting you want.
This displays the setting on the screen.
Each press of TOUCH changes the setting.
To adjust the velocity of the NOTE ON message in
accordance with key press intensity
Setting Type Display Name
Off OFF
Light LIGHT
Normal NORMAL
Heavy HEAVY
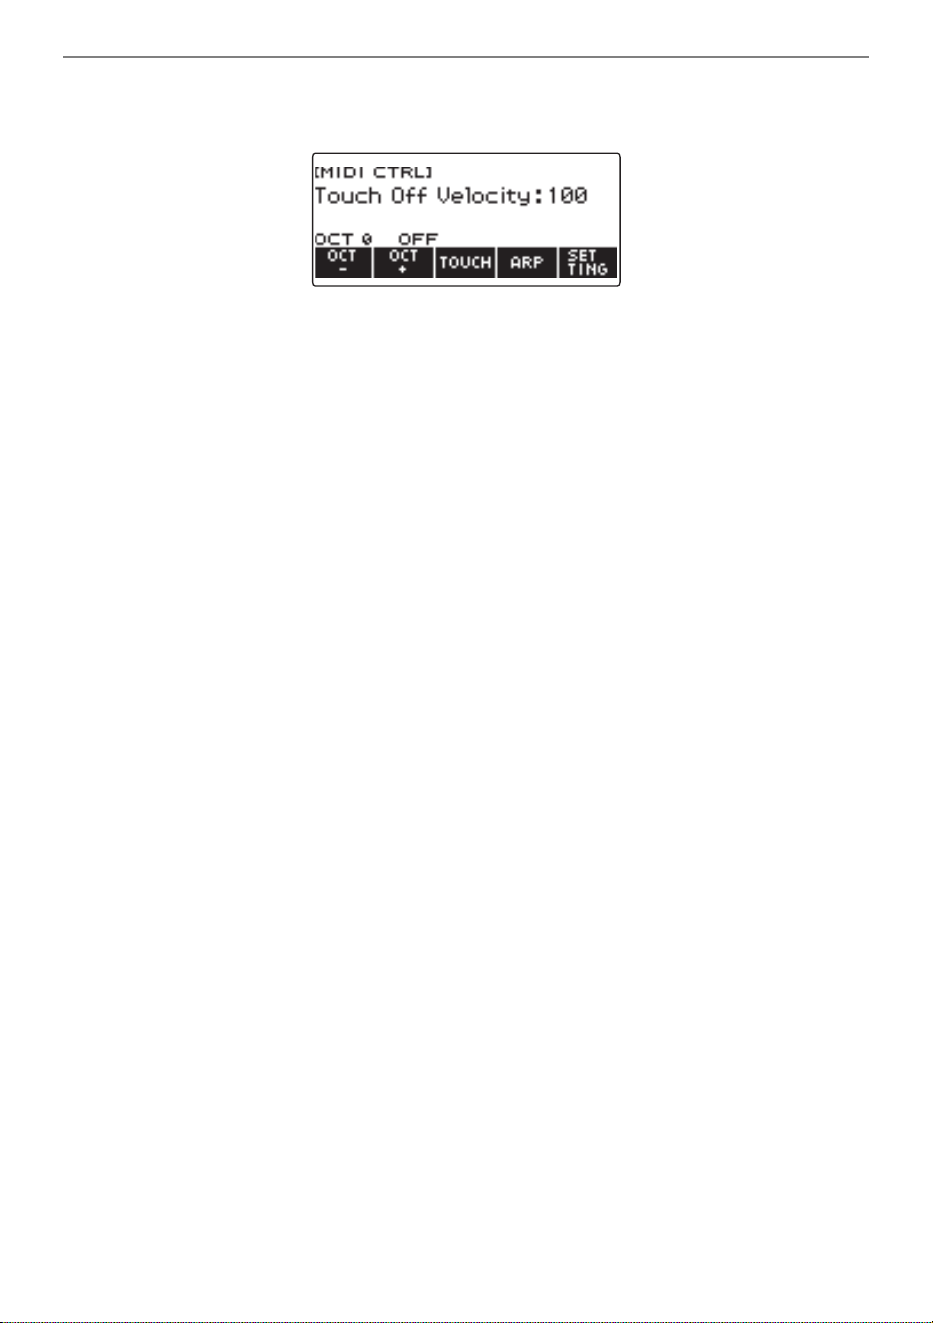
Using the MIDI Controller
EN-238
5.
If you selected Off for the setting, rotate the dial to adjust the velocity of the
NOTE ON message.
• After you rotate the dial once to select a value, you can change the velocity setting further using
– and +.
• To return the setting to its initial default, press – and + at the same time.
• To go back to the previous screen, press BACK.
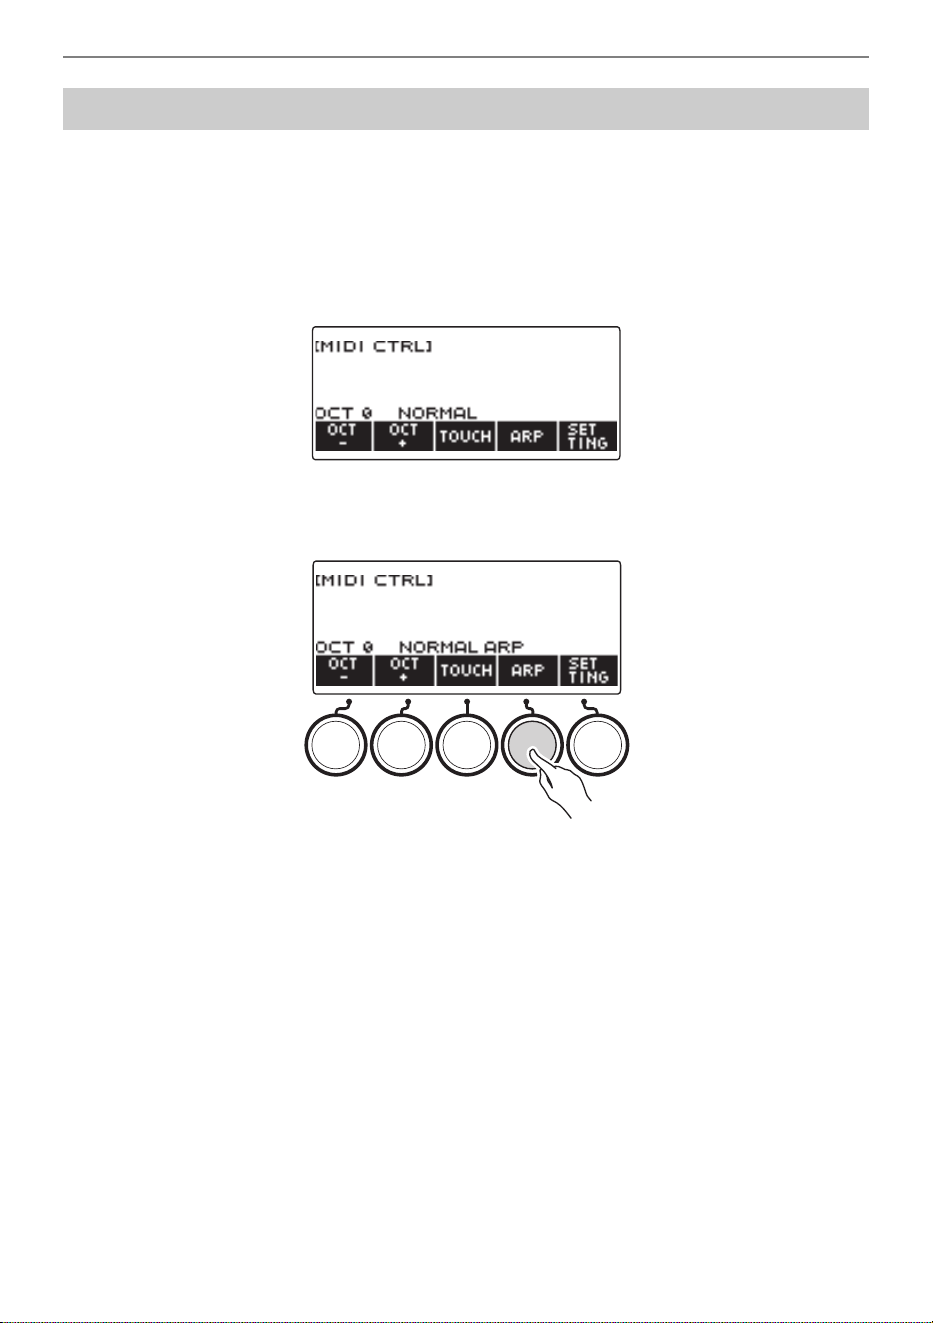
Using the MIDI Controller
EN-239
1.
Press MENU.
This displays the menu screen.
2.
Use U and I to select the 5 buttons menu that includes MIDI CTRL.
3.
Press MIDI CTRL.
This displays the MIDI controller screen.
4.
Press ARP.
This displays “ARP”, which indicates the arpeggiator is turned on.
5.
Long-press ARP.
This displays the arpeggiator screen.
• For information about arpeggiator operations, see “Sounding Arpeggio Phrases Automatically
(Arpeggiator)” (page EN-115).
• Part settings cannot be configured when this function is used in combination with the MIDI
controller.
Using the Arpeggiator
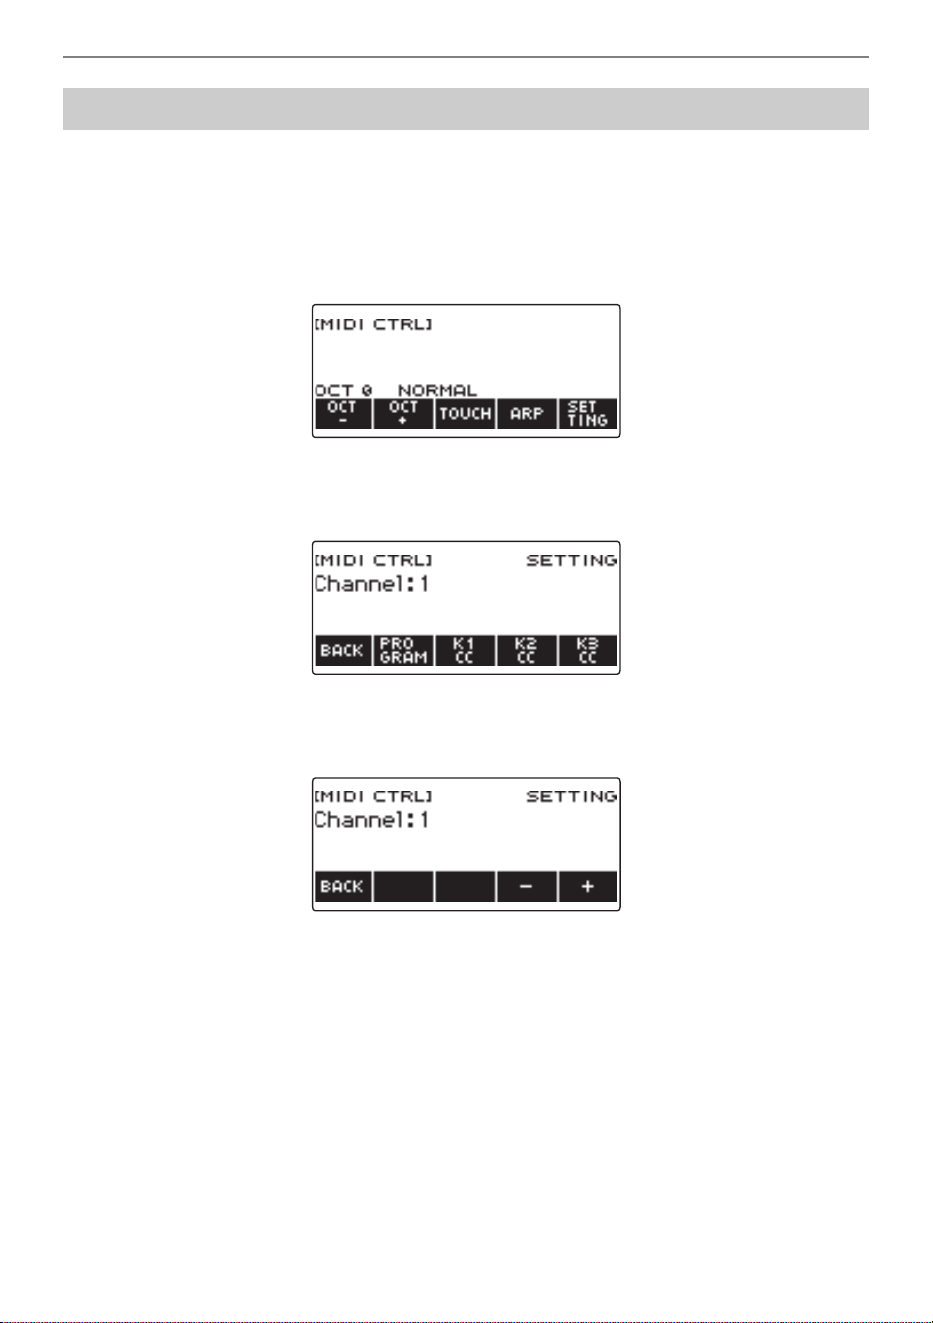
Using the MIDI Controller
EN-240
1.
Press MENU.
2.
Use U and I to select the 5 buttons menu that includes MIDI CTRL.
3.
Press MIDI CTRL.
This displays the MIDI controller screen.
4.
Press SETTING.
This displays the MIDI controller setting screen.
5.
Rotate the dial to change the channel message channel.
This displays the –/+ screen.
• Select a channel within the range of 1 to 16.
• After you rotate the dial once to select a channel, you can change the selection further using –
and +.
• To go back to the previous screen, press BACK.
Changing the Channel Message Channel
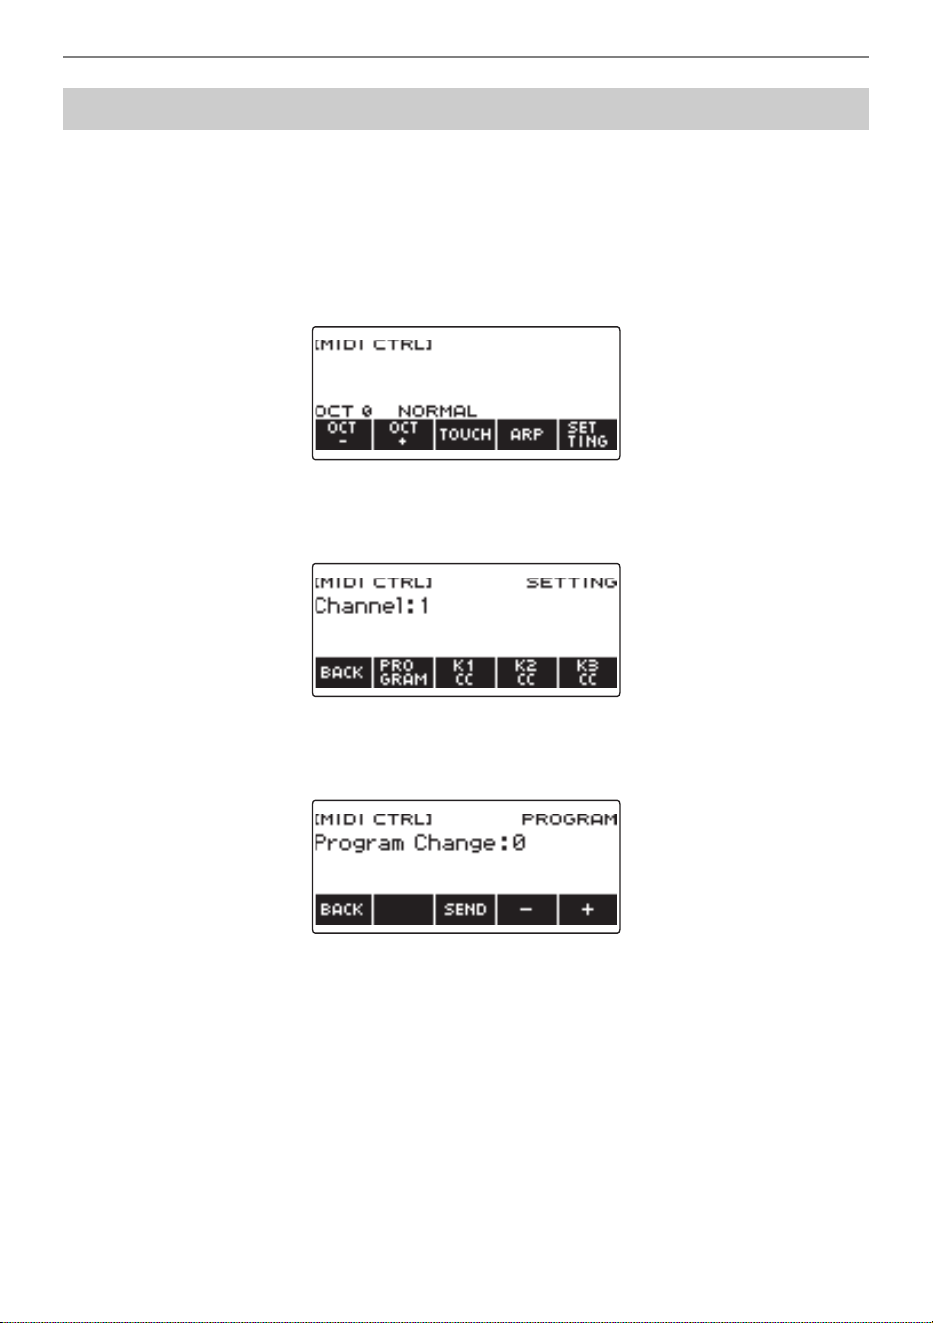
Using the MIDI Controller
EN-241
1.
Press MENU.
This displays the menu screen.
2.
Use U and I to select the 5 buttons menu that includes MIDI CTRL.
3.
Press MIDI CTRL.
This displays the MIDI controller screen.
4.
Press SETTING.
This displays the MIDI controller setting screen.
5.
Press PROGRAM.
This displays the program change send screen.
6.
Rotate the dial or use – and + to select a program change number.
7.
Press SEND.
This sends the program change message.
Sending a Program Change Message
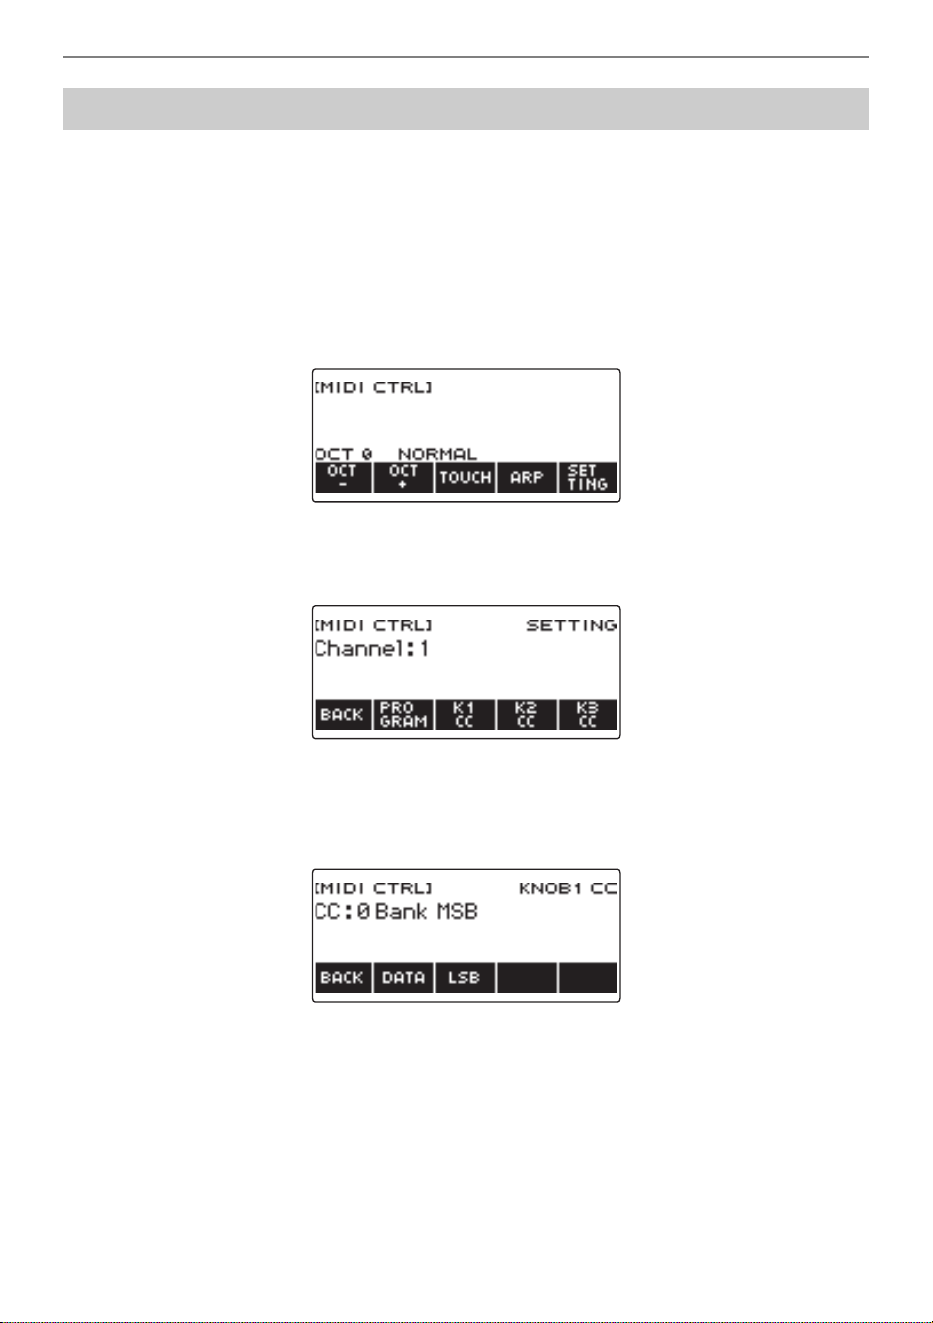
Using the MIDI Controller
EN-242
■ To use a knob for continuous send
1.
Press MENU.
This displays the menu screen.
2.
Use U and I to select the 5 buttons menu that includes MIDI CTRL.
3.
Press MIDI CTRL.
This displays the MIDI controller screen.
4.
Press SETTING.
This displays the MIDI controller setting screen.
5.
Press the button that corresponds to the knob where you want to assign the
Control Change.
This displays the knob setting screen.
Sending a Control Change Message
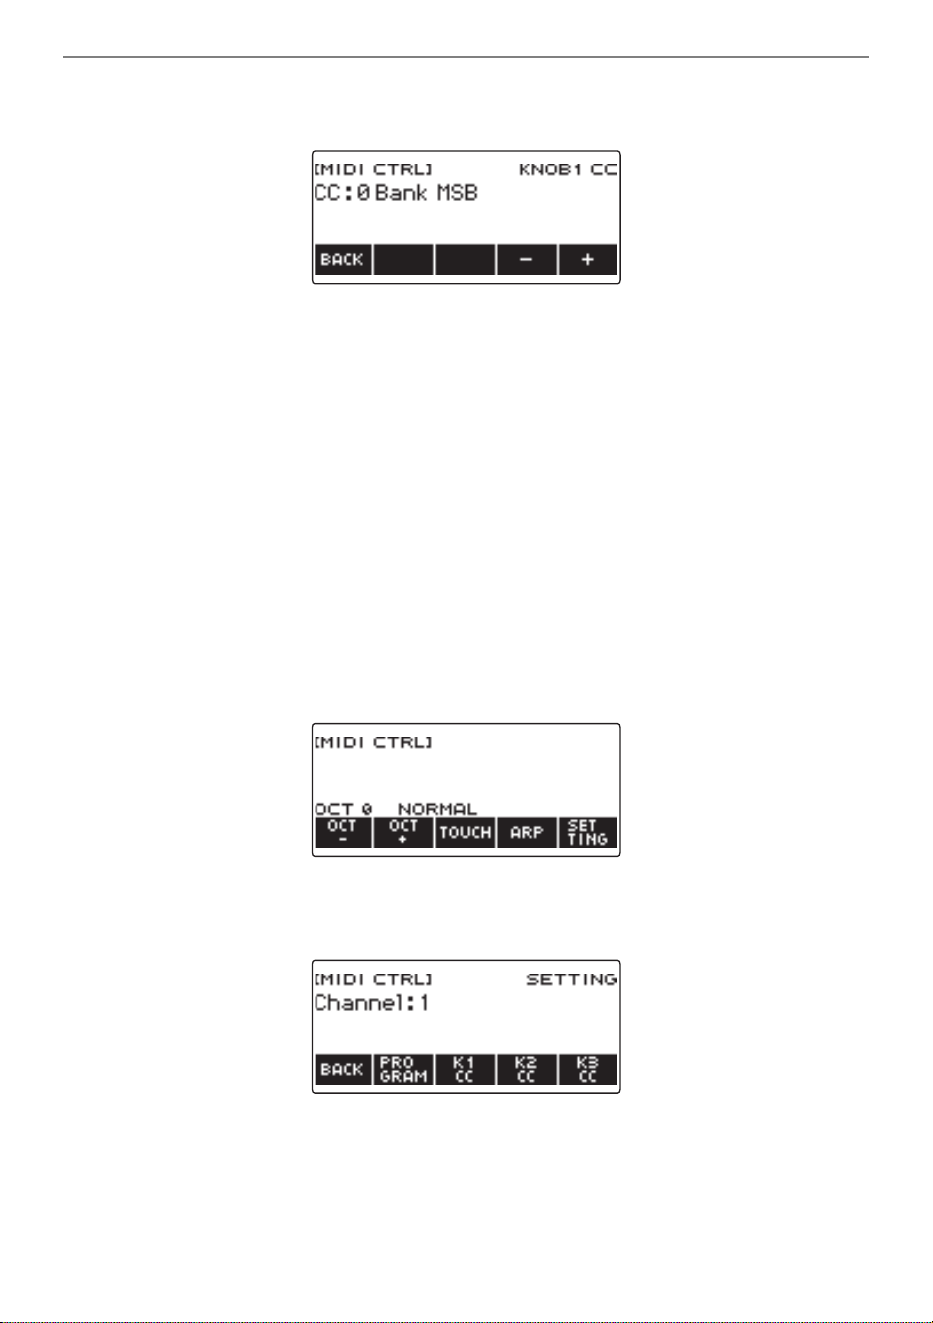
Using the MIDI Controller
EN-243
6.
Rotate the dial to select a control change number.
This displays the –/+ screen.
• You can select a control change number in the range of 0 to 127.
• After you rotate the dial once to select a control change number, you can change the selection
further using – and +.
• To go back to the previous screen, press BACK.
7.
Rotate a knob.
This displays the send value and continually sends the control change message.
■ To use a button operation to send
1.
Press MENU.
This displays the menu screen.
2.
Use U and I to select the 5 buttons menu that includes MIDI CTRL.
3.
Press MIDI CTRL.
This displays the MIDI controller screen.
4.
Press SETTING.
This displays the MIDI controller setting screen.
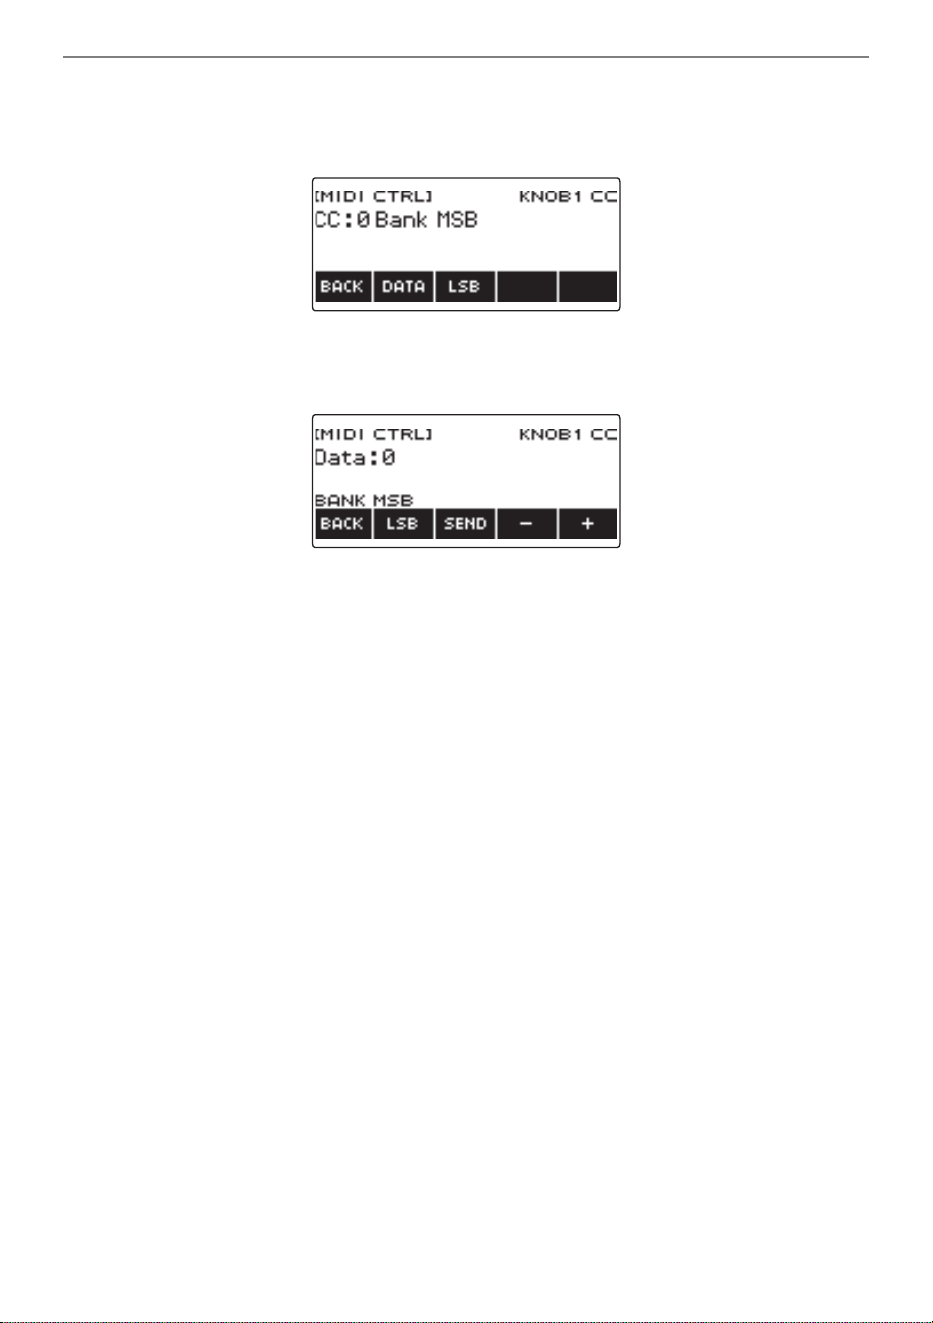
Using the MIDI Controller
EN-244
5.
Press the button that corresponds to the knob where you want to assign the
Control Change.
This displays the knob setting screen.
6.
Press DATA.
This displays the data send screen.
7.
Rotate a knob or the dial, or use – and + to select the data you want.
• Rotating a knob while the data transmission screen is displayed does not send a control change
message.
8.
Press SEND.
This sends a control change message.
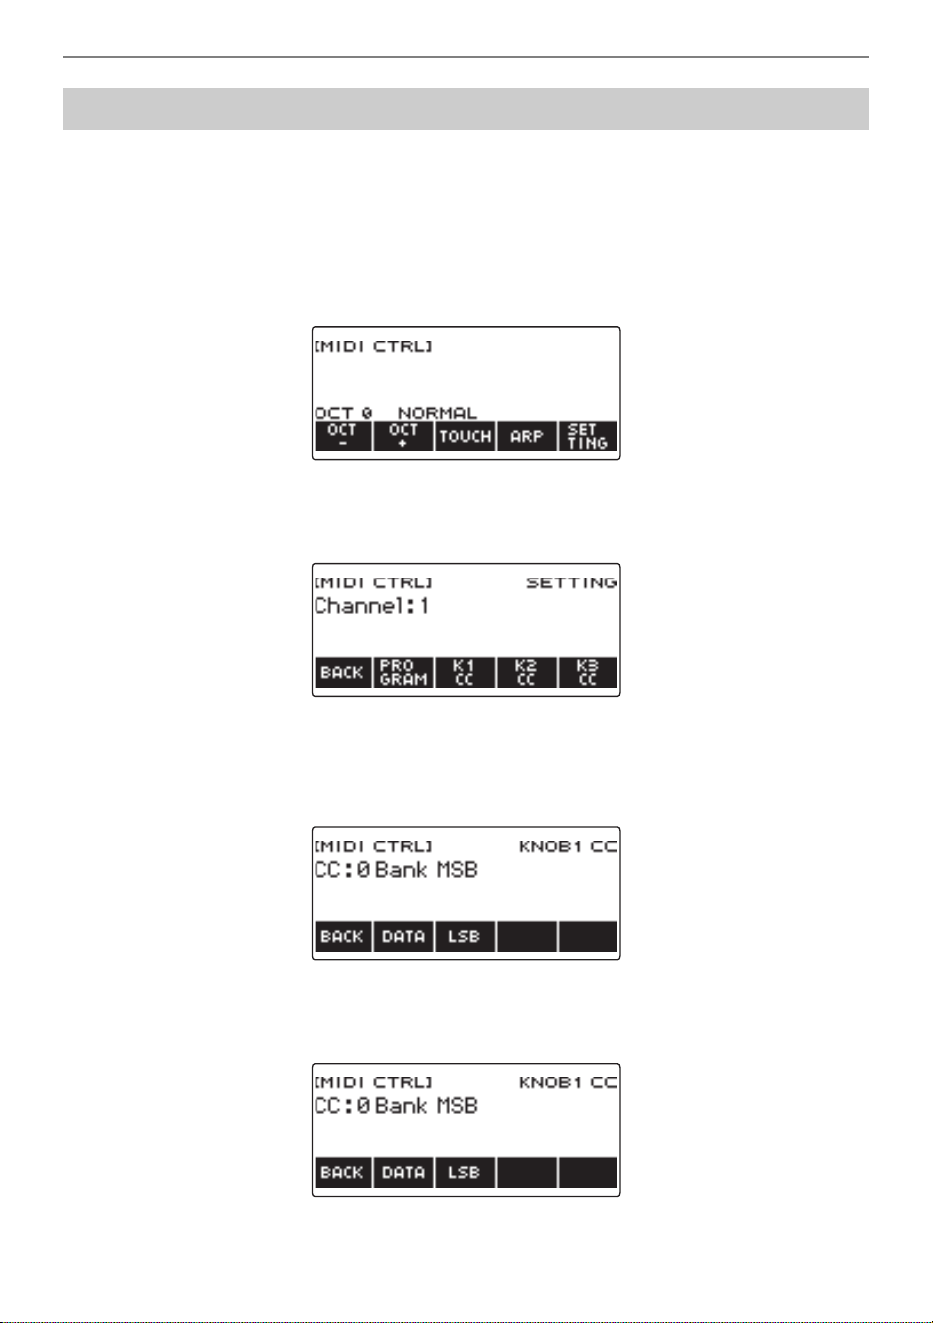
Using the MIDI Controller
EN-245
1.
Press MENU.
This displays the menu screen.
2.
Use U and I to select the 5 buttons menu that includes MIDI CTRL.
3.
Press MIDI CTRL.
This displays the MIDI controller screen.
4.
Press SETTING.
This displays the MIDI controller setting screen.
5.
Press the button that corresponds to the knob where you want to assign the
Control Change.
This displays the knob setting screen.
6.
Select the Control Change MSB or LSB.
This displays the LSB or MSB button.
To switch between the control change MSB and LSB
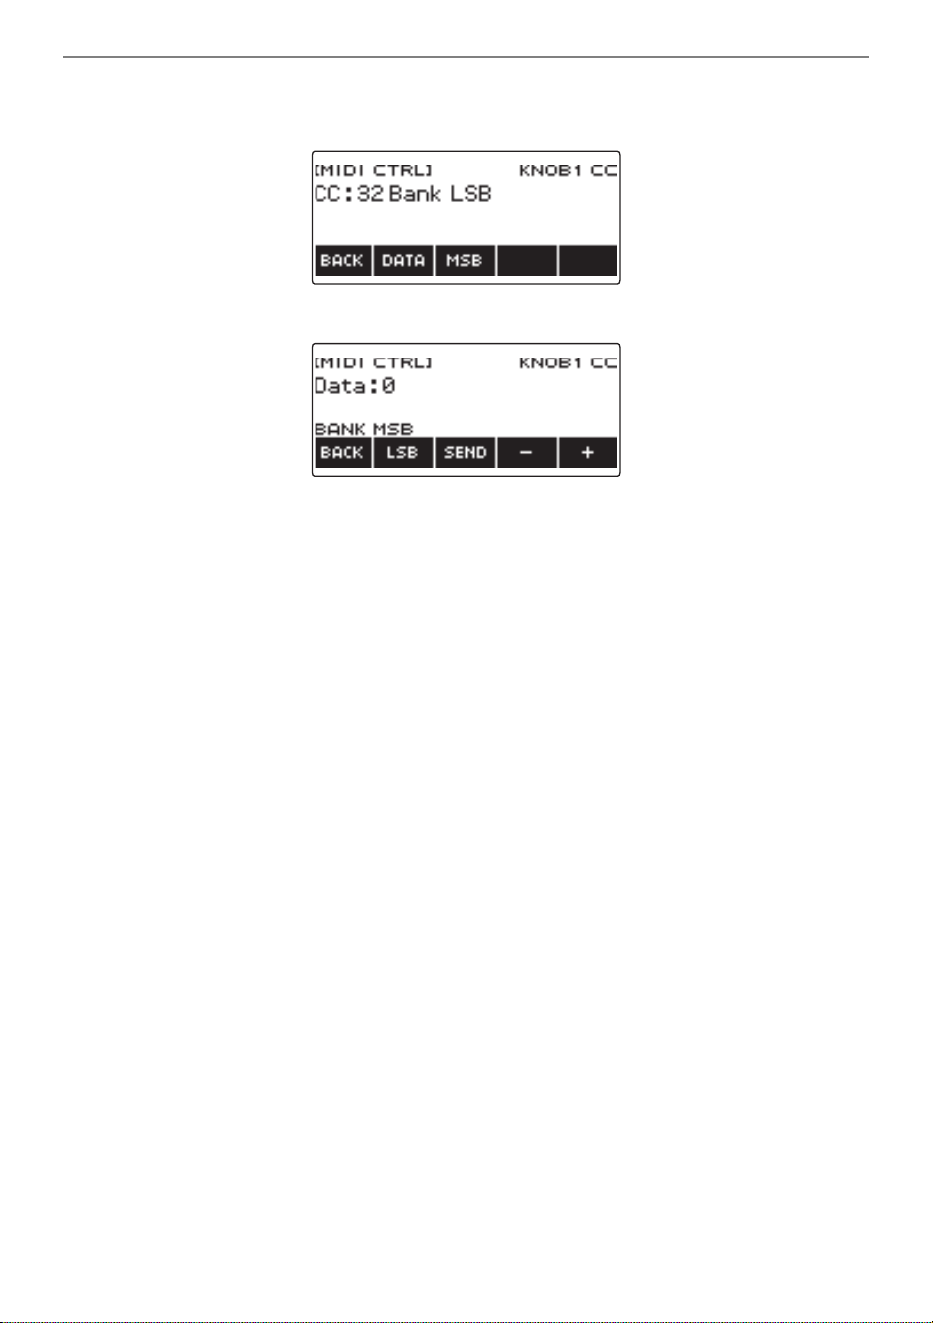
Using the MIDI Controller
EN-246
7.
Press LSB or MSB.
This selects the corresponding control change LSB or MSB.
• This displays the LSB or MSB button, so you can switch between them if you like.
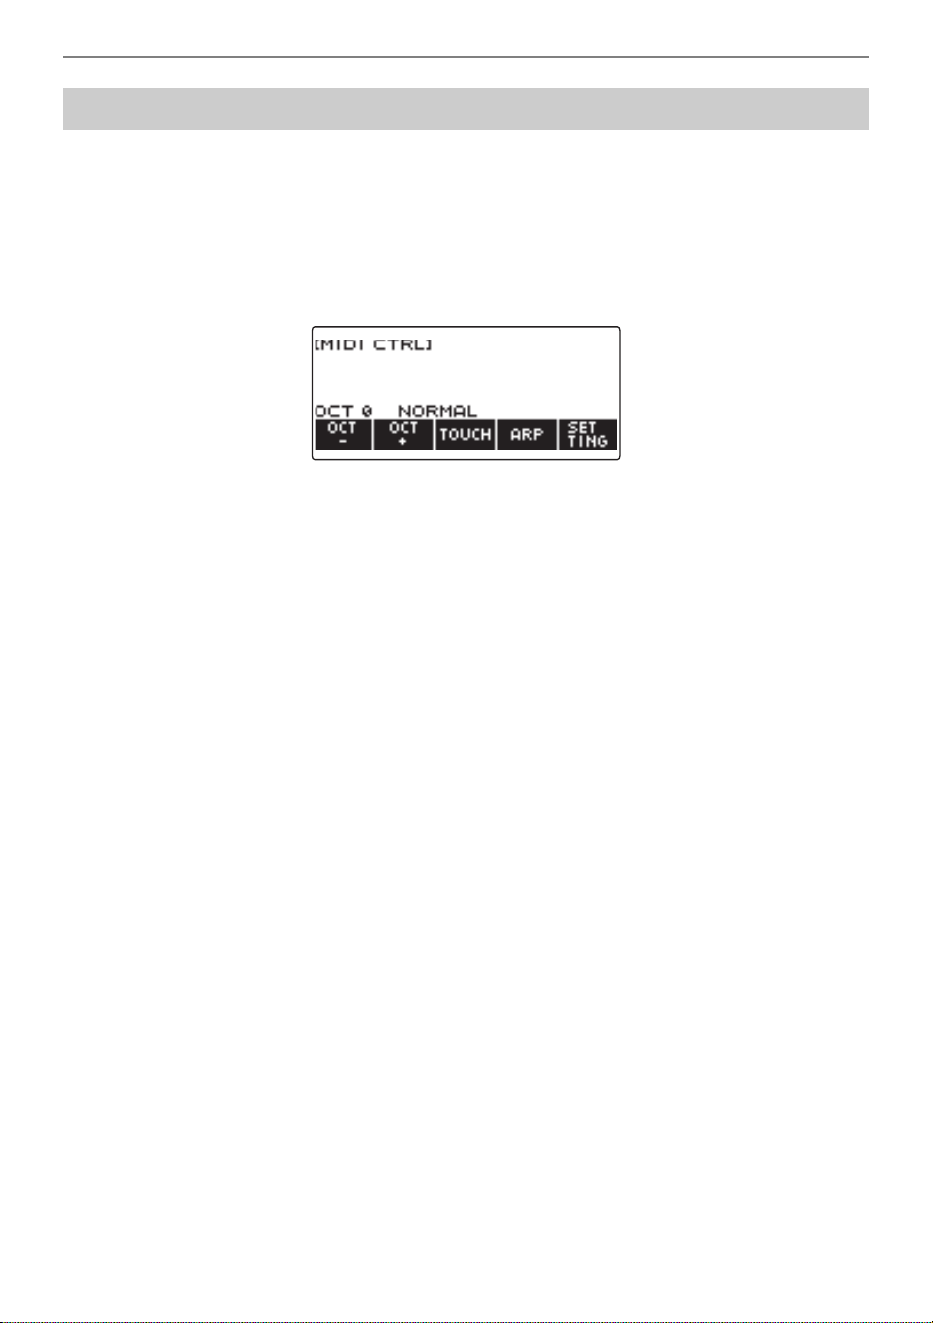
Using the MIDI Controller
EN-247
1.
Press MENU.
This displays the menu screen.
2.
Use U and I to select the 5 buttons menu that includes MIDI CTRL.
3.
Press MIDI CTRL.
This displays the MIDI controller screen.
4.
Press a.
This displays “PLAYING” and sends a system real-time message start.
5.
Press a again.
This causes “PLAYING” to disappear from the display and sends a system real-time message
stop.
To send a system real-time message start/stop
EN-248
Your Digital Keyboard supports the use of a commercially available USB flash drive to perform the
operations below.
• Formatting USB flash drives.
• Saving of Digital Keyboard MY SETUP, recorded song, and other data to a USB flash drive.
• Importing of MY SETUP, recorded song, and other data from a USB flash drive to Digital Keyboard
memory.
• Using the Digital Keyboard to play back general song data (MIDI file audio file) copied to a USB flash
drive using a computer.
– For information about how to save song data to a USB flash drive, see “Saving Digital Keyboard
Data to a USB Flash Drive” (page EN-254).
– For the song data playback operation, see “Selecting a Song on a USB Flash Drive” (page
EN-179).
• Be sure to observe the precautions provided in the documentation that comes with the USB
flash drive.
• Avoid using a USB flash drive under the following conditions. Such conditions can corrupt
data stored on a USB flash drive.
– Areas subjected to high temperature, high humidity, or corrosive gas
– Areas subjected to strong electrostatic charge and digital noise
• Never remove the USB flash drive while data is being written to or loaded from it. Doing so
can corrupt the data on the USB flash drive and damage the USB TO DEVICE port.
• Never insert anything besides a CASIO specified device or a USB flash drive into the USB TO
DEVICE port. Doing so creates the risk of malfunction.
• A USB flash drive can become warm after very long use. This is normal and does not indicate
malfunction.
• Electrostatic charge discharging from your fingers or the USB flash drive to the USB TO
DEVICE port can cause malfunction of the Digital Keyboard. If this happens, turn the
keyboard off and then back on again.
Using a USB Flash Drive
USB Flash Drive and USB TO DEVICE Port Precautions
Copyrights
You are allowed to use recordings for your personal use. Any reproduction of an audio or music
format file without the permission of its copyright holder is strictly prohibited under copyright laws
and international treaties. Also, making such files available on the Internet or distributing them to
third parties, regardless of whether such activities are conducted with or without compensation, is
strictly prohibited under copyright laws and international treaties. CASIO COMPUTER CO., LTD.
shall not be held in any way liable for any use of this Digital Keyboard that is illegal under copyright
laws.
Using a USB Flash Drive
EN-249
Your Digital Keyboard supports USB flash drives formatted to FAT (FAT32 or exFAT). If your USB flash
drive is formatted to a different file system, use the Windows format function on a computer to reformat
it to FAT (FAT32 or exFAT). Do not use quick format.
• Never insert anything besides a CASIO specified device or a USB flash drive into the USB TO
DEVICE port.
• When you perform a USB flash drive operation or turn on the Digital Keyboard while a USB
flash drive is plugged in, the Digital Keyboard initially needs to perform a “mounting” process
to prepare for data exchange with the USB flash drive. Digital Keyboard operations are
momentarily disabled while a mounting process is being performed.
– “MOUNTING” is shown on the display while a mounting process is in progress.
– Do not attempt to perform any operation on the Digital Keyboard while a mounting process
is in progress.
– It may take up to 10 or 20 seconds or even longer for the USB flash drive mounting process
to finish.
– A USB flash drive mounting process needs to be performed each time it is connected to the
Digital Keyboard.
• In the case of an exFAT format USB flash drive, the number of importable files may be limited
if long file names are used.
• Mounting a USB flash drive on this Digital Keyboard creates a folder named “MUSICDAT” in the
drive’s root directory (if a MUSICDAT folder does not already exist there). Use this folder when
exchanging data between the Digital Keyboard and USB flash drive.
Inserting and Removing a USB Flash Drive on the Digital
Keyboard
Supported USB Flash Drives
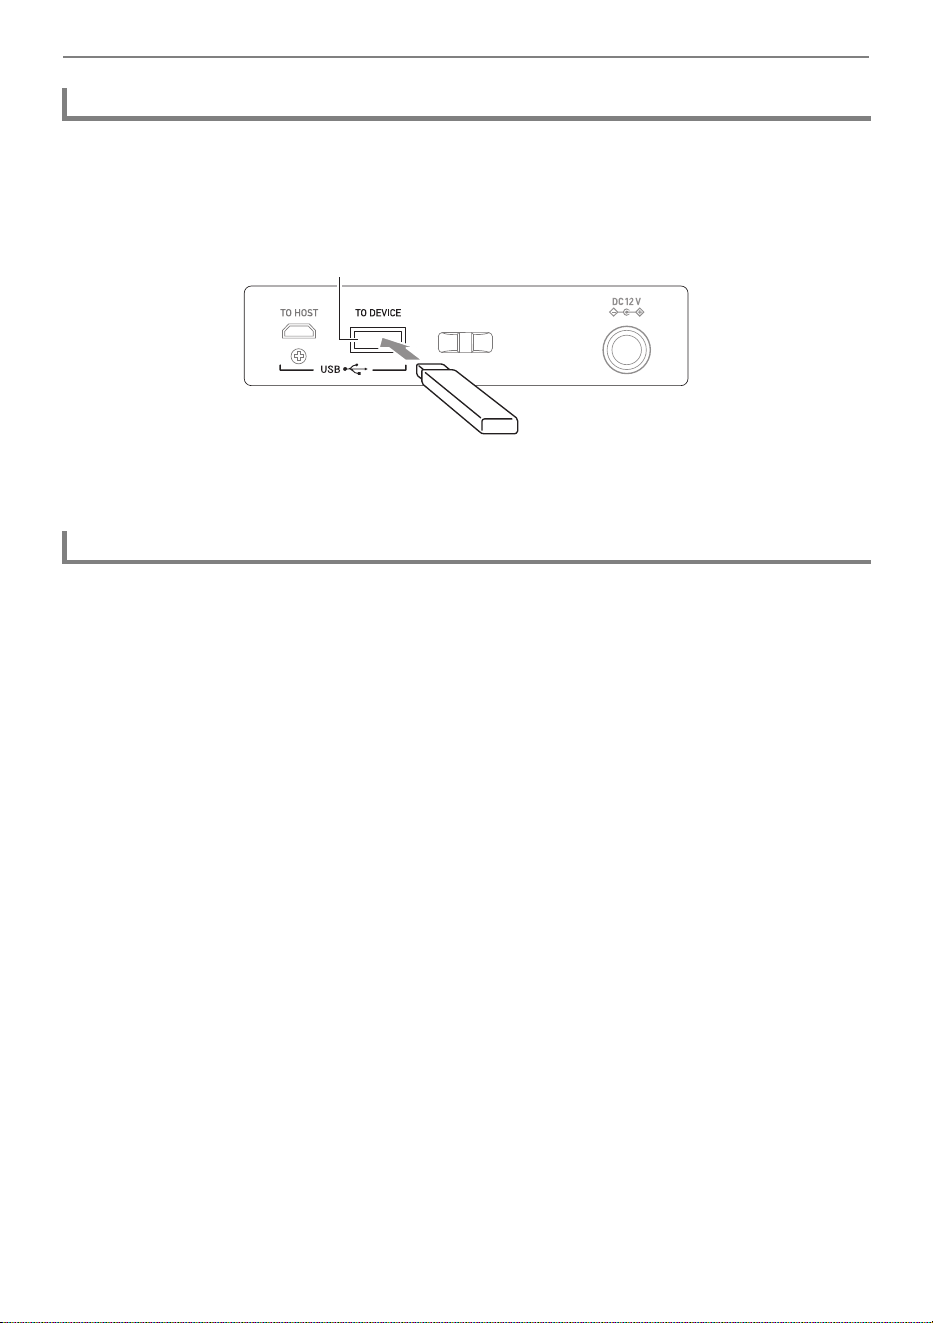
Using a USB Flash Drive
EN-250
1.
As shown in the illustration below, insert a USB flash drive into the Digital
Keyboard’s USB TO DEVICE port.
• Carefully push the USB flash drive in as far as it goes. Do not use undue force when inserting
the USB flash drive.
1.
Check to confirm that there is no data exchange operation being performed, and
then pull the USB flash drive straight out.
Mounting a USB Flash Drive on the Digital Keyboard
Removing a USB Flash Drive From the Digital Keyboard
USB TO DEVICE port
USB flash drive
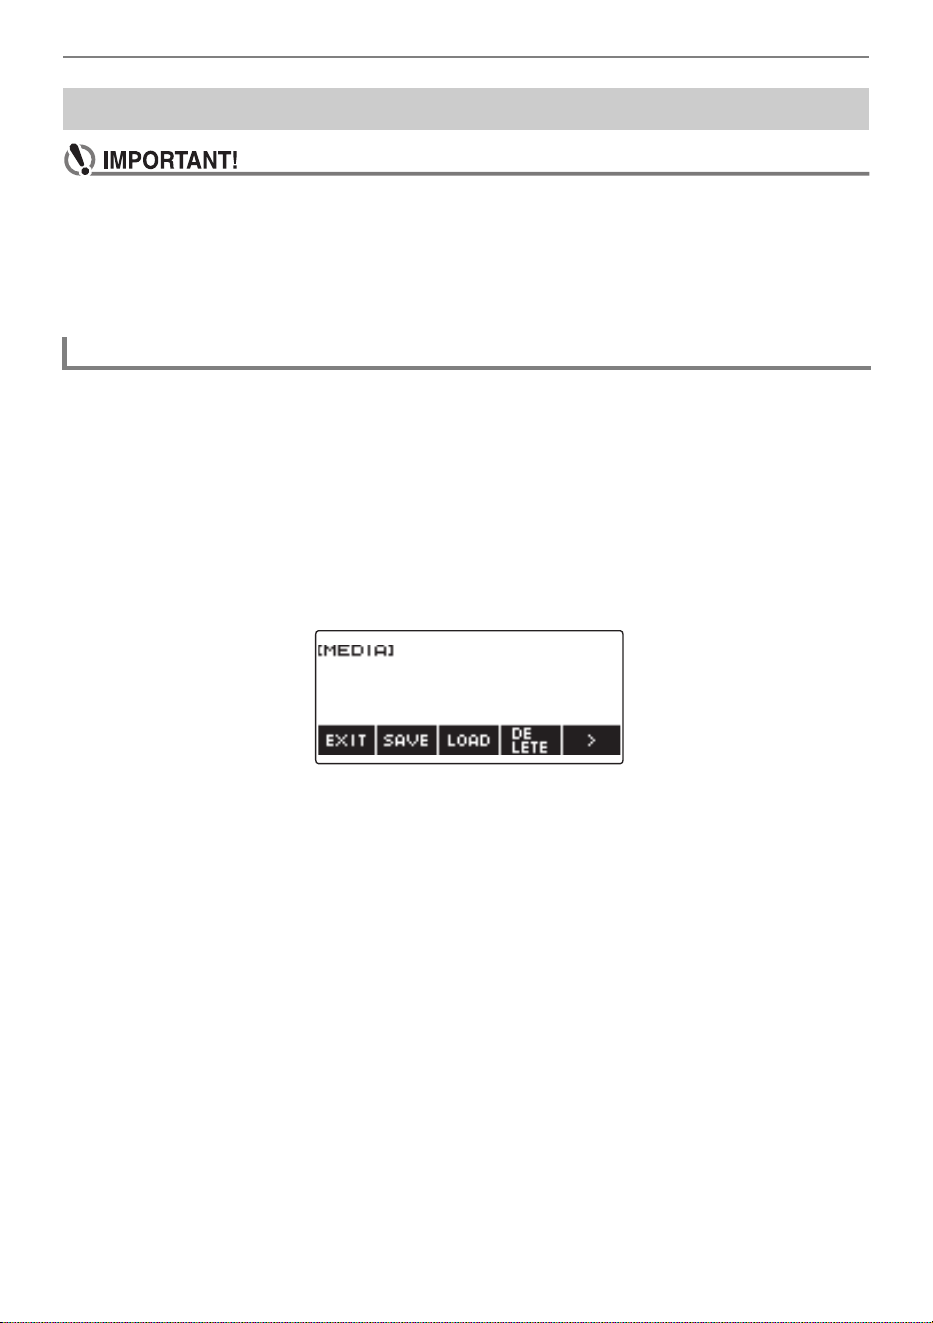
Using a USB Flash Drive
EN-251
• Be sure to format a USB flash drive on the Digital Keyboard before using it for the first time.
• Formatting a USB flash drive deletes all data currently stored on it. Before formatting a USB
flash drive, make sure it does not have any valuable data stored on it.
• The format operation performed by this Digital Keyboard is a “quick format”. If you want to
completely delete all of the data on a USB flash drive, format it on your computer or some
other device.
1.
Insert the USB flash drive you want to format into the Digital Keyboard’s USB TO
DEVICE port.
2.
Press MENU.
This displays the menu screen.
3.
Use U and I to select the 5 buttons menu that includes MEDIA.
4.
Press MEDIA.
This displays the media screen.
• This screen does not appear until the mounting process is complete.
5.
Use U and I to select the 5 buttons menu that includes FORMAT.
6.
Press FORMAT.
This displays “Sure?”.
7.
Press YES.
This formats the USB flash drive.
• To cancel, press NO.
USB Flash Drive Formatting
USB flash drive formatting
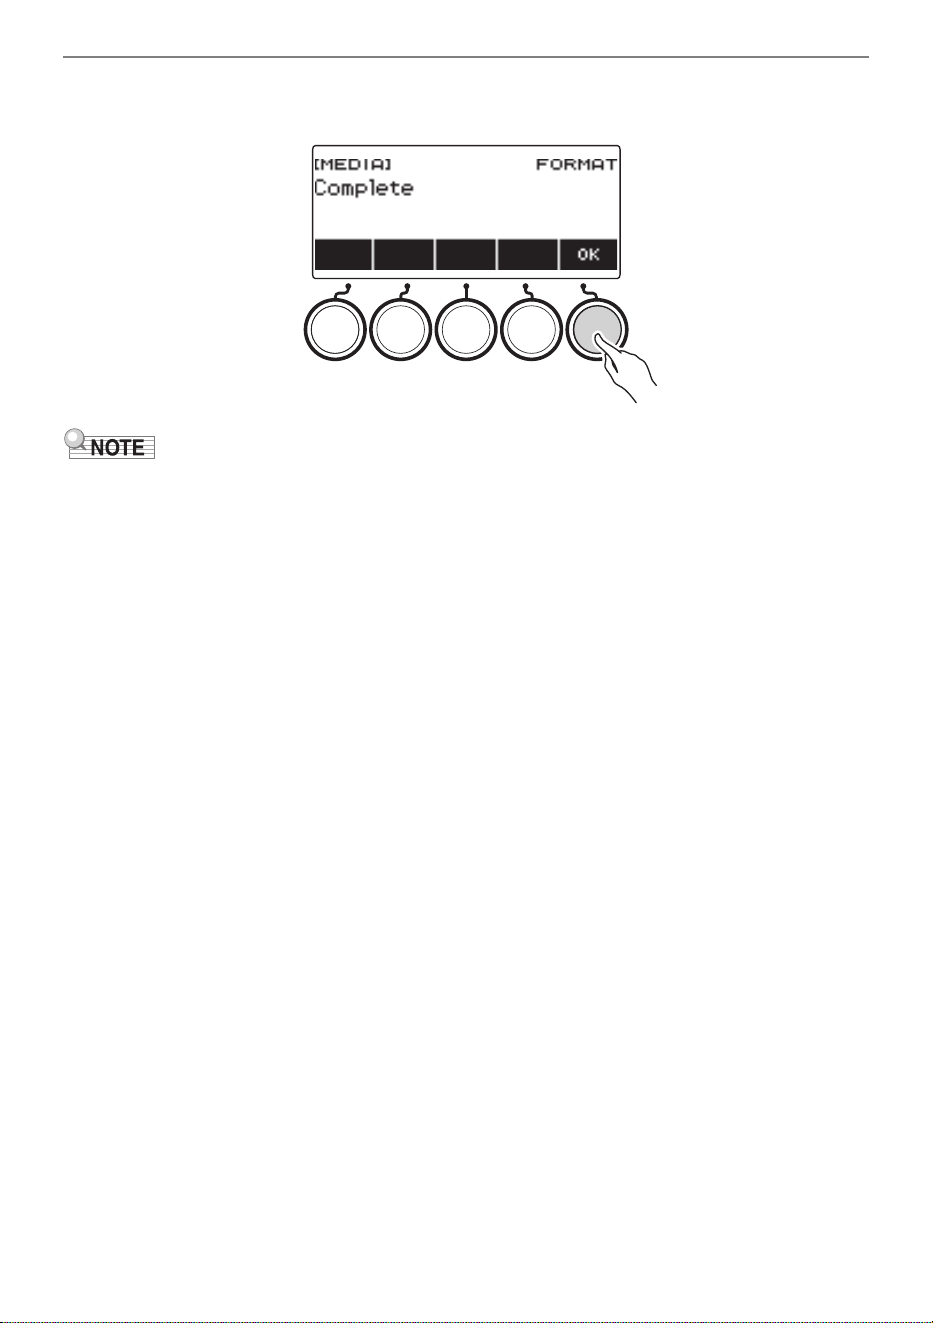
Using a USB Flash Drive
EN-252
8.
When “Complete” appears on the display, press OK.
This exits the formatting operation.
• Formatting a USB flash drive on the Digital Keyboard creates a folder named “MUSICDAT” in its root
directory. Use this folder when exchanging data between the Digital Keyboard and USB flash drive.
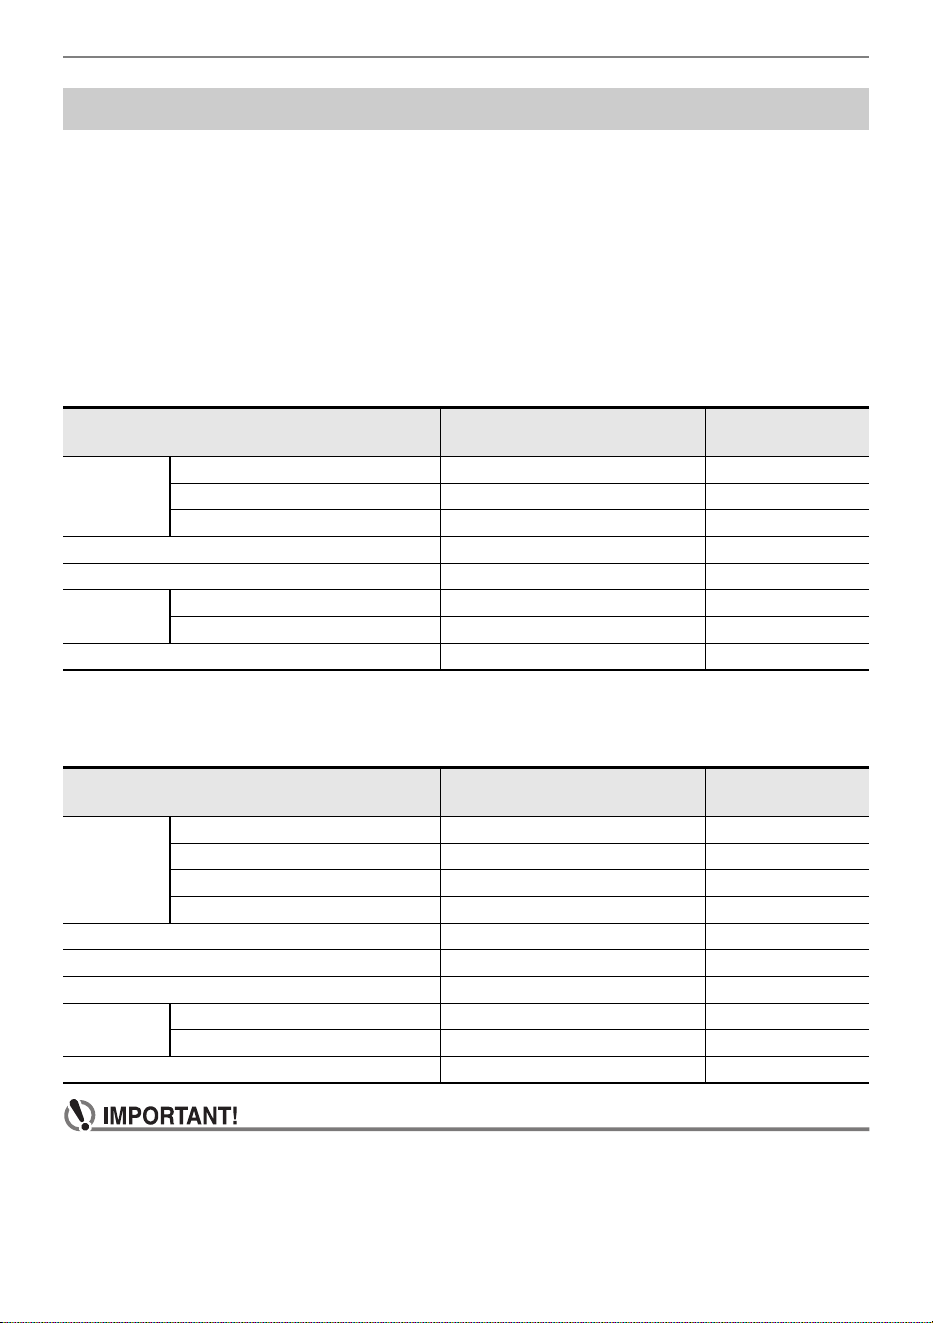
Using a USB Flash Drive
EN-253
The section provides information about the operations below.
• Saving Digital Keyboard data to a USB flash drive
• Importing Data (Files) from a USB Flash Drive to Digital Keyboard Memory
• Deleting Digital Keyboard Importable Data (Files) on a USB Flash Drive
• Renaming Digital Keyboard Importable Data (Files) on a USB Flash Drive
■ Data Types
Data types supported by your Digital Keyboard are those shown in the table below. The text in the
“Displayed Type Name” column is displayed for the data type on the Digital Keyboard’s LCD.
• Digital Keyboard → USB Flash Drive
You can store the data shown in the table below onto a USB flash drive.
• USB Flash Drive → Digital Keyboard
You can import the data shown in the table below from a USB flash drive into Digital Keyboard memory,
rename it, and delete it.
• Even if a file name has one of the extensions shown in the table above, you may not be able to
import it into Digital Keyboard memory if the data was created with a non-compatible device,
etc.
USB Flash Drive Operations
Data Type Displayed Type Name
File Name
Extension
Songs Tone Recording TONE REC TRF, MID
Rhythm Recording RHYTHM REC RRF, MID
Multi-track Recording MULTI TRACK REC MRF, MID
Registration Memory (Bank Unit) REGISTRATION BANK RBK
MY SETUP MY SETUP MYS
Sampling Sampled melody SAMPLING MELODY SPM
Sampled drum SAMPLING DRUM SPD
All data above + All Lyric Tones ALL DATA DAL
Data Type Displayed Type Name
File Name
Extension
Songs User Songs USER SONG CMF, MID
Tone Recording TONE REC TRF
Rhythm Recording RHYTHM REC RRF
Multi-track Recording MULTI TRACK REC MRF
User Rhythms USER RHYTHM AC7, CKF, Z00
Registration Memory (Bank Unit) REGISTRATION BANK RBK
MY SETUP MY SETUP MYS
Sampling Sampled melody SAMPLING MELODY SPM
Sampled drum SAMPLING DRUM SPD
All data above + All Lyric Tones ALL DATA DAL
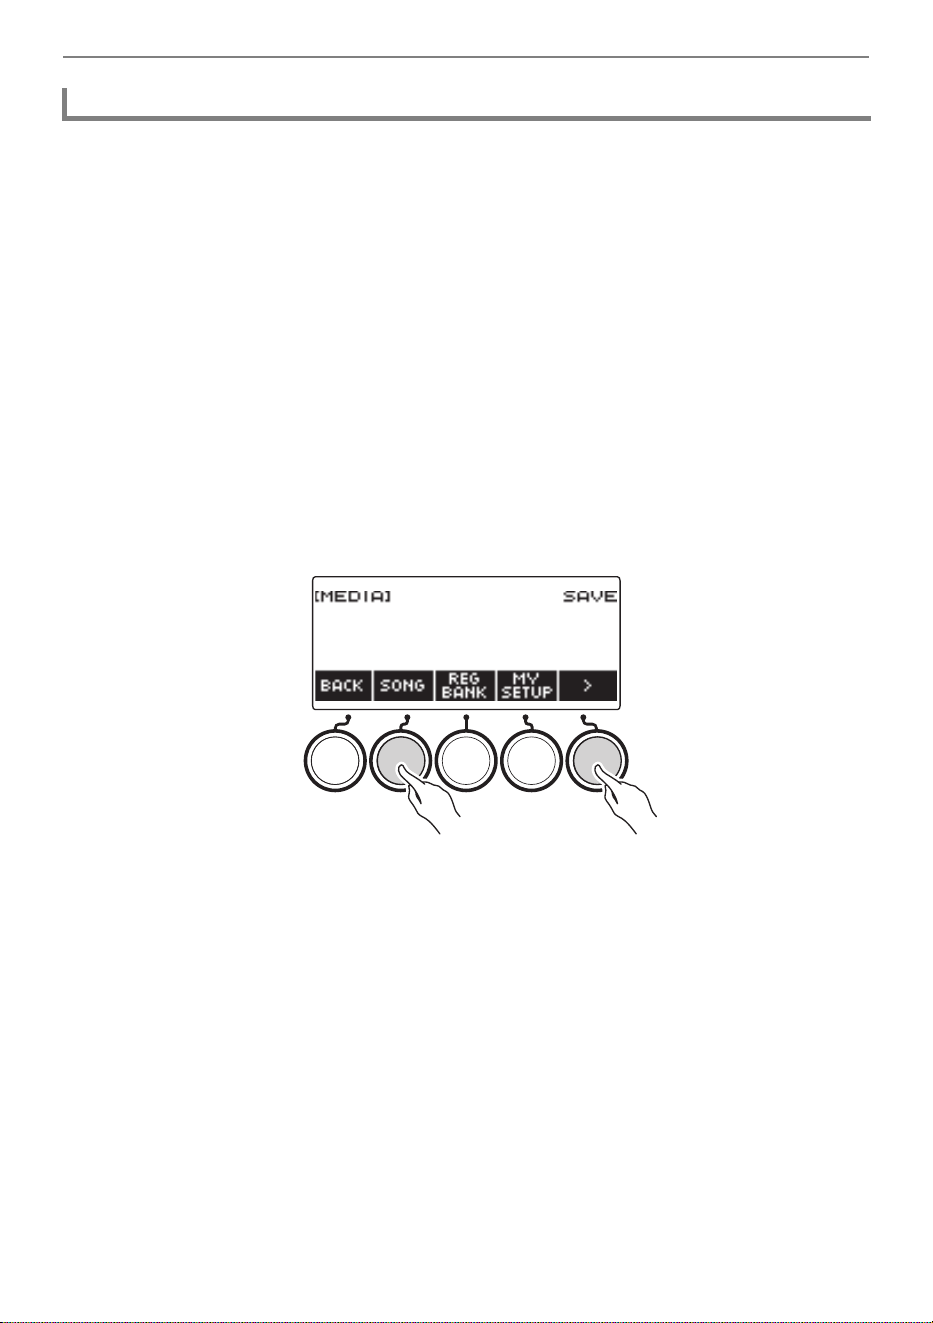
Using a USB Flash Drive
EN-254
1.
Insert the USB flash drive into the Digital Keyboard’s USB TO DEVICE port.
2.
Press MENU.
This displays the menu screen.
3.
Use U and I to select the 5 buttons menu that includes MEDIA.
4.
Press MEDIA.
This displays the media screen.
5.
Press SAVE.
6.
Press the button that corresponds to the data type you want to save.
• If you select ALL DATA as the data type, steps 7 and 8 are not necessary. Proceed to step 9.
• If you pressed the SONG button, press the button that corresponds to the type of song data you
want to save. If you pressed the TONE button or RHYTHM button as the data type, next select
the file type and then advance to step 9. If you pressed the PART OFF button for the data type,
advance to step 9. If you pressed SAMPLING, press the button that corresponds to the type of
sampled data you want to save and then advance to step 9.
7.
Rotate the dial or use – and + to select the data you want to save.
8.
Press SELECT.
• If the data type you want to save is a multi-track recording, you also need to select a file type
(file name extension).
9.
Rename the file.
• For information about viewing and editing text, see “Inputting Characters” (page EN-23).
10.
To confirm the file name, press CONFIRM.
This displays “Sure?”.
• The message “Replace?” appears if there is already data with the same name in the USB flash
drive’s “MUSICDAT” folder.
Saving Digital Keyboard Data to a USB Flash Drive
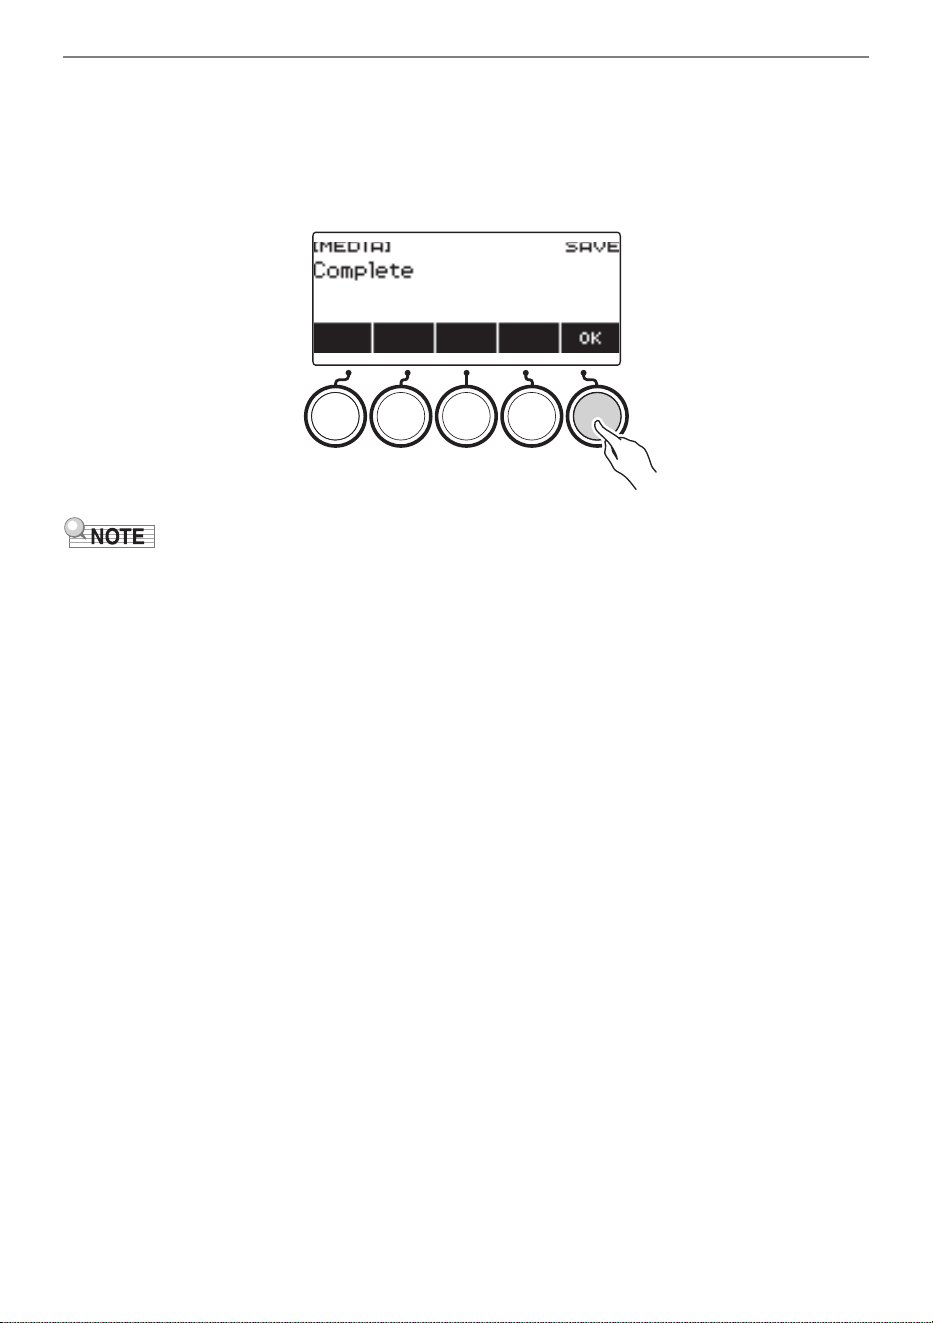
Using a USB Flash Drive
EN-255
11.
Press YES to save the file.
This saves the file to the USB flash drive.
• To cancel, press NO.
• If you are saving ALL DATA, the save operation can take several minutes.
12.
When “Complete” appears on the display, press OK.
• When saving Multi-track Recording data as a standard MIDI file (SMF), only the system track data is
saved if the system track contains data. If the system track does not contain any data, only the solo
track data is saved.
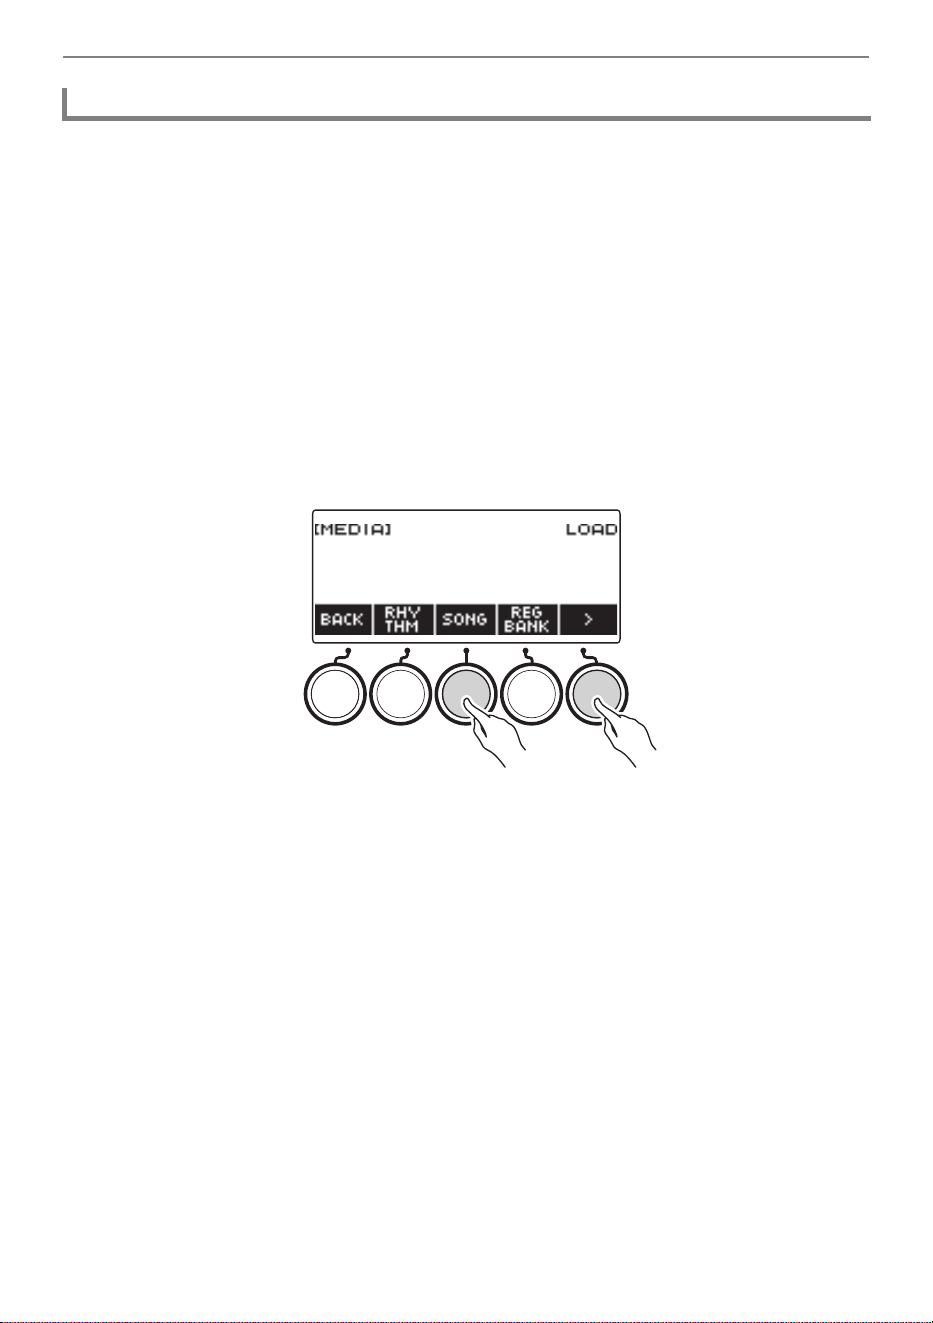
Using a USB Flash Drive
EN-256
1.
Insert the USB flash drive into the Digital Keyboard’s USB TO DEVICE port.
2.
Press MENU.
This displays the menu screen.
3.
Use U and I to select the 5 buttons menu that includes MEDIA.
4.
Press MEDIA.
This displays the media screen.
5.
Press LOAD.
6.
Press the button that corresponds to the type of data you want to load.
• If you pressed SONG, press the button that corresponds to the type of song data you want to
load. If you pressed SAMPLING, press the button that corresponds to the type of sampled data
you want to load.
7.
Rotate the dial or use – and + to select the file you want to load.
This displays the file name extension of the selected file.
8.
Press SELECT.
• If you are importing tone recording, rhythm recording, sampled, or all data, advance to step 11.
9.
Rotate the dial to select the import destination number.
10.
Press SELECT.
This displays “Sure?”.
• “Replace?” is displayed if data already exists in the destination.
Loading Data From a USB Flash Drive to Digital Keyboard Memory
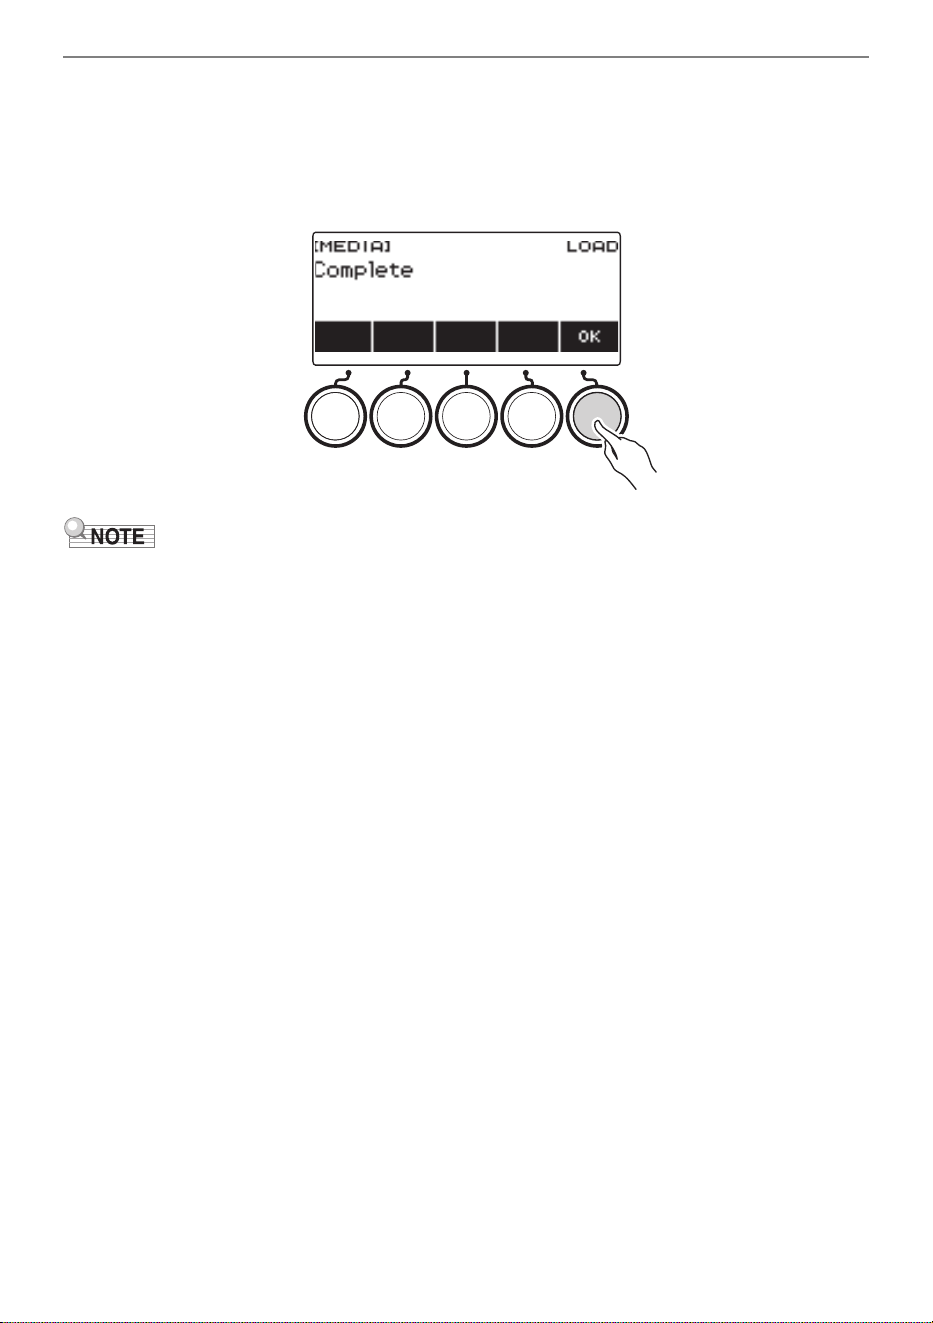
Using a USB Flash Drive
EN-257
11.
Press YES.
This loads the file.
• To cancel, press NO.
• If you are saving ALL DATA, the save operation can take several minutes.
12.
When “Complete” appears on the display, press OK.
• Connecting a smart device running the Lyric Creator app to this Digital Keyboard and loading ALL
DATA will not synchronize the list of lyric tones. Reconnect the smart device with this Digital
Keyboard. This reflects the correct information.
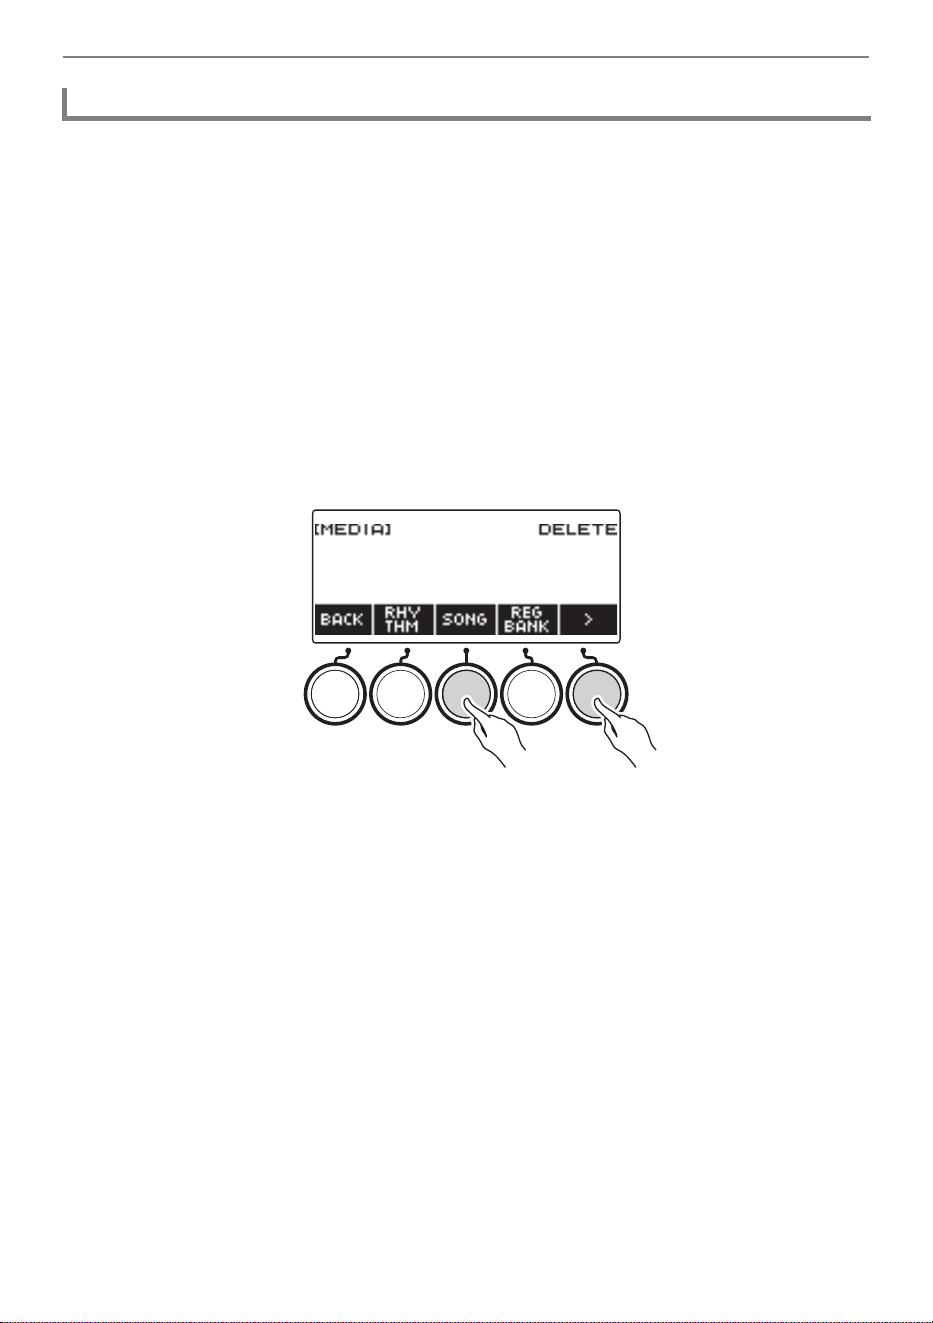
Using a USB Flash Drive
EN-258
1.
Insert the USB flash drive into the Digital Keyboard’s USB TO DEVICE port.
2.
Press MENU.
This displays the menu screen.
3.
Use U and I to select the 5 buttons menu that includes MEDIA.
4.
Press MEDIA.
This displays the media screen.
5.
Press DELETE.
6.
Touch the data type of the data you want to delete.
• If you pressed SONG, press the button that corresponds to the song type you want to delete. If
you pressed SAMPLING, press the button that corresponds to the type of sampled data you
want to delete.
7.
Rotate the dial or use – and + to select the file you want to delete.
This displays the file name extension of the selected file.
8.
Press SELECT.
This displays “Sure?”.
9.
Press YES.
This deletes the file.
• To cancel, press NO.
Deleting a USB Flash Drive File
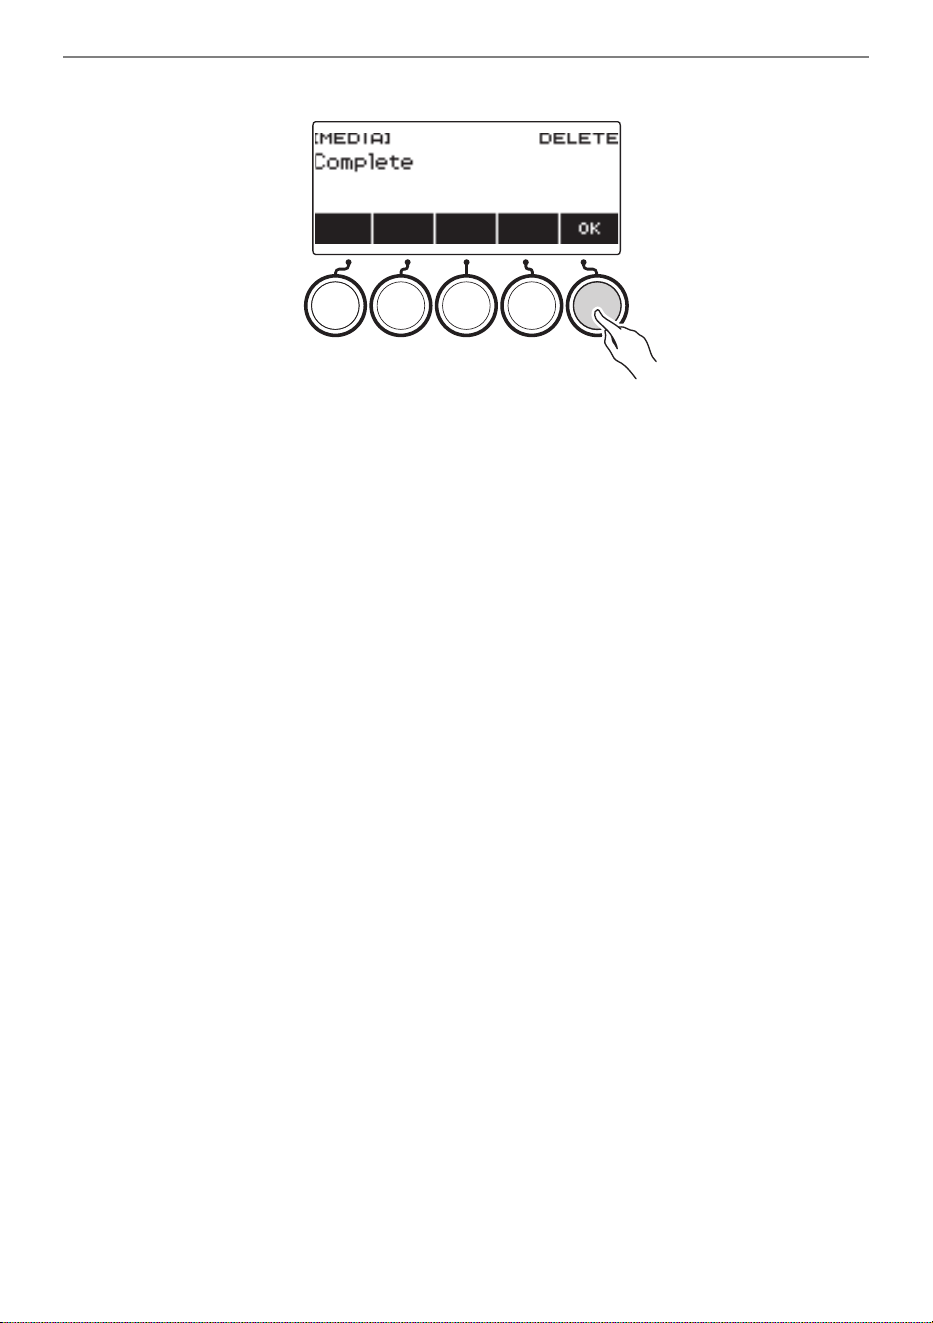
Using a USB Flash Drive
EN-259
10.
When “Complete” appears on the display, press OK.
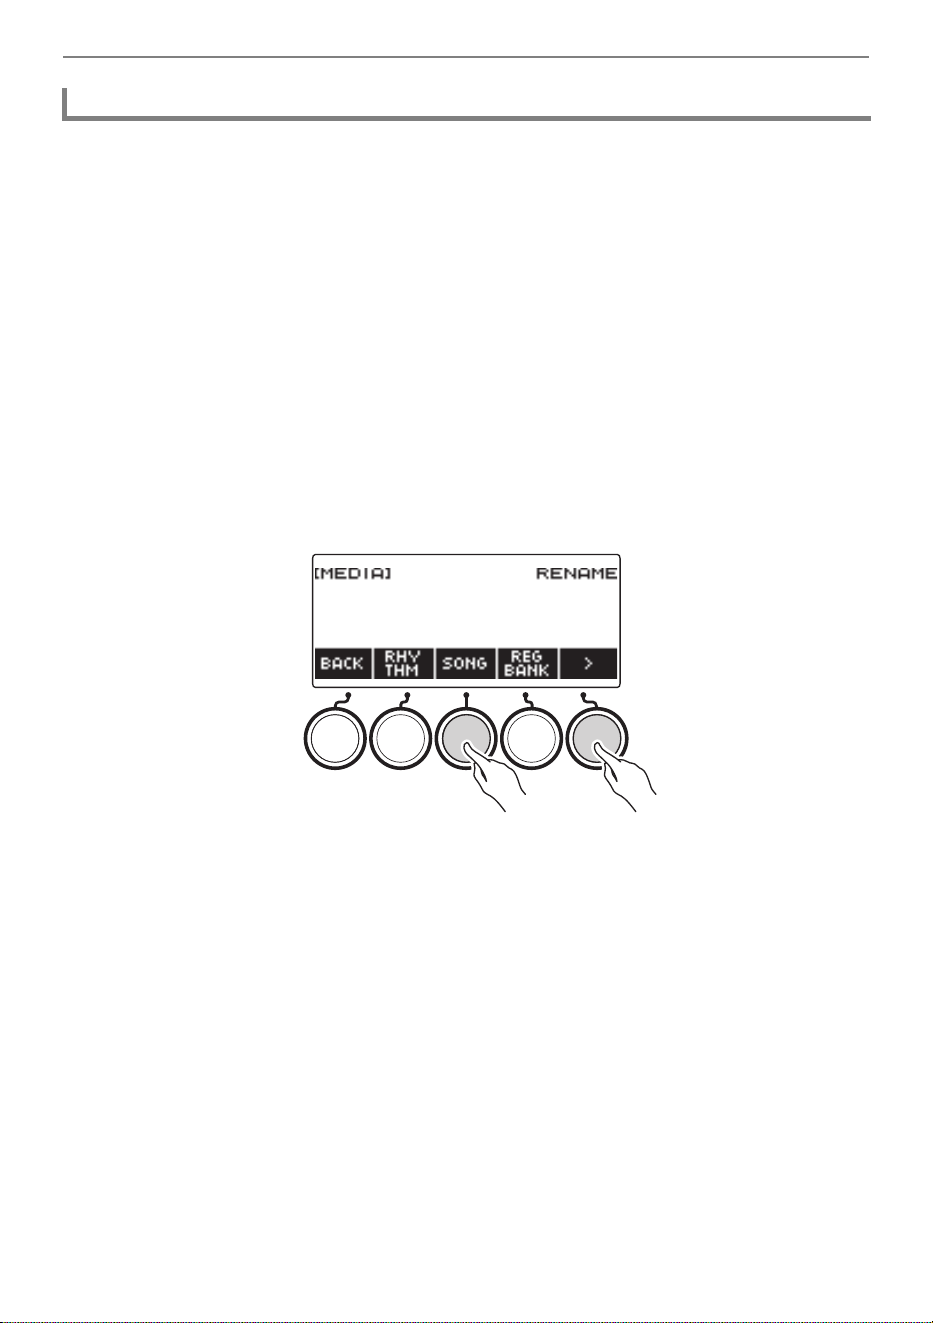
Using a USB Flash Drive
EN-260
1.
Insert the USB flash drive into the Digital Keyboard’s USB TO DEVICE port.
2.
Press MENU.
This displays the menu screen.
3.
Use U and I to select the 5 buttons menu that includes MEDIA.
4.
Press MEDIA.
This displays the media screen.
5.
Use U and I to select the 5 buttons menu that includes RENAME.
6.
Press RENAME.
7.
Press the button that corresponds to the data type you want to rename.
• If you pressed SONG, press the button that corresponds to the song data you want to rename. If
you pressed SAMPLING, press the button that corresponds to the type of sampled data you
want to rename.
8.
Rotate the dial or use – and + to select the file you want to rename.
This displays the file name extension of the selected file.
9.
Press SELECT.
10.
Rename the file.
• For information about how to edit characters, see “Inputting Characters” (page EN-23).
11.
To confirm the file name, press CONFIRM.
This displays “Sure?”.
• The message “Replace?” appears if there is already data with the same name in the USB flash
drive’s “MUSICDAT” folder.
Renaming a File on a USB Flash Drive
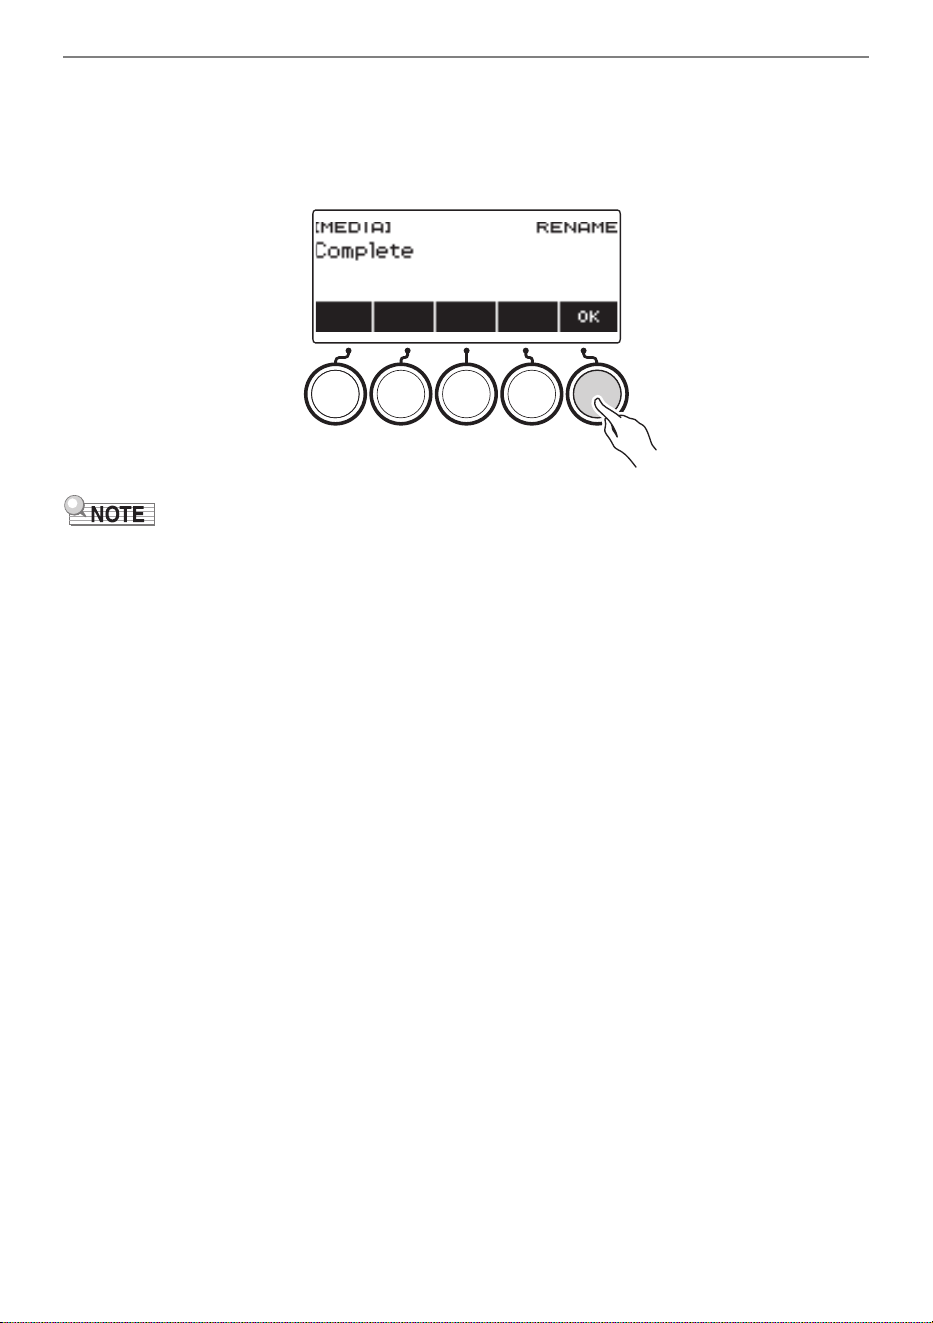
Using a USB Flash Drive
EN-261
12.
Press YES.
This renames the file.
• To cancel, press NO.
13.
When “Complete” appears on the display, press OK.
• Changing the letters in a file name from upper case to lower case or vice versa does not count as a
name change. Change the file name to something else.
EN-262
This Digital Keyboard can be connected to various types of external devices. You can enhance your
enjoyment by connecting with a smart device (APP function) or a computer.
After using a cable to connect this Digital Keyboard with a smartphone, tablet or other smart device,
you can use the Lyric Creator app to perform the operations below.
• Transferring lyric, sequence, and vocalist data created with the app to the Digital Keyboard
• Checking the lyric tones stored in Digital Keyboard memory and remaining memory capacity
■ Downloading the Smart Device App
Download the Lyric Creator from the CASIO website and install it on the smart device.
https://support.casio.com/global/en/emi/manual/CT-S1000V/
Connecting with External Devices
Linking with a Smart Device and Using Lyric Creator
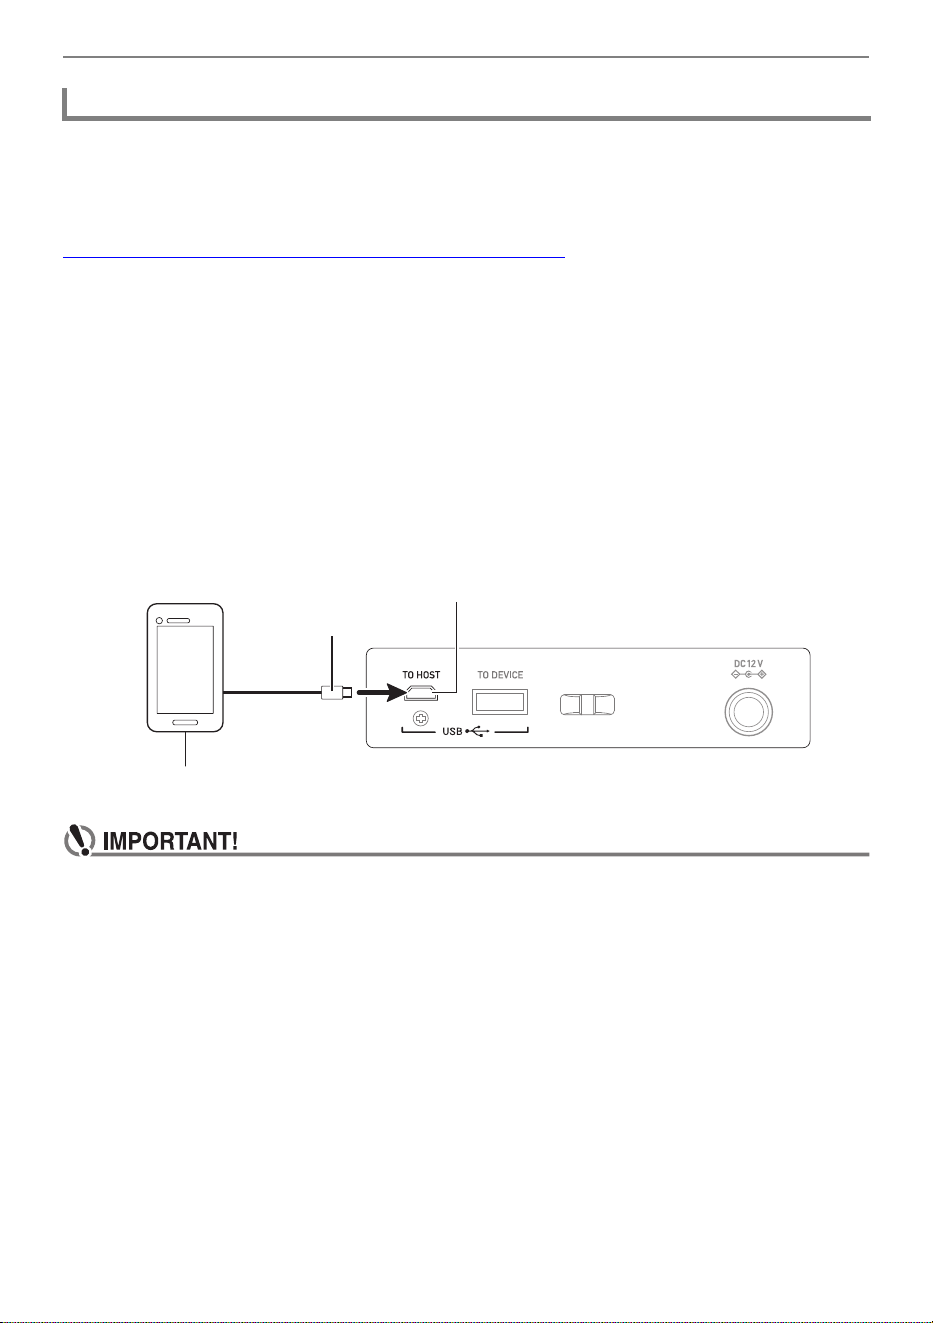
Connecting with External Devices
EN-263
Use a commercially available USB cable for connection.
• You cannot use Bluetooth to connect with a Smart Device.
■ Using a Cable to Connect the Digital Keyboard with a Smart Device
For information about the requirements for a cable used for connection, visit the website below.
https://web.casio.com/app/en/lyric_creator/support/connect.html
• When connecting a USB cable, you may need an adapter in addition to a commercially available
USB cable.
• The adapter you may need depends on your phone or tablet.
• Some phones and tablets do not support USB cable connection.
1.
Referring to “Downloading the Smart Device App” (page EN-262), install the app
on the smart device.
2.
Use a commercially available USB cable to connect the smart device port to the
Digital Keyboard’s USB TO HOST port.
• After connecting the smart device to the Digital Keyboard, use the smart device app to perform
operations. For details about operations, refer to the user documentation of the app.
• Connect using a USB cable that is no more than two meters long.
• Do not connect a USB cable and audio cable to a smart device at the same time.
• If you are connecting with a USB cable, do not use the USB TO DEVICE port if you plan to
use the CASIO smart device app.
Connecting with a Smart Device
USB TO HOST port (micro-B)
micro-B connector
Smart Device
B
Connecting with External Devices
EN-264
After connecting this Digital Keyboard to a smartphone, tablet, or other smart device, you can use the
CASIO MUSIC SPACE app to perform the operations below.
• Sending song data from the smart device app
• Using the lesson functions of an app on the smart device to play notes on the Digital Keyboard
• Using the Digital Keyboard sound source to sound music data played using an app on the smart
device
■ Downloading the Smart Device App
Download the CASIO MUSIC SPACE from the CASIO website and install it on the smart device.
https://support.casio.com/global/en/emi/manual/CT-S1000V/
Linking with a Smart Device and Using CASIO MUSIC SPACE
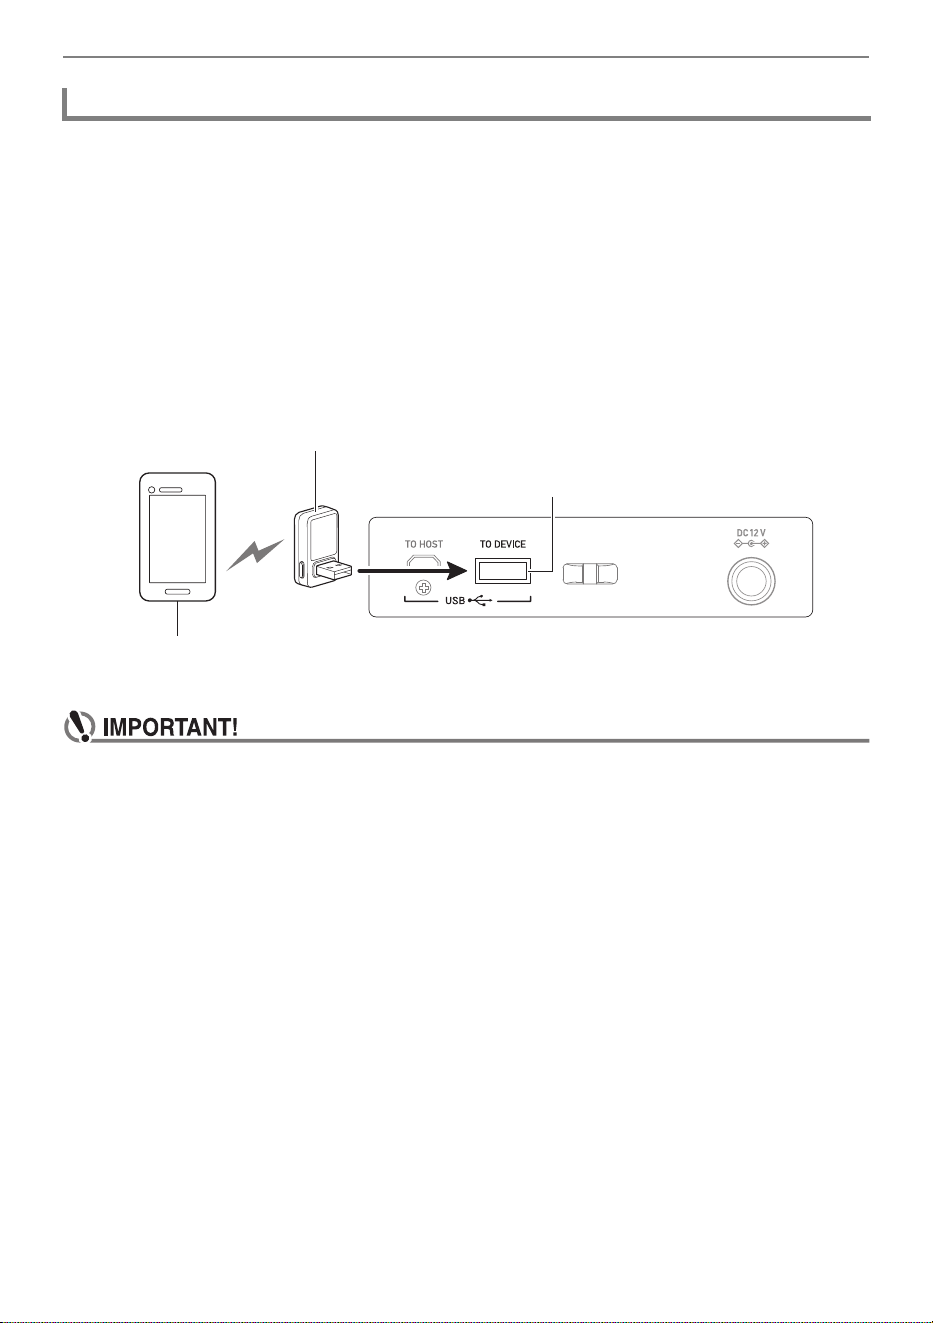
Connecting with External Devices
EN-265
There are two ways to connect with a smart device: Bluetooth and a commercially available USB cable.
■ Using Bluetooth to Connect the Digital Keyboard with a Smart Device
You can use the Wireless MIDI & audio adaptor for Bluetooth connection.
1.
Referring to “Downloading the Smart Device App” (page EN-264), install the app
on the smart device.
2.
Plug the Wireless MIDI & audio adaptor into the USB TO DEVICE port (page
EN-14).
• After connecting the smart device to the Digital Keyboard, use the smart device app to perform
operations. For details about operations, refer to the user documentation of the app.
• Do not perform any Digital Keyboard operation while it is in the process of connecting with
the smart device app.
• With a Bluetooth connection, some communication environments and use of smart device
functions may cause a noticeable sound distortion. If this happens, try the countermeasures
below.
– Refer to the app’s user documentation for information about MIDI playback quality.
– If your smart device is connected by Wi-Fi to another device, turn off the smart device Wi-Fi.
– Use a cable connection instead of Bluetooth.
• If you are connecting with Bluetooth, do not use the USB TO HOST port if you plan to use the
CASIO smart device app.
Connecting with a Smart Device
Wireless MIDI & audio adaptor
Smart Device
USB TO DEVICE port
B
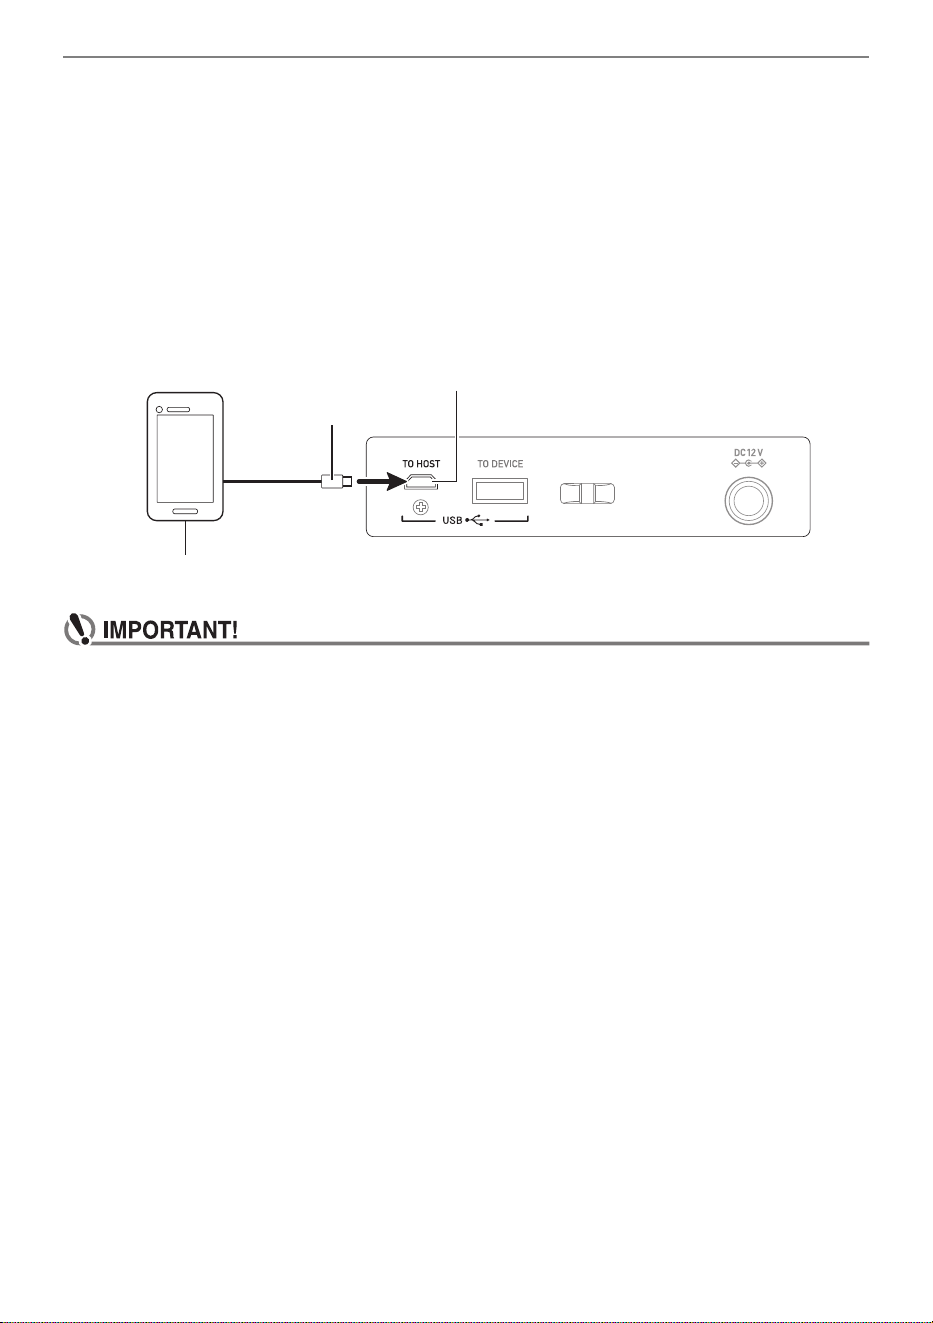
Connecting with External Devices
EN-266
■ Using a Cable to Connect the Digital Keyboard with a Smart Device
For information about cables required for connection, refer to the connection settings of the CASIO
MUSIC SPACE app.
1.
Referring to “Downloading the Smart Device App” (page EN-264), install the app
on the smart device.
2.
Use a commercially available USB cable to connect the smart device port to the
Digital Keyboard’s USB TO HOST port.
• After connecting the smart device to the Digital Keyboard, use the smart device app to perform
operations. For details about operations, refer to the user documentation of the app.
• Connect using a USB cable that is no more than two meters long.
• Do not connect a USB cable and audio cable to a smart device at the same time.
• If you are connecting with a USB cable, do not use the USB TO DEVICE port if you plan to
use the CASIO smart device app.
USB TO HOST port (micro-B)
micro-B connector
Smart Device
B
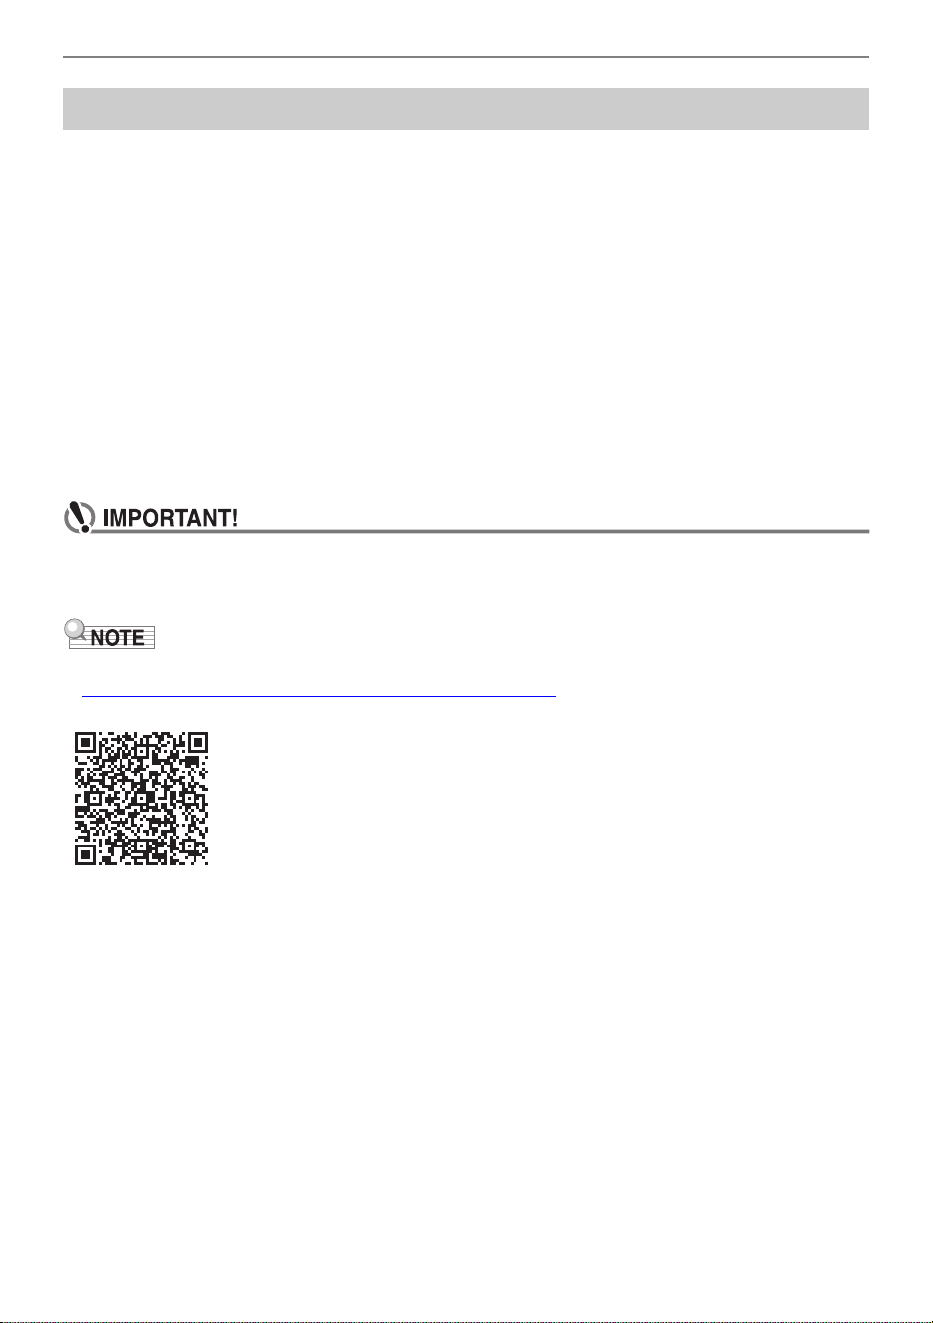
Connecting with External Devices
EN-267
You can connect the Digital Keyboard to a computer and exchange MIDI data between them. You can
record your performance using computer music software, and use the Digital Keyboard to play data
sent from a computer.
■ Minimum Computer System Requirements
The following shows the minimum computer system requirements for sending and receiving MIDI data.
Be sure to check your computer system setup before trying to install the driver.
● Supported Operating Systems
Windows 8.1*
1
Windows 10*
2
macOS (OS X/Mac OS X) 10.7, 10.8, 10.9, 10.10, 10.11, 10.12, 10.13, 10.14, 10.15, 11.0
*1 Windows 8.1 (32-bit versions, 64-bit versions)
*2 Windows 10 (32-bit versions, 64-bit versions)
● USB port
• Connecting with a computer running an operating system that is not one of those above can
cause malfunction of the computer. Never connect the Digital Keyboard to a computer
running a non-supported operating system.
• For the latest news about supported operating systems, visit the website at the URL below.
https://support.casio.com/global/en/emi/manual/CT-S1000V/
Connecting to a Computer and Using MIDI
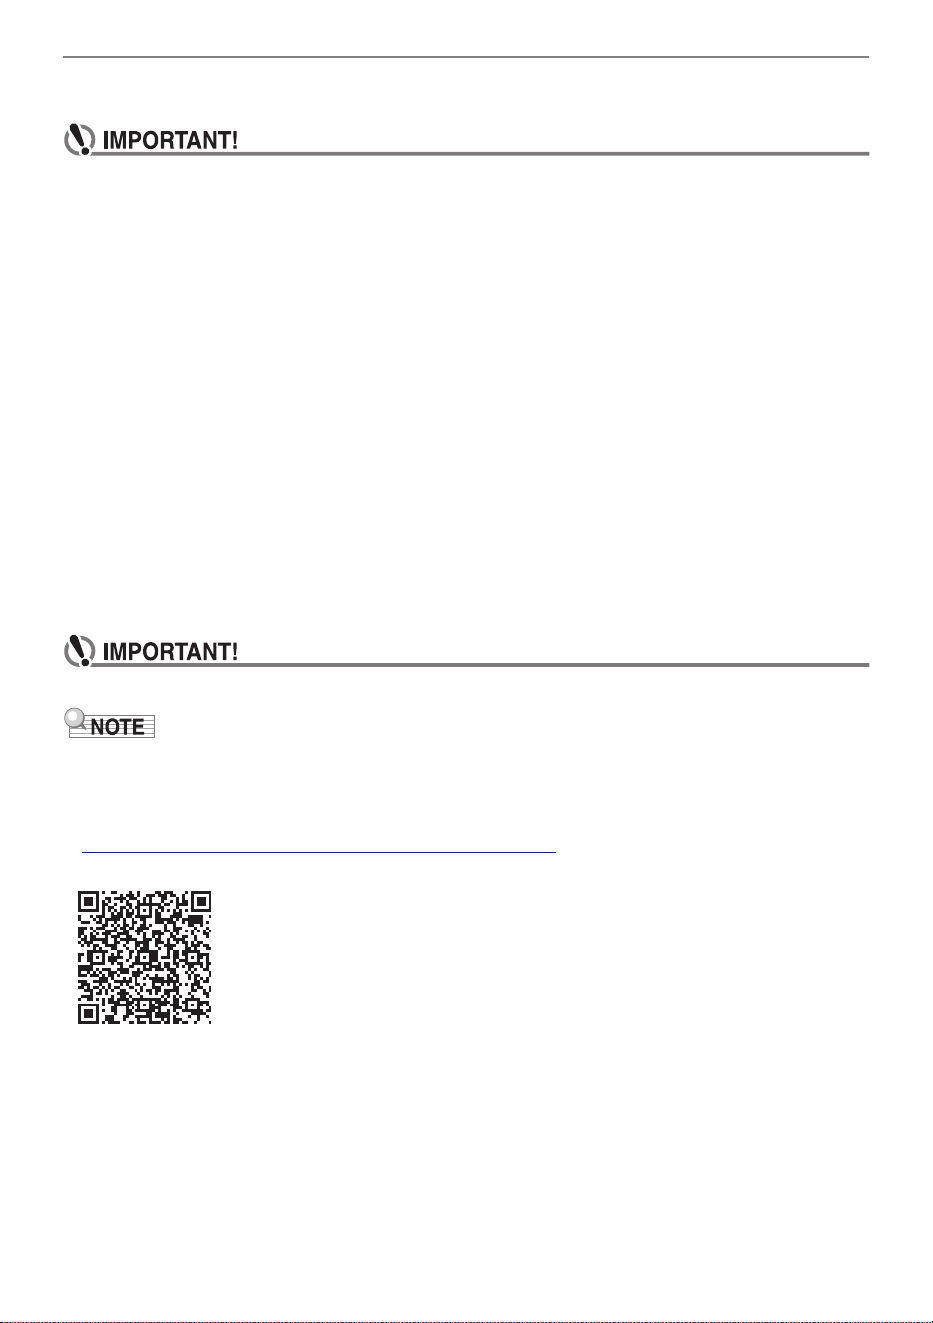
Connecting with External Devices
EN-268
■ Connecting to a Computer
• Incorrect connections can make data exchange impossible. Be sure to follow the steps of the
procedure below.
1.
Turn off the Digital Keyboard and then start up your computer.
• Do not start up the music software on your computer yet!
2.
Use a commercially available USB cable to connect your computer to the Digital
Keyboard’s USB TO HOST port.
• Use a USB 2.0 or 1.1 A-micro-B connector type USB cable that supports data communication.
3.
Turn on the Digital Keyboard.
• If this is the first time you are connecting, the driver required to transfer data will automatically
be installed on your computer.
4.
Start up commercially available music software on your computer.
5.
Use the settings of your computer’s commercially available music software to
select “CASIO USB- MIDI” as the MIDI device.
• For information about how to select the MIDI device, refer to the user documentation that comes
with the music software you are using.
• Be sure to turn on the Digital Keyboard before starting up your computer’s music software.
• Once you are able to connect successfully, you can leave the USB cable connected when you turn
off your computer and/or this Digital Keyboard.
• For detailed specifications and connections that apply to MIDI data communication by this Digital
Keyboard, see the latest support information provided on the website at the URL below.
https://support.casio.com/global/en/emi/manual/CT-S1000V/
B
Connecting with External Devices
EN-269
■ MIDI Sync Mode
Entering the MIDI sync mode lets you synchronize the tempo with an external MIDI device or music
software running on your computer. There are two modes: a master mode that syncs to the tempo of
this Digital Keyboard, and a slave mode that syncs to the tempo of an external MIDI device or music
software running on your computer.
MIDI timing clock messages are used for tempo synchronization, so the external MIDI device and
computer music software must also support such messages. In addition to the settings of this unit, you
also need to adjust the settings related to the MIDI timing clock on the music software running on your
external MIDI device or computer.
To change the MIDI Sync Mode setting, use the procedure under “Configuring Settings” (page
EN-230).
• When using the MIDI sync mode, a USB cable connection with the external MIDI device or computer
is recommended. Bluetooth Low Energy MIDI connection using the Wireless MIDI & audio adaptor
may result in noticeable data communication delay.
• When the MIDI sync mode is slave mode, the functions below will not operate unless the MIDI timing
clock is continuously received.
– Metronome
– Rhythm
– Songs
– Recorder
– Arpeggiator
– Sample tone looping
– Lyric tone retrigger
• When the MIDI sync mode is slave mode, the displayed tempo value is replaced with “Slave”, “S”, or
“SLV”, which all stand for “Slave”.
■ Configuring MIDI Settings
For about the MIDI settings below, see the “Setting Item List” (page EN-231).
• MIDI OUT Channel (Upper1, Upper2, Lower)
• Local Control
• MIDI Sync Mode
Setting Indicator Description
Off Off Disables sending and receiving of a MIDI timing clock.
Master Master Continually sends a MIDI timing clock at an interval that depends
on the Digital Keyboard’s tempo.
Slave Slave Enables reception of a MIDI timing clock. The tempo is determined
in accordance with the continuously received interval, and functions
such as rhythms and songs operate according to the tempo. The
tempo cannot be set on the Digital Keyboard.
B
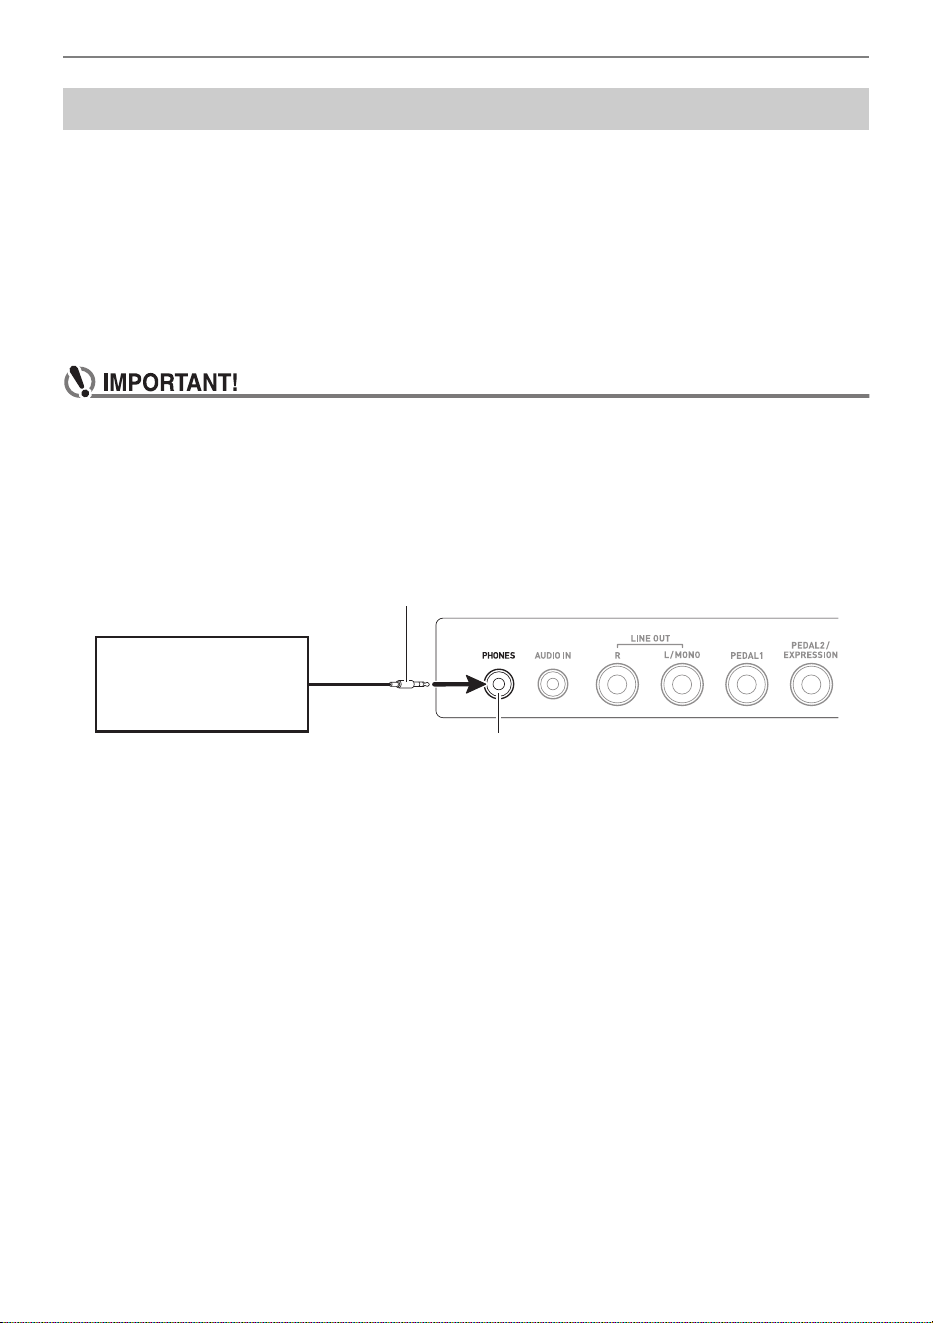
Connecting with External Devices
EN-270
You can connect this Digital Keyboard to a commercially available playback device or amplifier, or to a
recording device. You can also use this Digital Keyboard to sound output from a portable audio player
or another device, and use that as backing for your keyboard play.
■ Sounding Output from the Digital Keyboard on an External Device
● To connect an external device to the PHONES jack
Connection requires commercially available connecting cords, supplied by you.
Use a connecting cord that has a stereo mini plug on one end for connection to this Digital Keyboard,
and a plug that matches the configuration of the input jack of external device on the other end.
• Turn off the external device and the Digital Keyboard before connecting them. Before turning
power on or off, turn down the volume level of this Digital Keyboard and external devices.
• After connecting, turn on this Digital Keyboard first and then the external device.
• If this Digital Keyboard’s notes are distorted when they are sounded on an external audio
device, lower the Digital Keyboard’s volume level.
• The headphones you use must have a 3.5mm 3-pole stereo mini plug. Use of other types of
plugs is not supported.
Using a Cable to Connect with an Audio Device
Stereo mini plug
Audio equipment,
amplifier, etc.
PHONES jack (3.5mm stereo mini jack)
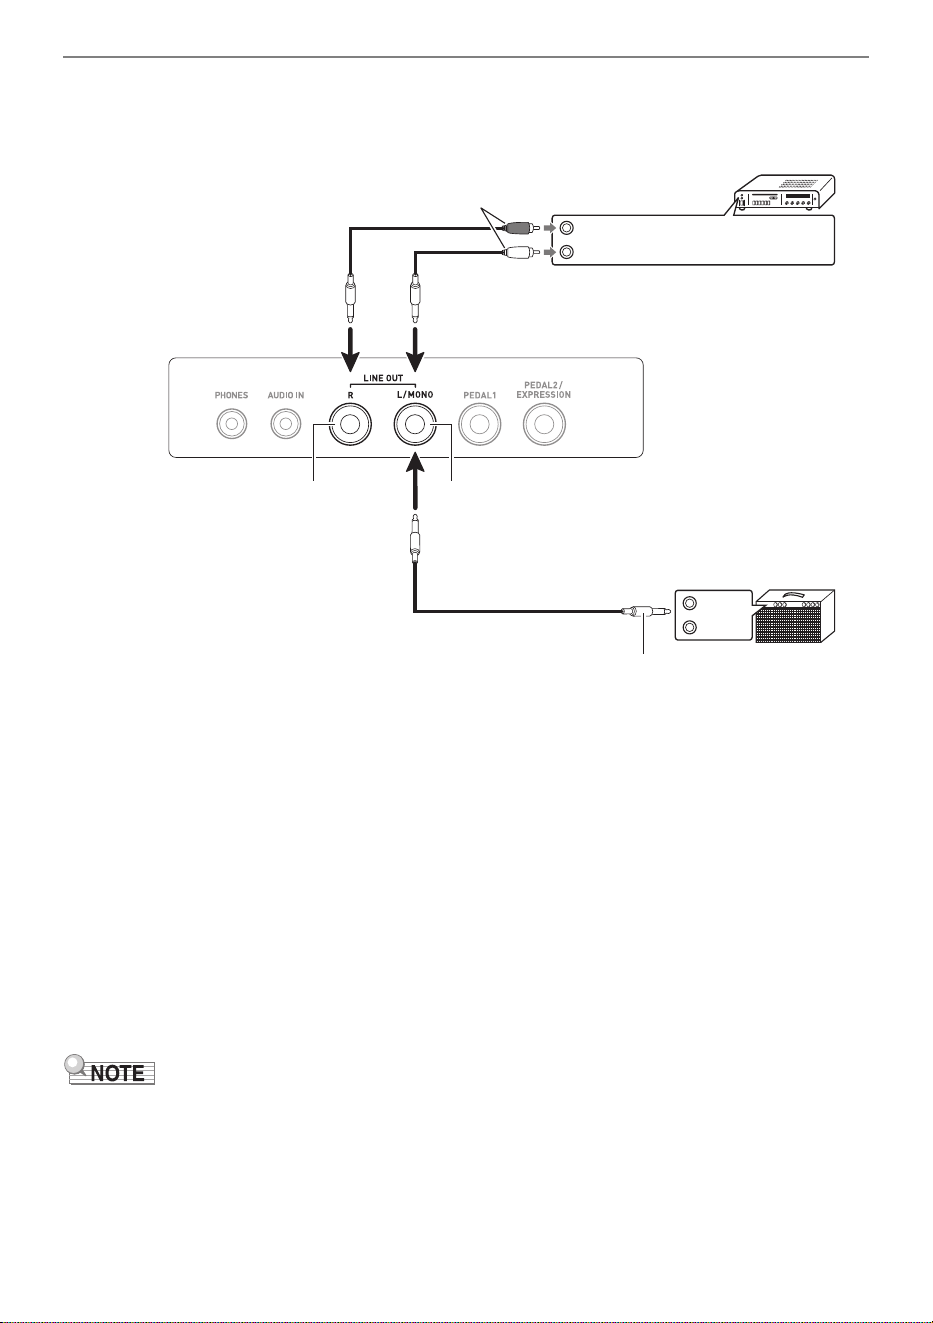
Connecting with External Devices
EN-271
● To connect an external device to the LINE OUT jack
You can use a commercially available connecting cable for connection.
• When connected with an audio device (Figure
)
LINE OUT R (right) is the right channel and LINE OUT L/MONO (left) is the left channel.
Use a commercially available connection cable for connection as shown in Figure
. Normally,
you should set the input selector of the audio equipment to the jack where the Digital Keyboard is
connected (AUX IN, etc.)
• When connected with a music amplifier (Figure
)
Connecting to the LINE OUT L/MONO jack only outputs a mixture of both channels. Use a
commercially available connection cable as shown in Figure
.
■ Speaker Audio Output
If you want to disable sound output from the Digital Keyboard speaker while using the LINE OUT jack,
use the procedure under “Configuring Settings” (page EN-230) to change the “Speaker” setting to “Off”.
Use the procedure under “Configuring Settings” (page EN-230) to change the “Speaker enabled when
PHONES connected” setting to “On”.
• If “Off” is selected for the “Speaker” setting, nothing will be output from the speaker of the Digital
Keyboard even if “On” is selected for the “Speaker enabled when PHONES connected” setting.
• Selecting “Off” for the “Speaker” setting turns off the surround function.
INPUT 1
INPUT 2
Guitar amplifier
Keyboard amplifier, etc.
RIGHT (Red)
LEFT (White)
Pin plugs
Audio amplifier AUX IN jacks, etc.
Standard plug (6.3mm)
LINE OUT L/MONO jacks
(Standard jack (6.3mm))
LINE OUT R jacks
(Standard jack (6.3mm))
B
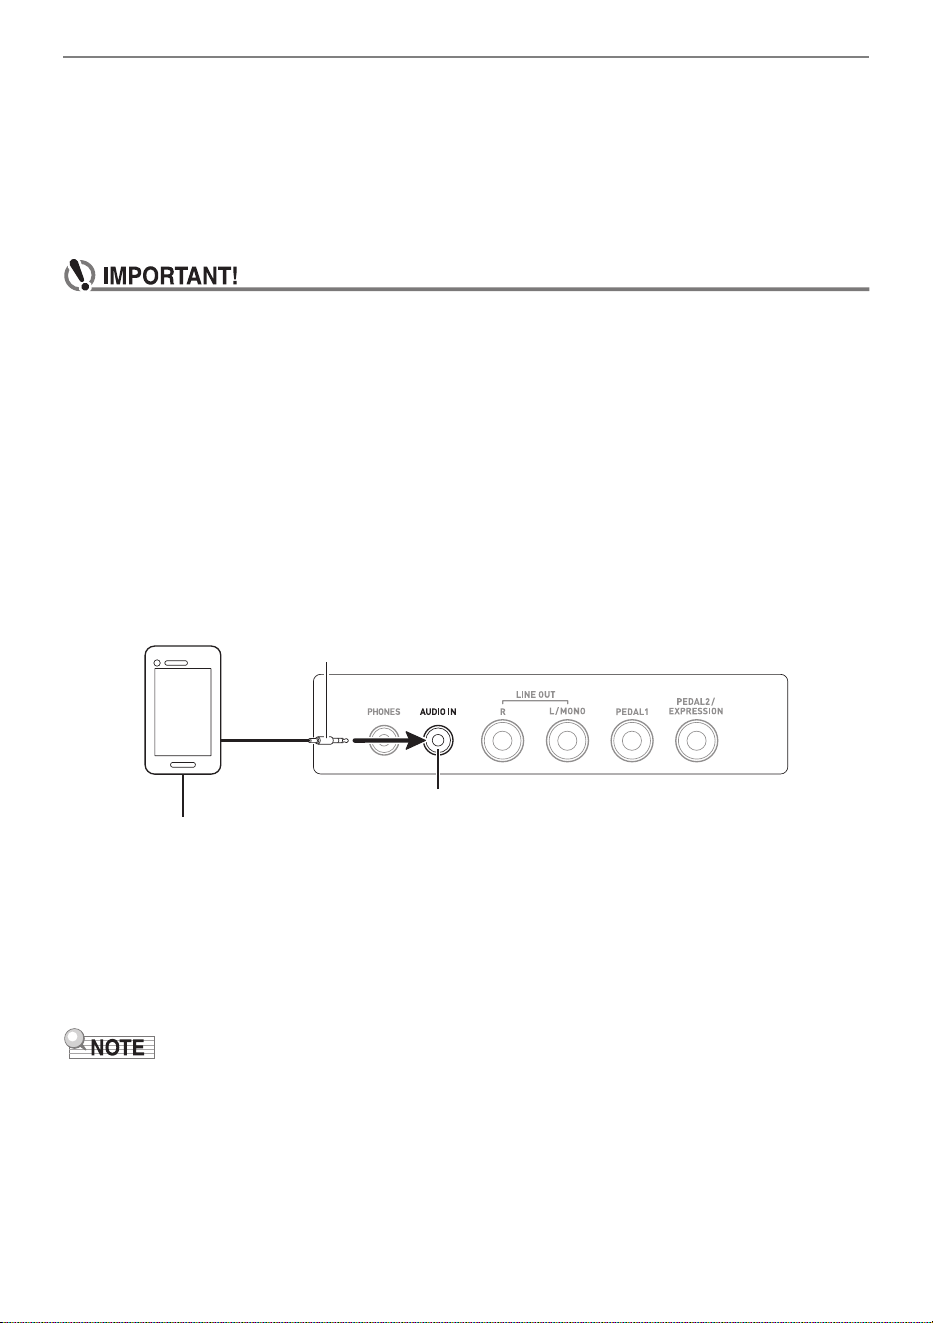
Connecting with External Devices
EN-272
■ Sounding Input From an External Device on This Digital Keyboard
Connection requires commercially available connecting cords, supplied by you.
The connecting cord should have a stereo mini plug on one end for connection to this Digital Keyboard
and a plug that matches the configuration of the output jack of external device on the other end.
When sounding input from an external device with this Digital Keyboard, use the external device
controls to adjust the volume level. In this case, you cannot adjust the volume level on this Digital
Keyboard.
• Turn off this Digital Keyboard before connecting. Before turning power on or off, turn down
the volume level of the Digital Keyboard and external devices.
• After connecting, turn on the external device and then this Digital Keyboard.
• If external device notes sounded by this Digital Keyboard are distorted, lower the external
device’s volume level.
• If the volume level of the external device notes sounds by this Digital Keyboard is lower than
the volume level of the notes you are playing on the keyboard, adjust the volume balance of
the Digital Keyboard. See “Changing the Volume Balance Between Keyboard Play and
Rhythm Play (Balance)” on page EN-128.
• Setting the volume level of the external device too high can cause Digital Keyboard power to
turn off in order to protect it against damage. If this happens, lower the volume of the external
device.
• The end of the connecting cord you connect to the Digital Keyboard must have a 3.5mm 3-
pole stereo mini plug. Use of other types of plugs is not supported.
■ AUDIO IN center cancel (Vocal Cut)
Enabling Vocal Cut removes (mutes or minimizes) the vocal part from the AUDIO IN jack input or the
input using Bluetooth audio. Note that this function cancels the sound in the center position of the
audio, which may (depending on how the original audio was mixed) end up canceling something else
other than the vocal part. How vocal cut is performed depends on the sound being input.
For information about how to configure settings, see the “Setting Item List” (page EN-231).
• Digital Keyboard built-in effects (reverb, other) are not applied to AUDIO IN jack or Bluetooth audio
input.
Stereo mini plug
Portable audio player, etc.
AUDIO IN jack (3.5mm stereo mini jack)
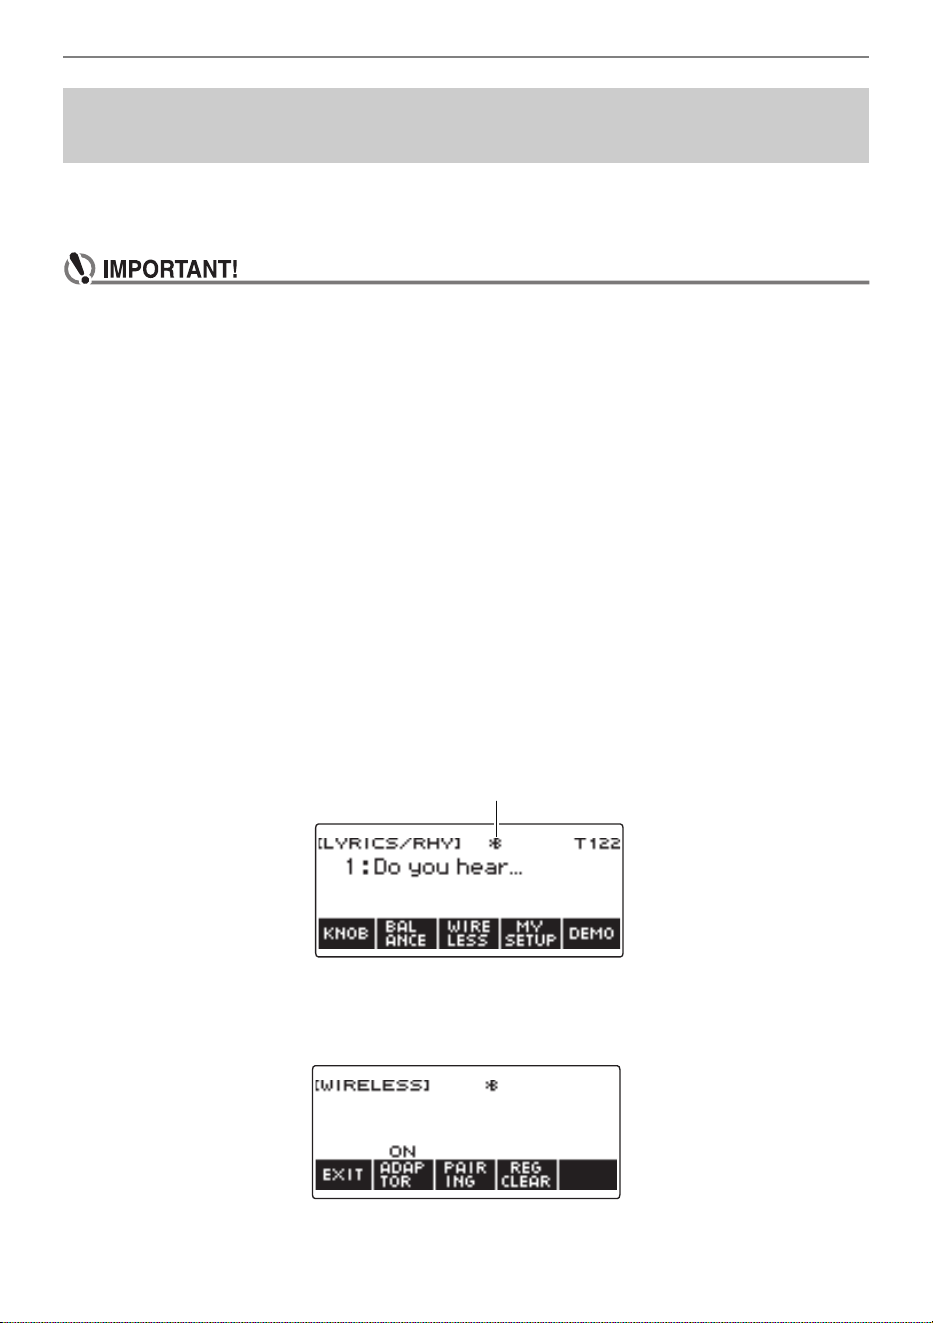
Connecting with External Devices
EN-273
You can use a Wireless MIDI & audio adaptor (WU-BT10) to pair this Digital Keyboard with an external
Bluetooth audio capable audio device and then playback from the external device through this Digital
Keyboard’s speakers.
• Before performing the pairing operation, turn down the volume levels of this Digital Keyboard
and the external device.
• If external device notes sounded by this Digital Keyboard are distorted, lower the external
device’s volume level.
• If the volume level of the external device notes sounds by this Digital Keyboard is lower than
the volume level of the notes you are playing on the keyboard, adjust the volume balance of
the Digital Keyboard. See “Changing the Volume Balance Between Keyboard Play and
Rhythm Play (Balance)” on page EN-128.
• Setting the volume level of the external device too high can cause Digital Keyboard power to
turn off in order to protect it against damage. If this happens, lower the volume of the external
device.
• Due to Bluetooth wireless technology characteristics, you may notice some lag in notes. If
that happens, connect using a USB cable.
1.
Long-press the P (Power) button to turn off the Digital Keyboard.
2.
Plug the Wireless MIDI & audio adaptor into the USB TO DEVICE port (page
EN-14).
3.
Press the P (Power) button to turn on the Digital Keyboard.
This displays the Bluetooth icon.
4.
Press WIRELESS.
This displays the wireless screen.
Sounding a Bluetooth Audio Capable Device (Bluetooth
Audio Pairing)
Bluetooth icon
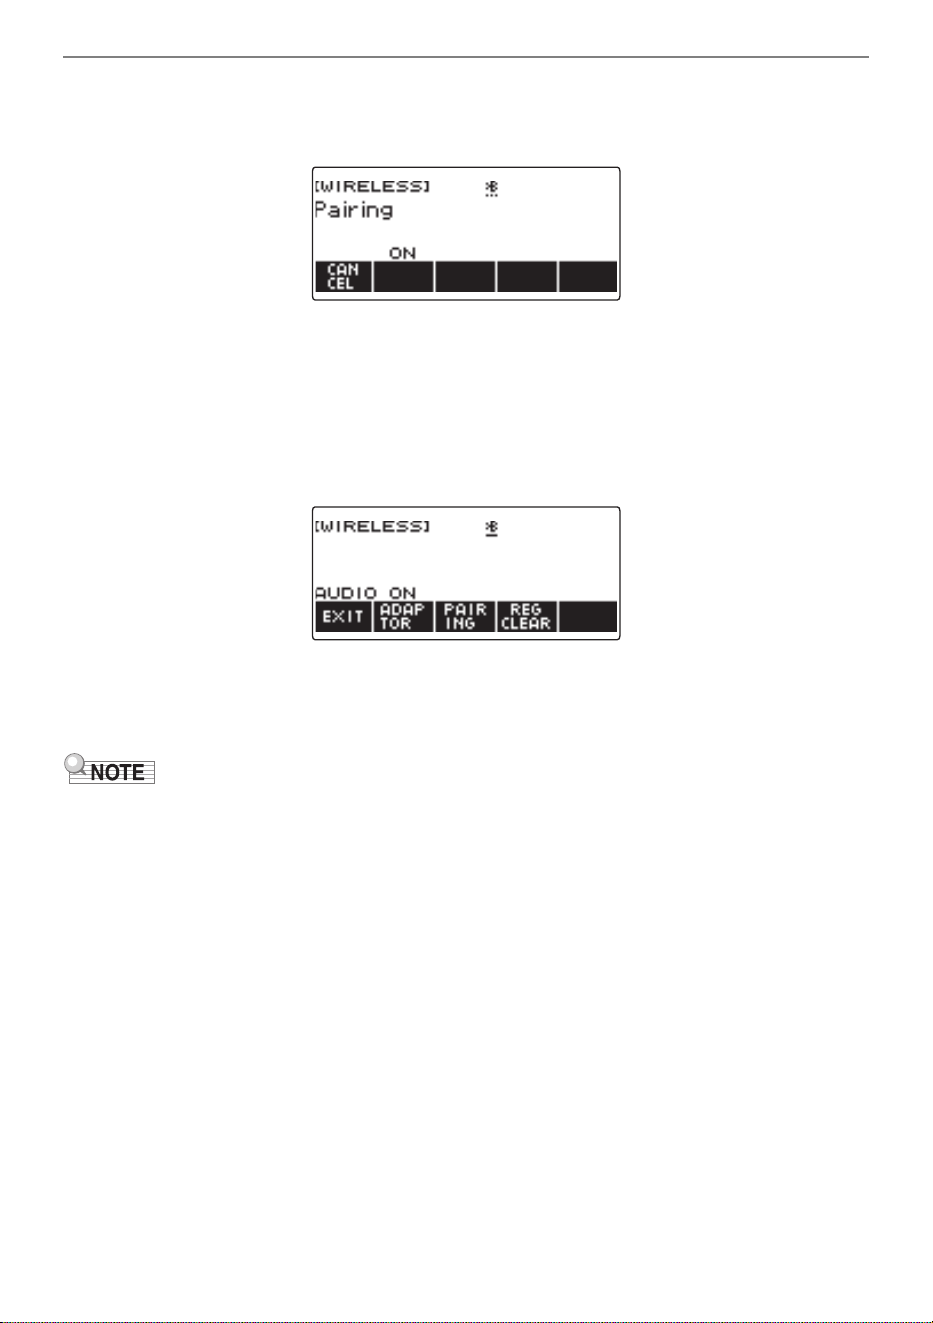
Connecting with External Devices
EN-274
5.
Press PAIRING.
This displays the Bluetooth audio pairing screen with “Pairing” shown, indicating Bluetooth audio
pairing.
• A broken line is under the Bluetooth icon while the Digital Keyboard is Bluetooth audio paired
with another device.
• To stop Bluetooth audio pairing, press CANCEL.
6.
Use the setting screen of the Bluetooth-capable audio device to select “WU-BT10
AUDIO” to pair with this Digital Keyboard.
Connecting with a Bluetooth audio-capable device causes “AUDIO” to appear on the Digital
Keyboard display.
• This causes a solid line to appear under the Bluetooth icon.
7.
Produce sound on the Bluetooth audio capable device.
Output from the audio Bluetooth capable device will sound from the Digital Keyboard’s speakers.
• You need to turn on both the Digital Keyboard’s wireless function and the Bluetooth audio device’s
Bluetooth function.
• To change the Digital Keyboard’s wireless function settings, see “Disabling Wireless Functions”
(page EN-278).
• Information about the last Bluetooth audio device connected to this Digital Keyboard is saved on the
Wireless MIDI & audio adaptor. Because of this, it can automatically perform Bluetooth audio pairing
with the same device, so you do not need to perform the Bluetooth audio pairing operation every
time.
• You can also display the wireless screen by pressing MENU and then WIRELESS.
• The WIRELESS button may not be displayed on the home screen due to the Home Customization
setting.
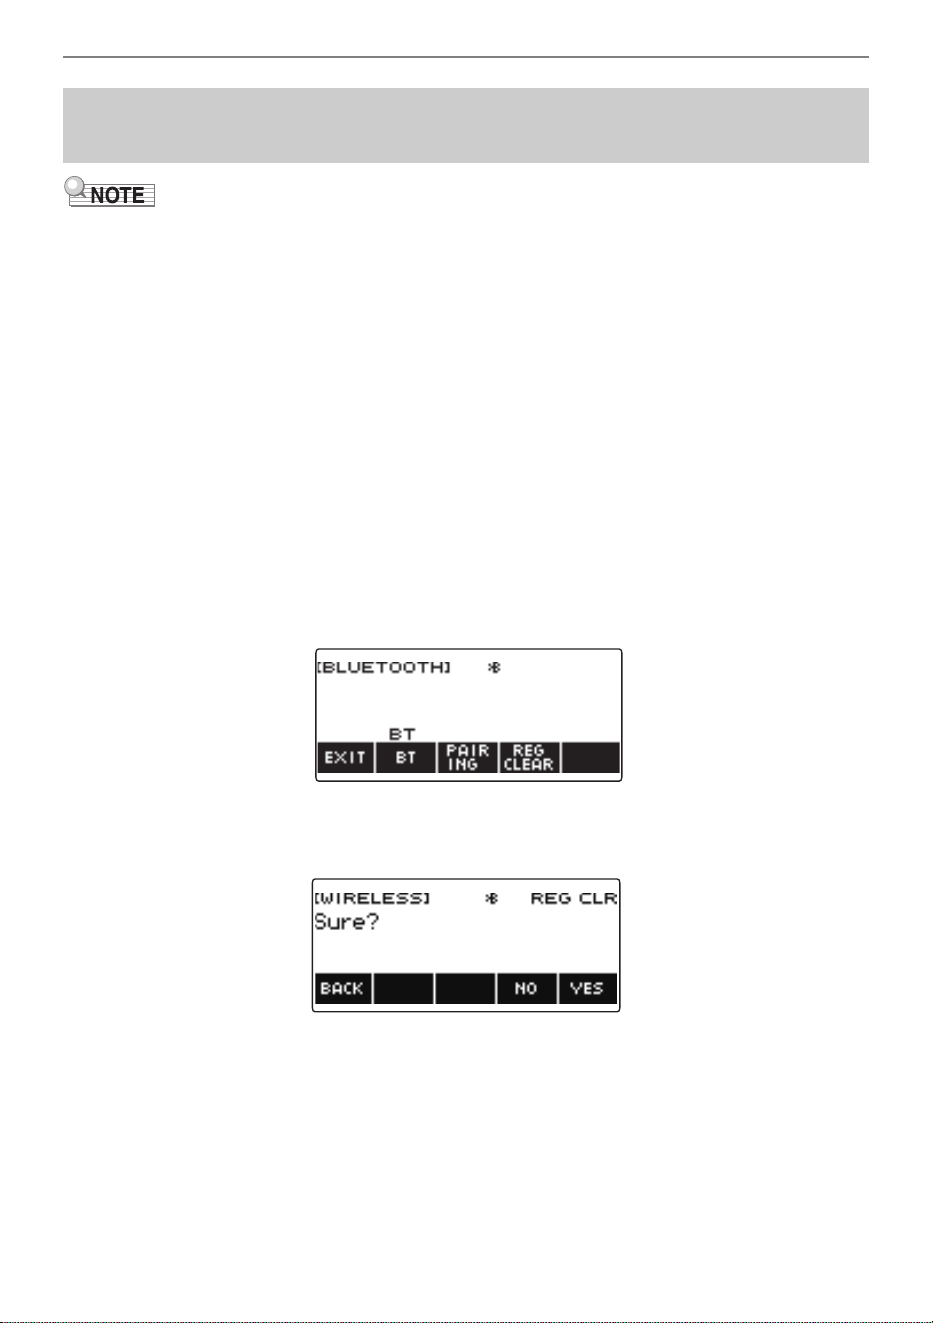
Connecting with External Devices
EN-275
• Performing the procedure below will delete the pairing registration between this Digital Keyboard and
it’s currently paired Bluetooth audio capable device. If you are experiencing connectivity problems
with a Bluetooth audio capable device, perform the procedure below and then perform the procedure
under “Sounding a Bluetooth Audio Capable Device (Bluetooth Audio Pairing)” (page EN-273).
• After performing the procedure below, you should also clear this Digital Keyboard’s pairing
registration on the Bluetooth audio capable device. For information about how to do this, refer to the
user documentation of each Bluetooth audio device.
1.
Long-press the P (Power) button to turn off the Digital Keyboard.
2.
Plug the Wireless MIDI & audio adaptor into the USB TO DEVICE port (page
EN-14).
• You cannot delete a Bluetooth audio pairing registration unless a Wireless MIDI & audio adaptor
is connected to the Digital Keyboard.
3.
Press P (Power) to turn on the Digital Keyboard.
4.
Press WIRELESS.
This displays the wireless screen.
5.
Press REG CLEAR.
This displays “Sure?”.
6.
Press YES.
This deletes the Bluetooth audio pairing registration.
• To cancel, press NO.
Deleting Bluetooth Audio Capable Device Pairing
Registration
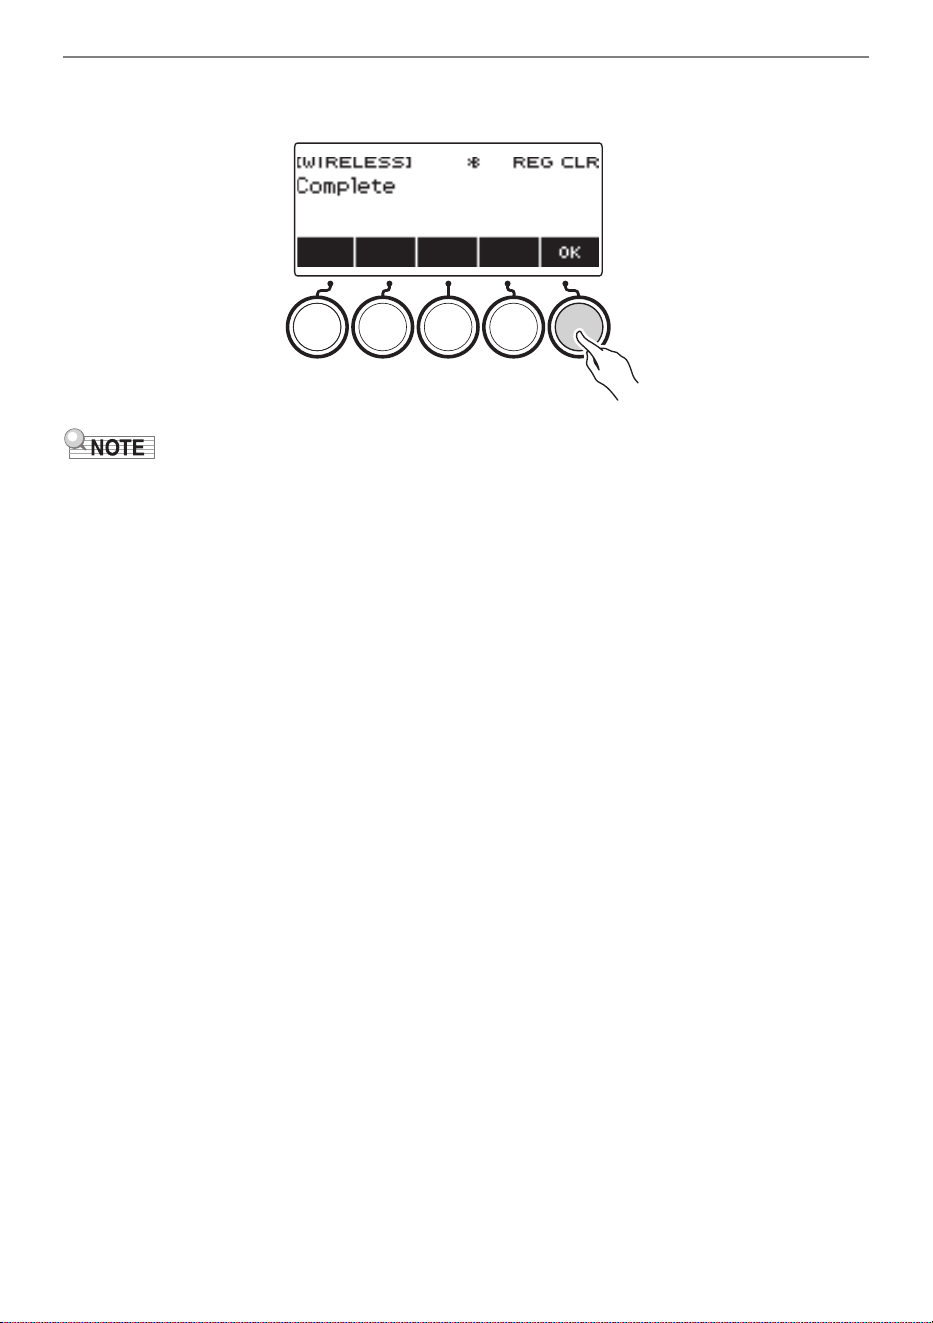
Connecting with External Devices
EN-276
7.
When “Complete” appears on the display, press OK.
This exits the Bluetooth audio-capable pairing registration delete operation.
• You can also display the wireless screen by pressing MENU and then WIRELESS.
• The WIRELESS may not be displayed on the home screen due to the Home Customization setting.
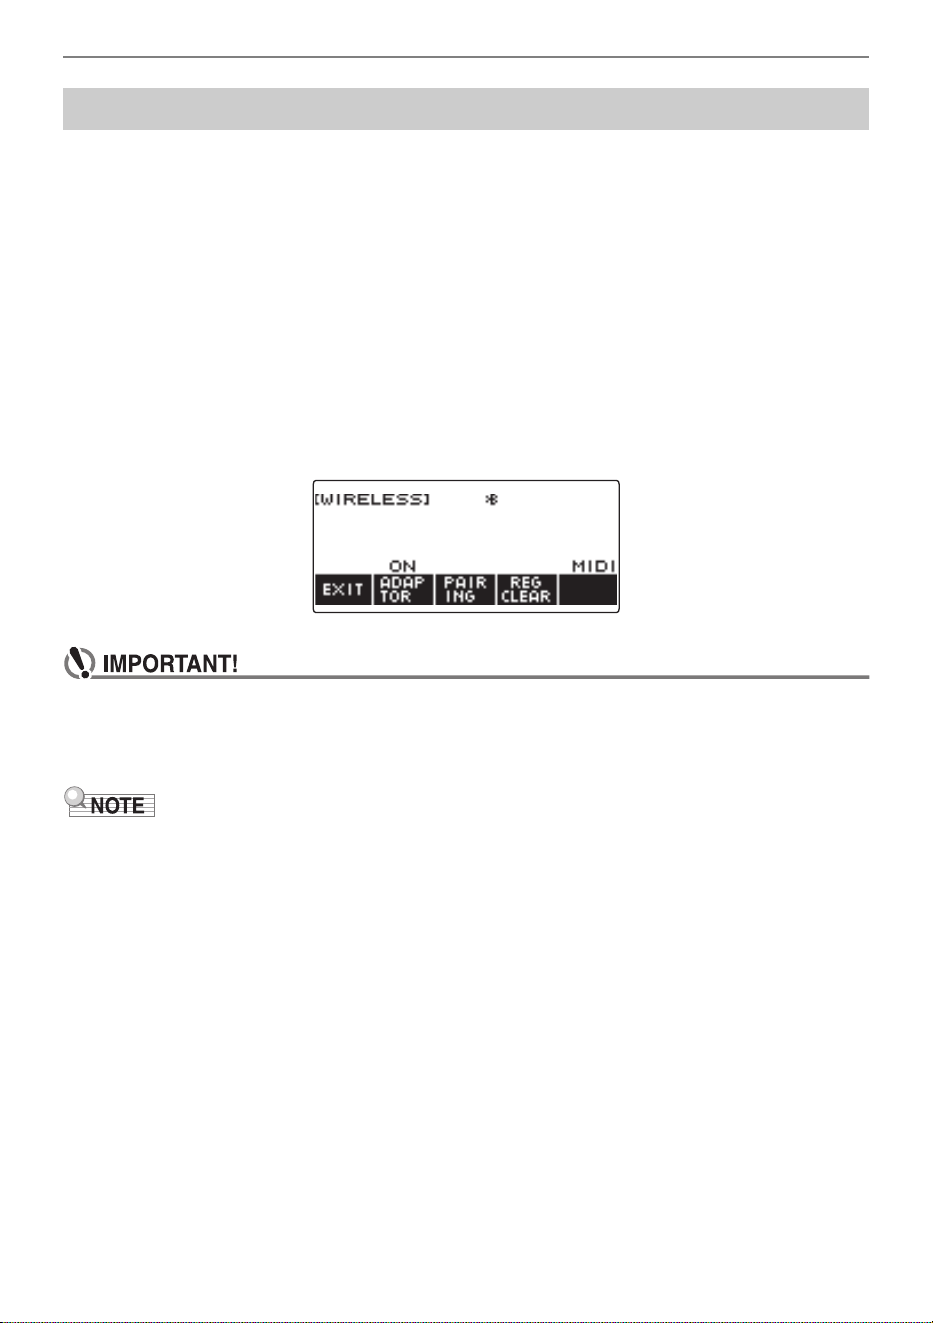
Connecting with External Devices
EN-277
You can use the Wireless MIDI & audio adaptor to connect the Digital Keyboard with a Bluetooth Low
Energy MIDI device.
1.
Long-press P (Power) to turn off the Digital Keyboard.
2.
Plug the Wireless MIDI & audio adaptor into the USB TO DEVICE port (page
EN-14).
3.
Press P (Power) to turn on the Digital Keyboard.
4.
On the setting screen of the app installed on your Bluetooth Low Energy MIDI
device, select “WU-BT10 MIDI” to connect with the Digital Keyboard.
Connecting with a Bluetooth Low Energy MIDI-capable device causes “MIDI” to appear on the
display.
• Do not perform any Digital Keyboard operation while it is in the process of connecting with a
Bluetooth Low Energy MIDI device. Wait until the connection operation is finished.
• Due to Bluetooth wireless technology characteristics, there may be some delay in data
transfer. If that happens, connect using a USB cable.
• You need to turn on both the Digital Keyboard’s wireless function and the Bluetooth Low Energy MIDI
device’s Bluetooth function.
• For information about this Digital Keyboard’s wireless function, see “Disabling Wireless Functions”
(page EN-278).
• You need to perform the above connection operation each time you connect with a Bluetooth Low
Energy MIDI device.
Connection with a Bluetooth Low Energy MIDI Device
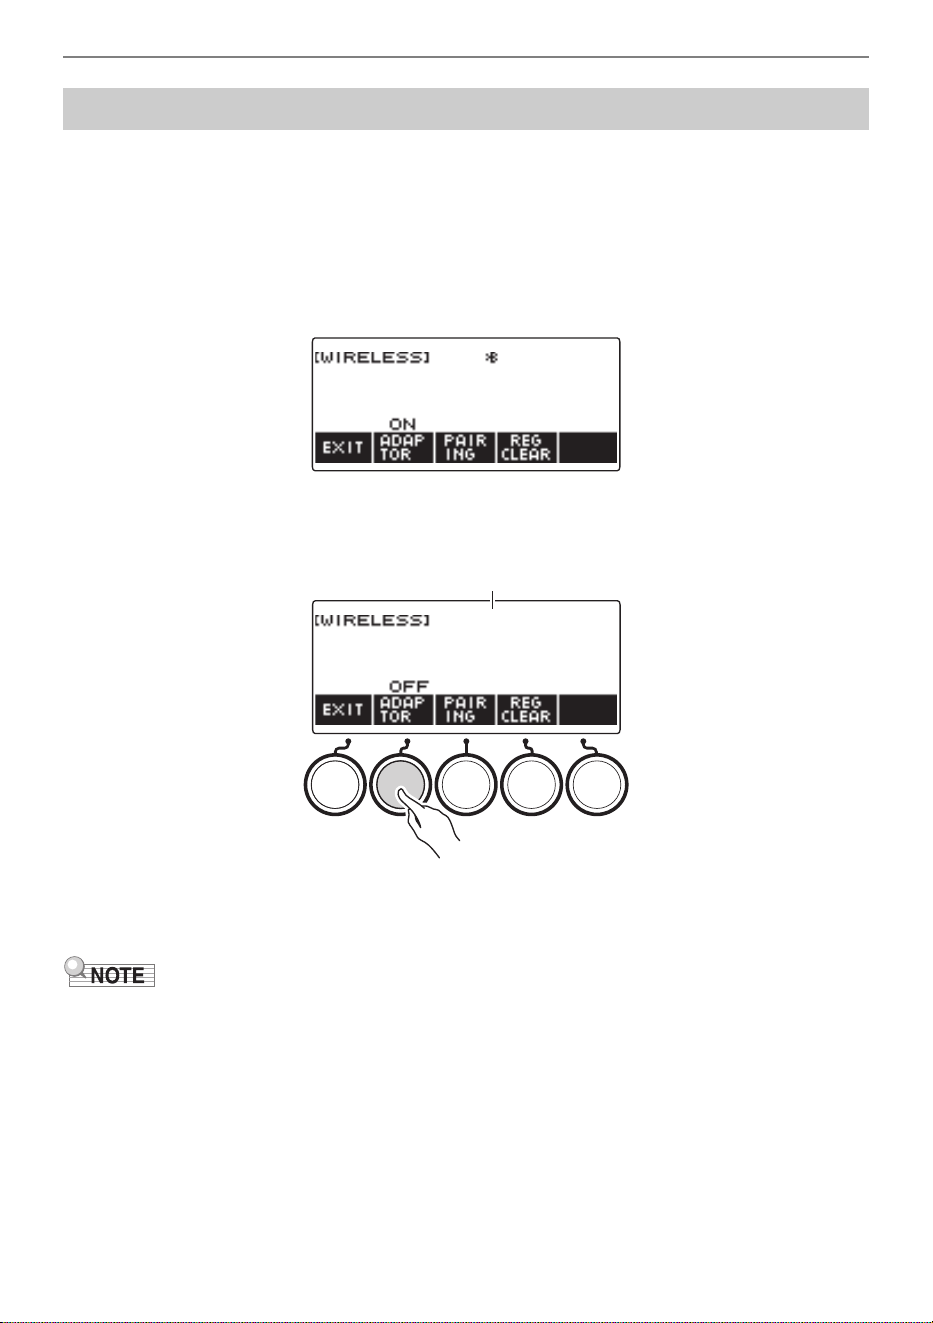
Connecting with External Devices
EN-278
You can disable the Digital Keyboard’s wireless function when you are not using the Wireless MIDI &
audio adaptor for Bluetooth connection.
1.
Press HOME.
This displays the home screen.
2.
Press WIRELESS.
This displays the wireless screen.
3.
Press ADAPTOR.
The Bluetooth icon disappears from the display, indicating that wireless is turned off.
4.
To enable the wireless function, press ADAPTOR again.
This displays the Bluetooth icon.
• While a wireless on/off operation is in progress,
displayed in place of the Bluetooth icon.
• You can also display the wireless screen by pressing MENU and then WIRELESS.
• The WIRELESS may not be displayed on the home screen due to the Home Customization setting.
Disabling Wireless Functions
Bluetooth icon (not displayed)
EN-279
Reference
Troubleshooting
Symptom Required Action
Included Accessories
I can’t find included items during
unpacking.
Carefully check inside all of the packing materials.
Power Requirements
Power does not turn on. • Check the AC adaptor or make sure that the batteries
are facing correctly (page EN-8).
• Replace the batteries with new ones. Or use AC
adaptor power (page EN-8).
When P (Power) is pressed, the
display appears momentarily, but power
does not turn on.
Press P (Power) to turn power back on.
The Digital Keyboard suddenly turns off
after outputting a loud sound.
• Replace the batteries with new ones. Or use AC
adaptor power (page EN-8).
• Lower the volume of the external device.
The Digital Keyboard suddenly turns off
after about 30 minutes.
Disable Auto Power Off (page EN-27).
Display Name
The display keeps going dark or keeps
flickering.
Replace the batteries with new ones (page EN-10). Or
use AC adaptor power (page EN-8).
Screen contents are visible only from a
fixed angle.
This is due to the Digital Keyboard’s production
limitations. It does not indicate malfunction.
Sound
Nothing happens when I press a
keyboard key.
• Adjust the volume level (page EN-28).
• Review volume level related settings of the balance
function, etc.
• Confirm that nothing is plugged into the PHONES
jack on the back of the Digital Keyboard.
• Check to make sure that the “Speaker” setting (page
EN-231) is not turned off.
• Turn the Digital Keyboard off and then back on (page
EN-26). This will initialize settings. Settings are not
initialized if MY SETUP power on recall is enabled.
Nothing happens or notes do not play
normally when I play on the
accompaniment (left-side) keyboard.
Press ACCMP to disable chord play with the
accompaniment keyboard (page EN-159).
B
Reference
EN-280
Nothing happens when I start an Auto
Accompaniment.
• With rhythms 234 to 243, nothing sounds if you do not
play a chord on the keyboard. Try playing a chord
(page EN-160).
• Check and adjust the rhythm volume level (page
EN-151).
• If you have not saved user rhythms to rhythm
numbers 244 to 293, nothing will sound if you select
one of these rhythms and press a (page EN-169).
• Turn the Digital Keyboard off and then back on (page
EN-26). This will initialize settings. Settings are not
initialized if MY SETUP power on recall is enabled.
Nothing happens when I start playing a
song’s Auto Accompaniment.
• It takes a little time after you press the button until the
song starts to play. Wait for the song to start.
• Check and adjust the song volume level (page
EN-186).
• If the song data is not saved, pressing a does not
start the song (page EN-183).
• Turn the Digital Keyboard off and then back on (page
EN-26). This will initialize settings. Settings are not
initialized if MY SETUP power on recall is enabled.
The metronome does not sound. • Check and adjust the metronome volume level (page
EN-33).
• Turn the Digital Keyboard off and then back on (page
EN-26). This will initialize settings. Settings are not
initialized if MY SETUP power on recall is enabled.
Notes keep sounding, without stopping. • Turn the Digital Keyboard off and then back on (page
EN-26). This will initialize settings. Settings are not
initialized if MY SETUP power on recall is enabled.
• Replace the batteries with new ones. Or use AC
adaptor power (page EN-8).
Some notes are cut off while they are
playing.
This happens whenever the number of notes being
sounded exceeds the maximum polyphony value of 64
(32 for some tones). It does not indicate malfunction.
The volume level or tone setting I
configured has changed.
• Adjust the volume level (page EN-28).
• Turn the Digital Keyboard off and then back on (page
EN-26). This will initialize settings. Settings are not
initialized if MY SETUP power on recall is enabled.
• Replace the batteries with new ones. Or use AC
adaptor power (page EN-8).
With certain volume levels and tones,
the sound of notes played in one
keyboard range will sound different from
those played in another keyboard
range.
This is due to system limitations and does not indicate
malfunction.
With some tones, octaves do not
change at the far ends of the keyboard.
This is due to system limitations, and does not indicate
malfunction.
Symptom Required Action
Reference
EN-281
The pitch of the notes does not match
other accompanying instruments or
notes sound strange when played along
with other instruments.
• Check and adjust the transpose setting (page
EN-131) and tuning setting (page EN-132).
• Turn the Digital Keyboard off and then back on (page
EN-26). This will initialize settings. Settings are not
initialized if MY SETUP power on recall is enabled.
The reverb of notes seems to change
suddenly.
• Check and adjust the reverb setting (page EN-107).
• Turn the Digital Keyboard off and then back on (page
EN-26). This will initialize settings. Settings are not
initialized if MY SETUP power on recall is enabled.
Operation
Tone, rhythm, and other settings revert
to their initial defaults whenever I turn
on the Digital Keyboard.
Turning power off and then back on again initializes
Digital Keyboard settings (page EN-26). Settings are not
initialized if MY SETUP power on recall is enabled. You
can save settings to MY SETUP (page EN-140) or
registration memory (page EN-170).
Connecting to a computer
I can’t send or receive MIDI data. • Check to make sure that the USB cable is connected
to the Digital Keyboard and your computer, and that
the correct device is selected with your computer’s
music software (page EN-267).
• Turn off the Digital Keyboard and then exit the music
software on your computer. Next, turn the Digital
Keyboard back on and then restart the music
software on your computer.
Symptom Required Action
Reference
EN-282
Error Indicators
Display Name Cause Action
Measure Limit You are attempting to record more than
1,000 measures.
Make your recordings up to 999
measures long.
Memory Full You are attempting a recording that
exceeds the allowable per-song size
limit.
Keep song recordings with the allowable
per-song size limit
Data Full You are attempting to copy a Tone
Recording and Rhythm Recording as a
Multi-track Recording when there is no
empty Multi-track Recording number.
Delete one or more of the multi-track
recordings in memory.
You are attempting to sample more than
17 drum tones.
Delete some existing data to make room
for new data.
No Media The USB flash drive is not plugged
correctly into the Digital Keyboard’s USB
TO DEVICE port.
Plug the USB flash drive correctly into
the USB TO DEVICE port.
The USB flash drive was removed while
some operation was in progress.
Do not remove the USB flash drive while
any operation is in progress.
The USB flash drive is write-protected. Write-enable the USB flash drive.
The USB flash drive is protected by anti-
virus software.
Use a USB flash drive that is not
protected by anti-virus software.
No File There is no loadable or playable file in
the “MUSICDAT” folder.
Move the file you want to load or play to
the “MUSICDAT” folder.
Read Only A read-only file with the same name you
are trying to use is already stored on the
USB flash drive.
Use a different name.
Remove the read-only attribute from the
existing USB flash drive file and
overwrite it with the new data you want
to save.
Move the file USB flash drive file into its
“MUSICDAT” folder.
Media Full There is not enough room available on
the USB flash drive.
Delete some of the files on the USB flash
drive to make room for new data.
Use a different USB flash drive.
Not SMF 0/1 You are attempting to load or play back
an SMF Format 2 file.
The Digital Keyboard supports SMF
Format 0 or Format 1 files only.
Size Too Large The file on the USB flash drive is too
large to import and play on the Digital
Keyboard.
In the case of a standard MIDI file, use a
file whose size is 320 KB maximum.
Wrong Data The file on the USB flash drive is
corrupted.
Use a file that is not corrupted.
Reference
EN-283
Version Not
Supported
The USB flash drive file version is not
supported by the Digital Keyboard.
Use a version that is supported by the
Digital Keyboard.
Unformatted The USB flash drive format is not
compatible with the Digital Keyboard.
Use a computer to format the USB flash
drive to a format that is compatible with
the Digital Keyboard.
The USB flash drive is corrupted. Use a different USB flash drive.
Display Name Cause Action

Reference
EN-284
Product Specifications
Model CT-S1000V
Keyboard 61 keys
Touch Response 3 types, Off
Maximum Polyphony 64 notes
Tones
Preset Tones 900 preset tones (including 100 lyric tones)
Other Layer, Split, Sustain, Portamento
Vocal Synthesis Language (Japanese, English); Vocalist (22 types); User vocalist;
Vocalist parameters (gender, age, voice); Lyric tone performance
modes (PHRASE Mode, NOTE Mode); Syllable control; Lyric Tone
retrigger; Lyric Tone sequence; Up to 150 user lyric tones
Effects Reverb (24 types, Tone, Off); Chorus (12 types, Tone);
Delay (15 types, Tone); Active DSP (100 types, Tone)
Master Effects Equalizer (10 types, User)
Active Effects Volume sync equalizer, Surround
External Input Effects Center cancel (vocal cut) of AUDIO IN jack input or Bluetooth audio
input
Metronome
Beat Beat chime off, 1 to 16 beats
Tempo 20 to 255
Song Bank
User Songs 10*
1
Part Off Left hand, right hand, both hands
Auto Accompaniment
Preset Rhythms 243 types
User Rhythms 50 types*
2
One Touch Presets 243 types
Other INTRO, ENDING; chord fingering mode switching
Registration Maximum 64 setups (4 setups × 16 banks), Registration sequence,
Freeze
Demo Function 2 Demo Songs
Function Volume
Adjustment
Metronome; Rhythm; Song
B
Reference
EN-285
MIDI Recorder Real-time recording, playback
Tone Recording 1 song
Rhythm Recording 1 song
Multi-track Recording 5 songs, 6 tracks (1 system track, 5 solo tracks)
Capacity 1 song, approximately 40,000 notes
Sampling Sampled melody × 1, sampled drum set × 1 (16 notes)
Sampling Frequencies 44.1 kHz
Sampling Channels Stereo
Sampling Bits 16
Other loop function
Other Functions
Transpose ±1 octave (–12 to 0 to +12 semitones)
Octave Shift –3 to 0 to +3 octaves
Tuning A4 = 415.5 to 465.9Hz (Initial Default: 440.0Hz)
Scales 17 preset scales
Auto Harmonize 12 types
Arpeggiator 150 types
Pitch Bend Wheel 0 to 24 semitones
Control Knobs 3, Knob parameter control
APP Function
Supported Devices iOS, Android
MIDI Function 16-channel multi-timbre receive; GM Level 1 standard
Jacks
PHONES jack Stereo mini jack (3.5 mm)
LINE OUT jack Standard jack (6.3mm) × 2
AUDIO IN jack Stereo mini jack (3.5 mm) (Input impedance: 10 kΩ;
Input sensitivity: 200 mV)
USB TO HOST port micro-B
USB TO DEVICE port Type A
PEDAL 1 jack Standard jack (6.3mm) (pedal sustain, sostenuto, soft, start/stop,
fill-in, arpeggiator hold, registration sequence,
Lyric Change, Syllable Reset, Lyric tone hold)
PEDAL 2/EXPRESSION
jack
Standard jack (6.3mm) (PEDAL 1 settings, expression,
master volume, balance, tempo)
AC adaptor terminal 12V DC
Reference
EN-286
*1 Maximum capacity per song: Approximately 320 kilobytes
*2 Maximum capacity per rhythm: Approximately 64 kilobytes
*3 Measured values while using eneloop batteries.
eneloop is a registered trademark of Panasonic Corporation.
• Specifications and designs are subject to change without notice.
Power Requirements 2-Way Power
Batteries 6 AA-size alkaline batteries or AA-size rechargeable nickel-metal
hydride batteries
Continuous Operation Approximately 3 hours (alkaline batteries), approximately 3 hours
(rechargeable nickel-metal hydride batteries)*
3
Actual continuous operation time may be shorter due to battery type,
performance type, and usage environment.
AC adaptor AD-A12150LW (JEITA Standard with unified polarity plug)
Auto Power Off After approximately 30 minutes of non-operation; Can be disabled.
Speakers 13 cm × 6 cm (oval) × 2 (Output: 2.5 W + 2.5 W)
Power Consumption 12 V = 7.5 W
LCD Adjustable contrast
Dimensions 93.0 (W) × 25.8 (D) × 9.1 (H) cm (36 5/8 × 10 3/16 × 3 9/16 inch)
Weight Approximately 4.7 kg (10.4 lbs) (Excluding batteries)

Reference
EN-287
AC Adaptor Handling Precautions
Model: AD-A12150LW
1. Read these instructions.
2. Keep these instructions on hand.
3. Heed all warnings.
4. Follow all instructions.
5. Do not use this product near water.
6. Clean only with a dry cloth.
7. Do not install near radiators, heat registers, stoves, or any other source of heat (including
amplifiers).
8. Use only attachments and accessories specified by the manufacturer.
9. Refer all servicing to qualified service personnel. Servicing is required after any of the
following occurs: when the product is damaged, when the power supply cord or plug is
damaged, when liquid is spilled into the product, when a foreign object falls into the product,
when the product is exposed to rain or moisture, when the product does not operate normally,
when the product is dropped.
10. Do not allow the product to be exposed to dripping or splashing liquid. Do not place any object
containing liquid on the product.
11. Do not allow the electrical load output to exceed the label rating.
12. Make sure the surrounding area is dry before plugging into a power source.
13. Make sure the product is oriented correctly.
14. Unplug the product during lightning storms or when you do not plan to use it for a long time.
15. Do not allow product ventilation openings to become blocked. Install the product in
accordance with the manufacturer’s instructions.
16. Take care the power cord is located where it will not be stepped upon or bent severely,
particularly in locations close to plugs and convenience receptacles, and in locations where it
exits from the product.
17. The AC adaptor should be plugged into a power outlet as close to the product as possible to
allow immediate disconnection of the plug in case of emergency.
The symbol below is an alert indicating un-insulated hazardous voltage inside the product’s
enclosure, which may be sufficient to constitute the risk of electric shock to users.
’
The symbol below is an alert indicating the presence of important operating and maintenance
(servicing) instructions in the documentation that accompanies the product.
*
Reference
EN-288
Tone List
No. Tone Name
Program
Change
Bank
Select
MSB
Bank
Select
LSB
*1
DSP
Tone
Advanced
Tone
Advanced
Layer
Tone
*2
Part
Octave
Shift
Mono
Mode
PIANO
1 STAGE PIANO 0 1 0/64
2 CLASSIC GRAND 0 24 0/64
3 BALLAD PIANO 0 25 0/64
4BRIGHT PIANO 1 1 0/64
5 MELLOW ROCK PIANO 0 26 0/64
6 MELLOW PIANO 0 2 0/64
7 DYNAMIC PIANO 1 24 0/64
8 ADV PIANO PAD 0 28 0/64
9 GRAND PIANO 0 3 0/64
10 AMBIENT PIANO 0 39 0/64
11 POP PIANO 0 32 0/64
12 ROCK PIANO 1 2 0/64
13 DANCE PIANO 1 3 0/64
14 LA PIANO 1 4 0/64
15 BREEZING PIANO 0 27 0/64
16 TACK PIANO 0 33 0/64
17 WIDE GRAND PIANO 0 5 0/64
18 MONO PIANO 0 4 0/64
19 HONKY-TONK 1 3 32 0/64
20 HONKY-TONK 2 3 34 0/64
21 OCTAVE PIANO 1 3 33 0/64
22 OCTAVE PIANO 2 3 35 0/64
23 BASS/PIANO 0 31 0/64
24 STRINGS PIANO 0 34 0/64
25 PIANO PAD 0 35 0/64
26 MODULATED PIANO 0 36 0/64
27 VOICE PIANO 0 37 0/64
28 NEW AGE PIANO 0 38 0/64
29 ELEC.GRAND PIANO 2 32 0/64
30 AMP E.GRAND 2 34 0/64
31 MODERN E.G.PIANO 2 33 0/64
HARPSICHORD
32 HARPSICHORD 1 6 1 0/64
33 HARPSICHORD 2 6 32 0/64
34
COUPLED HARPSICHORD
6 33 0/64
35
AMBIENT HARPSICHORD
6350/64
ELEC.PIANO
36 STAGE E.PIANO 4 24 0/64
37 GALAXIA EP 5 32 0/64
38 PHASER E.PIANO 4 7 0/64
39 DYNO E.PIANO 4 33 0/64
40 AMP 60'S E.PIANO 4 35 0/64
41 LUCENT EP 5 33 0/64
B

Reference
EN-289
42 DYNAMIC EP 4 32 0/64
43 ELEC.PIANO 1 4 1 0/64
44 ELEC.PIANO 2 4 2 0/64
45 ELEC.PIANO 3 4 3 0/64
46 ELEC.PIANO 4 4 4 0/64
47 ELEC.PIANO 5 5 34 0/64
48 ELEC.PIANO 6 4 5 0/64
49 TREM 60'S E.PIANO 4 25 0/64
50 60'S E.PIANO 4 6 0/64
51 AMP E.PIANO 1 4 36 0/64
52 AMP E.PIANO 2 4 37 0/64
53 PAN E.PIANO 4 26 0/64
54 DIGITAL E.PIANO 1 5 1 0/64
55 DIGITAL E.PIANO 2 5 2 0/64
56 DIGITAL E.PIANO 3 5 3 0/64
57 WIDE E.PIANO 4 8 0/64
58 MELLOW E.PIANO 4 9 0/64
59 WAH E.PIANO 4 38 0/64
60 CRUNCH E.PIANO 4 39 0/64
61 DIZZY E.PIANO 4 40 0/64
62 ADV E.PIANO PAD 1 4 27 0/64
63 ADV E.PIANO PAD 2 5 24 0/64
64 E.PIANO PAD 4 34 0/64
CLAVI
65 CLAVI 1 7 24 0/64
66 WAH CLAV 7 25 0/64
67 AMP CLAVI 7 34 0/64
68 CLAVI 2 7 1 0/64
69 CLAVI 3 7 32 0/64
70 CLAVI 4 7 2 0/64
71 CLAVI 5 7 33 0/64
72 CLAVI 6 7 3 0/64
VIB./CHROM.PERC.
73 VIBRAPHONE 1 11 24 0/64
74 AMBIENT VIBRAPHONE 11 32 0/64
75 VIBRAPHONE 2 11 1 0/64
76 VIBRAPHONE 3 11 2 0/64
77 VIBRAPHONE WIDE 11 3 0/64
78 ADV VIBRAPHONE PAD 11 25 0/64
79 MARIMBA 12 32 0/64
80 ADV MARIMBA PAD 12 24 0/64
81 XYLOPHONE 13 1 0/64
82 CELESTA 8 1 0/64 +1
83 GLOCKENSPIEL 9 1 0/64 +1
84 MUSIC BOX 10 32 0/64 +1
85 ORGEL 10 33 0/64
No. Tone Name
Program
Change
Bank
Select
MSB
Bank
Select
LSB
*1
DSP
Tone
Advanced
Tone
Advanced
Layer
Tone
*2
Part
Octave
Shift
Mono
Mode
Reference
EN-290
86 TUBULAR BELL 14 32 0/64
87 CHURCH BELLS 14 33 0/64
ELEC.ORGAN
88 JS ORGAN 17 32 0/64
89 AMP ORGAN 1 16 24 0/64
90 ROCK ORGAN 1 18 24 0/64
91 HARD ROCK ORGAN 18 25 0/64
92 GOSPEL ORGAN 1 20 24 0/64
93 VELO.ORGAN 16 25 0/64
94 F-ORGAN 16 26 0/64
95 V-ORGAN 16 27 0/64
96 RTF FD ORGAN 16 32 0/64
97 ROCK OD ORGAN 18 32 0/64
98 TREMOLO ORGAN 16 5 0/64
99 DP ORGAN 16 4 0/64
100 JAZZ ORGAN 1 17 33 0/64
101 JAZZ ORGAN 2 17 34 0/64
102 ELEC.ORGAN 1 16 1 0/64
103 ELEC.ORGAN 2 16 2 0/64
104 ELEC.ORGAN 3 16 33 0/64
105 ELEC.ORGAN 4 16 34 0/64
106 ELEC.ORGAN 5 16 35 0/64
107 PERC.ORGAN 1 17 1 0/64
108 PERC.ORGAN 2 17 35 0/64
109 GOSPEL ORGAN 2 17 38 0/64
110 FULL DRAWBAR 16 3 0/64
111 ROCK ORGAN 2 18 1 0/64
112 ROCK ORGAN 3 18 2 0/64
113 CLICK ORGAN 17 37 0/64
114 70'S ORGAN 17 36 0/64
115 ORGAN PAD 16 6 0/64
116 THEATER ORGAN 19 1 0/64
117 PERC.ORGAN 3 17 39 0/64
118 ELEC.ORGAN 6 16 36 0/64
119 AMP ORGAN 2 16 37 0/64
120 AMP ORGAN 3 16 38 0/64
121 ORGAN FLUTE 19 35 0/64
122 PUFF ORGAN 20 33 0/64
123 REED ORGAN 20 25 0/64
124 ROTARY F-ORGAN 16 28 0/64
125 ROTARY V-ORGAN 16 29 0/64
PIPE ORGAN
126 CHAPEL ORGAN 19 34 0/64
127 PIPE ORGAN 1 19 2 0/64
128 PIPE ORGAN 2 19 32 0/64
129 PIPE ORGAN 3 19 33 0/64
No. Tone Name
Program
Change
Bank
Select
MSB
Bank
Select
LSB
*1
DSP
Tone
Advanced
Tone
Advanced
Layer
Tone
*2
Part
Octave
Shift
Mono
Mode
Reference
EN-291
ACCORDION
130 ACCORDION FRENCH 1 21 32 0/64
131 ACCORDION FRENCH 2 21 33 0/64
132 ACCORDION FRENCH 3 21 34 0/64
133 ACCORDION ITALY 1 21 1 0/64
134 ACCORDION ITALY 2 21 35 0/64
135 ACCORDION 21 2 0/64
136 BANDONEON 23 32 0/64
137 BANDONEON SOLO 23 1 0/64
138 HARMONICA 1 22 32 0/64
139 HARMONICA 2 22 33 0/64
ACOUS.GUITAR
140
DYNAMIC NYLON GUITAR
24 24 0/64
141
DYNAMIC STEEL GUITAR
25 24 0/64
142 GUITAR PAD 25 72 0/64
143
NYLON GUITAR VELO.SLIDE
24 32 0/64
144
STEEL GUITAR VELO.SLIDE
25 32 0/64
145 NYLON STR.GUITAR 1 24 1 0/64
146 NYLON STR.GUITAR 2 24 2 0/64
147 NYLON STR.GUITAR 3 24 4 0/64
148 STEEL STR.GUITAR 1 25 1 0/64
149 STEEL STR.GUITAR 2 25 2 0/64
150 STEEL STR.GUITAR 3 25 3 0/64
151 STEEL STR.GUITAR 4 25 4 0/64
152 12 STR.GUITAR 25 5 0/64
153 MANDOLIN 25 40 0/64
154 UKULELE 24 3 0/64
155
VERSATILE NYLON GUITAR
24 8 0/64
156
VERSATILE STEEL GUITAR
25 8 0/64
ELEC.GUITAR
157 CLEAN LEAD GUITAR 27 24 0/64
158 DISTORTION GUITAR 1 30 2 0/64
159 DOUBLE TRACK GUITAR 27 25 0/64
160
SOLO FEEDBACK GUITAR
30 25 0/64
161 CRY DIST GUITAR 30 24 0/64
162 TALK GUITAR OH-YEAH 30 30 0/64
163 SOLO GUITAR SYNTH 62 24 0/64
164 JAZZ GUITAR 1 26 1 0/64
165 JAZZ GUITAR 2 26 32 0/64
166 OD OCT JAZZ GUITAR 26 2 0/64
167 CRUNCH JAZZ GUITAR 26 3 0/64
168 CLEAN GUITAR 1 27 32 0/64
169 CLEAN GUITAR 2 27 1 0/64
170 CLEAN GUITAR 3 27 2 0/64
171 CLEAN GUITAR 4 27 3 0/64
172 CLEAN GUITAR 5 27 4 0/64
No. Tone Name
Program
Change
Bank
Select
MSB
Bank
Select
LSB
*1
DSP
Tone
Advanced
Tone
Advanced
Layer
Tone
*2
Part
Octave
Shift
Mono
Mode
Reference
EN-292
173 CLEAN GUITAR 6 27 33 0/64
174 CLEAN GUITAR 7 27 7 0/64
175
CHORUS CLEAN GUITAR 1
27 5 0/64
176
CHORUS CLEAN GUITAR 2
27 6 0/64
177 WAH CLEAN GUITAR 27 34 0/64
178
CRUNCH ELEC.GUITAR 1
29 3 0/64
179
CRUNCH ELEC.GUITAR 2
29 32 0/64
180
CRUNCH ELEC.GUITAR 3
27 8 0/64
181
CHORUS CRUNCH GUITAR
29 4 0/64
182 MUTE GUITAR 28 1 0/64
183 CRUNCH MUTE GUITAR 28 2 0/64
184 OVERDRIVE MUTE GT 28 5 0/64
185 PHASER MUTE GUITAR 28 3 0/64
186 AMBIENT MUTE GUITAR 28 4 0/64
187 HUM BLUES GUITAR 29 5 0/64
188 OVERDRIVE GUITAR 1 29 1 0/64
189 OVERDRIVE GUITAR 2 29 2 0/64
190 LFO WAH OD GUITAR 29 6 0/64
191 WAH OD GUITAR 29 33 0/64
192 CRY OD GUITAR 29 34 0/64
193 FLANGER OD GUITAR 29 35 0/64
194 DISTORTION GUITAR 2 30 1 0/64
195 DISTORTION GUITAR 3 30 3 0/64
196 DISTORTION GUITAR 4 30 5 0/64
197 WAH DIST GUITAR 30 4 0/64
198 PHASER DRIVE GUITAR 29 36 0/64
199 VINTAGE OD GUITAR 29 37 0/64
200 AMP GUITAR 1 30 35 0/64
201 AMP GUITAR 2 30 36 0/64
202
METAL AMBIENT GUITAR
30 32 0/64
203 FRONT DRIVE GUITAR 30 33 0/64
204 UPPER OCT GUITAR 27 35 0/64
205 C+R CRUNCH GUITAR 29 40 0/64
206 OCT METAL GUITAR 30 34 0/64
207 TALK GUITAR UUH-WAH 30 28 0/64
208 TALK GUITAR DOO-CHU 30 29 0/64
209 FEEDBACK GUITAR 30 26 0/64
210 GUITAR SYNTH 62 25 0/64
211
VERSATILE SINGLE COIL E.GUITAR
27 9 0/64
ACOUS.BASS
212 ACOUSTIC BASS 1 32 1 0/64 –1
213 ACOUSTIC BASS 2 32 32 0/64 –1
214 RIDE BASS 32 33 0/64 –1
ELEC.BASS
215 FINGERED BASS 1 33 6 0/64 –1
216 FINGERED BASS 2 33 5 0/64 –1
No. Tone Name
Program
Change
Bank
Select
MSB
Bank
Select
LSB
*1
DSP
Tone
Advanced
Tone
Advanced
Layer
Tone
*2
Part
Octave
Shift
Mono
Mode

Reference
EN-293
217
FINGERED BASS VELO.SLAP 1
33 33 0/64 –1
218
FINGERED BASS VELO.SLAP 2
33 32 0/64 –1
219 SLAP BASS 1 36 1 0/64 –1
220 FINGER SLAP BASS 1 36 5 0/64 –1
221
CHORUS FINGERED BASS 1
33 39 0/64 –1
222
PHASER FINGERED BASS
33 40 0/64 –1
223 AMP FINGERED BASS 33 38 0/64 –1
224 WAH FINGERED BASS 1 33 36 0/64 –1
225 WAH SLAP BASS 1 36 36 0/64 –1
226 FINGERED BASS 3 33 1 0/64 –1
227 FINGERED BASS 4 33 2 0/64 –1
228 FINGERED BASS 5 33 3 0/64 –1
229 FINGERED BASS 6 33 4 0/64 –1
230 FINGERED BASS 7 33 7 0/64 –1
231
CHORUS FINGERED BASS 2
33 8 0/64 –1
232 WAH FINGERED BASS 2 33 9 0/64 –1
233 PICKED BASS 1 34 1 0/64 –1
234 PICKED BASS 2 34 2 0/64 –1
235 MUTE PICKED BASS 34 5 0/64 –1
236 SLAP BASS 2 36 32 0/64 –1
237 SLAP BASS 3 36 2 0/64 –1
238 CHORUS SLAP BASS 36 33 0/64 –1
239 AMP SLAP BASS 36 3 0/64 –1
240 WAH SLAP BASS 2 36 34 0/64 –1
241 FRETLESS BASS 35 32 0/64 –1
242
CHORUS FRETLESS BASS
35 33 0/64 –1
243 AMP FRETLESS BASS 35 34 0/64 –1
244 FINGER SLAP BASS 2 36 4 0/64 –1
245 FINGER SLAP BASS 3 36 35 0/64 –1
246
VERSATILE ELECTRIC BASS 1
33 10 0/64 –1
247
VERSATILE ELECTRIC BASS 2
33 24 0/64 –1
SYNTH-BASS
248 SYNTH-BASS 1 39 3 0/64 –1
249 SYNTH-BASS 2 38 6 0/64 –1
250 SYNTH-BASS 3 38 1 0/64 –1
251 SYNTH-BASS 4 38 2 0/64 –1
252 SYNTH-BASS 5 39 1 0/64 –1
253 SYNTH-BASS 6 39 2 0/64 –1
254 SYNTH-BASS 7 38 32 0/64 –1
255 SYNTH-BASS 8 39 33 0/64 –1
256 SYNTH-BASS 9 39 4 0/64 –1
257 SYNTH-BASS 10 39 5 0/64 –1
258 SYNTH-BASS 11 38 4 0/64 –1
259 SYNTH-BASS 12 38 5 0/64 –1
260 SYNTH-BASS 13 39 6 0/64 –1
261 ORGAN BASS 39 7 0/64
No. Tone Name
Program
Change
Bank
Select
MSB
Bank
Select
LSB
*1
DSP
Tone
Advanced
Tone
Advanced
Layer
Tone
*2
Part
Octave
Shift
Mono
Mode
Reference
EN-294
SOLO STRINGS
262 SOLO VIOLIN 40 32 0/64
263 VIOLIN 40 33 0/64
264 SLOW VIOLIN 40 34 0/64
265 VIOLA 41 32 0/64
266 CELLO 42 32 0/64 –1
267 SLOW CELLO 42 33 0/64 –1
268 CONTRABASS 43 32 0/64 –1
269 HARP 1 46 32 0/64
270 HARP 2 46 34 0/64
STRING ENSEMBLE
271 STEREO STRINGS 48 32 0/64
272 MELLOW STRINGS 1 49 1 0/64
273 MELLOW STRINGS 2 48 1 0/64
274 BRIGHT STRINGS 1 49 2 0/64
275 BRIGHT STRINGS 2 48 38 0/64
276 STRINGS 48 3 0/64
277
SLOW STEREO STRINGS
49 37 0/64
278 SLOW STRINGS 1 48 2 0/64
279 SLOW STRINGS 2 49 32 0/64
280 STRING ENSEMBLE 48 4 0/64
281 WARM STRINGS 48 5 0/64
282 PIZZICATO STRINGS 45 32 0/64
283 CHAMBER 48 33 0/64
284 OCTAVE STRINGS 48 34 0/64
285 ORCHESTRA HIT 1 55 4 0/64
286 ORCHESTRA HIT 2 55 32 0/64
287 ORCHESTRA HIT 3 55 33 0/64
288 BRASS & STRINGS 48 36 0/64
289 VIOLIN SECTION 48 6 0/64
290 STRING QUARTET 48 37 0/64
291 HARP & STRINGS 49 3 0/64
SOLO BRASS
292 SOLO TRUMPET 56 1 0/64
293 TRUMPET 1 56 32 0/64
294 TRUMPET 2 56 2 0/64
295 TRUMPET 3 56 36 0/64
296 MELLOW TRUMPET 56 3 0/64
297 MUTE TRUMPET 59 1 0/64
298 AMBIENT TRUMPET 56 33 0/64
299 FLUGELHORN 56 37 0/64
300 TROMBONE 57 32 0/64 –1
301 JAZZ TROMBONE 57 33 0/64 –1
302 FRENCH HORN 60 32 0/64
303
FRENCH HORN SECTION
60 1 0/64
304 TUBA 58 32 0/64 –2
No. Tone Name
Program
Change
Bank
Select
MSB
Bank
Select
LSB
*1
DSP
Tone
Advanced
Tone
Advanced
Layer
Tone
*2
Part
Octave
Shift
Mono
Mode

Reference
EN-295
BRASS ENSEMBLE
305 SYMPHONIC BRASS 61 40 0/64
306 STEREO BRASS 61 1 0/64
307 BRASS 61 2 0/64
308 BRASS SECTION 1 61 3 0/64
309 BRASS SECTION 2 61 4 0/64
310 BRASS SECTION 3 61 37 0/64
311 AMBIENT BRASS 61 38 0/64
312 BIG BAND BRASS 61 32 0/64
313 HARD BRASS 61 5 0/64
314 BRASS SFZ 61 33 0/64
315
TRUMPET & TROMBONE & SAX
61 39 0/64
316 BRASS VELO.FALL 61 34 0/64
317 BRASS VELO.SHAKE 61 35 0/64
318
BRASS VELO.GLISSANDO
61 36 0/64
319 VERSATILE BRASS 1 61 8 0/64
320 VERSATILE BRASS 2 61 9 0/64
SYNTH-BRASS
321 SYNTH-BRASS 1 62 32 0/64
322 SYNTH-BRASS STAB 62 39 0/64
323 SYNTH-BRASS 2 62 33 0/64
324 SYNTH-BRASS 3 62 1 0/64
325 SYNTH-BRASS 4 62 34 0/64
326 SYNTH-BRASS 5 62 37 0/64
327 WARM SYNTH-BRASS 1 62 35 0/64
328 WARM SYNTH-BRASS 2 62 38 0/64
329 ANALOG SYNTH-BRASS 62 36 0/64
330 80'S SYNTH-BRASS 62 2 0/64
331 TRANCE BRASS 63 32 0/64
SAX
332 SOLO TENOR SAX 1 66 5 0/64 –1
333 SOLO TENOR SAX 2 66 1 0/64 –1
334 SOLO ALTO SAX 65 42 0/64
335 VELO.ALTO SAX 65 36 0/64
336 BREATHY ALTO SAX 65 33 0/64
337 SOLO SOPRANO SAX 1 64 37 0/64
338 SOLO SOPRANO SAX 2 64 32 0/64
339 VELO.SOPRANO SAX 64 35 0/64
340 BREATHY S.SAX 64 34 0/64
341 ALTO SAX GROWL 65 37 0/64
342 ALTO SAX 1 65 39 0/64
343 ALTO SAX 2 65 1 0/64
344 TENOR SAX 66 2 0/64 –1
345 BREATHY TENOR SAX 66 3 0/64 –1
346 SOPRANO SAX 1 64 36 0/64
347 SOPRANO SAX 2 64 33 0/64
No. Tone Name
Program
Change
Bank
Select
MSB
Bank
Select
LSB
*1
DSP
Tone
Advanced
Tone
Advanced
Layer
Tone
*2
Part
Octave
Shift
Mono
Mode

Reference
EN-296
348 BARITONE SAX 67 1 0/64 –1
349 AMBIENT SAX 1 65 38 0/64
350 AMBIENT SAX 2 67 33 0/64 –1
351 HARD ALTO SAX 65 2 0/64
352 TENOR SAXYS 66 4 0/64
353 SAX SECTION 1 65 40 0/64
354 SAX SECTION 2 65 41 0/64
REED
355 SOLO OBOE 68 32 0/64
356 SOLO BASSOON 70 32 0/64 –1
357 CLARINET 71 32 0/64
358 VELO.CLARINET 71 1 0/64
359 OBOE 68 1 0/64
360 ENGLISH HORN 69 32 0/64
361 BASSOON 70 33 0/64 –1
PIPE
362 SOLO FLUTE 1 73 32 0/64
363 SOLO FLUTE 2 73 33 0/64
364 FLUTE 1 73 1 0/64
365 FLUTE 2 73 36 0/64
366 JAZZ FLUTE 1 73 2 0/64
367 JAZZ FLUTE 2 73 37 0/64
368 PICCOLO 72 32 0/64 +1
369 RECORDER 74 32 0/64
370 PAN FLUTE 1 75 32 0/64
371 PAN FLUTE 2 75 33 0/64
372 BOTTLE BLOW 76 32 0/64
373 WHISTLE 78 1 0/64
374 OCARINA 79 32 0/64
375 SHAKUHACHI 77 32 0/64
376 PIPE SECTION 72 33 0/64
377 FLUTE & OBOE 73 38 0/64
378 TAPE FLUTE 1 73 39 0/64
379 TAPE FLUTE 2 73 40 0/64
SYNTH-LEAD
380 SAW LEAD 1 81 51 0/64
381 AMP SAW LEAD 81 52 0/64
382 DRIVE SAW LEAD 81 53 0/64
383 SUPER SAW LEAD 1 81 16 0/64
384 SUPER SAW LEAD 2 81 17 0/64
385 TRANCE POLY LEAD 81 18 0/64
386 TRANCE PLUCK 81 38 0/64
387 PROGRESSIVE PLUCK 81 39 0/64
388 SAW PLUCK 81 40 0/64
389 DIRTY PLUCK 80 38 0/64
390 POP LEAD 81 43 0/64
No. Tone Name
Program
Change
Bank
Select
MSB
Bank
Select
LSB
*1
DSP
Tone
Advanced
Tone
Advanced
Layer
Tone
*2
Part
Octave
Shift
Mono
Mode

Reference
EN-297
391 HOUSE CHORD SYNTH 81 44 0/64
392 POPULAR PLUCK 1 81 19 0/64
393 POPULAR PLUCK 2 81 20 0/64
394 VOCAL CHOP SYNTH 1 85 16 0/64
395 VOCAL CHOP SYNTH 2 85 17 0/64
396
DSP MODULATED SYNTH 1
81 45 0/64
397
DSP MODULATED SYNTH 2
81 46 0/64
398
DSP MODULATED SYNTH 3
81 47 0/64
399 X SYNTH LEAD 1 81 7 0/64
400 X SYNTH LEAD 2 80 36 0/64
401 X SYNTH LEAD 3 81 32 0/64
402 X SYNTH LEAD 4 80 37 0/64
403 X SYNTH LEAD 5 81 33 0/64
404 X SYNTH LEAD 6 80 6 0/64
405 VA SYNTH 1 80 3 0/64
406 VA SYNTH 2 80 4 0/64
407 VA SYNTH 3 80 5 0/64
408 VA SYNTH SEQ-BASS 1 81 10 0/64
409 VA SYNTH SEQ-BASS 2 81 11 0/64
410 VA SYNTH SEQ-BASS 3 81 12 0/64 –1
411 VA SYNTH SEQUENCE 1 81 13 0/64 –1
412 VA SYNTH SEQUENCE 2 81 14 0/64
413 SAW LEAD 2 81 1 0/64
414 SAW LEAD 3 81 2 0/64
415 SAW LEAD 4 81 3 0/64
416 MELLOW SAW LEAD 81 4 0/64
417 PULSE SAW LEAD 81 5 0/64
418 TRANCE LEAD 81 6 0/64
419 SS LEAD 81 34 0/64
420 SQUARE LEAD 1 80 32 0/64
421 SQUARE LEAD 2 80 41 0/64
422 SLOW SQUARE LEAD 80 1 0/64
423 PHASER SQUARE LEAD 80 42 0/64
424 PULSE LEAD 1 80 33 0/64
425 PULSE LEAD 2 80 43 0/64
426 SQUARE PULSE LEAD 80 34 0/64
427 SINE LEAD 80 2 0/64
428 VELO.SINE LEAD 80 44 0/64
429 SYNTH SEQUENCE 80 8 0/64
430 SEQUENCE SAW 81 15 0/64
431 SEQUENCE SINE 80 7 0/64
432 8BIT ARPEGGIO 1 80 9 0/64
433 8BIT ARPEGGIO 2 80 45 0/64
434 8BIT WAVE 80 35 0/64
435 SAW ARPEGGIO 1 81 8 0/64
436 SAW ARPEGGIO 2 81 9 0/64
No. Tone Name
Program
Change
Bank
Select
MSB
Bank
Select
LSB
*1
DSP
Tone
Advanced
Tone
Advanced
Layer
Tone
*2
Part
Octave
Shift
Mono
Mode
Reference
EN-298
437
DSP MODULATED LEAD 1
81 48 0/64
438
DSP MODULATED LEAD 2
81 49 0/64
439
DSP MODULATED LEAD 3
81 50 0/64
440 VENT LEAD 82 32 0/64
441 CHURCH LEAD 85 32 0/64
442 DOUBLE VOICE LEAD 85 34 0/64
443 SYNTH-VOICE LEAD 85 1 0/64
444 FIFTH LEAD 86 32 0/64
445 FIFTH SAW LEAD 86 33 0/64
446 FIFTH SQUARE LEAD 86 34 0/64
447 FOURTH LEAD 86 35 0/64
448 SEVENTH SEQUENCE 86 36 0/64
449 BASS+LEAD 87 32 0/64
450 SYNTH-BASS+LEAD 87 33 0/64
451 REED LEAD 87 34 0/64
452 G FUNK LEAD 81 41 0/64
453 HOP LEAD 80 39 0/64
454 HIP LEAD 80 40 0/64
455 WIRE LEAD 81 35 0/64
456 FIRE WIRE 81 36 0/64
SYNTH-PAD
457 SYNTH-STRINGS 1 50 36 0/64
458 SYNTH-STRINGS 2 50 37 0/64
459 SYNTH-STRINGS 3 50 38 0/64
460 PROGRESSIVE VOICE 88 4 0/64
461 SUPER SAW PAD 90 6 0/64
462 OLD TAPE PAD 88 5 0/64
463 SOUND TRACK 1 97 34 0/64
464 FANTASIA 88 33 0/64
465 XENON PAD 88 32 0/64
466 HOUSE CHORD PAD 97 33 0/64
467 MAGNI SYNTH PAD 90 39 0/64
468 ADVANCED PAD 1 90 40 0/64
469 ADVANCED PAD 2 90 41 0/64
470 DSP MODULATED PAD 1 90 36 0/64
471 DSP MODULATED PAD 2 90 37 0/64
472 DSP MODULATED PAD 3 90 38 0/64
473 X SYNTH PAD 1 90 32 0/64
474 X SYNTH PAD 2 90 33 0/64
475 X SYNTH PAD 3 90 34 0/64
476 SYNTH-STRINGS 4 51 32 0/64
477 SYNTH-STRINGS 5 50 1 0/64
478 SYNTH-STRINGS 6 50 2 0/64
479 70'S SYNTH-STR.1 50 3 0/64
480 70'S SYNTH-STR.2 50 32 0/64
481 80'S SYNTH-STR.1 50 33 0/64
No. Tone Name
Program
Change
Bank
Select
MSB
Bank
Select
LSB
*1
DSP
Tone
Advanced
Tone
Advanced
Layer
Tone
*2
Part
Octave
Shift
Mono
Mode
Reference
EN-299
482 80'S SYNTH-STR.2 50 34 0/64
483 DIGITAL SYNTH-STR.1 51 33 0/64
484 DIGITAL SYNTH-STR.2 50 4 0/64
485 FAST SYNTH-STRINGS 50 5 0/64
486 SLOW SYNTH-STRINGS 50 35 0/64
487
OCTAVE SYNTH-STRINGS
51 35 0/64
488 FANTASY 88 1 0/64
489 NEW AGE 88 2 0/64
490 WARM PAD 89 1 0/64
491 FAT SAW PAD 89 2 0/64
492 SOFT PAD 89 3 0/64
493 POLYSYNTH PAD 90 35 0/64
494 SYNTH-PAD 90 1 0/64
495 VA SYNTH-PAD 90 2 0/64
496 POLY SAW 90 3 0/64
497 BRIGHT SAW PAD 1 90 4 0/64
498 BRIGHT SAW PAD 2 90 5 0/64
499 GLASS PAD 92 32 0/64
500 BOTTLE PAD 92 33 0/64
501 ETHNIC PAD 93 32 0/64
502 SWEEP PAD 95 1 0/64
503 WOOD PAD 96 32 0/64
504 SOUND TRACK 2 97 1 0/64
505 VIBRAPHONE BELL 98 32 0/64
506 ATMOSPHERE PAD 99 1 0/64
507 STEEL PAD 99 32 0/64
508 BRIGHTNESS 100 1 0/64
509 BRIGHT BELL PAD 100 2 0/64
510 SPACE PAD 103 1 0/64
511 EDM PAD 88 3 0/64
CHOIR
512 VOCODER 54 33 0/64
513 SYNTH CHOIR 54 34 0/64
514
DSP MODULATED VOICE 1
52 34 0/64
515
DSP MODULATED VOICE 2
52 35 0/64
516
DSP MODULATED VOICE 3
52 37 0/64
517 CHOIR AAHS 52 1 0/64
518 STRINGS VOICE 52 33 0/64
519 SLOW CHOIR 52 32 0/64
520 VOICE DOO 53 32 0/64
521 VOICE UUH 53 33 0/64
522 SYNTH-VOICE 1 54 1 0/64
523 SYNTH-VOICE 2 52 36 0/64
524 VOICE ENSEMBLE 54 2 0/64
525 SYNTH-VOICE PAD 54 32 0/64
526 WARM VOX 89 32 0/64
No. Tone Name
Program
Change
Bank
Select
MSB
Bank
Select
LSB
*1
DSP
Tone
Advanced
Tone
Advanced
Layer
Tone
*2
Part
Octave
Shift
Mono
Mode
Reference
EN-300
527 SPACE CHOIR 91 32 0/64
528 STAR VOICE 91 33 0/64
529 ECHO VOICE 102 32 0/64
EDM SYNTH
530 EDM KICK & BASS 96 8 0/64
531 EDM LEAD SYNTH 96 36 0/64
532 EDM PER SYNTH 97 10 0/64
533 EDM LAZER 1 96 9 0/64
534 EDM LAZER 2 96 10 0/64
535 EDM THEME SYNTH 1 96 11 0/64
536 EDM THEME SYNTH 2 96 34 0/64
537 EDM THEME HIT 97 8 0/64
538 EDM BRASS HIT 96 12 0/64 +1
539 EDM BASS 97 9 0/64 –1
540 EDM SE BEND 96 13 0/64
541 EDM SE VOX SYNTH 96 14 0/64
542 EDM SE WHITE 96 15 0/64
543 EDM SE 96 35 0/64
CASIO CLASSIC
544 VL-TONE 40 35 0/64
545 CT E.PIANO 5 35 0/64
546 CT HARP 46 35 0/64
547 CZ BASS 38 33 0/64 –1
548 CZ TRUMPET 56 38 0/64
549 CZ VIOLIN 40 36 0/64
550 CZ PIANO 5 36 0/64
551 CZ GUITAR 25 33 0/64
552 CZ LEAD 1 81 54 0/64
553 CZ LEAD 2 81 55 0/64
554 VZ SEEGOD 90 83 0/64
555 VZ BRASS 62 40 0/64
556 VZ BASS 38 34 0/64 –1
557 VZ HARP 46 36 0/64
558 VZ LEAD 1 81 56 0/64
559 VZ LEAD 2 81 57 0/64
INDIAN
560 SITAR 1 104 32 0/64
561 SITAR 2 104 1 0/64
562 SITAR 3 104 33 0/64
563 SITAR PAD 104 34 0/64
564 TANPURA 1 104 2 0/64
565 TANPURA 2 104 35 0/64
566 HARMONIUM 1 20 32 0/64
567 HARMONIUM 2 20 1 0/64
568 SANTUR 1 15 1 0/64
569 SANTUR 2 15 32 0/64
No. Tone Name
Program
Change
Bank
Select
MSB
Bank
Select
LSB
*1
DSP
Tone
Advanced
Tone
Advanced
Layer
Tone
*2
Part
Octave
Shift
Mono
Mode

Reference
EN-301
570 SAROD 1 105 10 0/64
571 SAROD 2 105 41 0/64
572 SARANGI 1 110 8 0/64
573 SARANGI 2 110 43 0/64
574 VEENA 1 104 36 0/64
575 VEENA 2 104 37 0/64
576 SHANAI 111 1 0/64
577 BANSURI 72 9 0/64
578 PUNGI 111 8 0/64
579 TABLA 116 41 0/64
INDONESIAN
580 ANGKLUNG TREM. 12 40 0/64
581 GENDER 11 40 0/64
582 CAK 25 12 0/64
583 CUK 24 40 0/64
584 CELLO FINGERED 32 12 0/64 –1
585 SASANDO 46 40 0/64
586 SHORT SULING 77 40 0/64
587 SULING BAMBOO 1 77 41 0/64 +1
588 SALUANG 77 43 0/64
589 SULING BAMBOO 2 77 42 0/64
ARABIC
590 OUD 1 105 11 0/64
591 OUD 2 105 42 0/64
592 SAZ 15 4 0/64
593 KANUN 1 15 5 0/64
594 KANUN 2 15 33 0/64
595 BOUZOUKI 105 43 0/64
596 RABAB 105 44 0/64
597 KEMENCHE 110 44 0/64
598 NEY 1 72 10 0/64
599 NEY 2 72 41 0/64
600 ZURNA 111 9 0/64
601 ARABIC ORGAN 16 7 0/64
602 ARABIC STRINGS 48 7 0/64
CHINESE
603 ER HU 1 110 9 0/64
604 ER HU 2 110 40 0/64
605 ER HU 3 110 41 0/64
606 ER HU 4 110 42 0/64
607 YANG QIN 1 15 2 0/64
608 YANG QIN 2 15 3 0/64
609 YANG QIN 3 15 34 0/64
610 ZHENG 1 107 8 0/64
611 ZHENG 2 107 40 0/64
612 PI PA 1 105 8 0/64
No. Tone Name
Program
Change
Bank
Select
MSB
Bank
Select
LSB
*1
DSP
Tone
Advanced
Tone
Advanced
Layer
Tone
*2
Part
Octave
Shift
Mono
Mode
Reference
EN-302
613 PI PA 2 105 9 0/64
614 PI PA 3 105 40 0/64
615 CHINESE HARP 46 33 0/64
616 DI ZI 1 72 8 0/64
617 DI ZI 2 72 40 0/64
618 XIAO 77 8 0/64
619 SHENG 1 109 8 0/64
620 SHENG 2 109 40 0/64
621 SUO NA 1 111 10 0/64
622 SUO NA 2 111 32 0/64
BRAZILIAN
623 CAVAQUINHO 104 38 0/64
624 VIOLA CAIPIRA 104 39 0/64
625 BERIMBAU 104 40 0/64
626 PANDEIRO 116 40 0/64
ETHNIC OTHERS
627 BANJO 105 32 0/64
628 MUTE BANJO 105 1 0/64
629 STEEL DRUMS 114 1 0/64
630 FIDDLE 1 110 32 0/64
631 SHAMISEN 106 32 0/64
632 KOTO 107 32 0/64
633 THUMB PIANO 108 32 0/64
634 BAGPIPE 109 32 0/64
635 FIDDLE 2 110 33 0/64
636 CAJON 116 42 0/64
GM TONES
637 GM PIANO 1 0 0 0
638 GM PIANO 2 1 0 0
639 GM ELEC.GRAND PIANO 2 0 0
640 GM HONKY-TONK 3 0 0
641 GM E.PIANO 1 4 0 0
642 GM E.PIANO 2 5 0 0
643 GM HARPSICHORD 6 0 0
644GM CLAVI 700
645 GM CELESTA 8 0 0
646 GM GLOCKENSPIEL 9 0 0
647 GM MUSIC BOX 10 0 0
648 GM VIBRAPHONE 11 0 0
649 GM MARIMBA 12 0 0
650 GM XYLOPHONE 13 0 0
651 GM TUBULAR BELL 14 0 0
652 GM DULCIMER 15 0 0
653 GM ORGAN 1 16 0 0
654 GM ORGAN 2 17 0 0
655 GM ORGAN 3 18 0 0
No. Tone Name
Program
Change
Bank
Select
MSB
Bank
Select
LSB
*1
DSP
Tone
Advanced
Tone
Advanced
Layer
Tone
*2
Part
Octave
Shift
Mono
Mode

Reference
EN-303
656 GM PIPE ORGAN 19 0 0
657 GM REED ORGAN 20 0 0
658 GM ACCORDION 21 0 0
659 GM HARMONICA 22 0 0
660 GM BANDONEON 23 0 0
661 GM NYLON STR.GUITAR 24 0 0
662 GM STEEL STR.GUITAR 25 0 0
663 GM JAZZ GUITAR 26 0 0
664 GM CLEAN GUITAR 27 0 0
665 GM MUTE GUITAR 28 0 0
666 GM OVERDRIVE GT 29 0 0
667 GM DISTORTION GT 30 0 0
668 GM GT HARMONICS 31 0 0
669 GM ACOUSTIC BASS 32 0 0
670 GM FINGERED BASS 33 0 0
671 GM PICKED BASS 34 0 0
672 GM FRETLESS BASS 35 0 0
673 GM SLAP BASS 1 36 0 0
674 GM SLAP BASS 2 37 0 0
675 GM SYNTH-BASS 1 38 0 0
676 GM SYNTH-BASS 2 39 0 0
677 GM VIOLIN 40 0 0
678 GM VIOLA 41 0 0
679 GM CELLO 42 0 0
680 GM CONTRABASS 43 0 0
681 GM TREMOLO STRINGS 44 0 0
682 GM PIZZICATO 45 0 0
683 GM HARP 46 0 0
684 GM TIMPANI 47 0 0
685 GM STRINGS 1 48 0 0
686 GM STRINGS 2 49 0 0
687 GM SYNTH-STRINGS 1 50 0 0
688 GM SYNTH-STRINGS 2 51 0 0
689 GM CHOIR AAHS 52 0 0
690 GM VOICE DOO 53 0 0
691 GM SYNTH-VOICE 54 0 0
692 GM ORCHESTRA HIT 55 0 0
693 GM TRUMPET 56 0 0
694 GM TROMBONE 57 0 0
695 GM TUBA 58 0 0
696 GM MUTE TRUMPET 59 0 0
697 GM FRENCH HORN 60 0 0
698 GM BRASS 61 0 0
699 GM SYNTH-BRASS 1 62 0 0
700 GM SYNTH-BRASS 2 63 0 0
701 GM SOPRANO SAX 64 0 0
No. Tone Name
Program
Change
Bank
Select
MSB
Bank
Select
LSB
*1
DSP
Tone
Advanced
Tone
Advanced
Layer
Tone
*2
Part
Octave
Shift
Mono
Mode

Reference
EN-304
702 GM ALTO SAX 65 0 0
703 GM TENOR SAX 66 0 0
704 GM BARITONE SAX 67 0 0
705 GM OBOE 68 0 0
706 GM ENGLISH HORN 69 0 0
707 GM BASSOON 70 0 0
708 GM CLARINET 71 0 0
709 GM PICCOLO 72 0 0
710 GM FLUTE 73 0 0
711 GM RECORDER 74 0 0
712 GM PAN FLUTE 75 0 0
713 GM BOTTLE BLOW 76 0 0
714 GM SHAKUHACHI 77 0 0
715 GM WHISTLE 78 0 0
716 GM OCARINA 79 0 0
717 GM SQUARE LEAD 80 0 0
718 GM SAW LEAD 81 0 0
719 GM CALLIOPE 82 0 0
720 GM CHIFF LEAD 83 0 0
721 GM CHARANG 84 0 0
722 GM VOICE LEAD 85 0 0
723 GM FIFTH LEAD 86 0 0
724 GM BASS+LEAD 87 0 0
725 GM FANTASY 88 0 0
726 GM WARM PAD 89 0 0
727 GM POLYSYNTH 90 0 0
728 GM SPACE CHOIR 91 0 0
729 GM BOWED GLASS 92 0 0
730 GM METAL PAD 93 0 0
731 GM HALO PAD 94 0 0
732 GM SWEEP PAD 95 0 0
733 GM RAIN DROP 96 0 0
734 GM SOUND TRACK 97 0 0
735 GM CRYSTAL 98 0 0
736 GM ATMOSPHERE 99 0 0
737 GM BRIGHTNESS 100 0 0
738 GM GOBLINS 101 0 0
739 GM ECHOES 102 0 0
740 GM SF 103 0 0
741 GM SITAR 104 0 0
742 GM BANJO 105 0 0
743 GM SHAMISEN 106 0 0
744 GM KOTO 107 0 0
745 GM THUMB PIANO 108 0 0
746 GM BAGPIPE 109 0 0
747 GM FIDDLE 110 0 0
No. Tone Name
Program
Change
Bank
Select
MSB
Bank
Select
LSB
*1
DSP
Tone
Advanced
Tone
Advanced
Layer
Tone
*2
Part
Octave
Shift
Mono
Mode

Reference
EN-305
748 GM SHANAI 111 0 0
749 GM TINKLE BELL 112 0 0
750 GM AGOGO 113 0 0
751 GM STEEL DRUMS 114 0 0
752 GM WOOD BLOCK 115 0 0
753 GM TAIKO 116 0 0
754 GM MELODIC TOM 117 0 0
755 GM SYNTH-DRUM 118 0 0
756 GM REVERSE CYMBAL 119 0 0
757 GM GT FRET NOISE 120 0 0
758 GM BREATH NOISE 121 0 0
759 GM SEASHORE 122 0 0
760 GM BIRD 123 0 0
761 GM TELEPHONE 124 0 0
762 GM HELICOPTER 125 0 0
763 GM APPLAUSE 126 0 0
764 GM GUNSHOT 127 0 0
DRUM SET
765 STANDARD SET 1 0 120 0 Drum
766 STANDARD SET 2 1 120 0 Drum
767 STANDARD SET 3 2 120 0 Drum
768 STANDARD SET 4 3 120 0 Drum
769 STANDARD SET 5 4 120 0 Drum
770 DANCE SET 1 26 120 0 Drum
771 DANCE SET 2 27 120 0 Drum
772 DANCE SET 3 28 120 0 Drum
773 DANCE SET 4 29 120 0 Drum
774 DANCE SET 5 34 120 0 Drum
775 DANCE SET 6 35 120 0 Drum
776 TRANCE SET 31 120 0 Drum
777 HIP-HOP SET 9 120 0 Drum
778 ROOM SET 8 120 0 Drum
779 POWER SET 16 120 0 Drum
780 ROCK SET 17 120 0 Drum
781 ELECTRONIC SET 24 120 0 Drum
782 DRUM MACHINE SET 1 25 120 0 Drum
783 DRUM MACHINE SET 2 30 120 0 Drum
784 DRUM MACHINE SET 3 33 120 0 Drum
785 JAZZ SET 32 120 0 Drum
786 BRUSH SET 40 120 0 Drum
787 ORCHESTRA SET 48 120 0 Drum
788 LATIN SET 1 49 120 0 Drum
789 LATIN SET 2 50 120 0 Drum
790 INDONESIAN SET 53 120 0 Drum
791 INDIAN SET 54 120 0 Drum
792 ARABIC SET 52 120 0 Drum
No. Tone Name
Program
Change
Bank
Select
MSB
Bank
Select
LSB
*1
DSP
Tone
Advanced
Tone
Advanced
Layer
Tone
*2
Part
Octave
Shift
Mono
Mode
Reference
EN-306
*1 When 64 is received, the chorus, delay, and reverb types change to match the tone. There is no
change when 0 is received.
*2 When three or more keyboard keys are pressed at the same time, new notes are added for those
pitches.
• Tone names that start with “VERSATILE” (such as 155 VERSATILE NYLON GUITAR) are the
names of “versatile tones”. See “Versatile Tone Map” (page EN-321).
• DRUM SET assigns different percussive instruments to keyboard keys. Keyboard keys that do not
have a tone assigned do not produce any sound. See “Drum Assignment List” (page EN-315).
793 CHINESE SET 51 120 0 Drum
794 SFX SET 1 60 120 0 Drum
795 SFX SET 2 61 120 0 Drum
796 SNARE SET 1 64 120 0 Drum
797 SNARE SET 2 65 120 0 Drum
798 KICK SET 66 120 0 Drum
799 CYMBAL SET 67 120 0 Drum
800 TOM SET 68 120 0 Drum
SAMPLING MELODY
801 SAMPLING MELODY 1 113 0/64
SAMPLING DRUM
802 SAMPLING DRUM 2 113 0/64 Drum
No. Tone Name
Program
Change
Bank
Select
MSB
Bank
Select
LSB
*1
DSP
Tone
Advanced
Tone
Advanced
Layer
Tone
*2
Part
Octave
Shift
Mono
Mode
Reference
EN-307
Lyric Tone List
No. Title
Program
Change
Bank
Select
MSB
Bank
Select
LSB
1
Do you hear the music?
0 108 0
2 I know you see me 1 108 0
3 I want you 2 108 0
4 Raise your hands up! 3 108 0
5 Oh, yeah! 4 108 0
6 I know what you mean 5 108 0
7 Let’s go 6 108 0
8 Deep in my soul 7 108 0
9 I said shake it 8 108 0
10 CASIO 9 108 0
11 All I wanna do 10 108 0
12 All night long 11 108 0
13 Are you ready? 12 108 0
14 Better 13 108 0
15 Bring it up 14 108 0
16 Can I get with you? 15 108 0
17 Can’t stop the feeling 16 108 0
18 Check it out 17 108 0
19 Close your eyes 18 108 0
20 Come on and work it 19 108 0
21 Come together 20 108 0
22 Daa 21 108 0
23 Da da da 22 108 0
24 Dance with me 23 108 0
25 Don’t believe me 24 108 0
26 Don’t tell me 25 108 0
27 Doo-wop 26 108 0
28 Every single day 27 108 0
29 Faster 28 108 0
30 Feel so good 29 108 0
31 Feel the music 30 108 0
32 Get lucky 31 108 0
33 Give it to me 32 108 0
34 Go for it 33 108 0
35 Hallelujah 34 108 0
36 Happy birthday to you 35 108 0
37 Happy Christmas 36 108 0
38 Happy new year 37 108 0
39 Harder 38 108 0
40 Here we go 39 108 0
41 Hold me tight 40 108 0
42 Hold on 41 108 0
43 Holy night 42 108 0
44 Honey, you will survive 43 108 0
45 I can dance 44 108 0
46 I can fly 45 108 0
47 I can’t help myself 46 108 0
48 I can’t stop 47 108 0
49 I can’t stop the feeling 48 108 0
50 I don’t want nobody 49 108 0
51 I got it 50 108 0
52 I got the power 51 108 0
53 I just can’t get enough 52 108 0
54 I know I got it 53 108 0
55
I know what you’re saying
54 108 0
56 I love you 55 108 0
57 I love your style 56 108 0
58 I make a world 57 108 0
59 I miss you 58 108 0
60 I need you 59 108 0
61 I wanna be with you 60 108 0
62 I was born to love you 61 108 0
63 I’m on fire 62 108 0
64 It’s Christmas 63 108 0
65 Just do it 64 108 0
66 Just like that 65 108 0
67 Keep on movin’ 66 108 0
68 La la la la 67 108 0
69 Let it go 68 108 0
70 Let’s do it for real 69 108 0
71
Let’s make a snowman
70 108 0
72 Merry Christmas 71 108 0
73 Oh 72 108 0
74 One more time 73 108 0
75 Put your hands up 74 108 0
76 Set me free 75 108 0
77 Shake it 76 108 0
78 Sha la la la 77 108 0
79 Silent night 78 108 0
80 Sunday morning 79 108 0
81 Take it easy 80 108 0
82 Tell me why 81 108 0
83 That’s all I know 82 108 0
84 The show must go on 83 108 0
85
Throw your hands up
84 108 0
86 Up all night 85 108 0
87 Walk away 86 108 0
88 Watching you 87 108 0
89 We’ll give it a shot 88 108 0
90 What do you mean? 89 108 0
91 What do you want? 90 108 0
92 What’s going on? 91 108 0
93 What’s up? 92 108 0
94 Wo woo 93 108 0
No. Title
Program
Change
Bank
Select
MSB
Bank
Select
LSB
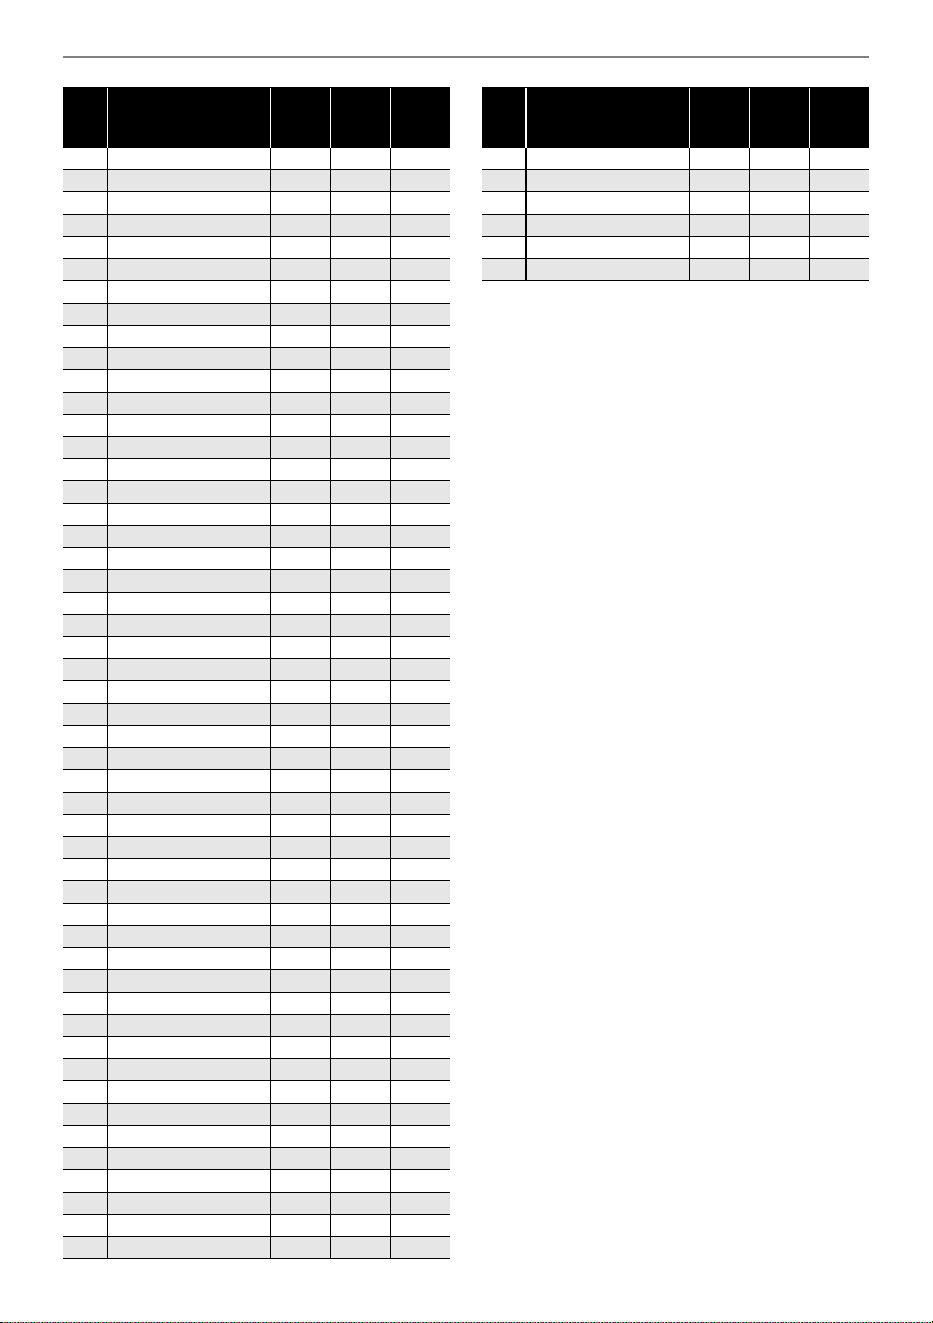
Reference
EN-308
95 Wow wow 94 108 0
96 Yeah 95 108 0
97
You can’t make me cry
96 108 0
98 You know you’re right 97 108 0
99 Arigatou 98 108 0
100 Konnichiwa 99 108 0
101 Empty 100 108 0
102 Empty 101 108 0
103 Empty 102 108 0
104 Empty 103 108 0
105 Empty 104 108 0
106 Empty 105 108 0
107 Empty 106 108 0
108 Empty 107 108 0
109 Empty 108 108 0
110 Empty 109 108 0
111 Empty 110 108 0
112 Empty 111 108 0
113 Empty 112 108 0
114 Empty 113 108 0
115 Empty 114 108 0
116 Empty 115 108 0
117 Empty 116 108 0
118 Empty 117 108 0
119 Empty 118 108 0
120 Empty 119 108 0
121 Empty 120 108 0
122 Empty 121 108 0
123 Empty 122 108 0
124 Empty 123 108 0
125 Empty 124 108 0
126 Empty 125 108 0
127 Empty 126 108 0
128 Empty 127 108 0
129 Empty 0 108 1
130 Empty 1 108 1
131 Empty 2 108 1
132 Empty 3 108 1
133 Empty 4 108 1
134 Empty 5 108 1
135 Empty 6 108 1
136 Empty 7 108 1
137 Empty 8 108 1
138 Empty 9 108 1
139 Empty 10 108 1
140 Empty 11 108 1
141 Empty 12 108 1
142 Empty 13 108 1
143 Empty 14 108 1
144 Empty 15 108 1
No. Title
Program
Change
Bank
Select
MSB
Bank
Select
LSB
145 Empty 16 108 1
146 Empty 17 108 1
147 Empty 18 108 1
148 Empty 19 108 1
149 Empty 20 108 1
150 Empty 21 108 1
No. Title
Program
Change
Bank
Select
MSB
Bank
Select
LSB
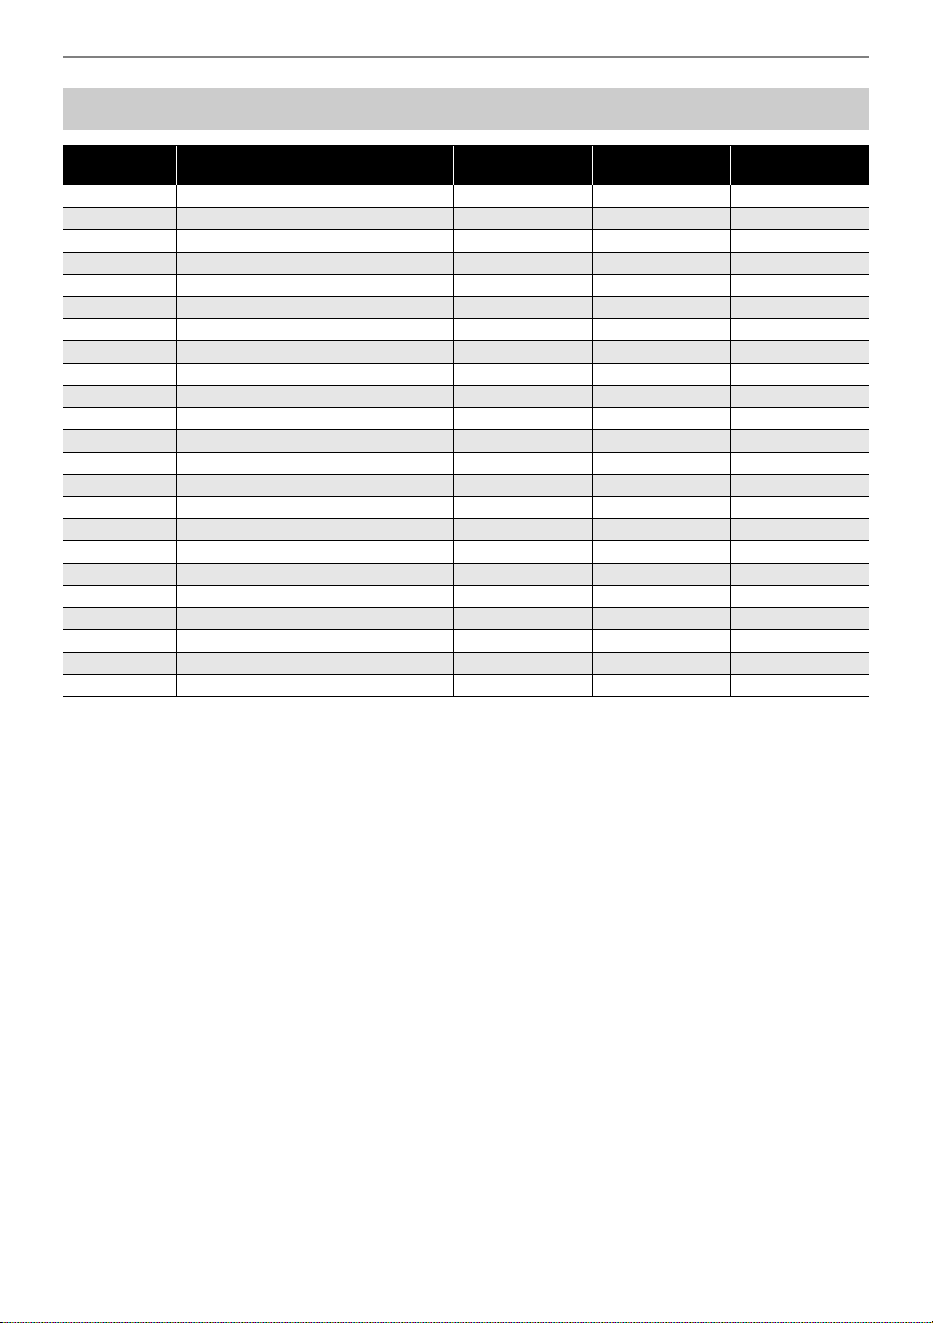
Reference
EN-309
VOCALIST List
No. Name DSP Tone
Part Octave
Shift
Mono Mode
1 CHOIR GROUP –1
2 CHOIR WHISPER –1
3 CHOIR FULL –1
4 CHOIR TRIO –1
5 VOCODER 1 –2
6 VOCODER 2 –2
7TALKBOX –1
8 FEMALE –1
9 BOSSA NOVA –1
10 OPERA –1
11 ENKA –1
12 CHILD –1
13 CUTE –1
14 BOY –1
15 HUSKY –2
16 ANIMATION 1 –2
17 ANIMATION 2 –1
18 DEATH VOICE –1
19 WAH –1
20 GHOST –1
21 WHISPER –1
22 ANIMALS
23 USER –1
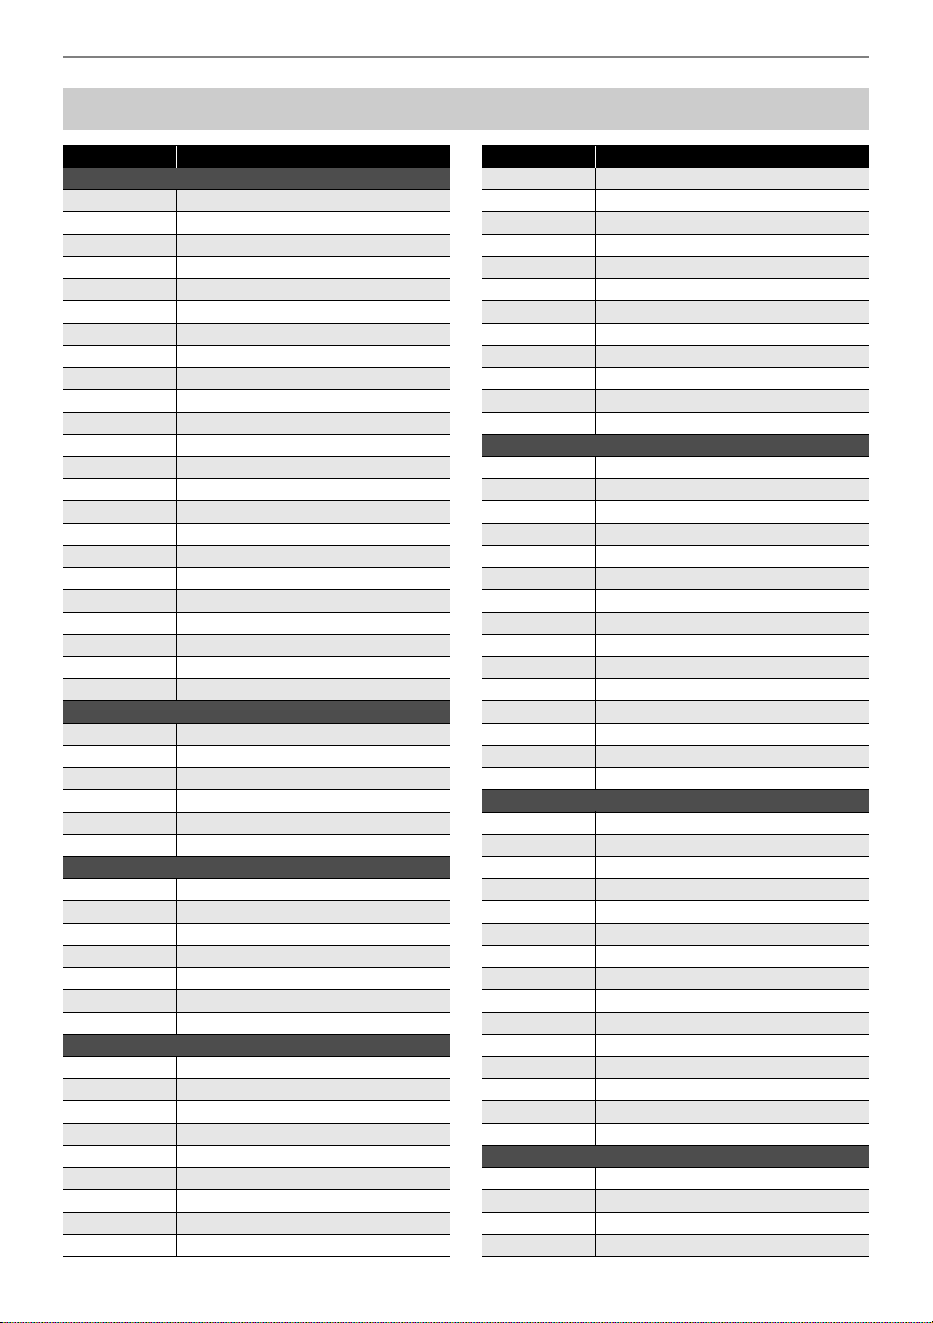
Reference
EN-310
Rhythm List
No. Rhythm Name
POPS
1 FUTURE DISCO POP
2 CHART HIP-HOP
3 ELECTRO DANCE POP
4 ELECTRO FUNK POP
5 R&B POP SHUFFLE
6 ELECTRO POP
7 JAZZ FUNK
8 80’s POP STAR
9 80’s FUNK POP
10 80’s SYNTH POP
11 USA FOLK ROCK
12 6/8 POP
13 ACOUSTIC POP ROCK
14 POP SHUFFLE
15 OLDIES POP
16 UK BEAT
17 FUNK SHUFFLE
18 SLOW SOUL
19 FAST SOUL
20 OLDIES SOUL
21 60’s POP
22 60’s SHUFFLE
23 DOO-WOP
8 BEAT
24 ACOUSTIC GUITAR 8 BEAT
25 STRAIGHT 8 BEAT
26 GUITAR 8 BEAT
27 MELLOW 8 BEAT
28 OLDIES 8 BEAT
29 60’s 8 BEAT
16 BEAT
30 FUNK 16 BEAT
31 16 BEAT POP
32 16 BEAT SHUFFLE 1
33 16 BEAT
34 16 BEAT SHUFFLE 2
35 FUNK SOUL
36 SMOOTH JAZZ
ROCK
37 ROCK ANTHEM
38 80’s POP ROCK
39 HARD ROCK
40 SOFT SHUFFLE ROCK
41 BOOGIE BLUES 1
42 BOOGIE BLUES 2
43 SHUFFLE ROCK
44 ROCK WALTZ
45 SHUFFLE BLUES
46 SLOW BLUES
47 6/8 BLUES
48 R&B
49 80’s SUPER ROCK
50 80’s ROCK
51 60’s ROCK 1
52 60’s ROCK 2
53 SLOW ROCK
54 ROCK & ROLL
55 50’s PIANO ROCK
56 50’s ROCK
57 NEW ORLNS R&R
DANCE
58 DISCO SHUFFLE
59 R&B FUNK
60 POP DISCO
61 FUNK GROOVE
62 BIGROOM HOUSE
63 CHART DANCE
64 70’s DISCO POP
65 DANCE POP
66 ELECTRONIC HIP-HOP
67 HIP-HOP
68 DISCO POP
69 TRANCE
70 MODERN R&B
71 TECHNO
72 LATIN HOUSE
JAZZ
73 STEADY JAZZ
74 UP TEMPO JAZZ
75 PIANO JAZZ WALTZ
76 COOL JAZZ
77 ORCHESTRA SWING 1
78 BIG BAND SWING
79 MODERN BIG BAND
80 FAST BIG BAND
81 ORCHESTRA SWING 2
82 SWING
83 SLOW SWING
84 JAZZ WALTZ
85 5/4 JAZZ
86 FOX TROT
87 QUICKSTEP
TRAD
88 WALTZ 1
89 WALTZ 2
90 WALTZ 3
91 ENGLISH WALTZ
No. Rhythm Name
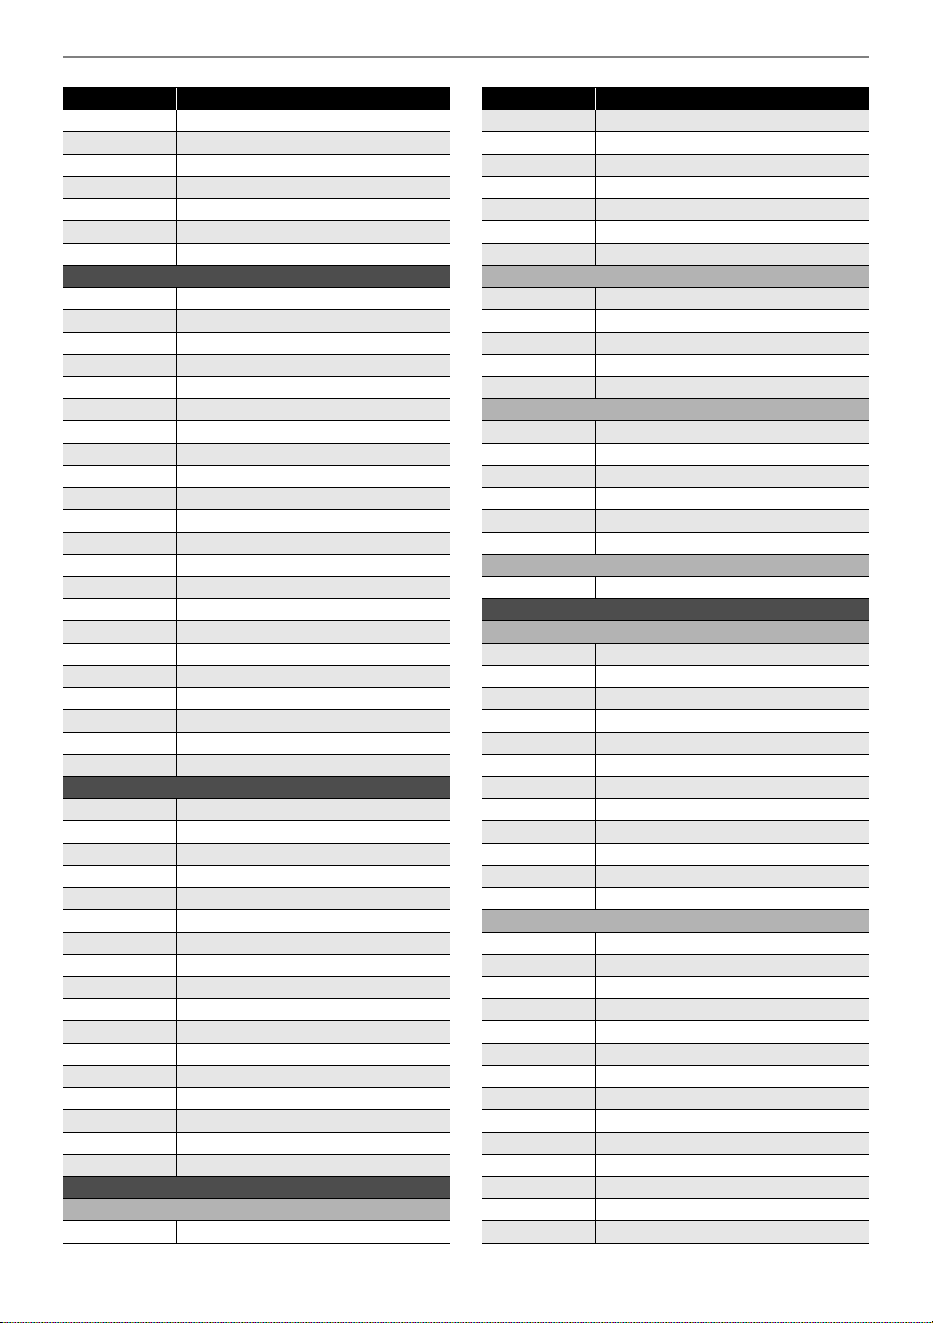
Reference
EN-311
92 VIENNESE WALTZ
93 ITALIAN WALTZ
94 FRENCH WALTZ
95 TANGO 1
96 MARCH 1
97 MARCH 2
98 GERMAN MARCH
LATIN I
99 BOSSA NOVA 1
100 ORCHESTRA BOSSA
101 BOSSA NOVA 2
102 BEGUINE
103 SAMBA 1
104 SAMBA 2
105 MAMBO
106 RHUMBA
107 CHA-CHA-CHA
108 POP RHUMBA
109 POP CHA CHA
110 MERENGUE
111 BOLERO
112 SALSA 1
113 SALSA 2
114 SALSA DANCE
115 REGGAE
116 POP REGGAE
117 REGGAE DANCE
118 SKA
119 TANGO 2
120 FOLKLORE
LATIN II
121 REGGAETON
122 CUMBIA 1
123 CUMBIA 2
124 OLD SAMBA
125 CALIPSO
126 FORRO UNIVERSITARIO
127 XOTE SERTANEJO
128 BAIAO
129 PAGODE
130 BANDA
131 NORTENO
132 PASILLO
133 TECHNO CUMBIA
134 VALLENATO
135 ARGENTINE CUMBIA
136 PUNTA
137 BACHATA
WORLD I
EUROPEAN
138 SCHLAGER
No. Rhythm Name
139 POLKA
140 POP POLKA
141 PASODOBLE
142 CAUCASIAN
143 RUSSIAN CHANSON 1
144 RUSSIAN CHANSON 2
145 POLISH WALTZ
AMERICAN
146 DIXIE
147 TEX-MEX
148 FAST GOSPEL
149 SLOW GOSPEL
150 HAWAIIAN
ARABIC/ORIENTAL
151 SAIDI
152 MALFOUF
153 BALADI
154 KHALIJI
155 MUS
156 SIRTAKI
SOUTH AFRICAN
157 KWAITO
WORLD II
INDIAN
158 BHANGRA
159 DADRA
160 GARBA
161 KEHARWA
162 DANDIYA
163 TEEN TAAL
164 BHAJAN
165 JHAP TAAL
166 RUPAK
167 DEEPCHANDI
168 INDIAN POP 1
169 INDIAN POP 2
CHINESE
170 GUANGDONG
171 JIANGNAN
172 BEIJING
173 DONGBEIYANGGE
174 JINGJU
175 HUANGMEIXI
176 QINQIANG
177 YUJU
178 YAOZU
179 DAIZU
180 MIAOZU
181 MENGGU
182 XINJIANG
183 ZANGZU
No. Rhythm Name
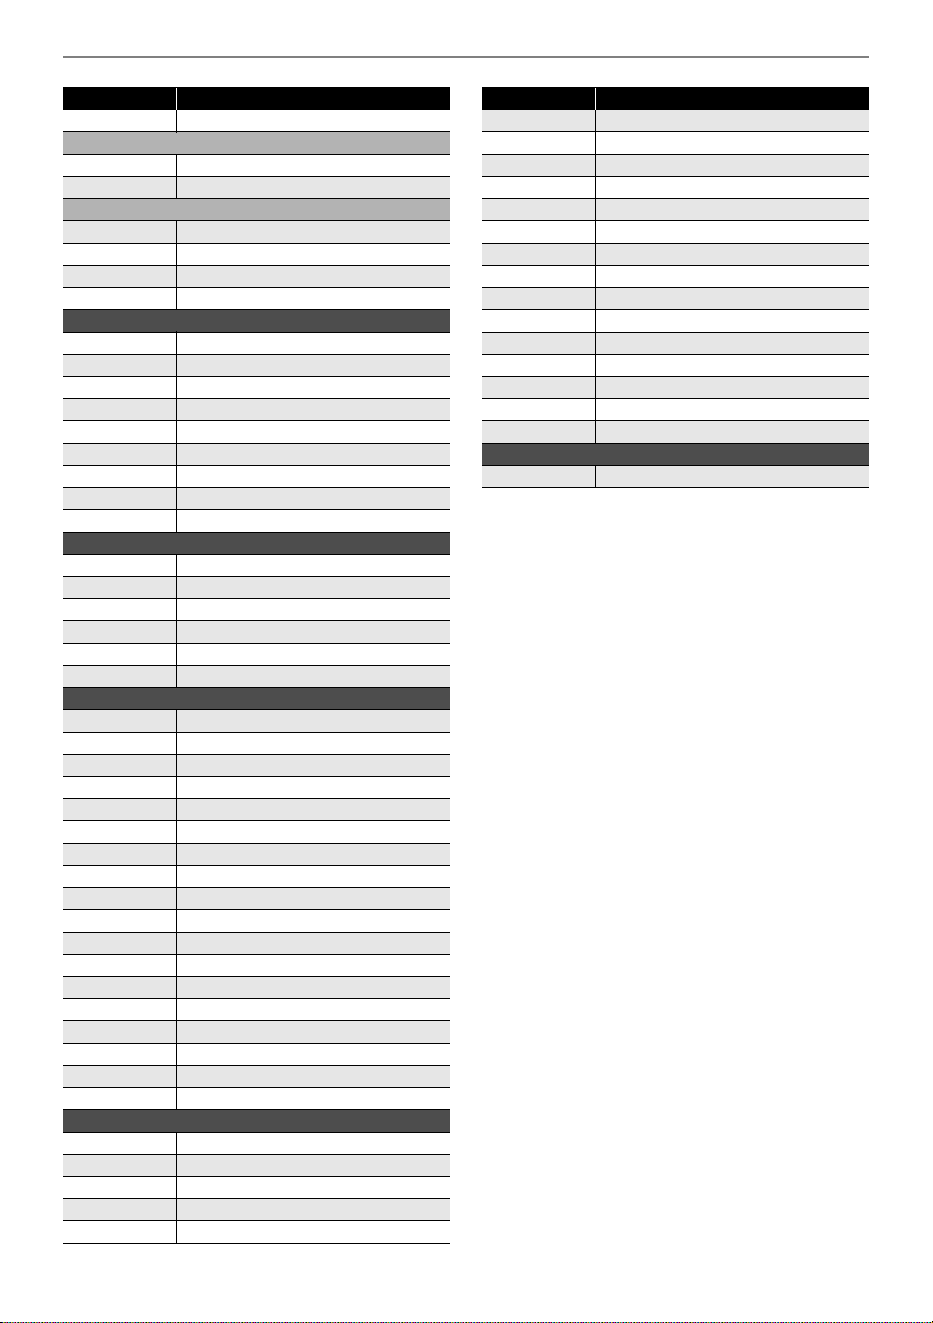
Reference
EN-312
184 CHINESE POP
INDONESIAN
185 KRONCONG
186 DANGDUT
JAPANESE
187 ENKA 1
188 ENKA 2
189 SHOUKA 1
190 SHOUKA 2
COUNTRY
191 COUNTRY POP
192 COUNTRY ROCK
193 COUNTRY 8 BEAT
194 COUNTRY BALLAD
195 COUNTRY SHUFFLE
196 FINGER PICKING COUNTRY
197 COUNTRY WALTZ
198 BLUEGRASS
199 HOEDOWN
ENSEMBLE/ORCHESTRA
200 CHRISTMAS SONG
201 CHRISTMAS WALTZ
202 SCREEN SWING
203 HABANERA
204 SERENADE
205 STRING QUARTET
BALLAD
206 16 BEAT BALLAD
207 AOR BALLAD
208 90’s BALLAD
209 PIANO ROCK BALLAD
210 SLOW BALLAD 1
211 SLOW BALLAD 2
212 ELECTRIC BALLAD
213 R&B BALLAD
214 BRUSH BALLAD
215 POP BALLAD
216 PIANO WALTZ BALLAD
217 90’s 6/8 BALLAD
218 6/8 BALLAD 1
219 6/8 BALLAD 2
220 EASY LISTENING BALLAD
221 UNPLUGGED BALLAD
222 ROCK BALLAD
223 6/8 ROCK BALLAD
PIANO RHYTHMS
224 PIANO 8 BEAT
225 PIANO BALLAD 1
226 PIANO BALLAD 2
227 EP BALLAD 1
228 EP BALLAD 2
No. Rhythm Name
229 BLUES BALLAD
230 JAZZ COMBO 1
231 JAZZ COMBO 2
232 RAGTIME
233 BOOGIE-WOOGIE
234 PIANO ROCK & ROLL
235 ARPEGGIO 1
236 ARPEGGIO 2
237 ARPEGGIO 3
238 PIANO MARCH 1
239 PIANO MARCH 2
240 STRIDE PIANO
241 WALTZ 4
242 WALTZ 5
243 WALTZ 6
USER RHYTHMS
244-293 USER RHYTHM 1-50
No. Rhythm Name
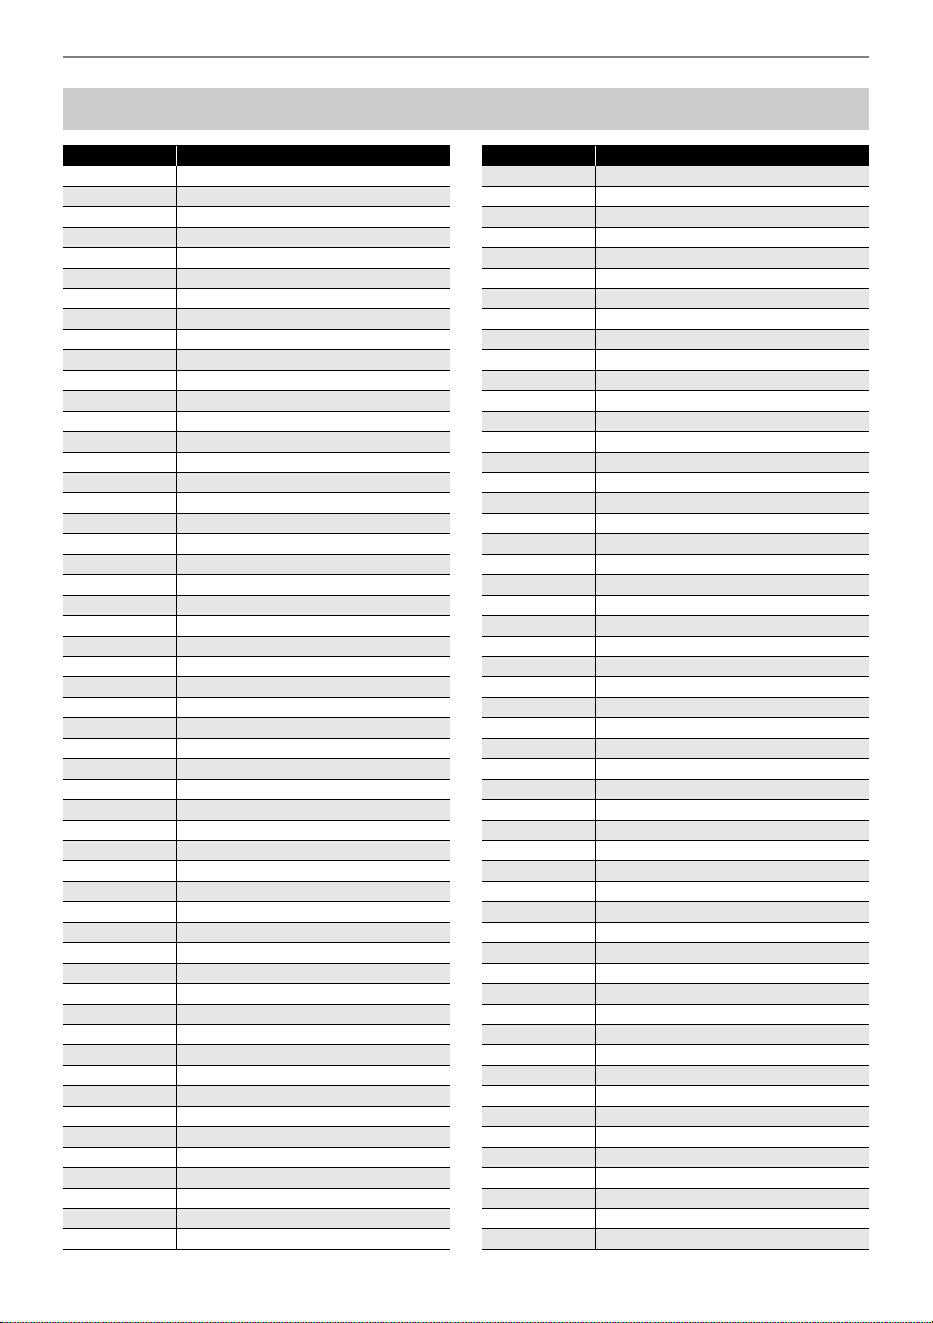
Reference
EN-313
Arpeggiator List
No. Type Name
1Screw Up
2 Screw Down
3 Panning Up
4 Filtering
5Skip Up
6 Skip Down
7 Up Up Down
8 Down Down Up
9 Step Arp 1
10 Step Arp 2
11 Seq Lines
12 Synth Seq 1
13 Synth Seq 2
14 Seq Line 1
15 Seq Line 2
16 Seq Line 3
17 Seq Line 4
18 Seq Line 5
19 Seq Line 6
20 Seq Line 7
21 Prelude
22 Arp 2Oct
23 9th Arp 1
24 9th Arp 2
25 9th Arp 3
26 Soul Bass 1
27 Soul Bass 2
28 Shuffle Bass
29 Funk Bass
30 Bossa Bass
31 8 Beat Bass
32 R&B Bass
33 Bass Line 1
34 Bass Line 2
35 Scale 1
36 Scale 2
37 Scale 3
38 Scale 4
39 Blues Scale
40 Penta Scale
41 Funky EP
42 Ragtime
43 Riff
44 Ska
45 8 Beat
46 12/8
47 Shuffle
48 Waltz
49 Shuffle Pop
50 Hard Rock
51 Echo
52 Trill
53 Poly 1
54 Poly 2
55 Poly 3
56 Poly 4
57 Poly 5
58 Poly 6
59 Poly 7
60 Poly 8
61 Odd Beat 1
62 Odd Beat 2
63 Odd Beat 3
64 Odd Beat 4
65 Odd Beat 5
66 Odd Beat 6
67 Odd Beat 7
68 Odd Beat 8
69 Odd Beat 9
70 Odd Beat 10
71 Up 1Oct 1
72 Up 2Oct 1
73 Up 3Oct 1
74 Up 4Oct 1
75 Up 1Oct 2
76 Up 2Oct 2
77 Up 3Oct 2
78 Up 4Oct 2
79 Up 1Oct 3
80 Up 2Oct 3
81 Up 3Oct 3
82 Up 4Oct 3
83 Down 1Oct 1
84 Down 2Oct 1
85 Down 3Oct 1
86 Down 4Oct 1
87 Down 1Oct 2
88 Down 2Oct 2
89 Down 3Oct 2
90 Down 4Oct 2
91 Down 1Oct 3
92 Down 2Oct 3
93 Down 3Oct 3
94 Down 4Oct 3
95 UpDownA1Oct1
96 UpDownA2Oct1
97 UpDownA3Oct1
98 UpDownA4Oct1
99 UpDownA1Oct2
100 UpDownA2Oct2
101 UpDownA3Oct2
102 UpDownA4Oct2
103 UpDownA1Oct3
104 UpDownA2Oct3
105 UpDownA3Oct3
106 UpDownA4Oct3
No. Type Name
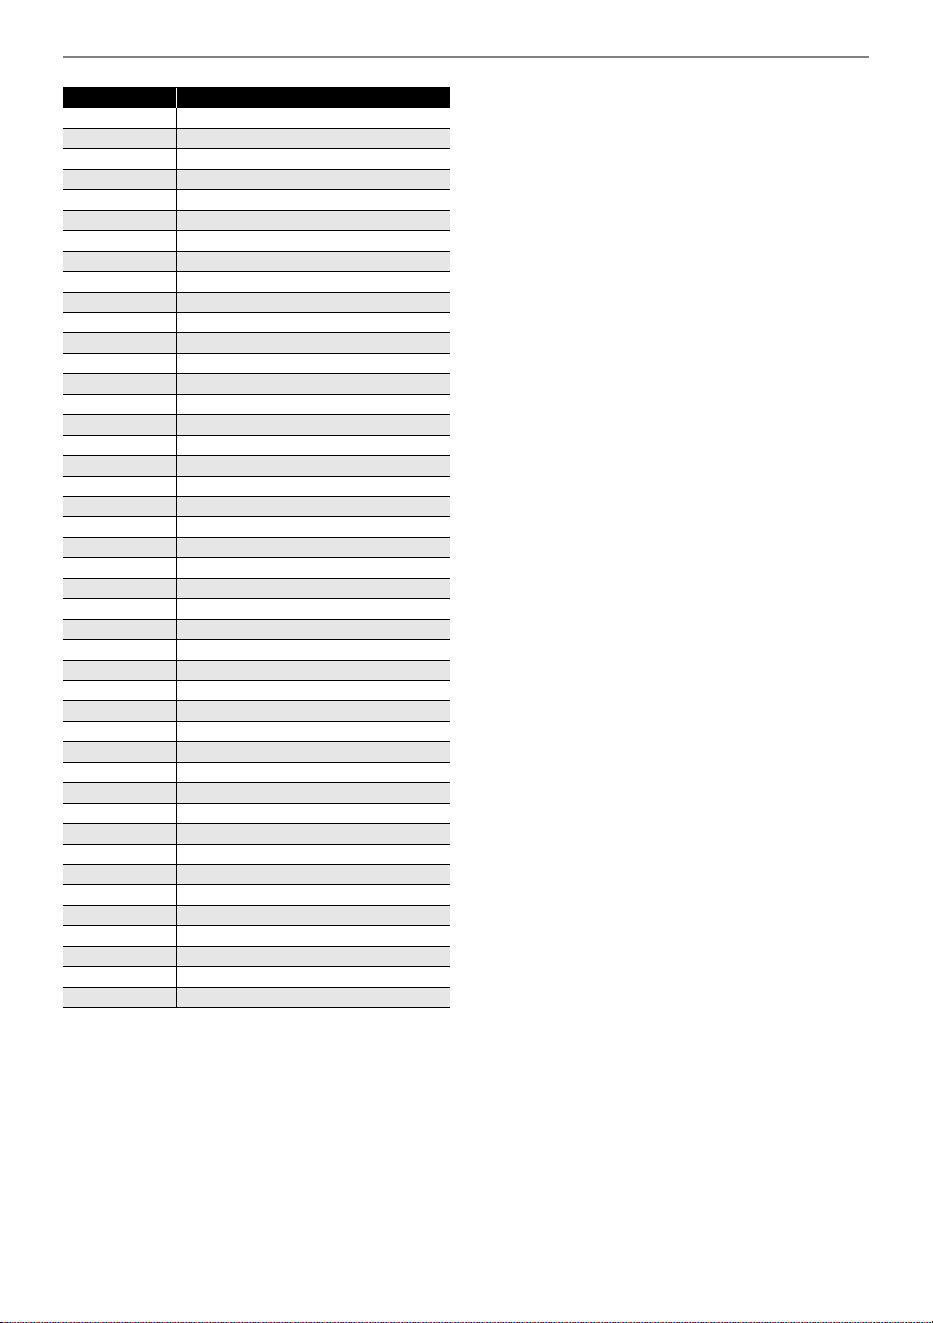
Reference
EN-314
107 UpDownB1Oct1
108 UpDownB2Oct1
109 UpDownB3Oct1
110 UpDownB4Oct1
111 UpDownB1Oct2
112 UpDownB2Oct2
113 UpDownB3Oct2
114 UpDownB4Oct2
115 UpDownB1Oct3
116 UpDownB2Oct3
117 UpDownB3Oct3
118 UpDownB4Oct3
119 Random1Oct 1
120 Random2Oct 1
121 Random3Oct 1
122 Random4Oct 1
123 Random1Oct 2
124 Random2Oct 2
125 Random3Oct 2
126 Random4Oct 2
127 Random1Oct 3
128 Random2Oct 3
129 Random3Oct 3
130 Random4Oct 3
131 Repeat 1
132 Repeat 2
133 Add 5th Up
134 Add 5th Down
135 Add 5th U/D
136 5th Up 1
137 5th Up 2
138 Octave Up 1
139 Octave Up 2
140 Octave Down
141 Poly Up
142 Poly Down
143 Poly Line
144 4th Up
145 4th Down
146 New Age
147 Gtr Strk 1
148 Gtr Strk 2
149 Latin Pf 1
150 Latin Pf 2
No. Type Name
Reference
EN-315
• “” indicates a key is assigned the same tones as it is for 765:STANDARD SET 1.
Drum Assignment List
765 : STANDARD SET 1 766 : STANDARD SET 2
C-1
D-1
E-1
F-1
G-1
A-1
B-1
C0
D0
E0
F0
G0
A0
B0
C1
D1
E1
F1
G1
A1
B1
C2
D2
E2
F2
G2
A2
B2
C3
D3
E3
F3
G3
A3
B3
C4
D4
E4
F4
G4
A4
B4
C5
D5
E5
F5
G5
A5
B5
C6
D6
E6
F6
G6
A6
B6
C7
D7
E7
F7
G7
A7
B7
C8
D8
E8
F8
G8
A8
B8
C9
D9
E9
F9
G9
C{-1
E}
-1
F{-1
A}
-1
B}
-1
C{0
E}
0
F{0
A}
0
B}
0
C{1
E}
1
F{1
A}
1
B}
1
C{2
E}
2
F{2
A}
2
B}
2
C{3
E}
3
F{3
A}
3
B}
3
C{4
E}
4
F{4
A}
4
B}
4
C{5
E}
5
F{5
A}
5
B}
5
C{6
E}
6
F{6
A}
6
B}
6
C{7
E}
7
F{7
A}
7
B}
7
C{8
E}
8
F{8
A}
8
B}
8
C{9
E}
9
F{9
768 : STANDARD SET 4767 : STANDARD SET 3
DRUMS SET NAME
769 : STANDARD SET 5 770 : DANCE SET 1
0
1
2
3
4
5
6
7
8
9
10
11
12
13
14
15
16
17
18
19
20
21
22
23
24
25
26
27
28
29
30
31
32
33
34
35
36
37
38
39
40
41
42
43
44
45
46
47
48
49
50
51
52
53
54
55
56
57
58
59
60
61
62
63
64
65
66
67
68
69
70
71
72
73
74
75
76
77
78
79
80
81
82
83
84
85
86
87
88
89
90
91
92
93
94
95
96
97
98
99
100
101
102
103
104
105
106
107
108
109
110
111
112
113
114
115
116
117
118
119
120
121
122
123
124
125
126
127
Tabla Ge
Tabla Ka
Tabla Te
Tabla Na
Tabla Tun
Dholak Ge
Dholak Ke
Dholak Ta 1
Dholak Ta 2
Dholak Na
Dholak Ta 3
Dholak Ring
Mridangam Tha
Mridangam Dhom
Mridangam Dhi
Mridangam Dhin
Mridangam Num
High Q
Slap
Scratch Push
Scratch Pull
Sticks
Square Click
Metronome Click
Metronome Bell
Standard1 Kick 2
Standard1 Kick 1
Standard1 Side Stick
Standard1 Snare 1
Hand Clap 1
Standard1 Snare 2
Standard1 Low Tom 2
Standard1 Closed Hi-Hat
Standard1 Low Tom 1
Standard1 Pedal Hi-Hat
Standard1 Mid Tom 2
Standard1 Open Hi-Hat
Standard1 Mid Tom 1
Standard1 High Tom 2
Standard1 Crash Cymbal 1
Standard1 High Tom 1
Standard1 Ride Cymbal 1
Standard1 Chinese Cymbal
Standard1 Ride Bell
Tambourine
Standard1 Splash Cymbal
Cowbell
Standard1 Crash Cymbal 2
Vibraslap
Standard1 Ride Cymbal 2
High Bongo
Low Bongo
Mute High Conga
Open High Conga
Open Low Conga
High Timbale
Low Timbale
High Agogo 1
Low Agogo 1
Cabasa 1
Maracas 1
High Whistle 1
Low Whistle 1
Short Guiro
Long Guiro
Claves 1
High Wood Block
Low Wood Block
Mute Cuica
Open Cuica
Mute Triangle 1
Open Triangle 1
Shaker
Jingle Bell 1
Bell Tree
Castanets
Mute Surdo
Open Surdo 1
Applause 1
Applause 2
Jingle Bell 2
Open Surdo 2
Cabasa 2
Maracas 2
Shaker 2
Mute Triangle 2
Open Triangle 2
High Agogo 2
Low Agogo 2
Tablah 1
Tablah 2
Tablah 3
Daf 1
Daf 2
Riq 1
Riq 2
Riq 3
Davul 1
Davul 2
Zill 1
Zill 2
Ban Gu
Hu Yin Luo
Xiao Luo
Xiao Bo
Low Tang Gu
Mid Tang Gu
High Tang Gu
»
»
»
»
Standard2 Sticks
»
»
»
Standard2 Kick 2
Standard2 Kick 1
Standard2 Side Stick
Standard2 Snare 1
»
Standard2 Snare 2
Standard2 Low Tom 2
Standard2 Closed Hi-Hat
Standard2 Low Tom 1
Standard2 Pedal Hi-Hat
Standard2 Mid Tom 2
Standard2 Open Hi-Hat
Standard2 Mid Tom 1
Standard2 High Tom 2
Standard2 Crash Cymbal 1
Standard2 High Tom 1
Standard2 Ride Cymbal 1
Standard2 Chinese Cymbal
Standard2 Ride Bell
»
Standard2 Splash Cymbal
»
Standard2 Crash Cymbal 2
»
Standard2 Ride Cymbal 2
»
»
»
»
»
»
»
»
»
»
»
High Whistle 2
Low Whistle 2
»
»
»
»
»
»
»
»
»
»
»
»
»
»
»
»
»
Standard3 Snare 1 mp
Standard3 Snare 1 mf
Standard3 Snare 2 mp
Standard3 Snare 2 mf
»
»
»
»
Standard2 Sticks
»
»
»
Standard3 Kick 2
Standard3 Kick 1
Standard2 Side Stick
Standard3 Snare 1
»
Standard3 Snare 2
Standard3 Low Tom 2
Standard3 Closed Hi-Hat
Standard3 Low Tom 1
Standard3 Pedal Hi-Hat
Standard3 Mid Tom 2
Standard3 Open Hi-Hat
Standard3 Mid Tom 1
Standard3 High Tom 2
Standard3 Crash Cymbal 1
Standard3 High Tom 1
Standard3 Ride Cymbal 1
Standard3 Chinese Cymbal
Standard3 Ride Bell
»
Standard3 Splash Cymbal
»
Standard3 Crash Cymbal 2
»
Standard3 Ride Cymbal 2
»
»
»
»
»
»
»
»
»
»
»
High Whistle 2
Low Whistle 2
»
»
»
»
»
»
»
»
»
»
»
»
»
»
»
»
»
»
»
»
»
Standard2 Sticks
»
»
»
Standard4 Kick 2
Standard4 Kick 1
Standard2 Side Stick
Standard4 Snare 1
»
Standard4 Snare 2
Standard3 Low Tom 2
Standard4 Closed Hi-Hat
Standard3 Low Tom 1
Standard4 Pedal Hi-Hat
Standard3 Mid Tom 2
Standard4 Open Hi-Hat
Standard3 Mid Tom 1
Standard3 High Tom 2
Standard3 Crash Cymbal 1
Standard3 High Tom 1
Standard3 Ride Cymbal 1
Standard3 Chinese Cymbal
Standard3 Ride Bell
»
Standard3 Splash Cymbal
»
Standard3 Crash Cymbal 2
»
Standard3 Ride Cymbal 2
»
»
»
»
»
»
»
»
»
»
»
High Whistle 2
Low Whistle 2
»
»
»
»
»
»
»
»
»
»
»
»
»
»
»
»
»
»
»
»
»
Standard2 Sticks
»
»
»
Standard5 Kick 2
Standard5 Kick 1
Standard5 Side Stick
Standard5 Snare 1
Standard5 Hand Clap
Standard5 Snare 2
Standard5 Low Tom 2
Standard5 Closed Hi-Hat
Standard5 Low Tom 1
Standard5 Pedal Hi-Hat
Standard5 Mid Tom 2
Standard5 Open Hi-Hat
Standard5 Mid Tom 1
Standard5 High Tom 2
Standard3 Crash Cymbal 1
Standard5 High Tom 1
Standard3 Ride Cymbal 1
Standard3 Chinese Cymbal
Standard3 Ride Bell
»
Standard3 Splash Cymbal
»
Standard3 Crash Cymbal 2
»
Standard3 Ride Cymbal 2
»
»
»
»
»
»
»
»
»
»
»
High Whistle 2
Low Whistle 2
»
»
»
»
»
»
»
»
»
»
»
»
»
»
»
»
»
Dance1 Kick 1
Dance1 Kick 2
Dance1 Kick 3
Dance1 Kick 4
Dance1 Kick 5
Dance1 Snare 1
Dance1 Snare 2
Dance1 Snare 3
Dance1 Snare 4
Dance1 Snare 5
Dance1 Snare 6
Dance1 Snare 7
Dance1 Snare 8
Dance1 Snare 9
Dance1 Tambourine
Hip-Hop Snare 4
Hip-Hop Snare 3
Techno Snare
Hip-Hop Rim Shot
Hip-Hop Snare 3 Rev.
DM2 Kick 1 Rev.
Reverse Cymbal Gate
Hip-Hop Snare 4 Gate
Hip-Hop Snare 3 Gate
Techno Snare Gate
Hip-Hop Side Stick Gate
Hand Clap 2 Gate
»
»
Hip-Hop Scratch 1
Hip-Hop Scratch 2
Standard2 Sticks
»
»
»
DM2 Kick 2
DM2 Kick 1
Standard2 Side Stick
DM2 Snare 1
»
DM2 Snare 2
DM2 Low Tom 2
DM2 Closed Hi-Hat 1
DM2 Low Tom 1
DM2 Closed Hi-Hat 2
DM2 Mid Tom 2
DM2 Open Hi-Hat
DM2 Mid Tom 1
DM2 High Tom 2
Standard3 Crash Cymbal 1
DM2 High Tom 1
Standard3 Ride Cymbal 1
Standard3 Chinese Cymbal
Standard3 Ride Bell
»
Standard3 Splash Cymbal
»
Standard3 Crash Cymbal 2
»
DM1 Kick 2
DM1 Kick 1
DM1 Rim Shot
DM1 Snare 1
DM1 Hand Clap
DM1 Snare 2
DM1 Low Tom 2
DM1 Closed Hi-Hat 1
DM1 Low Tom 1
DM1 Closed Hi-Hat 2
DM1 Mid Tom 2
DM1 Open Hi-Hat
DM1 Mid Tom 1
DM1 High Tom 2
DM1 Crash Cymbal
DM1 High Tom 1
DM1 Ride Cymbal
Standard3 Chinese Cymbal
Standard3 Ride Bell
DM1 Tambourine
Standard3 Splash Cymbal
DM1 Cowbell
Standard3 Crash Cymbal 2
Vibraslap
DM1 Kick 3
Hip-Hop Kick 3
Standard4 Kick 1
Standard4 Snare 1
Hand Clap 3
Standard4 Snare 2
Elec.Low Tom 2
Hip-Hop Closed Hi-Hat
Elec.Low Tom 1
Hip-Hop Pedal Hi-Hat
Elec.Mid Tom 2
Hip-Hop Open Hi-Hat
Elec.Mid Tom 1
Elec.High Tom 2
Techno Cymbal
Elec.High Tom 1
Techno Ride
Standard3 Low Tom 2
Room Closed Hi-Hat
Standard3 Low Tom 1
Room Pedal Hi-Hat
Standard3 Mid Tom 2
Room Open Hi-Hat
Standard3 Mid Tom 1
Standard3 High Tom 2
Standard3 Crash Cymbal 1
Standard3 High Tom 1
Standard3 Ride Cymbal 1
Tambourine 2
Tambourine 3
Cabasa 2
Maracas 2
Claves 2
Mute Triangle 2
Open Triangle 2
Shaker 2
Hand Clap 1
Hand Clap 2
Key
Note No.

Reference
EN-316
• “” indicates a key is assigned the same tones as it is for 765:STANDARD SET 1.
771 : DANCE SET 2 772 : DANCE SET 3
C-1
D-1
E-1
F-1
G-1
A-1
B-1
C0
D0
E0
F0
G0
A0
B0
C1
D1
E1
F1
G1
A1
B1
C2
D2
E2
F2
G2
A2
B2
C3
D3
E3
F3
G3
A3
B3
C4
D4
E4
F4
G4
A4
B4
C5
D5
E5
F5
G5
A5
B5
C6
D6
E6
F6
G6
A6
B6
C7
D7
E7
F7
G7
A7
B7
C8
D8
E8
F8
G8
A8
B8
C9
D9
E9
F9
G9
C{-1
E}
-1
F{-1
A}
-1
B}
-1
C{0
E}
0
F{0
A}
0
B}
0
C{1
E}
1
F{1
A}
1
B}
1
C{2
E}
2
F{2
A}
2
B}
2
C{3
E}
3
F{3
A}
3
B}
3
C{4
E}
4
F{4
A}
4
B}
4
C{5
E}
5
F{5
A}
5
B}
5
C{6
E}
6
F{6
A}
6
B}
6
C{7
E}
7
F{7
A}
7
B}
7
C{8
E}
8
F{8
A}
8
B}
8
C{9
E}
9
F{9
774 : DANCE SET 5773 : DANCE SET 4
DRUMS SET NAME
775 : DANCE SET 6 776 : TRANCE SET
0
1
2
3
4
5
6
7
8
9
10
11
12
13
14
15
16
17
18
19
20
21
22
23
24
25
26
27
28
29
30
31
32
33
34
35
36
37
38
39
40
41
42
43
44
45
46
47
48
49
50
51
52
53
54
55
56
57
58
59
60
61
62
63
64
65
66
67
68
69
70
71
72
73
74
75
76
77
78
79
80
81
82
83
84
85
86
87
88
89
90
91
92
93
94
95
96
97
98
99
100
101
102
103
104
105
106
107
108
109
110
111
112
113
114
115
116
117
118
119
120
121
122
123
124
125
126
127
»
»
»
»
Standard2 Sticks
»
»
»
Hip-Hop Kick 3
Dance1 Kick 5
Hand Clap 3
Dance1 Snare 7
Hand Clap 2
Techno Snare
DM2 Low Tom 2
Trance Closed Hi-Hat
DM2 Low Tom 1
Trance Open Hi-Hat 1
DM2 Mid Tom 2
Trance Open Hi-Hat 2
DM2 Mid Tom 1
DM2 High Tom 2
»
DM2 High Tom 1
Standard3 Ride Cymbal 1
Standard3 Chinese Cymbal
Standard3 Ride Bell
»
Standard3 Splash Cymbal
»
Standard3 Crash Cymbal 2
»
Standard3 Ride Cymbal 2
»
»
»
»
»
»
»
»
»
Cabasa 2
Maracas 2
High Whistle 2
Low Whistle 2
»
»
»
»
»
»
»
Mute Triangle 2
Open Triangle 2
Shaker 2
»
»
»
»
»
»
»
»
»
»
»
Standard2 Sticks
»
»
»
Dance1 Kick 2
Dance1 Kick 4
Hip-Hop Side Stick Gate
Dance1 Snare 2
DM1 Hand Clap
Dance1 Snare 1 Gate
Standard5 Low Tom 2
Standard5 Closed Hi-Hat
Standard5 Low Tom 1
Standard5 Pedal Hi-Hat
Standard5 Mid Tom 2
Standard5 Open Hi-Hat
Standard5 Mid Tom 1
Standard5 High Tom 2
Standard3 Crash Cymbal 1
Standard5 High Tom 1
Standard3 Ride Cymbal 1
Standard3 Chinese Cymbal
Standard3 Ride Bell
»
Standard3 Splash Cymbal
»
Standard3 Crash Cymbal 2
»
Standard3 Ride Cymbal 2
»
»
»
»
»
»
»
»
»
Cabasa 2
Maracas 2
High Whistle 2
Low Whistle 2
»
»
»
»
»
»
»
Mute Triangle 2
Open Triangle 2
Shaker 2
»
»
»
»
»
»
»
Dance1 Kick 1
Dance1 Kick 2
Dance1 Kick 3
Dance1 Kick 4
Dance1 Kick 5
Dance1 Snare 1
Dance1 Snare 2
Dance1 Snare 3
Dance1 Snare 4
Dance1 Snare 5
Dance1 Snare 6
Dance1 Snare 7
Dance1 Snare 8
Dance1 Snare 9
Dance1 Tambourine
Hip-Hop Snare 4
Hip-Hop Snare 3
Techno Snare
Hip-Hop Rim Shot
Hip-Hop Snare 3 Rev.
DM2 Kick 1 Rev.
Reverse Cymbal Gate
Dance4 Snare Rev.
Dance4 Open Hi-Hat Rev.
Techno Snare Gate
Hip-Hop Side Stick Gate
Hand Clap 2 Gate
»
»
Dance4 Scratch Push
Dance4 Scratch Pull
Standard2 Sticks
»
»
»
Dance4 Kick 2
Dance4 Kick 1
Dance4 Hand Clap 1
Dance4 Snare 1
Dance4 Hand Clap 2
Dance4 Snare 2
Dance4 Low Tom 2
Dance4 Closed Hi-Hat 1
Dance4 Low Tom 1
Dance4 Closed Hi-Hat 2
Dance4 Mid Tom 2
Dance4 Open Hi-Hat 1
Dance4 Mid Tom 1
Dance4 High Tom 2
Standard3 Crash Cymbal 1
Dance4 High Tom 1
Standard3 Ride Cymbal 1
Standard3 Chinese Cymbal
Standard3 Ride Bell
»
Standard3 Splash Cymbal
»
Standard3 Crash Cymbal 2
»
Dance4 Kick 4
Dance4 Kick 3
Dance4 Hand Clap 3
Dance4 Hand Clap 4
Dance4 Hand Clap 5
Dance4 Snare 3
DM1 Low Tom 2
Dance4 Closed Hi-Hat 3
DM1 Low Tom 1
Dance4 Closed Hi-Hat 4
DM1 Mid Tom 2
Dance4 Open Hi-Hat 2
DM1 Mid Tom 1
DM1 High Tom 2
DM1 Crash Cymbal
DM1 High Tom 1
DM1 Ride Cymbal
Standard3 Chinese Cymbal
Standard3 Ride Bell
DM1 Tambourine
Standard3 Splash Cymbal
DM1 Cowbell
Standard3 Crash Cymbal 2
Vibraslap
DM1 Kick 3
Dance4 Kick 5
Dance6 Kick 1
Dance6 Snare 1
Dance4 Hand Clap 6
Dance6 Snare 2
Elec.Low Tom 2
Dance4 Closed Hi-Hat 5
Elec.Low Tom 1
Dance4 Closed Hi-Hat 6
Elec.Mid Tom 2
Dance4 Open Hi-Hat 3
Elec.Mid Tom 1
Elec.High Tom 2
Techno Cymbal
Elec.High Tom 1
Techno Ride
Standard3 Low Tom 2
Room Closed Hi-Hat
Standard3 Low Tom 1
Room Pedal Hi-Hat
Standard3 Mid Tom 2
Room Open Hi-Hat
Standard3 Mid Tom 1
Standard3 High Tom 2
Standard3 Crash Cymbal 1
Standard3 High Tom 1
Standard3 Ride Cymbal 1
Tambourine 2
Tambourine 3
Cabasa 2
Maracas 2
Claves 2
Mute Triangle 2
Open Triangle 2
Shaker 2
Hand Clap 1
Hand Clap 2
Dance5 Kick 2
Dance5 Kick 1
Dance5 Kick 2
Dance5 Kick 3
Dance5 Snare 1
Dance5 Snare 2
Dance5 Clap
Dance5 Snare 3
DM1 Low Tom 2
Dance5 Closed Hi-Hat
DM1 Low Tom 1
Dance5 Open Hi-Hat 1
DM1 Mid Tom 2
Dance5 Open Hi-Hat 2
DM1 Mid Tom 1
DM1 High Tom 2
DM1 Crash Cymbal
DM1 High Tom 1
DM1 Ride Cymbal
Standard3 Chinese Cymbal
Standard3 Ride Bell
DM1 Tambourine
Standard3 Splash Cymbal
DM1 Cowbell
Standard3 Crash Cymbal 2
»
Standard3 Ride Cymbal 2
Dance5 SFX Sound 1
Dance5 SFX Sound 2
Dance5 SFX Sound 3
Dance5 SFX Sound 4
Dance5 SFX Sound 5
Dance5 SFX Sound 6
Dance5 SFX Sound 7
Dance5 SFX Sound 8
Dance5 SFX Sound 9
Dance5 SFX Sound 10
Dance5 SFX Sound 11
Dance5 SFX Sound 12
Dance5 SFX Sound 13
Dance5 SFX Sound 14
Dance5 SFX Sound 15
Dance5 SFX Sound 16
Dance5 SFX Sound 17
Dance5 SFX Sound 18
Dance5 SFX Sound 19
Dance5 SFX Sound 20
Dance5 SFX Sound 21
Dance5 SFX Sound 22
Dance5 SFX Sound 23
Dance5 SFX Sound 24
Dance5 SFX Sound 25
Dance5 SFX Voice 1
Dance5 SFX Voice 2
Dance5 SFX Voice 3
Dance5 SFX Voice 4
Dance5 SFX Voice 5
Dance5 SFX Voice 6
Dance5 SFX Voice 7
Dance5 SFX Voice 8
VL Snare
VL Pong
VL Ping
Dance6 Rev.Snare 1
Dance6 Open Hi-Hat 1
Dance6 Crash 1
Dance6 SE Noise
Dance6 Noise Down
Dance6 Gate Snare
Dance6 SE Exp.
Dance6 Open Hi-Hat 2
Dance6 Gate Snare
Dance6 Kick 1
Dance6 Kick 2
Dance6 Snare 1
Dance6 Snare 2
Dance6 Rev.Snare 1
Dance6 Closed Hi-Hat 1
Dance6 Open Hi-Hat 1
Dance6 Crash 2
Dance6 Filter Hi-Hat L
Dance6 Filter Hi-Hat R
Wobble 1
Wobble 2
Wobble 3
Wobble 4
Dance6 Closed Hi-Hat 2
Dance6 Closed Hi-Hat 3
Dance6 Open Hi-Hat 3
Dance6 SE Snare
Dance6 SE Noise
Dance6 SE Rev.Snare 1
Dance6 Noise Down
Dance6 Gate Snare
Dance6 Rev.Snare 2
Dance6 SE Exp.
Dance6 SE Rev.Snare 2
Dance6 Kick 3
Dance6 Snare 3
Dance6 Clap
Dance6 Closed Hi-Hat 4
Dance6 Noise Hi-Hat
»
»
»
»
Standard2 Sticks
»
»
»
Trance Kick 2
Trance Kick 1
Trance Side Stick
Trance Snare 1
Trance Hand Clap
Trance Snare 2
Standard3 Low Tom 2
Trance Closed Hi-Hat
Standard3 Low Tom 1
Trance Open Hi-Hat 1
Standard3 Mid Tom 2
Trance Open Hi-Hat 2
Standard3 Mid Tom 1
Standard3 High Tom 2
Standard3 Crash Cymbal 1
Standard3 High Tom 1
Standard3 Ride Cymbal 1
Standard3 Chinese Cymbal
Standard3 Ride Bell
Trance Tambourine
Standard3 Splash Cymbal
»
Standard3 Crash Cymbal 2
»
Standard3 Ride Cymbal 2
»
»
»
»
»
»
»
»
»
Cabasa 2
Maracas 2
High Whistle 2
Low Whistle 2
»
»
»
»
»
»
»
Mute Triangle 2
Open Triangle 2
Shaker 2
»
»
»
»
»
»
»
Key
Note No.

Reference
EN-317
• “” indicates a key is assigned the same tones as it is for 765:STANDARD SET 1.
777 : HIP-HOP SET 778 : ROOM SET
C-1
D-1
E-1
F-1
G-1
A-1
B-1
C0
D0
E0
F0
G0
A0
B0
C1
D1
E1
F1
G1
A1
B1
C2
D2
E2
F2
G2
A2
B2
C3
D3
E3
F3
G3
A3
B3
C4
D4
E4
F4
G4
A4
B4
C5
D5
E5
F5
G5
A5
B5
C6
D6
E6
F6
G6
A6
B6
C7
D7
E7
F7
G7
A7
B7
C8
D8
E8
F8
G8
A8
B8
C9
D9
E9
F9
G9
C{-1
E}
-1
F{-1
A}
-1
B}
-1
C{0
E}
0
F{0
A}
0
B}
0
C{1
E}
1
F{1
A}
1
B}
1
C{2
E}
2
F{2
A}
2
B}
2
C{3
E}
3
F{3
A}
3
B}
3
C{4
E}
4
F{4
A}
4
B}
4
C{5
E}
5
F{5
A}
5
B}
5
C{6
E}
6
F{6
A}
6
B}
6
C{7
E}
7
F{7
A}
7
B}
7
C{8
E}
8
F{8
A}
8
B}
8
C{9
E}
9
F{9
780 : ROCK SET779 : POWER SET
DRUMS SET NAME
781 : ELECTRONIC SET 782 : DRUM MACHINE SET 1
0
1
2
3
4
5
6
7
8
9
10
11
12
13
14
15
16
17
18
19
20
21
22
23
24
25
26
27
28
29
30
31
32
33
34
35
36
37
38
39
40
41
42
43
44
45
46
47
48
49
50
51
52
53
54
55
56
57
58
59
60
61
62
63
64
65
66
67
68
69
70
71
72
73
74
75
76
77
78
79
80
81
82
83
84
85
86
87
88
89
90
91
92
93
94
95
96
97
98
99
100
101
102
103
104
105
106
107
108
109
110
111
112
113
114
115
116
117
118
119
120
121
122
123
124
125
126
127
»
»
»
»
Standard2 Sticks
»
»
»
Hip-Hop Kick 2
Hip-Hop Kick 1
Hip-Hop Side Stick
Hip-Hop Snare 1
Hip-Hop Hand Clap
Hip-Hop Snare 2
Standard3 Low Tom 2
Hip-Hop Closed Hi-Hat
Standard3 Low Tom 1
Hip-Hop Pedal Hi-Hat
Standard3 Mid Tom 2
Hip-Hop Open Hi-Hat
Standard3 Mid Tom 1
Standard3 High Tom 2
Standard3 Crash Cymbal 1
Standard3 High Tom 1
Standard3 Ride Cymbal 1
Standard3 Chinese Cymbal
Standard3 Ride Bell
»
Standard3 Splash Cymbal
»
Standard3 Crash Cymbal 2
»
Standard3 Ride Cymbal 2
»
»
»
»
»
»
»
»
»
»
»
High Whistle 2
Low Whistle 2
»
»
»
»
»
»
»
»
»
»
»
»
»
»
»
»
»
»
»
»
»
Standard2 Sticks
»
»
»
Room Kick 2
Room Kick 1
Standard2 Side Stick
Room Snare 1
»
Room Snare 2
Room Low Tom 2
Room Closed Hi-Hat
Room Low Tom 1
Room Pedal Hi-Hat
Room Mid Tom 2
Room Open Hi-Hat
Room Mid Tom 1
Room High Tom 2
Standard3 Crash Cymbal 1
Room High Tom 1
Standard3 Ride Cymbal 1
Standard3 Chinese Cymbal
Standard3 Ride Bell
»
Standard3 Splash Cymbal
»
Standard3 Crash Cymbal 2
»
Standard3 Ride Cymbal 2
»
»
»
»
»
»
»
»
»
»
»
High Whistle 2
Low Whistle 2
»
»
»
»
»
»
»
»
»
»
»
»
»
»
»
»
»
»
»
»
»
Standard2 Sticks
»
»
»
Power Kick 2
Power Kick 1
Standard2 Side Stick
Power Snare 1
»
Power Snare 2
Room Low Tom 2
Room Closed Hi-Hat
Room Low Tom 1
Room Pedal Hi-Hat
Room Mid Tom 2
Room Open Hi-Hat
Room Mid Tom 1
Room High Tom 2
Standard3 Crash Cymbal 1
Room High Tom 1
Standard3 Ride Cymbal 1
Standard3 Chinese Cymbal
Standard3 Ride Bell
»
Standard3 Splash Cymbal
»
Standard3 Crash Cymbal 2
»
Standard3 Ride Cymbal 2
»
»
»
»
»
»
»
»
»
»
»
High Whistle 2
Low Whistle 2
»
»
»
»
»
»
»
»
»
»
»
»
»
»
»
»
»
»
»
»
»
»
»
»
»
Rock Kick 2
Rock Kick 1
»
Rock Snare 1
»
Rock Snare 2
Rock Low Tom 2
Rock Closed Hi-Hat
Rock Low Tom 1
Rock Pedal Hi-Hat
Rock Mid Tom 2
Rock Open Hi-Hat
Rock Mid Tom 1
Rock High Tom 2
Rock Crash Cymbal 1
Rock High Tom 1
Rock Ride Cymbal 1
Rock Chinese Cymbal
Rock Ride Bell
»
Rock Splash Cymbal
»
Rock Crash Cymbal 2
»
Rock Ride Cymbal 2
»
»
»
»
»
»
»
»
»
»
»
High Whistle 2
Low Whistle 2
»
»
»
»
»
»
»
»
»
»
»
»
»
»
»
»
»
»
»
»
»
Standard2 Sticks
»
»
»
Elec.Kick 2
Elec.Kick 1
Standard2 Side Stick
Elec.Snare 1
»
Elec.Snare 2
Elec.Low Tom 2
Room Closed Hi-Hat
Elec.Low Tom 1
Room Pedal Hi-Hat
Elec.Mid Tom 2
Room Open Hi-Hat
Elec.Mid Tom 1
Elec.High Tom 2
Standard3 Crash Cymbal 1
Elec.High Tom 1
Standard3 Ride Cymbal 1
Reverse Cymbal
Standard3 Ride Bell
»
Standard3 Splash Cymbal
»
Standard3 Crash Cymbal 2
»
Standard3 Ride Cymbal 2
»
»
»
»
»
»
»
»
»
Cabasa 2
Maracas 2
High Whistle 2
Low Whistle 2
»
»
»
»
»
»
»
Mute Triangle 2
Open Triangle 2
Shaker 2
»
»
»
»
»
»
»
»
»
»
»
Standard2 Sticks
»
»
»
DM1 Kick 2
DM1 Kick 1
DM1 Rim Shot
DM1 Snare 1
DM1 Hand Clap
DM1 Snare 2
DM1 Low Tom 2
DM1 Closed Hi-Hat 1
DM1 Low Tom 1
DM1 Closed Hi-Hat 2
DM1 Mid Tom 2
DM1 Open Hi-Hat
DM1 Mid Tom 1
DM1 High Tom 2
DM1 Crash Cymbal
DM1 High Tom 1
DM1 Ride Cymbal
Standard3 Chinese Cymbal
Standard3 Ride Bell
DM1 Tambourine
Standard3 Splash Cymbal
DM1 Cowbell
Standard3 Crash Cymbal 2
»
Standard3 Ride Cymbal 2
DM1 High Bongo
DM1 Low Bongo
DM1 Mute High Conga
DM1 Open High Conga
DM1 Open Low Conga
»
»
»
»
Cabasa 2
DM1 Maracas
High Whistle 2
Low Whistle 2
»
»
DM1 Claves
»
»
»
»
Mute Triangle 2
Open Triangle 2
Shaker 2
»
»
»
»
»
»
»
Key
Note No.

Reference
EN-318
• “” indicates a key is assigned the same tones as it is for 765:STANDARD SET 1.
783 : DRUM MACHINE SET 2 784 : DRUM MACHINE SET 3
C-1
D-1
E-1
F-1
G-1
A-1
B-1
C0
D0
E0
F0
G0
A0
B0
C1
D1
E1
F1
G1
A1
B1
C2
D2
E2
F2
G2
A2
B2
C3
D3
E3
F3
G3
A3
B3
C4
D4
E4
F4
G4
A4
B4
C5
D5
E5
F5
G5
A5
B5
C6
D6
E6
F6
G6
A6
B6
C7
D7
E7
F7
G7
A7
B7
C8
D8
E8
F8
G8
A8
B8
C9
D9
E9
F9
G9
C{-1
E}
-1
F{-1
A}
-1
B}
-1
C{0
E}
0
F{0
A}
0
B}
0
C{1
E}
1
F{1
A}
1
B}
1
C{2
E}
2
F{2
A}
2
B}
2
C{3
E}
3
F{3
A}
3
B}
3
C{4
E}
4
F{4
A}
4
B}
4
C{5
E}
5
F{5
A}
5
B}
5
C{6
E}
6
F{6
A}
6
B}
6
C{7
E}
7
F{7
A}
7
B}
7
C{8
E}
8
F{8
A}
8
B}
8
C{9
E}
9
F{9
786 : BRUSH SET785 : JAZZ SET
DRUMS SET NAME
787 : ORCHESTRA SET 788 : LATIN SET 1
0
1
2
3
4
5
6
7
8
9
10
11
12
13
14
15
16
17
18
19
20
21
22
23
24
25
26
27
28
29
30
31
32
33
34
35
36
37
38
39
40
41
42
43
44
45
46
47
48
49
50
51
52
53
54
55
56
57
58
59
60
61
62
63
64
65
66
67
68
69
70
71
72
73
74
75
76
77
78
79
80
81
82
83
84
85
86
87
88
89
90
91
92
93
94
95
96
97
98
99
100
101
102
103
104
105
106
107
108
109
110
111
112
113
114
115
116
117
118
119
120
121
122
123
124
125
126
127
»
»
»
»
Standard2 Sticks
»
»
»
DM2 Kick 2
DM2 Kick 1
DM1 Rim Shot
DM2 Snare 1
»
DM2 Snare 2
DM2 Low Tom 2
DM2 Closed Hi-Hat 1
DM2 Low Tom 1
DM2 Closed Hi-Hat 2
DM2 Mid Tom 2
DM2 Open Hi-Hat
DM2 Mid Tom 1
DM2 High Tom 2
Standard3 Crash Cymbal 1
DM2 High Tom 1
Standard3 Ride Cymbal 1
Standard3 Chinese Cymbal
Standard3 Ride Bell
»
Standard3 Splash Cymbal
DM1 Cowbell
Standard3 Crash Cymbal 2
»
Standard3 Ride Cymbal 2
»
»
»
»
»
»
»
»
»
Cabasa 2
DM1 Maracas
High Whistle 2
Low Whistle 2
»
»
DM1 Claves
»
»
»
»
Mute Triangle 2
Open Triangle 2
Shaker 2
»
»
»
»
»
»
»
»
»
Dance4 Scratch Push
Dance4 Scratch Pull
Standard2 Sticks
»
»
»
DM3 Kick 2
DM3 Kick 1
DM3 Rim Shot
DM3 Snare 1
DM3 Hand Clap 1
DM3 Snare 2
DM3 Low Tom 2
DM3 Closed Hi-Hat 1
DM3 Low Tom 1
DM3 Closed Hi-Hat 2
DM3 Mid Tom 2
DM3 Open Hi-Hat 1
DM3 Mid Tom 1
DM3 High Tom 2
DM3 Crash Cymbal 1
DM3 High Tom 1
DM3 Ride Cymbal 1
Standard3 Chinese Cymbal
Standard3 Ride Bell
»
Standard3 Splash Cymbal
»
Standard3 Crash Cymbal 2
»
DM3 Kick 4
DM3 Kick 3
DM3 Hand Clap 2
DM3 Snare 3
DM3 Snare 4
DM3 Snare 5
DM3 Low Tom 4
DM3 Closed Hi-Hat 3
DM3 Low Tom 3
DM3 Closed Hi-Hat 4
DM3 Mid Tom 4
DM3 Open Hi-Hat 2
DM3 Mid Tom 3
DM3 High Tom 4
DM3 Crash Cymbal 2
DM3 High Tom 3
DM3 Ride Cymbal 2
Standard3 Chinese Cymbal
Standard3 Ride Bell
DM3 Tambourine
Standard3 Splash Cymbal
DM3 Cowbell
Standard3 Crash Cymbal 2
Vibraslap
DM3 Conga
DM3 Cabasa
Finger Snap 1
Finger Snap 2
Clap Reverb
Jazz Snare 2 mp
Jazz Snare 1 mp
Jazz Snare 1 mf
Jazz Rim
»
»
»
»
Standard2 Sticks
»
»
»
Jazz Kick 2
Jazz Kick 1
Jazz Side Stick
Jazz Snare 1
»
Jazz Snare 2
Jazz Low Tom 2
Room Closed Hi-Hat
Jazz Low Tom 1
Room Pedal Hi-Hat
Jazz Mid Tom 2
Room Open Hi-Hat
Jazz Mid Tom 1
Jazz High Tom 2
Standard3 Crash Cymbal 1
Jazz High Tom 1
Standard3 Ride Cymbal 1
Standard3 Chinese Cymbal
Standard3 Ride Bell
»
Standard3 Splash Cymbal
»
Standard3 Crash Cymbal 2
»
Standard3 Ride Cymbal 2
»
»
»
»
»
»
»
»
»
»
»
High Whistle 2
Low Whistle 2
»
»
»
»
»
»
»
»
»
»
»
»
»
»
»
»
»
Finger Snap 3
Brush Slap 1 mp
Brush Slap 1 mf
Brush Slap 2
Brush Swirl 2
Brush Swirl 3
Brush Swirl 4
Brush Swirl 5
»
»
»
»
Standard2 Sticks
»
»
»
Jazz Kick 2
Brush Kick
Jazz Side Stick
Brush Snare
Brush Slap 1
Brush Swirl 1
Brush Low Tom 2
Room Closed Hi-Hat
Brush Low Tom 1
Room Pedal Hi-Hat
Brush Mid Tom 2
Room Open Hi-Hat
Brush Mid Tom 1
Brush High Tom 2
Brush Crash Cymbal 1
Brush High Tom 1
Brush Ride Cymbal 1
Standard3 Chinese Cymbal
Brush Ride Bell
Brush Tambourine
Brush Splash Cymbal
»
Brush Crash Cymbal 2
»
Brush Ride Cymbal 2
»
»
»
»
»
»
»
»
»
»
»
High Whistle 2
Low Whistle 2
»
»
»
»
»
»
»
»
»
»
»
»
»
»
»
»
»
Standard3 Closed Hi-Hat
Standard3 Pedal Hi-Hat
Standard3 Open Hi-Hat
Standard3 Ride Cymbal 1
Standard2 Sticks
»
»
»
Concert BD 2
Concert BD 1
»
Concert SD
Castanets
Concert SD
Timpani F
Timpani F#
Timpani G
Timpani G#
Timpani A
Timpani A#
Timpani B
Timpani C+
Timpani C#+
Timpani D+
Timpani D#+
Timpani E+
Timpani F+
»
Standard3 Splash Cymbal
»
Concert Cymbal 2
»
Concert Cymbal 1
»
»
»
»
»
»
»
»
»
»
»
High Whistle 2
Low Whistle 2
»
»
»
»
»
»
»
»
»
»
»
»
»
»
»
»
»
Timbal Slap
Timbal Open
Timbal Bass
Timbal Moff
Surdo Body
Surdo Close
Surdo Hand 1
Surdo Hand 2
Surdo Hand 3
Surdo Hand Off
Surdo Open 1
Surdo Open 2
Surdo Rim
Standard2 Sticks
»
»
»
Standard3 Kick 2
Standard3 Kick 1
Standard2 Side Stick
Standard3 Snare 1
»
Standard3 Snare 2
Standard3 Low Tom 2
Room Closed Hi-Hat
Standard3 Low Tom 1
Room Pedal Hi-Hat
Standard3 Mid Tom 2
Room Open Hi-Hat
Standard3 Mid Tom 1
Standard3 High Tom 2
Standard3 Crash Cymbal 1
Standard3 High Tom 1
Standard3 Ride Cymbal 1
Standard3 Chinese Cymbal
Standard3 Ride Bell
»
Standard3 Splash Cymbal
»
Standard3 Crash Cymbal 2
»
Standard3 Ride Cymbal 2
»
»
»
»
»
»
»
High Agogo 3
Low Agogo 3
Agogo 2 Crash
Shaker 3
High Whistle 2
Low Whistle 2
Zabumba Open
Zabumba Mute 1
Zabumba Mute 2
Zabumba Rim
Ganza
Ganza Bottom
Triangle 3 Mute 1
Triangle 3 Mute 2
Triangle 3 Open
Triangle 3 Half Mute
Pandeiro 1 P
Pandeiro 1 D
Pandeiro 1 G
Pandeiro 1 GDM
Pandeiro 1 T
Pandeiro 1 /G
Pandeiro 1 G/DM
Pandeiro 1 Jingle
Pandeiro 1 Roll
Tamborim Head 1
Tamborim Head 2
Tamborim Head Edge
Tamborim Head Finger 1
Tamborim Head Finger 2
Tamborim Tail Finger
Tamborim Roll
Pandeiro 2 P
Pandeiro 2 D
Pandeiro 2 G
Pandeiro 2 GDM
Pandeiro 2 T
Pandeiro 2 /G
Pandeiro 2 G/DM
Pandeiro 2 Jingle
Key
Note No.

Reference
EN-319
• “” indicates a key is assigned the same tones as it is for 765:STANDARD SET 1.
789 : LATIN SET 2 790 : INDONESIAN SET
C-1
D-1
E-1
F-1
G-1
A-1
B-1
C0
D0
E0
F0
G0
A0
B0
C1
D1
E1
F1
G1
A1
B1
C2
D2
E2
F2
G2
A2
B2
C3
D3
E3
F3
G3
A3
B3
C4
D4
E4
F4
G4
A4
B4
C5
D5
E5
F5
G5
A5
B5
C6
D6
E6
F6
G6
A6
B6
C7
D7
E7
F7
G7
A7
B7
C8
D8
E8
F8
G8
A8
B8
C9
D9
E9
F9
G9
C{-1
E}
-1
F{-1
A}
-1
B}
-1
C{0
E}
0
F{0
A}
0
B}
0
C{1
E}
1
F{1
A}
1
B}
1
C{2
E}
2
F{2
A}
2
B}
2
C{3
E}
3
F{3
A}
3
B}
3
C{4
E}
4
F{4
A}
4
B}
4
C{5
E}
5
F{5
A}
5
B}
5
C{6
E}
6
F{6
A}
6
B}
6
C{7
E}
7
F{7
A}
7
B}
7
C{8
E}
8
F{8
A}
8
B}
8
C{9
E}
9
F{9
792 : ARABIC SET791 : INDIAN SET
DRUMS SET NAME
793 : CHINESE SET 794 : SFX SET 1
0
1
2
3
4
5
6
7
8
9
10
11
12
13
14
15
16
17
18
19
20
21
22
23
24
25
26
27
28
29
30
31
32
33
34
35
36
37
38
39
40
41
42
43
44
45
46
47
48
49
50
51
52
53
54
55
56
57
58
59
60
61
62
63
64
65
66
67
68
69
70
71
72
73
74
75
76
77
78
79
80
81
82
83
84
85
86
87
88
89
90
91
92
93
94
95
96
97
98
99
100
101
102
103
104
105
106
107
108
109
110
111
112
113
114
115
116
117
118
119
120
121
122
123
124
125
126
127
Standard2 Sticks
»
»
»
Surdo Body
Surdo Close
Surdo Hand 1
Surdo Hand 2
Surdo Hand 3
Surdo Hand Off
Surdo Open 1
Surdo Open 2
Surdo Rim
Tamborim Head 1
Tamborim Head 2
Tamborim Head Edge
Tamborim Head Finger 1
Tamborim Head Finger 2
Tamborim Tail Finger
Tamborim Roll
Standard2 Snare 2
Standard2 Snare 2
»
»
»
»
»
»
»
»
»
»
»
»
»
»
»
»
»
»
»
Timbal Slap
Timbal Open
Timbal Bass
Timbal Moff
Ganza
Ganza Bottom
Triangle 3 Mute 1
Triangle 3 Mute 2
Triangle 3 Open
Triangle 3 Half Mute
Pandeiro 2 P
Pandeiro 2 D
Pandeiro 2 G
Pandeiro 2 GDM
Pandeiro 2 T
Pandeiro 2 /G
Pandeiro 2 G/DM
Pandeiro 2 Jingle
»
»
»
»
»
»
»
»
»
»
»
»
»
»
»
»
»
Standard2 Sticks
»
»
»
Standard3 Kick 2
Standard3 Kick 1
Standard2 Side Stick
Standard3 Snare 1
»
Standard3 Snare 2
Standard3 Low Tom 2
Room Closed Hi-Hat
Standard3 Low Tom 1
Room Pedal Hi-Hat
Standard3 Mid Tom 2
Room Open Hi-Hat
Standard3 Mid Tom 1
Standard3 High Tom 2
Standard3 Crash Cymbal 1
Standard3 High Tom 1
Standard3 Ride Cymbal 1
Standard3 Chinese Cymbal
Standard3 Ride Bell
»
Standard3 Splash Cymbal
»
Standard3 Crash Cymbal 2
»
Standard3 Ride Cymbal 2
»
»
»
»
»
»
»
»
»
Ketipung L Dang Deng
Ketipung L Dang Deng Mute
Ketipung L Dang Dhuk 1
Ketipung L Dang Dhuk 2
Ketipung L Dang Dhuk 3
Ketipung L Dang Dhuk Fast
Ketipung L Dang Dhuk Long
Ketipung L Dang Finger Rim
Ketipung L Dang Skin Left
Ketipung L Dang Thumb Rim
Ketipung H Dut Flam Right Finger
Ketipung H Dut Ket
Ketipung H Dut Pok
Ketipung H Dut Skin Right
Ketipung H Dut Tak
Ketipung H Dut Tang
Ketipung H Dut Tex
Ketipung H Dut Tung
Rebana Hadroh D1
Rebana Hadroh D2
Rebana Hadroh D&D
Rebana Hadroh T1
Rebana Hadroh T2
Rebana Hadroh T&T
»
»
»
»
»
»
»
»
»
»
»
»
Morsing B 1
Morsing B 2
Morsing B 3
Morsing B 4
Morsing B 5
Morsing E 1
Morsing E 2
Morsing E 3
Morsing E 4
Morsing E 5
Morsing G 1
Morsing G 2
Morsing G 3
Morsing G 4
Morsing G 5
Gatham Dom
Gatham Ta
Gatham Dim
Gatham Nam
Thavil Nam
Thavil Ki
Thavil Kun
Thavil Jou
Thavil Kirara
Kanjira Ta
Kanjira Di
Kanjira Don
Kanjira Don BendShort
Standard2 Sticks
»
»
»
Standard3 Kick 2
Standard3 Kick 1
Standard2 Side Stick
Standard3 Snare 1
»
Standard3 Snare 2
Standard3 Low Tom 2
Room Closed Hi-Hat
Standard3 Low Tom 1
Room Pedal Hi-Hat
Standard3 Mid Tom 2
Room Open Hi-Hat
Standard3 Mid Tom 1
Standard3 High Tom 2
Standard3 Crash Cymbal 1
Standard3 High Tom 1
Standard3 Ride Cymbal 1
Standard3 Chinese Cymbal
Standard3 Ride Bell
»
Standard3 Splash Cymbal
»
Standard3 Crash Cymbal 2
»
Standard3 Ride Cymbal 2
»
»
»
»
»
»
»
»
»
»
»
Tabla Ge
Tabla Ka
Tabla Te
Tabla Na
Tabla Tun
Dholak Ge
Dholak Ke
Dholak Ta 1
Dholak Ta 2
Dholak Na
Dholak Ta 3
Dholak Ring
Mridangam Tha
Mridangam Dhom
Mridangam Dhi
Mridangam Dhin
Mridangam Num
Tabla Ge Slide 1
Tabla Ge Slide 2
Bhangra Aha
Bhangra Ashke
Bhangra Chakde
Bhangra Hoye
Bhangra Oho
Bhangra Oh-Balle
Bhangra Oh-Shava
Nagada Rim 1
Nagada Rim 2
Duff Close
Duff Open
Duffli Close 1
Duffli Close 2
Duffli Close 3
Duffli Open 1
Duffli Open 2
Duffli Jingle 1
Duffli Jingle 2
Dhol L
Dhol H
Dumru
Ghungroo 1
Ghungroo 2
Ghungroo 3
Tasha 1
Tasha 2
Tabla Chi
»
»
»
»
Standard2 Sticks
»
»
»
Standard3 Kick 2
Standard3 Kick 1
Standard2 Side Stick
Standard3 Snare 1
»
Standard3 Snare 2
Standard3 Low Tom 2
Room Closed Hi-Hat
Standard3 Low Tom 1
Room Pedal Hi-Hat
Standard3 Mid Tom 2
Room Open Hi-Hat
Standard3 Mid Tom 1
Standard3 High Tom 2
Standard3 Crash Cymbal 1
Standard3 High Tom 1
Standard3 Ride Cymbal 1
Standard3 Chinese Cymbal
Standard3 Ride Bell
»
Standard3 Splash Cymbal
»
Standard3 Crash Cymbal 2
»
Standard3 Ride Cymbal 2
»
»
»
»
»
»
»
»
»
Tablah 1
Tablah 2
Tablah 3
Daf 1
Daf 2
Riq 1
Riq 2
Riq 3
Davul 1
Davul 2
Zill 1
Zill 2
Riq Jingle
Riq Slap
Riq Tek 1
Riq Tek 2
Standard2 Sticks
»
»
»
Standard3 Kick 2
Standard3 Kick 1
Standard2 Side Stick
Standard3 Snare 1
»
Standard3 Snare 2
Standard3 Low Tom 2
Room Closed Hi-Hat
Standard3 Low Tom 1
Room Pedal Hi-Hat
Standard3 Mid Tom 2
Room Open Hi-Hat
Standard3 Mid Tom 1
Standard3 High Tom 2
Standard3 Crash Cymbal 1
Standard3 High Tom 1
Standard3 Ride Cymbal 1
Standard3 Chinese Cymbal
Standard3 Ride Bell
»
Standard3 Splash Cymbal
»
Standard3 Crash Cymbal 2
»
Standard3 Ride Cymbal 2
»
»
»
»
»
»
»
»
»
Ban Gu
Hu Yin Luo
Xiao Luo
Xiao Bo
Low Tang Gu
Mid Tang Gu
High Tang Gu
Gong 1
Gong 2
Yun Luo F#
Yun Luo G
Yun Luo G#
Yun Luo A
Yun Luo A#
Yun Luo B
Yun Luo C+
Yun Luo C#+
Yun Luo D+
Yun Luo D#+
Yun Luo E+
Yun Luo F+
Yun Luo F#+
Yun Luo G+
Yun Luo G#+
Yun Luo A+
Yun Luo A#+
Yun Luo B+
Yun Luo C++
Rain
Seashore
Thunder
Wind
Bubble
Bird
Cat
Rooster
Cow
Dog
Donkey
Elephant
Goat
Horse
Horse Gallop
Lion Roar
Nightingale
Peacock
Applause 3
Footsteps
Heartbeat
Child Crying
Child Laughing
Man Laughing
Punch
Scream
Roller Coaster
Bike Vroom
Car Passing
Car Crash
Car Engine Ignition
Car Horn
Jet Plane
Submarine
Car Tires Squeal
Train
Buzzer
Coin
Scratch
Shankh
Clock Tick-tock
Whistle 1
Whistle 2
Whistle 3
Ambulance Siren
Blast
Bar Chimes
Doorbell
Door Slam
Door Squeak
Firework
Gunshot
Machine Gun
Police Siren
Telephone Call
Telephone Ring
Temple Bell
Key
Note No.
Reference
EN-320
• “” indicates a key is assigned the same tones as it is for 765:STANDARD SET 1.
795 : SFX SET 2 796 : SNARE SET 1
C-1
D-1
E-1
F-1
G-1
A-1
B-1
C0
D0
E0
F0
G0
A0
B0
C1
D1
E1
F1
G1
A1
B1
C2
D2
E2
F2
G2
A2
B2
C3
D3
E3
F3
G3
A3
B3
C4
D4
E4
F4
G4
A4
B4
C5
D5
E5
F5
G5
A5
B5
C6
D6
E6
F6
G6
A6
B6
C7
D7
E7
F7
G7
A7
B7
C8
D8
E8
F8
G8
A8
B8
C9
D9
E9
F9
G9
C{-1
E}
-1
F{-1
A}
-1
B}
-1
C{0
E}
0
F{0
A}
0
B}
0
C{1
E}
1
F{1
A}
1
B}
1
C{2
E}
2
F{2
A}
2
B}
2
C{3
E}
3
F{3
A}
3
B}
3
C{4
E}
4
F{4
A}
4
B}
4
C{5
E}
5
F{5
A}
5
B}
5
C{6
E}
6
F{6
A}
6
B}
6
C{7
E}
7
F{7
A}
7
B}
7
C{8
E}
8
F{8
A}
8
B}
8
C{9
E}
9
F{9
798 : KICK SET797 : SNARE SET 2
DRUMS SET NAME
799 : CYMBAL SET 800 : TOM SET
0
1
2
3
4
5
6
7
8
9
10
11
12
13
14
15
16
17
18
19
20
21
22
23
24
25
26
27
28
29
30
31
32
33
34
35
36
37
38
39
40
41
42
43
44
45
46
47
48
49
50
51
52
53
54
55
56
57
58
59
60
61
62
63
64
65
66
67
68
69
70
71
72
73
74
75
76
77
78
79
80
81
82
83
84
85
86
87
88
89
90
91
92
93
94
95
96
97
98
99
100
101
102
103
104
105
106
107
108
109
110
111
112
113
114
115
116
117
118
119
120
121
122
123
124
125
126
127
Car Horn
Train
Buzzer
Clock Tick-tock
Door Squeak
Standard1 Snare 1
Standard1 Snare 2
Standard2 Snare 1
Standard2 Snare 2
Standard3 Snare 1
Standard3 Snare 2
Standard4 Snare 1
Standard4 Snare 2
Standard5 Snare 1
Standard5 Snare 2
Dance1 Snare 1
Dance1 Snare 2
Dance1 Snare 3
Dance1 Snare 4
Dance1 Snare 5
Dance1 Snare 6
Dance1 Snare 7
Dance1 Snare 8
Dance1 Snare 9
Hip-Hop Snare 4
Hip-Hop Snare 3
Techno Snare
Hip-Hop Snare 3 Rev.
Hip-Hop Snare 4 Gate
Hip-Hop Snare 3 Gate
Techno Snare Gate
DM2 Snare 1
DM2 Snare 2
DM1 Snare 1
DM1 Snare 2
Dance1 Snare 1 Gate
Dance4 Snare Rev.
Dance4 Snare 1
Dance4 Snare 2
Dance4 Snare 3
Dance6 Snare 1
Dance6 Snare 2
DM3 Snare 1
DM3 Snare 2
DM3 Snare 3
DM3 Snare 4
Dance5 Snare 1
Dance5 Snare 2
Dance5 Snare 3
VL Snare
Dance6 Noise Down
Dance6 Snare 2
Dance6 SE Snare
Dance6 SE Rev.Snare 2
Dance6 Gate Snare
Dance6 Rev.Snare 2
4inch Shot L Edge
4inch Close Rim
4inch Shot L
4inch Close Rim Edge
4inch Shot R
4inch Flam
4inch Ghost
4inch Snappie Off
4inch Snappie Off Edge
4inch Roll
4inch Roll Cres.
5inch Shot L Edge
5inch Close Rim
5inch Shot L
5inch Close Rim Edge
5inch Shot R
5inch Flam
5inch Ghost
5inch Snappie Off
5inch Snappie Off Edge
5inch Roll
5inch Roll Cres.
6inch Shot L Edge
6inch Close Rim
6inch Shot L
6inch Close Rim Edge
6inch Shot R
6inch Flam
6inch Ghost
6inch Snappie Off
6inch Snappie Off Edge
6inch Roll
6inch Roll Cres.
Orch. Shot
Orch. Roll Cres.
Orch. Roll
Brush2 Press Tap L
Brush2 Tap L
Brush2 Tap R
Brush2 Press Tap R
Brush2 Rubbing Short
Brush2 Hit-Rubbing Short
Brush2 Rubbing Long
Brush2 Hit-Rubbing Long
Brush2 Var.1
Brush2 Var.2
Standard1 Kick 2
Standard1 Kick 1
Standard2 Kick 2
Standard2 Kick 1
Standard3 Kick 2
Standard3 Kick 1
Standard4 Kick 2
Standard4 Kick 1
Standard5 Kick 2
Standard5 Kick 1
Dance1 Kick 1
Dance1 Kick 2
Dance1 Kick 3
Dance1 Kick 4
Dance1 Kick 5
DM2 Kick 1 Rev.
DM2 Kick 2
DM2 Kick 1
DM1 Kick 2
DM1 Kick 1
DM1 Kick 3
Hip-Hop Kick 3
Dance4 Kick 2
Dance4 Kick 1
Dance4 Kick 4
Dance4 Kick 3
Dance4 Kick 5
Dance6 Kick 1
DM3 Kick 2
DM3 Kick 1
DM3 Kick 4
DM3 Kick 3
Dance5 Kick 2
Dance5 Kick 1
Dance5 Kick 3
Dance6 Kick 2
Dance6 Kick 3
Trance Kick 2
Trance Kick 1
Hip-Hop Kick 2
Hip-Hop Kick 1
Room Kick 2
Room Kick 1
Power Kick 2
Power Kick 1
Rock Kick 2
Rock Kick 1
Elec.Kick 2
Elec.Kick 1
Jazz Kick 2
Jazz Kick 1
Brush Kick
Concert Cymbal 2
Concert Cymbal 1
Brush Crash Cymbal 1
Brush Ride Cymbal 1
Brush Ride Bell
Brush Splash Cymbal
Brush Crash Cymbal 2
Brush Ride Cymbal 2
DM2 Closed Hi-Hat 1
DM2 Closed Hi-Hat 2
DM2 Open Hi-Hat
DM1 Closed Hi-Hat 1
DM1 Closed Hi-Hat 2
DM1 Open Hi-Hat
DM1 Crash Cymbal
DM1 Ride Cymbal
Reverse Cymbal
Rock Closed Hi-Hat
Rock Pedal Hi-Hat
Rock Open Hi-Hat
Rock Crash Cymbal 1
Rock Ride Cymbal 1
Rock Chinese Cymbal
Rock Ride Bell
Rock Splash Cymbal
Rock Crash Cymbal 2
Rock Ride Cymbal 2
Standard1 Closed Hi-Hat
Standard1 Pedal Hi-Hat
Standard1 Open Hi-Hat
Standard1 Crash Cymbal 1
Standard1 Ride Cymbal 1
Standard1 Chinese Cymbal
Standard1 Ride Bell
Standard1 Splash Cymbal
Standard1 Crash Cymbal 2
Standard1 Ride Cymbal 2
Standard2 Closed Hi-Hat
Standard2 Pedal Hi-Hat
Standard2 Open Hi-Hat
Standard2 Crash Cymbal 1
Standard2 Ride Cymbal 1
Standard2 Chinese Cymbal
Standard2 Ride Bell
Standard2 Splash Cymbal
Standard2 Crash Cymbal 2
Standard2 Ride Cymbal 2
Standard3 Closed Hi-Hat
Standard3 Pedal Hi-Hat
Standard3 Open Hi-Hat
Standard3 Crash Cymbal 1
Standard3 Ride Cymbal 1
Standard3 Chinese Cymbal
Standard3 Ride Bell
Standard3 Splash Cymbal
Standard3 Crash Cymbal 2
Standard3 Ride Cymbal 2
Standard4 Closed Hi-Hat
Standard4 Pedal Hi-Hat
Standard4 Open Hi-Hat
Standard5 Closed Hi-Hat
Standard5 Pedal Hi-Hat
Standard5 Open Hi-Hat
Reverse Cymbal Gate
Techno Cymbal
Dance4 Open Hi-Hat Rev.
Dance4 Closed Hi-Hat 1
Dance4 Closed Hi-Hat 2
Dance4 Open Hi-Hat 1
Dance4 Closed Hi-Hat 3
Dance4 Closed Hi-Hat 4
Dance4 Open Hi-Hat 2
Dance4 Closed Hi-Hat 5
Dance4 Closed Hi-Hat 6
Dance4 Open Hi-Hat 2
DM3 Closed Hi-Hat 1
DM3 Closed Hi-Hat 2
DM3 Open Hi-Hat 1
DM3 Crash Cymbal 1
DM3 Ride Cymbal 1
DM3 Closed Hi-Hat 3
DM3 Open Hi-Hat 2
DM3 Crash Cymbal 2
DM3 Ride Cymbal 2
Dance5 Closed Hi-Hat
Dance5 Open Hi-Hat 1
Dance5 Open Hi-Hat 2
Dance6 Open Hi-Hat 1
Dance6 Open Hi-Hat 2
Dance6 Closed Hi-Hat 1
Dance6 Crash 2
Dance6 Filter Hi-Hat L
Dance6 Filter Hi-Hat R
Dance6 Closed Hi-Hat 2
Dance6 Closed Hi-Hat 3
Dance6 Open Hi-Hat 3
Dance6 Closed Hi-Hat 4
Dance6 Noise Hi-Hat
Trance Closed Hi-Hat
Trance Open Hi-Hat 1
Trance Open Hi-Hat 2
Hip-Hop Closed Hi-Hat
Hip-Hop Pedal Hi-Hat
Hip-Hop Open Hi-Hat
Room Closed Hi-Hat
Room Pedal Hi-Hat
Room Open Hi-Hat
Jazz Low Tom 2
Jazz Low Tom 1
Jazz Mid Tom 2
Jazz Mid Tom 1
Jazz High Tom 2
Jazz High Tom 1
Brush Low Tom 2
Brush Low Tom 1
Brush Mid Tom 2
Brush Mid Tom 1
Brush High Tom 2
Brush High Tom 1
Standard1 Low Tom 2
Standard1 Low Tom 1
Standard1 Mid Tom 2
Standard1 Mid Tom 1
Standard1 High Tom 2
Standard1 High Tom 1
Standard2 Low Tom 2
Standard2 Low Tom 1
Standard2 Mid Tom 2
Standard2 Mid Tom 1
Standard2 High Tom 2
Standard2 High Tom 1
Standard3 Low Tom 2
Standard3 Low Tom 1
Standard3 Mid Tom 2
Standard3 Mid Tom 1
Standard3 High Tom 2
Standard3 High Tom 1
Dance4 Low Tom 2
Dance4 Low Tom 1
Dance4 Mid Tom 2
Dance4 Mid Tom 1
Dance4 High Tom 2
Dance4 High Tom 1
DM3 Low Tom 2
DM3 Low Tom 1
DM3 Mid Tom 2
DM3 Mid Tom 1
DM3 High Tom 2
DM3 High Tom 1
DM3 Low Tom 4
DM3 Low Tom 3
DM3 Mid Tom 4
DM3 Mid Tom 3
DM3 High Tom 4
DM3 High Tom 3
Rock Low Tom 2
Rock Low Tom 1
Rock Mid Tom 2
Rock Mid Tom 1
Rock High Tom 2
Rock High Tom 1
Elec.Low Tom 2
Elec.Low Tom 1
Elec.Mid Tom 2
Elec.Mid Tom 1
Elec.High Tom 2
Elec.High Tom 1
Standard5 Low Tom 2
Standard5 Low Tom 1
Standard5 Mid Tom 2
Standard5 Mid Tom 1
Standard5 High Tom 2
Standard5 High Tom 1
Room Low Tom 2
Room Low Tom 1
Room Mid Tom 2
Room Mid Tom 1
Room High Tom 2
Room High Tom 1
DM1 Low Tom 2
DM1 Low Tom 1
DM1 Mid Tom 2
DM1 Mid Tom 1
DM1 High Tom 2
DM1 High Tom 1
DM2 Low Tom 2
DM2 Low Tom 1
DM2 Mid Tom 2
DM2 Mid Tom 1
DM2 High Tom 2
DM2 High Tom 1
Key
Note No.
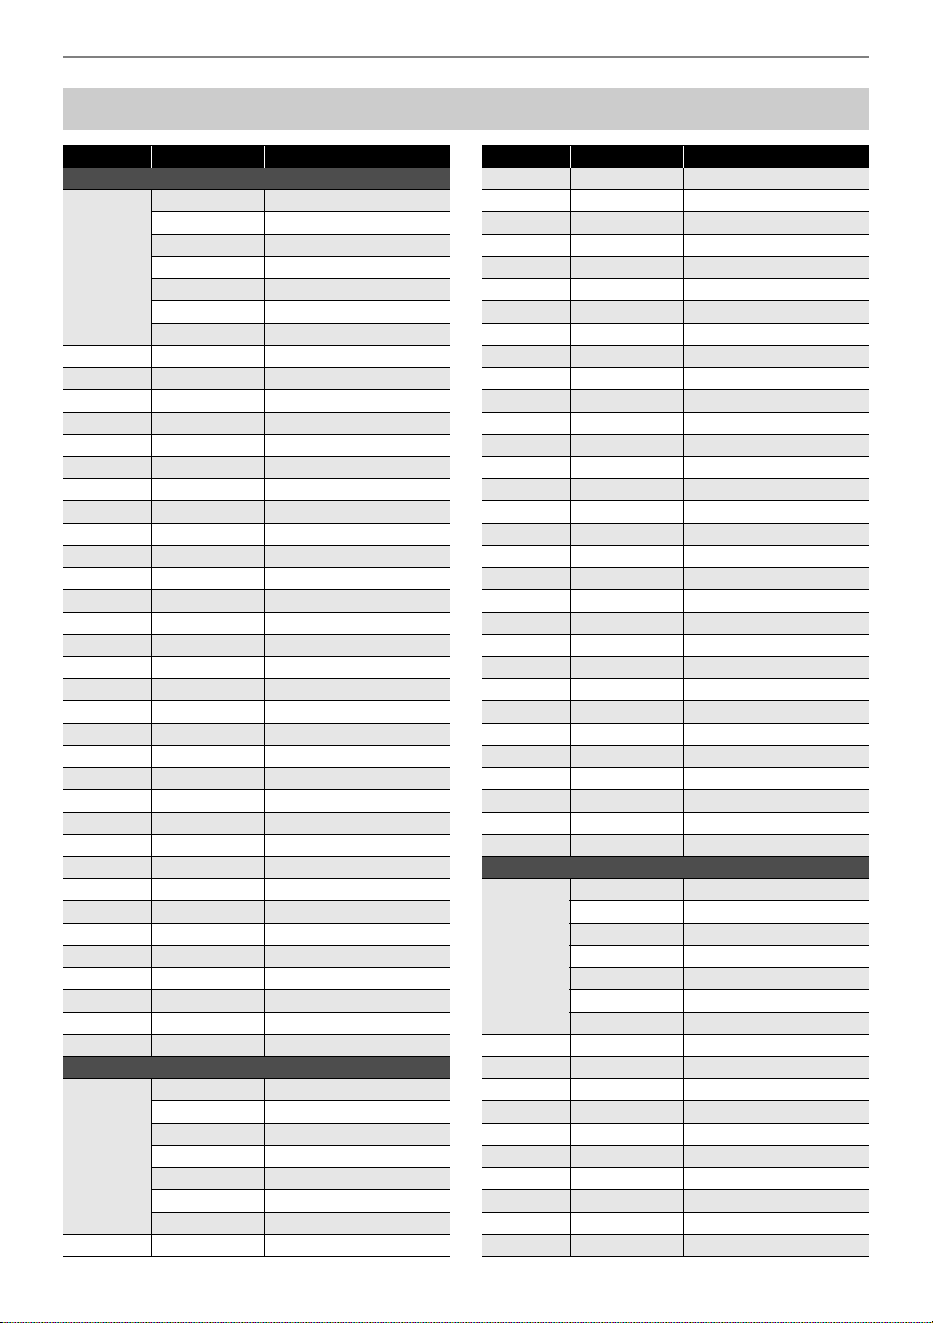
Reference
EN-321
Versatile Tone Map
Key Velocity Sound
155 VERSATILE NYLON GUITAR
C1 - B6
1-30 Normal mp
31-60 Normal mf
61-75 Ghost Note
76-90 Mute
91-105 Hammering
106-120 Glissando
121-127 Open Harmonics
C7 1-127 Strum 1
C{7 1-127 Strum 2
D7 1-127 Strum 3
E}7 1-127 Strum 4
E7 1-127 Strum 5
F7 1-127 Strum 6
F{7 1-127 Strum 7
G7 1-127 Strum 8
A}7 1-127 Strum 9
A7 1-127 Strum 10
B}7 1-127 Strum 11
B7 1-127 Strings Slap 1
C8 1-127 Strings Slap 2
C{8 1-127 Strings Slap 3
D8 1-127 Strings Slap 4
E}8 1-127 Strings Slap 5
E8 1-127 Body 1
F8 1-127 Body 2
F{8 1-127 Body 3
G8 1-127 Body 4
A}8 1-127 Body 5
A8 1-127 Body 6
B}8 1-127 Body 7
B8 1-127 Body 8
C9 1-127 Fret Noise1
C{9 1-127 Fret Noise2
D9 1-127 Fret Noise3
E}9 1-127 Fret Noise4
E9 1-127 Fret Noise5
F9 1-127 Head String1
F{9 1-127 Head String2
G9 1-127 Head String3
156 VERSATILE STEEL GUITAR
C1 - B6
1-30 Normal mp
31-60 Normal mf
61-75 Ghost Note
76-90 Mute
91-105 Hammering
106-120 Glissando
121-127 Open Harmonics
C7 1-127 Strum 1
C{7 1-127 Strum 2
D7 1-127 Strum 3
E}7 1-127 Strum 4
E7 1-127 Strum 5
F7 1-127 Strum 6
F{7 1-127 Strum 7
G7 1-127 Strum 8
A}7 1-127 Strum 9
A7 1-127 Strings Slap 1
B}7 1-127 Strings Slap 2
B7 1-127 Strings Slap 3
C8 1-127 Strings Slap 4
C{8 1-127 Strings Slap 5
D8 1-127 Strings Slap 6
E}8 1-127 Strings Slap 7
E8 1-127 Body 1
F8 1-127 Body 2
F{8 1-127 Body 3
G8 1-127 Body 4
A}8 1-127 Body 5
A8 1-127 Body 6
B}8 1-127 Body 7
B8 1-127 Body 8
C9 1-127 Fret Noise1
C{9 1-127 Fret Noise2
D9 1-127 Fret Noise3
E}9 1-127 Fret Noise4
E9 1-127 Fret Noise5
F9 1-127 Head String1
F{9 1-127 Head String2
G9 1-127 Head String3
211 VERSATILE SINGLE COIL E.GUITAR
C1 - B6
1-30 Normal mp
31-60 Normal mf
61-75 Ghost Note
76-90 Mute
91-105 Hammering
106-120 Glissando
121-127 Open Harmonics
C7 1-127 Strum 1
C{7 1-127 Strum 2
D7 1-127 Strum 3
E}7 1-127 Strum 4
E7 1-127 Strum 5
F7 1-127 Strum 6
F{7 1-127 Strum 7
G7 1-127 Strum 8
A}7 1-127 Strum 9
A7 1-127 Strum 10
Key Velocity Sound
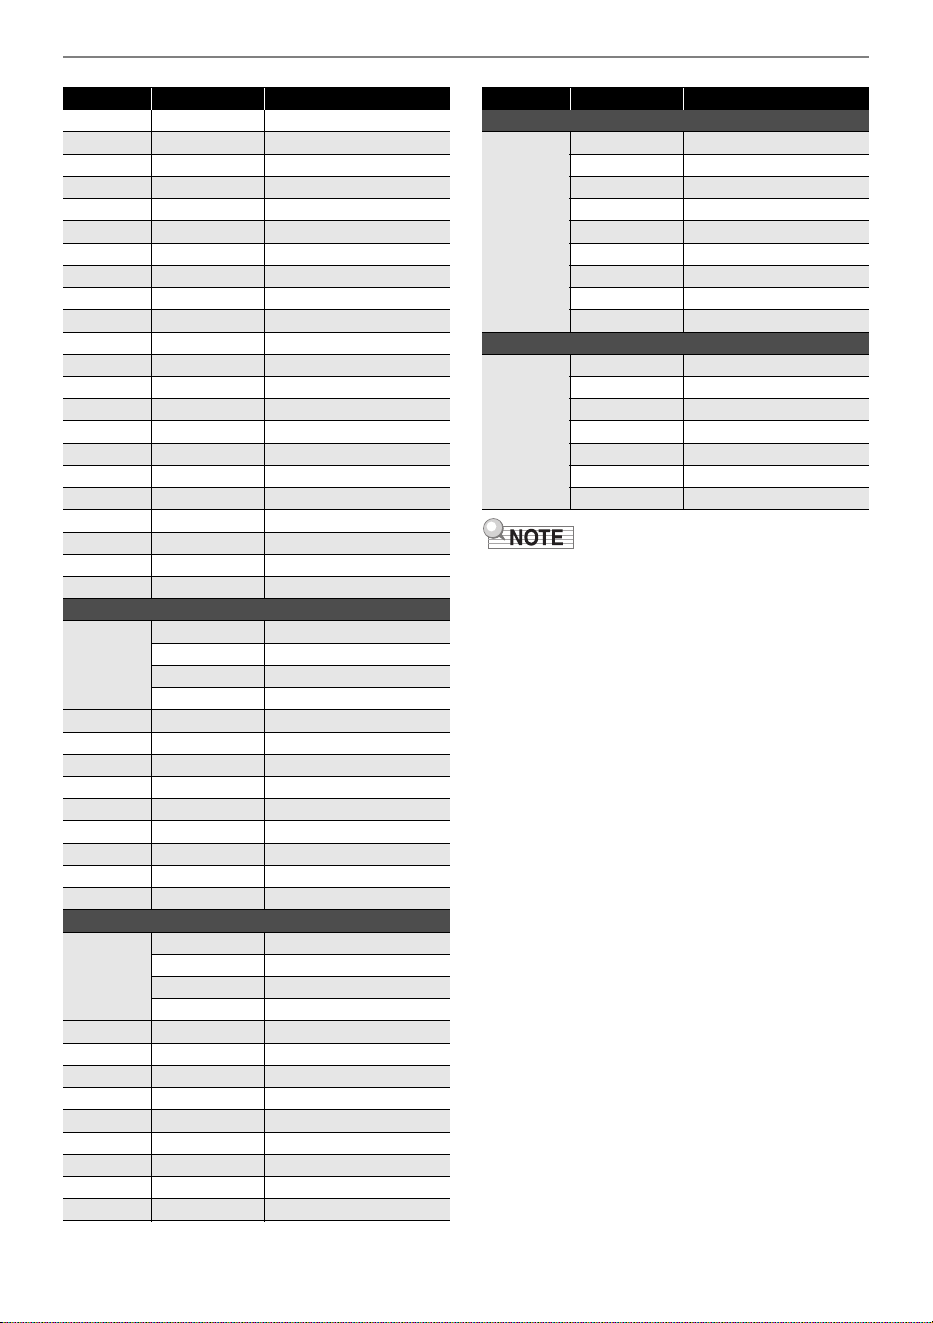
Reference
EN-322
• Versatile tones are intended for DTM (desktop
music, or computer music). Performance
sounds of stringed instruments, wind
instruments, and other instruments, as well as
noise peculiar to instruments are assigned in
accordance with the key press strength
(velocity). Because of this, when playing on the
keyboard, relatively slight changes in keyboard
pressure can result in large changes in
volume, or changes in keyboard pressure may
be opposite what is expected.
B}7 1-127 Strum 11
B7 1-127 Strum 12
C8 1-127 Strum 13
C{8 1-127 Strum 14
D8 1-127 Low Ghost Note 1
E}8 1-127 Low Ghost Note 2
E8 1-127 Low Ghost Note 3
F8 1-127 Low Ghost Note 4
F{8 1-127 Low Ghost Note 5
G8 1-127 Low Ghost Note 6
A}8 1-127 Low Ghost Note 7
A8 1-127 Low Ghost Note 8
B}8 1-127 Low Ghost Note 9
B8 1-127 Low Ghost Note 10
C9 1-127 Fret Noise1
C{9 1-127 Fret Noise2
D9 1-127 Fret Noise3
E}9 1-127 Fret Noise4
E9 1-127 Fret Noise5
F9 1-127 Fret Noise6
F{9 1-127 Fret Noise7
G9 1-127 Fret Noise8
246 VERSATILE ELECTRIC BASS 1
C1 - B6
1-60 Normal mf
61-80 Normal ff
81-120 Ghost Note
121-127 Slap
C7 1-127 Gliss 1
C{7 1-127 Gliss 2
D7 1-127 Gliss 3
E}7 1-127 Gliss 4
E7 1-127 Gliss 5
F7 1-127 Gliss 6
F{7 1-127 Gliss 7
G7 1-127 Fret Noise 1
A}7 1-127 Fret Noise 2
247 VERSATILE ELECTRIC BASS 2
C1 - B6
1-60 Normal mf
61-80 Normal ff
81-120 Ghost Note
121-127 Slap
C7 1-127 Gliss 1
C{7 1-127 Gliss 2
D7 1-127 Gliss 3
E}7 1-127 Gliss 4
E7 1-127 Gliss 5
F7 1-127 Gliss 6
F{7 1-127 Gliss 7
G7 1-127 Fret Noise 1
A}7 1-127 Fret Noise 2
Key Velocity Sound
319 VERSATILE BRASS 1
C1 - G9
1-20 Normal mf
21-40 Normal f
41-60 Normal ff
61-80 Attack
81-90 Schoop
91-100 Shake
101-110 Falls Fast mf
111-120 Falls Fast f
121-127 Gliss up
320 VERSATILE BRASS 2
C1 - G9
1-30 Normal f
31-60 Normal ff
61-75 Attack
76-90 Schoop
91-105 Shake
106-120 Falls Fast f
121-127 Gliss up
Key Velocity Sound
Reference
EN-323
DSP List
DSP
No.
Indicator Module1 Module2 Module3 Module4
1 Mono 1BandEQ Mono 1-Band EQ
2 Mono 2BandEQ Mono 2-Band EQ
3 Mono 3BandEQ Mono 3-Band EQ
4 Stereo1BndEQ Stereo 1-Band EQ
5 Stereo2BndEQ Stereo 2-Band EQ
6 Stereo3BndEQ Stereo 3-Band EQ
7 Tone Control Tone Control
8 Compressor Compressor
9 Limiter Limiter
10 Enhancer Enhancer
11 Phaser Phaser
12 Chorus Chorus
13 Flanger Flanger
14 Tremolo Tremolo
15 Auto Pan Auto Pan
16 Rotary Rotary
17 Drive Rotary Drive Rotary
18 LFO Wah LFO Wah
19 Auto Wah Auto Wah
20 Modeling Wah Modeling Wah
21 Pitch Pitch
22 Ring Mod Ring Modulator
23 Piano Effect Piano Effect
24 Distortion Distortion
25 Drive Drive Tone Control
26 Amp Cab Amp Cab
27 Re-Amp 1 Compressor Amp Cab Enhancer Tone Control
28 Re-Amp 2 Compressor Limiter Amp Cab Delay
29 Re-Amp 3 Compressor Limiter Amp Cab Mono 2-Band EQ
30 Re-Amp 4 Compressor Limiter Amp Cab Delay
31 Re-Amp 5 Distortion Delay
32 Drive Amp 1 Mono 3-Band EQ Drive Tone Control Amp Cab
33 Drive Amp 2 Drive Tone Control Amp Cab Tremolo
34 Drive Amp 3 Drive Tone Control Amp Cab AutoPan
35 Drive Amp 4 Drive Tone Control Amp Cab Phaser
36 Drive Amp 5 Drive Tone Control Amp Cab Flanger
37 Drive Amp 6 Drive Tone Control Amp Cab Pitch Shifter
38 OctaveDrvAmp Pitch Shifter Drive Tone Control Amp Cab
39 PhaseDrvAmp Phaser Drive Tone Control Amp Cab
40 DelayDrvAmp Drive Tone Control Amp Cab Delay
41 Comp Amp 1 Compressoror Drive Mono 1-Band EQ Amp Cab
42 Comp Amp 2 Drive Compressoror Mono 1-Band EQ Amp Cab
43 Deley OD Amp Drive Enhancer Amp Cab Delay
44 Wah Drv Amp Modeling Wah Drive Amp Cab
45 DelayWahAmp LFO Wah Drive Amp Cab Delay
46 Auto Wah Amp Auto Wah Drive Amp Cab Delay
Reference
EN-324
47 DriveAmpMod1 Drive Amp Cab Phaser Flanger
48 DriveAmpMod2 LFO Wah Drive Amp Cab Tremolo
49 S/H DriveAmp LFO Wah Drive Amp Cab Auto Pan
50 PhaseDrvAmp2 Drive Amp Cab Phaser Delay
51 FlngrDelyAmp Drive Amp Cab Flanger Delay
52 PitchModAmp Drive Amp Cab Pitch Shifter Delay
53 Drive Rotary Drive Rotary
54 DrvRotaryEQ Drive Rotary Stereo 3-Band EQ
55 DrvRotaryPan Drive Rotary Auto Pan
56 PhaserAmpPan Drive Amp Cab Phaser Auto Pan
57 FlangrAmpPan Drive Amp Cab Flanger Auto Pan
58 ReflctAmpPan Drive Amp Cab Reflection Auto Pan
59 DualDriveAmp Drive Drive Mono 2-Band EQ Amp
60 DualDrvAmpDl Drive Drive Amp Cab Delay
61 BassAmpAmbi Tone Control Compressor Amp Cab Delay
62 Comp Ambi 1 Tone Control Compressor Enhancer Reflection
63 Comp Ambi 2 Tone Control Compressor Amp Cab Delay
64 Comp Ambi 3 Drive Compressor Amp Cab Delay
65 Comp Ambi 4 Drive Compressor Amp Cab Delay
66 EnhanceAmbi1 Drive Enhancer Amp Cab Delay
67 EnhanceAmbi2 Drive Reflection Amp Cab Delay
68 Comp Mod 1 Tone Control Compressor Tremolo Tone Control
69 Comp Mod 2 Tone Control Compressor Phaser Reflection
70 Comp Mod 3 Tone Control Compressor Flanger Phaser
71 Comp Mod 4 Compressor Tremolo Flanger Delay
72 VibraphonTrm Vibraphone Tremolo
73 EQ Mod 1 Tone Control Tone Control Phaser Amp Cab
74 EQ Mod 2 Tone Control Flanger Tone Control Delay
75 EQ Mod 3 Tone Control Chorus Tone Control Delay
76 EQ Mod 4 Tone Control Tremolo Chorus Delay
77 Double Phase Amp Cab Phaser Phaser Enhancer
78 DoubleFlang1 Amp Cab Flanger Flanger Tone Control
79 DoubleFlang2 Amp Cab Flanger Flanger Phaser
80 Tremolo Spin Tremolo Drive Rotary Tone Control
81 AmbientEnh 1 Enhancer Reflection Delay Tone Control
82 AmbientEnh 2 Tone Control Enhancer Reflection Delay
83 AmbientEnh 3 Tone Control Drive Amp Cab Delay
84 AmbientEnh 4 Piano Effect Delay Tone Control
85 AmbientEnh 5 Enhancer Delay Tone Control
86 AmbientEnh 6 Drive Delay Tone Control
87 Pitch Delay Delay Pitch Phaser Auto Pan
88 ReflectDelay Reflection Enhancer Auto Pan Delay
89 Drive Delay Drive Delay Tone Control
90 Pitch Mod 1 Tone Control Phaser Delay Pitch
91 Pitch Mod 2 Pitch Delay Phaser Tone Control
92 Double Enhan Amp Cab Enhancer Enhancer
93 Drive Enhan Drive Enhancer Enhancer
94 Reflection 1 Reflection Delay Tone Control
95 Reflection 2 Delay Reflection Enhancer Tone Control
DSP
No.
Indicator Module1 Module2 Module3 Module4
Reference
EN-325
96 Mod Tremolo Phaser Chorus Flanger Tremolo
97 Wah Phase LFO Wah Phaser Delay Tone Control
98 Wah Flanger Flanger Flanger LFO Wah Tone Control
99 Lo Cut EQ Tone Control Tone Control Tone Control
100 Hi Cut EQ Tone Control Tone Control Tone Control
DSP
No.
Indicator Module1 Module2 Module3 Module4
Reference
EN-326
DSP Effect List
DSP Module List
Module
Number
DSP Module Name Indicator Description
Mono 1-Band EQ MONO 1EQ This is a single-band monaural equalizer.
Mono 2-Band EQ MONO 2EQ This is a dual-band monaural equalizer.
Mono 3-Band EQ MONO 3EQ This is a three-band monaural equalizer.
Stereo 1-Band EQ STREO 1EQ This is a single-band stereo equalizer.
Stereo 2-Band EQ STREO 2EQ This is a dual-band stereo equalizer.
Stereo 3-Band EQ STREO 3EQ This is a three-band stereo equalizer.
Tone Control TONE CTRL Monaural tone control that adjusts low, mid, and high
frequencies.
Tremolo TREMOLO Uses an LFO to shift the volume of the input signal.
Auto Pan AUTO PAN Uses an LFO to shift the phase of the input signal.
Compressor COMPRESS Compresses the input signal and suppresses level variation.
Limiter LIMITER Limits the input signal level so it does not rise above a preset
level.
Enhancer ENHANCER Enhances the profiles of the low range and high range of the
input signal.
Phaser PHASER Produces a distinctive pulsating, broad sound by using an
LFO to change the phase of the input signal and then mixes
it with the original input signal.
Chorus CHORUS Gives notes depth and breadth.
Flanger FLANGER Applies wildly pulsating and metallic reverberation to notes.
Enables selection of the LFO waveform.
Rotary ROTARY This effect is a rotary speaker simulator.
Drive Rotary DRIVE ROT A rotary speaker simulator that makes overdrive possible.
Pitch Shifter PITCH This effect transforms the pitch of the input signal.
Ring Modulator RING MOD Multiplies the input signal with an internal oscillator signal to
create a metallic sound.
Reflection REFLECT An effect that simulates the initial reflection of reverberation.
Applies acoustic ambiance and presence to notes.
Delay DELAY Delays the input signal and feeds it back to create a
repeating effect.
Piano Effect PIANO An effect suited to acoustic piano play.
LFO Wah LFO WAH “Wah” effect that can automatically affect the frequency
using an LFO.
Auto Wah AUTO WAH “Wah” effect that can automatically shift the frequency
according to the input signal level.

Reference
EN-327
Modeling Wah MODEL WAH Simulates various types of wah pedals. An effect that can
automatically shift the frequency according to the level of the
input signal.
Distortion DISTORT Distortion, wah, and amp simulator combined into a single
effect.
Drive DRIVE Simulates the drive of a musical instrument amplifier.
Amp Cab AMP CAB Simulates an amp without distortion-generating drive and
speaker cabinet.
Vibraphone Tremolo VIB TREM An effect that simulates the tremolo effect of vibraphone.
Module
Number
DSP Module Name Indicator Description
Reference
EN-328
DSP Parameter List
DSP Module
Description Settings
Indicator Parameter Name
Mono 1-Band EQ This is a single-band monaural equalizer.
EQ Freq EQ Frequency Adjusts the center frequency of Equalizer. *1 (page EN-337)
EQ Gain EQ Gain Adjusts the gain of Equalizer. –12 to 00 to 12
In Level Input Level Adjusts the input level. 000 to 127
WetLevel Wet Level Adjusts the level of the effect sound. 000 to 127
DryLevel Dry Level Adjusts the level of the direct sound. 000 to 127
Mono 2-Band EQ This is a dual-band monaural equalizer.
EQ1 Freq EQ1 Frequency Adjusts the center frequency of Equalizer 1. *1 (page EN-337)
EQ1 Gain EQ1 Gain Adjusts the gain of Equalizer 1. –12 to 00 to 12
EQ2 Freq EQ2 Frequency Adjusts the center frequency of Equalizer 2. *1 (page EN-337)
EQ2 Gain EQ2 Gain Adjusts the gain of Equalizer 2. –12 to 00 to 12
In Level Input Level Adjusts the input level. 000 to 127
WetLevel Wet Level Adjusts the level of the effect sound. 000 to 127
DryLevel Dry Level Adjusts the level of the direct sound. 000 to 127
Mono 3-Band EQ This is a three-band monaural equalizer.
EQ1 Freq EQ1 Frequency Adjusts the center frequency of Equalizer 1. *1 (page EN-337)
EQ1 Gain EQ1 Gain Adjusts the gain of Equalizer 1. –12 to 00 to 12
EQ2 Freq EQ2 Frequency Adjusts the center frequency of Equalizer 2. *1 (page EN-337)
EQ2 Gain EQ2 Gain Adjusts the gain of Equalizer 2. –12 to 00 to 12
EQ3 Freq EQ3 Frequency Adjusts the center frequency of Equalizer 3. *1 (page EN-337)
EQ3 Gain EQ3 Gain Adjusts the gain of Equalizer 3. –12 to 00 to 12
In Level Input Level Adjusts the input level. 000 to 127
WetLevel Wet Level Adjusts the level of the effect sound. 000 to 127
DryLevel Dry Level Adjusts the level of the direct sound. 000 to 127
Stereo 1-Band EQ This is a single-band stereo equalizer.
EQ Freq EQ Frequency Adjusts the center frequency of Equalizer. *1 (page EN-337)
EQ Gain EQ Gain Adjusts the gain of Equalizer. –12 to 00 to 12
In Level Input Level Adjusts the input level. 000 to 127
WetLevel Wet Level Adjusts the level of the effect sound. 000 to 127
DryLevel Dry Level Adjusts the level of the direct sound. 000 to 127
Reference
EN-329
Stereo 2-Band EQ This is a dual-band stereo equalizer.
EQ1 Freq EQ1 Frequency Adjusts the center frequency of Equalizer 1. *1 (page EN-337)
EQ1 Gain EQ1 Gain Adjusts the gain of Equalizer 1. –12 to 00 to 12
EQ2 Freq EQ2 Frequency Adjusts the center frequency of Equalizer 2. *1 (page EN-337)
EQ2 Gain EQ2 Gain Adjusts the gain of Equalizer 2. –12 to 00 to 12
In Level Input Level Adjusts the input level. 000 to 127
WetLevel Wet Level Adjusts the level of the effect sound. 000 to 127
DryLevel Dry Level Adjusts the level of the direct sound. 000 to 127
Stereo 3-Band EQ This is a three-band stereo equalizer.
EQ1 Freq EQ1 Frequency Adjusts the center frequency of Equalizer 1. *1 (page EN-337)
EQ1 Gain EQ1 Gain Adjusts the gain of Equalizer 1. –12 to 00 to 12
EQ2 Freq EQ2 Frequency Adjusts the center frequency of Equalizer 2. *1 (page EN-337)
EQ2 Gain EQ2 Gain Adjusts the gain of Equalizer 2. –12 to 00 to 12
EQ3 Freq EQ3 Frequency Adjusts the center frequency of Equalizer 3. *1 (page EN-337)
EQ3 Gain EQ3 Gain Adjusts the gain of Equalizer 3. –12 to 00 to 12
In Level Input Level Adjusts the input level. 000 to 127
WetLevel Wet Level Adjusts the level of the effect sound. 000 to 127
DryLevel Dry Level Adjusts the level of the direct sound. 000 to 127
Tone Control Monaural tone control that adjusts low, mid, and high frequencies.
Low Freq Low Frequency Adjusts the cutoff frequency of Low-range *2 (page EN-337)
Low Gain Low Gain Adjusts the Low-range gain. –12 to 00 to 12
Mid Freq Mid Frequency Adjusts the center frequency of Mid-range. *1 (page EN-337)
Mid Gain Mid Gain Adjusts the Mid-range gain. –12 to 00 to 12
HighFreq High Frequency Adjusts the cutoff frequency of High-range *3 (page EN-337)
HighGain High Gain Adjusts the High-range gain. –12 to 00 to 12
In Level Input Level Adjusts the input level. 000 to 127
WetLevel Wet Level Adjusts the level of the effect sound. 000 to 127
DryLevel Dry Level Adjusts the level of the direct sound. 000 to 127
DSP Module
Description Settings
Indicator Parameter Name

Reference
EN-330
Tremolo Uses an LFO to shift the volume of the input signal.
Rate LFO Rate Adjusts the LFO rate. 000 to 127
Depth LFO Depth Adjusts the LFO depth. 000 to 127
Waveform LFO Waveform Selects the LFO waveform. Sine, Triangle,
Trapzoid
WetLevel Wet Level Adjusts the level of the effect sound. 000 to 127
DryLevel Dry Level Adjusts the level of the direct sound. 000 to 127
Auto Pan Uses an LFO to shift the phase of the input signal.
Rate LFO Rate Adjusts the LFO rate. 000 to 127
Depth LFO Depth Adjusts the LFO depth. 000 to 127
Waveform LFO Waveform Selects the LFO waveform. Sine, Triangle,
Trapzoid
Manual Manual Adjusts the pan (stereo position). –64 is full left, 0 is
center, and +63 is full right.
–64 to 00 to 63
WetLevel Wet Level Adjusts the level of the effect sound. 000 to 127
DryLevel Dry Level Adjusts the level of the direct sound. 000 to 127
Compressor Compresses the input signal and suppresses level variation.
Attack Attack Adjusts the time until compression goes into effect.
A smaller value causes prompt compressor
operation, which suppresses the attack of the input
signal. A larger values delays compressor operation,
which causes the attack of the input signal to be
output as-is.
000 to 127
Release Release Adjusts the time until compression is released after
the input signal drops below a prescribed level.
When an attack feeling is desired (no compression
at the onset of the sound), set this parameter to as
low a value as possible. To have compression
applied at all times, set a high value.
000 to 127
Ratio Ratio Adjusts the compression ratio of the audio signal. 1:1, 2:1, 4:1, 8:1,
16:1, 32:1, Inf:1
WetLevel Wet Level Adjusts the level of the effect sound. Output volume
changes in accordance with the Ratio setting and
the characteristics of the input tone.
000 to 127
DryLevel Dry Level Adjusts the level of the direct sound. 000 to 127
DSP Module
Description Settings
Indicator Parameter Name

Reference
EN-331
Limiter Limits the input signal level so it does not rise above a preset level.
Limit Limit Adjusts the volume level of the limit at which limiting
is applied.
000 to 127
Attack Attack Adjusts the time until the compression effect starts.
A smaller value causes prompt limiter operation,
which suppresses the attack of the input signal. A
larger values delays limiter operation, which causes
the attack of the input signal to be output as-is.
000 to 127
Release Release Adjusts the time until compression is released after
the input signal drops below a prescribed level.
000 to 127
WetLevel Wet Level Adjusts the level of the effect sound. Output volume
changes in accordance with the Limit setting and the
characteristics of the input tone. Use this parameter
to correct for such changes.
000 to 127
DryLevel Dry Level Adjusts the level of the direct sound. 000 to 127
Enhancer Enhances the profiles of the low range and high range of the input signal.
Low Freq Low Frequency Adjusts the low range enhancer frequency. 000 to 127
Low Gain Low Gain Adjusts the low range enhancer gain. 000 to 127
HighFreq High Frequency Adjusts the high range enhancer frequency. 000 to 127
HighGain High Gain Adjusts the high range enhancer gain. 000 to 127
In Level Input Level Adjusts the input level. 000 to 127
WetLevel Wet Level Adjusts the level of the effect sound. 000 to 127
DryLevel Dry Level Adjusts the level of the direct sound. 000 to 127
Phaser Produces a distinctive pulsating, broad sound by using an LFO to change
the phase of the input signal and then mixes it with the original input signal.
Resonanc Resonance Adjusts the strength of feedback. 000 to 127
Manual Manual Adjusts the reference phaser shift amount. –64 to 00 to 63
Rate LFO Rate Adjusts the LFO rate. 000 to 127
Depth LFO Depth Adjusts the LFO depth. 000 to 127
Waveform LFO Waveform Selects the LFO waveform. Sine, Triangle,
Random
In Level Input Level Adjusts the input level. 000 to 127
WetLevel Wet Level Adjusts the level of the effect sound. 000 to 127
DryLevel Dry Level Adjusts the level of the direct sound. 000 to 127
DSP Module
Description Settings
Indicator Parameter Name
Reference
EN-332
Chorus Gives notes depth and breadth.
Rate LFO Rate Adjusts the LFO rate. 000 to 127
Depth LFO Depth Adjusts the LFO depth. 000 to 127
Waveform LFO Waveform Selects the LFO waveform. Sine, Triangle
Feedback Feedback Adjusts the strength of feedback –64 to 00 to 63
WetLevel Wet Level Adjusts the level of the effect sound. 000 to 127
Polarity Polarity Inverts the LFO of one channel. Negative, Positive
In Level Input Level Adjusts the input level. 000 to 127
DryLevel Dry Level Adjusts the level of the direct sound. 000 to 127
Flanger Applies wildly pulsating and metallic reverberation to notes. Enables
selection of the LFO waveform.
Rate LFO Rate Adjusts the LFO rate. 000 to 127
Depth LFO Depth Adjusts the LFO depth. 000 to 127
Waveform LFO Waveform Selects the LFO waveform. Sine, Triangle,
Random
Feedback Feedback Adjusts the strength of feedback –64 to 00 to 63
WetLevel Wet Level Adjusts the level of the effect sound. 000 to 127
In Level Input Level Adjusts the input level. 000 to 127
DryLevel Dry Level Adjusts the level of the direct sound. 000 to 127
Rotary This effect is a rotary speaker simulator.
Type Type Selects the rotary speaker type. 0 to 3
Speed Speed Switches the speed mode between fast and slow. Slow, Fast
Brake Brake Stops speaker rotation. Rotate, Stop
FallAcel Fall Accel Adjusts acceleration when the speed mode is
switched from fast to slow.
000 to 127
RiseAcel Rise Accel Adjusts acceleration when the speed mode is
switched from slow to fast.
000 to 127
SlowRate Slow Rate Adjusts the speaker rotation speed in the slow
speed mode.
000 to 127
FastRate Fast Rate Adjusts the speaker rotation speed in the fast speed
mode.
000 to 127
Vib/Cho Vibrato/Chorus Selects the vibrato and the chorus type. Off, Vibrato1,
Chorus 1, Vibrato2,
Chorus 2, Vibrato3,
Chorus 3
WetLevel Wet Level Adjusts the level of the effect sound. 000 to 127
DryLevel Dry Level Adjusts the level of the direct sound. 000 to 127
DSP Module
Description Settings
Indicator Parameter Name
Reference
EN-333
Drive Rotary A rotary speaker simulator that makes overdrive possible.
Type Type Selects the rotary speaker type. 0 to 3
OD Gain Overdrive Gain Adjusts overdrive gain. 000 to 127
OD Level Overdrive Level Adjusts the overdrive output level. 000 to 127
Speed Speed Switches the speed mode between fast and slow. Slow, Fast
Brake Brake Stops speaker rotation. Rotate, Stop
FallAcel Fall Accel Adjusts acceleration when the speed mode is
switched from fast to slow.
000 to 127
RiseAcel Rise Accel Adjusts acceleration when the speed mode is
switched from slow to fast.
000 to 127
SlowRate Slow Rate Adjusts the speaker rotation speed in the slow
speed mode.
000 to 127
FastRate Fast Rate Adjusts the speaker rotation speed in the fast speed
mode.
000 to 127
Vib/Cho Vibrato/Chorus Selects the vibrato and the chorus type. Off, Vibrato1,
Chorus 1, Vibrato2,
Chorus 2, Vibrato3,
Chorus 3
WetLevel Wet Level Adjusts the level of the effect sound. 000 to 127
DryLevel Dry Level Adjusts the level of the direct sound. 000 to 127
Pitch Shifter This effect transforms the pitch of the input signal.
Pitch Pitch Adjusts the pitch shift amount in quarter tone steps. –24 to 00 to 24
HighDamp High Damp Adjusts the high-range damp. A smaller number
increases damping.
000 to 127
Feedback Feedback Adjusts the feedback amount. 000 to 127
In Level Input Level Adjusts the input level. 000 to 127
WetLevel Wet Level Adjusts the level of the effect sound. 000 to 127
DryLevel Dry Level Adjusts the level of the direct sound. 000 to 127
Fine Fine Adjusts the pitch shift amount. –50 is a quarter note
decrease, while +50 is a quarter note increase.
–50 to 00 to 50
Ring Modulator Multiplies the input signal with an internal oscillator signal to create a
metallic sound.
OSC Freq OSC Frequency Sets the reference frequency of the internal
oscillator.
000 to 127
Rate LFO Rate Adjusts the LFO rate. 000 to 127
Depth LFO Depth Adjusts the LFO depth. 000 to 127
Tone Tone Adjusts the timbre of the ring modulator input sound. 000 to 127
WetLevel Wet Level Adjusts the level of the effect sound. 000 to 127
DryLevel Dry Level Adjusts the level of the direct sound. 000 to 127
DSP Module
Description Settings
Indicator Parameter Name
Reference
EN-334
Reflection An effect that simulates the initial reflection of reverberation. Applies
acoustic ambiance and presence to notes.
WetLevel Wet Level Adjusts the level of the effect sound. 000 to 127
Feedback Feedback Adjusts the repeat of the reflected sound. 000 to 127
Tone Tone Adjusts the tone of the reflected sound. 000 to 127
In Level Input Level Adjusts the input level. 000 to 127
DryLevel Dry Level Adjusts the level of the direct sound. 000 to 127
Delay Delays the input signal and feeds it back to create a repeating effect.
Time Delay Time Adjusts the total delay time in 1 ms units. 0001 to 1099
TmRatioL Delay Ratio L Adjusts the ratio of the left channel relative to the
total delay time.
000 to 127
TmRatioR Delay Ratio R Adjusts the ratio of the right channel relative to the
total delay time.
000 to 127
Level L Delay Level L Adjusts the level of the left channel. 000 to 127
Level R Delay Level R Adjusts the level of the right channel. 000 to 127
FdbkType Feedback Type Selects the feedback type.
Stereo: Stereo feedback
Cross: Cross feedback
Stereo, Cross
Fdbk Lvl Feedback Adjusts the feedback amount. 000 to 127
Hi Damp High Damp Adjusts the high-range damp. A smaller number
increases damping.
000 to 127
TmpoSync Delay Tempo
Sync
Specifies how the actual total delay time is synced
with tempo.
Off: Uses Delay Time value.
1/4 to 1: Uses value in accordance with number of
beats.
Off, 1/4, 1/3, 3/8,
1/2, 2/3, 3/4, 1
In Level Input Level Adjusts the input level. 000 to 127
DryLevel Dry Level Adjusts the level of the direct sound. 000 to 127
WetLevel Wet Level Adjusts the level of the effect sound. 000 to 127
Piano Effect An effect suited to acoustic piano play.
Lid Type Lid Type Adjusts how sound resonates in accordance with
the opening state of a piano lid.
Closed, SemiOpen,
FullOpen
RefLevel Reflection Level Adjusts the level of the initial reflection. 000 to 127
In Level Input Level Adjusts the input level. 000 to 127
WetLevel Wet Level Adjusts the level of the effect sound. 000 to 127
DryLevel Dry Level Adjusts the level of the direct sound. 000 to 127
DSP Module
Description Settings
Indicator Parameter Name
Reference
EN-335
LFO Wah “Wah” effect that can automatically affect the frequency using an LFO.
In Level Input Level Adjusts the input level. The input signal can become
distorted when the level of the sound being input,
the number of chords, or the Resonance value is
large. Adjust this parameter to eliminate such
distortion.
000 to 127
Resonanc Resonance Adjusts the strength of feedback 000 to 127
Manual Manual Adjusts the wah filter reference frequency. 000 to 127
Rate LFO Rate Adjusts the LFO rate. 000 to 127
Depth LFO Depth Adjusts the LFO depth. 000 to 127
Waveform LFO Waveform Selects the LFO waveform. Sine, Triangle,
Random
WetLevel Wet Level Adjusts the level of the effect sound. 000 to 127
DryLevel Dry Level Adjusts the level of the direct sound. 000 to 127
Auto Wah “Wah” effect that can automatically shift the frequency according to the
input signal level.
In Level Input Level Adjusts the input level. The input signal can become
distorted when the level of the sound being input,
the number of chords, or the Resonance value is
large. Adjust this parameter to eliminate such
distortion.
000 to 127
Resonanc Resonance Adjusts the strength of feedback 000 to 127
Manual Manual Adjusts the wah filter reference frequency. 000 to 127
Depth Depth Adjusts the depth of the wah in accordance with the
level of the input signal. Setting a positive value
causes the wah filter to open in direct proportion
with the size of the input signal, producing a bright
sound. Setting a negative value causes the wah
filter to close in direct proportion with the size of the
input signal, producing a dark sound.
–64 to 00 to 63
WetLevel Wet Level Adjusts the level of the effect sound. 000 to 127
DryLevel Dry Level Adjusts the level of the direct sound. 000 to 127
DSP Module
Description Settings
Indicator Parameter Name
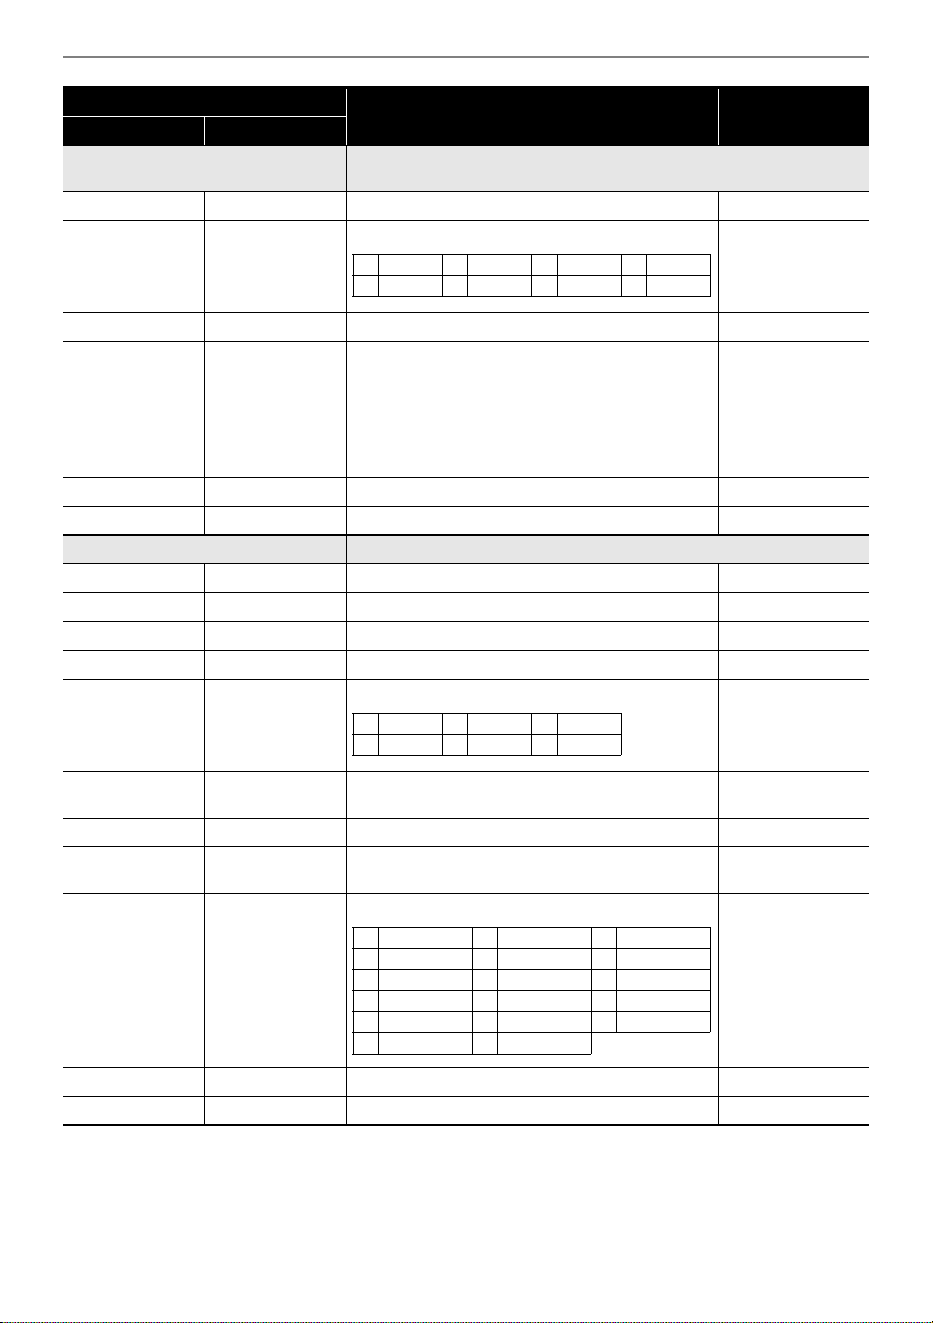
Reference
EN-336
Modeling Wah Simulates various types of wah pedals. An effect that can automatically
shift the frequency according to the level of the input signal.
OutLevel Level Adjusts the wah level. 000 to 127
Type Type Selects the wah type. 1 to 8
Manual Manual Adjusts the wah filter reference frequency. 000 to 127
Depth Depth Adjusts the depth of the wah in accordance with the
level of the input signal. Setting a positive value
causes the wah filter to open in direct proportion
with the size of the input signal, producing a bright
sound. Setting a negative value causes the wah
filter to close in direct proportion with the size of the
input signal, producing a dark sound.
–64 to 00 to 63
WetLevel Wet Level Adjusts the level of the effect sound. 000 to 127
DryLevel Dry Level Adjusts the level of the direct sound. 000 to 127
Distortion Distortion, wah, and amp simulator combined into a single effect.
DistGain Dist Gain Adjusts the distortion input signal gain. 000 to 127
Dist Lvl Dist Level Adjusts the distortion output level. 000 to 127
Dist Low Dist Low Adjusts the distortion low-range gain. 000 to 127
DistHigh Dist High Adjusts the distortion high-range gain. 000 to 127
Wah Type Wah Type Specifies the wah type. 1 to 6
WahDepth Wah Depth Adjusts the depth of the wah in accordance with the
level of the input signal.
–64 to 00 to 63
Wah Manu Wah Manual Adjusts the wah filter reference frequency. 000 to 127
Routing Routing Specifies the distortion and wah connection. Dist, Wah,
Wah-Dist, Dist-Wah
Amp Amp Specifies the amp type. 0 to 16
WetLevel Wet Level Adjusts the level of the effect sound. 000 to 127
DryLevel Dry Level Adjusts the level of the direct sound. 000 to 127
DSP Module
Description Settings
Indicator Parameter Name
1 CAE 3 IBZ 5 FAT 7 7STR
2 CRY 4 VO 6 LIGHT 8 RESO
1 LPF 3 V-Wah 5 L-Wah
2 C-Wah 4 F-Wah 6 H-Wah
0 Bypass 6 VX-AC3 12 MB-RCTF
1 FD-PRNST 7 ML-DC3 13 PV-51-SK
2 FD-TWRV1 8 MB-MK1 14 BASS-CMB
3 RL-J12 9 MS-STK 15 FD-BMAN
4 FD-TWD 10 FD-TWRV2 16 BASS-STK
5 FD-DXRV 11 SL-SLO
Reference
EN-337
*1 100Hz, 125Hz, 160Hz, 200Hz, 250Hz, 315Hz, 400Hz, 500Hz, 630Hz, 800Hz, 1.0kHz, 1.3kHz,
1.6kHz, 2.0kHz, 2.5kHz, 3.2kHz, 4.0kHz, 5.0kHz, 6.3kHz, 8.0kHz
*2 50Hz, 63Hz, 80Hz, 100Hz, 125Hz, 160Hz, 200Hz, 250Hz, 315Hz, 400Hz, 500Hz, 630Hz, 800Hz
*3 2.0kHz, 2.5kHz, 3.2kHz, 4.0kHz, 5.0kHz, 6.0kHz, 8.0kHz, 10kHz, 13kHz, 16kHz
*4
Drive Simulates the drive of a musical instrument amplifier.
Type Drive Type Selects the drive type.
*4
(page EN-337) 1 to 20
Gain Gain Adjusts the driver input signal gain. 000 to 127
OutLevel Level Adjusts the drive output level. 000 to 127
WetLevel Wet Level Adjusts the level of the effect sound. 000 to 127
DryLevel Dry Level Adjusts the level of the direct sound. 000 to 127
Amp Cab Simulates an amp without distortion-generating drive and speaker cabinet.
Type Type Selects the amp cabinet type. (page EN-338) 1 to 92
Vari Variation Selects a variation that changes the setup of the
currently selected amp. The number of variations
(page EN-338) depends on the amp type.
1 to 4
WetLevel Wet Level Adjusts the level of the effect sound. 000 to 127
DryLevel Dry Level Adjusts the level of the direct sound. 000 to 127
Vibraphone Tremolo An effect that simulates the tremolo effect of vibraphone.
Rate LFO Rate Adjusts the LFO rate. 000 to 127
Depth LFO Depth Adjusts the LFO depth. 000 to 127
In Level Input Adjusts the input level. 000 to 127
WetLevel Wet Level Adjusts the level of the effect sound. 000 to 127
DryLevel Dry Level Adjusts the level of the direct sound. 000 to 127
Settings Drive Type Display Description
1 to 4 Clean1 to 4 Clean1 to 4 Simulates a clean sound with little distortion.
5 to 8 Crunch1 to 4 Crunch1 to 4 Simulates a crisp crunch sound with little distortion.
9 to 12 Overdrive1 to 4 Overdrv1 to 4 Simulates an overdrive sound with mellow
distortion.
13 to 16 Distortion1 to 4 Distort1 to 4 Simulates a hard, straight distortion sound.
17 to 20 Metal1 to 4 Metal1 to 4 Simulates an extreme and weighty distortion sound
that is suitable for heavy metal music.
DSP Module
Description Settings
Indicator Parameter Name
Reference
EN-338
Amp Cab Type List
Type
Number
Indicator
Number of
variations
1 FD-PRNST 1
2 FD-TWRV1 1
3RL-J12 1
4 FD-TWD 1
5 FD-DXRV 1
6 VX-AC3 1
7 ML-DC3 1
8 MB-MK1 1
9 MS-STK 1
10 FD-TWRV2 1
11 SL-SLO 1
12 MB-RCTF 1
13 PV-51-SK 1
14 BASS-CMB 1
15 FD-BMAN 1
16 BASS-STK 1
17 65-MQ 3
18 AD-MP+CA 3
19 BC-HC30 2
20 BN-SHV 3
21 BN-ECS 3
22 BN-UBR 3
23 CV-LG3 3
24 DR-MZ38 2
25 DZ-V4 2
26 DZ-HA 2
27 EG-TWK 4
28 EG-VEN 3
29 EN-G15 2
30 EN-INV 1
31 EN-BM 1
32 EN-53+DI 2
33 EV-51III 4
34 FD-CHMP 3
35 FD-TWN 3
36 FD-TWRV3 3
37 FU-OD 2
38 GB-LANC 2
39 HK-TM18 3
40 HK-SBL 3
41 KH-STDT 2
42 KR-RV 3
43 LY-IRST 4
44 MB-MK3 3
45 MB-F3+DI 3
46 MB-D5 1
47 MB-DRCT 4
48 MB-TX+.5 1
49 MB-TX+DI 4
50 MS-VS80 4
51 MS-J800 4
52 MS-J2401 2
53 MS-J2000 3
54 MS-J2+MB 2
55 MS-PLX 3
56 MS-J1+DI 2
57 MT-CFT 4
58 OR-O15 4
59 PN-P7 2
60 PR-SE3 3
61 PV-51II 4
62 PV-65MH 4
63 RA-NBK 3
64 RL-J20 2
65 RL-J120 2
66 RV-30 2
67 SA-PS1 4
68 SL-X8 2
69 SL-X9 2
70 SP-1624 3
71 SP-1695 3
72 SU-BGR3 3
73 VH-SP6 2
74 VX-A15 3
75 VX-A15TB 2
76 VX-A30 3
77 VX-A30TB 3
78 YM-DG8 4
79 YM-F112 4
80 YM-F115 4
81 RD-PET-PRE 4
82 RD-PET-PRE-TRM 4
83 RD-MK1-PRE 4
84 RD-MK1-PRE-TRM 4
85 RD-MK2-PRE 4
86 RD-MK2-PRE-TRM 4
87 RD-DMY-PRE 4
88 RD-PRE-STWT 4
89 YM-CP-PRE 4
90 YM-CP-PRE-TRM 4
91 WR-200-PRE 4
92 CLV-TAB-PRE 4
93 CLV-CMB-PRE 4
94 LES-CMB-PRE 4
95 RL-VP-PRE 4
100 AC-360 2
Type
Number
Indicator
Number of
variations
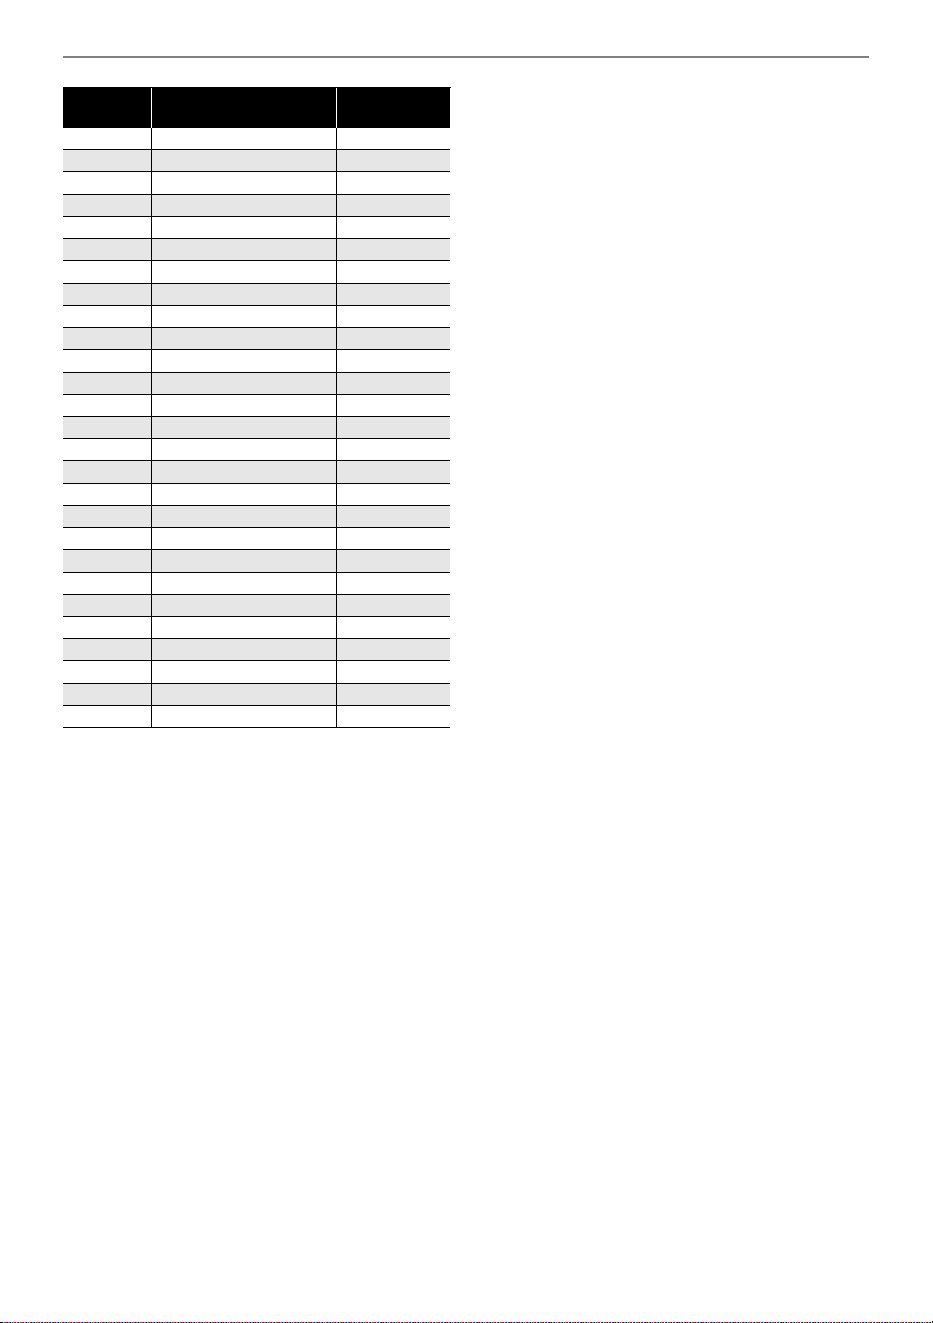
Reference
EN-339
101 AP-SV4DI 2
102 EB-C450 2
103 FD-BMNtw 2
104 FD-BMNsv 2
105 FD-BMNbk 2
106 FD-STBAS 2
107 GK-150 3
108 MK-T501 3
109 SW-PB20 3
110 SW-SM50 3
111 RL-CBKB 1
112 LY-3C-AC 1
113 AC-SIM 4
114 AP-EXT-VIN 4
115 STR-EXT 4
116 MG-MIN-VCF-NEG 4
117 MG-MIN-VCF-POS 4
118 MG-MIN-VCF-TOP 3
119 MG-MIN-VCF-OVL 4
120 MG-MIN-VCF-OVL-T 4
121 SSL-LCUT 4
122 SSL-LMCUT 4
123 HI-BST 4
124 PARA-BST 4
125 BASFIL-DEP 4
126 BASFIL-SHL 4
127 EH-SS-SPRK 4
Type
Number
Indicator
Number of
variations
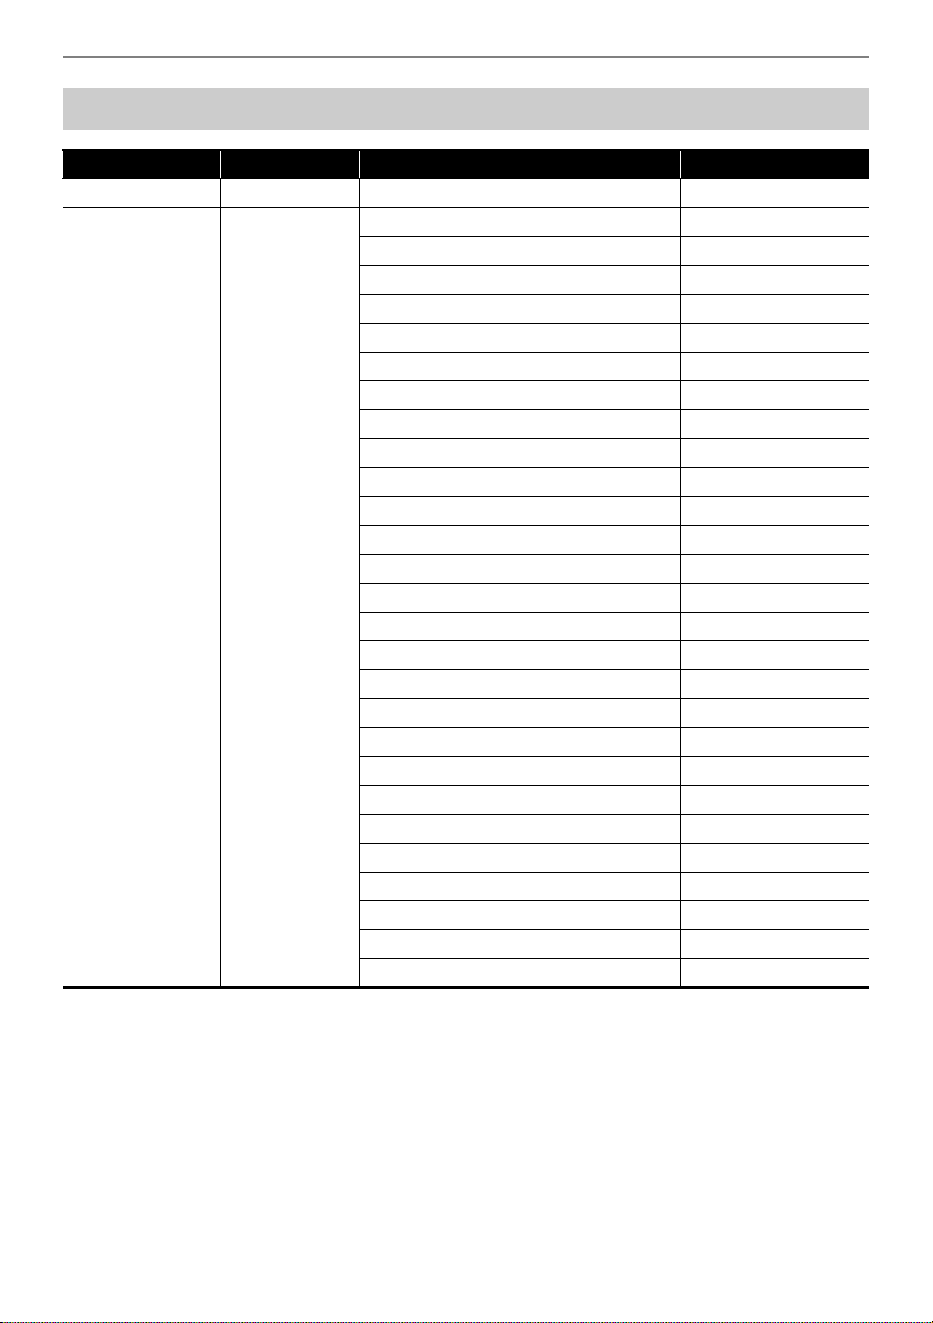
Reference
EN-340
Home Customization 5 buttons Function List
Category Screen Display Name Screen
BLANK BLANK Empty Blank
MENU MENU Menu Item My Setup My Setup on Menu
Menu Item Active DSP Active DSP on Menu
Menu Item Metronome Metronome on Menu
Menu Item Balance Balance on Menu
Menu Item Octave Shift Octave Shift on Menu
Menu Item Sustain Sustain on Menu
Menu Item Portamento Portamento on Menu
Menu Item Pedal Pedal on Menu
Menu Item Pedal1 Pedal 1 on Menu
Menu Item Pedal2 Pedal 2 on Menu
Menu Item Pitch Bend Wheel Pitch Bend on Menu
Menu Item Knob Knob on Menu
Menu Item Knob1 Knob 1 on Menu
Menu Item Knob2 Knob 2 on Menu
Menu Item Knob3 Knob 3 on Menu
Menu Item Arpeggiator Arpeggiator on Menu
Menu Item Auto Harmonize Auto Hrm on Menu
Menu Item Sampling Sampling on Menu
Menu Item Song Song on Menu
Menu Item System Effects System FX on Menu
Menu Item Equalizer Equalizer on Menu
Menu Item Scale Tuning Scale on Menu
Menu Item MIDI Controller MIDI Ctrl on Menu
Menu Item Wireless Wireless on Menu
Menu Item Media Media on Menu
Menu Item Setting Setting on Menu
Menu Item Demo Demo on Menu
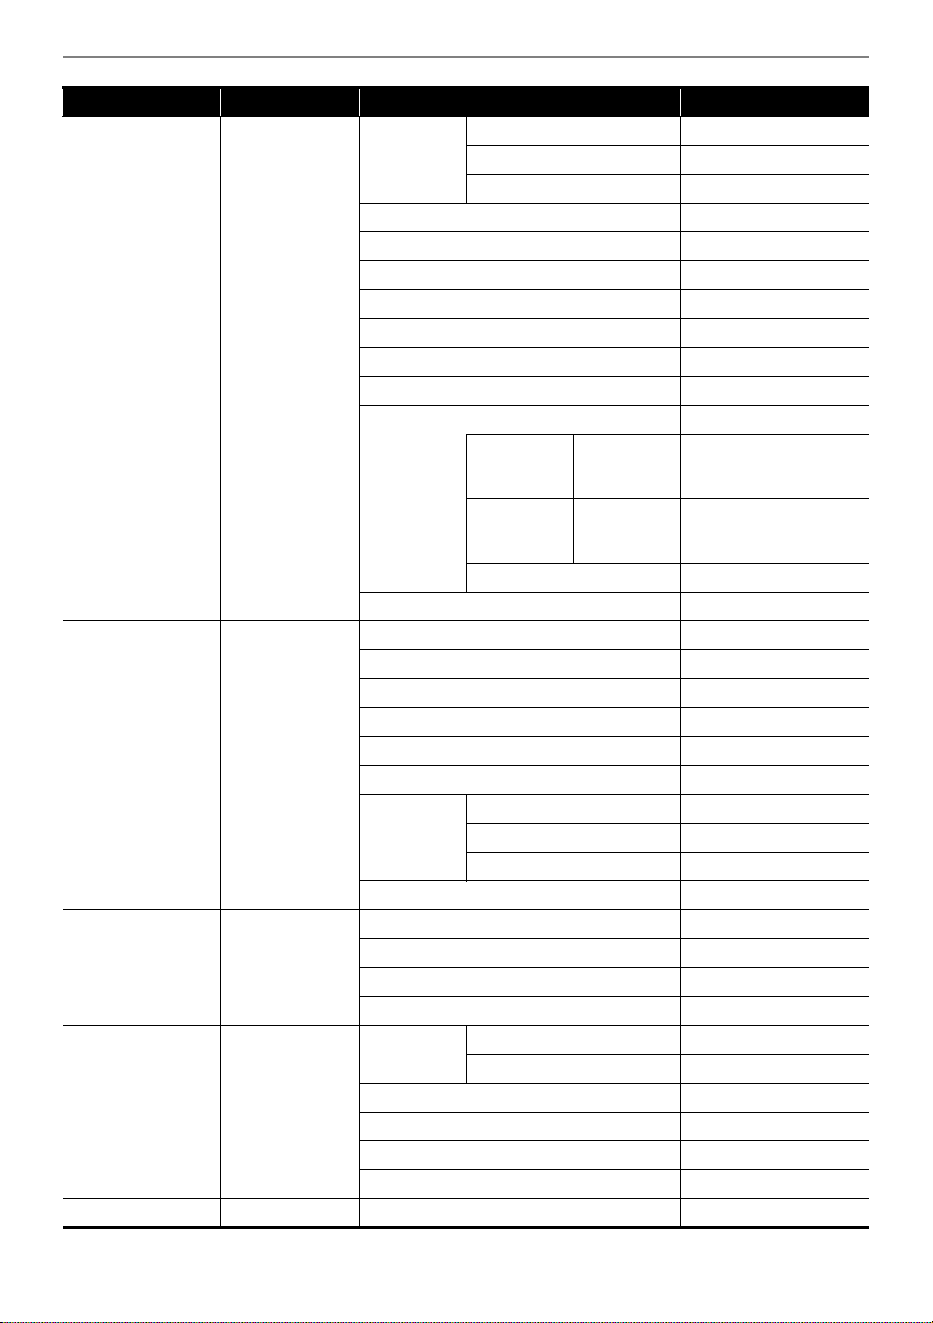
Reference
EN-341
TONE TONE Tone Upper1 Tone Upper1
Upper2 Tone Upper2
Lower Tone Lower
Split Split
Layer Layer
Touch Response Touch Response
Lyric tone performance mode Lyrics Play Mode
Lyric tone controller Lyrics Key Ctrl
Random syllable advance Syllable Random
Syllable chord control function Syllable Chord Ctrl
Lyric tone retrigger Lyrics Retrigger
Retrigger
cycle unit
note value
+ Lyrics Rtg Unit +
Retrigger
cycle unit
note value
– Lyrics Rtg Unit –
Hold Lyrics Rtg Hold
Vocalist Vocalist
Active DSP ACTIVE DSP Recommended Setting 1 Act DSP Recommend 1
Recommended Setting 2 Act DSP Recommend 2
Recommended Setting 3 Act DSP Recommend 3
Bypass Change Module Bypass Module
Bypass Module Bypass
Effect Change Part Act DSP Chg Part
Effect Part Upper1 Act DSP Upper1
Upper2 Act DSP Upper2
Lower Act DSP Lower
Active DSP Hold Act DSP Hold
BALANCE BALANCE Upper1 Part Volume Upper1
Upper2 Part Volume Upper2
Lower Part Volume Lower
Rhythm (Same as Rhythm volume) Rhythm Volume
OCTAVE SHIFT OCTAVE SHIFT Upper octave
shift
+ Upper Octave Shift +
– Upper Octave Shift –
Upper Upper Octave Shift
Upper1 Part Octave Shift U1
Upper2 Part Octave Shift U2
Lower Part Octave Shift L
SUSTAIN SUSTAIN Sustain Sustain
Category Screen Display Name Screen
B
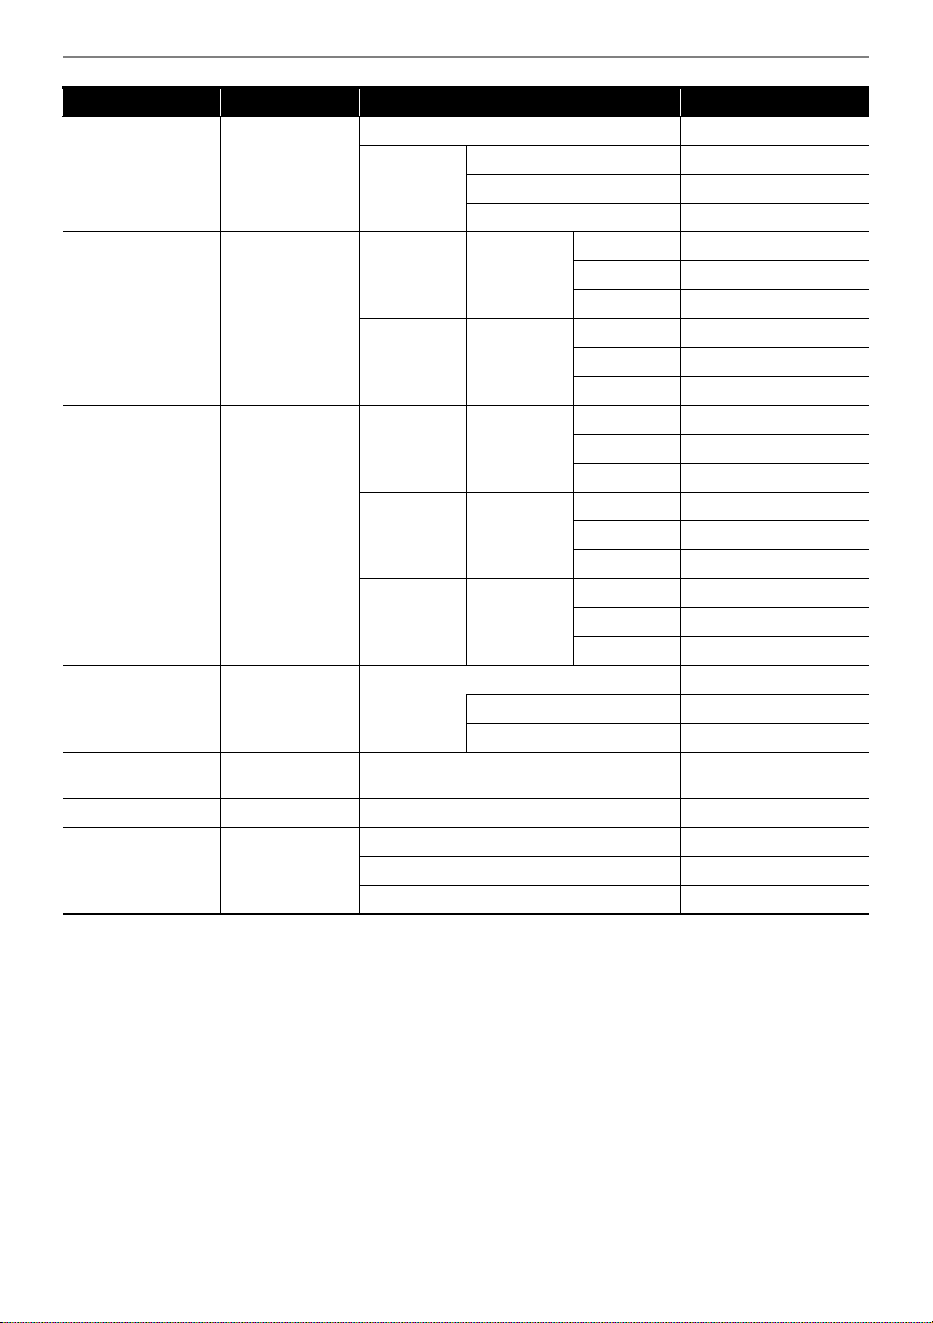
Reference
EN-342
Portamento PORTAMENTO Upper Portamento Upper Portamento
Part
Portamento
Upper1 Part Portamento U1
Upper2 Part Portamento U2
Lower Part Portamento L
PEDAL PEDAL Pedal1 Effect Part Upper1 Pedal1 Upper1
Upper2 Pedal1 Upper2
Lower Pedal1 Lower
Pedal2 Effect Part Upper1 Pedal2 Upper1
Upper2 Pedal2 Upper2
Lower Pedal2 Lower
Knob KNOB Knob1 Effect Part Upper1 Knob1 Upper1
Upper2 Knob1 Upper2
Lower Knob1 Lower
Knob2 Effect Part Upper1 Knob2 Upper1
Upper2 Knob2 Upper2
Lower Knob2 Lower
Knob3 Effect Part Upper1 Knob3 Upper1
Upper2 Knob3 Upper2
Lower Knob3 Lower
ARPEGGIATOR ARPEGGIATOR Arpeggiator Arpeggiator
Hold Arpeggiator Hold
Part Arpeggiator Part
AUTO HARMONIZE AUTO
HARMONIZE
Auto Harmonize Auto Harmonize
METRONOME METRONOME Start/Stop Metronome St/Sp
TEMPO TEMPO + Tempo +
– Tempo –
Tap tempo Tap Tempo
Category Screen Display Name Screen
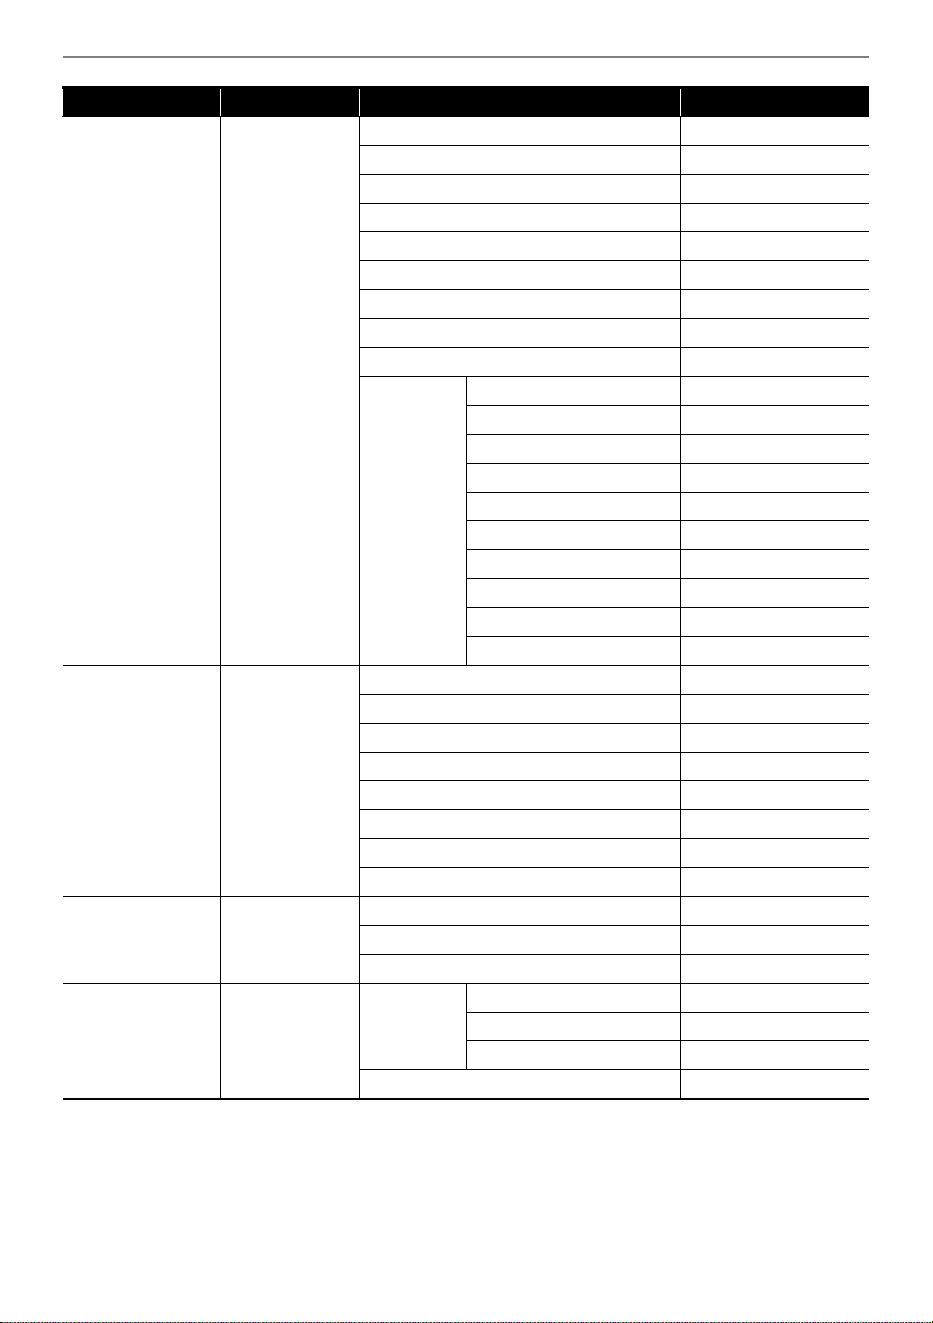
Reference
EN-343
REGISTRATION REGISTRATION 1 Registration Area 1
2 Registration Area 2
3 Registration Area 3
4 Registration Area 4
Next bank Reg Bank Next
Previous bank Reg Bank Prev
Next area Reg Area Next
Previous area Reg Area Prev
Freeze Reg Freeze
Freeze item Rhythm Reg Frz Item Rhythm
Tempo Reg Frz Item Tempo
Tone Reg Frz Item Tone
Split point Reg Frz Item Split P
Arpeggiator/Auto Harmonize Reg Frz Item ARP/AH
Transpose Reg Frz Item Trs
Scale Tuning Reg Frz Item Scale
Touch Response Reg Frz Item Touch R
Effects Reg Frz Item Sys FX
Controllers Reg Frz Item Ctrl
RHYTHM RHYTHM
*1
Intro Rhythm Intro
Variation Rhythm Variation
*2
FILL-IN Rhythm Fill-in
*3
Accomp Rhythm Accomp
Chord mode Rhythm Chord Mode
Synchro start Rhythm Sync Start
Synchro stop Rhythm Sync Stop
Volume Rhythm Volume
SYSTEM EFFECT SYSTEM
EFFECT
Reverb type Reverb
Chorus type Chorus
Delay Type Delay
MIDI MIDI MIDI OUT
channel
Upper1 MIDI Out Ch Upper1
Upper2 MIDI Out Ch Upper2
Lower MIDI Out Ch Lower
Local Control Local Control
Category Screen Display Name Screen

Reference
EN-344
*1 Not shown on the tone screen.
*2 Rhythm Variation 1 in the case of Operation Type 2.
*3 Rhythm Variation 2 in the case of Operation Type 2.
SETTING SETTING Transpose + Transpose +
– Transpose –
Transpose Transpose
Tuning Tuning
Surround Surround
Audio center cancel Audio In Center Cxl
Category Screen Display Name Screen
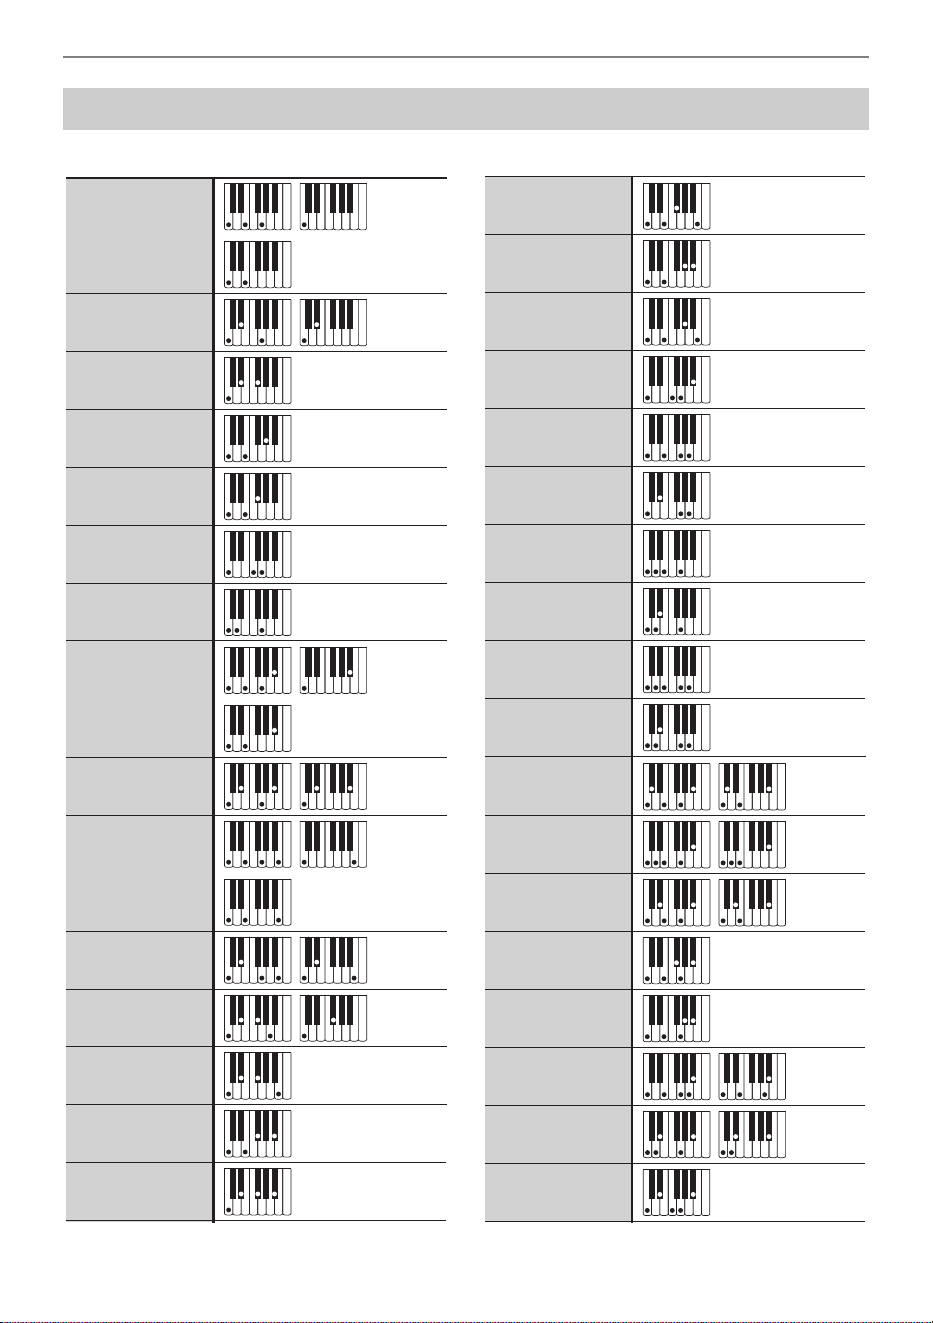
Reference
EN-345
■ FINGERED 1, FINGERED 2 Chords
Fingering Guide
C
Cm
Cdim
Caug
*3
C
}
5
Csus4
*3
Csus2
*3
C7
CmM7
Cdim7
*3
CdimM7
Cm7
*3
CM7
Cm7
}
5
*3
C7
}
5
*3
*6
*6
*6
*6
*6
*6
Cmadd9
C69
*3
C6
*1 *3
Cm6
*2 *3
CaugM7
Caug7
Cm69
*3
CM7
}
5
C7sus4
Cadd9
Cm7
(9)
Cm7
(11)*3
C7
(
}
13)
C7
(
{
11)
C7
(9)
C7
(
{
9)
C7
(13)
C7
(
}
9)
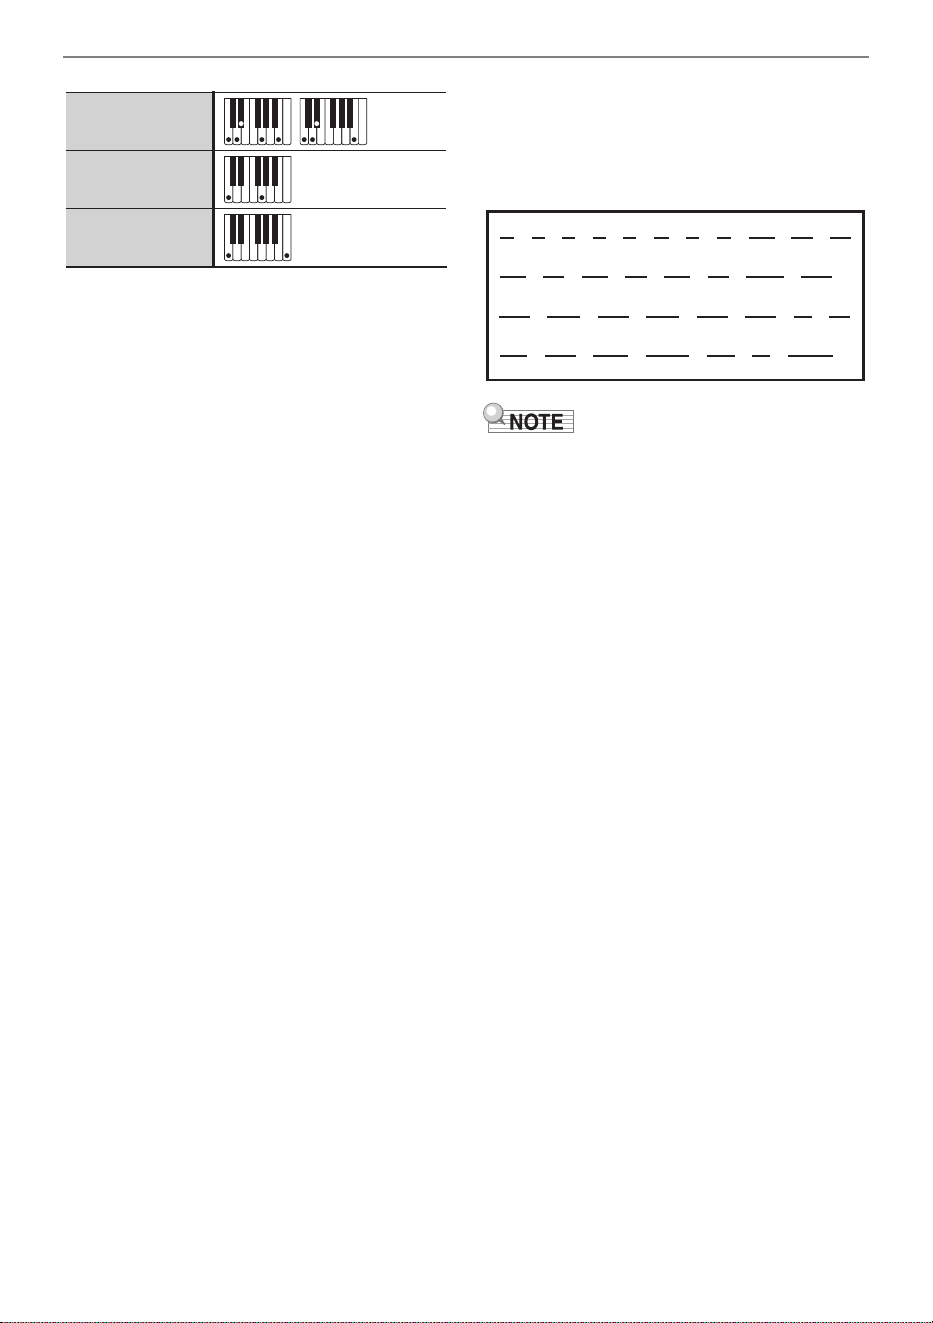
Reference
EN-346
*1 With FINGERED 2, interpreted as Am7.
*2 With FINGERED 2, interpreted as Am7
}5
.
*3 Inverted form not supported in some cases.
*4 Chord consisting of root and 5th only.
*5 Not a standard chord, but used when you
want Auto Accompaniment with the root note
only, or the root with an octave added.
*6 These fingerings are special fingerings for
Digital Keyboard chord input, and so they are
not suitable for normal keyboard play.
■ FINGERED ON BASS, FULL RANGE
CHORD
In addition to the chords that can be fingered with
FINGERED 1 and FINGERED 2, the chords
below also are recognized.
• With FINGERED ON BASS, the lowest note
fingered is interpreted as the base note.
Inverted forms are not supported.
• With FULL RANGE CHORD, when the lowest
note fingered is a certain distance from the
neighboring note, the chord is interpreted as a
fraction chord.
• Unlike FINGERED 1, 2, and FINGERED ON
BASS, FULL RANGE CHORD requires
pressing of at least three keys to form a chord.
CmM7
(9)
C5
*4
C8
*5
C
C
D
C
F
C
F
C
G
C
A
D
C
A
C
Gm
C
Am
C
B
D
m
C
Ddim
C
Fdim
C
FM7
C
A
D
M7
C
F
m7
D
5
C
Gdim
C
Adim
C
Bdim
C
A
D
7
C
F7
C
Fm7
C
B
D
C
C
m
C
Dm
C
Fm
C
zzzzz zz z z z
Bm
C
zz zz zz z
A
D
m
C
F
m
C
zzzzz zz
Gm7
C
A
D
add9
C
zz z z
G7
C
zz
C
dim
C
F
dim
C
A
D
dim
C
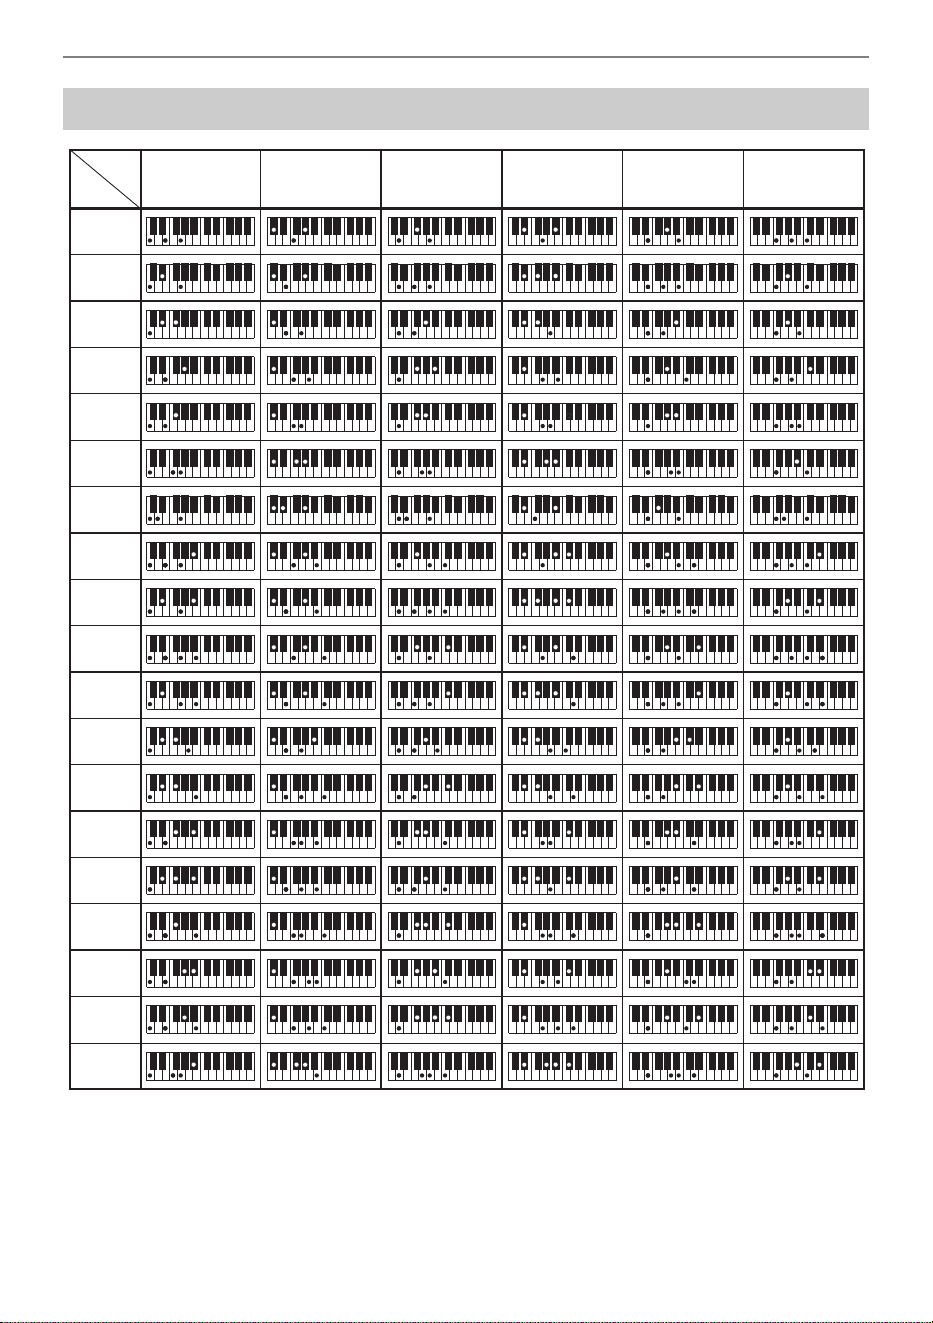
Reference
EN-347
*1 Root *2 Chord Type
• Since the chord input range is limited, this model may not support some of the chords shown above.
• You can use the split point to change the size of the accompaniment keyboard range (page EN-127).
Chord Example List
*2
*1
M
m
dim
aug
sus4
sus2
7
m7
M7
m7
D
5
7
D
5
7sus4
mM7
dim7
FCC
/
(
D
D
)
D
(
D
)
/E
D
E
}5
dimM7
M7
}5
aug7
augM7
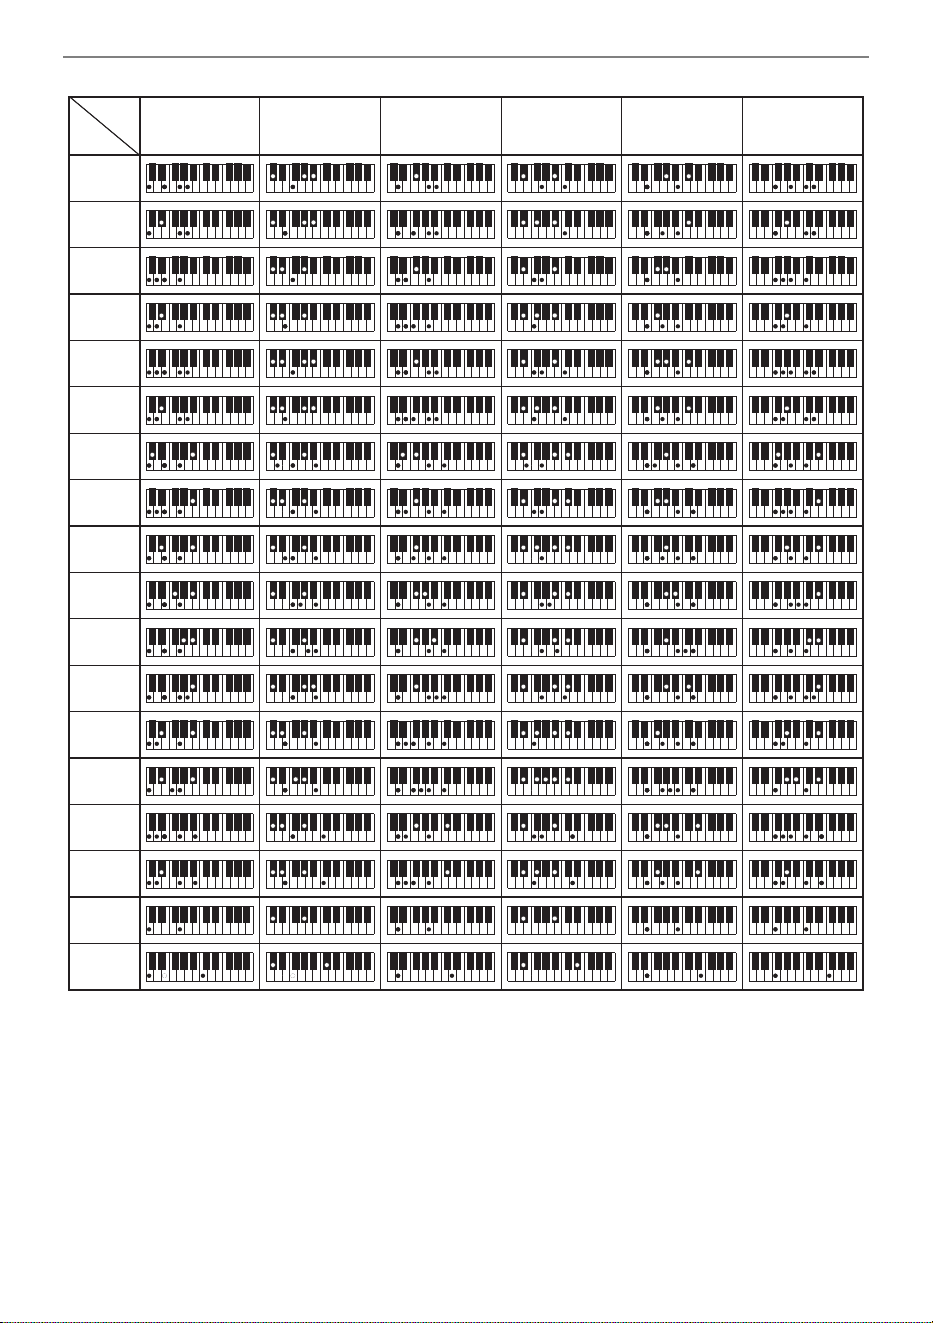
Reference
EN-348
*1 Root *2 Chord Type
• Since the chord input range is limited, this model may not support some of the chords shown above.
• You can use the split point to change the size of the accompaniment keyboard range (page EN-127).
*1
FCC
/
(
D
D
)
D
(
D
)
/E
D
E
*2
m69
7
(}9)
7
(9)
7
({9)
7
({11)
7
(}13)
7
(13)
m7
(9)
m7
(11)
M7
(9)
mM7
(9)
5
8
6
m6
add9
madd9
69
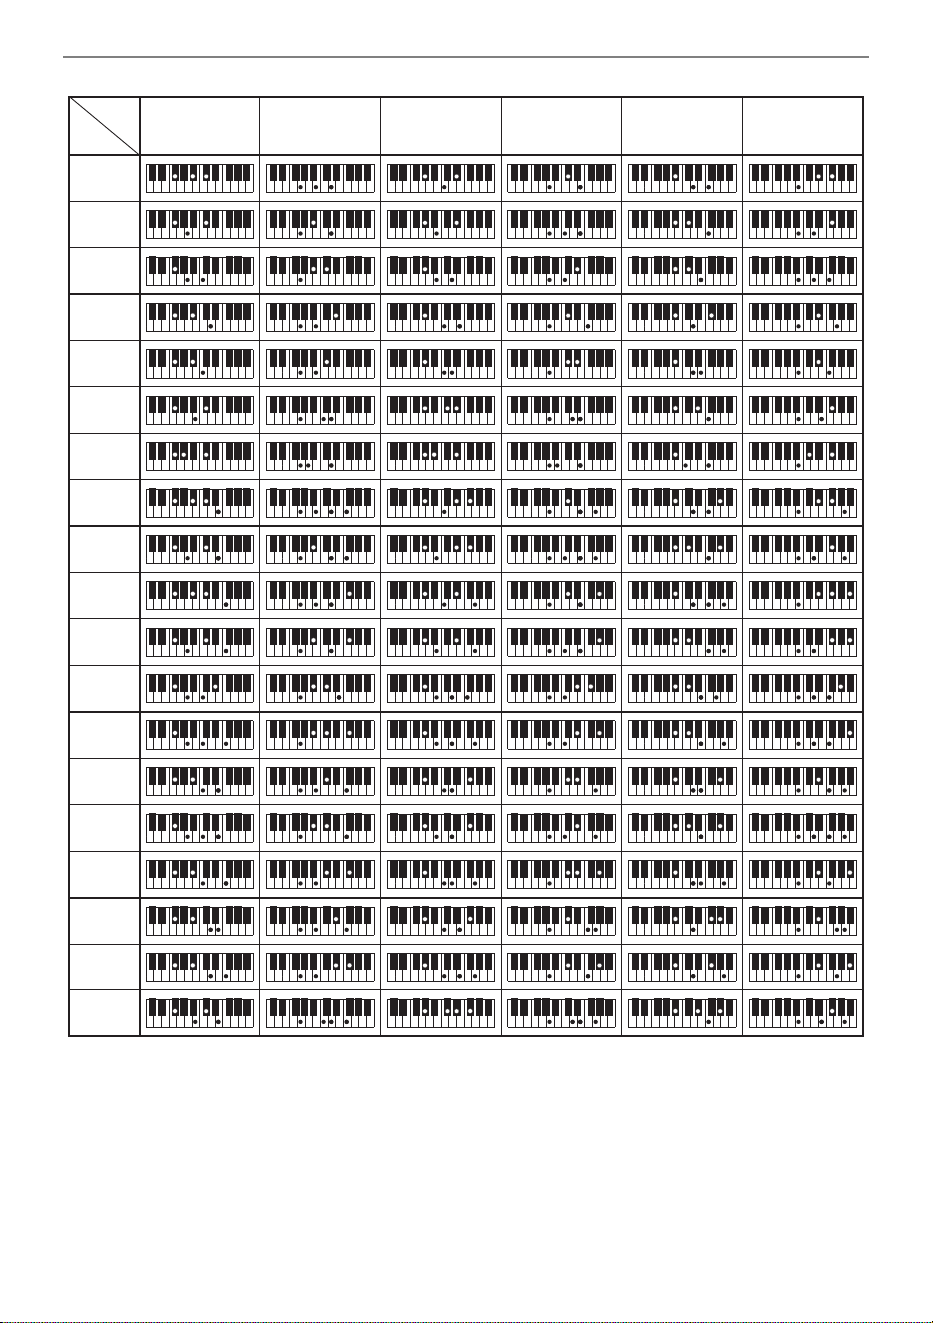
Reference
EN-349
*1 Root *2 Chord Type
• Since the chord input range is limited, this model may not support some of the chords shown above.
• You can use the split point to change the size of the accompaniment keyboard range (page EN-127).
*2
*1
M
m
dim
aug
sus4
sus2
7
m7
M7
m7
D
5
7
D
5
7sus4
mM7
dim7
(
A
)
/B
D
BF
/
(
G
D
)
G
(
G
)
/A
D
A
}5
dimM7
M7
}5
aug7
augM7
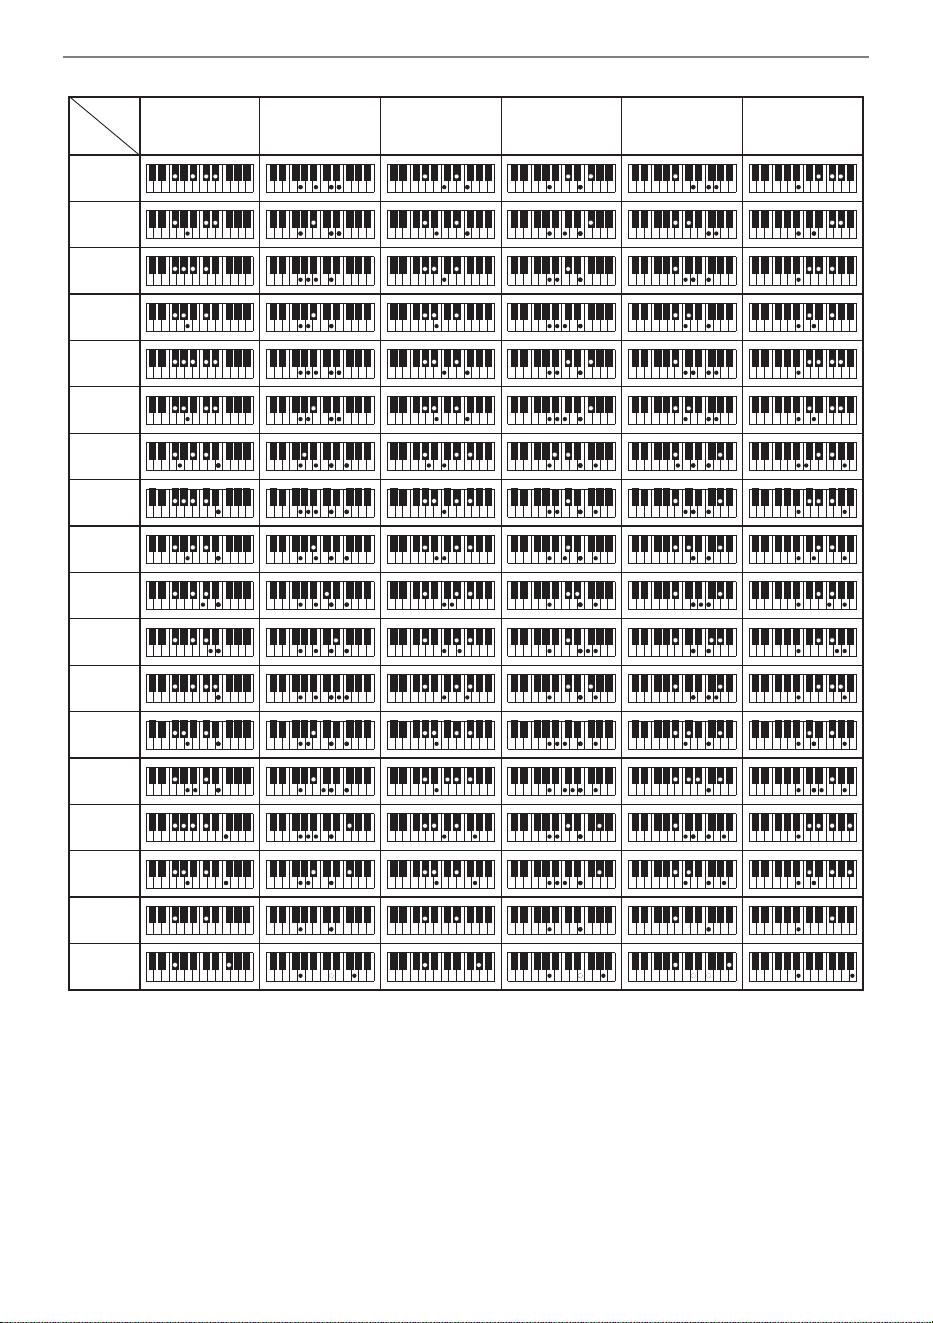
Reference
EN-350
*1 Root *2 Chord Type
• Since the chord input range is limited, this model may not support some of the chords shown above.
• You can use the split point to change the size of the accompaniment keyboard range (page EN-127).
69
*2
*1
(
A
)
/B
D
BF
/
(
G
D
)
G
(
G
)
/A
D
A
m69
7
(}9)
7
(9)
7
({9)
7
({11)
7
(}13)
7
(13)
m7
(9)
m7
(11)
M7
(9)
mM7
(9)
5
8
6
m6
add9
madd9

Reference
EN-351
#######################################################################
hts_engine API
#######################################################################
-----------------------------------------------------------------
The HMM-Based Speech Synthesis Engine "hts_engine API"
developed by HTS Working Group
http://hts-engine.sourceforge.net/
-----------------------------------------------------------------
Copyright (c) 2001-2015 Nagoya Institute of Technology
Department of Computer Science
2001-2008 Tokyo Institute of Technology
Interdisciplinary Graduate School of
Science and Engineering
All rights reserved.
Redistribution and use in source and binary forms, with or
without modification, are permitted provided that the following
conditions are met:
- Redistributions of source code must retain the above copyright
notice, this list of conditions and the following disclaimer.
- Redistributions in binary form must reproduce the above
copyright notice, this list of conditions and the following
disclaimer in the documentation and/or other materials provided
with the distribution.
- Neither the name of the HTS working group nor the names of its
contributors may be used to endorse or promote products derived
from this software without specific prior written permission.
THIS SOFTWARE IS PROVIDED BY THE COPYRIGHT HOLDERS AND
CONTRIBUTORS "AS IS" AND ANY EXPRESS OR IMPLIED WARRANTIES,
INCLUDING, BUT NOT LIMITED TO, THE IMPLIED WARRANTIES OF
MERCHANTABILITY AND FITNESS FOR A PARTICULAR PURPOSE ARE
DISCLAIMED. IN NO EVENT SHALL THE COPYRIGHT OWNER OR CONTRIBUTORS
BE LIABLE FOR ANY DIRECT, INDIRECT, INCIDENTAL, SPECIAL,
EXEMPLARY, OR CONSEQUENTIAL DAMAGES (INCLUDING, BUT NOT LIMITED
TO, PROCUREMENT OF SUBSTITUTE GOODS OR SERVICES; LOSS OF USE,
DATA, OR PROFITS; OR BUSINESS INTERRUPTION) HOWEVER CAUSED AND ON
ANY THEORY OF LIABILITY, WHETHER IN CONTRACT, STRICT LIABILITY,
OR TORT (INCLUDING NEGLIGENCE OR OTHERWISE) ARISING IN ANY WAY
OUT OF THE USE OF THIS SOFTWARE, EVEN IF ADVISED OF THE
POSSIBILITY OF SUCH DAMAGE.
-----------------------------------------------------------------
#######################################################################
Sinsy
#######################################################################
-----------------------------------------------------------------
The HMM-Based Singing Voice Synthesis System "Sinsy"
developed by Sinsy Working Group
http://sinsy.sourceforge.net/
-----------------------------------------------------------------
Copyright (c) 2009-2015 Nagoya Institute of Technology
Department of Computer Science
All rights reserved.
Redistribution and use in source and binary forms, with or
without modification, are permitted provided that the following
conditions are met:
- Redistributions of source code must retain the above copyright
notice, this list of conditions and the following disclaimer.
- Redistributions in binary form must reproduce the above
copyright notice, this list of conditions and the following
disclaimer in the documentation and/or other materials provided
with the distribution.
- Neither the name of the Sinsy working group nor the names of
its contributors may be used to endorse or promote products
derived from this software without specific prior written
permission.
THIS SOFTWARE IS PROVIDED BY THE COPYRIGHT HOLDERS AND
CONTRIBUTORS "AS IS" AND ANY EXPRESS OR IMPLIED WARRANTIES,
INCLUDING, BUT NOT LIMITED TO, THE IMPLIED WARRANTIES OF
MERCHANTABILITY AND FITNESS FOR A PARTICULAR PURPOSE ARE
DISCLAIMED. IN NO EVENT SHALL THE COPYRIGHT OWNER OR CONTRIBUTORS
BE LIABLE FOR ANY DIRECT, INDIRECT, INCIDENTAL, SPECIAL,
EXEMPLARY, OR CONSEQUENTIAL DAMAGES (INCLUDING, BUT NOT LIMITED
TO, PROCUREMENT OF SUBSTITUTE GOODS OR SERVICES; LOSS OF USE,
DATA, OR PROFITS; OR BUSINESS INTERRUPTION) HOWEVER CAUSED AND ON
ANY THEORY OF LIABILITY, WHETHER IN CONTRACT, STRICT LIABILITY,
OR TORT (INCLUDING NEGLIGENCE OR OTHERWISE) ARISING IN ANY WAY
OUT OF THE USE OF THIS SOFTWARE, EVEN IF ADVISED OF THE
POSSIBILITY OF SUCH DAMAGE.
-----------------------------------------------------------------

Reference
EN-352
#######################################################################
CRF++
#######################################################################
Copyright (c) 2001-2012, Taku Kudo
All rights reserved.
Redistribution and use in source and binary forms, with or without modification, are
permitted provided that the following conditions are met:
* Redistributions of source code must retain the above
copyright notice, this list of conditions and the
following disclaimer.
* Redistributions in binary form must reproduce the above
copyright notice, this list of conditions and the
following disclaimer in the documentation and/or other
materials provided with the distribution.
* Neither the name of Taku Kudo
nor the names of its contributors may be used to endorse or
promote products derived from this software without specific
prior written permission.
THIS SOFTWARE IS PROVIDED BY THE COPYRIGHT HOLDERS AND CONTRIBUTORS "AS IS" AND ANY EXPRESS OR IMPLIED
WARRANTIES, INCLUDING, BUT NOT LIMITED TO, THE IMPLIED WARRANTIES OF MERCHANTABILITY AND FITNESS FOR A
PARTICULAR PURPOSE ARE DISCLAIMED. IN NO EVENT SHALL THE COPYRIGHT OWNER OR CONTRIBUTORS BE LIABLE FOR
ANY DIRECT, INDIRECT, INCIDENTAL, SPECIAL, EXEMPLARY, OR CONSEQUENTIAL DAMAGES (INCLUDING, BUT NOT
LIMITED TO, PROCUREMENT OF SUBSTITUTE GOODS OR SERVICES; LOSS OF USE, DATA, OR PROFITS; OR BUSINESS
INTERRUPTION) HOWEVER CAUSED AND ON ANY THEORY OF LIABILITY, WHETHER IN CONTRACT, STRICT LIABILITY, OR
TORT (INCLUDING NEGLIGENCE OR OTHERWISE) ARISING IN ANY WAY OUT OF THE USE OF THIS SOFTWARE, EVEN IF
ADVISED OF THE POSSIBILITY OF SUCH DAMAGE.
#######################################################################
SPTK
#######################################################################
-----------------------------------------------------------------
The Speech Signal Processing Toolkit (SPTK)
developed by SPTK Working Group
http://sp-tk.sourceforge.net/
-----------------------------------------------------------------
Copyright (c) 1984-2007 Tokyo Institute of Technology
Interdisciplinary Graduate School of
Science and Engineering
1996-2015 Nagoya Institute of Technology
Department of Computer Science
All rights reserved.
Redistribution and use in source and binary forms, with or
without modification, are permitted provided that the following
conditions are met:
- Redistributions of source code must retain the above copyright
notice, this list of conditions and the following disclaimer.
- Redistributions in binary form must reproduce the above
copyright notice, this list of conditions and the following
disclaimer in the documentation and/or other materials provided
with the distribution.
- Neither the name of the SPTK working group nor the names of its
contributors may be used to endorse or promote products derived
from this software without specific prior written permission.
THIS SOFTWARE IS PROVIDED BY THE COPYRIGHT HOLDERS AND
CONTRIBUTORS "AS IS" AND ANY EXPRESS OR IMPLIED WARRANTIES,
INCLUDING, BUT NOT LIMITED TO, THE IMPLIED WARRANTIES OF
MERCHANTABILITY AND FITNESS FOR A PARTICULAR PURPOSE ARE
DISCLAIMED. IN NO EVENT SHALL THE COPYRIGHT OWNER OR CONTRIBUTORS
BE LIABLE FOR ANY DIRECT, INDIRECT, INCIDENTAL, SPECIAL,
EXEMPLARY, OR CONSEQUENTIAL DAMAGES (INCLUDING, BUT NOT LIMITED
TO, PROCUREMENT OF SUBSTITUTE GOODS OR SERVICES; LOSS OF USE,
DATA, OR PROFITS; OR BUSINESS INTERRUPTION) HOWEVER CAUSED AND ON
ANY THEORY OF LIABILITY, WHETHER IN CONTRACT, STRICT LIABILITY,
OR TORT (INCLUDING NEGLIGENCE OR OTHERWISE) ARISING IN ANY WAY
OUT OF THE USE OF THIS SOFTWARE, EVEN IF ADVISED OF THE
POSSIBILITY OF SUCH DAMAGE.
-----------------------------------------------------------------
#######################################################################
Optional notices
#######################################################################
Some parts of the following software tools were used in speech analysis
step.
We are very grateful to the following people and projects for their
contributions to this product:
- Speech Analysis and Syntheisis System: WORLD (Masanori Morise)
http://www.isc.meiji.ac.jp/~mmorise/world/english/
Function Transmitted Recognized Remarks
Basic
Channel
1
1 - 16
1 - 16
1 - 16
Default
Changed
Note
Number
0 - 127
0 - 127
*
1
0 - 127
True voice
Program
Change
True #
After
Touch
Control
Change
*
4
X
X
X
O
Pitch Bender
OO
Exclusive
O
*
3
O
*
3
Key’s
Ch’s
Velocity
O
9nH v = 1 - 127
X
9nH v = 0, 8nH v =
**
O 9nH v = 1 - 127
X 8nH v = 64
Note ON
Note OFF
Mode
Mode 3
X
Mode 3
X
Default
Messages
Altered
System
Common
X
X
X
X
X
X
Song Pos
Song Sel
Tune
Aux
Messages
*
4
Remarks
X
X
X
X
X
X
O
O
X
O
O
X
All sound off
Reset all controller
Local ON/OFF
All notes OFF
Active Sense
System Reset
System
Real Time
O
X
*
5
O
X
Clock
Commands
0
1
5
6, 38
7
10
11
64
65
66
67
71
72
73
74
76
77
78
84
91
93
94
100, 101
Bank select
Modulation
Portamento Time
Data entry LSB/MSB
Volume
Pan
Expression
Hold 1
Portamento Switch
Sostenuto
Soft pedal
Filter resonance
Release time
Attack time
Brightness
Vibrato rate
Vibrato depth
Vibrato delay
Portamento Control
Reverb send level
Chorus send level
Delay send level
RPN LSB/MSB
Mode 1 : OMNI ON, POLY
Mode 3 : OMNI OFF, POLY
Mode 2 : OMNI ON, MONO
Mode 4 : OMNI OFF, MONO
O : Yes
X
: No
O
O
O
O
O
O
O
O
O
O
O
O
O
O
O
O
O
O
X
O
O
O
O
*
3
*
2
*
2
*
2
*
2
*
3
O
O
O
O
O
O
O
O
O
O
O
O
O
O
O
O
O
O
O
O
O
O
O
*
3
*
3
OO
0 - 127
Model: CT-S1000V Version : 1.0
MIDI Implementation Chart
**: no relation
*1: Depends on tone.
*2: Sent in accordance with pedal effect setting.
*3: For details about RPN and system exclusive messages, see MIDI Implementation at
https://support.casio.com/global/en/emi/manual/CT-S1000V/
*4: All control changes can be sent by MIDI Controller function.
*5: Start/Stop can be sent by MIDI Controller function.

MA2201-B