Loading ...
Loading ...
Loading ...
10
Remove packaging materials. Save the carton and the foam packaging for storing the air conditioner when not in use.
NOTE: There are NO packing materials inside the air conditioner to remove—Do Not open the cabinet.
Properly dispose of/recycle all packing material.
Handle the air conditioner gently.
Keep the air conditioner upright and level. Do not set the air conditioner on its side, front, back or upside down.
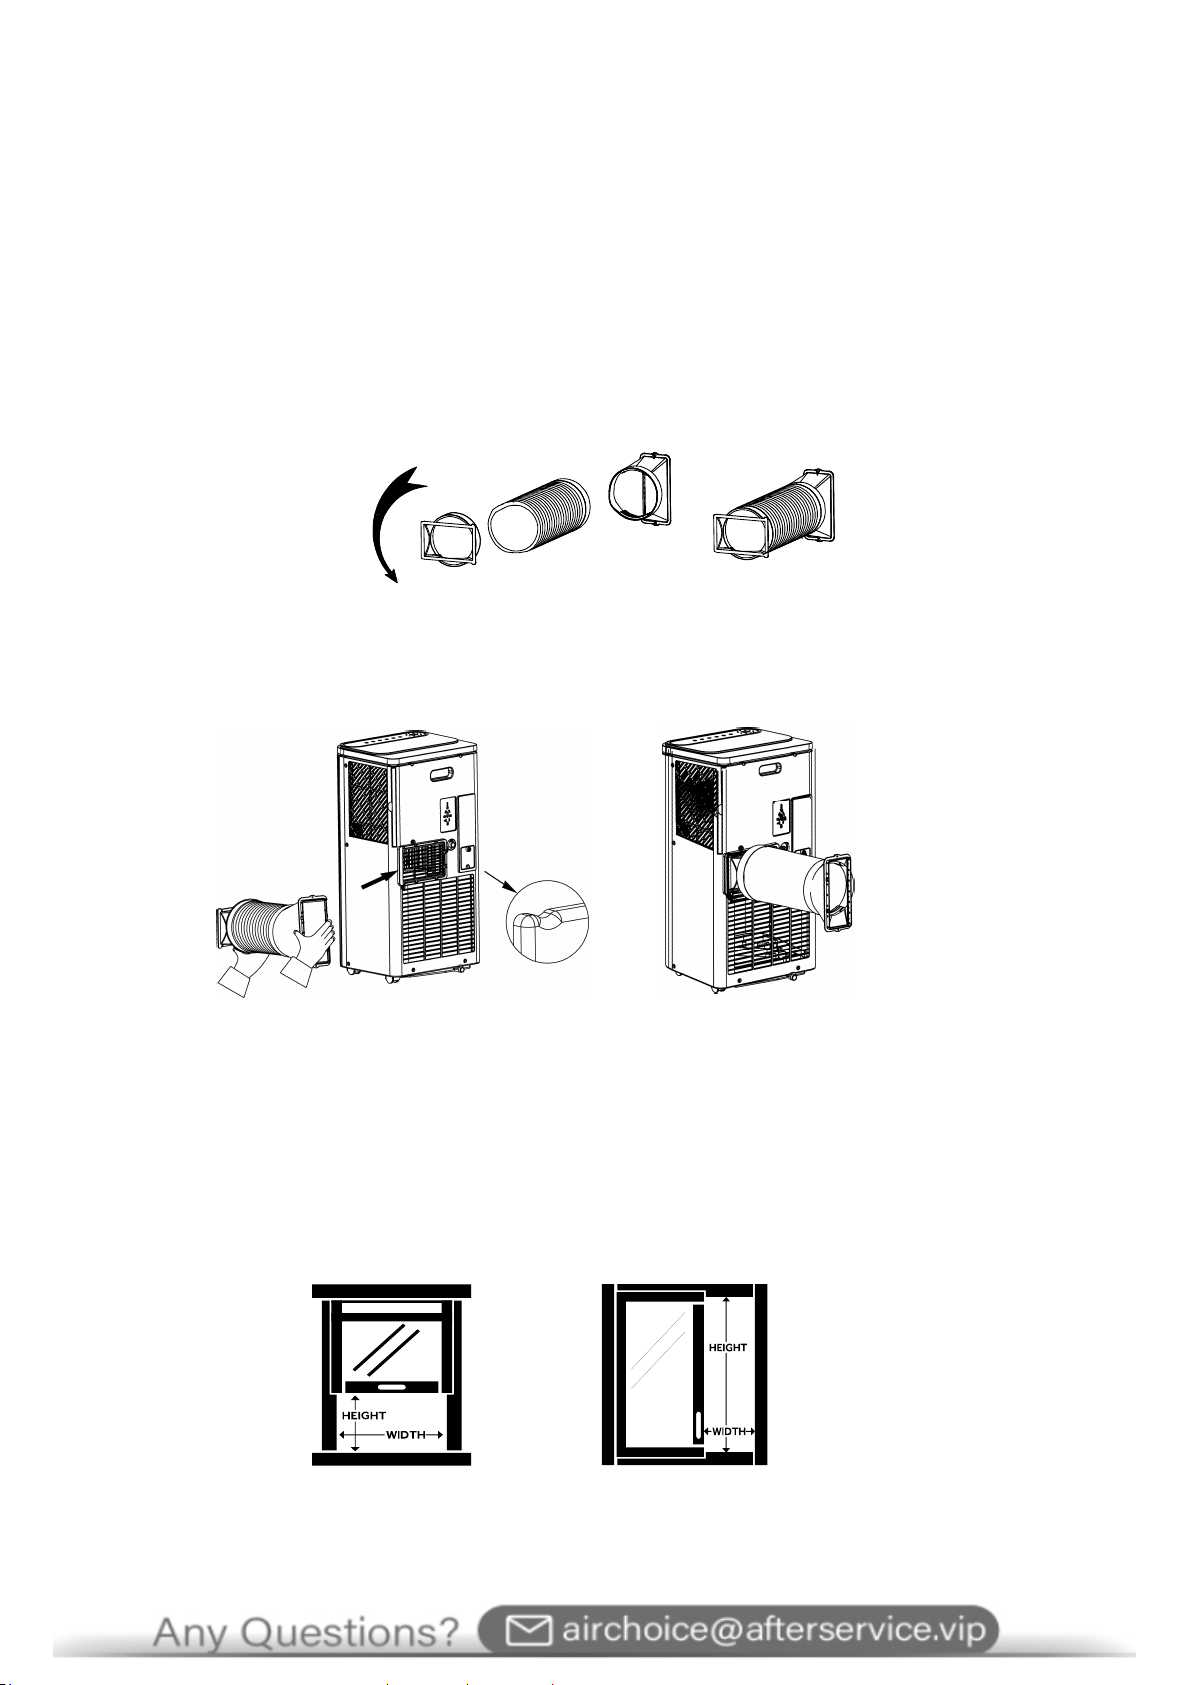
STEP 2 - TWIST THE EXHAUST HOSE CONNECTOR ONTO EXHAUST HOSE
A. Grasp both ends of the exhaust hose and gently pull to expand the hose.
NOTE: Do not attach additional hoses to extend the length. This would decrease cooling efficiency and may damage the
air conditioner.
B. Using a counterclockwise motion, attach the open end of the exhaust hose to the exhaust nozzle.
STEP 3 - CONNECT EXHAUST HOSE TO THE AIR CONDITIONER
IMPORTANT: When connecting the hose, the air conditioner must be close enough to the window that you will not dislodge
the window seal plate. Once the hose is connected, move the air conditioner 20” (50.8 cm) from the wall.
A. Slide the exhaust hose assembly from the outer air outlet to the right.
B. The assembly is completed until the convex point of the inner joint and the concave point of the air outlet are
stuck.
STEP 4 - INSTALL WINDOW PANELS
Depending on the size of your window opening, use the main panel and one or both of the extension panels.
A. Open the window and place the main window panel into the window.
NOTE: The window assembly is designed to accommodate either a vertical slide or horizontal slide window.
Vertical Slide Window Horizontal Slide Window
Loading ...
Loading ...
Loading ...