Loading ...
Loading ...
Loading ...
5
5. INSTALL UPPER FLUE MOUNTING BRACKET
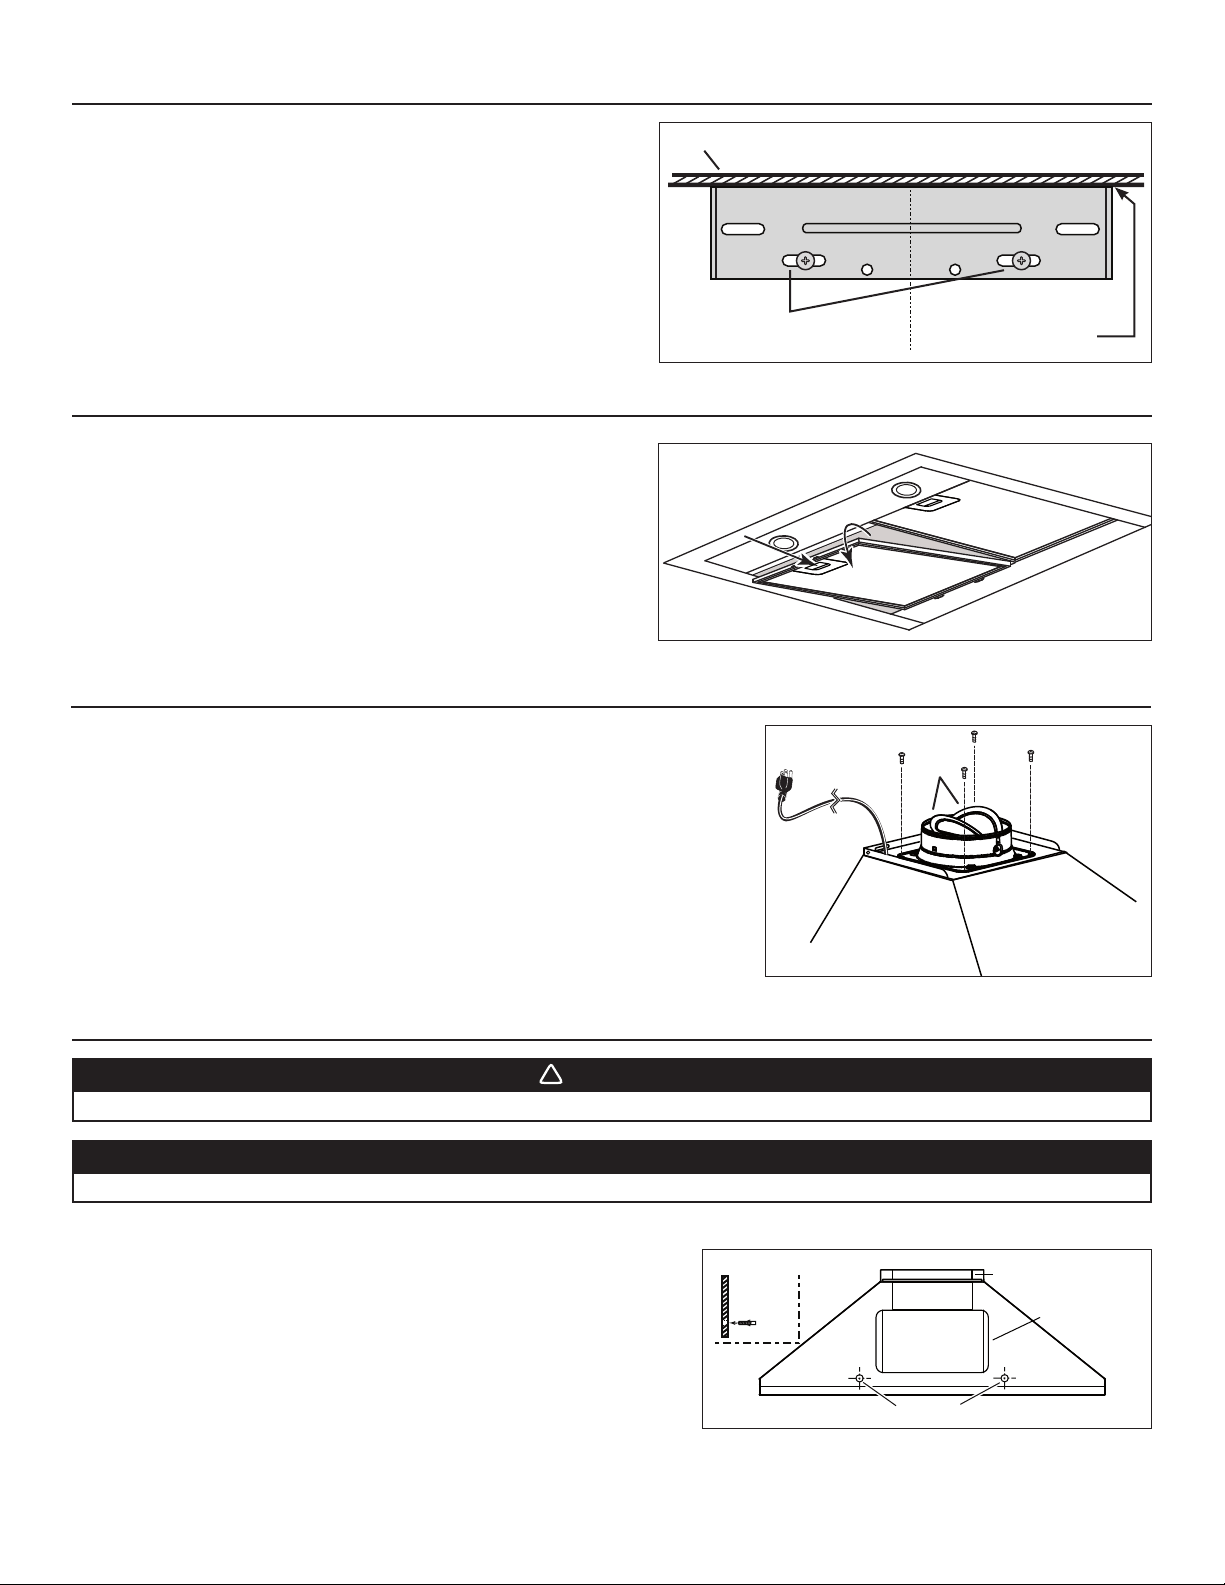
Center the upper flue mounting bracket with the center line previously
drawn in step 4 and place it flush with the ceiling. Make sure that the slots
of the upper flue bracket point down. Use the upper flue mounting bracket
as a template to mark the position of its screws.
Drill both screw holes using a 5/16” drill bit. Insert the included drywall
anchors into the drilled holes (one per hole).
Secure the upper flue bracket to the wall using 2 no. 8 x 1½” mounting
screws. Make sure that the bracket is tight against the wall.
C
L
HD1027
CENTER OF INSTALLATION
CEILING
UPPER FLUE MOUNTING
BRACKET SLOTS
MOUNTING BRACKET
FLUSH WITH CEILING
6. REMOVE GREASE FILTERS
Lay the back side of the hood flat on a table. Use a piece of cardboard to
avoid damaging the table or the hood.
To remove the grease filters, pull down on the metal latch tab and tilt each
filter downward. Set filters aside.
HD1028
7. INSTALL 6” ROUND ADAPTER/DAMPER
Mount the 6” round adapter/damper (included) using 4 no. 8 x 5/16” screws (included).
Seal the adapter/damper to the hood using metal foil duct tape.
NON-DUCTED INSTALLATION: Remove both damper flaps.
HJ0156
DAMPER
FLAPS
8. INSTALL THE HOOD
CAUTION
DO NOT REMOVE the protective plastic film covering the decorative flue (upper & lower) yet.
1. Align the hood and center it above the hood mounting bracket. Gently lower the hood until it securely engages the bracket.
2. Level the hood.
3. With the hood hanging in place, drill through both holes located in the
inside lower back of hood using a 5/16” drill bit (see illustration at right).
4. Insert the included drywall anchors into the drilled holes (one for each hole).
5. Verify that the hood is still centered and leveled.
6. Secure the hood to the wall using 2 no. 8 x 1½” screws and 2 washers.
Tighten both screws completely.
WARNING
!
BE CAREFUL when installing the decorative flue and hood, they may have sharp edges.
SIDE
VIEW
HOLES LOCATION (Ø 5/16” TYP.)
M
OTOR/ BLOWER
ASSEMBLY
ADAPTER/DAMPER
HD1029A
Loading ...
Loading ...
Loading ...