
Loading ...
Loading ...
Loading ...
1
Hold down the lock button (blue) at the
center of the [POWER ON/OFF] switch to set
to “OFF”.
2
Attach the supplied battery.
Slide it in until you hear a click.
3
Connect the supplied AC adapter to the
[DC]
terminal.
Open the cover of the [DC]
terminal and connect
as shown in the diagram.
4
Connect the AC adapter to a power outlet.
0
The [POWER/CHARGE] lamp blinks during
charging and will go out after charging is
complete.
0
Remove the AC adapter after charging is
complete.
Memo :
0
Blinking of the [POWER/CHARGE] lamp during
charging indicates the charge level.
[POWER/CHARGE] Lamp
Charge Level
Alternates between a blinking
orange light (4 times) and
light off (1 second)
Less than 25 %
Alternates between a blinking
orange light (3 times) and
light off (1 second)
Less than 50 %
Alternates between a blinking
orange light (2 times) and
light off (1 second)
Less than 75 %
Alternates between a blinking
orange
light (blinks once) and
light off (1 second)
Less than 100 %
Light goes out Fully charged
0
You
can charge the battery even when operating
the camera recorder using the AC adapter.
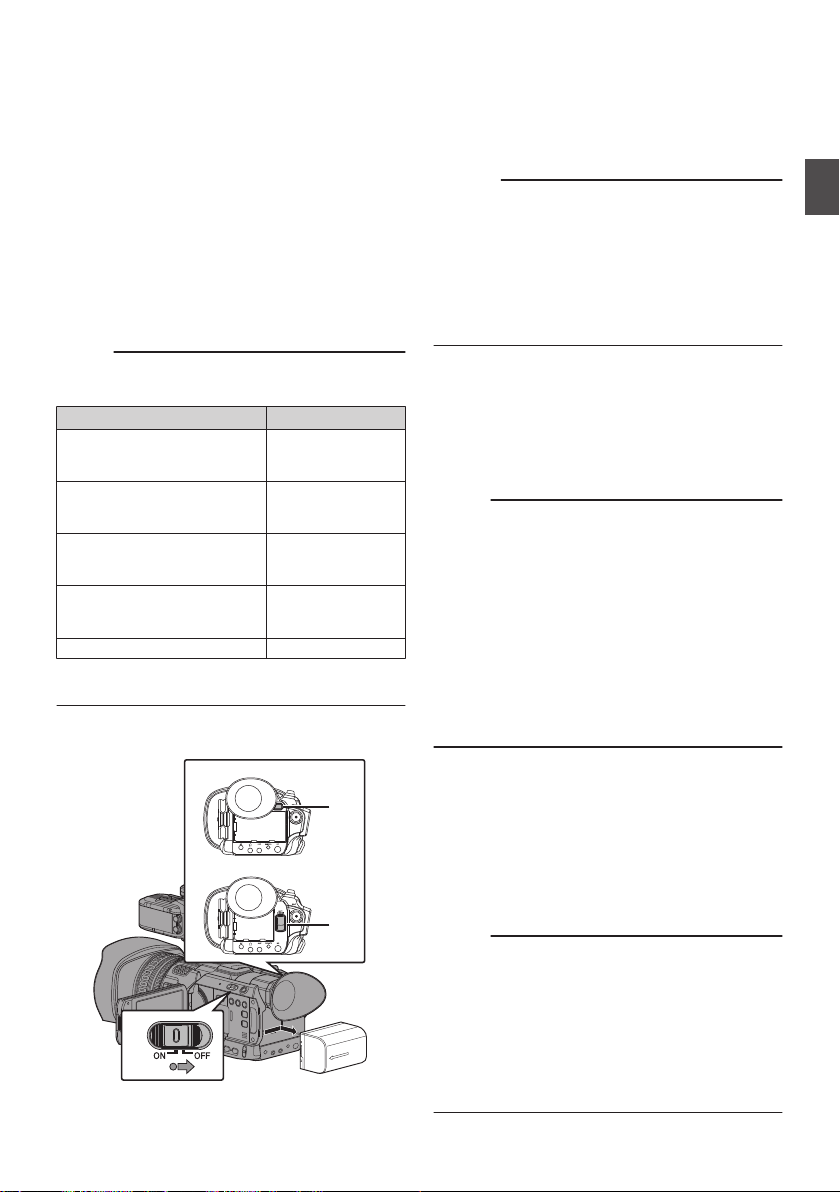
Removing the Battery
.
2
GY-HM200U/GY-HM200E
GY-HM170U/GY-HM170E
1
2
1
Hold down the lock button (blue) at the
center of the [POWER ON/OFF] switch to set
to “OFF”.
2
While pressing and holding the [BATT.
RELEASE
] button, push up and remove the
battery in the direction of the arrow.
Caution :
0
Do not remove the battery when the [POWER
ON/OFF] switch is “ON”.
0
Do not insert or remove the DC cable when the battery
is in use.
0
Leaving the camera recorder unused with the battery
inside will deplete the battery power even if you set
the [POWER ON/OFF] switch to “OFF”. Remove the
battery if you are not using the camera recorder.
Estimated Charging and Continuous
Operating Times
o
Charging time
SSL-JVC50 (accessory) K :
Approx. 4 hrs
BN-VF823 (accessory) M : Approx. 3 hrs
*
When the [POWER ON/OFF] switch is set to “OFF”
Memo :
o
M
0
If you charge the battery immediately after using while
the battery is still warm, it may not be fully charged.
0
It is recommended that you charge the battery in an
environment between 10 °C and 30 °C (50 °F and 86
°F). The battery may not be fully charged or the
charging time may be prolonged if charged under low
temperatures (below 10 °C/50 °F). In addition,
charging the battery under high temperature (above
30 °C/86 °F) condition may shorten the battery life.
o
K
0
For details, refer to the instruction manual of the
battery.
o
Continuous operating time
SSL-JVC50 (accessory)
K
:
Approx. 4 hrs 40 mins (*1)
Approx. 5 hrs (*2)
BN-VF823 (accessory)
M
:
Approx. 2 hrs (*1)
Approx. 2 hrs 20 mins (*2)
*1 When [System] is set to “4K” and all other
settings are in factory default
*2 When [System] is set to “HD” and all other
settings are in factory default
Memo :
0
Actual operating times may differ depending on the
age of the battery, charging condition, and operating
environment.
0
Operating time is shortened in cold environment.
0
The operating time may shorten when power zoom is
used, accessories are connected, or when the LCD
monitor is frequently used.
0
For purchase of spare batteries and battery charger,
please contact the local dealers in your area.
Charging the Battery
15
Preparations
Loading ...
Loading ...
Loading ...