Loading ...
Loading ...
Loading ...
12
ENG
There are ventilation holes around outside of the hob. YOU MUST ensure these holes are not blocked by the
worktop when you put the hob into position.
The unit should be placed on a stable, smooth surface (use the packaging). Do not apply force onto the controls protruding from
the hob.
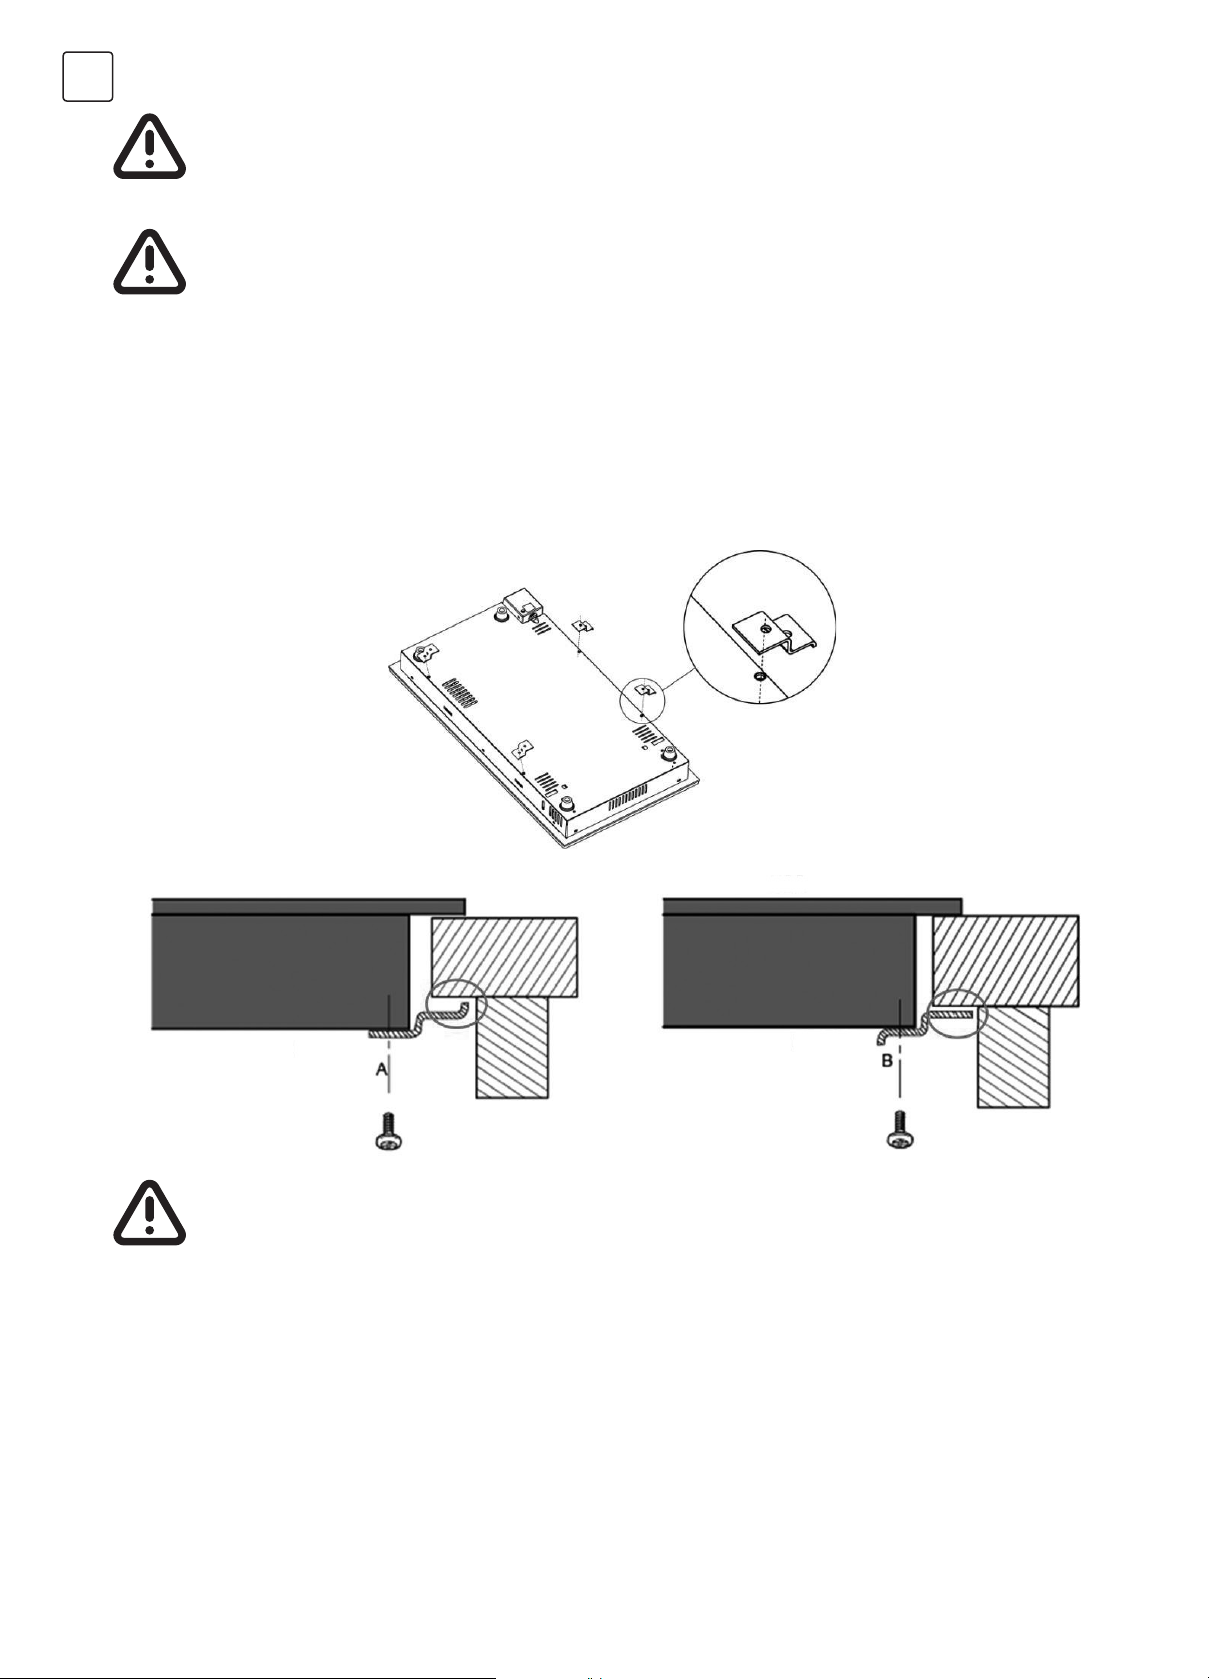
Fix the hob on the work surface by screw four brackets on the bottom of hob (see picture) after installation.
Adjust the bracket position to suit for different work surface’s thickness.
1. The ceramic cooker hob must be installed by qualified personnel or technicians. We have professionals at your service.
Please never conduct the operation by yourself.
2. The ceramic cooker hob should not be mounted to cooling equipment, dishwashers and rotary dryers.
3. The ceramic cooker hob should be installed as such so that better heat radiation can be ensured to enhance its reliability.
4. The wall and induced heating zone above the work surface should be suitable to withstand heat.
5. To avoid any damage, the sandwich layer and adhesive must be resistant to heat.
6. A steam cleaner is not to be used.
7. This ceramic can be connected only to a supply with system impedance no more than 0.427 ohm. In case necessary, please
consult your supply authority for system impedance information.
• Be aware that the glue that joins the plastic or wooden material to the furniture, has to resist to temperature not
below 150ºC, to avoid the deforming.
• The rear wall, adjacent and surrounding surfaces must therefore be able to withstand a temperature of 90ºC.
Before locating the fixing brackets
Cautions
Under any circumstances, the brackets cannot touch with the inner surfaces of the worktop after installation (see
picture).
HOB
BRACKET BRACKET
HOB
TABLE TABLE
Loading ...
Loading ...
Loading ...