Loading ...
Loading ...
Loading ...
4 ENGLISH
3. Plug the power plug of the battery charger into the
proper AC voltage source.
4.
After the charging is complete, remove the socket of
the battery charger, and then attach the cap of the battery.
During charging, the main power lamp lights up in red
and the indicator lamps indicate the remaining battery
capacity. When the charging is complete, the main
power lamp and indicator lamps go o.
Main
power
lamp
Indicator lamps
Remaining
capacity
Lighted O Blinking
Charging
(75% to
100%)
Charging
(50% to
75%)
Charging
(25% to
50%)
Charging
(0% to
25%)
1
3
2
►
1. Power button 2. Indicator lamp 3. Main power lamp
The tool or machine does not operate if the charger is connected
to the unit. If the main power lamp blinks in red, charging does
not start because the unit is overheated or the temperature of the
unit is low. In this case, cool down the unit, or warm up the unit.
If the main power lamp blinks in red and green alternately,
unplug the charger and remove the socket of the charger, and
then clean the charger by removing dust from the AC inlet,
intake vent, and exhaust vent. If the main power lamp keeps
blinking in red and green alternately after cleaning the charger,
ask your local Makita Authorized Service Center for repair.
The following table indicates the types of battery, the number of cells,
and the rated capacity which can be charged by the battery charger.
Voltage Number
of cells
Li-ion
portable
power
pack
Capacity
(Ah)
accord-
ing to
IEC61960
Charging
time
(Minutes)
36 V - 40
V max
100 PDC1200 33.5 360
NOTE: The charger is equipped with the cooling fan.
Sound of the cooling fan comes out during charging,
but it does not indicate a trouble of the charger.
MAINTENANCE
CAUTION: Always be sure that the portable
power pack is switched o and the battery is
removed before attempting to perform inspection
or maintenance.
To maintain product SAFETY and RELIABILITY,
repairs, any other maintenance or adjustment should
be performed by Makita Authorized or Factory Service
Centers, always using Makita replacement parts.
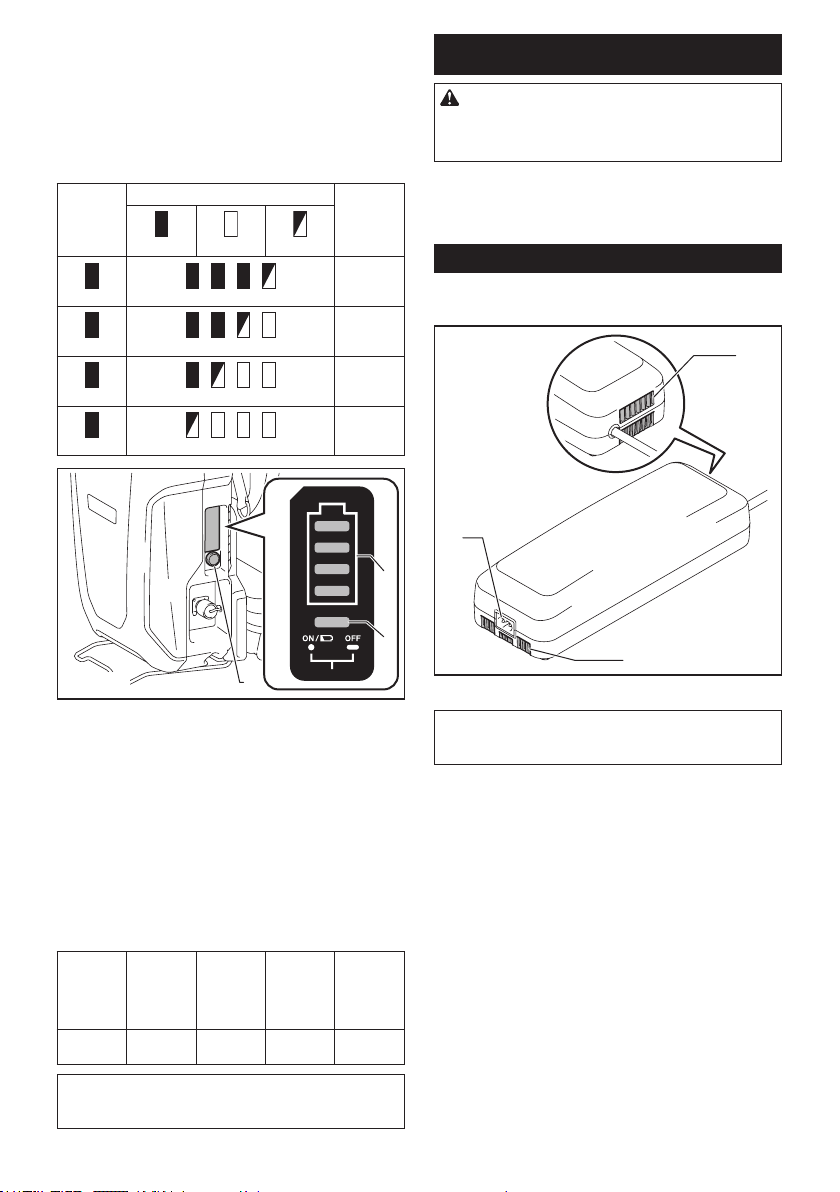
Cleaning the charger
Remove dust from the AC inlet, intake vent, and
exhaust vent.
1
2
3
► 1. AC inlet 2. Intake vent 3. Exhaust vent
NOTE: If the charging time becomes considerably
longer than usual, ask Makita Authorized Service
Centers for repair or maintenance.
Loading ...
Loading ...
Loading ...