Luz de seguridad de triple cabezal con detección de movimiento
PILAS:
Funciona con 4 pilas D, no incluidas. Cuando las reemplace, no coloque pilas nuevas con pilas viejas.
1. Destrabe cada pinza y retire la cubierta trasera/el soporte de montaje.
2. Inserte las pilas, teniendo en cuenta los polos.
3. Asegúrese de que la cinta esté presente para retirar fácilmente la pila inferior y reemplazar las pilas del mismo
modo en el futuro.
INSTALACIÓN
Monte la luz de seguridad en paredes o aleros. Para obtener el mejor rendimiento, instale a 2,4 m
(8 pies) sobre el nivel del suelo como mínimo. Asegúrese de que el área de montaje esté seca y
limpia de residuos.
1. Sostenga la cubierta trasera/el soporte de montaje en su lugar y marque la ubicación de cada tornillo o use la
plantilla incluida.
2. Taladre oricios piloto con una broca de 3/16”.
3. Inserte los tacos incluidos.
4. Instale la cubierta trasera/el soporte de montaje con los tornillos incluidos y un destornillador Phillips n. ° 1; no
apriete demasiado.
5. Vuelva a colocar la luz de seguridad en el soporte de montaje, asegurándose de que las pinzas encajen en su lugar.
PROYECTOR O REFLECTOR
Coloque o retire las lentes esmeriladas incluidas sobre cada cabezal para alternar entre los modos
de reector y proyector.
Proyector - Cuando desea una luz más brillante
• Sin las lentes colocadas, la luz brilla en un área concentrada.
• Cuando retire la lente, use suavemente un destornillador de plano para sacarla de su lugar.
Reector - Cuando desea una luz más difusa
• Con la lente colocada, la luz difusa brilla en un área más amplia.
• Al colocar la lente, asegúrese de que los oricios de la lente estén en el costado de la lámpara y que encaje
rmemente en su lugar.
OPERACIÓN
Sensor de movimiento
La luz se enciende en condiciones de poca luz cuando se detecta movimiento y se apaga cuando ya
no se detecta movimiento.
• Alcance de 7,62 m (25 pies), campo de 180°
• Gire el sensor hacia la izquierda y hacia la derecha para dirigirlo hacia donde necesita la mayor cobertura.
Interruptor de tiempo de espera
Use el interruptor en la base de la luz para seleccionar cuándo se debe APAGAR la luz después de
que no se detecte movimiento.
• Brillo total: 100 % durante 20 o 40 segundos
• ECO brillo: 50% durante 30 o 60 segundos
Botón de aprendizaje
Según los niveles de luz circundante, personalice cuándo estará activo el sensor de movimiento.
• Presione el botón durante 3 segundos cuando los niveles de luz ambiental alcancen su nivel preferi do, por ejemplo,
justo antes del atardecer. La luz parpadeará para indicar que se estableció el nuevo programa.
• Los sensores de movimiento se activarán automáticamente cuando se alcance un nivel de luz similar.
• Para restablecer la conguración predeterminada de fábrica, mantenga presionado el botón durante 10 segundos.
HECHO EN CHINA
Distribuido por Jasco Products Company LLC,
10 E Memorial Rd., Oklahoma City, Oklahoma 73114.
Este producto de Jasco tiene una garantía de por vida limitada. Visite
www.byjasco.com para conocer los detalles de la garantía.
¿Preguntas? Comuníquese al 1-800-654-8483 entre las 7AM y las
8PM CST (hora central estándar).
See reverse for easy-to-follow instructions
and exclusive deals.
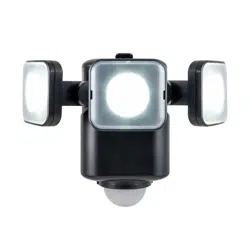
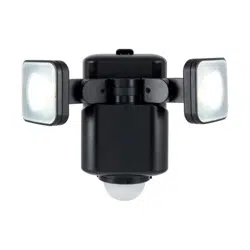
Motion-Sensing
Dual Head Security Light
• LAS BATERÍAS PUEDEN DERRAMAR
LÍQUIDOS NOCIVOS O MATERIALES
INFLAMABLES O ESTALLAR CAUSANDO
LESIONES Y DAÑOS AL PRODUCTO.
• REEMPLACE TODAS LAS BATERÍAS AL
MISMO TIEMPO.
• REEMPLACE LAS BATERÍAS
TOTALMENTE DESCARGADAS
INMEDIATAMENTE.
• QUITE LAS BATERÍAS SI EL DISPOSITIVO
NO VA A SER UTILIZADO POR UN
TIEMPO LARGO.
• NO SUMERGIR EN AGUA.
• LIMPIAR SOLAMENTE CON UN PAÑO
SUAVE Y HÚMEDO.
ADVERTENCIA
BATTERIES
Powered by 4 D batteries, not included. When replacing, do
not mix old batteries with new batteries.
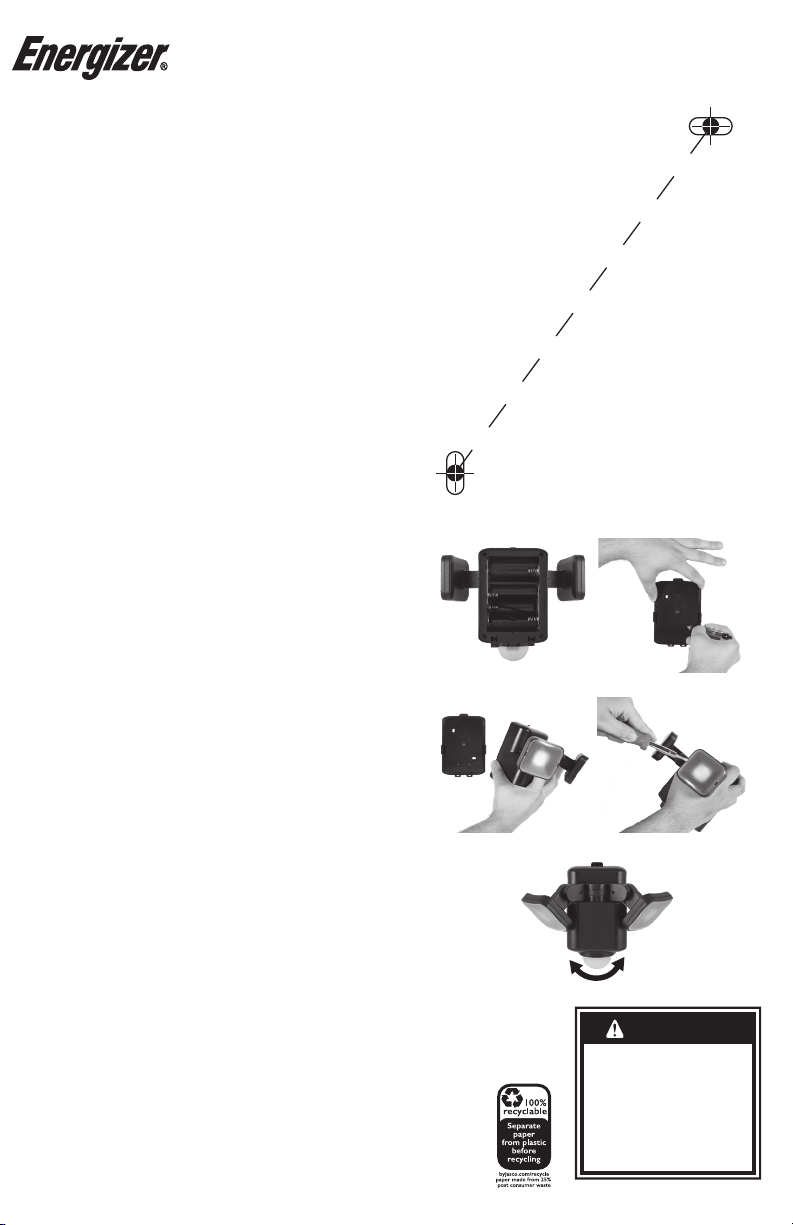
1. Unlatch each clip and remove the back cover/mounting
bracket. (Figure 1)
2. Insert baeries, noting polarity.
3.
Ensure ribbon is available to easily remove boom baery for
easy baery replacement in future.
INSTALLATION
Mount the security light on walls or eaves. For the best
performance, install at least 8ft. above ground level. Ensure
the mounting area is dry and clean of debris.
1.
Hold the back cover/mounting bracket in place and mark the
location for each screw or use the included template. (Figure 2)
2. Drill pilot holes using a 3/16in. drill bit.
3. Insert the included anchors.
4.
Install the back cover/mounting bracket using the included
screws and a #1 Phillips-head screwdriver — do not overtighten.
5.
Reaach the security light to the mounting bracket, ensuring
the clips lock into place. (Figure 3)
SPOTLIGHT OR FLOODLIGHT
Attach or remove the included frosted lenses over each head
to alternate between ood and spotlight modes.
Spotlight - When you want a brighter light
• No lens aached, the light shines in a concentrated area.
• When removing the lens, gently use a athead screwdriver
to pop it out of place. (Figure 4)
Floodlight - When you want a more diused light
• Lens aached, diused light shines in a wider area.
• When aaching the lens, ensure the holes of the lens are on
the side of the light xture and that it rmly snaps into place.
OPERATION
Motion sensor
The light turns on in low light conditions when motion is
detected and o when motion is no longer detected.
• 25. range, 180° eld
• Rotate sensor le or right to point where you need the most
coverage. (Figure 5)
Timeout switch
Use the switch on the base of the light to select
when the light turns OFF when motion is no longer
detected.
• Full brightness - 100% for 20sec. or 40sec.
• ECO brightness - 50% for 30sec. or 60sec.
Learning buon
Based o the surrounding light levels, customize when the
motion sensor will be active
• Press the buon for 3 seconds when the ambient light levels
reach your preferred level — for example, just before sunset.
The light will ash to signify that the new program has taken.
• The motion sensors will automatically activate when a similar light
level is reached.
•
To reset to the default factory seing, press and hold the buon
for 10 seconds.
KEYHOLE CENTER MARK
Marca centra l de agujero
KEYHOLE CENTER MARK
Marca centra l de agujero
MOUNTING TEMPLATE
PLANTILLA PARA LA INSTALACIÓN
2.9in
/
73.66mm
Motion-Sensing Dual Head Security Light
47250-1 EnSp Manual v1 6/21
MADE IN CHINA
©2021 Energizer. Energizer and certain graphic designs are
trademarks of Energizer Brands, LLC and related subsidiaries
and are used under license by Jasco Products Company, LLC.
Contact our U.S.-based Consumer Care at 1-800-654-8483
between 7AM-8PM, M-F, Central Time.
1-year warranty. Visit www.byjasco.com for warranty details.
WARNING
• BATTERIES MAY LEAK HARMFUL
LIQUIDS OR IGNITABLE MATERIALS
OR EXPLODE CAUSING INJURY OR
PRODUCT DAMAGE.
• DO NOT MIX OLD AND NEW OR
OTHER BATTERY TYPES.
• REPLACE ALL BATTERIES AT THE
SAME TIME.
• REMOVE BATTERIES IF PRODUCT
IS TO BE UNUSED FOR EXTENDED
PERIOD OF TIME.
Figure 1
Figure 2
Figure 3
Figure 4
Figure 5
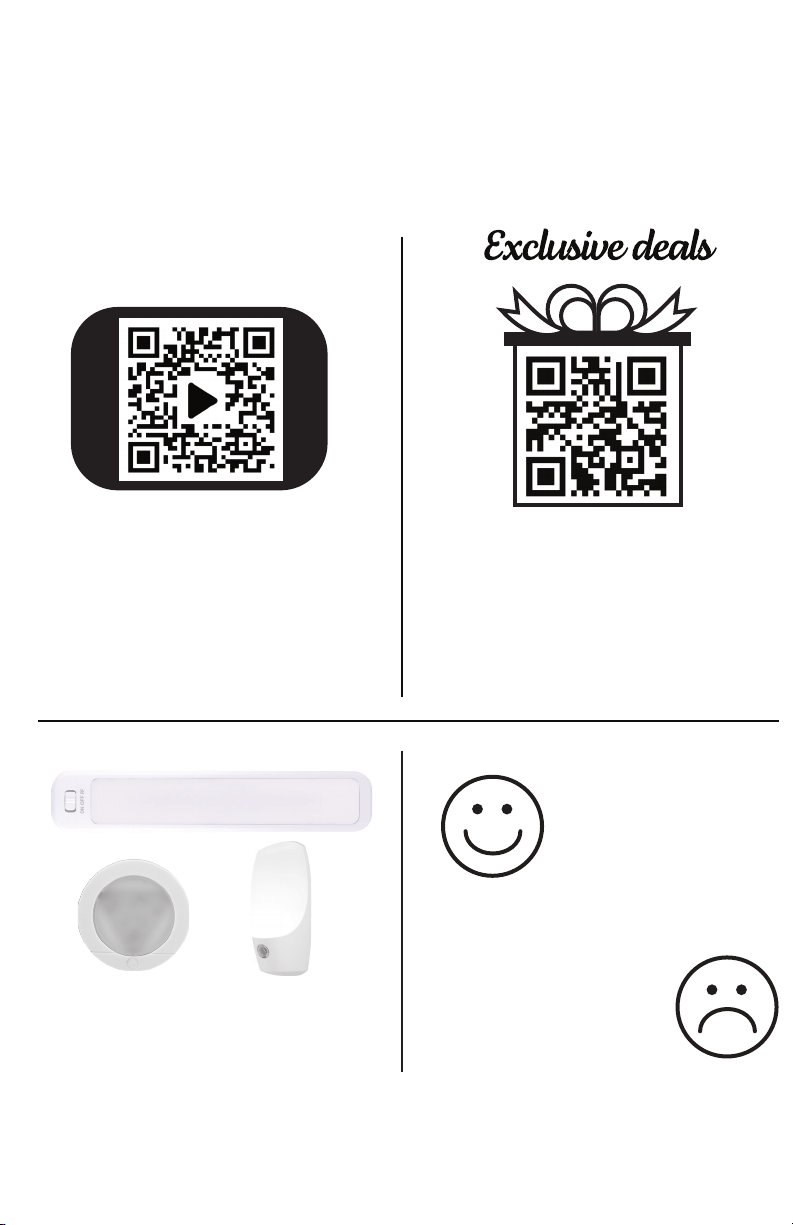
For deals, to register
your purchase and to
tell us how we’re
doing, simply scan
the code or visit
byjasco.com/deals
Instructions made easy
Read instructions or watch
easy-to-follow video.
Scan code or visit
Thank you for your purchase!
Like our product?
Leave a review
on your favorite
retailer website
or amazon.com
Having problems?
Let us know how
we can help.
1-800-654-8483
between 7AM-8PM,
M-F, Central Time.
Discover more lighting from
Energizer at byjasco.com
https://byjasco.com/
47250i
BATTERIES
Powered by 4 D batteries, not included. When replacing, do
not mix old batteries with new batteries.
1. Unlatch each clip and remove the back cover/mounting
bracket. (Figure 1)
2. Insert baeries, noting polarity.
3.
Ensure ribbon is available to easily remove boom baery for
easy baery replacement in future.
INSTALLATION
Mount the security light on walls or eaves. For the best
performance, install at least 8ft. above ground level. Ensure
the mounting area is dry and clean of debris.
1.
Hold the back cover/mounting bracket in place and mark the
location for each screw or use the included template. (Figure 2)
2. Drill pilot holes using a 3/16in. drill bit.
3. Insert the included anchors.
4.
Install the back cover/mounting bracket using the included
screws and a #1 Phillips-head screwdriver — do not overtighten.
5.
Reaach the security light to the mounting bracket, ensuring
the clips lock into place. (Figure 3)
SPOTLIGHT OR FLOODLIGHT
Attach or remove the included frosted lenses over each head
to alternate between ood and spotlight modes.
Spotlight - When you want a brighter light
• No lens aached, the light shines in a concentrated area.
• When removing the lens, gently use a athead screwdriver
to pop it out of place. (Figure 4)
Floodlight - When you want a more diused light
• Lens aached, diused light shines in a wider area.
• When aaching the lens, ensure the holes of the lens are on
the side of the light xture and that it rmly snaps into place.
OPERATION
Motion sensor
The light turns on in low light conditions when motion is
detected and o when motion is no longer detected.
• 25. range, 180° eld
• Rotate sensor le or right to point where you need the most
coverage. (Figure 5)
Timeout switch
Use the switch on the base of the light to select
when the light turns OFF when motion is no longer
detected.
• Full brightness - 100% for 20sec. or 40sec.
• ECO brightness - 50% for 30sec. or 60sec.
Learning buon
Based o the surrounding light levels, customize when the
motion sensor will be active
• Press the buon for 3 seconds when the ambient light levels
reach your preferred level — for example, just before sunset.
The light will ash to signify that the new program has taken.
• The motion sensors will automatically activate when a similar light
level is reached.
•
To reset to the default factory seing, press and hold the buon
for 10 seconds.
KEYHOLE CENTER MARK
Marca centra l de agujero
KEYHOLE CENTER MARK
Marca centra l de agujero
MOUNTING TEMPLATE
PLANTILLA PARA LA INSTALACIÓN
2.9in
/
73.66mm
Motion-Sensing Dual Head Security Light
47250-1 EnSp Manual v1 6/21
MADE IN CHINA
©2021 Energizer. Energizer and certain graphic designs are
trademarks of Energizer Brands, LLC and related subsidiaries
and are used under license by Jasco Products Company, LLC.
Contact our U.S.-based Consumer Care at 1-800-654-8483
between 7AM-8PM, M-F, Central Time.
1-year warranty. Visit www.byjasco.com for warranty details.
WARNING
• BATTERIES MAY LEAK HARMFUL
LIQUIDS OR IGNITABLE MATERIALS
OR EXPLODE CAUSING INJURY OR
PRODUCT DAMAGE.
• DO NOT MIX OLD AND NEW OR
OTHER BATTERY TYPES.
• REPLACE ALL BATTERIES AT THE
SAME TIME.
• REMOVE BATTERIES IF PRODUCT
IS TO BE UNUSED FOR EXTENDED
PERIOD OF TIME.
Figure 1
Figure 2
Figure 3
Figure 4
Figure 5
For deals, to register
your purchase and to
tell us how we’re
doing, simply scan
the code or visit
byjasco.com/deals
Instructions made easy
Read instructions or watch
easy-to-follow video.
Scan code or visit
Thank you for your purchase!
Like our product?
Leave a review
on your favorite
retailer website
or amazon.com
Having problems?
Let us know how
we can help.
1-800-654-8483
between 7AM-8PM,
M-F, Central Time.
Discover more lighting from
Energizer at byjasco.com
https://byjasco.com/
47250i

Luz de seguridad de triple cabezal con detección de movimiento
PILAS:
Funciona con 4 pilas D, no incluidas. Cuando las reemplace, no coloque pilas nuevas con pilas viejas.
1. Destrabe cada pinza y retire la cubierta trasera/el soporte de montaje.
2. Inserte las pilas, teniendo en cuenta los polos.
3. Asegúrese de que la cinta esté presente para retirar fácilmente la pila inferior y reemplazar las pilas del mismo
modo en el futuro.
INSTALACIÓN
Monte la luz de seguridad en paredes o aleros. Para obtener el mejor rendimiento, instale a 2,4 m
(8 pies) sobre el nivel del suelo como mínimo. Asegúrese de que el área de montaje esté seca y
limpia de residuos.
1. Sostenga la cubierta trasera/el soporte de montaje en su lugar y marque la ubicación de cada tornillo o use la
plantilla incluida.
2. Taladre oricios piloto con una broca de 3/16”.
3. Inserte los tacos incluidos.
4. Instale la cubierta trasera/el soporte de montaje con los tornillos incluidos y un destornillador Phillips n. ° 1; no
apriete demasiado.
5. Vuelva a colocar la luz de seguridad en el soporte de montaje, asegurándose de que las pinzas encajen en su lugar.
PROYECTOR O REFLECTOR
Coloque o retire las lentes esmeriladas incluidas sobre cada cabezal para alternar entre los modos
de reector y proyector.
Proyector - Cuando desea una luz más brillante
• Sin las lentes colocadas, la luz brilla en un área concentrada.
• Cuando retire la lente, use suavemente un destornillador de plano para sacarla de su lugar.
Reector - Cuando desea una luz más difusa
• Con la lente colocada, la luz difusa brilla en un área más amplia.
• Al colocar la lente, asegúrese de que los oricios de la lente estén en el costado de la lámpara y que encaje
rmemente en su lugar.
OPERACIÓN
Sensor de movimiento
La luz se enciende en condiciones de poca luz cuando se detecta movimiento y se apaga cuando ya
no se detecta movimiento.
• Alcance de 7,62 m (25 pies), campo de 180°
• Gire el sensor hacia la izquierda y hacia la derecha para dirigirlo hacia donde necesita la mayor cobertura.
Interruptor de tiempo de espera
Use el interruptor en la base de la luz para seleccionar cuándo se debe APAGAR la luz después de
que no se detecte movimiento.
• Brillo total: 100 % durante 20 o 40 segundos
• ECO brillo: 50% durante 30 o 60 segundos
Botón de aprendizaje
Según los niveles de luz circundante, personalice cuándo estará activo el sensor de movimiento.
• Presione el botón durante 3 segundos cuando los niveles de luz ambiental alcancen su nivel preferi do, por ejemplo,
justo antes del atardecer. La luz parpadeará para indicar que se estableció el nuevo programa.
• Los sensores de movimiento se activarán automáticamente cuando se alcance un nivel de luz similar.
• Para restablecer la conguración predeterminada de fábrica, mantenga presionado el botón durante 10 segundos.
HECHO EN CHINA
Distribuido por Jasco Products Company LLC,
10 E Memorial Rd., Oklahoma City, Oklahoma 73114.
Este producto de Jasco tiene una garantía de por vida limitada. Visite
www.byjasco.com para conocer los detalles de la garantía.
¿Preguntas? Comuníquese al 1-800-654-8483 entre las 7AM y las
8PM CST (hora central estándar).
See reverse for easy-to-follow instructions
and exclusive deals.
Motion-Sensing
Dual Head Security Light
• LAS BATERÍAS PUEDEN DERRAMAR
LÍQUIDOS NOCIVOS O MATERIALES
INFLAMABLES O ESTALLAR CAUSANDO
LESIONES Y DAÑOS AL PRODUCTO.
• REEMPLACE TODAS LAS BATERÍAS AL
MISMO TIEMPO.
• REEMPLACE LAS BATERÍAS
TOTALMENTE DESCARGADAS
INMEDIATAMENTE.
• QUITE LAS BATERÍAS SI EL DISPOSITIVO
NO VA A SER UTILIZADO POR UN
TIEMPO LARGO.
• NO SUMERGIR EN AGUA.
• LIMPIAR SOLAMENTE CON UN PAÑO
SUAVE Y HÚMEDO.
ADVERTENCIA