
Loading ...
Loading ...
Loading ...
English
6
Removing Paint (Fig. A)
WARNING: Refer to Important Notice under
Additional safety information before using the
tool to removepaint.
WARNING: Do not strip metal window frames as the
heat may crack theglass.
• When striping other window frames, use a glass
protectionnozzle.
• To prevent igniting the surface, do not keep the
tool directed at one spot toolong.
• Avoid collecting paint on the scraper accessory, as
it may ignite. If necessary, carefully remove paint
debris from the scraper accessory using aknife.
1. Attach the appropriateaccessory.
2. Turn the air temperature adjustment knob/LCD air
temperature indicator and adjuster
4
tohigh.
3. Turn the tool on by selecting the desired airflow.
4. Direct the hot air onto the paint to beremoved.
Best results will be achieved if the heat gun is moved
slowly, but CONSTANTLY, from side to side to evenly
distribute heat. DO NOT LINGER OR PAUSE IN ONESPOT.
5. When the paint softens, scrape the paint away using a
handscraper.
REMEMBER: Splinters and small particles of stripped paint
can be ignited and blown through holes and cracks in the
surface beingstripped.
Stationary Use (Fig.A)
This tool can also be used in stationarymode.
1. Fold down the kickstand
3
as shown in FigureA.
2. Set the tool onto a level, stable workbench. Ensure the
tool will not tipover.
3. Secure the power cord to prevent entanglement or
pulling the tool off theworkbench.
4. Turn the tool on by selecting the desired airflow.
Constant Heat Control
(OverloadProtection)
When the tool is overloaded, this feature protects the
heating element from damage without stopping the tool
and/or without a cool downperiod.
1. When the temperature gets too hot, the heating
element switches itself off. The motor will continue to
run and produce coldair.
2. When the temperature has cooled sufficiently (taking
only a few seconds) the heating element will switch
onautomatically.
Tool Ring (Fig.A)
WARNING: ALWAYS turn heat gun off, disconnect
from the power source and let the tool cool down for
at least 30 minutes before moving or storingit.
For easy storage, the tool can hang from the tool ring
6
.
The heat gun should be storedindoors.
Cool Down Period
The nozzle and accessory becomes very hot during use.
Turn heat gun off, disconnect from the power source and
let the tool cool down for at least 30 minutes before moving
or storingit.
nOTE: To reduce the cooling time, switch the tool on at
the lowest air temperature setting and let it run for a few
minutes before turning the heat gunoff.
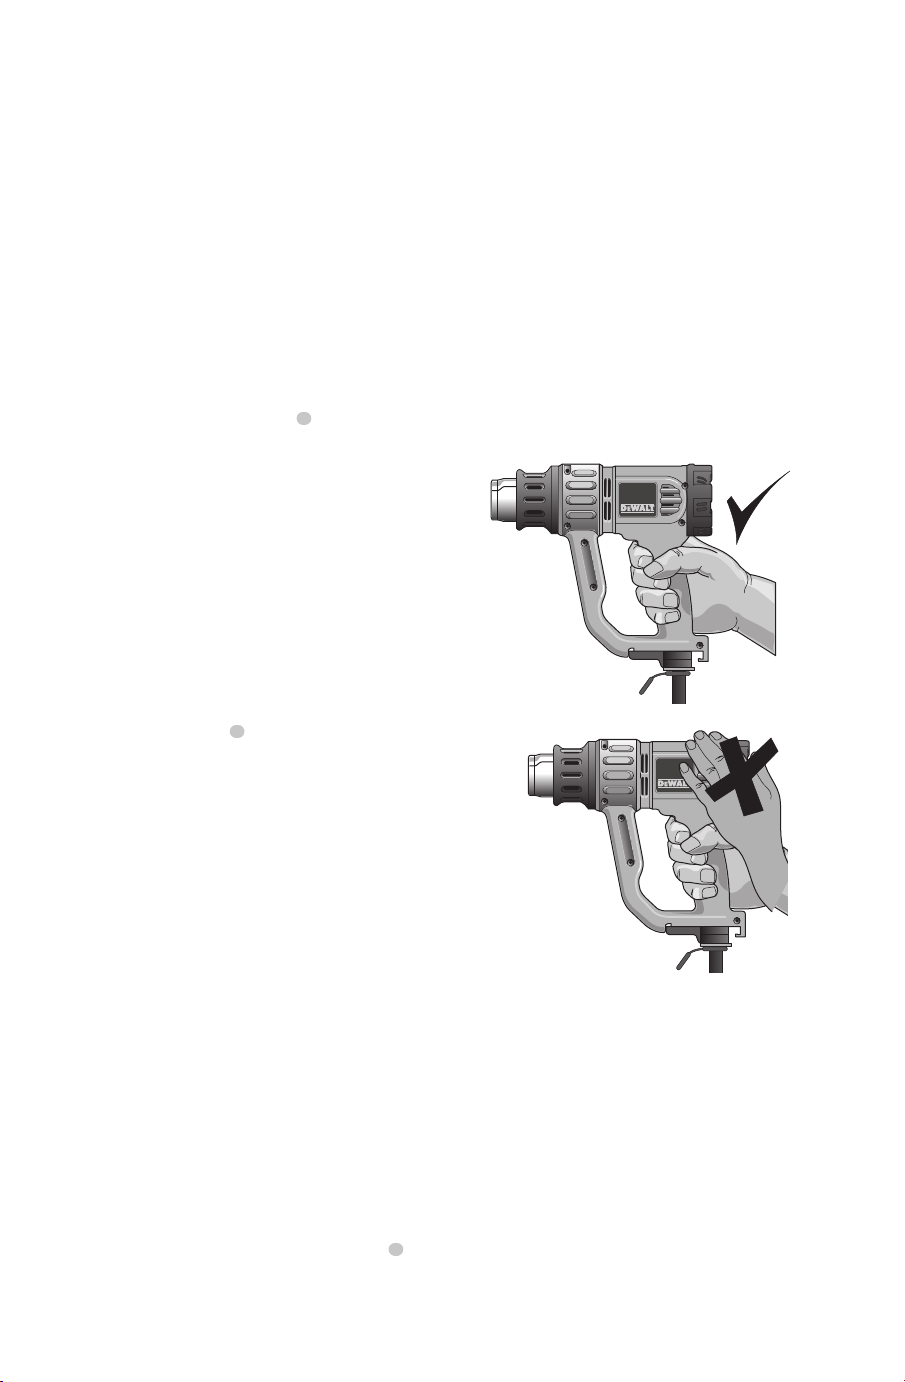
Proper Hand Position (Fig. C, D)
WARNING: To reduce the risk of serious personal injury,
ALWAYS use proper hand position as shown.
WARNING: To reduce the risk of serious personal
injury, ALWAYS hold securely in anticipation of a
suddenreaction.
Use only one hand to hold the tool as shown in FigureC. Do
not place your other hand over the air vents (Fig.D).
Fig. C
Fig. D
MAINTENANCE
WARNING: To reduce the risk of serious personal
injury, turn unit off and disconnect it from
power source before making any adjustments or
removing/installing attachments or accessories.
An accidental start-up can causeinjury.
Cleaning
WARNING: Blow dirt and dust out of all air vents with
clean, dry air at least once a week. To minimize the risk
of eye injury, always wear ANSI Z87.1 approved eye
protection when performingthis.
WARNING: Never use solvents or other harsh
chemicals for cleaning the non-metallic parts of
the tool. These chemicals may weaken the plastic
Loading ...
Loading ...
Loading ...