Loading ...
Loading ...
Loading ...
English
5
power source before making any adjustments or
removing/installing attachments or accessories.
An accidental start-up can causeinjury.
Air Temperature (Fig.A)
D26950
The air temperature can be adjusted to suit a wide range of
applications. Turn the air temperature adjustment knob
4
clockwise or counterclockwise for higher or lowerheat.
D26960
Press and release the LCD air temperature indicator
and adjuster
4
to set the desired temperature in 50˚F
(10˚C) increments. To continously increase or decrease
the temperature press and hold the LCD air temperature
indicator and adjuster
4
. Release the indicator when
desired temperature or minimum/maximum temperature
isreached.
The display shows the actual rising/falling temperature until
the desired temperature isreached.
Set and Forget Temperature
ControlSystem
D26960
The desired temperature is stored in the memory of the
tool. Each time the heat gun is turned on, the heat gun
heats to the last temperature setting, with respect to air
flow. If unsure about the setting, always start with a low
temperature setting and gradually increase the temperature
until the desired setting isreached.
Applications
The table below suggests settings for differentapplications.
Setting Applications
Low • Drying paint and varnish
• Removing stickers
• Waxing and dewaxing
• Drying wet timber prior to filling
• Shrinking PVC wrapping and
insulation tubes
• Thawing frozen pipes
High • Welding plastics
• Bending plastic pipes and sheets
• Loosening rusted or tightly
fastened nuts and bolts
• Removing paint and lacquer
• Soldering plumbing joints
• Removing linoleum or vinyl
floor tiles
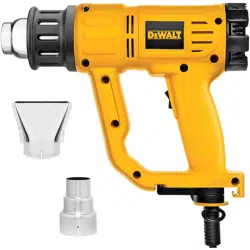
To Attach the Correct Accessory
This tool is supplied with a set of accessories for
differentapplications.
Icon Description Purpose
Cone nozzle Welding, soldering,
shrink sleeving (heat over
concentrated small area)
2" (50 mm) Fish tail
surface nozzle
Drying, removing paint,
removing vinyl or linoleum,
thawing (heat spread over
wide area)
1. Make sure the on/off switch
1
is in position O and the
tool is disconnected from the power source. Ensure the
nozzle has cooleddown.
2. Place the desired accessory onto thenozzle.
OPERATION
WARNING: To reduce the risk of serious personal
injury, turn unit off and disconnect it from
power source before making any adjustments or
removing/installing attachments or accessories.
An accidental start-up can causeinjury.
WARNING: Make sure the nozzle always points away
from you and anybystanders.
WARNING: DO NOT drop anything into thenozzle.
WARNING: DO NOT exceed 60 minutes "ON" in a
2hourperiod.
Prior to Operation
1. Attach the correct accessory recommended for
theapplication.
2. Turn the air temperature adjustment knob/LCD air
temperature indicator and adjuster
4
to desired
airtemperature.
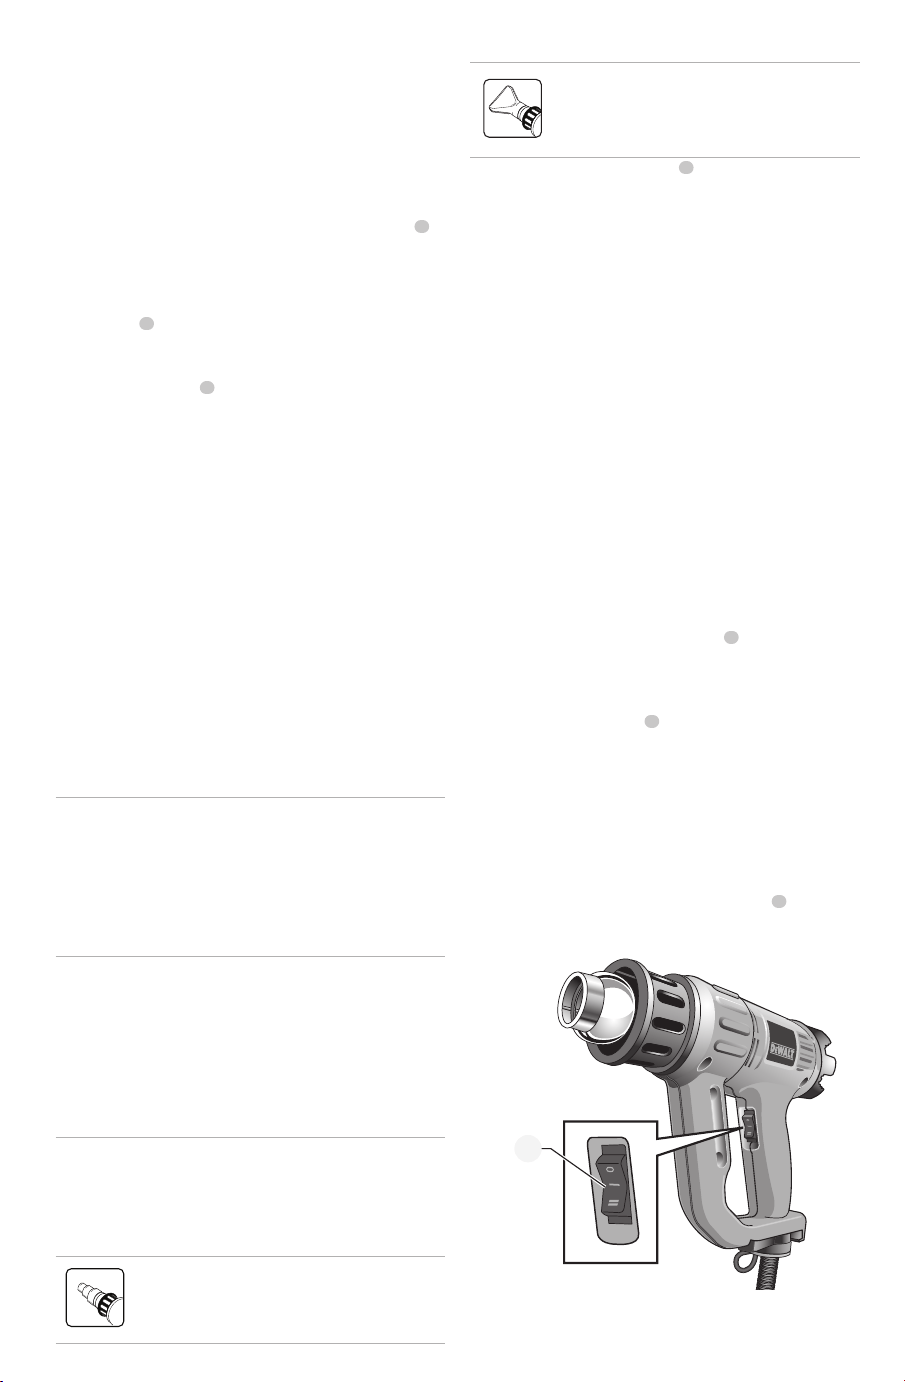
Switching On and Off (Fig.B)
1. Push the on/off switch
1
to the desired air flow
settings:
A low air flow to heat up the workpieceslowly.
I 8.5 CFM [120–750˚F (50˚–400˚C)]
8.8 CFM [150–750˚F (65˚–400˚C)] (D26960)
A high air flow to heat up the workpiecequickly.
II 16 CFM [120–1100˚F (50˚–600˚C)]
17.7 CFM [(150–1100˚F) (65˚–600˚C)] (D26960)
2. To turn the tool off, push the on/off switch
1
to
position O. Disconnect the tool from the power source
and let the tool cool down before moving or storingit.
Fig. B
1
Loading ...
Loading ...
Loading ...