Loading ...
Loading ...
Loading ...
Set-Up
3
Oil & Fuel Specifications
NOTE:The engine is shipped without gasoline in the engine.
Running the engine with insufficient oil can cause serious engine
damage and void the engine warranty.
IMPORTANT: Some engines are shipped with oil already in
the engine, others without oil already in the engine. It is very
important to check the oil level before operating the engine and
to add oil if necessary. Running the engine with insufficient oil
can cause serious engine damage and void the engine warranty
Oil Recommendations
Before starting engine, fill with motor oil, capacity is 600 ml/20
oz. Refer to viscosity chart in Fig. 3-1 for oil recommendations.
Do not over-fill. Use a 4-stroke, or an equivalent high detergent,
premium quality motor oil certified to meet or exceed
U.S. automobile manufacturer's requirements for service
m
_30
40 m_
20w4020w50__i_m_lb
I I v
15w40, 10m'_ s_mH Imu _um _m'_ _
I _"
10w40 .....
I v
10w30 ___m
(°C)-30o -20o -10° 0° 10° 20° 30° 40°
(°F)-20o 0° 20° 40° 60° 80° 100°
Figure 3-1
classification SG, SF.Motor oils classified SG, SF will show this
designation on the container.
NOTE: Do not use non-detergent oil or 2-stroke engine oil. It
could shorten the engine's service life.
Checkingthe Oil Level
Some engines will have a quarter-turn oil fill/dipstick cap, others
may have a threaded oil fill/dipstick cap. Follow the instructions
next that apply to your engine model.
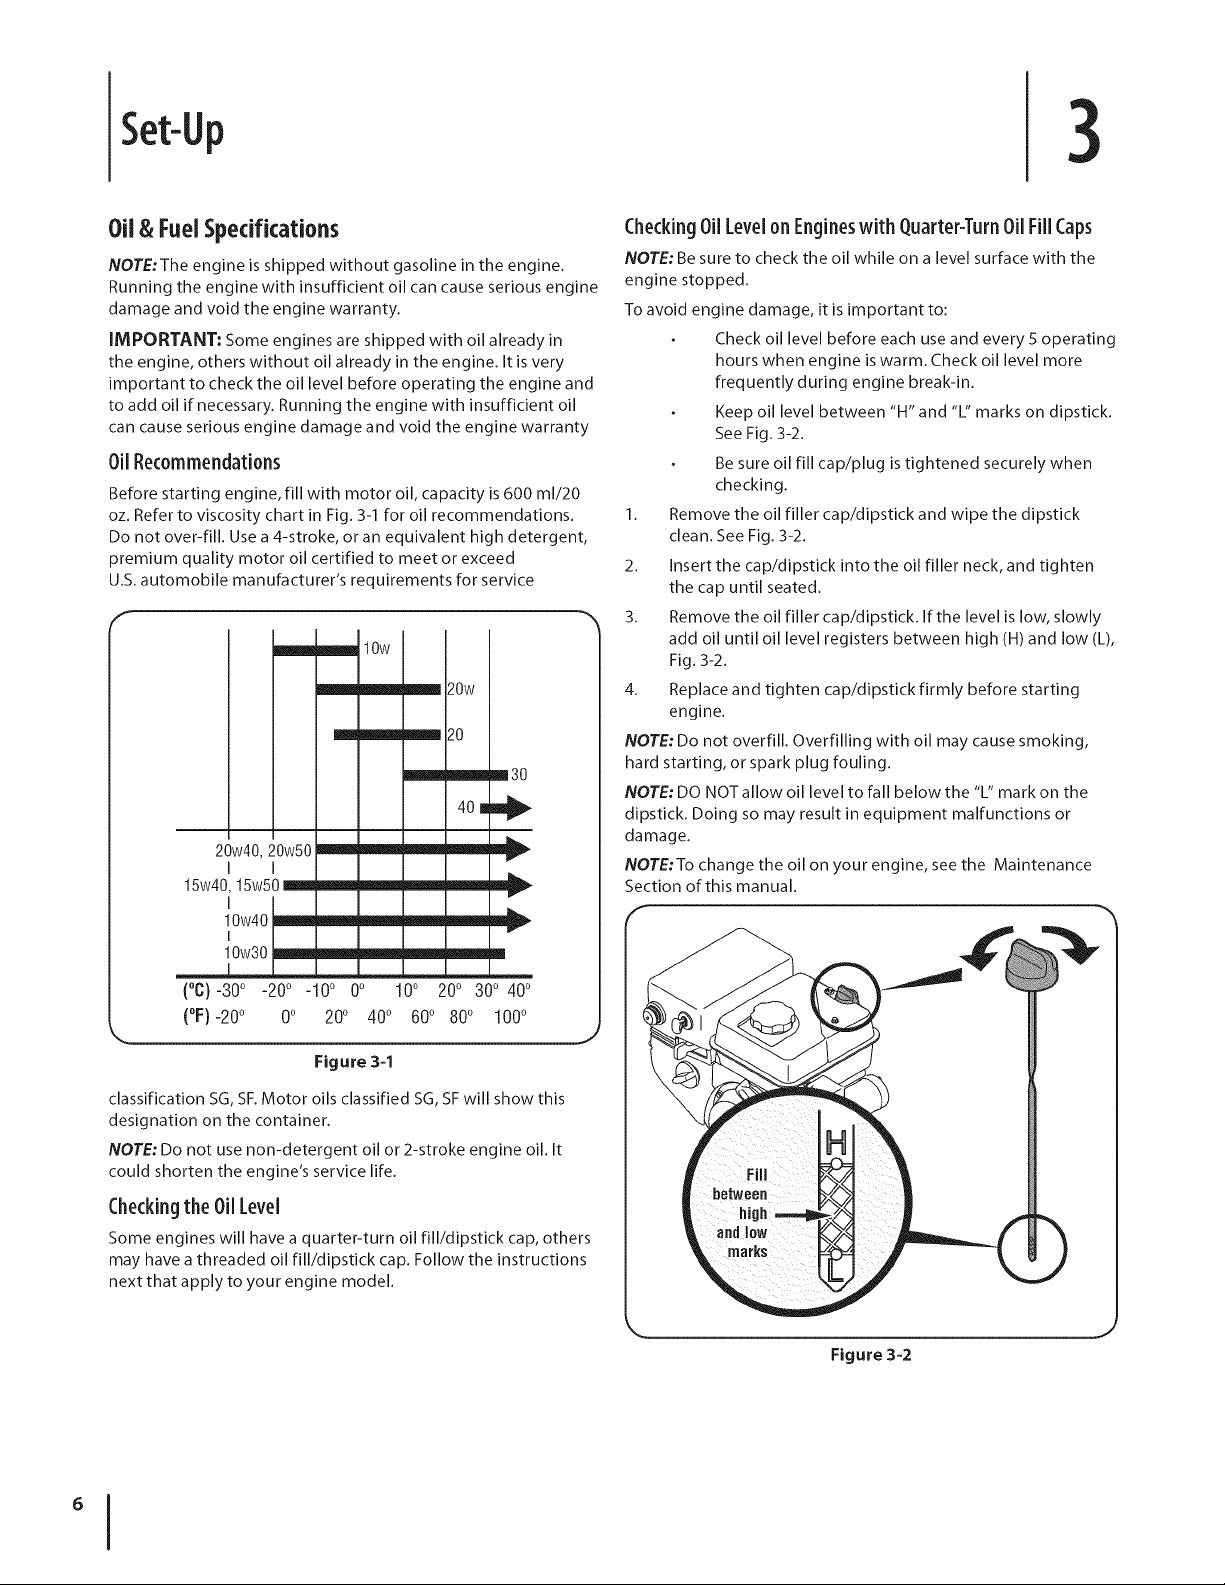
CheckingOil Levelon Engineswith Quarter-TurnOil FillCaps
NOTE: Be sure to check the oil while on a level surface with the
engine stopped.
To avoid engine damage, it is important to:
Check oil level before each use and every 5 operating
hours when engine is warm. Check oil level more
frequently during engine break-in.
Keep oil level between "H" and "L" marks on dipstick.
See Fig. 3-2.
Be sure oil fill cap/plug is tightened securely when
checking.
I. Remove the oil filler cap/dipstick and wipe the dipstick
clean. See Fig. 3-2.
2. Insert the cap/dipstick into the oil filler neck, and tighten
the cap until seated.
3. Remove the oil filler cap/dipstick. If the level is low, slowly
add oil until oil level registers between high (H) and low (L),
Fig. 3-2.
4. Replace and tighten cap/dipstick firmly before starting
engine.
NOTE: Do not overfill. Overfilling with oil may cause smoking,
hard starting, or spark plug fouling.
NOTE: DO NOT allow oil level to fall below the "L" mark on the
dipstick. Doing so may result in equipment malfunctions or
damage.
NOTE:To change the oil on your engine, see the Maintenance
Section of this manual.
f
Figure 3-2
Loading ...
Loading ...
Loading ...