Loading ...
Loading ...
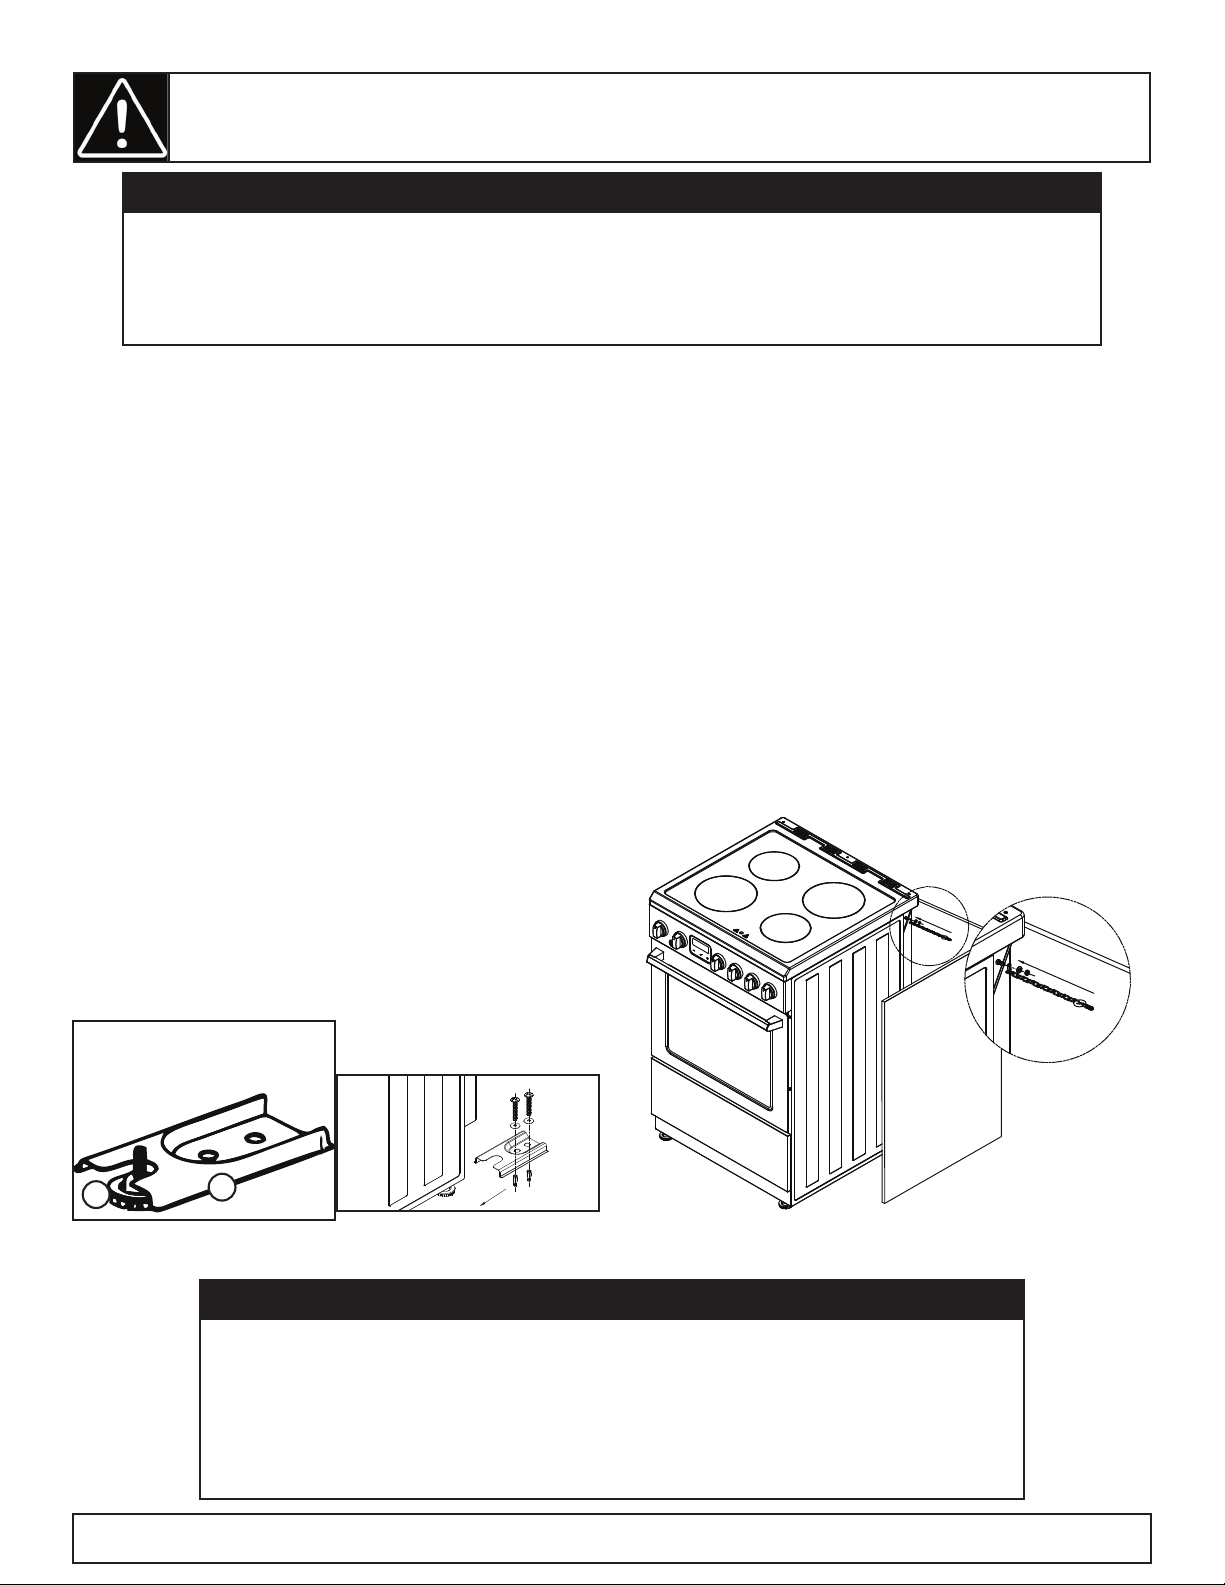
BRACKET
The anti-tip bracket can be installed on either the
left or the right rear leg by following the instructions
below.
1. Place the anti-tip bracket on the fl oor where the
range will be installed.
2. Mark the locations of the two holes in the anti-tip
bracket.
3. Use a 5/16” drill bit to drill a hole in the fl oor
and insert the provided plastic anchor.
4. Secure the bracket to the fl oor using the
provided screws.
5. Slide the range into position, ensuring that the
anti-tip bracket is positioned over the rear foot
of the appliance as per the below images.
1
2
WARNING - TIP OVER HAZARD
• A child or adult can tip the appliance and be killed.
• Verify the anti-tip bracket has been properly installed to the fl oor.
• Ensure the anti-tip bracket is re-engaged when the range is moved.
• Do not operate the range without the anti-tip bracket in place and engaged.
• Failure to follow these instructions can result in death or serious burns to children or adults.
1. Foot
2. Anti-tip bracket
ANTI-TIP DEVICE
To reduce the risk of the range tipping by abnormal usage or improper door loading, the range must
be secured by installing an anti-tip device. There are two difference anti-tip devices included with this
appliance.
Note: If the range is ever relocated the anti-tip bracket must be removed and installed at the new location.
CHAIN
There are two anti-tip chains that should be installed
on both sides of the appliance.
1. Screw the chains into the walls on either side of
where the appliance will be located.
2. Attach the other ends of the chains to the sides
of the appliance using a screw and locking nut.
WARNING
SUFFOCATION AND RISK OF CHILD ENTRAPMENT
To avoid the possibility of child entrapment please take the following
precautions before throwing out the appliance:
• Remove the oven door completely
• Never allow children to operate, play with or crawl inside the electric range
Important Safety Information
READ AND FOLLOW ALL SAFETY INSTRUCTIONS
SAVE THESE INSTRUCTIONS!
Loading ...
Loading ...
Loading ...