Loading ...
Loading ...
3
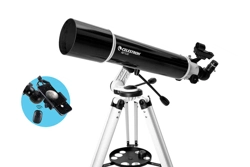
The AZ mount and tripod come fully assembled, so setting
it up is easy.
1. Remove the tripod and mount from the box.
2. Loosen the hand knobs at the bottom of each leg and
extend the inner section of the leg to the desired length.
Tighten the knobs to secure the legs, being careful not
to over tighten.
3. Stand the tripod upright and pull the tripod legs apart
until the center brace snaps into place.
4. Place the accessory tray on top of the center brace and
line up the threaded post on the bottom of the tray with
the hole in the top of the center leg brace. Rotate the
tray clockwise unitl it is secure.
5. Make sure the leg hinge bolts are secure by snugging
down the black thumbnuts at the top of each leg.
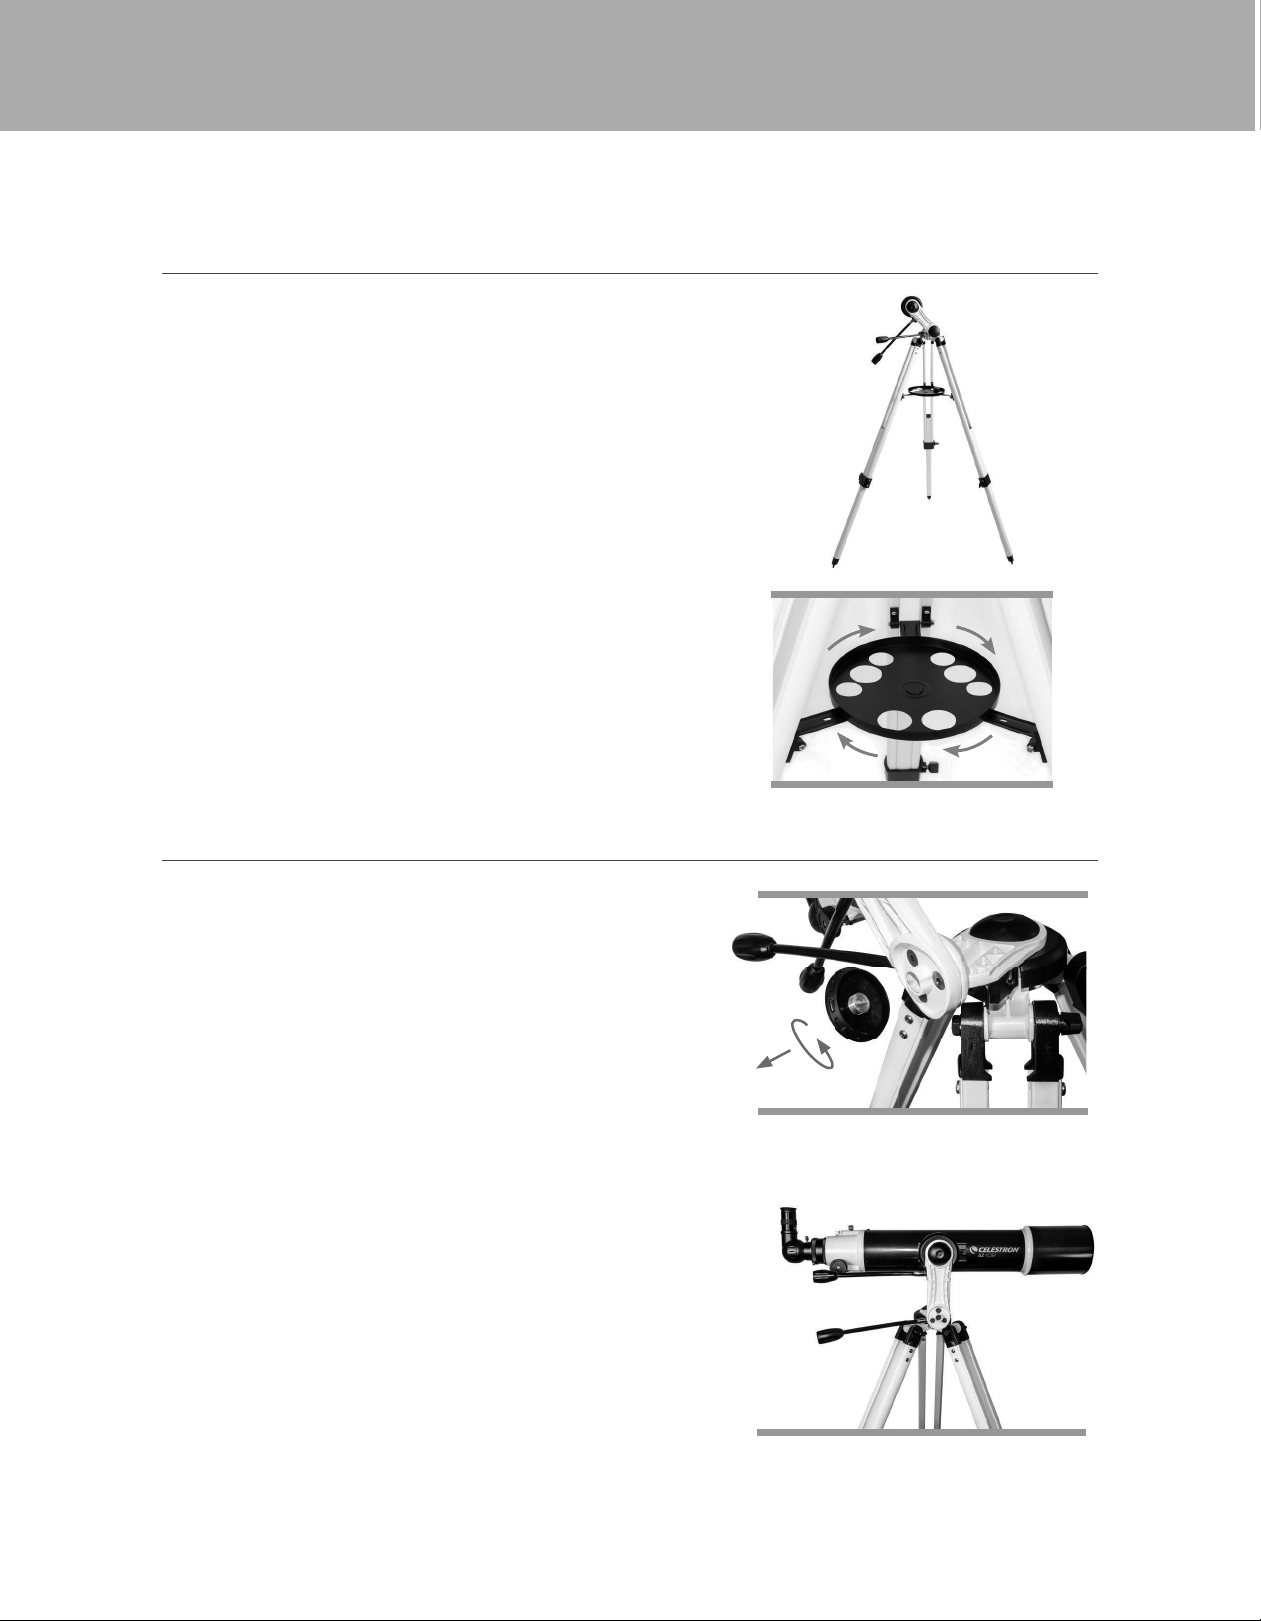
Depending on your specifi c use of the telescope, you may
wish to change the angle of the mount arm to give you
additional range of motion. The mount comes set up for
the astronomical use; it can move upward but is limited
in its downward motion. If you are using the mount for
terrestrial observation from an elevated location (cliff top,
balcony, etc.) and you want to point the scope well below
the horizon, you will need to change the angle of the mount
arm to accommodate this.
To make this adjustment:
1. Unthread the round cover on the bottom of the vertical
arm of the mount.
2. Using a 4mm hex-key wrench (user supplied), remove the
three screws under the cover.
3. Rotate the mount arm so that it is pointed straight up and
thread the three screws back in.
4. Tighten the screws and replace the round cover.
ASSEMBLING YOUR TELESCOPE
ADJUSTING THE ANGLE OF THE MOUNT ARM
THE MOUNT
Loading ...
Loading ...
Loading ...