Loading ...
Loading ...
Loading ...
www.costway.com
F
IN
A
L
ASS
E
M
BL
Y
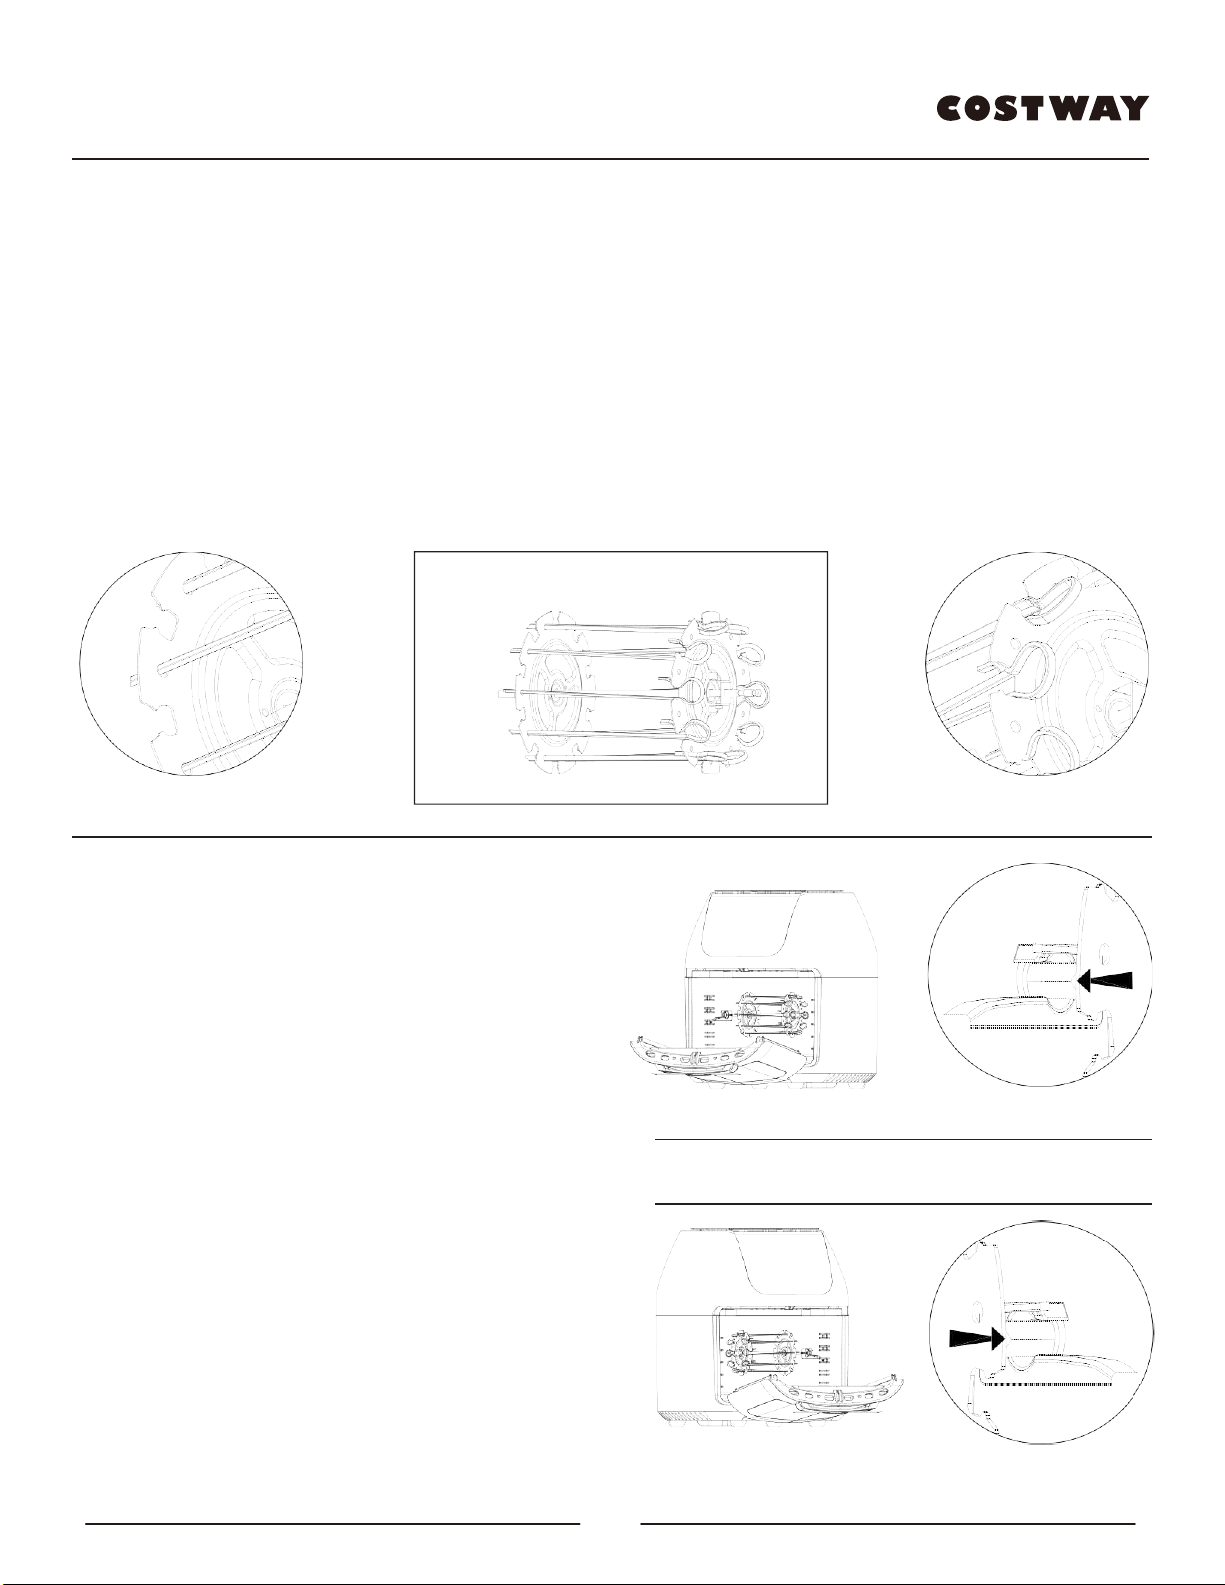
UsingtheAccessories
RotisserieSpitAssembly
1. Insert each Skewer point through holes on the left
Skewer Rack (fig. C).
2. Squeeze the clip-end of each Skewer as you insert
into the opposite Skewer Rack slot to secure.
3. Release clip to securely rest in slot as shown
(fig. D).
4. Repeat process 3 through 6 in a uniform manner
around the Skewer Rack. Make sure Skewers
are evenly spaced.
5. Tighten the Set Screws to make sure they
are securely in place.
6. Use caution while inserting the Spit into the Un
it
to prevent getting poked by the Skewer ends.
FIG. C - LEFT SIDE FIG. D - RIGHT SIDE
Place Rotisserie Spit or
Rotating Mesh Basket into Unit
1. Insert the left side of the assembled Spit or Basket first
into the Rotisserie Shaft socket. Be sure the Rotisserie
Shaft is in place to engage rotation (fig. E).
2. Place the right side onto the hanger (fig. F).
FIG. E - LEFT SIDE
RemoveRotisserieSpit
or Rotating Basket from Unit
IMPORTANT:See the Final Assembly diagram (page 8) to help identify
the left and right sides of the Rotisserie Shaft before placing it in
the Unit. The right side has two notches, and the left has one.
1. Open Unit door to pause cooking cycle or turn Unit off
by pressing the Power Button.
2. Insert Rotisserie Fetch tool beneath the Rotisserie Shaft.
3. Lift the right side of the Rotisserie Fetch tool at a slight
angle to clear the bracket, then shift to the rightuntil
the left side of the Shaft slides out of the Rotisserie
Shaft socket.
4. Carefully remove the rotisserie food from the oven.
FIG. E - RIGHT SIDE
8
Loading ...
Loading ...
Loading ...