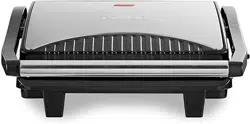
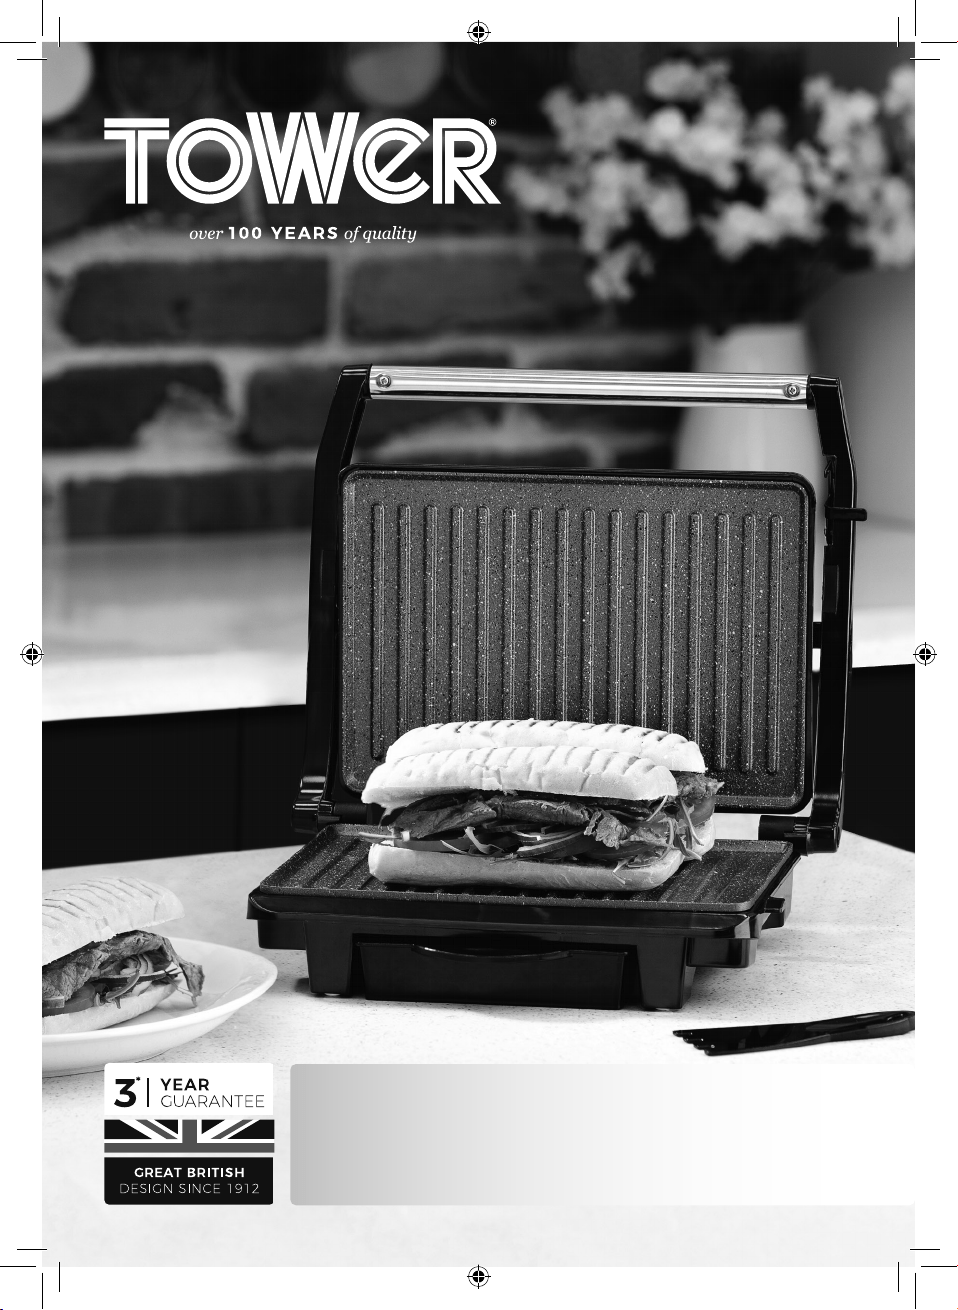
T27009 / T27009COP
Ceramic Health Grill & Panini Press
SAFETY AND INSTRUCTION MANUAL
PLEASE READ CAREFULLY
*Subject to registering your Extended Guarantee online at www.towerhousewares.co.uk.

2
GREAT BRITISH DESIGN, INNOVATION
AND EXCELLENCE SINCE 1912
Since the turn of the 20th century, Tower has been designing,
developing and manufacturing housewares and small
appliances used by millions of households throughout the
UK and beyond. During the 1960s, the rise in popularity
of pressure cooking saw Tower become the UK’s largest
producer of pressure cookers, right through into the late
1980s. In recent years the Tower brand has been reborn with
an exciting and varied range of housewares and electrical
appliances that have quickly reinstated the brand’s richly
deserved status as a household name.
Visit
www.towerhousewares.co.uk
for more fantastic products.

3
Contents:
Thank you for purchasing this appliance from the
Tower range.
Please read this manual carefully BEFORE using the
appliance for your own safety.
It has been designed to provide many years of
trouble-free use.
There are many benefits to using the Tower Ceramic
Health Grill & Panini Press:
• Perfect for deli style Panini’s at home, grilled meat
and vegetables.
• Grease release ledge and drip tray for healthier
grilling.
• Perfect for all breads including Ciabatta and
Focaccia
• Hinged top plate for variable heights
• A cool touch stainless steel handle and non-slip
feet make the Ceramic Health Grill & Panini Press
easy and safe to use
• Simple to use controls allow you to grill quickly
and eciently.
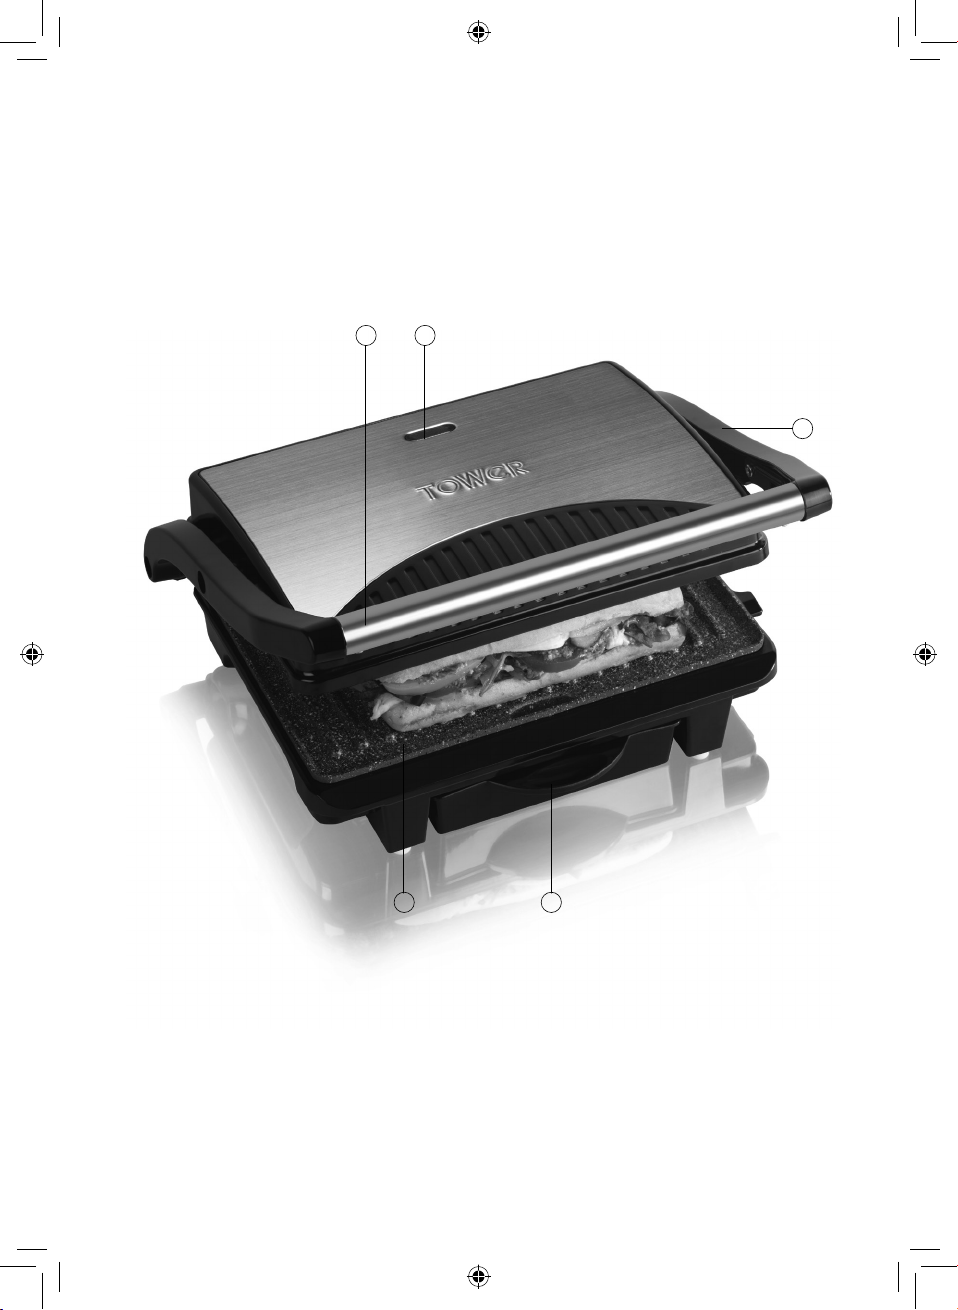
1. Specifications
Components and
structure
2. Technical Data
3. Important Safety
Information
4. Before First Use
5. Using your Appliance
6. Troubleshooting
7. Recycling
8. Cleaning & Care
9. Wiring Safety
10. Warranty Information
11. Weights and Measures
12. Recipes
See back page for Customer
Service Information.
4
This box contains:
Instruction Manual
Ceramic Health Grill & Panini Press
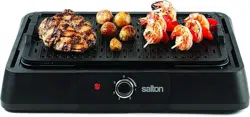
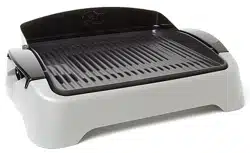
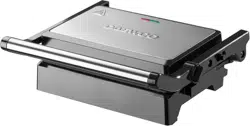
1. Handle
2. Power indicator light
3. Clasp to lock shut
4. Removable Drip Tray
5. Bottom Grill Plate
1 - Specifications:
Structure of your appliance:
1 2
5 4
3

5
Description: Ceramic Health Grill & Panini Press
Model: T27009 / T27009COP
Rated Voltage: 220V-240V ~ 50/60Hz
Power Consumption: 1000 Watts
Documentation
We declare that this product conforms to the following product legislation in
accordance with the following directive(s):
2014/30/EU Electromagnetic Compatibility Directive.
2014/35/EU Low Voltage Directive.
2011/65/EU Restriction of Hazardous Substances Directive.
1935/2004/EC Materials & Articles in Contact With Food
(LFGB section 30 & 31).
RK Wholesale LTD Quality Assurance, United Kingdom.
2 - Technical Data:
Should you encounter problems or require a replacement part, contact the Tower
Customer Support Team: +44 (0) 333 220 6066.
Some spare parts may be ordered from the Tower website.
Your warranty becomes void should you decide to use non Tower spare parts.
Spare parts can be purchased from www.towerhousewares.co.uk
Guarantee for spare parts:
The spares and accessories are guaranteed for 1 year from date of purchase.
The main body and housing are guaranteed for the extended free warranty subject
to registration.
If any defect arises due to faulty materials of workmanship, the faulty products must
be returned to the place of purchase within 12 months from the date of purchase.
Refund or replacement is at the discretion of the retailer.

6
• Check that the voltage
of the main circuit
corresponds with the rating
of the appliance before
operating.
• If the supply cord or
appliance is damaged,
stop using the appliance
immediately and
seek advice from the
manufacturer, its service
agent or a similarly qualified
person.
• WARNING! DO NOT let the
cord hang over the edge of
a table or counter, serious
burns may result from the
Grill being pulled off the
counter where it may be
grabbed by children or
become entangled with the
user.
• DO NOT carry the appliance
by the power cord.
• The use of accessory
attachments is not
recommended by the
appliance manufacturer
apart from those supplied
with this product. DO NOT
use extension cords with
the appliance.
• DO NOT pull the plug out
by the cord as this may
damage the plug and/or the
cable.
• Switch off at the wall socket
then remove the plug from
the socket when not in use
or before cleaning.
• Switch off and unplug
before fitting or removing
tools/attachments, after use
and before cleaning.
• Close supervision is
necessary when any
appliance is used by or near
children.
• Children should not play
with the appliance.
• This appliance can be
used by children aged
from 8 years and above
and persons with reduced
physical, sensory or mental
capabilities or lack of
experience and knowledge
if they have been given
supervision or instruction
concerning use of the
appliance in a safe way and
understand the hazards
involved.
• Cleaning and user
maintenance should not
be undertaken by children
without supervision.
Please read these notes carefully
BEFORE using your
Tower appliance
3 -
Important Safety Information:

7
• Take care when any
appliance is used near pets.
• DO NOT use this product
for anything other than its
intended use.
• This appliance is for
household use only.
• This appliance includes a
heating function.
• Please ensure that the
appliance is used on a
stable, level, and heat
resistant surface.
• DO NOT immerse cords,
plugs or any part of the
appliance in water or any
other liquid.
• DO NOT use the appliance
outdoors.
• DO NOT place the Grill on or
near combustible materials
such as a tablecloth or
curtain.
• DO NOT place the Grill
against a wall or against
other appliances. Leave at
least 10cm free space on
the back and sides and
10cm free space above the
appliance.
• Allow the Grill cool down
before you handle or clean
it.
• Remove burnt remnants.
• Keep your hands and face
at a safe distance from the
appliance.
• DO NOT place anything on
top of the Grill.
• DO NOT touch the non-stick
plate while cooking is in
progress.
• DO NOT use metal scouring
in cleaning the unit.
• CAUTION! Never leave the
unit unattended while
cooking.
• WARNING! Extreme caution
must be taken in moving an
appliance containing hot oil
or liquids.
• In the unlikely event the
appliance develops a fault,
stop using it immediately
and seek advice from the
Customer Support Team:
+44 (0) 333 220 6066

8
1. Place your Ceramic Health Grill & Panini Press on a clean, flat surface.
2. Connect the appliance to the electrical supply. Make sure that the plug is
connected properly. The indicator light will illuminate, indicating that the
Ceramic Health Grill & Panini Press has begun heating.
3. When the Ceramic Health Grill & Panini Press has reached the correct
temperature for cooking, the indicator light will go off. It will take
approximately 5 minutes to preheat. During this time, prepare the foods to be
cooked.
4. Open the Ceramic Health Grill & Panini Press and place your food on the
bottom cooking plate.
5. Close the Ceramic Health Grill & Panini Press. The top cooking plate has a
floating hinge that is designed to evenly press down on food. The top plate
must be fully lowered to achieve grill marks on the selected foods. The ready
indicator light will come on again.
6. Grilling times will depend on the food being cooked. Refer to Grilling Guide or
Grilling Tips.
7. When the food is grilled, use the handle to open the grill and raise the top
cooking plate. Remove food with the help of a heat resistant spatula. Never use
metal tongs or a knife as these can cause damage to the non-stick coating.
Note: Unplug the appliance when not in use.
Grilling Guide:
Contact grilling is a healthy and ecient way to cook. The cooking times are
approximate due to variances in ingredient thickness. It is not recommended to
cook items with thick bones such as T-bone steaks.
Ingredients Type Cooking time
Beef
Sirloin steak
3 minutes for medium rare,
5–6 minutes for well done
Minute steak 1–2 minutes
Hamburger patties 4–6 minutes
Scotch fillet 4–6 minutes
Pork
Rib eye steak 4–6 minutes
Loin steaks 4–6 minutes
Fillet 4–6 minutes
1. Remove the parts from the packaging.
2. Prior to initial use, wash grill surface in warm soapy water and dry thoroughly.
3. Your appliance is now ready for normal use.
4. Dispose of the packaging in a responsible manner
4 - Before First Use
5 - Using Your Appliance

9
Ingredients Type Cooking time
Lamb
Loin 3 minutes
Cutlets 4 minutes
Leg steaks 4 minutes
Chicken
Breast fillets 6 minutes or until cooked through
Thigh fillets 4–5 minutes or until cooked through
Sausages
Thin 3–4 minutes
Thick 6–7 minutes
Panini
sandwich
or focaccia
5–8 minutes or until golden brown
Vegetables
sliced ¼”
thick
Eggplant 3–5 minutes
Courgette 3–5 minutes
Sweet potato 3–5 minutes
Seafood
Fish fillets 2–4 minutes
Fish cutlets 3–5 minutes
Octopus (cleaned) 3 minutes
Shrimp 2 minutes
Scallops 1 minute
Grilling Tips:
There is an art to determining when your steak, lamb chop or cutlet is cooked to
the correct degree of doneness - rare, medium rare, medium, medium well or well
done - but it is easily mastered with these handy hints and tips.
Rare:
Cook for a few minutes per side, depending on thickness. Turn once only. Cook until
steak feels very soft with back of tongs. A meat thermometer will show the internal
temperature of a rare steak as 55-60°C / 130-140°F.
Medium Rare:
Cook on one side until moisture is just visible on top surface. Turn once only. Cook
on the other side until surface moisture is visible. Steak will be cooked to medium
rare when it feels soft with back of tongs. A meat thermometer will show the
internal temperature of a medium rare steak as 60-65°C / 140-150°F.
Medium:
Cook on one side until moisture is pooling on top surface. Turn once only. Cook
on second side until moisture is visible. Steak will be cooked to medium when
it feels springy with back of tongs. A meat thermometer will show the internal
temperature of a medium steak as 65-70°C / 150-160°F.

10
Medium Well:
Cook on one side until moisture is pooling on top surface. Turn and cook on
second side until moisture is pooling on top. Reduce heat slightly and continue to
cook until steak feels firm with back of tongs. A meat thermometer will show the
internal temperature of a medium well steak as 70-75°C / 160-170°F.
Well Done:
Cook on one side until moisture is pooling on top surface. Turn and cook on second
side until moisture is pooling on top. Reduce heat slightly and continue to cook
until steak feels very firm with back of tongs. A meat thermometer will show the
internal temperature of a well done steak as 75°C / 170°F.
Hints for Best Results for Toasting Sandwiches:
Bread:
The grill is ideal for toasting most types of bread (white, wholemeal, kibbled wheat,
wholegrain etc), as well as artisan breads (Focaccia, Turkish bread, baguettes, bread
rolls etc).
Raisin bread, brioche or other sweet breads which contain high sugar content will
tend to brown quicker.
Fillings:
Try to use canned or pre-cooked fruit as fresh fruit may give off excessive juices
when heated.
Be careful when biting into Paninis and sandwiches containing fillings such as
cheese and tomato or jam as they retain heat and can burn if eaten too quickly.
Toasting Bread:
The grill is ideal for toasting plain breads and Turkish bread, without any fillings or
spreads. Try toasting Turkish bread with jams for a great alternative to standard
breads at breakfast.
Fat Free Snacks:
Due to the non-stick cooking plates, it is not necessary to use any butter or
margarine on the outside of your toasted snacks.
11
6 - Troubleshooting
Questions Answers
What do I do if food
gets stuck to the
cooking plates?
If food gets stuck to the cooking plates do not use metal utensils, as
this can damage the non-stick cooking surface. Gently remove the
food using wooden or heat resistant utensils instead.
Does it need
preheating?
Yes. Always preheat the Grill for best results. Preheat with the lid
closed for approximately 5 minutes.
Do I need to use oil
when cooking?
Some non-fatty meats and veg may require the addition of a small
amount of oil to assist the non-stick surface.
Why are my sand-
wich fillings spilling
over during cooking?
You may have added too many fillings to your sandwiches. Ensure
that no fillings are ‘overflowing’ when you add the sandwich to the
Grill. Fillings such as cheese and jam reach very high temperatures
when heated and can spill over.
Does the indicator
light show when my
food is done?
No. The indicator light only indicates that the appliance is turned
on whilst plugged into the mains. Ensure you do not leave the Grill
unattended during use.
My frozen chick-
en breasts are still
pink inside but look
cooked outside.
To make sure that meats and poultry are safely cooked through, be
sure to thaw them before grilling.
Do I need to place
my food in the mid-
dle of the grill for it
to cook?
No, the grill plate is heated consistently along its length, so you
don’t need to worry about some food getting more heat than
others.
DISPOSAL OF THE UNIT
Appliances bearing the symbol shown here may not be disposed of in domestic
rubbish. You are required to dispose of old electrical and electronic appliances like
this separately.
Please visit www.recycle-more.co.uk or www.recyclenow.co.uk for access to
information about the recycling of electrical items.
Please visit www.weeeireland.ie for access to information about the recycling of
electrical items purchased in Ireland.
The WEEE directive, introduced in August 2006, states that all electrical items must
be recycled, rather than taken to landfill.
Please arrange to take this appliance to your local Civic Amenity site
for recycling, once it has reached the end of its life.
7 - Recycling

12
8 - Cleaning & Care
1. Before cleaning, switch the product off and remove the power plug from the
power outlet.
2. Allow your Health Grill & Griddle to cool before cleaning. It is easier to clean
when slightly warm.
3. Always clean your Health Grill & Griddle after each use to prevent a build-up of
baked-on foods.
4. Wipe cooking plates with a soft cloth to remove food residue.
5. For baked on food residue squeeze some warm water mixed with detergent
over the food residue then clean with a non-abrasive plastic scouring pad.
Cleaning the Drip Tray:
Remove and empty the drip tray after each use and wash the tray in warm, soapy
water.
Avoid the use of scouring pads or harsh detergents as they may damage the
surface. Rinse and dry thoroughly with a clean, soft cloth and replace. Alternatively
the drip tray can be cleaned in the dishwasher (top shelf recommended).
IMPORTANT:
Allow to dry fully after cleaning before using again.
Do not use the appliance if damp. Ensure the appliance is completely clean and
dry before storing.
Durable Non-stick Coating:
Cooking on a non-stick surface minimizes the need for oil, food does not stick and
cleaning is easier. Any discolouration that may occur will only detract from the
appearance of the grill and will not affect the cooking performance. When cleaning
the non-stick coating, do not use metal (or other abrasive) scourers. Wash with
warm soapy water.
Remove stubborn residue with a non-abrasive plastic scouring pad or nylon
washing brush.
Storage:
To store your appliance:
1. Unplug power cord from the power outlet.
2. Allow the grill to fully cool.
3. Close the Mini Panini Grill so that the top and bottom cooking plates are
together and push down the locking mechanism at the side of the grill to lock
together.
4. Wrap the power cord in the cord storage area below the grill.
5. Store on a flat, dry level surface.

13
9 - Wiring Safety for UK Use Only
IMPORTANT
As the colours in the mains lead of this
appliance may not correspond with the
coloured markings identifying the terminals
in your plug, please proceed as follows:
The wires in the mains lead are labelled in
accordance with the following code:
Blue neutral [N] Brown live [L]
Green/Yellow [EARTH]
Plug Fitting Details (Where Applicable).
The wire labelled blue is the neutral and
must be connected to the terminal marked
[N].
The wire labelled brown is the live wire and
must be connected to the terminal marked
[L].
The wire labelled green/yellow must be
connected to the terminal marked with the
letter [E].
On no account must either the brown or
the blue wire be connected to the [EARTH]
terminal.
Always ensure that the cord grip is fastened
correctly.
The plug must be tted with a fuse of the
same rating already tted and conforming to
BS 1362 and be ASTA approved.
If in doubt consult a qualied electrician who
will be pleased to do this for you.
Non-Rewireable Mains Plug
If your appliance is supplied with a non-
rewireable plug tted to the mains lead and
should the fuse need replacing, you must
use an ASTA approved one (conforming to
BS 1362 of the same rating).
If in doubt, consult a qualied electrician
who will be pleased to do this for you.
If you need to remove the plug - disconnect
it from the mains - then cut it off of the mains
lead and immediately dispose of it in a safe
manner. Never attempt to reuse the plug
or insert it into a socket outlet as there is a
danger of an electric shock.
FUSE
Earth
(Green/Yellow)
Fuse
Neutral
(Blue)
Live
(Brown)
WARNING:
This appliance MUST be earthed!

14
This product is guaranteed for 12 months
from the date of original purchase.
If any defect arises due to faulty materials
of workmanship, the faulty products must
be returned to the place of purchase.
Refund or replacement is at the discretion
of the retailer.
The Following Conditions Apply:
• The product must be returned to the
retailer with proof of purchase or a
receipt.
• The product must be installed and
used in accordance with the
instructions contained in this
instruction guide.
• It must be used only for domestic
purposes.
• It does not cover wear and tear,
damage, misuse or consumable parts.
• Tower has limited liability for incidental
or consequential loss or damage.
This guarantee is valid in the UK and Eire
only.
The standard one year guarantee is only
extended to the maximum available for
each particular product upon registration
of the product within 28 days of purchase.
If you do not register the product with us
within the 28 day period, your product is
guaranteed for 1 year only.
To validate your extended warranty, please
visit www.towerhousewares.co.uk and
register with us online.
Please note that length of extended
warranty offered is dependent on product
type and that each qualifying product
needs to be registered individually in order
to extend its warranty past the standard
1 year.
Extended warranty is only valid with proof
of purchase or receipt.
As a thank you for purchasing
one of our fantastic products,
we are offering you an extra
2 years peace of mind in
addition to your 1 year
guarantee.
To receive your extra 2 year
guarantee, register your
appliance online within 28
days of purchase by visiting
www.towerhousewares.co.uk
10 - Warranty

15
Check these charts for basic imperial to metric
conversions of weights.
Food Allergies
Important Note: Some of the recipes contained in this document may
contain nuts and/or other allergens. Please be careful when making any of our
sample recipes that you ARE NOT allergic to any of the ingredients. For more
information on allergies, please visit the Food Standards Agency’s website at:
www.food.gov.uk
11 - Weights & Measures
Metric Imperial US cups
250ml 8 floz 1 cup
180ml 6 fl oz 3/4 cup
150ml 5 floz 2/3 cup
120ml 4 floz 1/2 cup
75ml 2 1/2 floz 1/3 cup
60ml 2 floz 1/4 cup
30ml 1 floz 1/8 cup
15ml 1/2 floz 1 tablespoon
Imperial Metric
1/2 oz 15g
1 oz 30g
2 oz 60g
3 oz 90g
4 oz 110g
5 oz 140g
6 oz 170g
7 oz 200g
8 oz 225g
9 oz 255g
10 oz 280g
11 oz 310g
12 oz 340g
13 oz 370g
14 oz 400g
15 oz 425g
1 lb 450g
16
NOTES

17
NOTES
18
For more great recipes and inspiration from the
Tower Kitchen, visit
www.towerhousewares.co.uk/blog
Recipes
Recipes for use with the T27009 / T27009COP
Ceramic Health Grill & Panini Press.

19
Cooking with your Grill.
Fillings:
Savoury:
• Ham, Cheese and Tomato
• Tuna Melt - Tuna, Mayonnaise and Cheese
• Roast Pork and Apple Sauce
• Turkey, Stung and Cranberry
• Cheese, Beans and Sausage
• BLT - Bacon, Lettuce and Tomato
• Brie, Cranberry Sauce and Rocket
Sweet:
• Chocolate Spread and Banana
• Toffee and Apple
• Cherry Pie Filling
• Apple and Blackcurrant
• Apple and Sultanas

20
Ingredients
2 panini rolls, cut in half
horizontally
2 red bell peppers, sliced
1 medium red onion, thinly
sliced
Tomato, thinly sliced
Mozzarella, sliced
Pesto
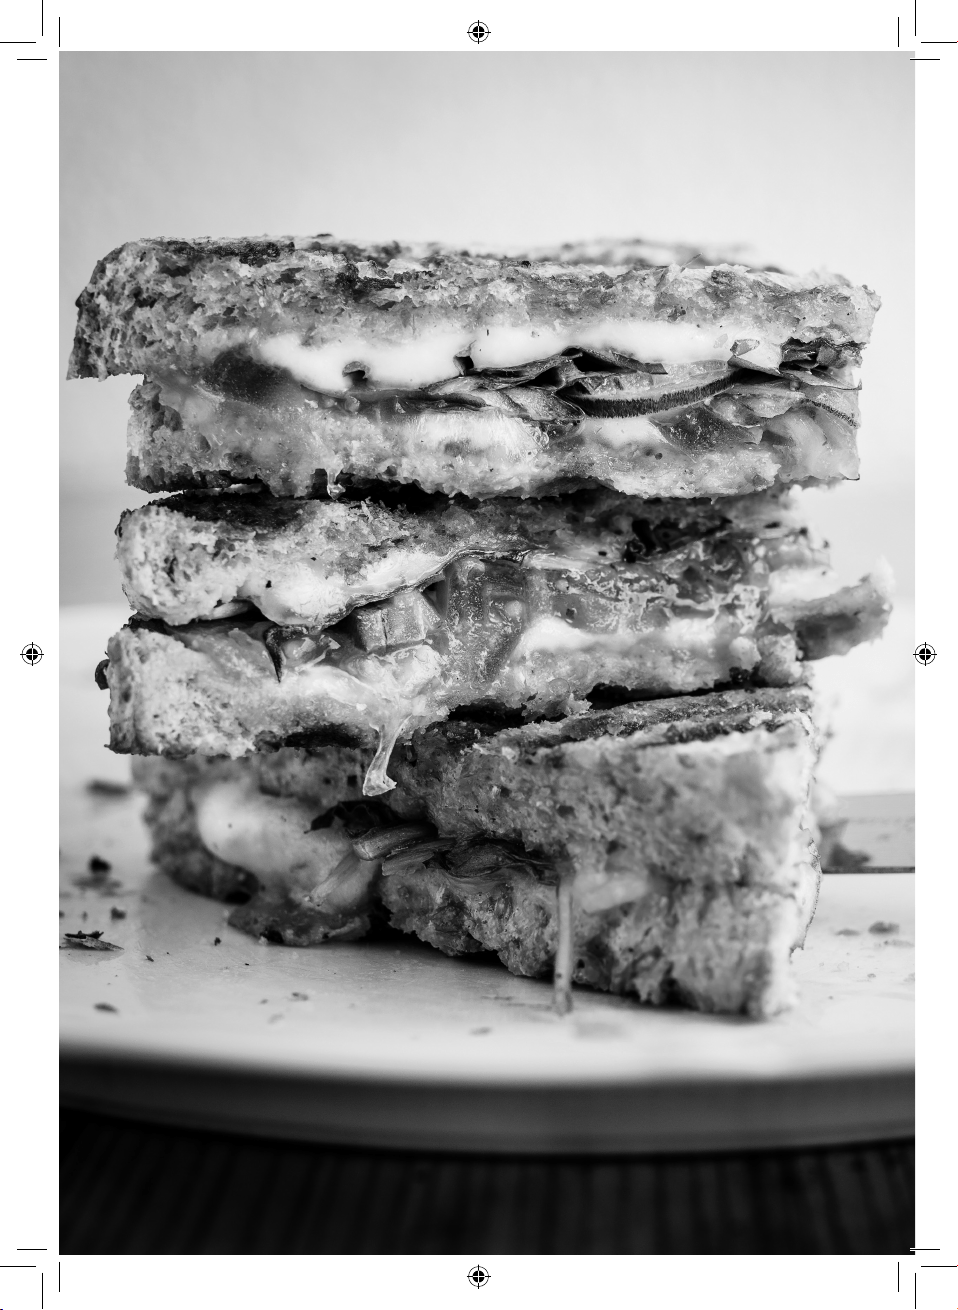
Grilled Vegetable Panini
Method
1. Assemble your Grill to use as an open grill.
2. Brush the slices of courgette, and bell pepper with olive
oil.
3. Grill on your Grill. See the grilling guide for recommended
times.
4. Whilst the vegetables are on the grill, spread pesto on
one cut side of each roll.
5. Remove the vegetables when lightly charred.
6. Close the Grill and preheat.
7. Top the slices with the vegetables and a few slices of
mozzarella on each.
8. Top with the remaining bread.
9. Grill for 4 – 8 minutes until the bread is golden brown
and the cheese is melted.
10. Cut in half and serve.
21

22
Ingredients
4 slices bread
1 pear, sliced
6 slices brie
4-6 slices cooked bacon
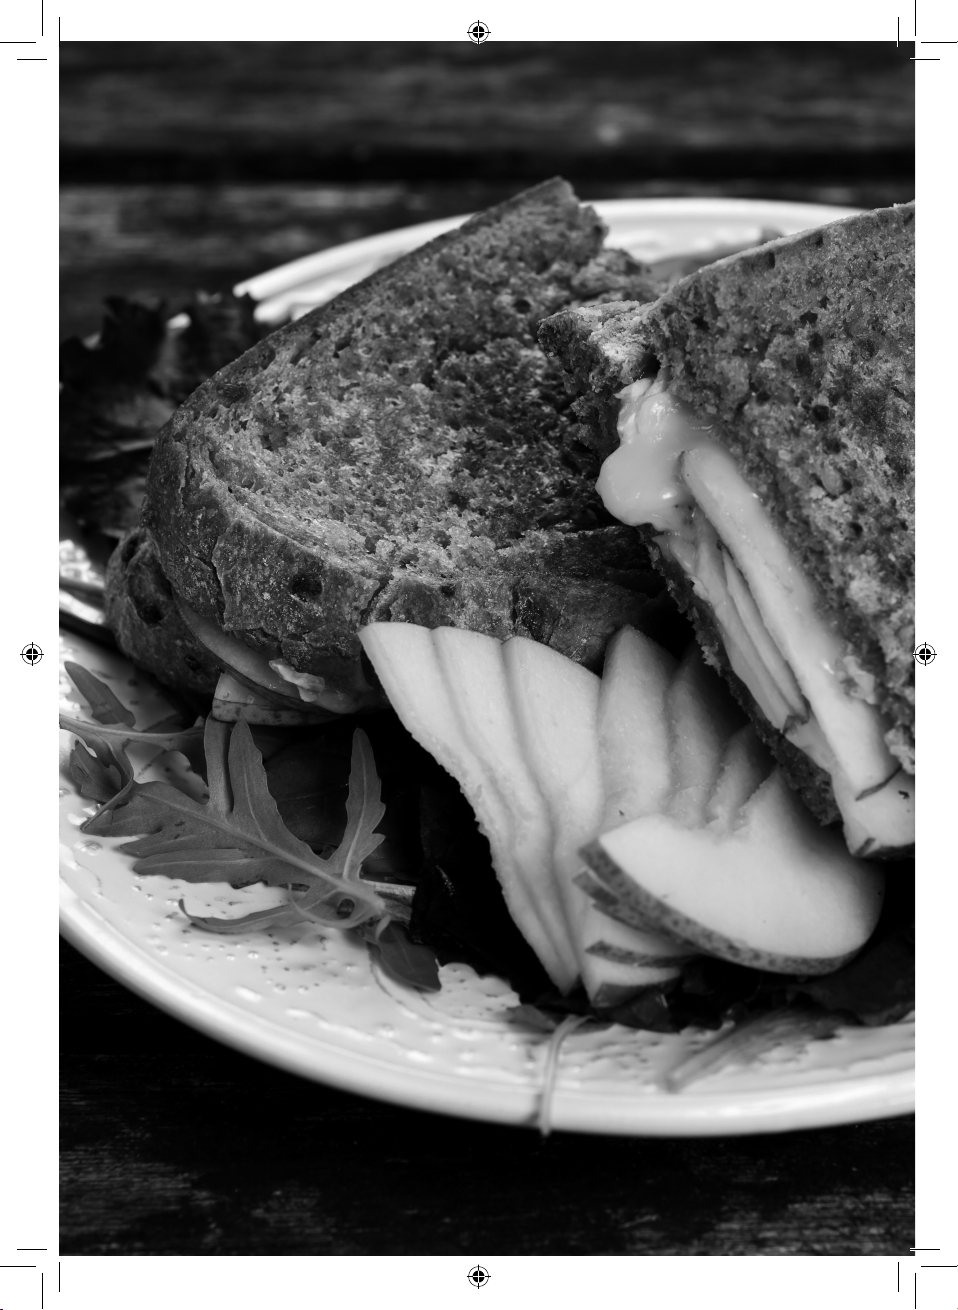
Bacon, Pear and Brie Panini
Method
1. Grill or fry the bacon to your desired doneness and set
aside,
2. Preheat the Grill.
3. Cut the pear into thin slices and place on the Grill. Cook
on each side for around 1 minute.
4. Remove pear slices and set aside.
5. Butter the bread and add the cooked pear, 2-3 strips
of cooked bacon and some slices of brie to make a
sandwich.
6. Place the sandwich on the Grill and grill until the bread
is golden brown and the brie is melted.
23

24
Ingredients
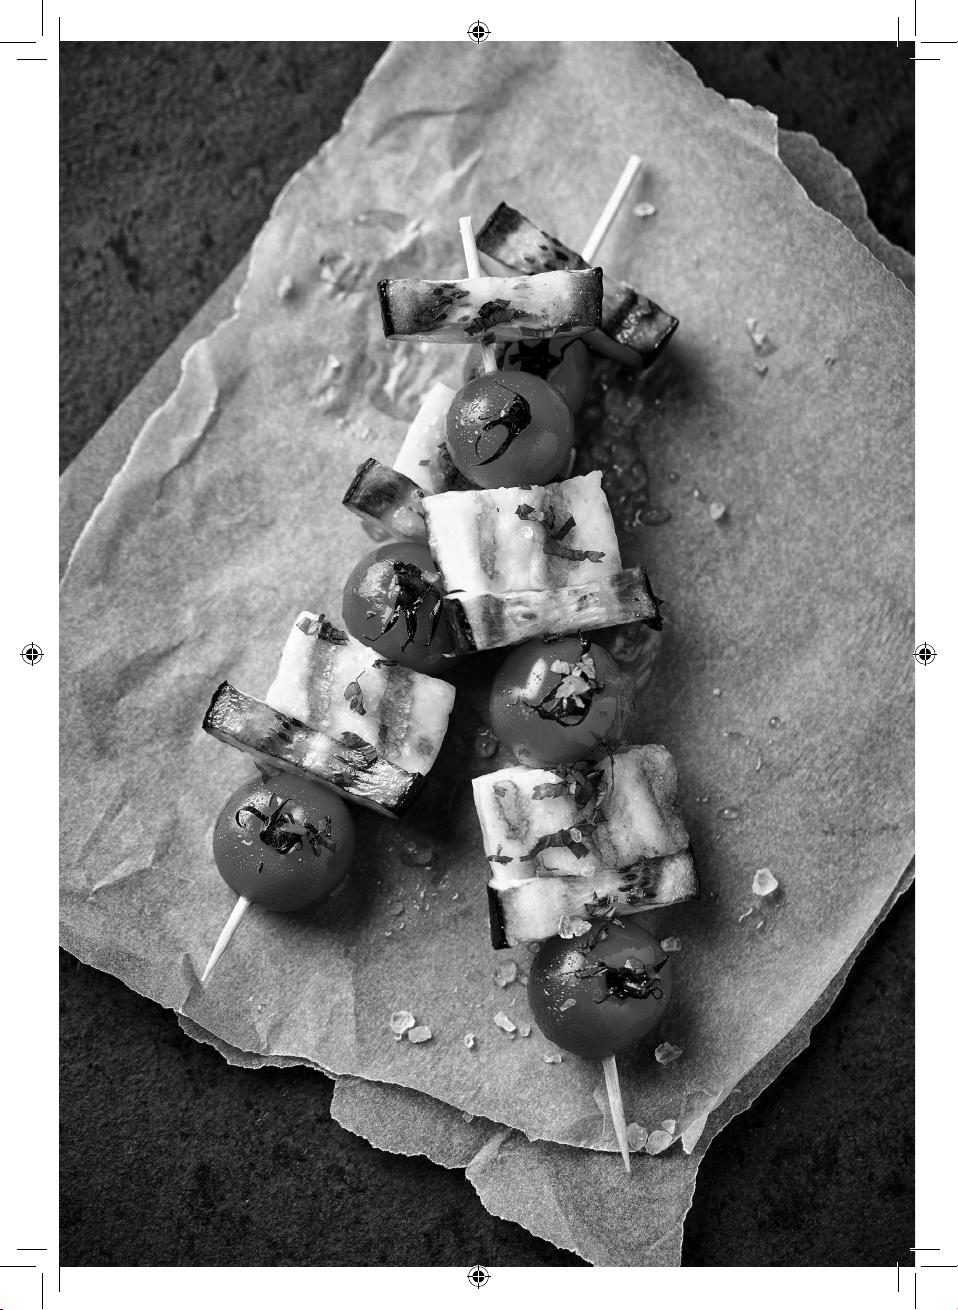
2 courgette, chopped.
225g halloumi cheese,
cubed
10-15 cherry tomatoes
Zest and juice of 1 lemon
Handful of mint, chopped
½ tsp. chilli powder
2 tbsp. extra-virgin olive oil
Method
1. Mix lemon zest and juice, chilli, oil and half of the mint
together. Add the courgettes, halloumi and cherry
tomatoes and leave to marinate for 30 minutes.
2. Soak the wooden skewers for 20 minutes.
3. Brush the chopped courgette lightly with oil before
threading the courgette, tomatoes and halloumi onto
the skewers.
4. Cook on the Grill for 7-8 minutes, turning half way
through and basting with any remaining marinade.
5. When the skewers are cooked, sprinkle with the
remaining mint.
Grilled Halloumi Skewers
25

26
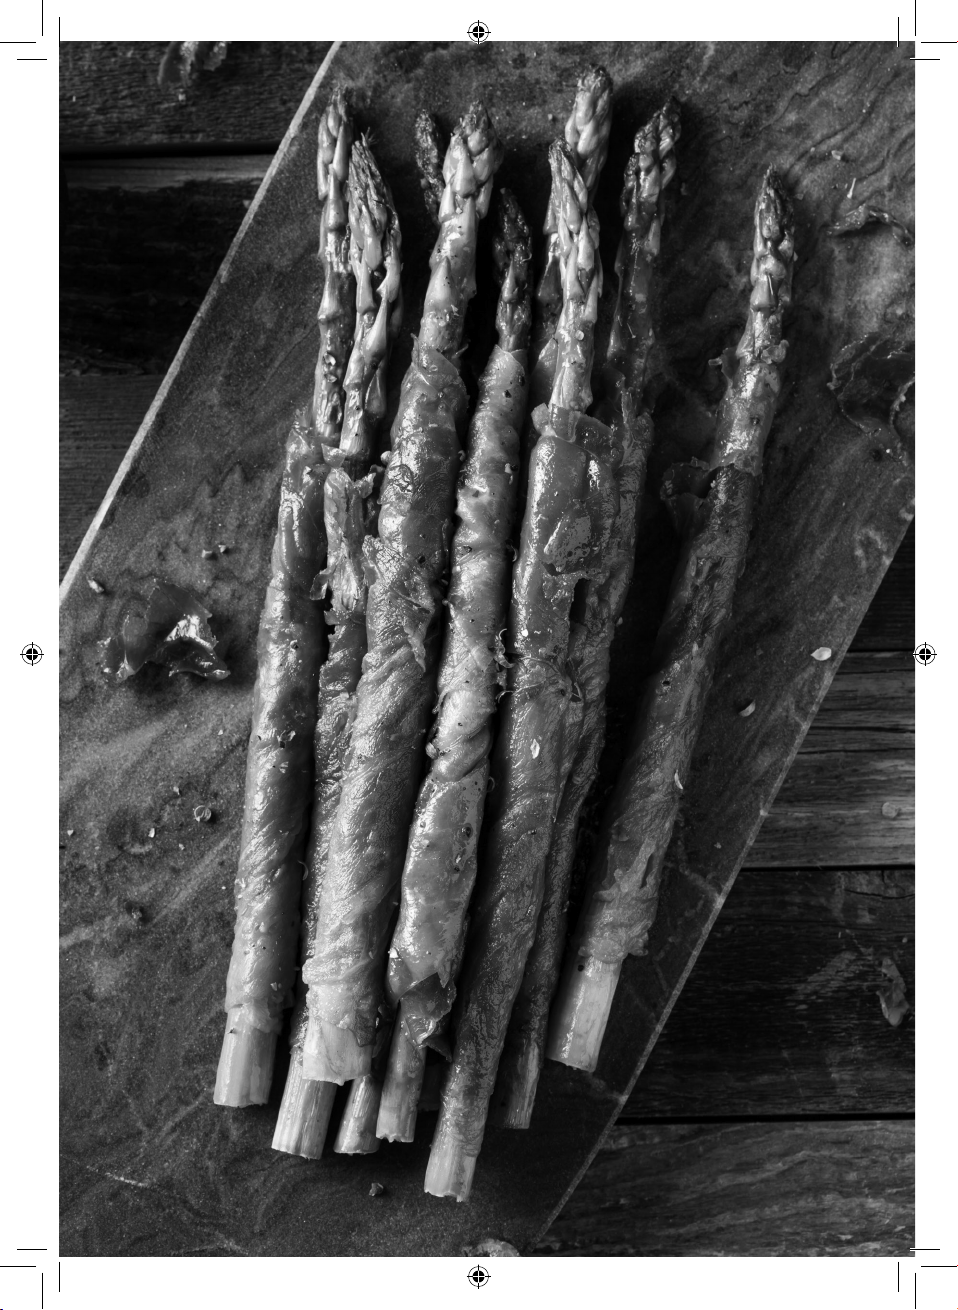
Ingredients
1 tbsp. olive oil
10 spears fresh asparagus,
trimmed
5 slices prosciutto ham (1/2
piece per spear)
Method
1. Preheat the Grill.
2. Rinse asparagus with water and leave to dry on a paper
towel.
3. Remove any excess water from the asparagus before
drizzling with olive oil and adding a few pinches of salt
and pepper.
4. Wrap the prosciutto around the asparagus spears,
starting at the bottom and spiralling up to the tip.
5. Cook the asparagus in batches on the Grill, for about 3
minutes or until grill marks show on the asparagus.
6. Serve as a side dish or starter, with a squeeze of lemon.
Prosciutto Wrapped Asparagus
27
thank you!
We hope you enjoy your appliance for many years. As a thank you for
purchasing one of our fantastic products, we are offering you an extra
2 years peace of mind.
*To receive your extra 2 years guarantee, register your appliance online
within 28 days of purchase by visiting:
www.towerhousewares.co.uk
Should you have a problem with your appliance, or need any spare parts,
please call our Customer Support Team:
+44 (0) 333 220 6066
0120.V4
Your warranty becomes void should you
decide to use non Tower spare parts.
Spare parts can be purchased from
www.towerhousewares.co.uk