Loading ...
Loading ...
Loading ...
4
Before First Use
IMPORTANT: Please check all packaging material carefully before discarding as there may be
accessory parts contained within the packaging material.
NOTE: Before your first use wipe down all surfaces with a damp cloth and then dry.
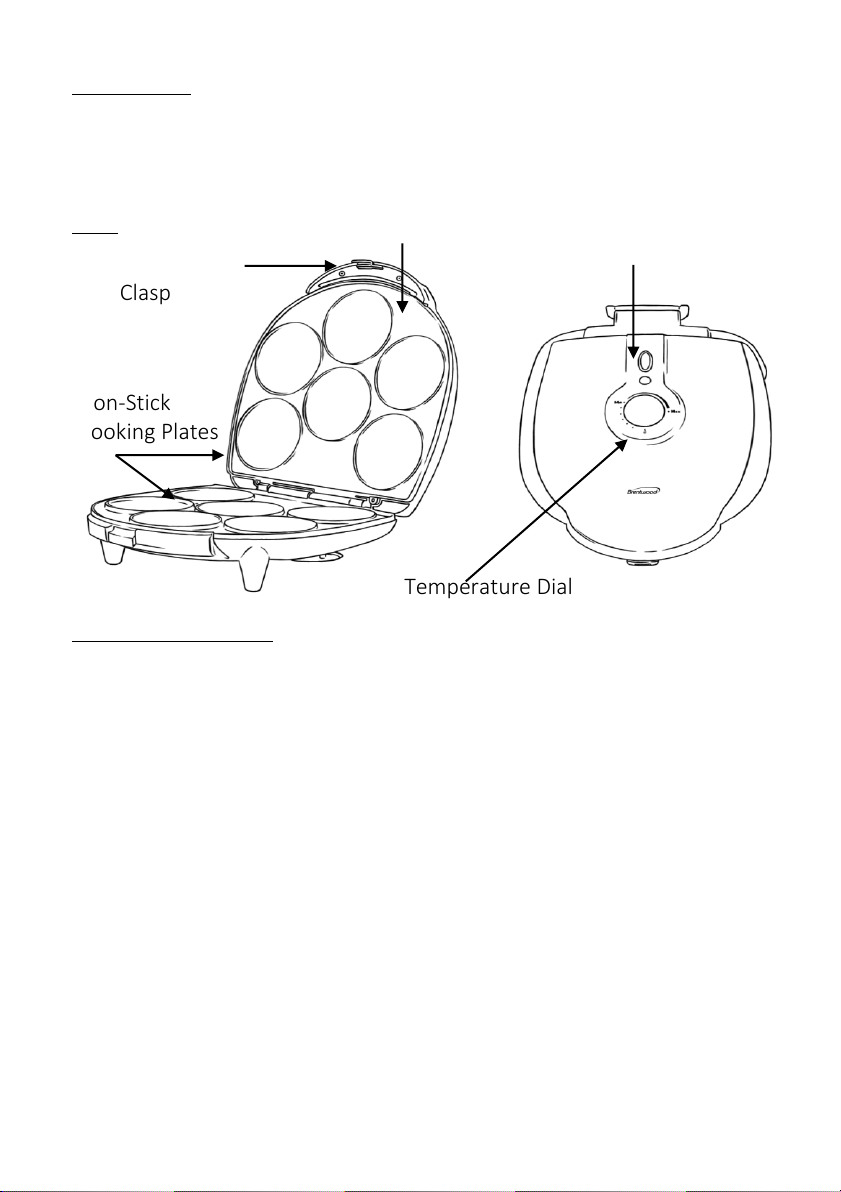
Parts:
Using Your Arepa Maker:
Attention: During the first use the heating element undergoes a minor chemical
reaction that may result in a slight odor and/or minor smoking. It quickly goes away.
WARNING: Avoid contact with hot parts.
1. Place your Arepa Maker on a sturdy and clean flat surface.
2. You can lightly coat the non-stick cooking plates with a small amount of vegetable oil. This
helps to prolong the life of your non-stick.
3. Plug the product into a standard AC electrical outlet and preheat the appliance by closing
the lid and turning the control dial to its maximum setting.
4. When the Power is on, the red power light will come on. Preheat your appliance for a
minimum of 7 minutes. The Green light indicates the appliance is ready to cook. *While
the appliance preheats, you can prepare your dough.
5. Once appliance has preheated, Green light has turned on, raise the lid using an oven mitt
to prevent any burns. Roll dough into portions and place one (1) in each non-stick cavity.
CAUTION: Do not overfill the product or operate it when empty.
6. Close the lid using the oven mitt and secure lock clasp in position.
NOTE: Steam may be released from the appliance during cooking. Only handle the
appliance using kitchen gloves to avoid burns.
7. Cooking time generally ranges from 6-9 minutes.
Lid
Non-Stick
Cooking Plates
Secure Lock
Clasp
Indicator Lights
Temperature Dial
Loading ...
Loading ...
Loading ...