Loading ...
This marking indicates that this prod-
uct should not be disposed of with
other household wastes.
Caution, risk of electric shock.
FUNCTION
WARNING
1. Please make sure to turn o the power before starting the installation.
2. Installation must be performed by a qualified electrician.
3. For Indoor use only
1. Can identify day and night: It can work in the daytime and at night when it is adjusted on the
“sun” position (max). It can work in the ambient light less than 3LUX when it is adjusted on the
“3” position (min). As for the adjustment pattern, please refer to the testing pattern.
2. SENS adjustable: It can be adjusted according to using location. The detection distance of low
sensitivity could be only 2m and high sensitivity could be 16m which fits for large room.
3. Time-Delay is added continually: When it receives the second induction signals within the first
induction, it will restart to time from the moment.
4. Time–Delay is adjustable. It can be set according to the consumer’s desire. The minimum time
is 10sec±3sec. The maximum is 12min±1min.
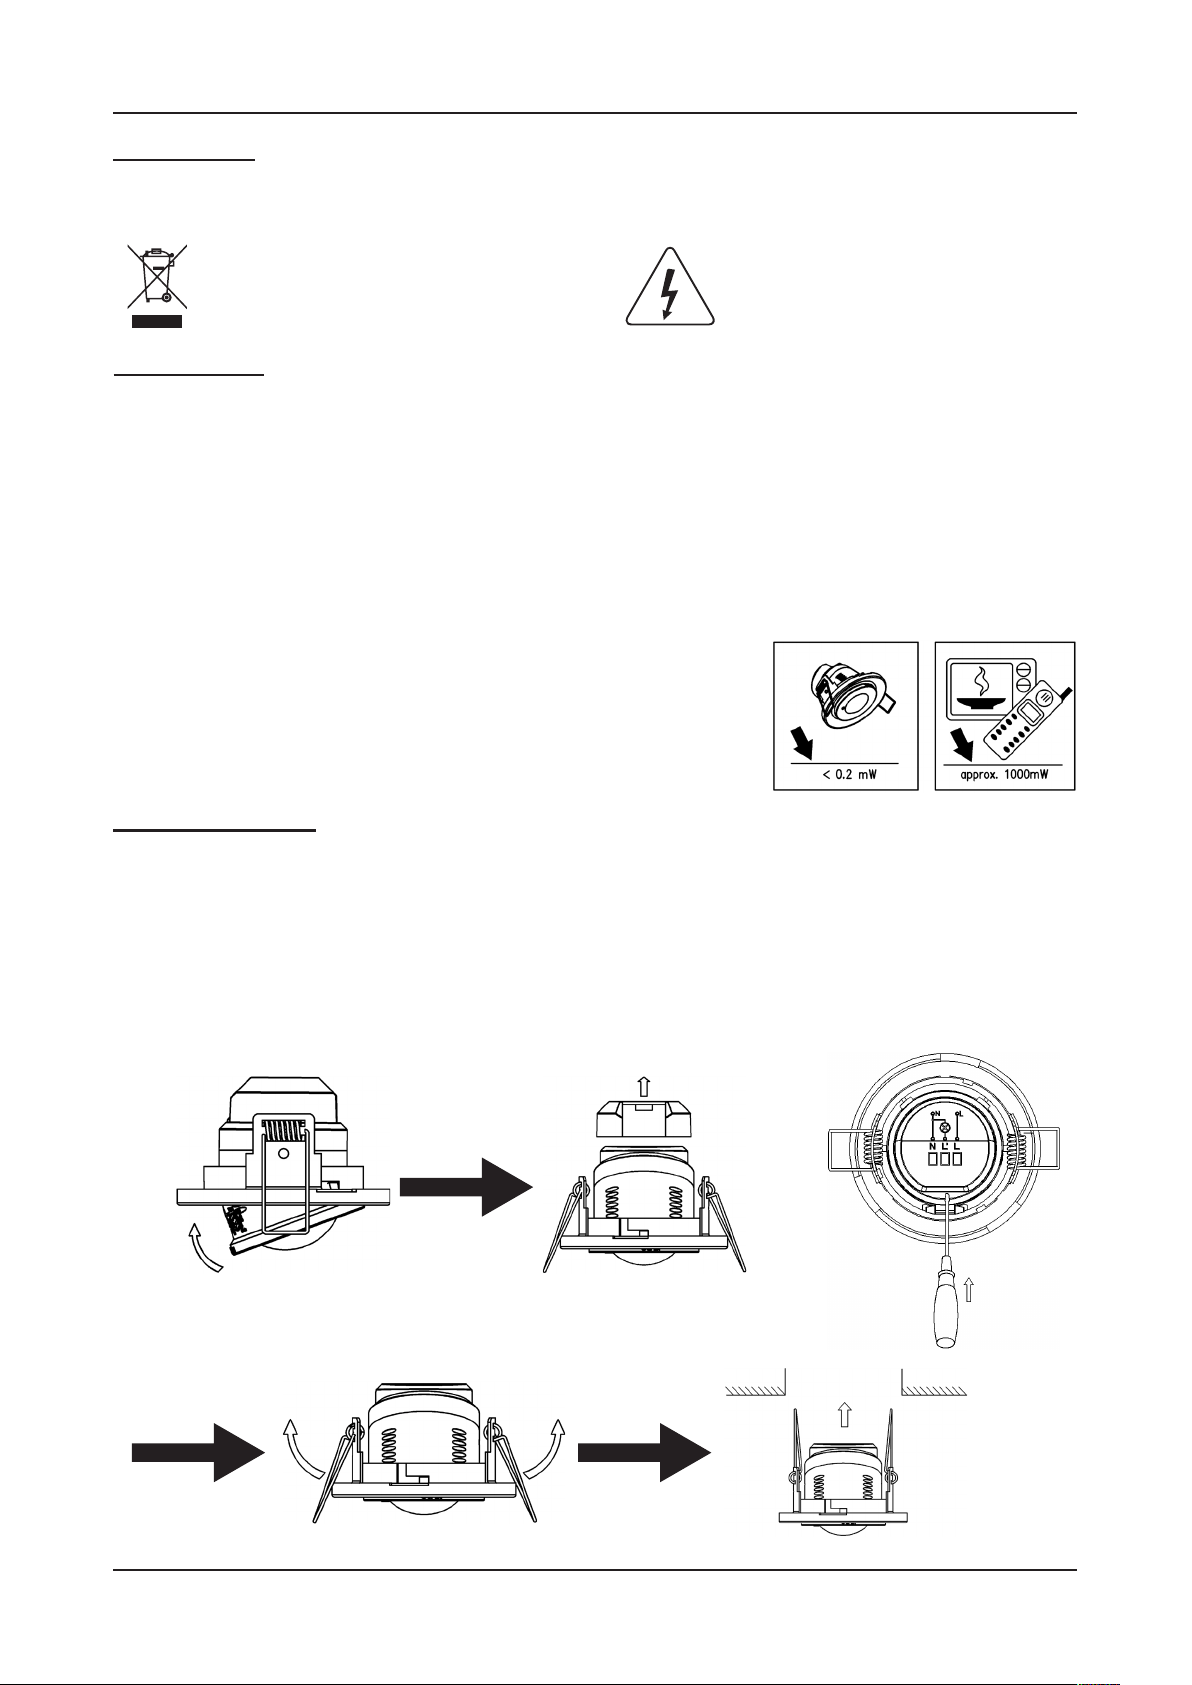
NOTE: the high-frequency output of the HF sensor is
<0.2Mw- that is just one 5000th of the transmission power
of a mobile phone or the output of a microwave oven, the
baby can not touch it
INSTALLATION
1. Swing the plastic cover a little and adjust time and LUX knob.
2. Unload the transparent vinyl cover, loose the screws in the connection terminal, and then
connect the power to connection terminal of sensor according to connection-wire diagram.
3. Fold the metal spring of the sensor upwards, until they are in “I” position with sensor, and
then put the sensor into the hole or installation box which is on the ceiling and has the similar
size with the sensor. Releasing the spring, the sensor will be set in this installation position.
4. Aer finishing installing, turn on the power and then test it
STEP 1
STEP 2 STEP 3
Loading ...
Loading ...