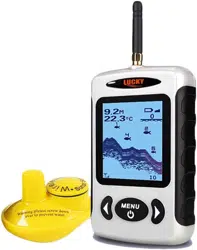
1) Display: Big Adjustable High-contrast Dot matrix FSTN LCD
128Vx64H
2) Display size:41Wx48H
3) Back lighting: On/off White LED
4) Power Requirement: 4-AAA alkaline Batteries(not included)
5) Measure Unit: Feet and meters
6) Sensor Coverage: 90 degrees
7) Depth Range Max/Min: 135Feet(45meters)/2Feet(0.7meters)
8) Temperature unit: Celsius/Fanrenheit
9) Operation temperature: -10℃-50℃
10) Storage temperature: -20℃-70℃
11)Temperature: Water temperature Sensor included in Wireless
Sonar Sensor
12)Wireless operational Range: 400Feets(120meters)
13)Water switch technology applied: Sensor could shut down when
it is out of the water.
14) Wireless sensor battery :CR-2032
15)Bottom contour: Show true changing of water bottom contour
16)Memory: B u i l t - i n m e m o r y s t o r e s s o n a r s e t t i n g w h e n t h e
u n i t i s t u r n e d o f f
17) Waterproof design: level-4 (spray-water-proof)
Atta c h ment s :
1) A Wireless Remote Sonar Sensor
2) A handheld device with LCD screen
3) A operation manual
4) A neck strap
Product specification:
1) Before store the wireless sensor, pls wipe the surface
dampened with fresh water after using the wireless sensor in salt water.
2) Rinse the wireless sensor bottom alloy pins with fresh water after using
in salt water.
3) After store wireless sensor out of the water for a long time, it will take
some time to wet it when returned to the water. Small air bubbles can
cling to the surface of the wireless sensor and foreclose it normal
operation. Wipe the face of the sensor with a wet soft cloth to eliminate
them.
4) Do not place the unit in a car! This will lead to the internal electronics
parts damaged for the high temperature in hot weather days.
with a soft cloth
Maintenance for the wireless sensor
Many factors about anomalous operation have been taken
consideration while designing this fish finder.This effort have ensured
that the product is able to work for many years even without regular
maintenance. Follow these steps to ensure your fish finder continues to
deliver top performance.
into
1) If the unit comes into contact with salt spray, use a soft
dampened in fresh water then wipe the affected surfaces.
2) Don’t use a chemical glas cleaner on the surface! Ohterwise, this
will scratch the surface. When cleaning the LCD protective lens,
use a chamois and mild cleaner. Don’t wipe while dirt or grease is
on the lens. Be careful to avoid scratching the lens.
3) Do not place the unit in a closed car! This will lead to the internal
electronics
Parts damaged for the high temperature in hot weather days.
cloth
Maintenance for the handheld device
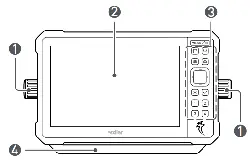
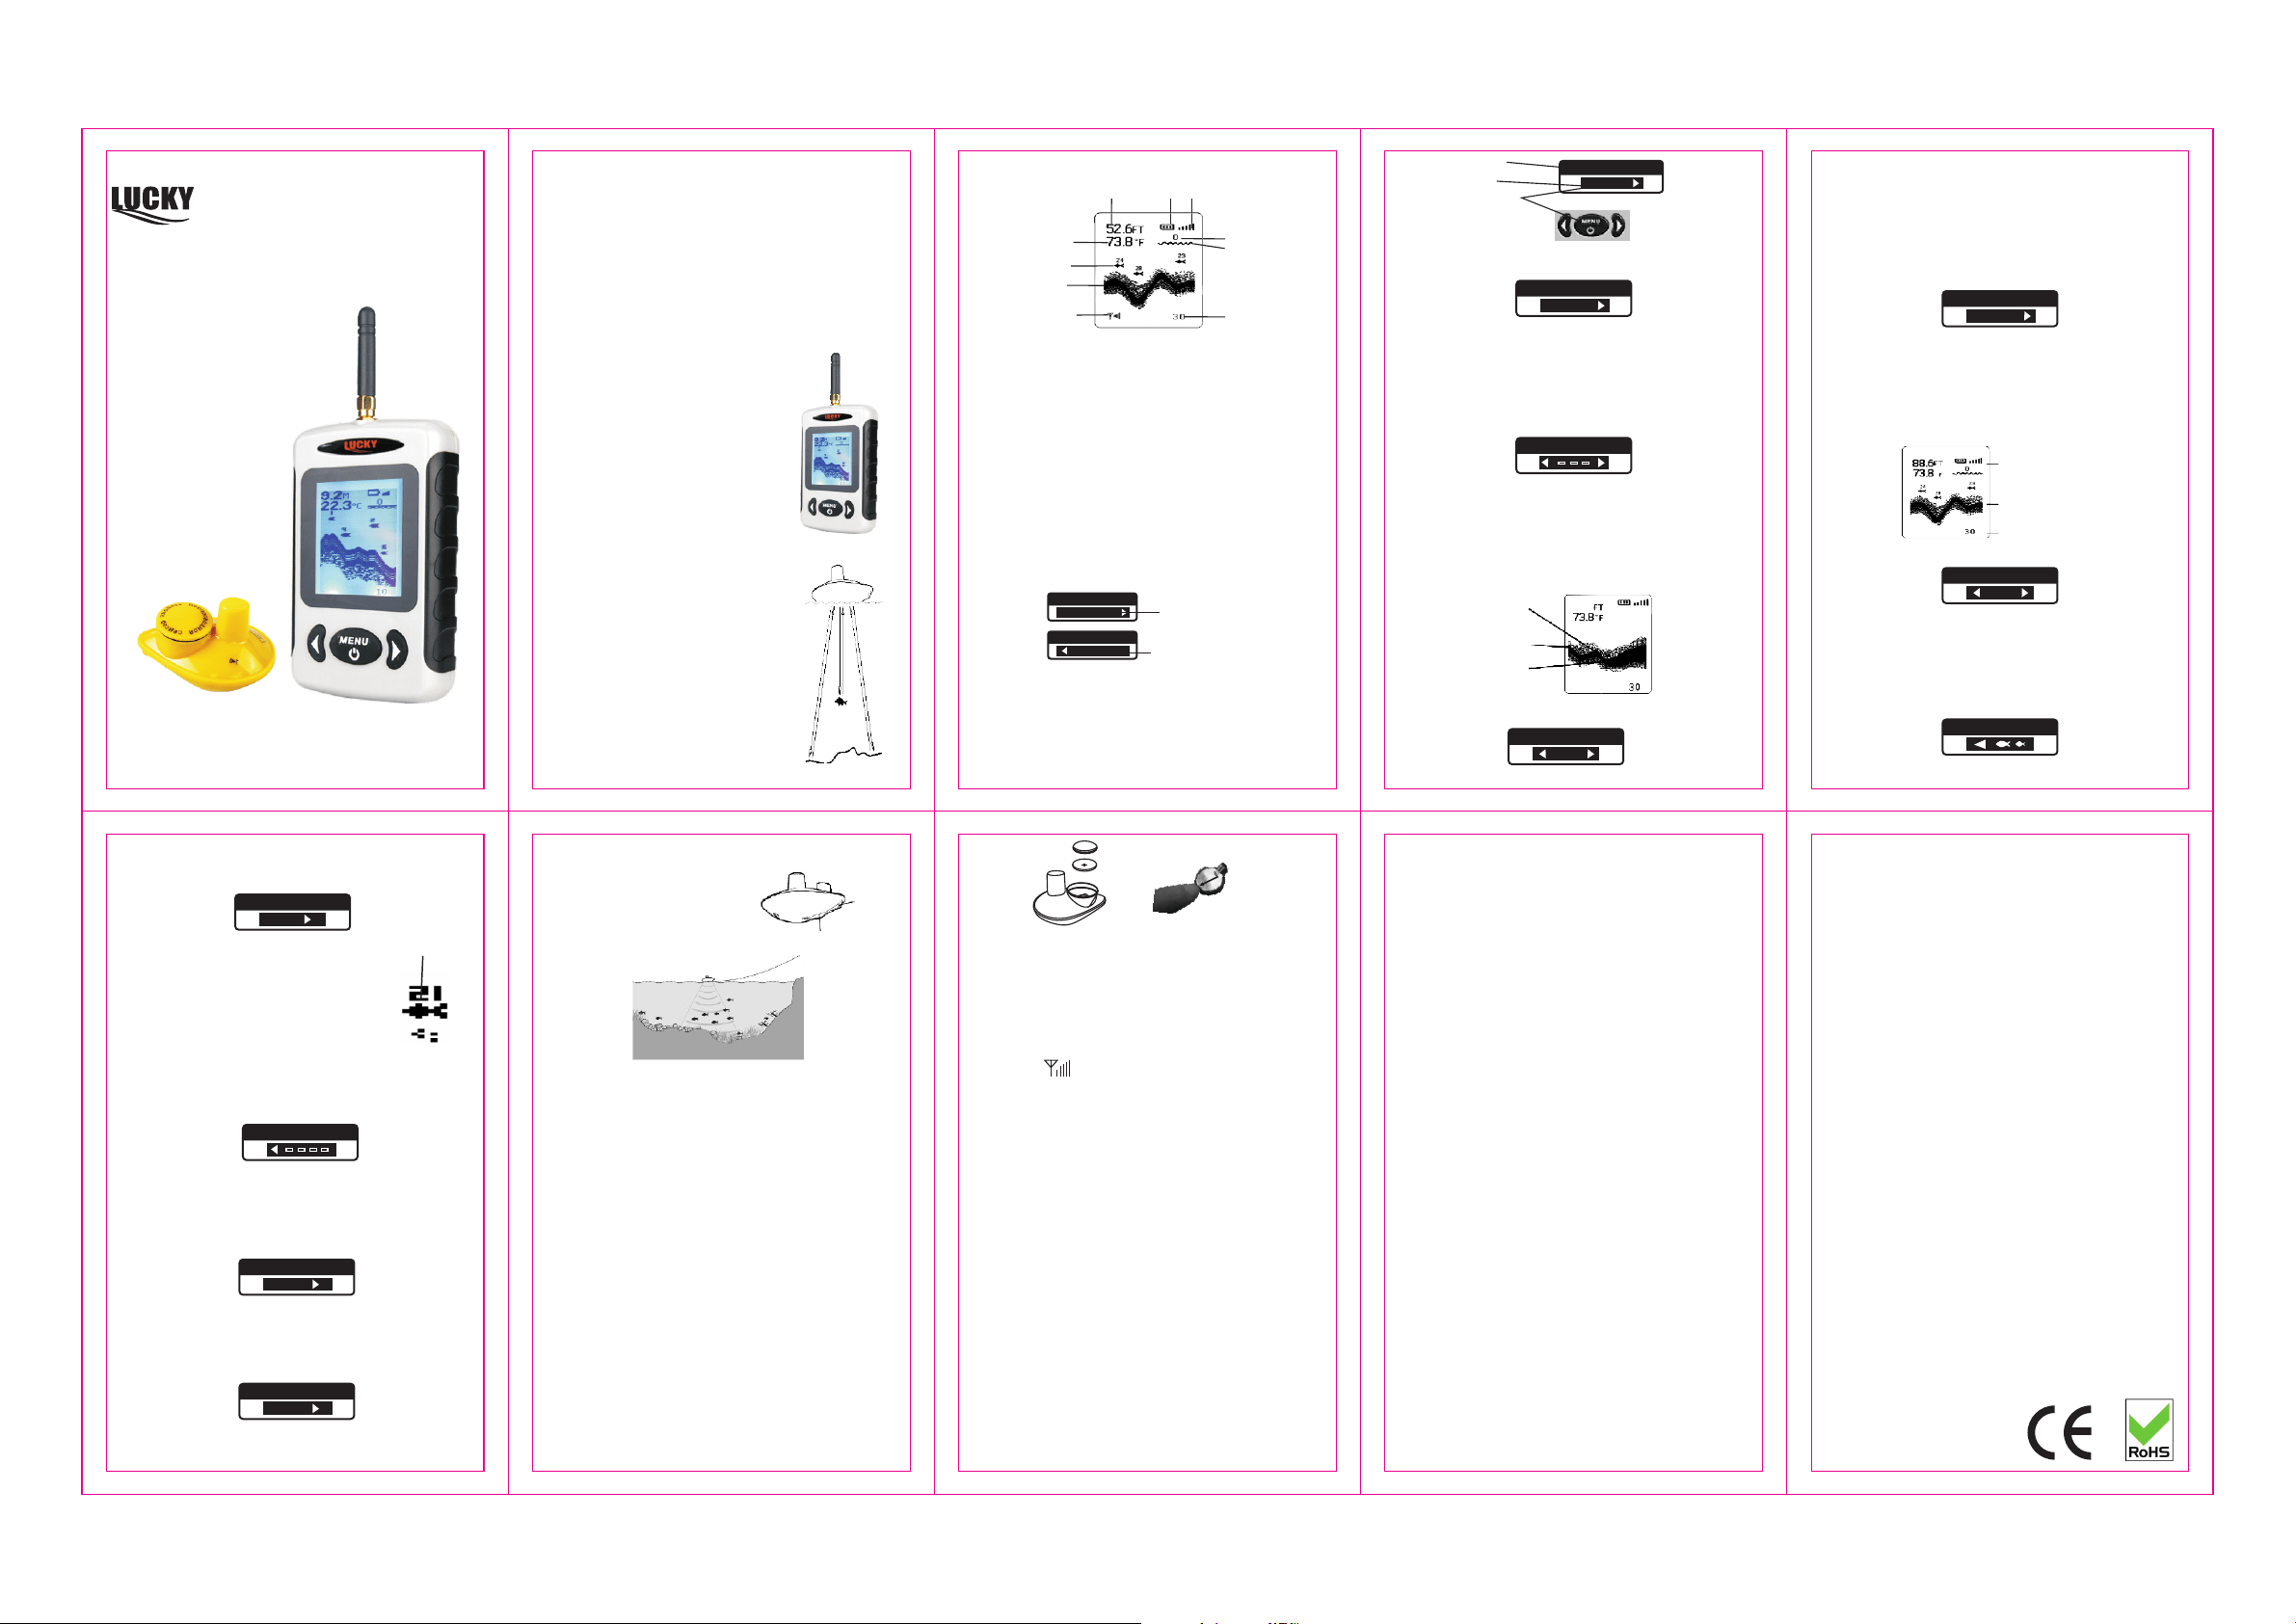
3 DISPLAY VIEW
1 Water Depth
2 Battery Strength Indicator
3 Sensitivity Indicator
4 Upper Zoom Range
5 Water Surface Line
6 Lower Zoom Range
7 Bottom Contour
8 Fish lcon with Depth
9 Water Temperature
10 Sensor connect indicator
1
2
3
4
5
6
7
8
9
10
fig.3
Press and release POWER-MENU to power the unit on.
POWER-MENU until the unit shuts downto power off .When Unit powers on,
the Start Up menu temporarily appears.From this menu, select either
Start-Up for on-the-wateruse,or Simulation for learning to use the system
with simulated sonar data. The Start-Up menu disappears after several
seconds and the Unit begins operation.
Press and hold
4 Powering ON and OFF
START UP
SIMULATION
SIMULATION MODE
ON
START UP
START UP
START UP MODE ON
5 Accessing Menu Features
A simple menu system accesses unit’s adjustable
the menu system, press POWER - MENU and a menu appears. Press
POWER-MENU repeatedly to access other menus one at a time. When
a menu is on the display, use the right and left arrow keys to adjust
the menu. Menus automatically are removed from the screen after
several seconds.
features. To activate
5.1 Light
LIGHT
OFF
or ON to activate the backlight at thedesired level.
Note: Continuous backlight operation significantly decreases battery life
on Unit Portables.
Prees POWER-MENU until the LIGHT menu appears.Select either OFF
Menu Title
Setting
Button Changes
LIGHT
OFF
fig.4
fig.9
fig.10
NOTE: handle during
soner operation, as this may cause physical discomfort and may result in
personal injury in the form of tissue damage. Handle the wireless
transducer only by the antenna tower when it has been in the water.
NOTE:The wireless transducer is not intended for use by children younger
than 6years old without adult supervision as the transducer may represent
a choking hazard to small children.
NOTE:When the fish finder receive the signal from wireless sensor the
signal indicator{ } will display on the screen.The max RF distance of
the unit is 60 meters unless the water is smooth. The signal indicator
will disappear if the distance between the fish finder and the wireless
sensor over 60 meters. The wireless transducer has contacts that perceive
when the device is immersed in the water. These contacts turn on the
sonar transmitter/receiver and begin transmitting the sonar information via
Radio Frequency to the display. The wireless transducer automatically
stops using power a few seconds after being pulled out of the water.
NOTE:Do not place the wireless transducer in a wet area when not in use
as this will turn on the wireless transducer and shorten its usable life.
Store the wireless transducer in a dry area when not in use to conserve
power. Never place the unit in a wet area of a boat or on a metal surtace
that could accidentally power it on.
NOTE:If the unit was used in salt water,rinse it with fresh water before
storing it.
NOTE: If the handheld device fails to receive signals from the wireless
sensor, it will stop showing on the screen. In any case, if the handheld
device can not receive signals transmitted by the sensor or the sensor is
out of water for several seconds, the screen will not show fish and depth
meter and sensor connect indicator until the sensor is placed in water
again and signals are restored.This machine is a products depending on
line of sight. So the barrier between the handheld device and the sensor
can lead to signal loss.
NOTE:lncorrect reading may appear in water areas with depth less than
0.7meter. Additionally, considering the sonsar physical characters, we
suggest you avoid using the products in swimming pools or small-sized
The bottom of the wireless transducer should not be
5.2 Sensitivity
SENSITIVITY
(Setting Saved in Memory , 1 to 5)
Press POWER-MENU until the SENSITIVITY menu
higher number to show smaller sonar returns on-screen, or a lower
number to remove clutter from the screen. Adjusting Sensitivity also
affects how sonar returns are identified as Fish lcon Symbols - more
fish will be detected at a higher setting, fewer at a lower setting.
appears. Select a
Low Sensitivity
Normal Sensitivity
High Sensitivity
56.8
fig.5
7.How to replace the CR-2032 battery
7.1 Remove the battery door of the wireless sonar sensor,
the lock-block of the battery holder and the battery will flip pls check
the picture.(fig.9, fig.10)
7.2 Make sure that the 0-ring in the battery compartment is present,
positioned correctly in the grooves, and free of debris before
reinstalling the battery door.
and press
5.3 Depth Range Menu
DEPTH RANGE
60FT
(Setting Saved in Memory)
Press POWER - MENU until the Depth Range menu
AUTO to have the Unit automatically select the Depth Range or manually
select 5、10、20、30 or 45meters.This locks the depth range to a specific
setting.
appears. Select
Note: In manual operation, if the depth is greater
setting, the bottom will not be visible on - screen. Select AUTO to
return to automatic operation.
than the depth range
5.4 Zoom
(Setting Saved in Memory)
Press the POWER-MENU key until ZOOM appears.
magnify the area around the bottom thus revealing fish and structure
close to the bottom that may not be visible in typical operation.
In Zoom,the Unit continually changes the upper and lower Depth Range
to keep area just above and below the bottom on the display.Select Off to
return to normal operation.(OFF,5 to 45 Meters)
Select a number to
ZOOM
OFF
5.10 Temperature Unit
TEMPE UNIT
0
C
Pre s s P OWER - M E N U until t h e T EMP UN I T m enu
eit h e r ℃ or ℉ to se t t h e unit of t e m pera t u re.
app e a rs. Se l e ct
(Setting Saved in Memory)
6. USING THE WIRELESS SENSOR
Use the wireless sonar sensor is
very easy for user, just simply
attach the sensor to the end of
your fishing line and cast it into
the water as your normal float or lure.
A.
B.
front hole
second hole
fig.8
5.5 Depth Alarm
Press POWER-MENU until the DEPTH ALARM menu
OFF for no Depth Alarm;select a number to set the alarm depth point
and turnit on. An audible alarm sounds when the depth is equal to or
less than the setting.
appears. Select
5.6 Fish Alarm
(Setting Saved in Memory)
DEPTH ALARM
15FT
Upper Zoom Range
Magnified Bottom with
Lower Zoom Range
56.8
fig.6
5.7 Fish Icon
(Setting Saved in Memory)
Pre s s P OWER - M ENU unt i l t he CHA R T S PEED me n u
a set t i ng fro m 1 - 4 to incr e a se or de c r ease th e c h art sp e e d,whe r e 1 i s
the s l o west a n d 4 i s the fas t e st cha r t s peed.
app e a rs.S e l ect
5.8 Chart Speed
5.9 Depth Unit
CHART SPEED
DEPTH UNIT
FT
(Setting Saved in Memory, 1to4)
(Setting Saved in Memory)
Press POWER -MENU until the DEPTH UNIT menu
either FT or M to set the unit of depth.
appears. Select
FISH ALARM
FISH ICON
OFF
Fish Icon
Press POWER-MENU until the FISH ICON
menu appears. Select either OFF to view
“ raw” sonar returns, or ON to take advantage
of Unit’s ability to identify sonar returns that
are determined to be a fish.( ON,OFF)
There are two fish symbol sizes. FISH ID
displays a small fish symbol when it thinks a target is a small fish,
and it thinks a target is a big fish, it will display a big fish.
(Setting Saved in Memory, Defaults to OFF)
Press POWER-MENU until the FISH ALARM menu appears. Select OFF
fig.7
(Setting Saved in Memory)
6.1 You can tie your fish reel line to the front hole in the wireless
transducer. If you want to use the wireless transducer as a stationary
float,use the second hole to attach your hook using a lighter weight
line. but A obstacle will break the lighter line easily, for this reason, we
suggest you not to pull the lighter weight line if unnecessary.Slip line
techniques are not recommended because will increase the risk of
losing the wireless transducer. If you do use the slip line method.
use a lighter weight line after the lower stop, unable get back of the
wireless transducer if the lower line with hook breaks away.
6.2 You will increase the risk of breaking your line if you use light test
pound line on your reel. The transducer in water is positively buoyant.
The maximum amount of weight for any attachment to the transducer
is approximately 6 grams, and includes the combined weight of any
hook, line, weight swivel/snap swivel and bait that is attached to the
wireless transducer. over 5.7g will submerge the wireless sonar
sensor, causing the signal loss.
for no fish alarm, or select the fish icon to set the fish alarm and turn
it on.(OFF,Large,All)
enclosed water areas. Dragging the sensor too fast can lead to signal lost.
With relatively quite water areas, this products is able to obtain a 160-feet
remote-control distance in max; with signifiaant fluctuations on water
surface, the distance may be reduces slightly. If you drag the sensor
or it floats out of the range,inconsistent signals or even no signals
will be transmitted to the handheld. If nothing displayed, please be
sure the batteries positive and negative poles are correctly oriented
in the holder, also check if the batteries has enough power.
OPERATION GUIDE
WIRELESS FISH FINDER
WIRELESS FISH FINDER
OPERATION GUIDE
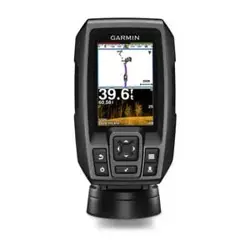
1 PRODUCT OVERVIEW
This amazing product is
designed for amateur and professional
fishermen alike, to find out the location
of fish , depth and bottom contour of
water.
The unit can be used in ocean, river or
lake a nd is fantast ic for detect in g
schools of fish in any particular area.
Using amazing and innovative
technology, this portable fish finder is
the ideal tool to bring the fish to you!
especially
fig.1
Sonar technology is based
waves. The system uses sonar to locate
and define structure, bottom contour
and composition, as well depth directly
below thetransducer. The transducer
sen d s a so u nd wave si g nal and
determines distance by measuring the
time between the transmission of the
sound wave and when the sound wave
is reflected of an object; it then uses
the reflected signal to interpret
location, size, and composition of
an object.
on sound
2 HOW SONAR WORKS
fig.2
We are really appreciated that you purchase our products!
In order to make the users can give the mach inery
performance into full play and well utilize this machine, we
are plea sed to ask the users to read th e o perat ing
instruction carefully before operating the machine. If you
have any question in use, please feel free to contact the
Zhejiang lucky Manufacturer Co., Ltd for
consultation: www.goodluck ycn.com
http://www.goodluckycn.com