Loading ...
Loading ...
Loading ...
8
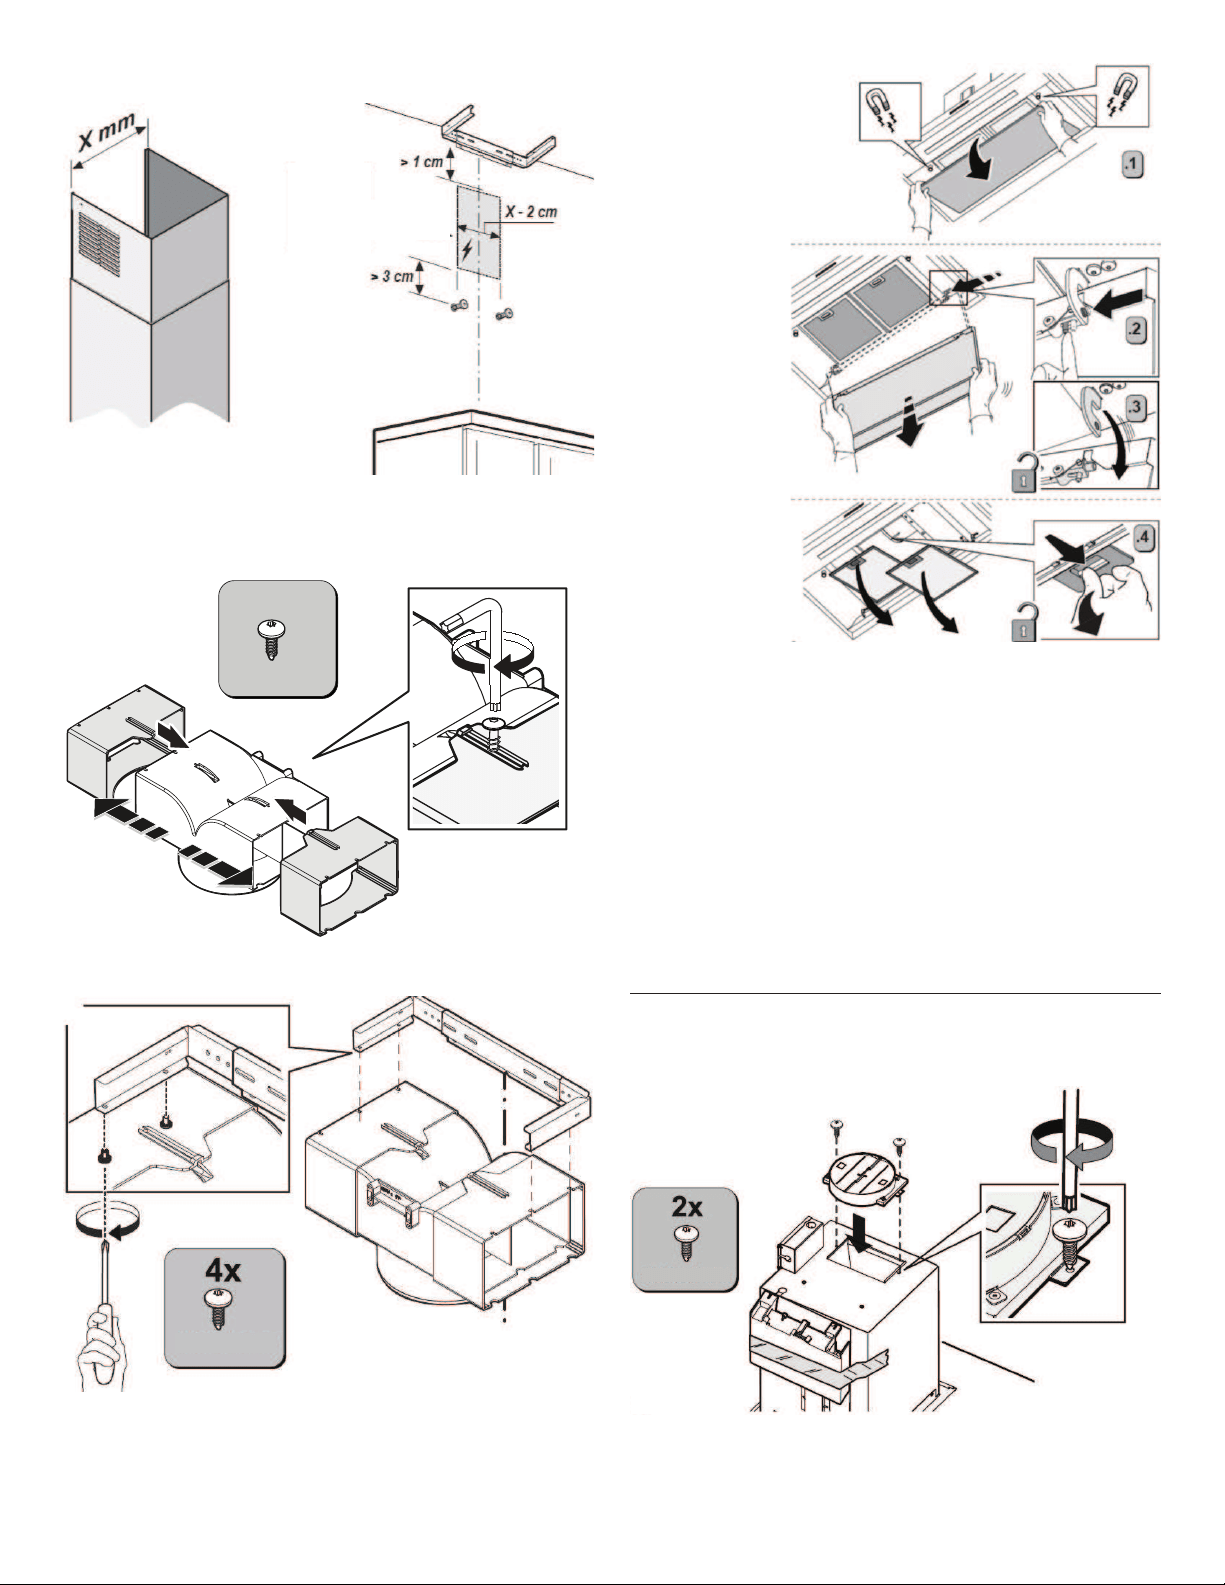
9. Check that there are no ducts or pipes on the wall that they
might make installation impossible as shown in gure.
10. If, instead, the hood has been installed with a recirculation kit,
the air diverter is included in the supply and must be adjusted
according to the width of the pipe and xed with two screws
Ø3.5x9.5 mm as shown in gure.
2x
Ø3.5x9.5 mm
11. Take the air diverter and x it to the wall bracket previously
xed, with 4 screws Ø3.5x9.5 mm as shown in gure.
Ø3.5x9.5 mm
NOTE: For better
handling of the
hood, before
proceeding with
installation, remove
the perimeter
suction panel and
the grease lter,
as shown in gure,
steps 1-2-3-4.
12. For vented installations only: Using a jigsaw or keyhole saw,
cut a 6½" (16.5 cm) diameter hole for the vent duct.
NOTE: Your hood can work with either an internal or an
in-line (external) blower motor system. An optional In-Line Smart
Kit (purchased separately) allows the blower motor that comes
with this hood to be installed in a location other than inside the
hood cavity.
CAUTION: To reduce the risk of re and electric shock, install this
hood only with the In-Line Smart Kit manufactured by Whirlpool,
W10692945.
For installation see the In-Line Smart Kit installation instructions.
See the “Assistance or Service” section to order.
Assemble and Install Hood
1. Install transition on top of hood (if removed for shipping) with
2 - 3.5 x 9.5 mm sheet metal screws.
Ø3.5x9.5 mm
Loading ...
Loading ...
Loading ...