Loading ...
Loading ...
Loading ...
ACCESSORIES
Safety Glasses ........... 71-85707
Extension Cord (16 Guage) 71-85708
Extension Cord (14 Guage) 71-85709
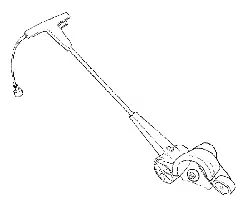
CUSTOMER SERVICEABLE PARTS
Blade .................. .71-85718
Spring washer (blade) ..... 530403499
Hex Nut (blade) .......... 530016293
Lock Nut (tube) ........... 530403094
Rear wheel .............. 530095663
Front wheel .............. 530095125
Blade Guard ............. 530402859
Edge guide .............. 530402865
Rear axle ............... .530402876
Front axle ............... 530402875
Cup Washer (axle) ........ 530403500
Locknut (axle) ............ 530016245
Spacer (axle) ............ 530403109
Screw (edge guide) ....... 530016227
Screw (tube) ............. 530402888
Washer (T-handle) ........ 530402887
_IkWARNING: Perform the following
steps after each use:
• Secure the unit before storing or
transporting.
• Store unit with all guards in place.
Position unit so that any sharp object
cannot accidentally cause injury.
• Store unit well out of reach of children.
SEASONAL STORAGE
Prepare unit for storage at the end of
the season or if it will not be used for
30 days or more.
If your edger is to be stored for a peri-
od of time:
• Clean the entire unit before lengthy
storage.
• Inspect the blade area and clean any
dirt, grass, leaves, or debris that has
collected. Inspect the blade and blade
guard; replace a blade that is bent,
warped, cracked, broken, or damaged
in any other way.
• Replace a damaged or worn blade
guard.
• Lightly oil external metal surfaces.
CAUTION: Wear protective gloves
when handling the blade. The blade is
sharp and can cut you even when it is
not moving.
• Apply a coating of oil to entire surface
of blade; wrap it in heavy paper or
cloth.
• Be sure all handles and guards are in
place and are securely fastened. Re-
place any damaged parts.
• Check entire unit for loose screws,
nuts, and bolts. Replace any dam-
aged, worn, or broken parts.
• Do not cover with plastic. Plastic can-
not breathe and will induce condensa-
tion and eventual rust or corrosion.
TROUBLESHOOTING TABLE
WARNING: Always stop unit and disconnect from the power source be-
fore performing all of the recommended remedies below except remedies
that require unit to be operating.
TROUBLE CAUSE REMEDY
Blade stops 1. Forcing blade into material 1. Cut at a slower pace.
under a load 2, Blade guard clogged with debris. 2. Clean blade guard area.
or does not turr 3. Edge guide bent toward blade. 3. Replace edge guide.
when switch is 4 Unit unplugged. 4. Plug unit into a 120 volt outlet.
pressed, 5. Fuse blown/circuit breaker off, 5. Replace fuse/reset breaker.
6. Worn spring washer. 6. Replace spring washer.
7, None of the above. 7. Contact Sears Service (see back
cover).
Blade turns but 1. Wheel depth incorrect. 1. Adjust wheel to proper depth.
will not cut. 2. incorrect or worn blade. 2. Replace blade.
3. Worn spring washer. 3. Replace spring washer.
Edger drags 1. Wheel depth incorrect. 1. Adjust wheel for proper depth.
ground or cuts 2. Wheel mount(s) broken. 2. Contact Sears Service (see back
too deep. cover).
9
Loading ...
Loading ...
Loading ...