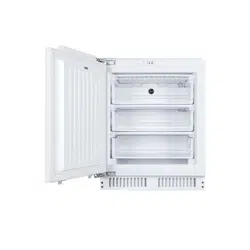
Loading ...
Loading ...
Loading ...
19
Positioning
o It is advisable that your appliance is only installed in a location where
the ambient temperature of the room, corresponds with the climate
classification that is stated on the rating plate of your appliance. Your
appliance may not function correctly if the ambient temperature falls
outside of the following ranges.
- Extended temperate (SN): ‘this refrigerating appliance is intended
to be used at ambient temperatures ranging from 10 °C to 32 °C’
- Temperate (N): ‘this refrigerating appliance is intended to be used
at ambient temperatures ranging from 16 °C to 32 °C’
- Subtropical (ST): ‘this refrigerating appliance is intended to be
used at ambient temperatures ranging from 16 °C to 38 °C’
- Tropical (T): ‘this refrigerating appliance is intended to be used at
ambient temperatures ranging from 16 °C to 43 °C’
o Your appliance should not be located in direct sunlight or exposed to
continuous heat or extremes of temperature (e.g. next to a radiator or
boiler).
o The door should be able to open completely and freely.
o The appliance should be situated so you can easily access the food
that is stored in it.
o You should check whether there is an electrical socket available,
which will be accessible after your appliance is installed.
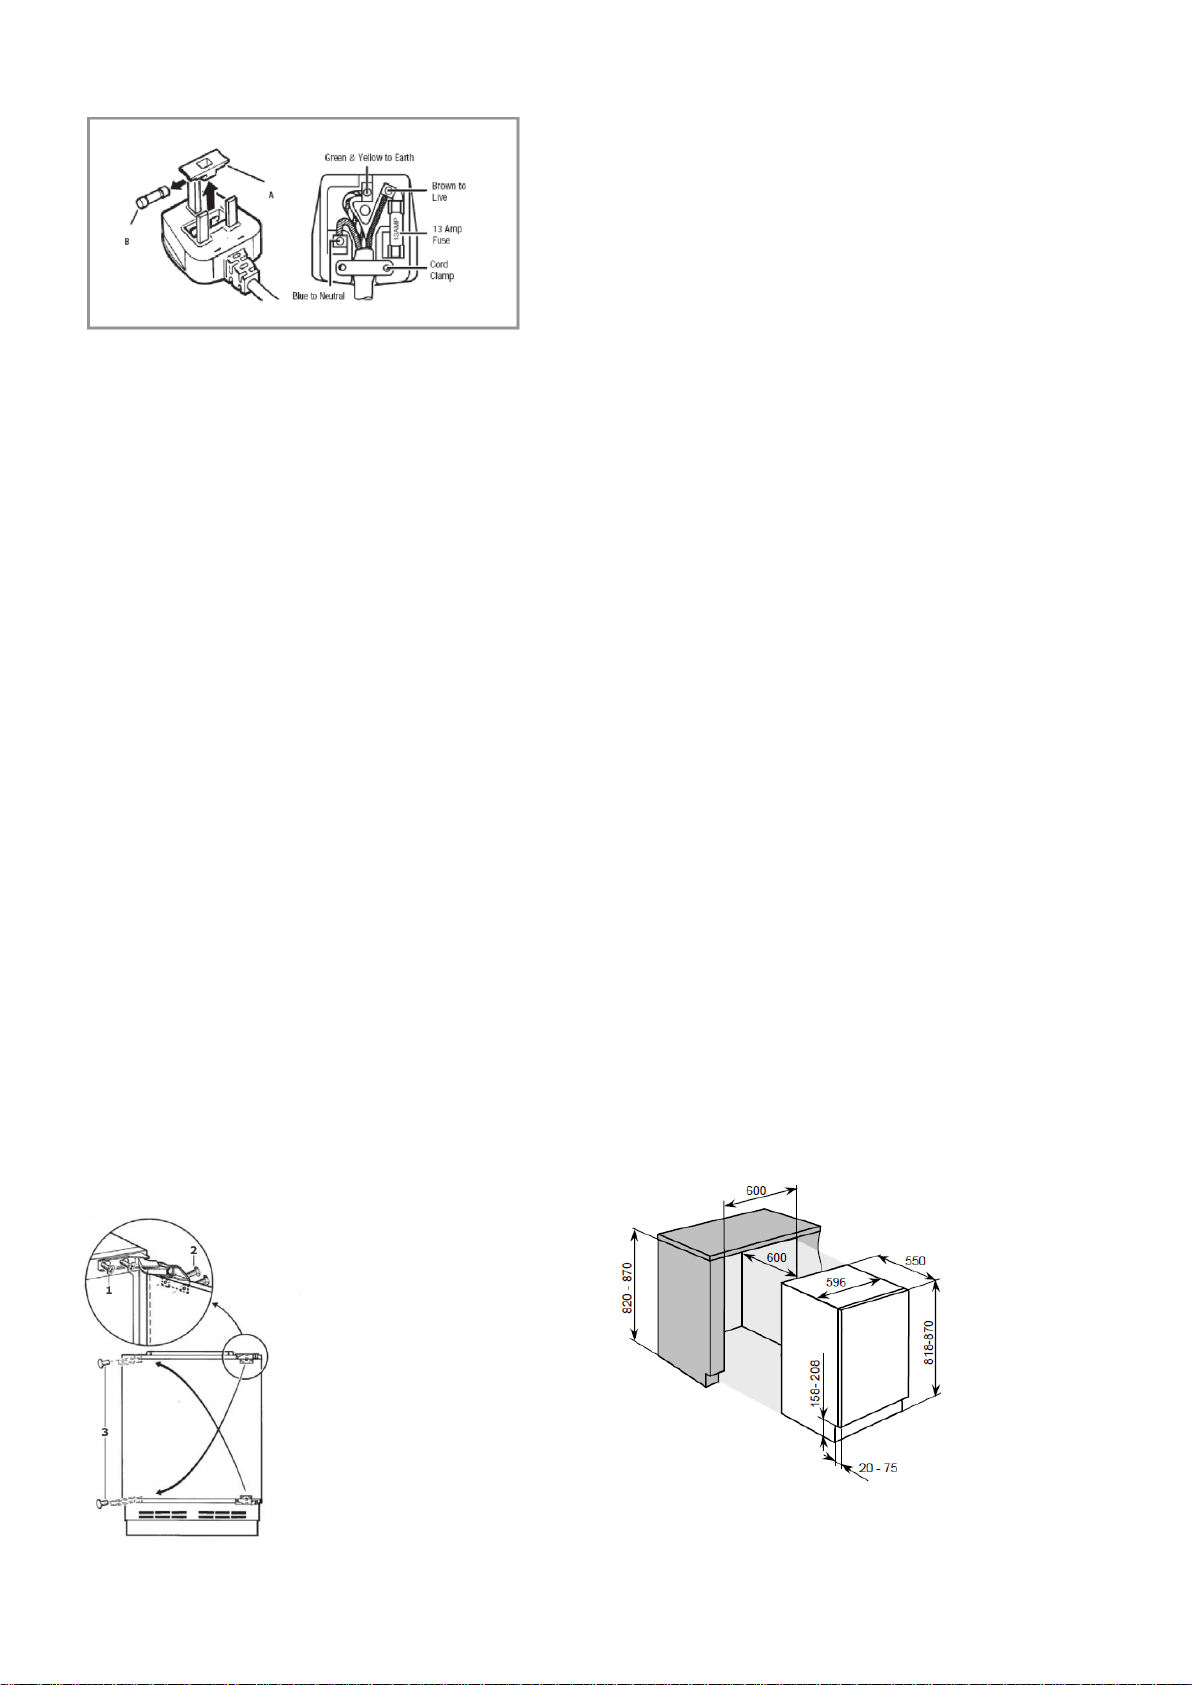
Reversing the door of your appliance
This procedure MUST be completed before the furniture door is
attached.
Any parts that you remove from the appliance whilst reversing the
door, should be retained for later use.
WARNING - Take care when opening the hinges, they are sprung
loaded and there is the risk of injury if they close on your hand.
Tools required:
o Phillips screwdriver
o Flat bladed screwdriver
o Slacken the retaining screws (1) on the appliance and then carefully
remove the appliance door.
o Place the appliance door on a cushioned surface, so that it does not
get damaged.
o Lever off the cover caps (3).
o Insert the retaining screws (1) into the opposite side of the appliance
from their original position. These screws should be partially tightened
but not fully tightened.
o Remove the door retaining screws (2) and then reverse the position
of the top and bottom hinge (as shown in the above diagram).
o Reattach the appliance door and then fully re-tighten the retaining
screws (1) and the door retaining screws (2).
o Insert the cover caps (3) into the holes that are now exposed on the
right hand side of the cabinet.
IMPORTANT: Check that the door opens and shuts correctly, without
fouling, after you have completed the door reversal process.
After the door has been reversed, you should check the door seal of
the appliance. The seal should not be creased or crushed; otherwise
there will be a gap between it and the inside of the door.
o The seal must adhere properly all the way around the door.
o If the seal is not adhering to the cabinet properly, then you should
either:
1. Use a warm damp cloth and manipulate the seal until it does adhere
to the cabinet properly, all the way around the door.
Or
2. Use a hair dryer on its lowest heat setting and lightly heat the areas
of the door seal that are not adhering correctly. The heat will make the
seal more pliable and this will allow you to manipulate the seal into
the correct position.
IMPORTANT: DO NOT HEAT THE DOOR SEAL ON ANYTHING BUT THE
LOWEST HEAT SETTING, OR HEAT THE SEAL FOR A LONG PERIOD OF
TIME. OTHERWISE DAMAGE MAY BE CAUSED TO THE DOOR SEAL,
WHICH WOULD NOT BE RECTIFIED UNDER THE GUARANTEE FREE OF
CHARGE.
Aperture dimensions
The diagram below shows the aperture size that you will need to be
able to install your appliance.
o The appliance must be stood on a level floor. You can use the
levelling feet to take into account any minor unevenness in the floor.
Loading ...
Loading ...
Loading ...