Loading ...
Loading ...
Loading ...
15INSTALLATION
ENGLISH
2 With the hose leading up from the elbow,
firmly insert the elbow onto the drain outlet
on the back of the pedestal washer.
3 Adjust the band clamp with pliers to keep the
hose securely in place and prevent leaking.
Connecting the Drain Connector
1 Insert the included band clamps on to the
ends of the two drain hoses.
2 Connect the drain hose of the front-loading
washer and the pedestal washer to the drain
connector.
3 Insert the end of the drain hose connector
into the laundry tub or standpipe. Use the
band clamps to keep it in place, if needed.
NOTE
• Depending on the installation environment, you
may have to purchase a separate drain hose
connector. The connector supplied will suit a
standard laundry tub-side standpipe.
Leveling the Washer
How to Level the Washer
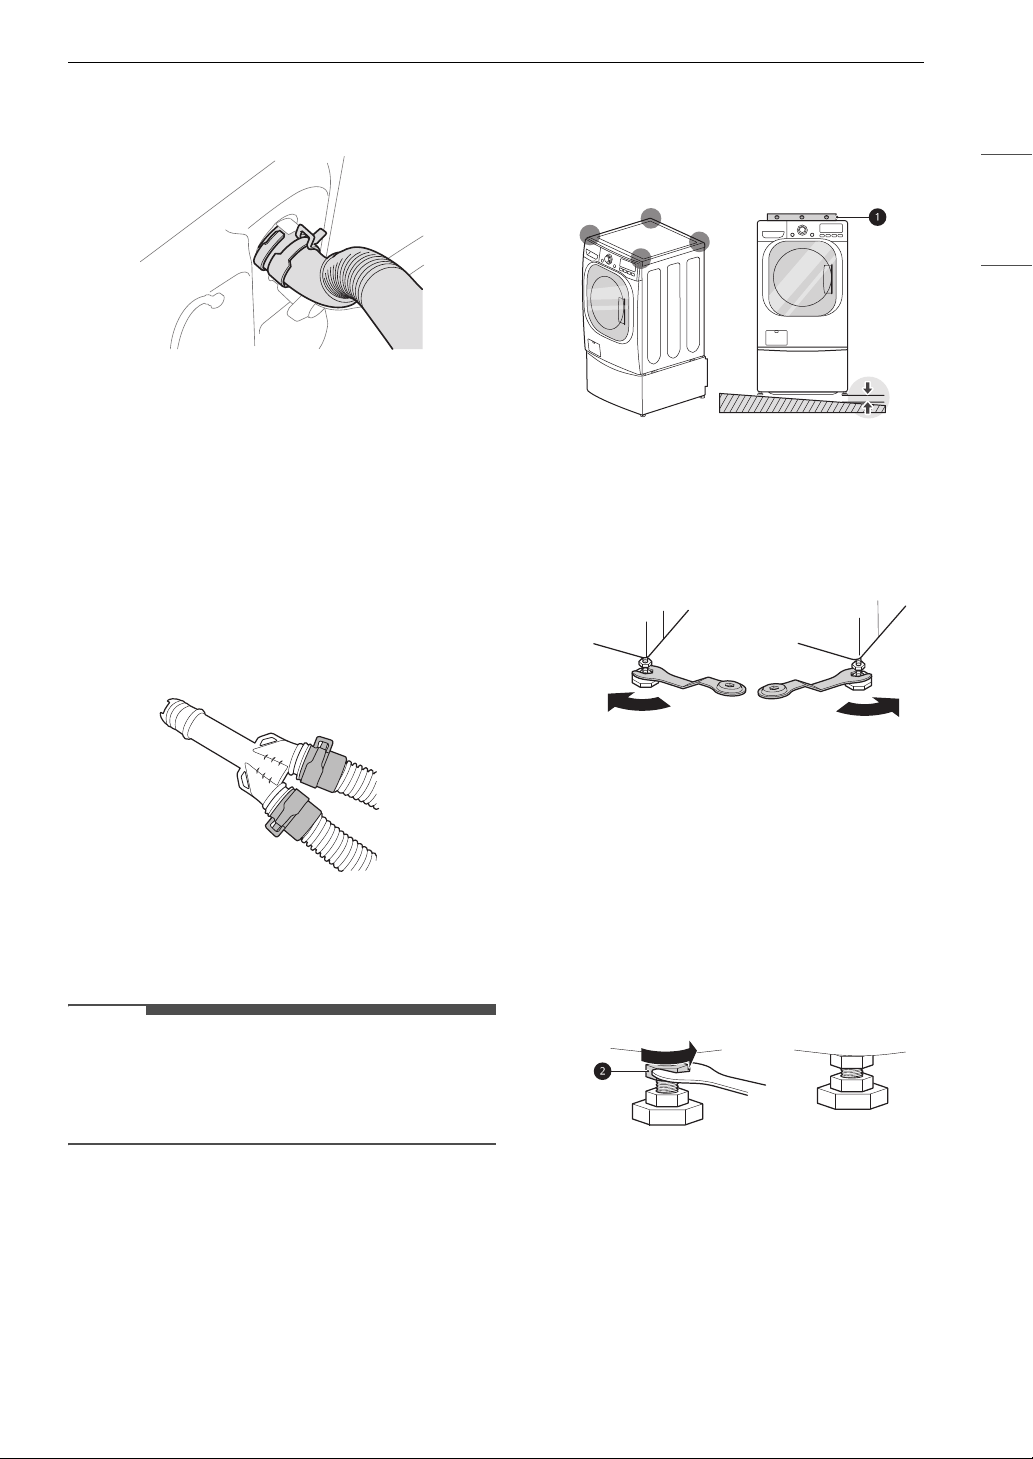
1 Position the washer in its final location.
• Take special care not to pinch, strain, or
crush the water and drain hoses. If you have
a carpenter’s level a, you can use it to
check that the washer is level. The slope
beneath the washer should not exceed 1/2",
and all 4 leveling feet must rest firmly on
the floor.
2 Adjust the leveling feet on the pedestal
washer.
• Turn all 4 leveling feet in one direction to
raise the washer or the other direction to
lower it.
3 Check the level again.
• Push or rock the top edges of the washer
gently to make sure the washer does not
rock. If the washer rocks, readjust the
leveling feet.
4 Tighten the locknuts b
• Turn the locknuts counterclockwise and
tighten them when the washer is level.
Using Non-Skid Pads
If you install the washer on a slippery surface, it
may move because of excessive vibration.
Incorrect leveling may cause malfunction through
noise and vibration. If this occurs, install the non-
skid pads under the leveling feet and adjust the
level.
1/2"
Loading ...
Loading ...
Loading ...