
Loading ...
Loading ...
Loading ...
Embroidering Preparation
28
a
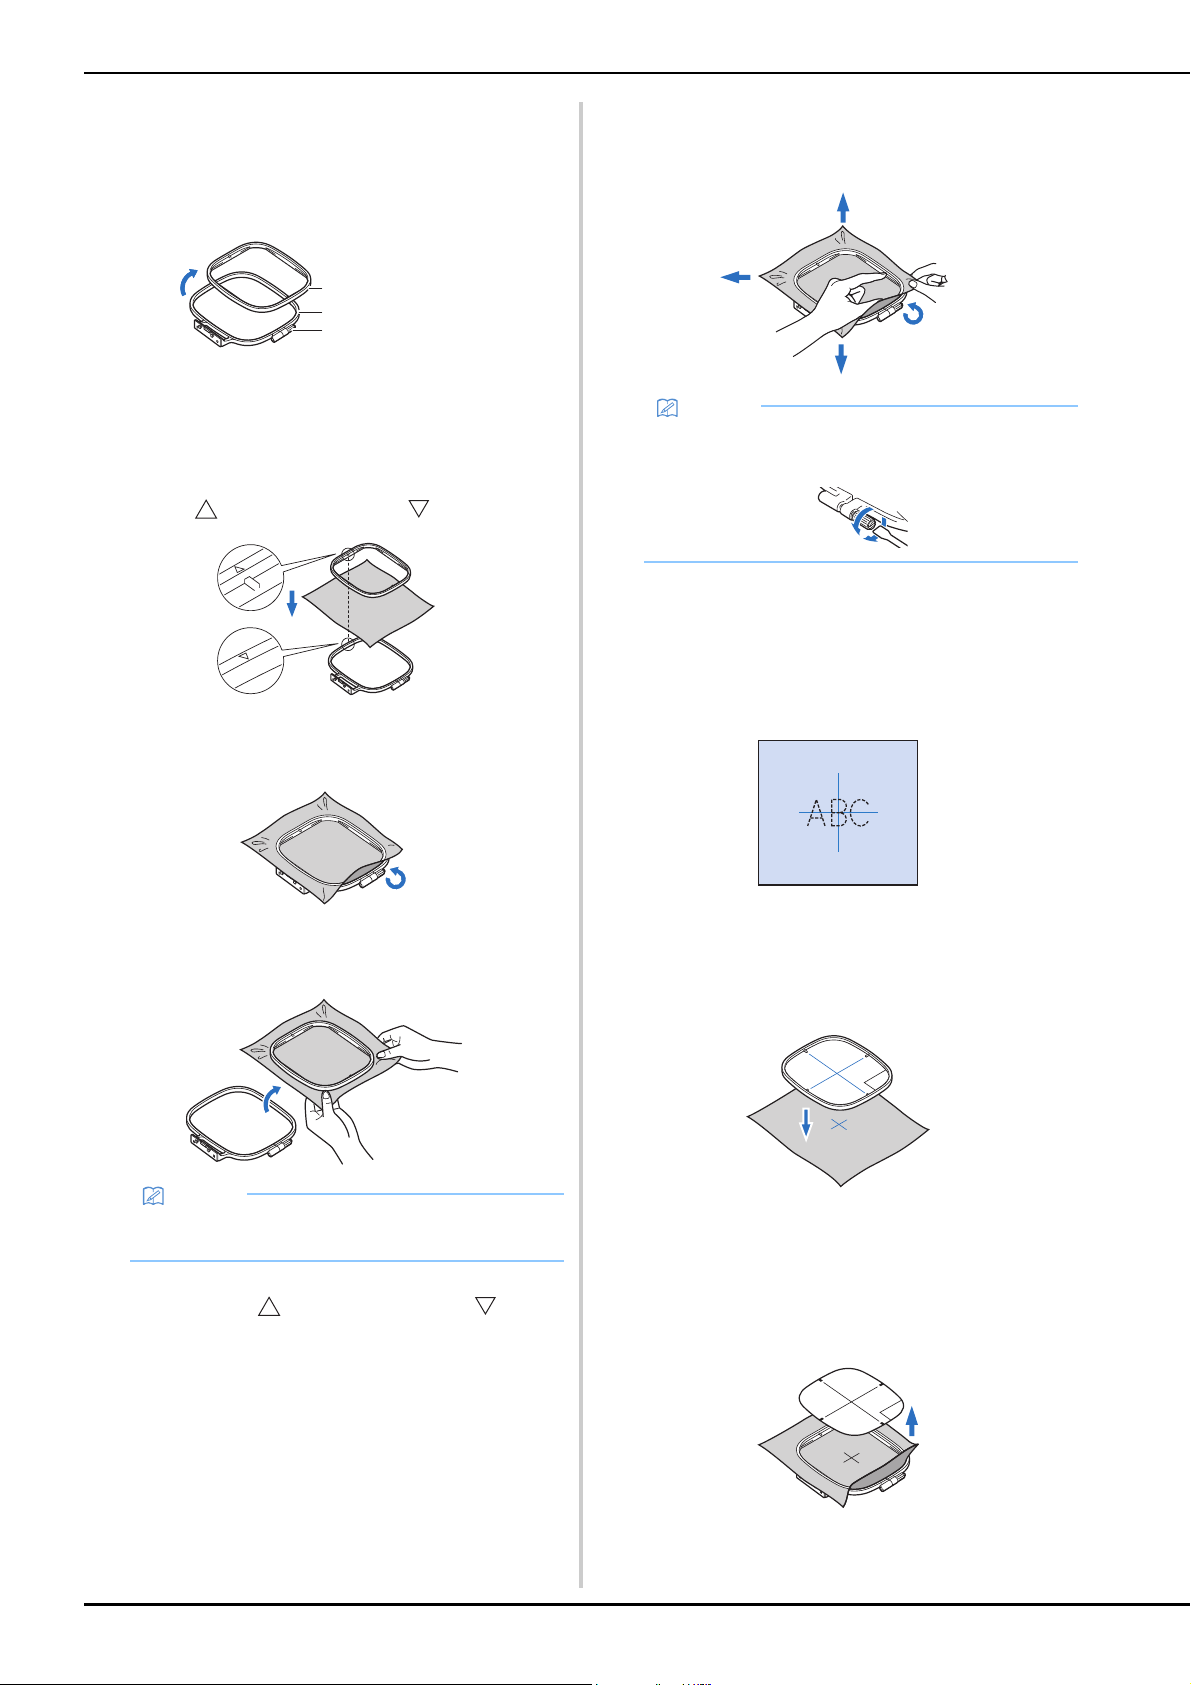
Loosen the embroidery frame adjustment screw and
remove the inner and outer frames, placing the outer
frame on a flat surface.
Separate the inner and outer frame by removing inner
frame upward.
b
Place the fabric with the stabilizer material on top of
the outer frame.
Have the right side of the fabric facing up.
c
Press the inner frame in from the top of the fabric.
Line up on the inner frame and on outer frame.
d
Tighten the adjustment screw by hand just enough to
secure the fabric.
e
Gently remove the fabric from the frame without
loosening the adjustment screw.
f
Press the inner frame in from the top of the fabric
again, lining up on the inner frame and on
outer frame.
• Press the inner frame into the outer frame. Before
beginning to embroider, make sure that the top edges
of the inner and outer frames are aligned.
g
Tighten the adjustment screw while removing any slack
in the fabric by hand. The goal is to have a drum-like
sound when the fabric is struck lightly.
■ Using the embroidery sheet
When you want to embroider the pattern in a particular
place, use the embroidery sheet with the frame.
a
With a chalk pencil, mark the area of the fabric you
want to embroider.
b
Place the embroidery sheet on the inner frame.
c
Line the mark on the fabric up with the base line on the
embroidery sheet.
d
Place the inner frame with the fabric on the outer
frame and adjust the fabric if needed to align marks on
fabric with the embroidery sheet.
• For details, refer to page 27.
e
Remove the embroidery sheet.
1 Inner frame
2 Outer frame
3 Adjustment screw
Memo
• This precautionary step will help reduce pattern
distortion while embroidering.
a
b
c
Memo
• You can use the included screwdriver when you
loosen or tighten the frame adjustment screw.
Loading ...
Loading ...
Loading ...