Loading ...
Loading ...
Loading ...
8 I ENGLISH
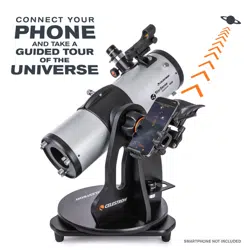
13. Loosen the thumbscrews on the end of the focuser,
remove the focuser’s cover cap, and insert the 25mm
(or 17mm) eyepiece. Retighten the thumbscrews on
the focuser to secure the eyepiece in place.
13
I1
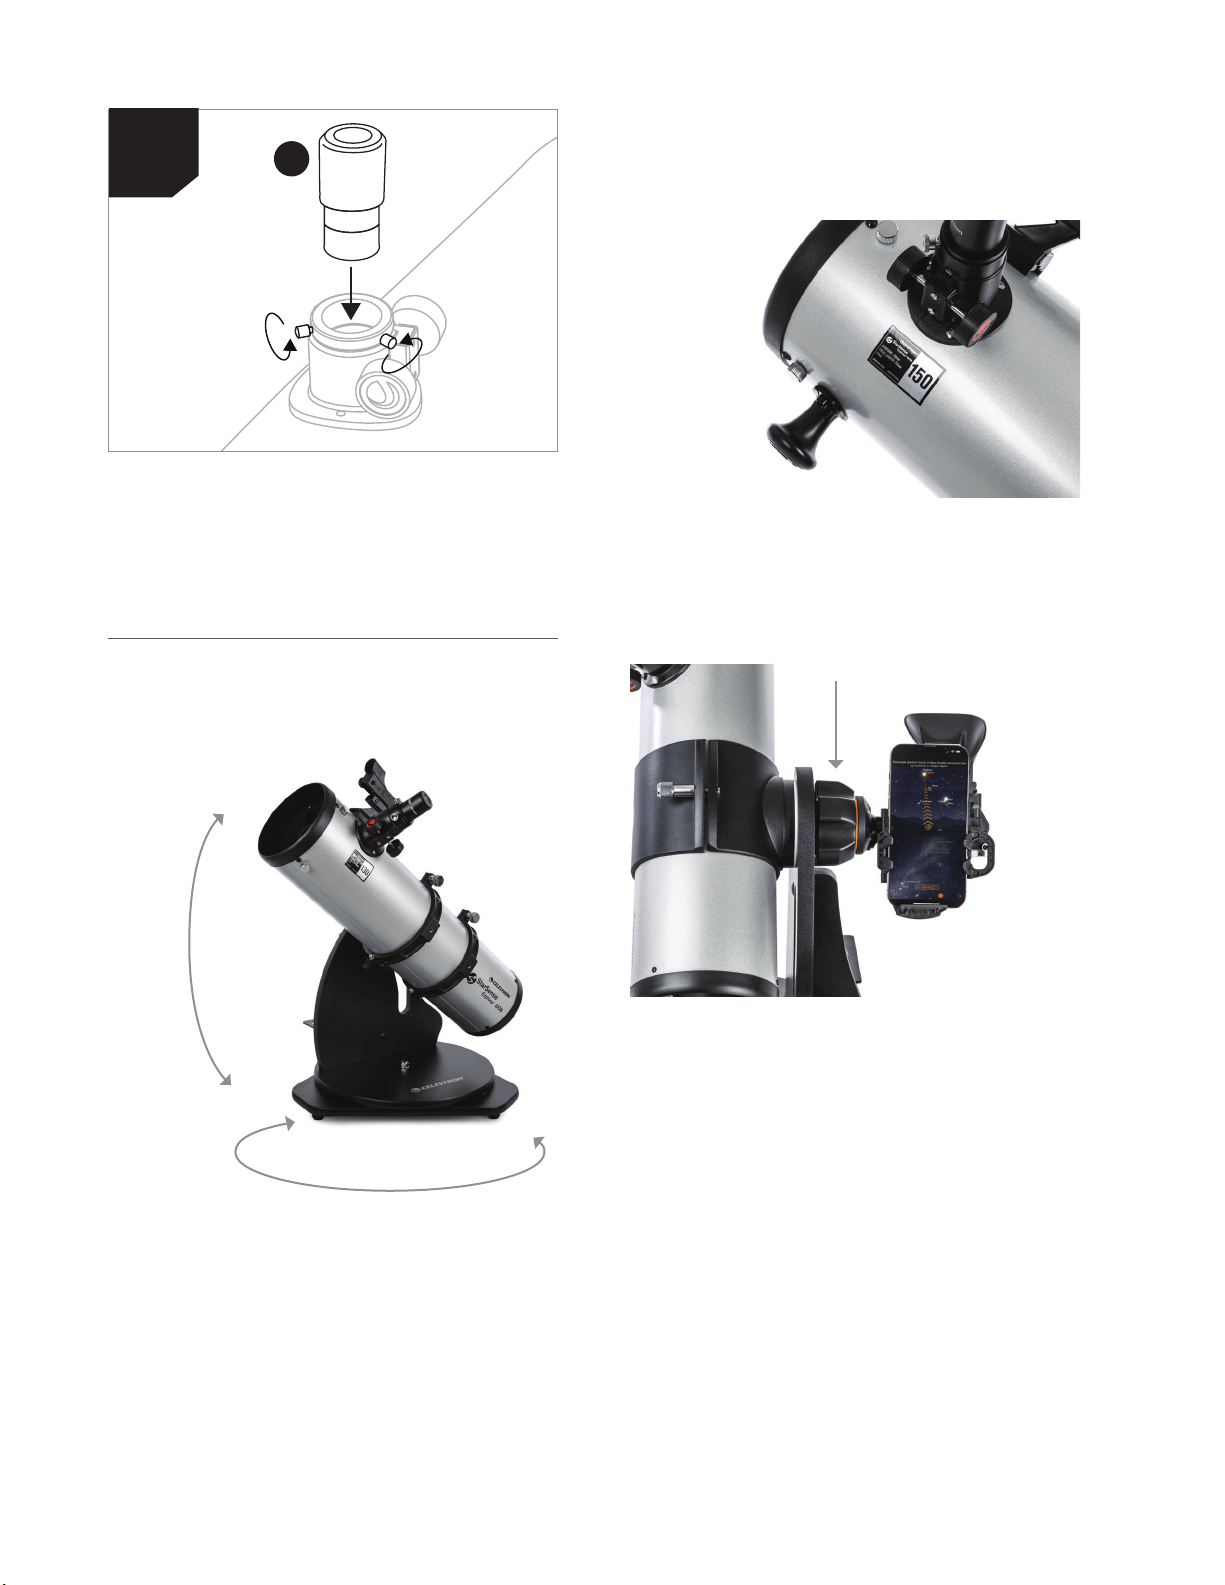
POINTING THE TELESCOPE
The tabletop Dobsonian base is an altazimuth mount, which
means it moves the telescope in two directions: up-and-
down (i.e., altitude) and left-to-right (i.e., azimuth) (Figure 2).
ALTITUDE
AZIMUTH
Figure 2: StarSense Explorer Tabletop Dobsonians have two axes of
motion: altitude (up-and-down) and azimuth (left-to-right).
Pointing your SSE Tabletop Dob at an object is easy. Simply
move the telescope tube up-and-down and left-to-right
until it is pointing toward the desired object, and the object
appears in the telescope’s eyepiece.
For the 150mm model, the panning knob at the front of
the telescope tube provides a convenient place to grasp the
tube for pointing (Figure 3). Using this knob also prevents
heat from your hand from entering the optical path, which
can temporarily distort the view.
Figure 3: Grasp the panning knob on the 150mm SSE Tabletop Dob when
pointing the telescope.
You can adjust the tension along the altitude axis by turning
the altitude tensioning knob (Figure 4).
Figure 4: Adjust the tension of the altitude axis with the altitude tensioning
knob.
Turn the knob to add enough tension to provide a smooth
up-and-down motion. Under most circumstances, you
won’t need to add much tension. However, if you are using
a heavy eyepiece, you may need to add more tension so the
telescope remains still when not touched.
Ensure the telescope is balanced front-to-back in the rings
or cradle for the best performance. Slightly loosen the
clamping knob(s) on the tube rings or cradle and move
the telescope forward or back until it is balanced. Then
retighten the clamping knob(s) (Figure 4a).
Loading ...
Loading ...
Loading ...