
Loading ...
Loading ...
Loading ...
4
1
Control Panel: For more information, refer to Control Panel.
CAUTION: Lids and tampers are not interchangeable between
dierent container styles, types and sizes.
2
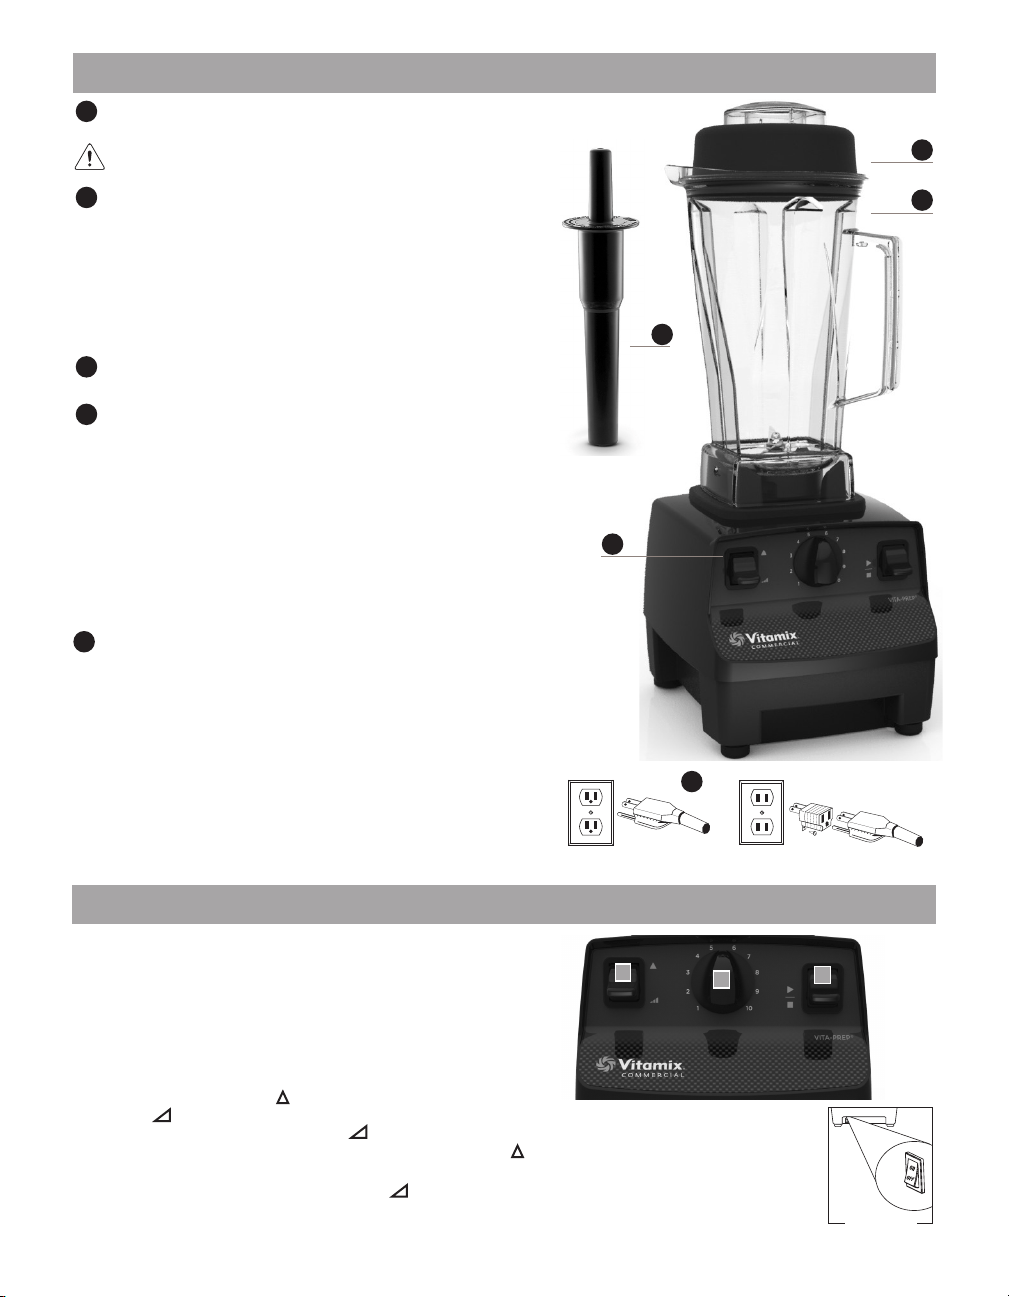
64-oz. capacity container with 2-part lid:
• Always use the lid and the lid plug when the machine is
operating.
• Never operate the blender without the lid securely locked
in place.
• Ounces, Milliliters and Cups are clearly marked.
• Insert the lid plug through the lid and secure by turning
clockwise.
• Remove the lid plug to use the tamper or to add ingredients.
3
Tamper: Using the tamper maintains circulation by preventing
air pockets from forming.
4
Two Piece Lid: (lid and lid plug)
To Lock the Lid in Place: The lid must always be secured when
processing, especially hot liquids that may scald. Never operate
the blender without the lid securely locked in place. The lid
has a continuous rim which latches inside the container tabs.
Push one side of the rim under one tab and push down over
the opposite tab to snap the lid into position.
To Remove the Lid: Place hands around the lid, pressing
thumbs above one of the container tabs. Push in and lift off.
To Remove the Lid Plug: Rotate the lid plug counterclockwise
from the “locked” to “unlocked” position and lift out.
5
Power Cord: The blender’s power cord comes equipped with
a three-prong (grounding) plug which mates with a standard
three-prong wall outlet. This cord will vary for countries outside
the United States of America.
Adapters are available for two-prong outlets. Do not cut or
remove the third (ground) prong from the plug or power cord.
Consult your electrician if you are not sure if the wall outlet
is grounded through the building wiring. With a properly
grounded two-prong wall outlet, ground the machine by
attaching the tab on the adapter to the wall outlet cover by
means of the screw in the center of the cover.
Pa R t S an d featu R e S
co n tRo l Pan e l
1. On/O Switch: This is a lighted switch. When the switch is lit, the
power is on. Located on the front of the machine below the control
panel (Figure A). The On/O switch controls the power to the
machine. While plugged in, switch to on to ready the machine for
blending. Shut o the power switch at night or whenever the machine
will be left unattended.
2. Start / Stop Switch: Depress the start switch to begin blending. Depress
the switch again to stop the blend.
3. High/Variable Switch: High
( )
is the fastest speed available. Switch to
Variable ( ) to activate the variable speeds. Always make sure that the
High/Variable Switch is set to Variable ( ) before moving the On/O
Switch to the On (|) position. Do not start your machine on High
( )
.
4. Variable Speed Dial: Selects many speed settings. It is active only when
the High/Variable Switch is set in the Variable ( ) position.
1
2
3
FIGURE A FIGURE B
Note: Your machine’s control panel may look
dierent from this illustration.
FIGURE A
1
2
3
4
5
Loading ...
Loading ...
Loading ...