mmWJENN.AIR
Use and Care Manual
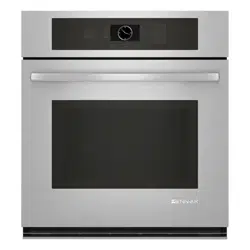
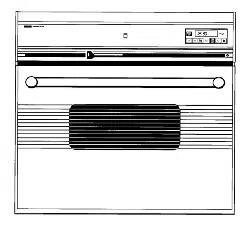
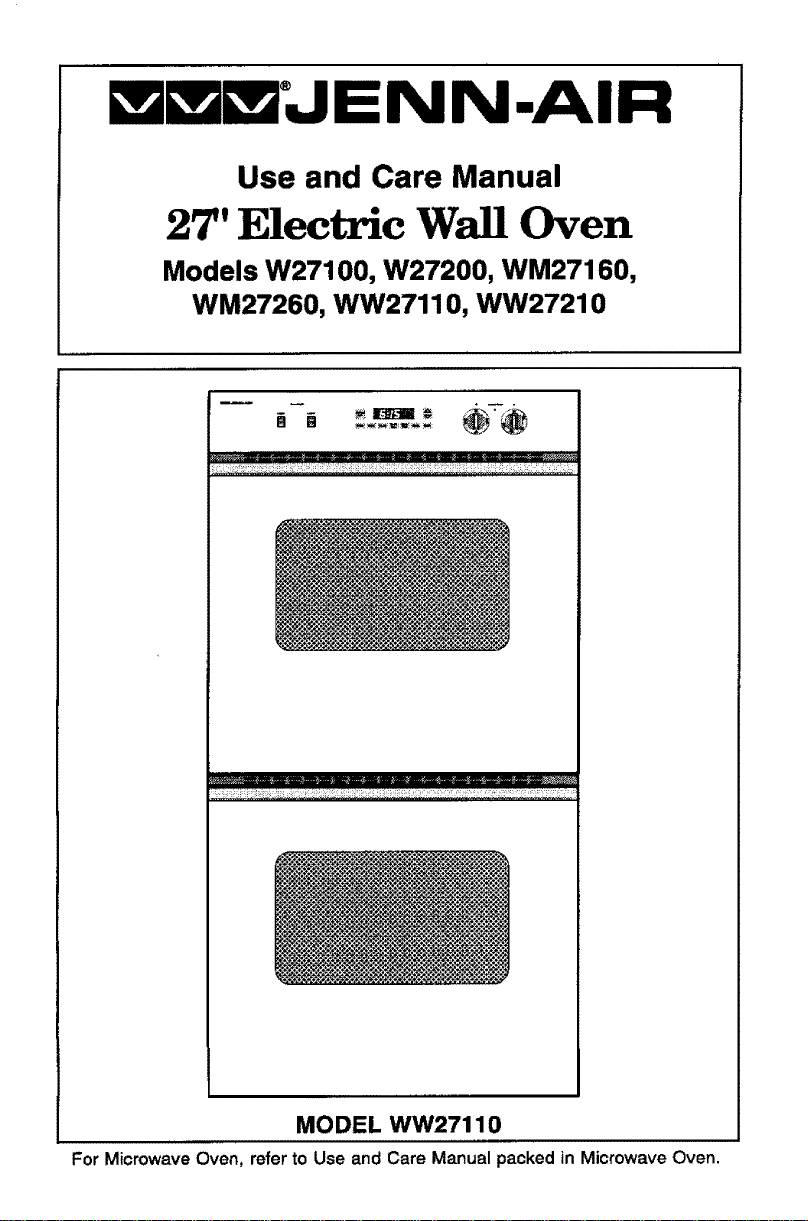
27" Electric Wall Oven
Models W27100, W27200, WM27160,
WM27260, WW27110, WW27210
m _ , n .
.... . m _,_m_m_=_my_ I
MODEL WW27110
For Microwave Oven, refer to Use and Care Manual packed in Microwave Oven.
Congratulations on your choice of a Jenn-Air wall oven. Your Jenn-Air
convection oven combines the best of four cooking methods: conventional
baking or roasting, convection baking, convection roasting and broiling in a
self-cleaning oven. (Note: Only Models W27200, WM27260 and WW27210
have the convection option.)
The Jenn-Air convection oven is actually a conventional oven that circulates
heated air within the oven. As both bake and broil heating elements cycle on
and off with the thermostat, a fan keeps the heated air circulating around the
food. The constantly recirculating heated air in the convection oven strips
away the layer of cooler air that surrounds the food. Consequently, many
foods cook more quickly. Evenly distributed heat makes multiple rack
cooking possible. Convection roasted meats retain their natural flavor and
juiciness with tess shrinkage than conventional roasting.
In addition to the many exclusive benefits of convection cooking, your Jenn-
Air oven is also a fine full featu red conventional bake and broil oven. You can
cook your "old favorite" recipes as you have in the past. The conventional
bake oven also gives you the flexibility of preparing various foods when
convection cooking may not be as beneficial, as when cooking foods in
covered casseroles or clay pots. The broil element is convenient for top
browning and oven broiling of foods.
Before you begin cooking with your new oven, please take a few minutes to
read and become familiar with the instructions in this book. On the following
pages you will find a wealth of information regarding all aspects of using your
new oven. By following the instructions carefully, you will be able to fully
enjoy and properly maintain your oven and achieve excellent results with the
food you prepare.
Should you have any questions about using your Jenn-Air oven, write to us.
Be sure to provide the model number.
Jenn-Air Customer Assistance
c/o Maytag Customer Service
P.O. Box 2370
Cleveland, TN 37320-2370
Baking
BakingChart ...................................................................................... 17
Causes of Cake Failure ..................................................................... 18
Convect Baking ........................................................................... 18-19
Convect Cooking on Multiple Racks ................................................. 19
General Recommendations ............................................................... 17
Before You Call for Service .............................................................. 34-35
Broiling
Broiling Chart ..................................................................................... 25
Broiling Tips ....................................................................................... 25
To Broil .............................................................................................. 24
Caring for Your Oven
Adjust Oven Temperature ........................................................... 32-33
Cleaning Other Surfaces ................................................................... 31
Oven Light Bulb Replacement ........................................................... 31
Cleaning
Cleaning the Lower Oven (Models WW27110 & WW27210 Only) ...29
Self-Cleaning Process ................................................................. 26-30
Clock Controls
Clock Controlled Baking and Roasting ........................................ 13-15
Time of Day Clock ............................................................................. 11
Timer ................................................................................................. 12
Oven Operation
Oven Control Panel ......................................................................... 6-7
Rack Positions ..................................................................................... 9
Setting Controls ................................................................................... 8
Oven Operation (Models WW27110 & WW27210 Lower Oven Only)
Oven Control Panel ........................................................................... 10
Setting Controls ................................................................................. 10
Roasting
Conventional Roasting Recommendations ....................................... 20
Convect Roasting ........................................................................ 22-23
Frozen Convenience Foods .............................................................. 23
General Roasting Recommendations ............................................... 20
Roasting Chart .................................................................................. 21
Safety Precautions ............................................................................... 4-5
Read before operating your oven
All appliances - regardless of the manufacturer - have the potential through
improper or careless use to create safety problems. Therefore the following
safety precautions should be observed"
1. Be sure your appliance isproperly installed and grounded by a qualified
technician.
2. Never use your appliance for warming or heating the room.
3. Children should not be left alone or unattended in area where appliance
is in use. They should never be allowed to sit or stand on any part of the
appliance.
4. Wear proper apparel. Loose-fitting or hanging garments should never be
worn while using the appliance.
5. Do not repair or replace any part of the appliance unless specifically
recommended in this manual. All other servicing should be referred to an
authorized Jenn-Air Service Contractor.
6. Flammable materials should not be stored in an oven.
7. Do not use water on grease fires, Smother fire or flame or use dr),
chemical or foam-type extinguisher.
8. Use only dry potholders. Moist or damp potholders on hot surfaces may
result in burns from steam. Do not let potholder touch hot heating
elements. Do not use a towel or other bulky cloth.
9. Use care when opening oven door, Let hot air or steam escape before
removing or replacing food.
10. Do not heat unopened food containers. Build-up of pressure may cause
container to burst and result in injury.
11. Keep oven vent ducts unobstructed.
12. Always place oven racks in desired location while oven iscool. If rack must
be moved while oven is hot, do not let potholder contact hot heating
element in oven.
13. Do not clean door gasket. The door gasket is essential for a good seal.
Care should be taken not to rub, damage, or move the gasket.
14. Do not use oven cleaners in a self-cleaning oven. No commercial oven
cleaner or oven liner protective coating of any kind should be used in or
around any part of the oven.
15. Clean only parts listed in this manual.
16, CAUTION: BEFORE SELF-CLEANING THE OVEN, REMOVE FOOD,
BROILER PAN AND OTHER UTENSILS.
17. Listen for fan. Afan noiseshould be heard during the bake, convect bake,
convect roast, broil and cleaning cycles. If not, call a serviceman.
18. DO NOTTOUCH HEATING ELEMENTS OR INTERIOR SURFACES OF
OVEN. Heating elements may be hot even though they are dark in color.
Interior surfaces of any oven become hot enough to cause bums. During
and after use, do not touch, or let clothing or other flammable materials
contact heating elements or interior surfaces of oven until they have had
sufficient time to cool. Other surfaces of the appliance may become hot
enough to cause burns-among these surfaces are:oven vent openings
and surfaces near these openings, oven doors, windows of oven doors.
19. PREPARED FOOD WARNING: Follow food manufacturer's instructions.
If a plastic frozen food container and/or its film cover distorts, warps or is
otherwise damaged during cooking, immediately discard the food and its
container. The food could be contaminated.
20. This appliance has been tested for safe performance using conventional
cookware. Do not use any devices or accessories that are not specificatly
recommended in this manual. Do not use add-on convection systems.
The use of devices or accessories that are not expressly recommended
in this manual could create serious safety hazards, result in performance
problems, and reduce the life of the components of the appliance.
21. Do not allow aluminum foil to contact heating element.
IMPORTANT SAFETY NOTICE AND WARNING
The California Safe Drinking Water and Toxic Enforcement Act of 1986
(Proposition 65) requires the Governor of California to publish a list of
substances known to the State of California to cause cancer or reproductive
harm, and requires businesses to warn customers of potential exposures to
such substances. Users of this appliance are hereby warned that when the
oven is engaged in the self-clean cycle, there may be some low level exposure
to some of the listed substances, including Carbon Monoxide. Exposure to
these substances can be minimized by properly venting the oven to the
outdoors during the self-clean cycle.
- SAVE THESE INSTRUCTIONS -
5
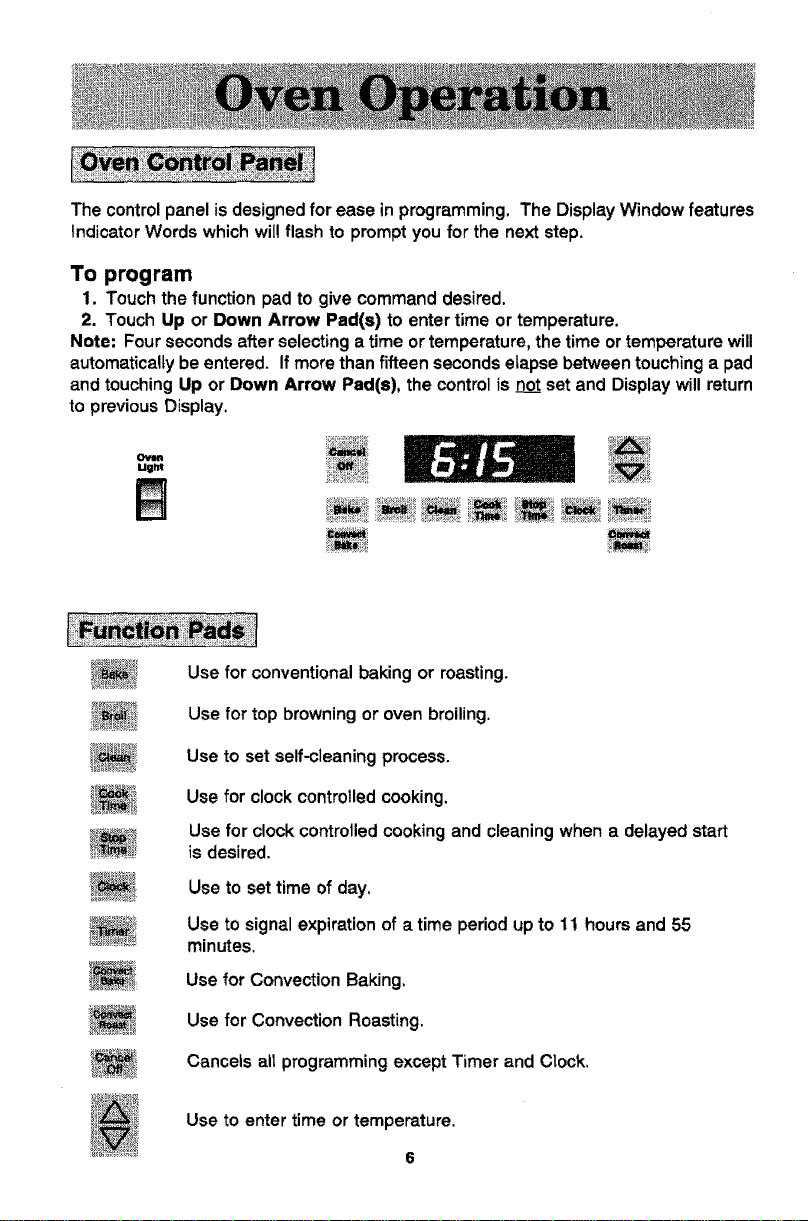
The controlpanel isdesigned for ease in programming. The DisplayWindowfeatures
IndicatorWordswhichwillflashto promptyoufor the nextstep.
To program
1. Touch the function pad to give command desired.
2. Touch Up or Down Arrow Pad(s) to enter time or temperature.
Note: Four seconds after selecting a time or temperature, the time or temperature will
automatically be entered. If more than fifteen seconds etapse between touching a pad
and touching Up or Down Arrow Pad(s), the control is notset and Display will return
to previous Display.
Oven
Ugltt
Use for conventional baking or roasting.
Use for top browning or oven broiling.
Use to set self-cleaning process.
Use for clock controlled cooking.
Use for clock controlled cooking and cleaning when a delayed start
is desired.
Use to set time of day.
Use to signal expiration of a time period up to 11 hours and 55
minutes.
Use for Convection Baking.
Use for Convection Roasting.
Cancels all programming except Timer and Clock,
Use to enter time or temperature.
6

Oven Light Switch (Control Panel)
The oven lightautomatically comes on whenever the oven door is opened. When door
is closed, push the Oven Light Switch to turn oven light on or off.
Display Window
Shows time of day, timer, and oven functions.
gL]
iE:
CONVECT SAKEROASTCOOK
Display Numbers:
• Show time of day.
CLEAN8ROLLLOCKel
DELAYTIMEDBAKE
STOP TIMER[]
• Countdown of time remaining when using time functions.
• Show temperature of oven as it rises to reach programmed temperature and the
set temperature once it is reached.
• Recall programmed temperature or time when commanded.
Prompts:
• Serve as a reminder toshut oven door, ifit isopen, for self-cleaning operation when
the word, "door",is displayed.
Indicator Words:
• Flashto promptnextstep.
• Indicatestatusof programmedfunction,
• Show programmedfunction when recalled.
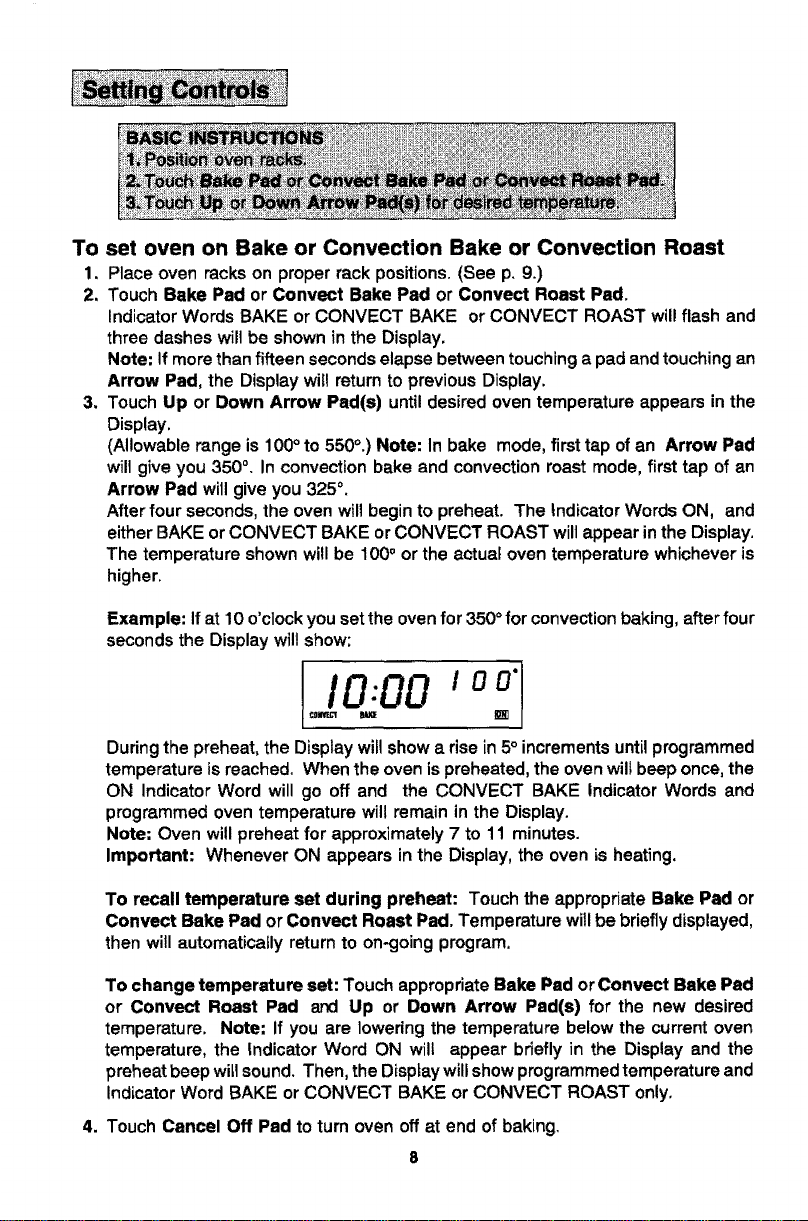
To set oven on Bake or Convection Bake or Convection Roast
1. Place oven racks on proper rack positions. (See p. 9.)
2. Touch Bake Pad or Convect Bake Pad or Convect Roast Pad.
Indicator Words BAKE or CONVECT BAKE or CONVECT ROAST will flash and
three dashes will be shown in the Display.
Note: If more than fifteen seconds elapse between touching a pad and touching an
Arrow Pad, the Display will return to previous Display.
3. Touch Up or Down Arrow Pad(s) until desired oven temperature appears in the
Display.
(Allowable range is 100° to 550°.) Note: In bake mode, first tap of an Arrow Pad
will give you 350°. In convection bake and convection roast mode, first tap of an
Arrow Pad will give you 325 °.
After four seconds, the oven will begin to preheat. The Indicator Words ON, and
either BAKE or CONVECT BAKE or CONVECT ROAST will appear inthe Display.
The temperature shown will be 100° or the actual oven temperature whichever is
higher.
Example: If at 10 o'clock you set the oven for 350 ° for convection baking, after four
seconds the Display wiltshow:
I,oooo_. ,o j
During the preheat, the Display will show a rise in 5° increments until programmed
temperature is reached. When the oven is preheated, the oven wilt beep once, the
ON Indicator Word will go off and the CONVECT BAKE Indicator Words and
programmed oven temperature will remain in the Display.
Note: Oven will preheat for approximately 7 to 11 minutes.
Important: Whenever ON appears in the Display, the oven is heating,
To recall temperature set during preheat: Touch the appropriate Bake Pad or
Convect Bake Pad or Convect Roast Pad. Temperature will be briefly displayed.
then will automatically return to on-going program.
To change temperature set: Touch appropriate Bake Pad or Convect Bake Pad
or Convect Roast Pad and Up or Down Arrow Pad(s) for the new desired
temperature. Note: if you are lowering the temperature below the current oven
temperature, the Indicator Word ON will appear briefly in the Display and the
preheat beep wit1sound. Then, the Display will show programmed temperature and
Indicator Word BAKE or CONVECT BAKE or CONVECT ROAST only.
4. Touch Cancel Off Pad to turn oven off at end of baking,

The rackpositionsnotedare generallyrecommendedfor the best browningresults and
mostefficientcookingtimes. Formanyfooditems,excellentresultscan be achieved
whenusingoneofsevera/differentrackpositions. Refertobakingandmastingsections
for recommendationsfor specificfoods.
Different Racks
One flat rack and one offset rack are packaged with your oven. The use of the offset
rack is denoted in the listbelow and the charts as an "o" after the rack number. Note
W27200, WM27260 and WW27210: Convection models received a second flat rack
to be used forthree rack baking. Note WW27110 and WW27210 Owners: Anadditional
offset rack is packaged in your oven.
--4 (flat rack)
_3o (offset rack)
_t (flat rack)
Rack Uses
Rack Position #4o (offset rack on #4):
Most broiling.
Rack Position #3:
Most baked goods on cookie sheets, cakes (sheet and layer).
Rack Position #3o (offset rack on #3):
Most baked goods on cookie sheets, frozen convenience foods, fresh fruit pie, cream
pie, layer cakes, main dish souffle.
Rack Position #2:
Roasting small cuts of meat, cakes (tube, bundt or layer), frozen fruit pie, pie shell,
large casseroles.
Rack Position #20 (offset rack on #2):
Roasting small cuts of meat, loaves of bread, angel food cake.
Rack Position #1:
Large cuts of meat and large poultry, angel food cake, loaves of bread, custard pie,
dessert souffle.
Multiple Rack Cooking:
Two racks, use #20 and #4. Three racks, use#1,#3o, and #4,
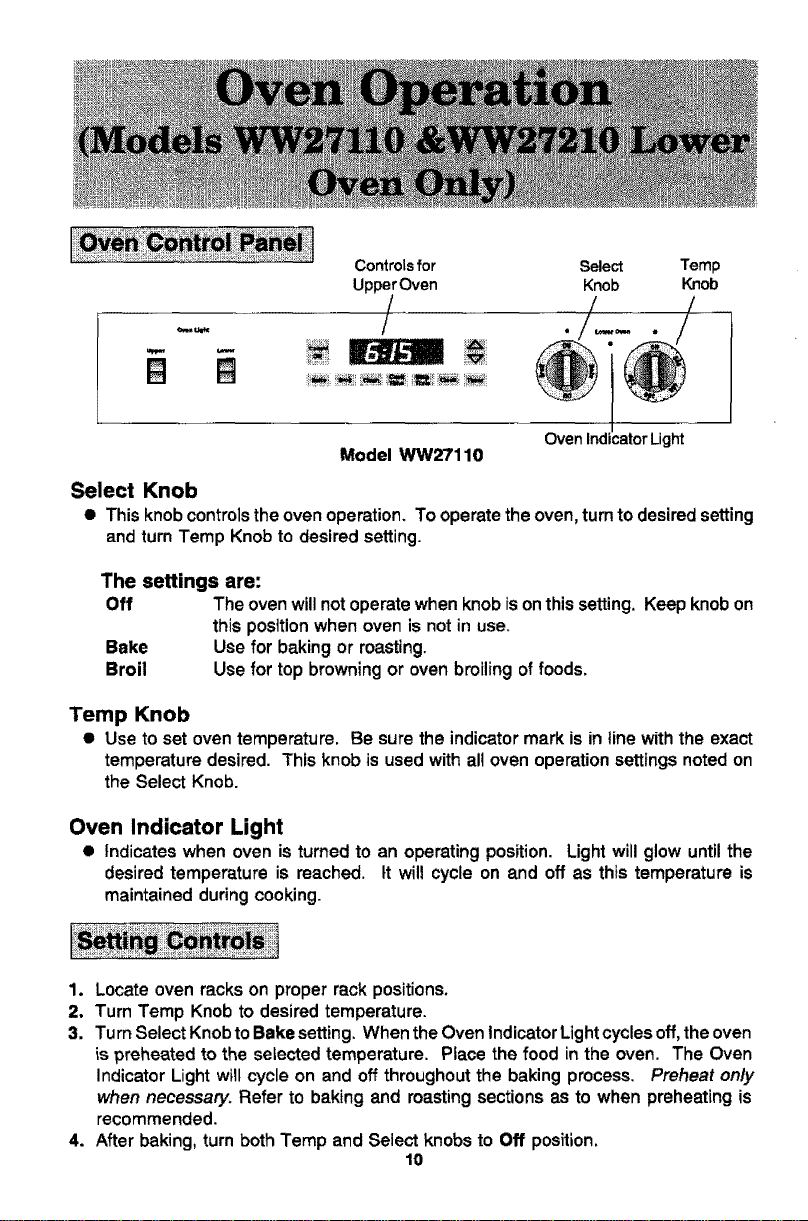
Controlsfor Select Temp
UpperOven Knob Knob
/ ./--./
OvenIndmatorLight
Model WW27110
Select Knob
• This knob controls the oven operation. To operate the oven, turn to desired setting
and turn Temp Knob to desired setting.
The settings are:
Off The oven will not operate when knob ison this setting. Keep knob on
this posttionwhen oven is not in use.
Bake Use for baking or roasting.
Broil Use for top browning or oven broiling of foods.
Temp Knob
• Use to set oven temperature. Be sure the indicator mark is in line with the exact
temperature desired. This knob is used with all oven operation settings noted on
the Select Knob.
Oven Indicator Light
• Indicates when oven is turned to an operating position. Light will glow until the
desired temperature is reached, tt will cycle on and off as this temperature is
maintained during cooking.
1, Locate oven racks on proper rack positions.
2, Turn Temp Knob to desired temperature.
3, Turn Select Knob to Bake setting. When the Oven indicator Light cycles off,the oven
is preheated to the selected temperature. Place the food in the oven. The Oven
Indicator Light wilt cycle on and off throughout the baking process. Preheat on/y
when necessary. Refer to baking and roasting sections as to when preheating is
recommended.
4. After baking, turn both Temp and Select knobs to Off position.
10
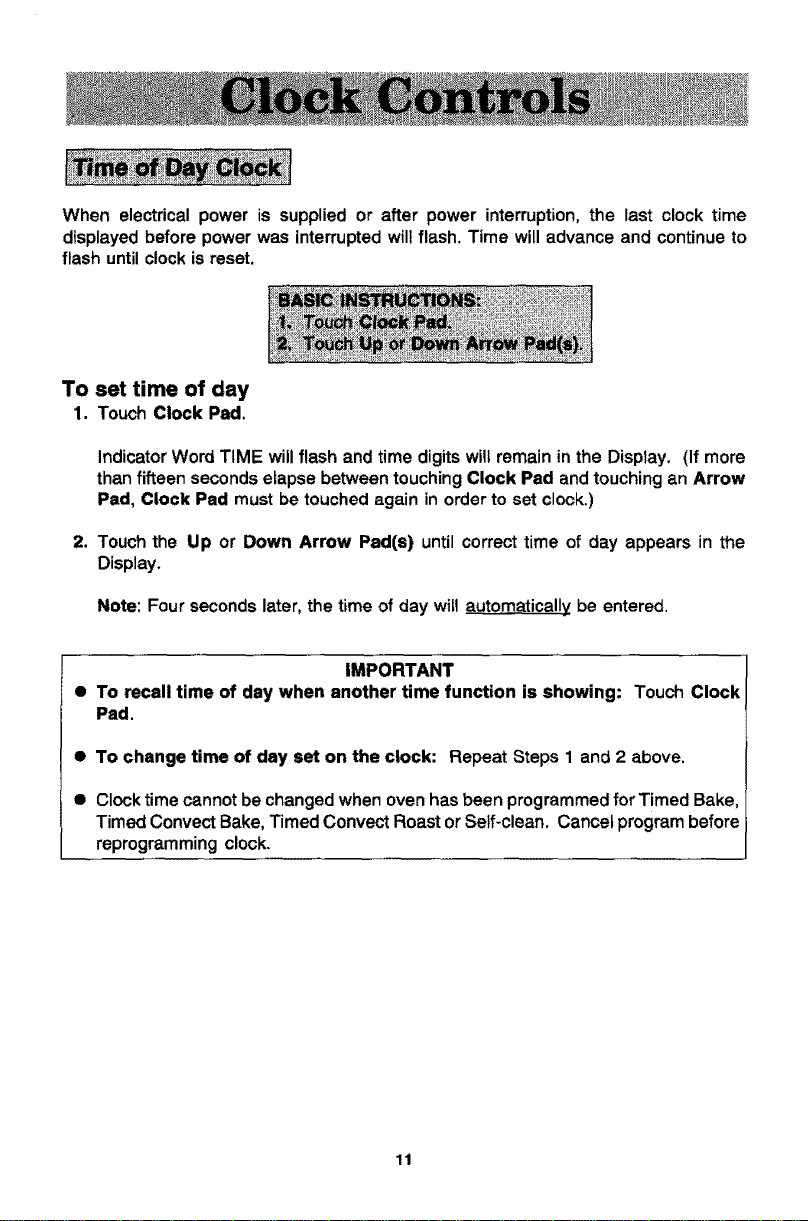
Whenelectrical power is supplied or after power interruption, the last clock time
displayed before power was interrupted will flash. Time will advance and continue to
flash until clock is reset.
To set time of day
1. TouchClock Pad.
Indicator Word TIME will flash and time digits will remain in the Display. (If more
than fifteen seconds elapse between touching Clock Pad and touching an Arrow
Pad, Clock Pad must be touched again in order to set clock.)
2. Touch the Up or Down Arrow Pad(s) until correct time of day appears in the
Display.
Note: Four seconds later, the time of day will automatically be entered.
IMPORTANT
• To recall time of day when another time function is showing: TouchClock
Pad.
• To change time of day set on the clock: Repeat Steps 1 and 2 above.
• Clock time cannot be changed when oven has been programmed for Timed Bake,
Timed Convect Bake, Timed Convect Roast or Self-clean, Cancel program before
reprogramming clock.
11
Important: This intervalTimercan be usedto remind youwhen a period,up to t 1hoursand
55 minutes, expires. Itcanbe usedindependentlyofanyotherovenactivity and canbeset while
another oven functionisoperating.The Timer doesnot controlthe oven.
To
1.
2.
set Timer
Touch Timer Pad.
The indicator WordTIMER witlflash and "0HR:00" appears inthe Display.
Touch Up Arrow Pad until the desirednumber ofminutes orhours and minutesappear
inthe Display.
Note: ifmorethanfifteen seconds elapsebetweentouchingtheTimer PadandUp Arrow
Pad, Timer Pad mustbe touched again.
Exampte: To settheTimer for5 minutes,touch:Timer Pad and U )Arrow Pad.Afterfour
sec°nds' the Display wiltsh°w: l "05
TIMER
Example: To set the Timer for I hour, touch: Timer Pad and U _Arrow Pad. After four
seconds,the Display wil! show:
I'1:00
11MER
Afterfour seconds,the Timer willstart tocountdown. Displaywiil countdowninminutes
untilthe lastminute.When the lastminute isreachedthere willbe a beepand Displaywill
0o,o con° I SS t
Example: 55 sec. *"
"rt_R
At the end oftime set, the timerwillbeep four timesand "End" willappear in the Display.
Ifthe timer is not cancefled(see below), there will be two beeps every thirty secondsfor
five minutes and the Displaywill remain asbelow.
Note: Countdownwitlhave display precedence over othertime functions. AfterTimer
ends, Displaywill returnto timeofday.
To cancel Timer
1. Touch and hoidTimer Pad for three seconds.
OR
2. e. TouchTimer Pad and
b. Touch Down Arrow Pad untiltimeisreturned to "00".
NOTE: Touching Cancel Off Pad to cancel beeps will cancel ALL selected oven]
programming.
J
12
*Omitsteps5&6ifyou want baking to start immediately.
To set oven to start immediately and shut off automatically
1. Touch Bake Pad or Convect Bake Pad or Convect Roast Pad.
Indicator Words BAKE or CONVECT BAKE or CONVECT ROAST will flash and
three dashes will be shown in the Display
2. Touch Up or Down Arrow Pad(s) until desired oven temperature appears in the
Display.
After four seconds the oven will begin to preheat. The Indicator Words ON and
BAKE or CONVECT BAKE or CONVECT ROAST will appear in the Display. The
temperature shown will be 100° or the actual temperature of the oven, whichever
is higher.
Example: Ifat 10 o'clock you set the oven for 350 ofor convection baking, after four
seconds the Display will show:
I ooo_I
During the preheat, the Display willshow a rise in 5° increments untilprogrammed
temperature is reached. When the oven ispreheated, the oven willbeep once, the
ON indicator word wilt go off, and the CONVECT BAKE Indicator Words and
programmed oven temperature will remain in the Display.
Important: Whenever ON appears in the Display, the oven is heating.
3. Touch Cook Time Pad.
Indicator Words COOK TIME will flash and Display wilt show "0 HR:00".
4. Touch Up Arrow Pad to enter cooking hours and minutes.
Hours are to left of colon and minutes to right of colon.
(Allowable range is 10 minutes to 11 hours and 55 minutes.)
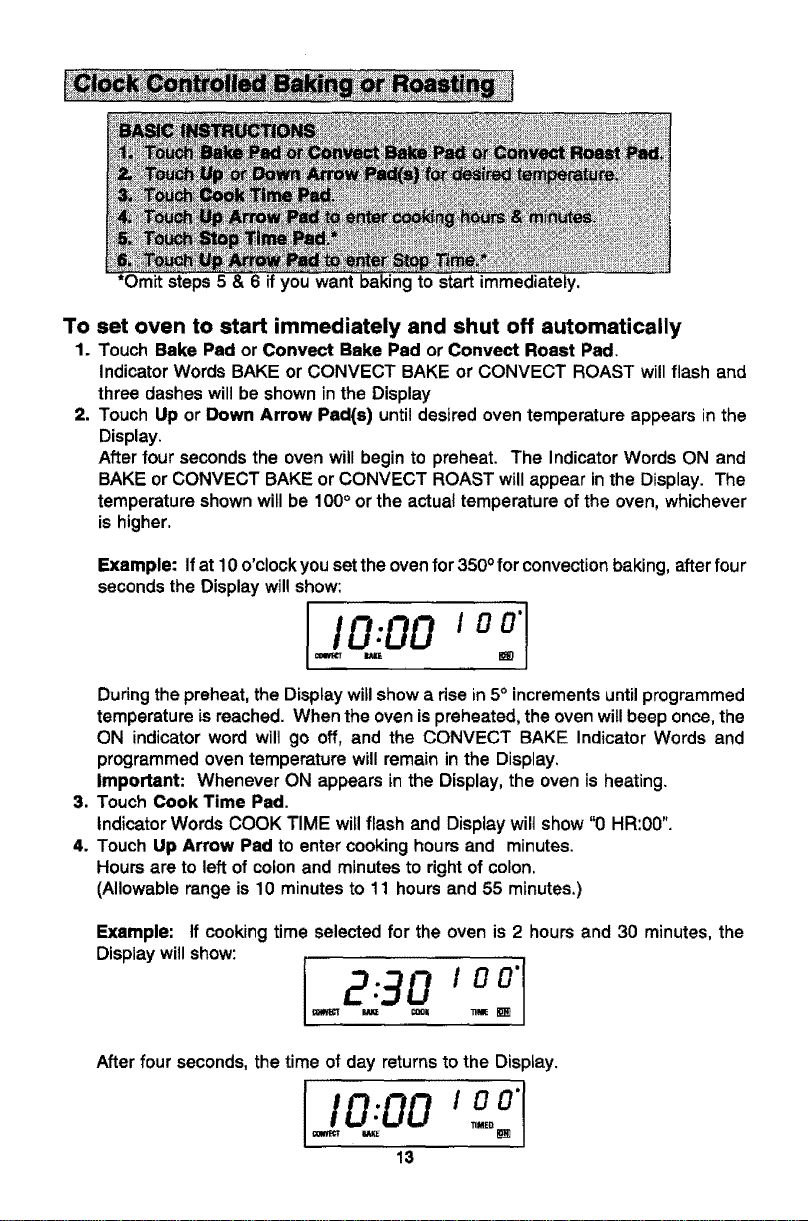
Example: If cooking time selected for the oven is 2 hours and 30 minutes, the
Display will show:
I 2 o,o:1
After four seconds, the time of day returns to the Display.
13
Important: Oven will preheat for approximately 7 to 11 minutes. At the end of the
preheat, there will be one beep. At end of programmed Cook Time, oven will shut
off automatically and retained heat will continue to cook the food. C!ock controlled
cooking is not recommended for baked _temsthat require a preheated oven, such
as cakes, cookies, pies, breads. For these foods, place food in preheated oven,
then use Timer to signal end of baking time.
At the end of programmed Cook Time, the oven will shut off automaticatly, four
beeps will be heard and the word "End" will appear in the Display. The beeps will
continue at one beep per minute for one hour or until theCancel Off Pad istouched.
To set oven to start at future time and shut off automatically
1-4. Follow preceding steps 1-4 on page 13,
5. Touch Stop Time Pad.
Indicator Words STOP TIME willflash, Displaywilt show the calculated stop time
based on current time of day and cook time.
6. Touch Up Arrow Pad to enter desired stop time.
A stop time can only be accepted for later in the day. Note: Since food continues
to cook if left in the oven, itis suggested that the clock controls be used primarily
to start the oven when no one is inthe kitchen. Provisions should be made to have
the food removed as soon as the cook time is completed,
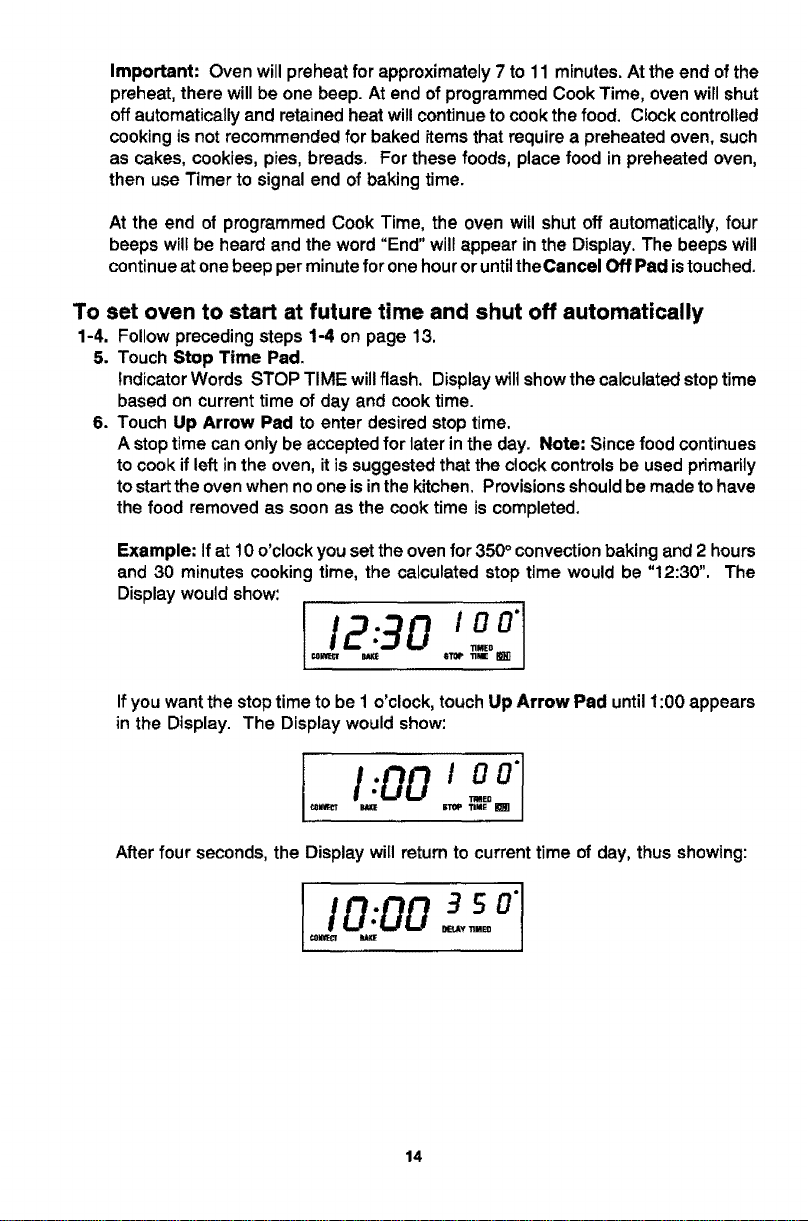
Example: If at 10 o'clock you set the oven for 350° convection baking and 2 hours
and 30 minutes cooking time, the calculated stop time would be "12:30", The
Display would show:
T! 3o'°°
Ifyou wantthestoptimetobe1 o'clock,touchUp Arrow Pad until1:00 appears
in the Display. The Displaywouldshow:
f1:001oo"
After four seconds, the Display will return to current time of day, thus showing:
I0.00 so"1
_Y TIMEO
14
At the end of the delayed period, the DELAY Indicator Word will go off, the ON
Indicator Word will appear and the oven will begin to heat. 100° or the current oven
temperature, whichever is higher, will be shown. As the oven heats, the Disptay
will show a rise in increments of 5° until programmed temperature is reached.
At the end of programmed Cook Time, the oven will shut off automatically, four
beeps will be heard and "End" will appear in the Display. If oven is not cancelled,
"End" will remain in the Display and there will be one beep every minute for 1hour.
IMPORTANT
• To recall time function programmed: Touch the appropriate time pad.
• To cancel timed function only: Hold Cook Time Pad forfour seconds. This will
only cancel cook time and stop time, not programmed bake mode.
• If more than fifteen seconds elapse between touching afunction pad and touching
an Arrow Pad, the oven is not set and Display will return to previous Display.
15
!
_ i_ ill_i_ ,, .
• When cooking foods for the first time in your new oven, use recipe cooking times
and temperatures as a guide.
• Use tested recipes from reliable sources.
• Preheat the oven only when necessary. For baked foods that rise and for richer
browning, a preheated oven is better. Casseroles can be started in a cold oven.
Preheating takes from 7 to 11 minutes; place food in oven after preheat beep.
• Arrange oven racks before turning on oven. Follow suggested rack positions on
page 9 and in various charts.
• Allow about I to IV2inches ofspace between the oven side walls and pans to allow
proper air circulation.
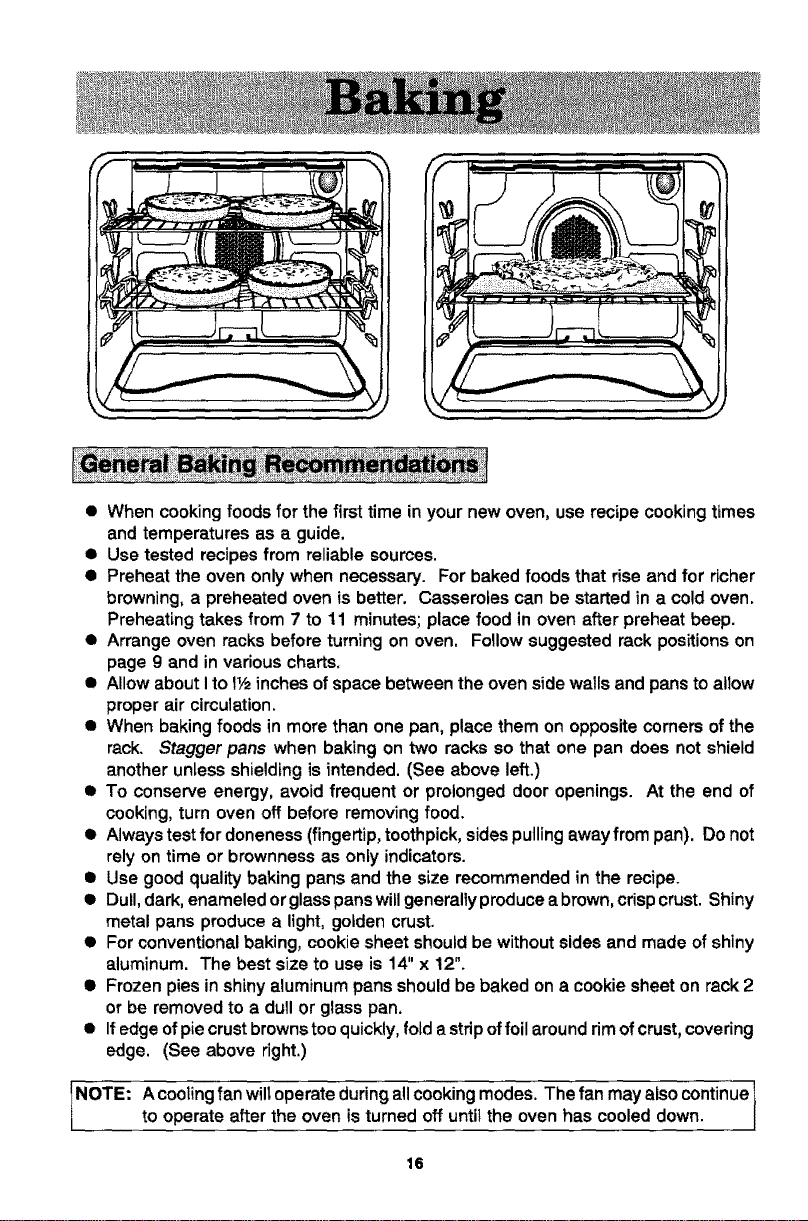
• When baking foods in more than one pan, place them on opposite corners ofthe
rack. Stagger pans when baking on two racks so that one pan does not shield
another unless shielding is intended. (See above left.)
• To conserve energy, avoid frequent or prolonged door openings. At the end of
cooking, turn oven off before removing food.
• Always test for doneness (fingertip, toothpick, sides pulling away from pan). Do not
rely on time or brownness as only indicators.
• Use good quality baking pans and the size recommended in the recipe.
• Dull, dark, enameled or glasspans willgenerally produce a brown, crispcrust. Shiny
metal pans produce a light, golden crust.
• For conventional baking, cookie sheet should be without sides and made of shiny
aluminum. The best size to use is 14" x 12".
• Frozen pies in shiny aluminum pans should be baked on a cookie sheet on rack 2
or be removed to a dull or glass pan.
• If edge of piecrust browns tooquickly, fold a stripof foilaround rimof crust, covering
edge, (See above right.)
NOTE. A cooling fan wiltoperate duringall cooking modes. The fan may also continue 1
to operate after the oven is turned off until the oven has cooled down.
I
16
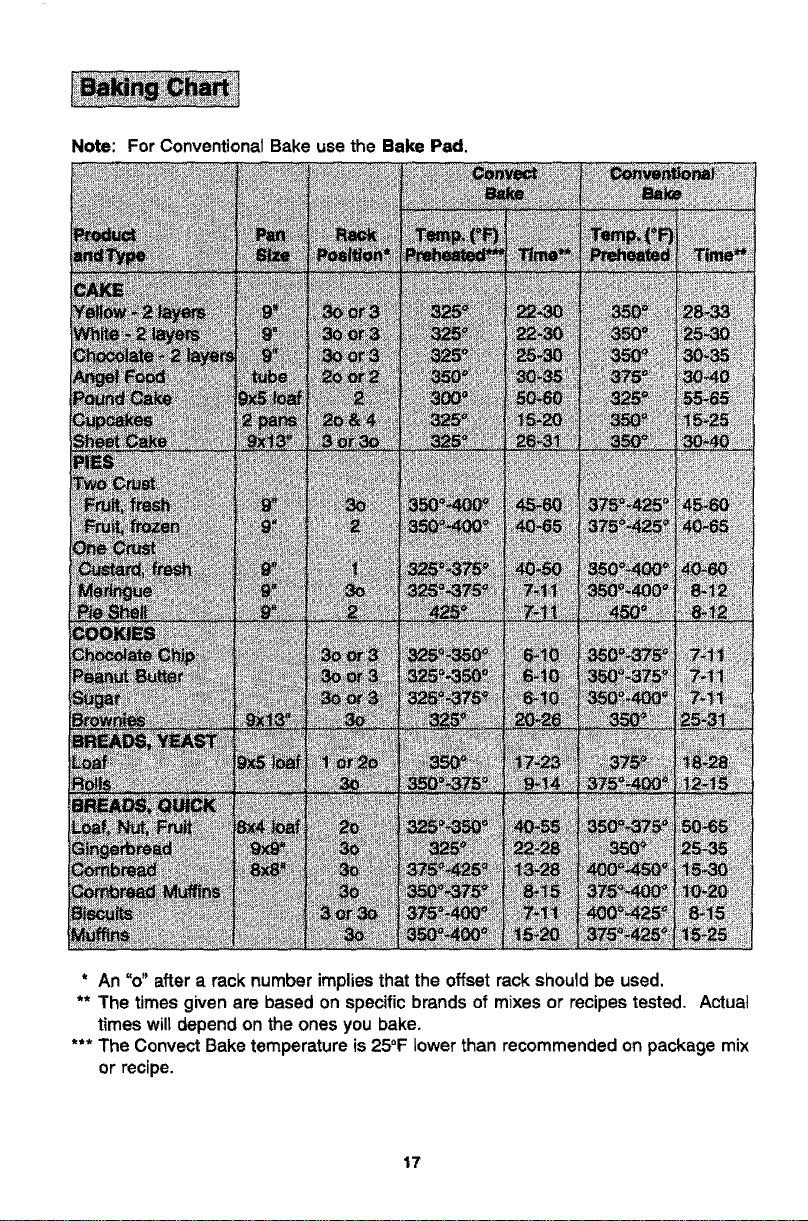
Note: For Conventional Bake use the Bake Pad.
* An "o" after a rack number implies that the offset rack should be used.
** The times given are based on specific brands of mixes or recipes tested. Actual
times will depend on the ones you bake.
*** The Convect Bake temperature is 25°F lower than recommended on package mix
or recipe.
17

• Use convection baking for breads, cakes, cookies, and pies.
• As a general rule, when using recipes or prepared mixes developed for a
conventional bake oven, set the oven temperature 25°F lower than the recipe
recommended temperature. Times wil! be similar to or a few minutes less than
recipe recommended times. Thechart onpage 17comparestimes andtemperatures
of many baked foods. Use this as a reference.
• For better browning, place cookie sheets and baking pans lengthwise, side to side
on the rack.
• Cookie sheets should be without sides and made ofshiny aluminum. The best size
to use for cookie sheets is 16" x 12" or smaller.
18
For best results, bake foods onone rackat a time as described in this manual. However,
very good results can be obtained when baking quantities of foods on multiple racks.
Quantity cooking provides both time and energy savings.
Convect Bake is suggested for most multiple rack cooking, especially three rack
cooking, because the circulating heated air results in more even browning. For two rack
cooking, the conventional bake oven provides very good baking results especially when
pans can be staggered, such as with layer cakes and fresh pies.
Many foods can be prepared on three racks at the same time. These are just a few
examples: cookies, cupcakes, rolls, biscuits, muffins, pies, pizzas, appetizers, and
snack foods.
To obtainthe best resultsin multiple rack cooking,follow thesesuggestions:
• Use temperature and times in this manual as a guide for best results.
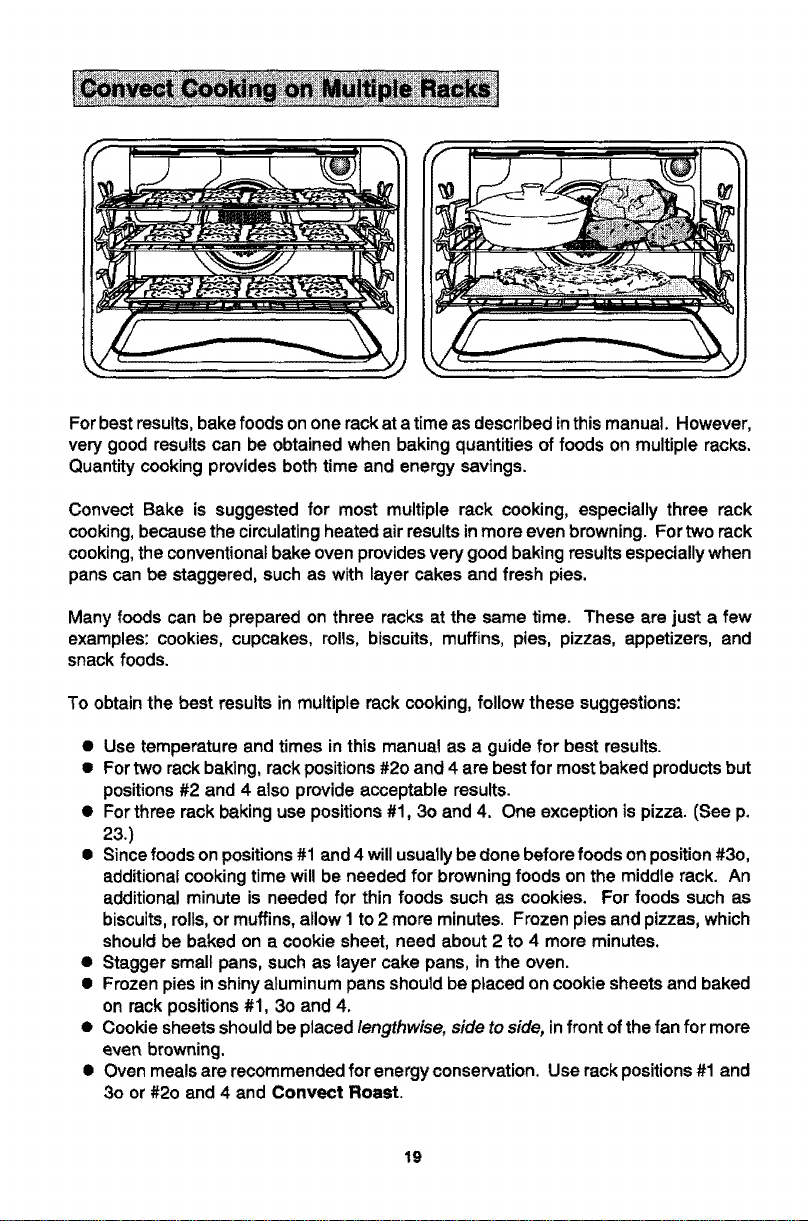
• For two rack baking, rack positions #2o and 4 are bestfor most baked products but
positions #2 and 4 also provide acceptable results.
• For three rack baking use positions #1, 3o and 4. One exception is pizza. (See p.
23.)
• Since foods on positions #1 and 4 will usuallybe done before foods on position #3o,
additional cooking time will be needed for browning foods on the middle rack. An
additional minute is needed for thin foods such as cookies. For foods such as
biscuits,rolls, or muffins, allow I to 2 more minutes. Frozen pies and pizzas, which
should be baked on a cookie sheet, need about 2 to 4 more minutes.
• Stagger small pans, such as layer cake pans, in the oven.
• Frozen pies in shiny aluminum pans should be placed on cookie sheets and baked
on rack positions #1, 3o and 4.
• Cookie sheets should be placed lengthwise, side to side, infront of the fan for more
even browning.
• Oven meals are recommended for energy conservation. Use rack positions#1 and
3o or #2o and 4 and Convect Roast.
19
• Preheating is not necessary.
• For open pan roasting, place meat or poultry on the slotted portion ofthe two-piece
pan included with the oven. Do not add water to the pan. Use open pan roasting
for tender cuts of meat. Less tender cuts of meat need to be cooked by moist heat
in a covered pan.
• For best results, a meat thermometer is the most accurate guide to degree of
doneness. The tip of the thermometer should be located in the thickest part of a
roast, not touching fat, bone, or gristle. For turkeys and large poultry products,
insert the tip of the thermometer into the thickest part of the inner thigh.
• Ptace mast fat side up to allow self basting of meat during roasting.
• Since meats continue to cook after being removed from the oven, remove roast
from oven when it reaches an internal temperature about 5 degrees below the
temperature desired.
• For less loss of juices and easier carting, allow about 15 minutes "standing time"
after removing meat from oven.
• For best results in roasting poultry, thaw completely. Duetothe structureof poultry,
partially thawed poultry will cook unevenly.
I NOTE:
If preferred, tender cuts of meat can be roasted in the conventional bake oven by
following the general recommendations given above. However, meats wi1_roast
more quickly in the convect oven using Convect Roast.
Conventionat bake is best for less tender cuts of meat that require a tonger, moist
heat method of cooking. Follow your recipe for times and temperatures for covered
meats.
Meats cooked inoven cooking bags, dutchovens, or covered roastingpans are best
cooked in the conventional bake oven using the Bake Pad.
Use meat masting charts in standard cookbooks for recommended times and
temperatures for roasting in a conventiona! bake oven.
A cooling fan will operate during all cooking modes. The fan may also
continue to operate after the oven is turned off until the oven has cooled
down.
2O
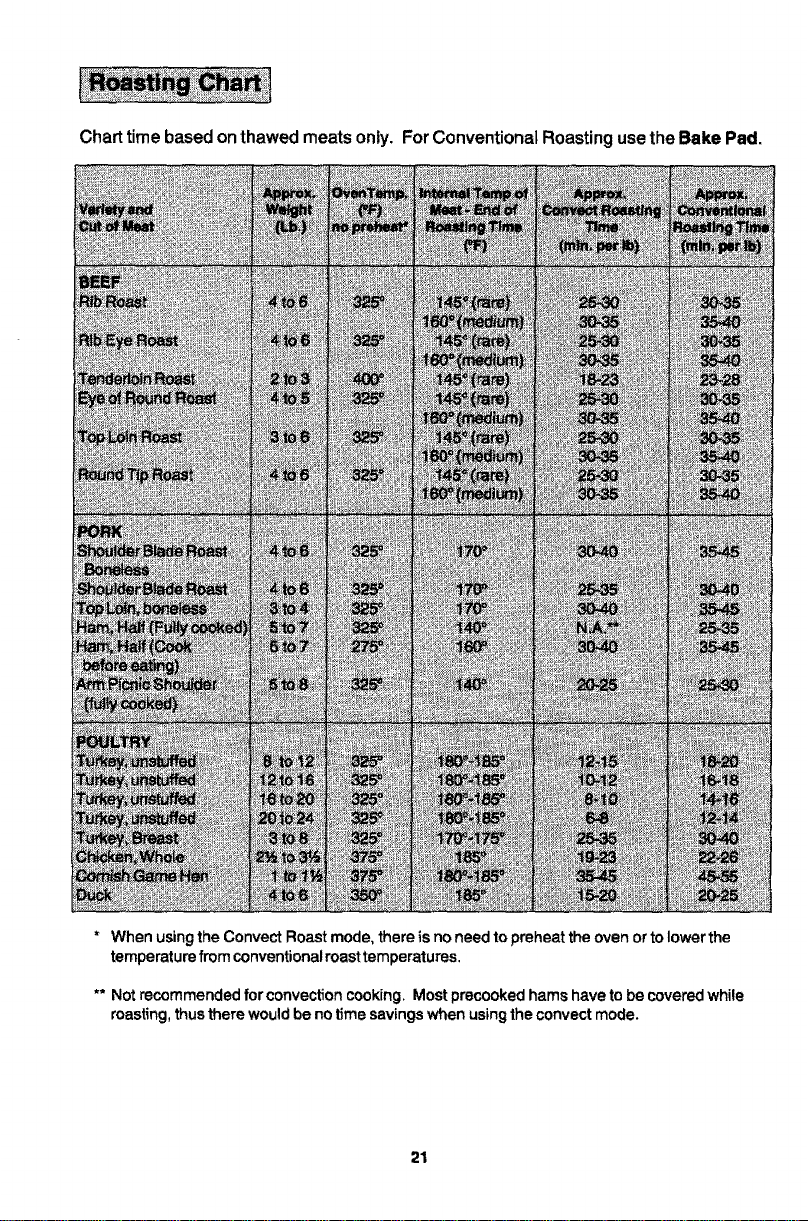
Charttime based onthawedmeatsonly. ForConventionalRoastingusetheBake Pad.
* WhenusingtheConvectRoastmode,thereis noneedtopreheattheovenortolowerthe
temperaturefromconventionalroasttemperatures.
** Notrecommendedfor convectioncooking,Mostprecookedhamshave tobe coveredwhile
roasting,thustherewouldbenotimesavingswhenusingtheconvectmode.
21
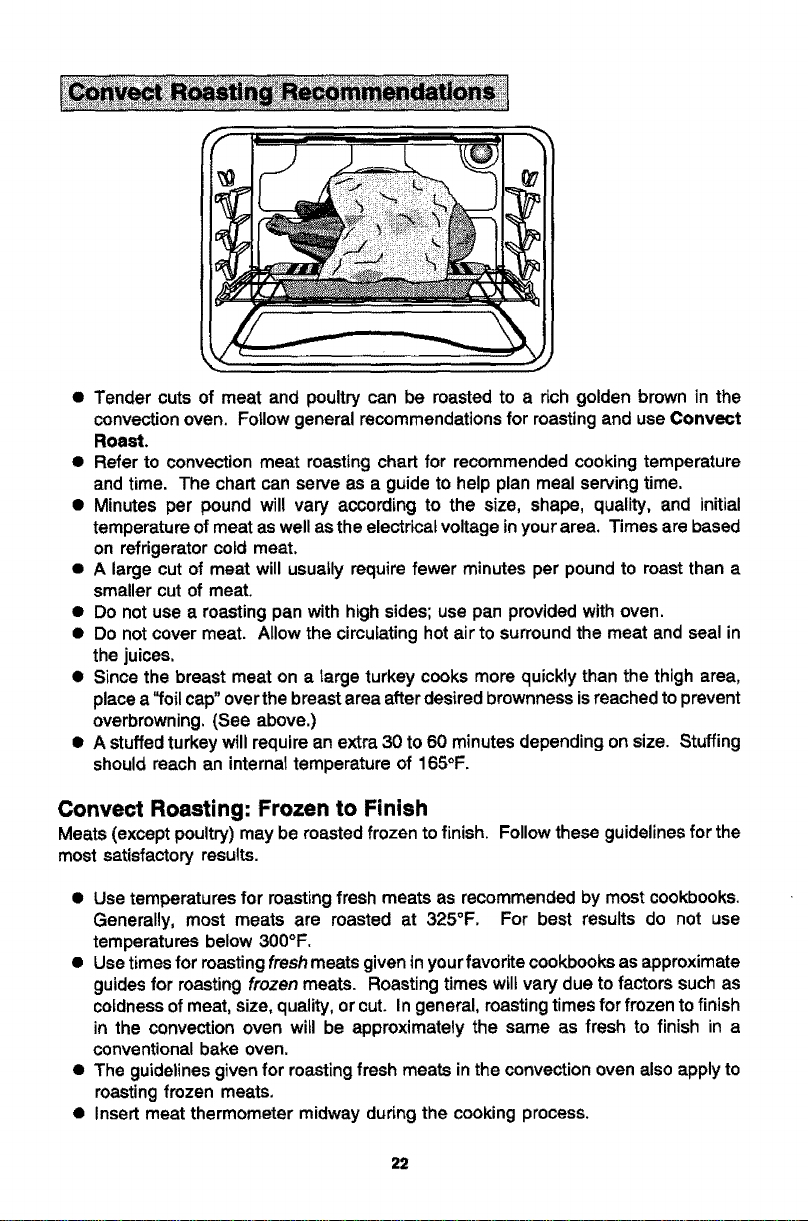
• Tender cuts of meat and poultry can be roasted to a rich golden brown in the
convection oven. Follow general recommendations for roasting and use Convect
Roast.
• Refer to convection meat roasting chart for recommended cooking temperature
and time. The chart can serve as a guide to help plan meal serving time.
• Minutes per pound will vary accordLng to the size, shape, quality, and initial
temperature of meat as well as the electrical voltage in yourarea. Times are based
on refrigerator cold meat.
• A large cut of meat will usually require fewer minutes per pound to roast than a
smaller cut of meat.
• Do not use a roasting pan with high sides; use pan provided with oven.
• Do not cover meat. Allow the circulating hot air to surround the meat and seal in
the juices.
• Since the breast meat on a large turkey cooks more quickly than the thigh area,
place a'_oil cap"over the breast area after desired brownness isreached to prevent
overbrowning. (See above.)
• A stuffed turkey will require an extra 30 to 60 minutes depending on size. Stuffing
should reach an internal temperature of 165°F.
Convect Roasting: Frozen to Finish
Meats (except poultry) may be roasted frozen to finish. Follow these guidelines for the
most satisfactory results.
• Use temperatures for roasting fresh meats as recommended by most cookbooks.
Generally, most meats are roasted at 325°F. For best results do not use
temperatures below 300°F.
• Use times for roasting fresh meats given in yourfavorite cookbooks as approximate
guides for roasting frozen meats. Roasting times wiltvary due to factors such as
coldness of meat, size, quality, or cut. In general, roastingtimes for frozen to finish
in the convection oven will be approximately the same as fresh to finish in a
conventional bake oven.
• The guidelines given for roasting fresh meats inthe convection oven also apply to
roasting frozen meats.
• Insert meat thermometer midway during the cooking process.
22
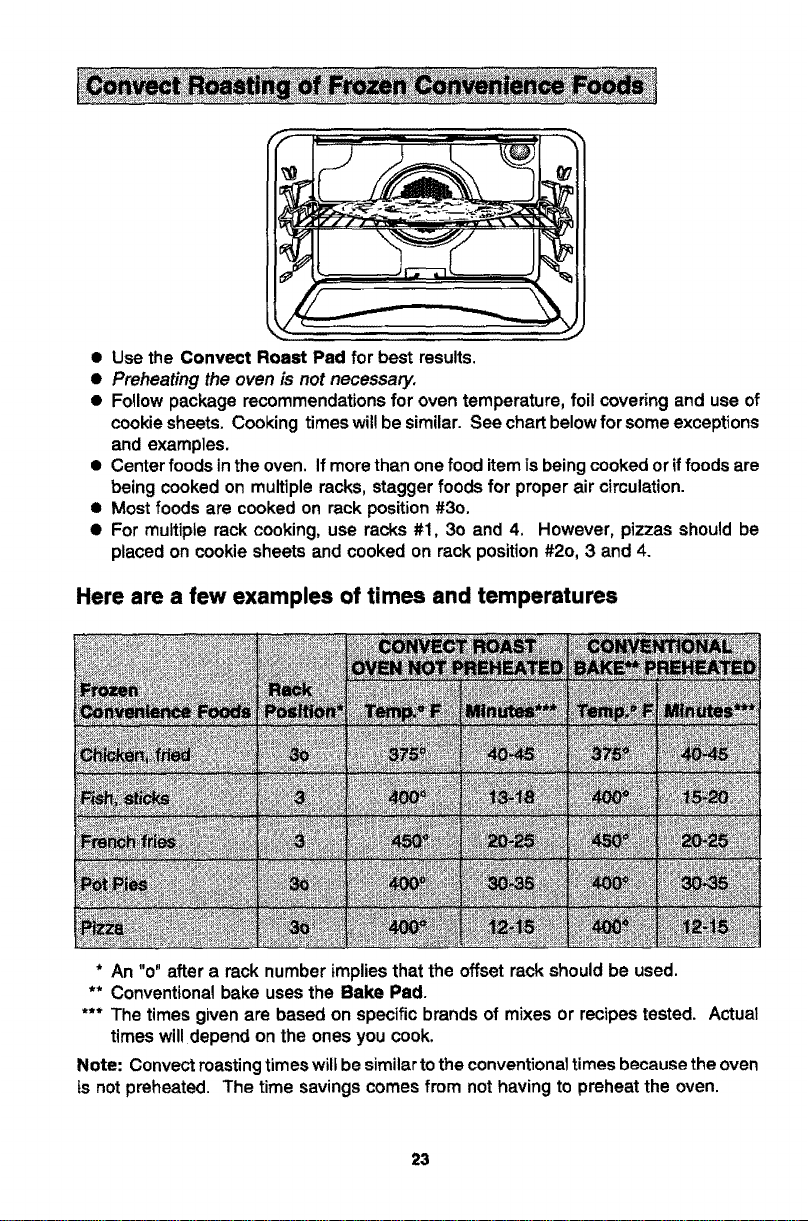
@UsetheConvectRoastPadforbestresults.
• Preheating the oven is not necessary.
• Follow package recommendations for oven temperature, foil covering and use of
cookie sheets. Cooking times wil!be similar. See chart below for some exceptions
and examples.
• Center foods inthe oven. If more than one food item is being cooked or if foods are
being cooked on multiple racks, stagger foods for proper air circulation.
• Most foods are cooked on rack position #3o.
• For multiple rack cooking, use racks #1, 3o and 4. However, pizzas should be
placed on cookie sheets and cooked on rack position #2o, 3 and 4.
Here are a few examples of times and temperatures
* An "o" aftera racknumberimplies thatthe offsetrackshouldbe used.
** Conventionalbakeusesthe Bake Pad.
*** The timesgivenare basedon specificbrandsof mixesor recipestested. Actual
timeswilldepend onthe onesyou cook.
Note: Convectroastingtimeswillbesimilartotheconventionaltimesbecausetheoven
is notpreheated. The timesavingscomesfrom nothavingto preheatthe oven.
23
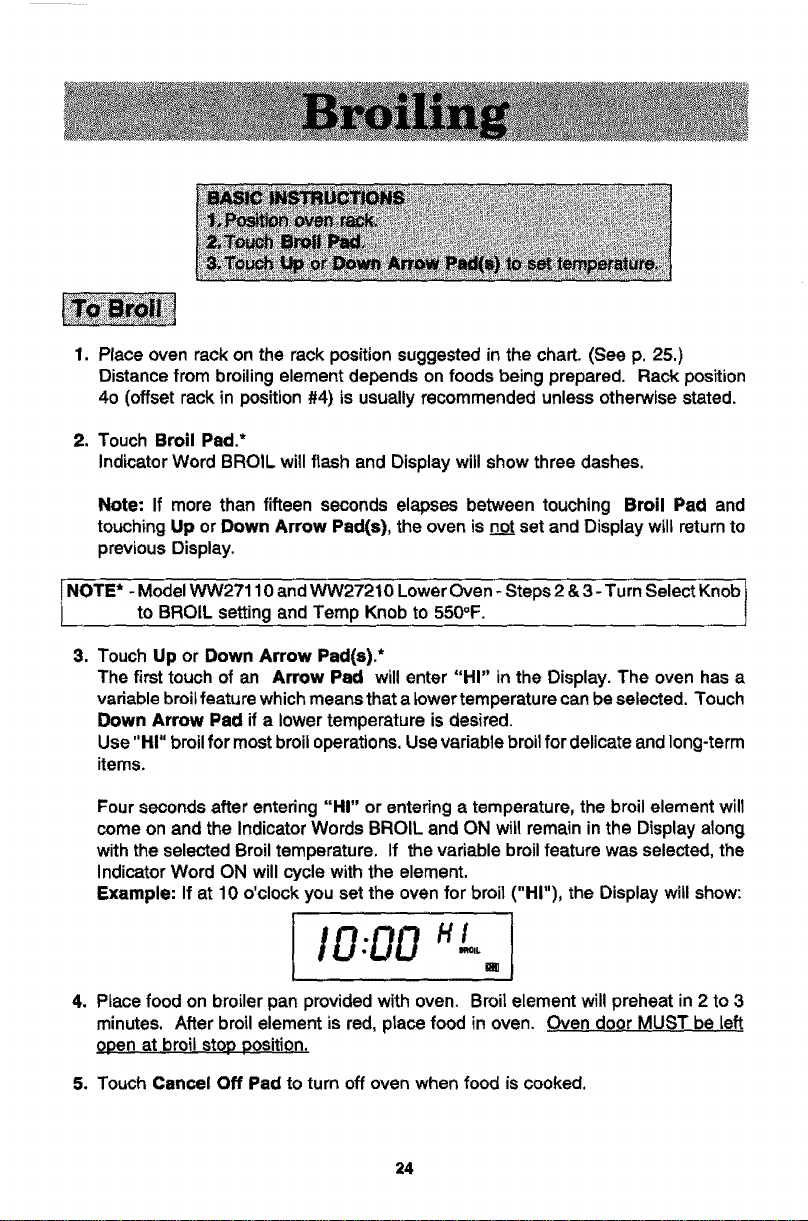
1.Place oven rack on the rack position suggested in the chart. (See p. 25.)
Distance from broiling element depends on foods being prepared. Rack position
40 (offset rack in position #4) is usually recommended unless otherwise stated.
2. Touch Broil Pad.*
IndicatorWord BROILwillflashand Display willshowthree dashes.
Note: If more than fifteen seconds elapses between touching Broil Pad and
touching Up or Down Arrow Pad(s), the oven is not set and Display will return to
previous Display.
I NOTE* -Model WW27110 and WW27210 Lower =nO_jen- Steps 2 &3- Turn Select Knob t
tO BROIL setting and Temp Knob to 550 F.
.
TouchUp or Down Arrow Pad(s).*
The firsttouchof an Arrow Pad willenter "HI" in the Display.The ovenhasa
variablebroilfeaturewhichmeansthata towertemperaturecanbe selected. Touch
Down Arrow Pad ifa lowertemperatureisdesired.
Use"HI" broil formostbroiloperations.Usevariablebroilfor delicateandlong-term
items.
Four seconds after entering "HI" or entering a temperature, the broil element wiU
come on and the Indicator Words BROIL and ON will remain inthe Display along
with the selected Broil temperature. If the variable broil feature was selected, the
Indicator Word ON will cycle with the element.
Example: If at 10 o'clock you set the oven for broil ("HI"), the Display will show:
!,o:ooI
4. PLacefood on broiler pan provided with oven. Broil element will preheat in 2 to 3
minutes. After broil element is red, place food in oven. Oven doQr MUST be Left
opeo at broil stop position.
5. Touch Cancel Off Pad to turn off oven when food is cooked.
24
• Tendercutsofmeat or marinated meats are best for broiling. This includes rib and
loin cuts of steak, ground beef, ham steaks, poultry pieces or fish. For best results,
steaks should be at least 1" thick. Thinner steaks should be pan-broiled.
• Do notcover broiler grid with foi! since this prevents fat drippings from draining into
the bottom of the pan.
• Before broiling, remove excess fat from meat and score edges offat (do notcut into
meat) to prevent meat from cud!rig. Salt after cooking.
• To prevent dry surface on fish or lean meats, brush melted butter on top.
• Foods that require turning should be turned only once during broiling. Turn meat
with tongs to avoid piercing and loss of juices.
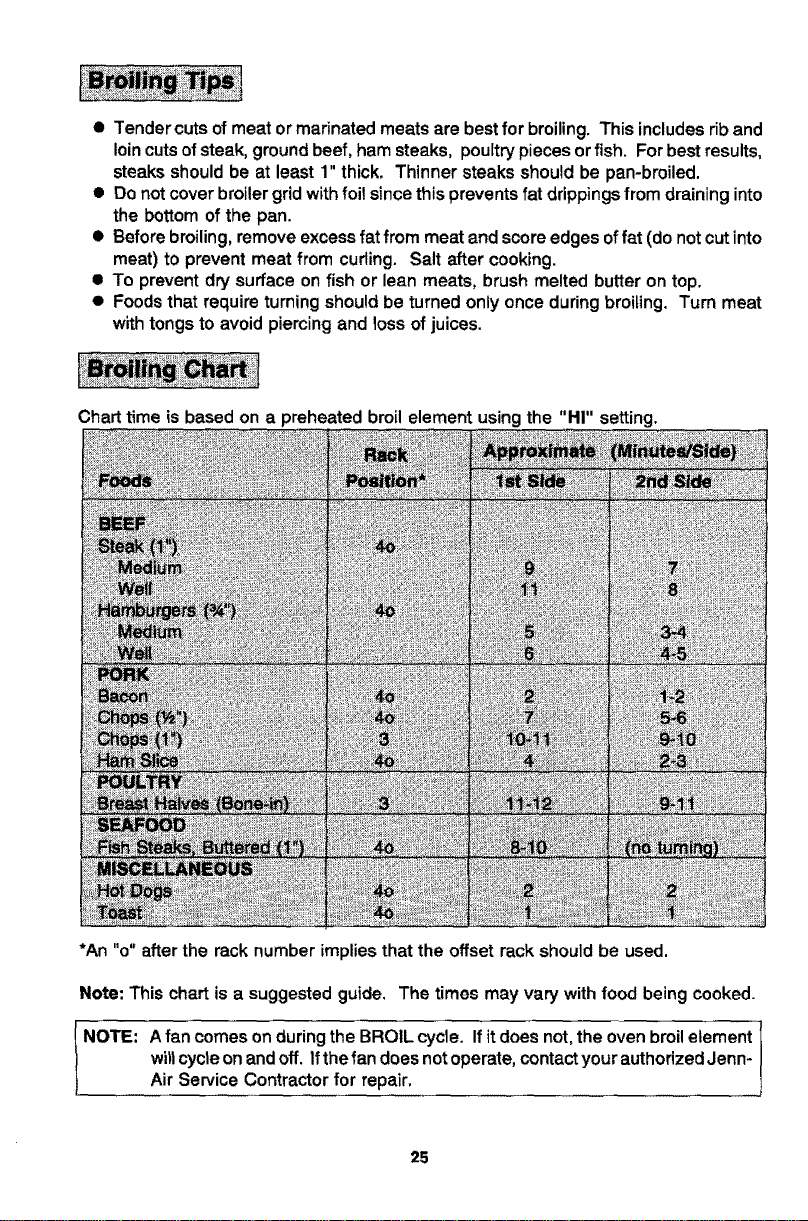
Chart time is based on a preheated broil element using the "HI" setting.
*An "o" after the rack number implies that the offset rack should be used.
Note: This chart is a suggested guide. The times may vary with food being cooked.
NOTE: A fan comes on during the BROIL cycle. If it does not,the oven broil element
wiltcycle on and off. Ifthe fan does not operate, contactyour authorized Jenn-
Air Service Contractor for repair,
25
When the oven controls are set to CLEAN, the oven heats to temperatures that are
higher than those used for cooking. The high temperatures cause food soilto burn off
and substantially disappear. While this occurs, a device in the oven vent helps to
consume normal amounts of smoke. The oven isvented through an opening under the
control panel.
• Removethebroilerpanand anyotherutensilsfromtheoven.Theseutensilscannot
withstandthe hightemperaturesofthe cleaningprocess.
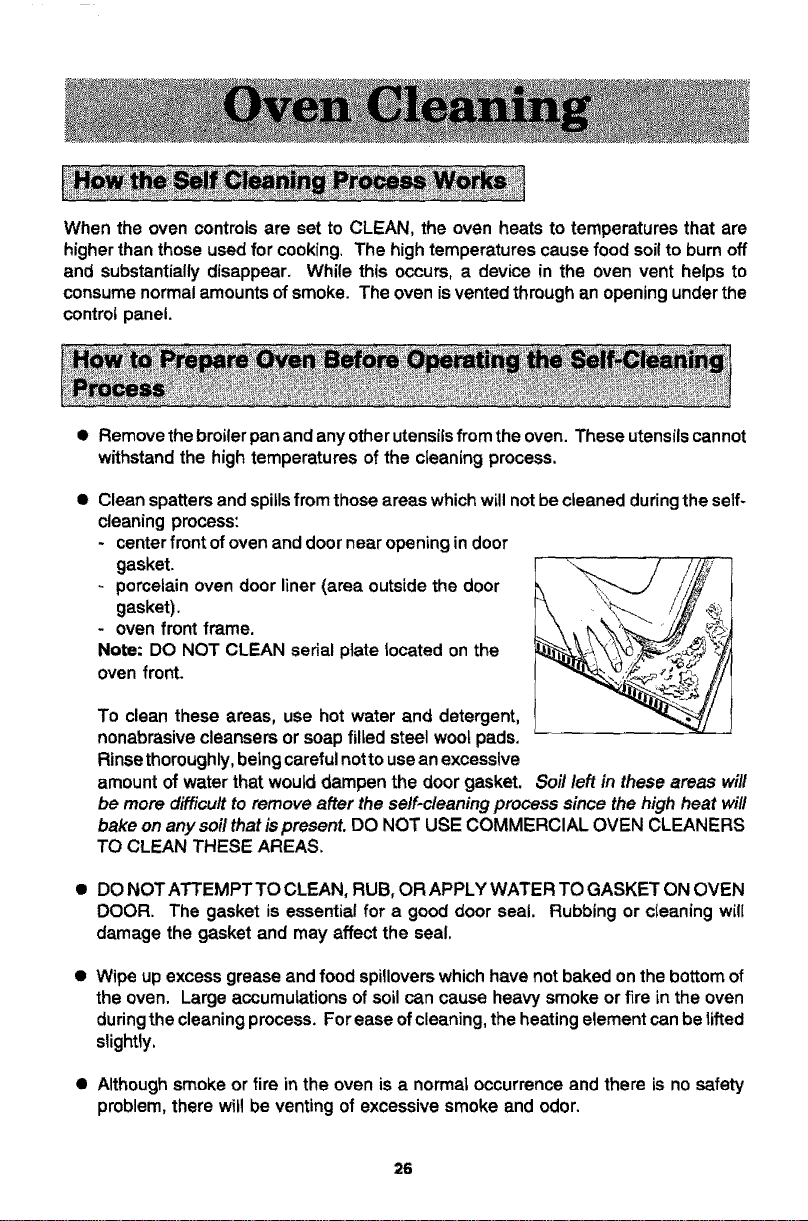
• Clean spatters and spills from those areas which will not be cleaned duringthe self-
cleaning process:
- center front ofoven and door near opening in door
gasket.
porcelain oven door liner (area outside the door
gasket).
- oven front frame.
Note: DO NOT CLEAN serial plate tocated on the
oven front.
To clean these areas, use hot water and detergent,
nonabrasive cleansers or soap filled steel woo_pads.
Rinse thoroughly, beingcareful notto use an excessive
amount of water that would dampen the door gasket. Soil left in these areas will
be more difficu/t to remove after the self.cleaning process since the high heat wil/
bake on any soil that ispresent. DO NOT USE COMMERCIAL OVEN CLEANERS
TO CLEAN THESE AREAS,
• DO NOT ATTEMPT TO CLEAN, RUB, OR APPLY WATER TO GASKET ON OVEN
DOOR. The gasket is essential for a good door seal. Rubbing or cteaning will
damage the gasket and may affect the seal.
• Wipeupexcessgreaseand foodspilloverswhichhavenot bakedonthebottomof
theoven. Largeaccumulationsofsoilcancause heavysmokeorfire in the oven
duringthecleaningprocess.Forease ofcleaning,theheatingelementcanbelifted
slightly,
• Although smoke or fire in the oven is a normal occurrence and there is no safety
problem, there will be venting of excessive smoke and odor.
26
@
Theovenrackscanbe cleanedintheoven. However,theovenrackswilldiscolor,
loseshininess,andbecomedifficulttoslidein andoutifleftintheovenduringthe
cleaningprocess. REMOVE RACKS FROM OVEN tF THIS DISCOLORATION
WILLBEOBJECTIONABLE. As a suggestion,donotleavethe racksintheoven
duringeachself-cleaningprocessiftheydonot needtobe cleanedsincetheywill
discolortoa dul!silverafteronecleaning. Moderatelysoiledrackscanbecleaned
witha soapyS,O.S. pad or Scotch-Britescourpad. Stubbornstainsneedto be
removedintheself-cleaningprocess.Besuretoreadspecialtipsonpage30 ifoven
racksarecleanedduringthe self-cleaningprocess.
To
1.
2.
3=
*Omit steps 4 & 5 if you wish cleaning to begin immediately.
set oven to start cleaning immediately
Close the oven door,
Touch Clean Pad.
" H __".Indicator Words CLEAN TIME will flash and Display will show _ HR :
Touch Up or Down Arrow Pad(s) to select cfeaning time.
The firsttouch of an Arrow Pad will give you 3 hours ofcleaning time. The cleaning
time can bevaried depending on the amount ofsoil. Set"2:00" for light soilor "4:00"
for heavy soil.
Note: If more than fifteen seconds elapse between touching Clean Pad and
touching an Arrow Pad, the oven isnotset and time of day willautomatically return
to the Display.
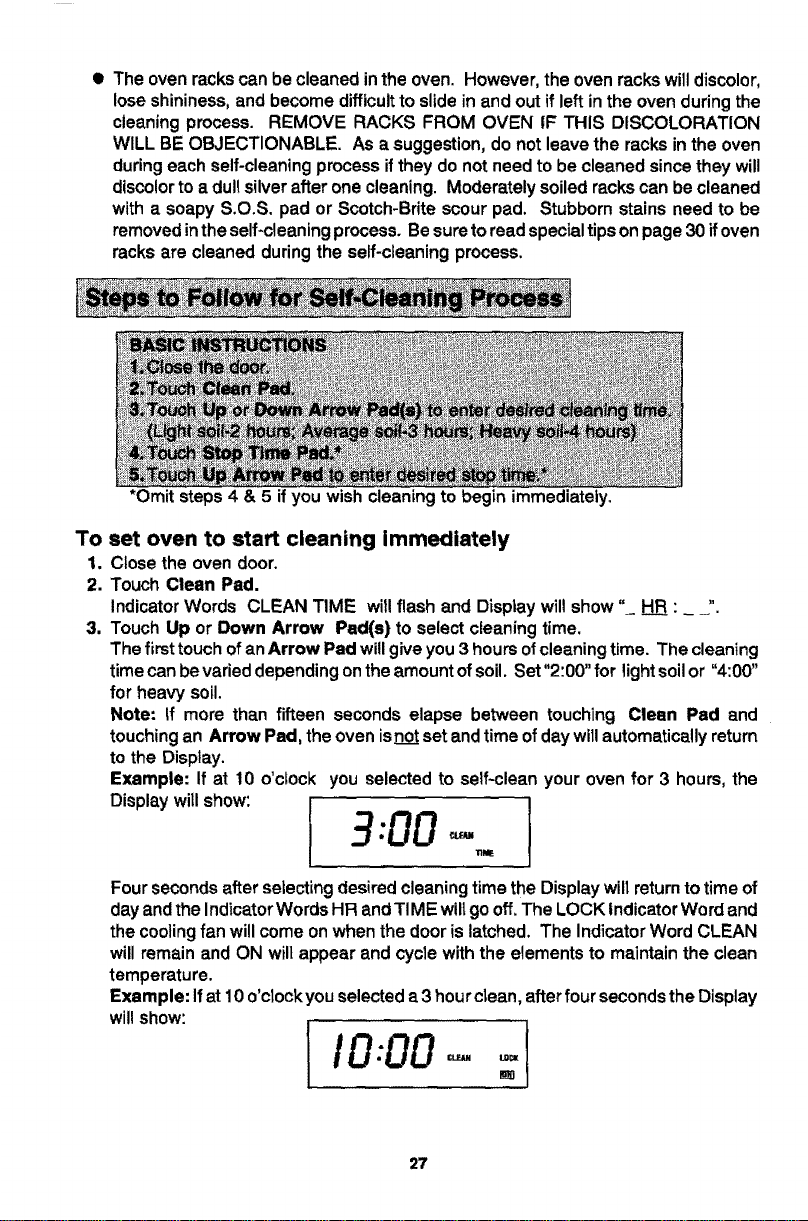
Example: If at 10 o'ctock you selected to self-clean your oven for 3 hours, the
Display will show:
3:00 -
Four seconds after selecting desired cleaning time the Display wilt returnto time of
day and the IndicatorWords HR and TI ME will go off. The LOCK Indicator Word and
the cooling fan will come on when the door is latched. The Indicator Word CLEAN
will remain and ON wilt appear and cycle with the elements to maintain the clean
temperature.
Example: Ifat 10 o'clock you selected a 3 hourctean, after four seconds the Display
will show:
I,o,oo--1.
27
Note: Ifoven doorwas leftopen, the word "door" willflash inthe Display and a signal
will continuously beep until the door is ctosed and the Clean Pad is touched.
Whenthecieanfunction hasbeencompleted,the indicatorWordsCLEAN andON
willgooff. The IndicatorWordLOCKandthecoolingfanwillremainonuntiltheoven
has cooleddownand thedoorhas unlocked.
To set oven to start cleaning at a later time
1-3. Follow steps 1-3 in previous section on pages 27 and 28.
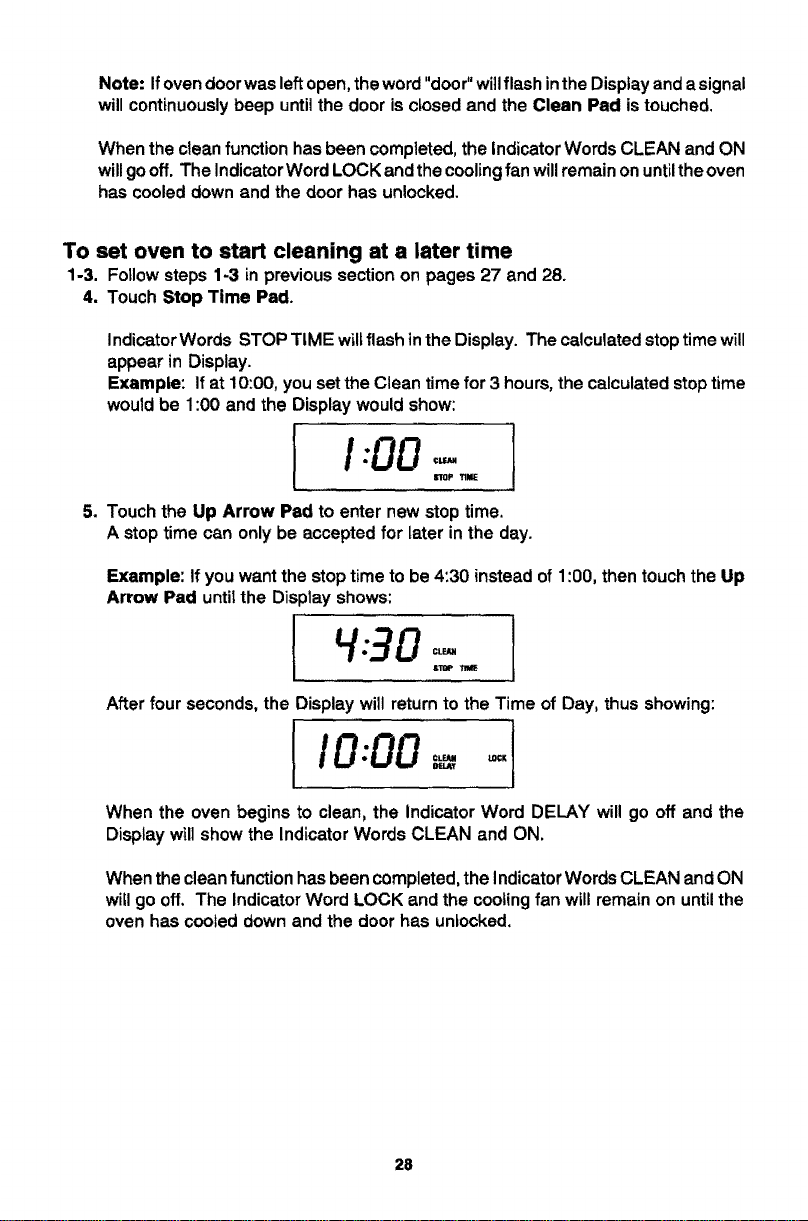
4. Touch Stop Time Pad.
Indicator Words STOP TIME wiltflash in the Display. The calculated stop timewill
appear in Display.
Example: If at 10:00, you set the Clean time for 3 hours, the calculated stop time
would be 1:00 and the Display would show:
5. Touch the Up Arrow Pad to enter new stop time.
A stop time can only be accepted for later in the day.
Example: if you want the stop time to be 4:30 instead of 1:00, then touch the Up
Arrow Pad untitthe Display shows:
{ q:30
&TIOP Im_
After four seconds, the Display will return to the Time of Day, thus showing:
I,ooo=.-I
When the oven begins to clean, the Indicator Word DELAY will go off and the
Display will show the Indicator Words CLEAN and ON.
When the clean function has been completed, the Indicator Words CLEAN and ON
wig go off. The indicator Word LOCK and the cooling fan will remain on untilthe
oven has cooled down and the door has unlocked.
28
To cancel self-clean
• Touch Cancel Off Pad.
@ The oven doorwill be lockedwhile the LOCK IndicatorWord remains inthe Display.
Depending on the length of time the oven had been self-cleaning, it may take up to
45 minutes for the oven to cool down, the door to unlock and cooling fan to turn off,
@
@
@
IMPORTANT
To recall cleaning time or stop time: Touchthe appropriate pad (Clean Pad
or Stop Time Pad).
To change cleaning time or atop time before cleaning begins: Repeat the
steps on pages 27-28.
When the Clean Pad is touched, a fan comes on. Ifthis fan is not operating, the
oven will go through the cleaning process at a reduced oven temperature and the
ovenwill notclean effectively. If thefan does not operate, contactyour authorized
Jenn-Air Service Contractor for service.
Since the upper oven isself-cleaning, its use is suggested for foodsthat have atendency
tospatter or spillover. The lower oven porcelain walls and door, which are of the same
highquality porcelain as the upper oven, can be wiped clean with soap and water iffood
is not allowed to bake on a second time. Heavy spattering of spitlovers wilt require
cleaning with mildabrasive cleansers such as Bar Keepers Friend, S.O.S. or BonAmi.
Household ammonia may be used to loosen soil by placing ½ cup household ammonia
in a glass dish on oven rack in a closed, cold oven overnight.
@
To removedifficultstains,use an ovencleanersuch as Easy-Offon oven liner,
Followoven cleaner directions. Do not spray electricalcontrols,temperature
sensingbulb, doorgasketorexteriorofoven. Removeovenracksbeforespraying
withovencleaner,
• For cleaning other areas of the oven, clean oven racks with S.O.S. pads. Oven
window may be cleaned with soap and water or a glass cleaner. Be careful not to
soak or rub the oven door gasket.
29
Door and control panel trim
The metal trim around the door and the control panel can be cleaned with a household
cleaner or soapy water, rinse well. Be careful notto use an excessive amount of water,
Glass on the oven door front
Use any suitable glass cteaner or soapy water.
Control Panel Area and Display Window
Wipe with paper towels dampened with soapy water or glasscleaner. Do notspray any
cleaning solutions directly onto the Display window or use large amounts of soap and
water, Do not scrub with S,O.S. pads or abrasive cleaners.
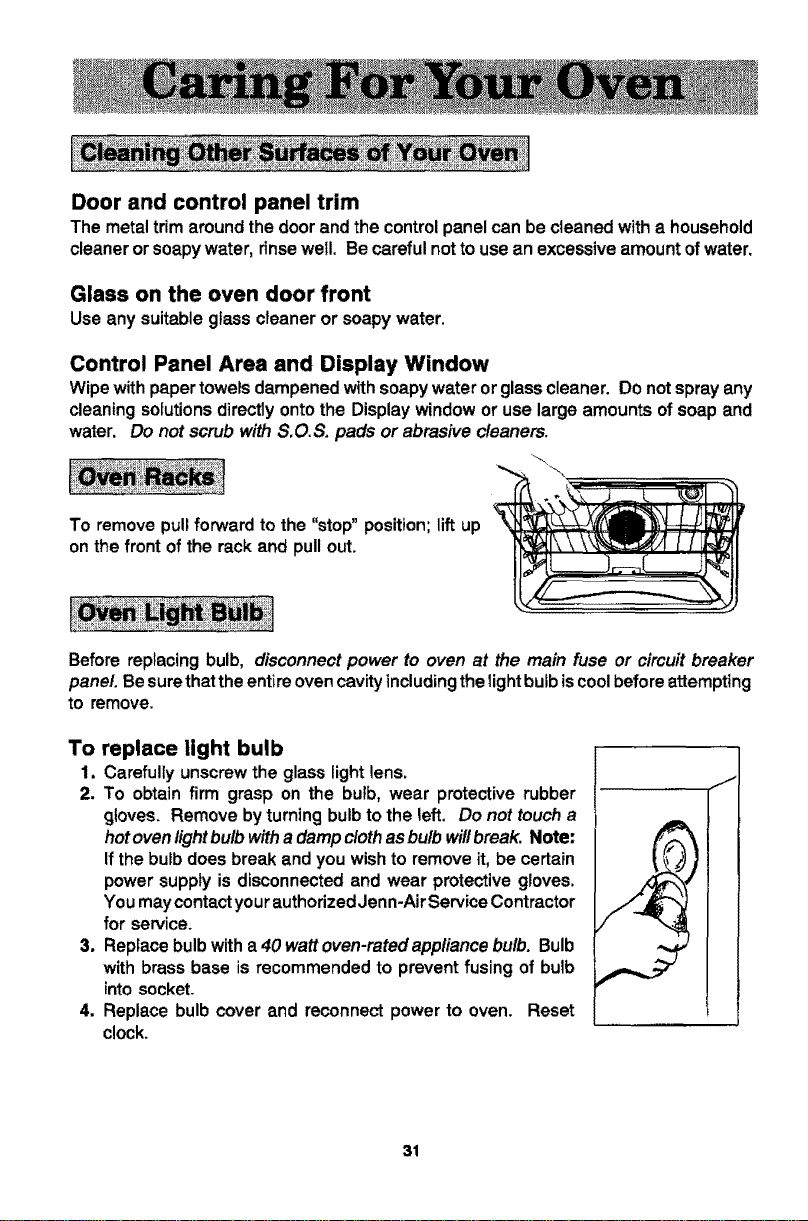
To remove pull forward to the "stop" position; lift up
on the front of the rack and pull out.
Before replacing bulb, disconnect power to oven at the main fuse or circuit breaker
panel. Be surethat the entire oven cavityincluding the bightbulb iscoolbefore attempting
to remove.
To replace light bulb
1. Carefully unscrew the glass light lens,
2. To obtain firm grasp on the bulb, wear protective rubber
gloves. Remove by turning bulb to the left, Do not touch a
hotoven lightbulb with adamp cloth as bulb will break. Note:
If the bulb does break and you wish to remove it, be certain
power supply is disconnected and wear protective gloves.
You may contact your authorized Jenn-Air Service Contractor
for service.
3. Repface bulbwith a 40 watt oven-ratedappliance bulb. Bulb
with brass base is recommended to prevent fusing of bulb
into socket.
4, Replace bulb cover and reconnect power to oven. Reset
clock.
J
31
The oven temperature can be adjusted if aJloven temperatures are too low or too high
and the length of time to cook ALL foods is too long or too short. Do NOT adjust the
temperature if only one or two items are not baking properly.
To adjust
1. Touch the Bake Pad.
2. Touch and hold the Up Arrow Pad until 500 ° or higher appears in the Display.
3. Touch and hold the Bake Pad for six seconds until "00 °" appears in the Display.
4. Touch the Up or Down Arrow Pad(s) to enter the desired offset temperature.
(Allowable range is -35 ° to +35°.) Four seconds later, the Display will return to
current time of day.
Note: Do notchangethetemperaturesettingmorethan 10° beforecheckingtheoven.
Important: The oven should be adjusted only 10° and the oven should be tested, (We
recommend baking two 9" yellow layer cakes using a purchased box mix.) If the oven
temperature is stilltoo low or too high repeat the procedure described above.
32
The oven Temp Knob can be adjusted ifthe oven temperature istoo low ortoo high and
the length oftime to cook ALL foods is too long or too short. Do NOT adjust the Temp
Knob if only one or two items are not baking properly.
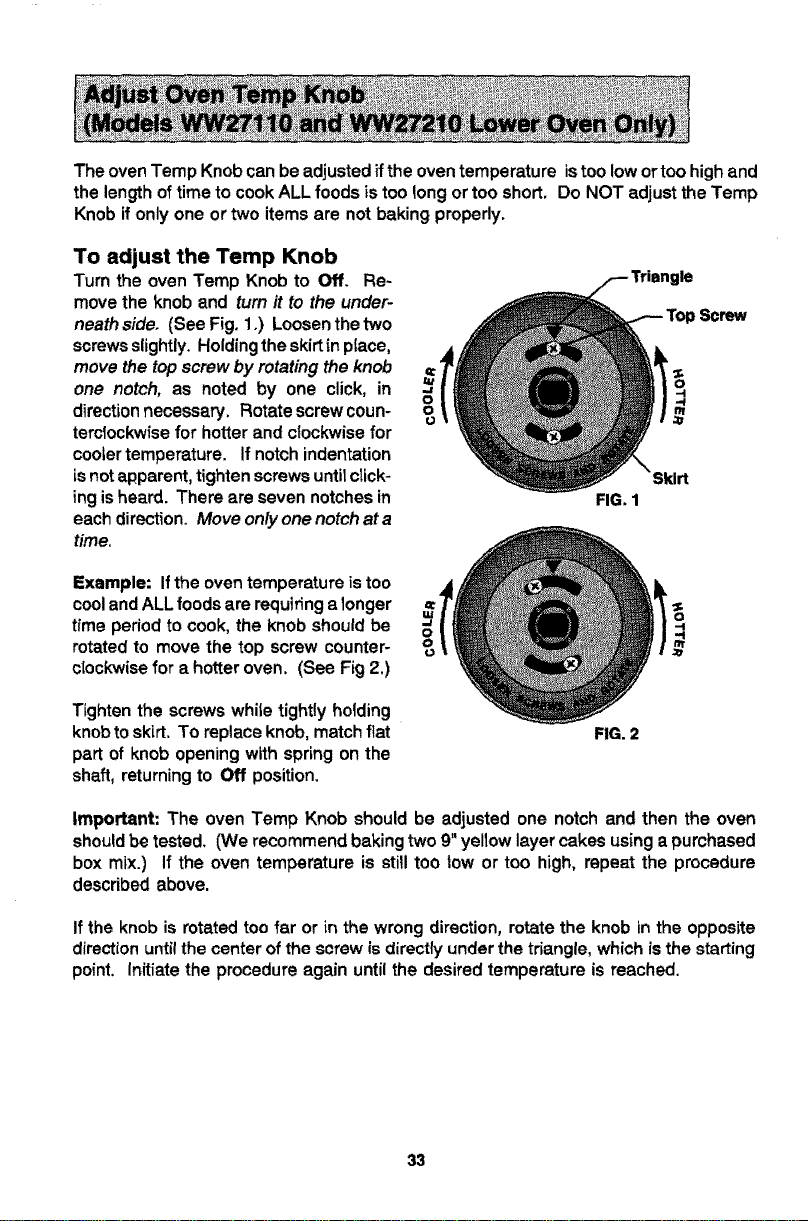
To adjust the Temp Knob
Turn the oven Temp Knob to Off. Re-
move the knob and turn it to the under-
neath side. (See Fig. 1.) Loosen the two
screws slightly. Holdingthe skirtin ptace,
move the top screw by rotating the knob
one notch, as noted by one click, in
direction necessary. Rotate screw coun-
terclockwise for hotter and clockwise for
cooler temperature. If notch indentation
is not apparent, tighten screws until click-
ing is heard. There are seven notches in
each direction. Move only one notch at a
time.
Example: Ifthe oven temperature is too
cooland ALL foods are requiring a longer
time period to cook, the knob should be
rotated to move the top screw counter- °u
clockwise for a hotter oven. (See Fig 2.)
Tighten the screws while tightly holding
knobto skirt. To replace knob, match flat
part of knob opening with spring on the
shaft, returning to Off position.
FIG. 1
FIG. 2
Screw
Important: The oven Temp Knob should be adjusted one notch and then the oven
should be tested. (We recommend baking two 9" yellow layer cakes using a purchased
box mix.) If the oven temperature is still too low or too high, repeat the procedure
described above.
If the knob is rotated too far or in the wrong direction, rotate the knob in the opposite
direction until the center of the screw is directly under the triangle, which is the starting
point. Initiate the procedure again until the desired temperature is reached.
33
Checkthefollowing listto be sure a service catl is really necessary. A quick reference
of this manual may prevent an unneeded service call,
If nothing on the oven operates:
• check for a blown circuit fuse or a tripped main circuit breaker.
• check if oven is propedy connected to electric circuit in house.
if clock, indicator words, and/or lights operate but oven does not
heat:
• the controls may have been set incorrectly.
• clock controls may be set for delayed start of oven.
If the oven light does not work:
• the light bulb is loose or defective.
• oven light does not work during self-cleaning process.
If oven will not go through self-cleaning process:
• controls may be improperly set.
• check the clock controlied settings and the current time of day on the clock.
If oven did not clean properly:
• oven may need longer cleaning time.
• excessive spills were not removed prior to self-cleaning process.
If oven door will not unlock:
• oven may not have cooled to safe temperature after self-cleaning process.
• electric current coming into the oven may be off.
If foods do not broil properly:
• the control may not be set properly.
• check rack position.
• voltage into house may be low,
If baked food is burned or too brown on top:
• food may be positioned incorrectly in oven,
• oven not preheated properly.
If foods bake unevenly:
• the oven may be installed improperly.
• check the oven rack with a level.
• stagger pans, do not allow pans to touch each other or oven wall.
• check instructions for suggested placement of pans on oven rack.
34
If oven baking results are less than expected:
• the pans being used may not be of the size or material recommended for best
results.
• there may not be sufficient room around sides ofthe pans for proper air circulation
in the oven.
• check instructionsfor preheating, rack position and oven temperature.
If baking results differ from previous oven:
• oven thermostat calibration may differ between old and new ovens. Follow recipe
and use and care directions before catling for service since the calibration on the
previous oven may have drifted to a too high or too low setting. (See pp. 32-33 -
Adjusting Oven Temperature.)
If F plus a number appears in the Display:
• a fault code is being shown. When a fault code appears and a continuous beep
sounds, touch the Cancel Off Pad. Ifthe fault code reappears, disconnect power
to the oven and call an authorized Jenn-Air Service Contractor.
35