JENN-AI
_JENN-AIR
Form No. A,/04/03 Part No. 8112P216-60 _2003 Maytag Appliances Sales Co, Litho U,S,A.
installer: Please leave this manual with this appliance,
Consumer: Please read and keep thb manual for future
reference. Keepsales receipt and/or canceled checkas proof
of purchase,
Model Number
Serial Number
Date of Purchase
If you have questions, caik
Jenn-Air Customer Assistance
1-800-JEN NAIR 'J -800-536-6247)
1-800-688-2080 { U.S.Try for hearing or speech impaired}
(Mon.-Fd., 8 am-8 pm Eastern Time}
Internet: http:i/www.jen nair.com
In our continuing effort to improve the quality and pertor-
mance of our cooking products, itmay be necessary to make
changes to the appliance without revising this guide.
Fer service J#fePmade_t, see page 27.
IM PORTANT SAFETY
iNSTRUCTiONS
Warning and Important Safety Instructions appearing in
this guide are not meant to cover all possible conditions
and situations that may occur. Common sense, caution,
and care must be exercised when installing, maintain-
ing, or operating the appliance.
Always contact your dealer, distributor, service agent, or
manufacturer about problems or conditions you do not
understand.
Recognize Safety Symbols, Words, Labds
WARNING. Hazards or unsafe practices which
COULD reSUlt in severe persona! injury or death,
COULD result in minor personal injury.
Read and follow ail instrections before using this
appmiance to prevent the potential risk of fire, electric
shock, personal injury or damage to the appliance as a
result of improper usage of the appliance. Use appliance
only for its intended purpose as described in this guide.
To ensure proper and safe operation: Appliance
must be properly installed and grounded by a qualified
technician. Do not attempt to adjust, repair, service, or
replace any part of your appliance unless it is specifi-
cally recommended in this guide. All other servicing
should be referred to a qualified servicer.
Always disconnect power to appliance before servicing.
To Prevent Fire or Smoke
Be sure all packing materials are removed from the
appliance before operating it.
Keep area around appliance clear and free from
combustible materials. Flammabb materials should not
be stored in an oven.
Many plastics are vulnerable to heat. Keep plastics
away from parts of the appliance that may become
warm or hot.
To prevent grease fires, do not let cooking grease or
other flammable materials accumulate in or near the
appliance.
In Case of Fire
• Use dry chemical or foam-type extinguisher or baking
soda to smother fire or flame. Never use water on a
grease fire.
1°Turn off appliance to avoid spreading the flame.
2. NEVER pick up or move a flaming pan.
3. Smother fire or flame by closing the oven door.
Child Safety
above an app!iance. Chi!dren c!irnb!ng on the appli-
ance or on the appliance door to reach items could be
NEVER leave children alone or unsupervised near the
appliance when it is in use or is still hot. Children
should never be allowed to sit or stand on any part of
the appliance as they could be injured or burned.
Children must be taught that the appliance and
utensils in it can be hot. Let hot utensils cool in a safe
place, out of reach of small children. Children should
be taught that an appliance is not a toy. Children
should not be allowed to play with controls or other
parts of the unit.
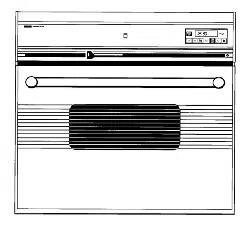
About Your Appliance
NEVER use an appliance as a step tO reach gabinets
above. Misuse of appliance doers, such as stepping,
serious injuries,
To prevent potential hazard to the user and damage to
the appliance, do not use appliance as a space heater
to heat or warm a room. ,Also, do not use the oven as a
storage area for food or cooking utensil&
Do not obstruct the flow of air by blocking the oven
venL
• DO NOT TOUCH HEATING ELEMENTS OR INTERIOR
SURFACES OF OVEN. Heating elements may be hot
even though they are dark in color. Interior surfaces of
any oven become hot enough to cause burns. During
and after use, do not touch, or let clothing or other
flammable materials contact heating elements or
interior surfaces of oven until they have had sufficient
time to cool. Other surfaces of the appliance may
become hot enough to cause burns - among these
surfaces are: oven vent openings and surfaces near
these openings, oven doors, windows of oven door&
Do not touch a hot oven light bulb with a damp cloth
as the bulb could break. Should the bulb break,
disconnect power to the appliance before removing
bulb to avoid electrical shock.
A fan should be heard during some bake, convect
bake, convect roast, and all broil and cleaning opera-
tions. If you do not hear the fan, call an authorized
servicer.
NEVER use aluminum foil to cover an oven rack or
oven bottom. Misuse could result in risk of electric
shock, fire, or damage to the appliance. Use foil only
as directed in this guide.
Cooking Safety
Never heat an unopened food container in the oven.
Pressure build-up may cause container to burst
resulting in serious personal injury or damage to the
appliance.
Use dry, sturdy potholders. Damp potholders may
cause burns from steam. Dish towels or other substi-
tutes should never be used as potholders because they
can trail across hot elements and ignite or get caught
on appliance part&
• Wear proper apparel. Loose fitting or long hanging-
sleeved apparel should not be worn while cooking.
Clothing may ignite and cause burns if garment comes
in contact with heating elements.
Always place oven racks in the desired positions while
oven is cool Slide oven rack out to add or remove
food, using dry, sturdy potholders. Always avoid
reaching into the oven to add or remove food. If a rack
must be moved while hot, use a dry potholder. Do not
let potholder contact hot element in oven.
Use care when opening the oven door. Let hot air or
steam escape before removing or replacing food.
•PREPARE[} FO0[} WARNUNG: Follow food
manufacturer's instructions. If a plastic frozen food
container and!or its cover distorts, warps, or is other-
wise damaged during cooking, immediately discard
the food and its container. The food could be contami-
nated.
Do not allow aluminum foil or meat probe to contact
heating element.
Always turn off all controls when cooking is com-
pleted.
Utensim Safety
Follow the manufacturer's directions when using oven
cooking bags.
This appliance has been tested for safe performance
using conventional cookware. Do not use any devices
or accessories that are not specifically recommended
in this manual. Do not use add-on oven convection
systems. The use of devices or accessories that are not
expressly recommended in this guide can create
serious safety hazards, result in performance problems,
and reduce the life of the components of the appli-
ance.
Only certain types of glass, glass/ceramic, ceramic,
earthenware, or other glazed utensils are suitable for
oven service without breaking due to the sudden
change in temperature. Follow utensil manufacturer's
instructions when using glass.
Cleaning Safety
•Turn off all controls and wait for appliance parts to
cool before touching or cleaning. Clean with caution.
Use care to avoid steam burns if a wet sponge or cloth
is used to wipe spills on a hot surface. Some cleaners
can produce noxious fumes if applied to a hot surface.
Clean only parts listed in this guide.
Se f-C ean Oven
Do not leave food or co0king utensils, etc. in the oven
dur!ng the se!f_c!ean cycle,
Do not clean door gasket. The door gasket is essential
for a good seal Care should be taken not to rub,
damage, or move the gaskeL
Do not use oven cleaners or oven liners of any kind in
or around any part of the seif-cban oven.
Before seif-cbaning the oven, remove broiler pan,
oven racks and other utensils, and wipe off excessive
spfllovers to prevent excessive smoke or flare ups.
important Safety Notice and
The California Safe Drinking Water and Toxic Enforce-
ment Act of 1986 (Proposition 65} requires the Governor
of California to publish a list of substances known to the
State of California to cause cancer or reproductive harm,
and requires businesses to warn customers of potential
exposures to such substances.
Users of this appliance are hereby warned that when
the oven is engaged in the seJf-cban cycle, there may
be some Jow-bveJ exposure to some of the listed
substances, including carbon monoxide. Exposure to
these substances can be minimized by properly venting
the oven to the outdoors by opening the windows and/
or door in the room where the appliance is located
during the self-dean cycle.
UMPORTANT NOTUCE REGARDUNG PET BURDS:
Never keep pet birds in the kitchen or in rooms where
the fumes from the kitchen could reach. Birds have a
very sensitive respiratory system. Fumes released during
an oven self-charting cycle may be harmful or fatal to
birds. Fumes released due to overheated cooking off, fat,
margarine and overheated non-stick cookware may be
equally harmful.
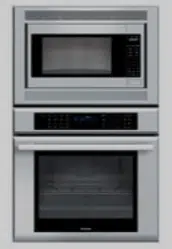
Note: For microwave oven operation (select models}
refer to the use and care guide packed in the micro-
wave oven.
Save These instructions for Future Reference
3
O00KING
Control Panel
A B C
Keep UF_IEROVENWarm
CANCEL Clean Broil Bake
CANCEL Clean Broil Bake
D EF
Convect
Bake
G
1 3
4 5 6
8 9
Keep TIMER TIMER Clock 0
Warm LOWER OVEN 1 2
I I
Cook & Delay
Hold
1
I
J K LM 0
Favorite
l
N
H
_Pvper
eft
Light
Lower
Oven
Light
Autoset
_J
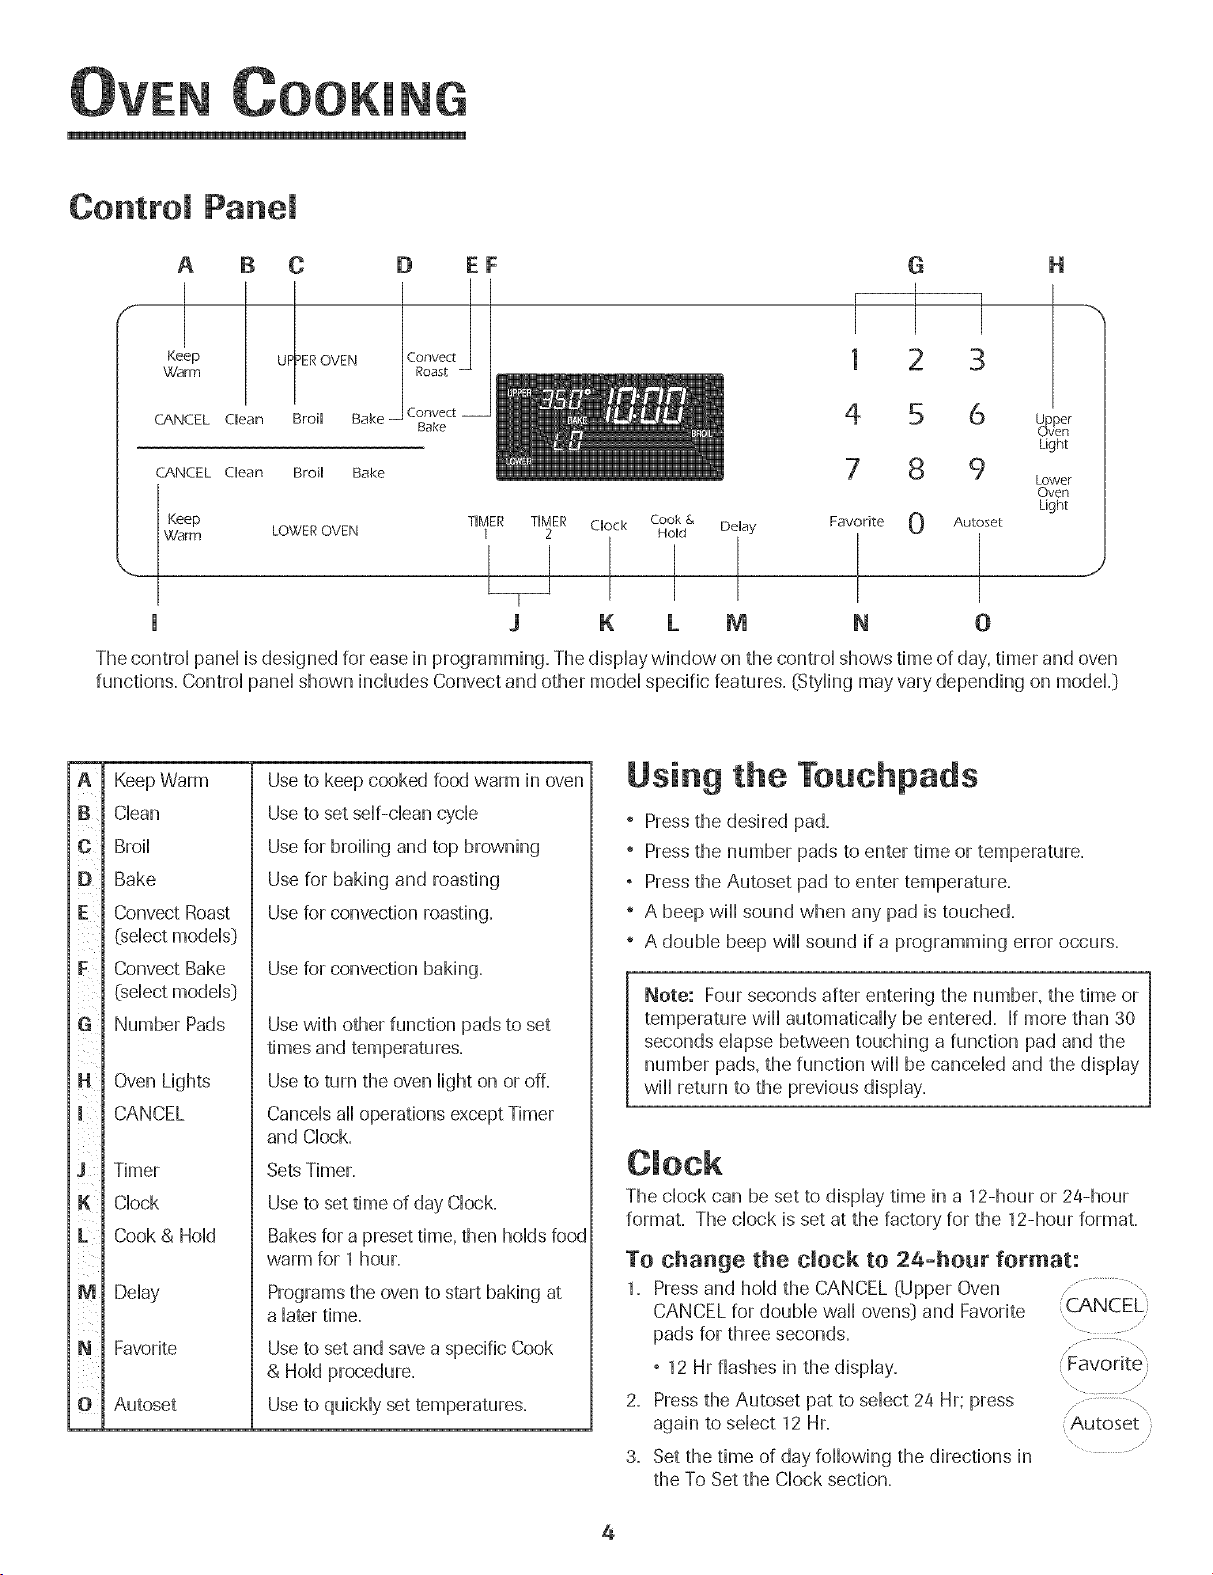
The control panel is designed for ease in programming. The display window on the control shows time of day, timer and oven
functions. Control panel shown includes Convect and other model specific features. (Styling may vary depending on modeL}
ia
i l
l
1¢
iD
iF
ii!i
J l i
[
iN
i l
J i i
l
iK
[L
im
ii
ii
IN
ii
i i
Keep Warm
Clean
Broil
Bake
Convect Roast
(select models}
Convect Bake
(select models}
Number Pads
Oven Lights
CANCEL
Timer
Clock
Cook & Hold
Delay
Favorite
Autoset
Useto keep cooked food warm in oven
Useto set self-clean cycle
Usefor broiling and top browning
Use for baking and roasting
Usefor convection roasting.
Use for convection baking.
Usewith other function pads to set
times and temperatures.
Useto turn the oven light on or off.
Cancels ail operations except Timer
and Clock.
SetsTimer.
Useto set time of day Clock.
Bakesfor a preset time, then holds food
warm for 1 hour.
Programs the oven to start baking at
a later time.
Useto set and save a specific Cook
& Hold procedure.
Useto quickly set temperatures.
Using the Touchpads
" Press the desired pad.
" Press the number pads to enter time or temperature.
, Press the Autoset pad to enter temperature.
" A beep will sound when any pad is touched.
" A double beep will sound if a programming error occurs.
Note: Four seconds after entering the number, the time or
temperature will automatically be entered. If more than 30
seconds elapse between touching a function pad and the
number pads, the function will be canceled and the display
will return to the previous display.
The clock can be set to display time in a 12-hour or 24-hour
format, The chock is set at the factory for the 12-hour format,
To change the clock to 2a-hour format:
1. Pressand hold the CANCEL (Upper Oven
CANCEL for double wail ovens} and Favorite
pads for three seconds.
, 12 Hr flashes in the display.
2. Pressthe Autoset pat to select 24 Hr; press
again to select 12 Hr.
3. Set the time of day following the directions in
the To Set the Clock section.
,:CAN C EL'}
...... \
'Autoset
\ .........
4
OOKING
To set the Clock:
1. Press the Clock pad. Clock
, The time of day flashes in the display.
2. Pressthe appropriate number pads to set the time of day.
, Colon flashes in the display.
3. Pressthe Clock pad again or wait four seconds.
, The colon will remain on.
When electrical power is supplied or after a power interrup-
tion, the last clock time before power was interrupted will
flash.
To recall the time of day when another time function is
showing, press the Clock pad.
Clock time cannot be changed when the oven has been
programmed for Delay cook or clean or Cook & Hold.
To cancel the Clock display:
If you do not want the time of day to display:
Press and hold the CANCEL and Clock pads for CANCEL
three seconds. The time of day will disappear .....
from the display. ...............,
When the clock display is canceled, press the , Clock }
Clock pad to briefly display the time of day. ............
When the clock display is canceled, after 15 minutes, the oven
control will go into Standby Mode to save energy. The display
will be blank and the oven light will not operate. To "wake up"
the control from Standby Mode, press any touchpad. A double
beep will sound.
To restore the Clock display:
Press and hold the CANCEL and Clock pads for three sec-
onds. The time of day will reappear in the display.
The timer can be set from one minute @0:01} up to 99 hours
and 59 seconds _99:59}.
The timer can be used independently of any other oven
activity'. It can also be set while another oven function is
operating.
The Timer does not control the oven. It only controls a
beeper.
TO set the Timer:
1. Press the Timer pad.
, 00:00 and TIMER icon flash in the display.
2. Pressthe appropriate number pads until the correct time
appears in the display.
, The colon and TIMER icon will continue to flash.
3. PressTimer pad again or wait four seconds.
, The colon stops flashing and the time begins counting
down.
, The last minute of the timer countdown wiii be displayed
in seconds.
4. At the end of the set time, one long beep wiii sound and
"End" will be displayed.
5. Pressthe Timer pad to clear the display. ..............,
TIMER
To cancel theTimer: , ! ...........
1. Pressand hold the Timer pad for three seconds ..........i 0
OR
2. Pressthe Timer pad and press '0' using the number pads.
Locking the Control
and Oven Door
The touchpad and oven door call be locked for safety,
cleaning, or to prevent unwanted use. The touchpads will not
function when locked.
If the oven is currently in use, the touchpads and door cannot
be locked.
The current time of day wiii remain in the display when the
touchpads and door are locked.
To lock: (CANCEL}
1. Pressand hold the CANCEL and Cook & Hold .........
pads for three seconds ............. Cook &
° OFFappears in the display
° The LOCK icon flashes while the door is locking.
To unlock:
Press and hold the CANCEL and Cook & Hold pads for three
seconds. OFFdisappears from the display.
Note: The touchpads and oven door cannot be locked if
the oven temperature is 400° F or above.
Fault Codes
The BAKE or LOCK icon may flash rapidly in the display to
alert you if there is an error or a problem. If the BAKE or
LOCK icon flashes in the display, press CANCEL pad. If the
BAKE or LOCK icon continues to flash, disconnect power to
the appliance. Wait a few minutes, and then reconnect
power. If the icon flashing still continues, disconnect power to
the appliance and call an authorized servicer.
5

OOKING
To set Bake:
Bake
1. Press the Bake pad.
, The BAKE icon will flash+
: Autoset '
, 000 will flash in the display. ......
2. Select the oven temperature. Press the Autoset pad for
350° F or the appropriate number pads.
+ Each additional press of the Autoset pad will increase
the temperature by 25°.
+ The oven temperature can be set from 170° to 550 °.
3. Press Bake pad again or wait four seconds.
+ The BAKE icon will stop fiasMng and light in the display.
+ The PREHEATicon wiHHHightin the dispHay.
+ 100° or the actual oven temperature if over 100° Fwill
display. It will rise in 5° increments until the preset
temperature is reached.
4. Allow the oven to preheat for 8-15 minutes.
+ When the set oven temperature is reached, one long
beep will sound.
+ The set temperature will display.
+ The PREHEATicon will turn off.
+ To recall set temperature during preheat, press Bake pad.
5. Place food in the oven.
8. Check cooking progress at the minimum cooking time.
Cook longer if needed.
7. When cooking is finished, press CANCEL pad.
8. Remove food from the oven. " ...........
Baking Notes:
+ To change the oven temperature during cooking+press
Bake,then press the Autoset or appropriate number pads
until the desired temperature is displayed.
To change the oven temperature during preheat, press the
Bake pad twice, then press the Autoset pad or appropriate
number pads until the desired temperature is displayed.
If you forget to turn off the oven, it will automatically turn
off at the end of 12 hours. If you wish to deactivate this
feature, see page 11.
For additional baking and roasting tips, see "Cooking Made
Simple" booklet.
Bak+ng Differences Between Your Old
and New Oven
It is normal to notice some baking time differences between a
new oven and an old one. See "Adjusting the OvenTemperature"
on page 12.
Baking with Convection
(:select models)
When convection baking, enter your normal baking tempera-
ture. The control will automatically reduce the set oven
temperature by 25°.
TO set Conveet Bake:
1. Pressthe Convect, or Convect Bake pad.
+ The BAKE and FAN icons will flash
, 000 will flash in the display.
2. Select the oven temperature. Press the Autoset pad for
350° F or the appropriate number pads.
, Each additional press of the Autoset pad will increase
the temperature by 25 degrees. The oven temperature
can be set from 170° to 550°.
Convect
Bake
Autoset
]
3. Press Convect Bake pad again or wait four seconds.
, The BAKE icon will stop flashing.
, The PREHEATicon will light in the display.
+ 100° or the actual oven temperature if over 100° F will
display. It will rise in 5° increments until the preset
temperature is reached.
, The FAN icon will start to rotate.
4. Allow the oven to preheat for 8-15 minutes.
, When the set oven temperature is reached, one long
beep will sound.
, The PREHEATicon will turn off.
+ The set temperature will display.
, To recall the set temperature during preheat, press the
Convect Bake pad.
5. Place food in the oven.
6. Check cooking progress at the minimum cooking time.
Cook longer if needed.
7. When cooking is finished, press CANCEL pad. \
8. Remove food from the oven.
O00KING
Roasting With Convection
(select models)
When convection roasting, enter your normai roasting time
and temperature. The controi wiii automaticaHHyprompt you to
check the food for aloneness at 75% of the set time.
° When convection roasting, the cooking time must be set
before setting the temperature.
° If your recipe requires a preheated oven, add 15 minutes
to the cooking time programmed.
° Roasting times can vary with different cuts of meat.
° Refer to "Cooking Made Simpie" bookiet for suggested
roasting temperatures and times.
To set Convect Roast:
1. Press the Convect Roast pad.
° The ROASTand FAN icons wiii flash
Convect"
Roast
° 00:00 wiii flash in the dispiay.
, 000 iights in the dispiay.
2. Enter the roasting time using the number pads.
, Time can be set from 10 minutes (00:10} to 11 hours,
59 minutes (11:59}.
, Press Convect Roast again or wait 4 seconds.
,'Roast' flashes in the dispiay.
3. Seiect the oven temperature. Press the "..........................
Autoset
Autoset pad for 350° F or the appropriate , ....
number pads.
° Each additionai press of the Autoset pad wiii uncrease
the temperature by 25°.
° The oven temperature can be set from 170° to 550°.
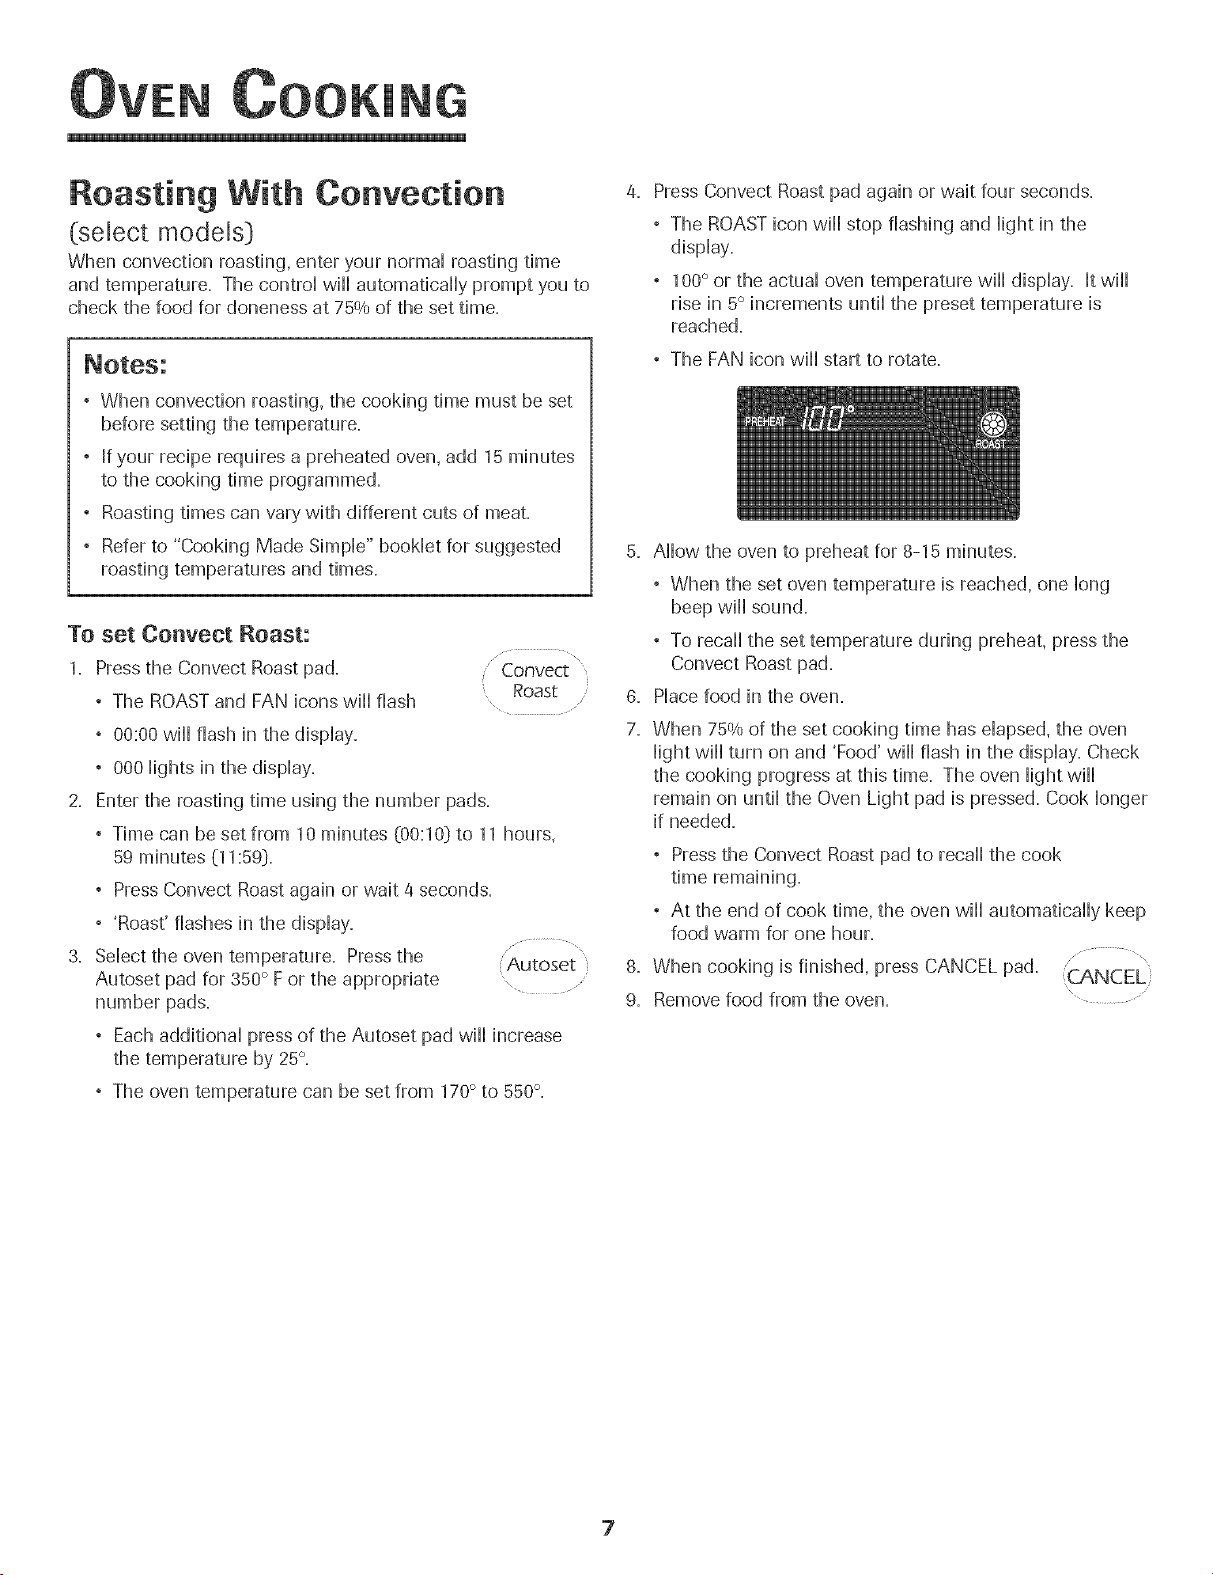
Press Convect Roast pad again or wait four seconds.
° The ROASTicon wiii stop flashing and Hightin the
dispiay.
, 1O0° or the actuaHoven temperature wiHHdispHay. It wiHH
rise in 5° increments untii the preset temperature is
reached.
, The FAN icon wiHHstart to rotate.
5. Allow the oven to preheat for 8-15 minutes.
° When the set oven temperature is reached, one long
beep wiii sound.
, To recall the set temperature during preheat, press the
Convect Roast pad.
6. Place food in the oven.
7. When 75% of the set cooking time has elapsed, the oven
light will turn on and 'Food' will flash in the display. Check
the cooking progress at this time. The oven light will
remain on until the Oven Light pad is pressed. Cook longer
if needed.
° Pressthe Convect Roast pad to recall the cook
° At the end of cook time, the oven wiii automatically keep
food warm for one hour.
8. When cooking is finished, press CANCEL pad.
9. Remove food from the oven.
7
OOK[NG
Cook & Hold
When using the Cook & Hold option, the oven begins to heat
immediately after the control has been set. Then, the oven
cooks for a specified length of time. When that time has
elapsed, the oven wii[ keep the food warm for up to an hour
then automatbafly turn off.
TO set Cook & Hold: Cook &
1. Press the Cook & Hold pad. \ Homd
° The HOLD icon wii[ flash to indicate that you are in Cook &
Hold programming.
° 00:00 wiii flash in the display.
2. Select the amount of time you want to cook by using the
number pads.
°The HOLD icon continues to flash.
°The time wiii iight in the display.
,Time can be set from 00:10 to 11:59.
3. Press Bake, Convect Bake or Convect Roast {select models}
and select the oven temperature. Pressthe Autoset pad for
350° F or the appropriate number pads. Bake
°The desired cycle icon will flash. ....
,The oven temperature can be set from 170° F to 550° F.
a. Pressthe desired cycle pad again OR wait four seconds.
°The desired cycle icon wiii remain iiL
°The cooking time wiii show in the display.
°The PREHEATicon will show in the display.
°The actual oven temperature wiii be displayed
during preheat.
°The set temperature wiii display when the oven is
preheated.
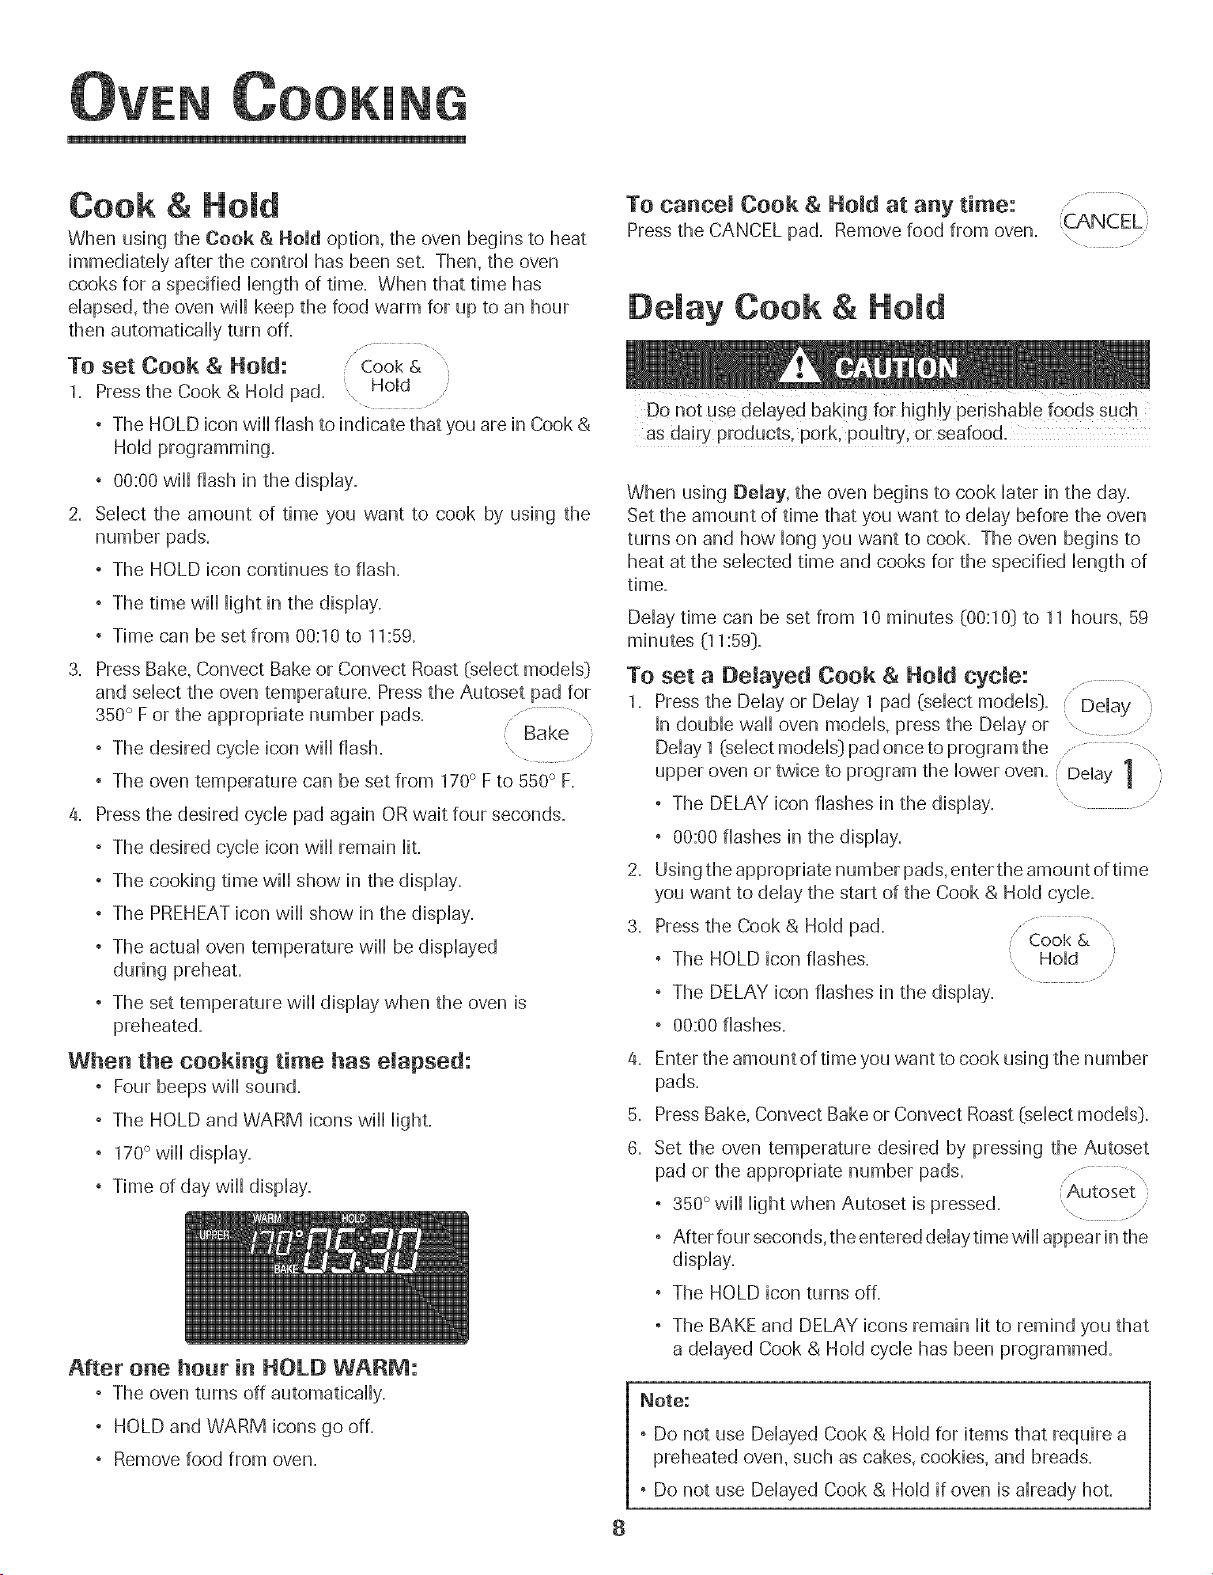
When the cooking time has elapsed:
° Four beeps wii] sound.
° The HOLD and WARM icons wii] light.
° 170°will display.
° Time of day wii] display.
After one hour in HOLD WARM:
, The oven turns off automatically.
, HOLD and WARM icons go off.
, Remove food from oven.
To cancer Cook & Hold at any time:
Press the CANCEL pad. Remove food from oven.
/,
Delay Cook & Hold
8
as dairy products, pork, poultry, or seafood.
When using Delay, the oven begins to cook later in the day.
Set the amount of time that you want to delay before the oven
turns on and how long you want to cook. The oven begins to
heat at the selected time and cooks for the specified length of
time.
Delay time can be set from 10 minutes (00:10} to 11 hours, 59
minutes (11:59}.
To set a Delayed Cook & Held cycle: .......... ,
1. Press the Delay or Delay 1 pad (select models}. Delay }
[n double wall oven models, press the Delay or .
Delay 1 (select models} pad once to program the .......... ,
upper oven or twice to program the lower oven. Delay 1
° The DELAY icon flashes in the display. ............
2,
3.
° 00:00 flashes in the display.
Using the appropriate number pads, enter the amount of time
you want to delay the start of the Cook & Hold cycle.
Pressthe Cook & Hold pad............... \
,' Cool<&
, The HOLD icon flashes. Hold
" The DELAY icon flashes in the display.
, 00:00 flashes.
4,
5.
6.
Enter the amount of time you want to cook using the number
pads.
Press Bake, Convect Bake or Convect Roast (select models}.
Set the oven temperature desired by pressing the Autoset
pad or the appropriate number pads. ........... ,
Autoset }
, 350° wiii light when Autoset is pressed. .......
° After four seconds, the entered delay time wiii appear in the
display.
° The HOLD icon turns off.
° The BAKE and DELAY icons remain lit to remind you that
a delayed Cook & Hold cycle has been programmed.
Note:
, Do not use Delayed Cook & Hold for items that require a
preheated oven, such as cakes, cookies, and breads.
° Do not use Delayed Cook & Hold if oven is already hot.
OOOKING
To set Btoih
1. Press the Broil pad.
, The BROIL icon flashes.
, 000 flashes.
, SET flashes.
\
Press the Autoset pad once to set HI broil or Autoset
twice to set LO broik " .................
, HI or LO wiiI be displayed.
Sebct HI broil for normal broiling. Sebct LO broil for
low-temperature broiling of longer cooking foods such
as poultry.
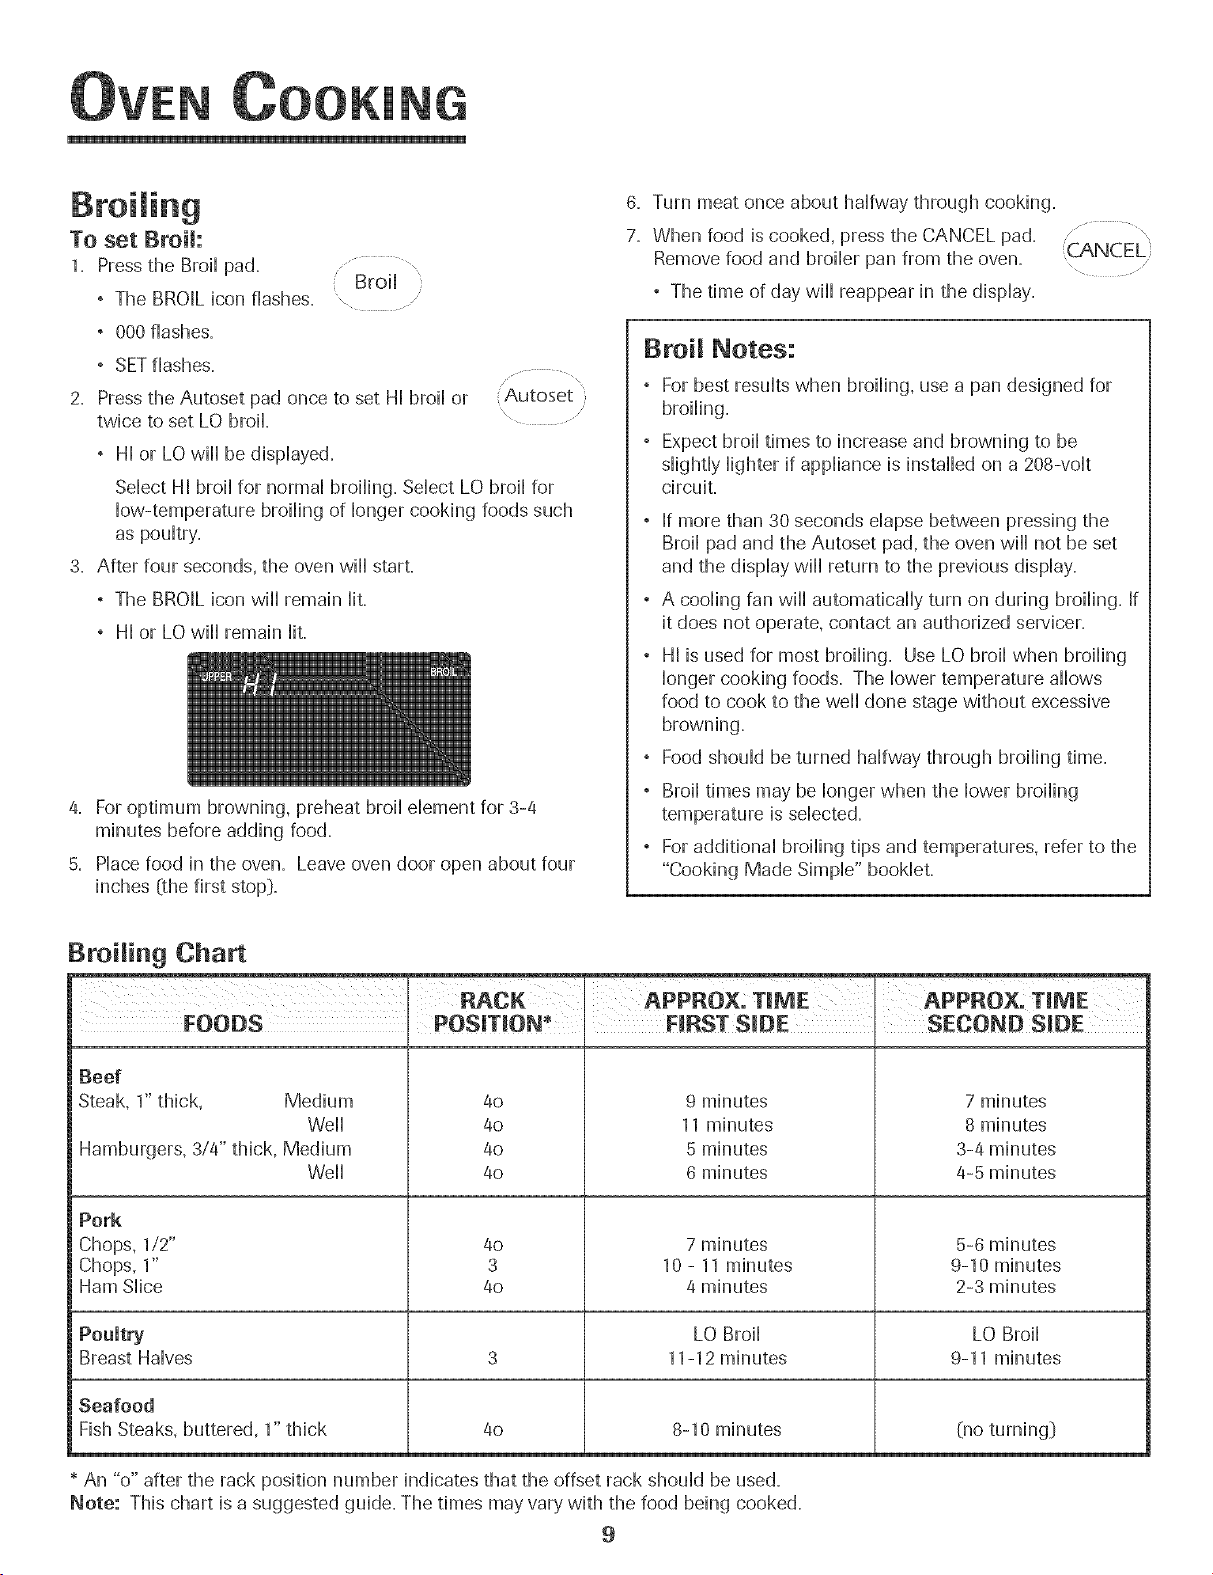
After four seconds, the oven wiiI start.
, The BROIL icon wiiI remain lit.
, HI or LO wiiI remain lit.
4. For optimum browning, preheat broil dement for 3-4
minutes before adding food.
5. Place food in the oven. Leave oven door open about four
inches (the first stop}.
6. Turn meat once about halfway through cooking.
7. When food is cooked, press the CANCEL pad.
Remove food and broiler pan from the oven.
, The time of day will reappear in the display.
CANCEL
Broil Notes:
, For best results when broiling, use a pan designed for
broiling.
, Expect broil times to increase and browning to be
slightly lighter if appliance is installed on a 208-volt
circuit.
° If more than 30 seconds elapse between pressing the
Broil pad and the Autoset pad, the oven will not be set
and the display will return to the previous display.
° A cooling fan will automatically turn on during broiling. If
it does not operate, contact an authorized servicer.
° HI is used for most broiling. Use LO broil when broiling
longer cooking foods. The lower temperature allows
food to cook to the well done stage without excessive
browning.
° Food should be turned halfway through broiling time.
° Broil times may be longer when tile lower broiling
temperature is selected.
° For additional broiling tips and temperatures, refer to the
"Cooking Made Simple" bookleL
Broiling Chart
RACK APPROX: TmME APPROX. TmME
FOODS FmRSTS_DE SECOND S_DE
Beef
Steak, 1" thick, Medium 4o 9 minutes 7 minutes
Well 40 11 minutes 8 minutes
Hamburgers, 3/4" thick, Medium 4o 5 minutes 3-4 minutes
Well 4o 6 minutes 4-5 minutes
Pork
Chops, 1/2" 4o 7 minutes 5-6 minutes
Chops, 1" 3 10 - 11 minutes 9-10 minutes
Ham Slice 4o 4 minutes 2-3 minutes
Poultry LO Broil LO Broil
Breast Halves 3 11-12 minutes 9-11 minutes
Seafood
Fish Steaks, buttered, 1" thick 4o 8-10 minutes (no turning[}
* An "o" after the rack position number indicates that the offset rack should be used.
Note: This chart is a suggested guide. The times may vary with the food being cooked.
9
OOKING
Keep War
For safeHykeephg hot foods warm or for warmhg breads and
pHates.
To set Keep Warm:
1. Press the Keep Warm pad.
° The WARM icon flashes.
° 000 flashes in the dispHay.
Warm
\
: Autoset
2. SeHectthe Keep Warm temperature. Press the Autoset pad
or the appropriate number pads.
° 170° wiHHHightwhen the Autoset pad is pressed.
° Each press of the Autoset pad wiHHincrease the
temperature by 5°.
The Keep Warm temperature can be set from 145° to 190°.
The WARM icon and the temperature wiHHbe dispHayed
wMHethe function is active.
Keep Warm Notes:
° For optimaHfood quaHity,oven cooked foods shouHdbe
kept warm for no Hongerthan 1 to 2 hours.
° To keep foods from drying, cover HooseHywith foiHor a Hid.
°To warm dinner rolls:
- cover roHHsHooseHywith foiHand pHacein oven.
- press Keep Warm and Autoset pads.
- warm for 12-15 minutes.
° To warm pmates:
- pHace2 stacks of up to four pHateseach in the oven.
- press Keep Warm and Autoset pads.
- warm for five minutes, turn off the oven and Heave
pHatesin the oven for 15 minutes more.
- use onHyoven-safe pHates,check with the
manufacturer.
- do not set warm dishes on a coHdsurface as rapid
temperature changes couHdcause crazing or
breakage.
To cancel Keep Warm: .......... \
1. Press the CANCEL pad.
2. Remove food from the oven.
10
OOKING
Automatic Shut-Off/Sabbath
Mode
The oven wi[[ automatically turn off after 12 hours if you
accidentaHHyHeaveit on. This safety feature can be turned off.
To cancel the 12=hour shut=off and run the oven con=
tinuously for 72 hours:
1= Pressand hoM the CHockpad for three seconds Clod<
° "SAb" will be dispHayedand flash for five seconds.
° "SAb" will then be dispHayedcontinuousHy untiHturned
off or untiHthe 72-hour time Himitis reached.
° The BAKE icon will also be displayed if a bake cycle is in
use while the oven is in Sabbath Mode.
° All keys are inactive except CANCEL and Clock. All other
functions EXCEPTBAKE (Timer, Keep Warm, Clean, etc.)
are locked out during the Sabbath Mode.
° A Cook & Hold can be programmed during the Sabbath
Mode, however a Delay Cook & Hold is not allowed.
TO cancem the Sabbath Mode:
1= Pressthe CLOCK pad for three seconds. ........
" Clock
OR
\ ....
2= After 72 hours, the Sabbath Mode will end=
, "SAb" will flash for five seconds.
, The time of day will return to the display.
Sabbath Mode Notes:
, Sabbath Mode can be turned on at any time with or
without the oven on=
, Sabbath Mode cannot be turned on if the keypads are
locked out or when the door is locked.
, Most prompts and messages and all beeps are
deactivated when Sabbath Mode is active.
, If the oven is baking when Sabbath Mode is set, the
BAKE icon will go out at the end of the baking cycle.
There will be no audible beeps.
, If the oven light is desired while in Sabbath Mode, it
must be turned on before the Sabbath Mode is started.
, When the Sabbath Mode is started, the temperature
display will immediately show the set temperature, rather
than the actual oven cavity temperature. No preheat
beep will sound.
, The self-clean cycle and automatic door lock do not
operate during the Sabbath Mode.
, Pressing CANCEL pad will cancel a Bake cycle, however
the control will stay in the Sabbath Mode.
, If power fails, the oven will power up in Sabbath Mode
with 72 hours remaining and no cycle active.
11

OOKING
Adjusting the Oven Temperature
Oven temperatures are carefully tested for accuracy at the
factory. It is normaHto notice some baking or browning
differences between a new oven and an oHdone. As ovens
get oHder,the oven temperature can shift.
You may adjust the oven temperature if you think the oven is
not baking or browning correctHy. To decide how much to
change the temperature, set the temperature 25 degrees
higher or Howerthan your recipe recommends, then bake.
The resuHtsof the first bake shouHdgive you an idea of how
much to adjust the temperature.
TO adjust the oven temperature: Bake
1. Press the Bake pad. .....
2. Enter 550° by pressing the appropriate number pads.
3. Pressand hoHdthe Bake pad for severaHseconds or untiH
O0° appears in the dispHay.
If the oven temperature was previousHyadjusted, the
change wiHHbe dispHayed. For exampHe,if the oven tem-
perature was reduced by 15° the dispHaywiHHshow "-15°",
4. Pressthe Autoset pad to adjust the temperature.
Each time the Autoset pad is pressed, the temperature
changes by 5°, The oven temperature can be increased or
decreased by 5° to 35°,
5. The time of day wiHHautomatically reappear in the dispHay.
You do not need to readjust the oven temperature if there is a
power faiHureor interruption. Temperature adjustment appHies
to Bake, Convect Bake and Convect Roast (seHectmodeHs_)
onHy.
The Favorite pad aHHowsyou to save the time and temperature
from a Cook & HoHdBake, Convect Bake or Convect Roast
_seHectmodeHs_)cycHe.
To set a Favorite cycHe,a Cook & HoHdfunction must be either
active or just programmed.
To set a new Favorite cycle or to save a cur-
rentJy running Cook & Hold as a Favorite:
1. Program a Cook & Hold cycle as described in the Cook &
HoHdsection on page 8. .................,
2. Pressand hoHdthe Favorite pad for three Favorite'
seconds. ......
° The newHyset or currentHyrunning Cook & HoHdcycHe
wiHHbe saved.
, A beep wiHHsound to indicate that the controHhas
accepted the Favorite setting.
To start a cycle programmed into Favorite:
1. Pressthe Favorite pad.
° Time and temperature for the set Cook & HoHdcycHewiHH
be dispHayed.(If no Cook & HoHdcycHehas been pro-
grammed, "nonE" is dispHayed._)
2. Pressthe Bake, Convect Bake or Convect Roast _seHect
modeHs_)pad.
° The Favorite cycHewiHHbegin immediateHy.
° The seHectedcycHeicon wiHHHightin the dispHay
° The cooking time wiHHHightin the dispHay
When the cooking time has elapsed:
° The seHectedcycHeicon wiHHturn off.
° The HOLD WARM icon wiHHHight.
° 170° wiHHdispHay.
To cance! a Favorite cycle in progress: ..................,
1. Pressthe CANCEL pad.
° The stored Favorite cycle will not be affected. .....
2. Remove food from the oven.
12
OOKING
Oven Light
The Oven Light automaticaHHycomes on whenever the oven
door is opened. When the door is dosed, press the Oven Light
pad to turn the Oven Light on or off. A beep wiHHsound
every'time the Oven Light pad is pressed.
uven
Light ......
Oven Vent ....
The oven vent is Hocatedbellow the controHpaneHon your waHH
oven,
When the oven is in use, the area near the oven vent may
become hot enough to cause burns. Do not Mock the vent
opening for best baking resuHts.
Oven Fans
The cooling fan wiHHautomaticaHHyturn on during cHeaning,
broiHingand some baking operations. It is used to heHpkeep
intemaHparts on the controHpaneHcool The fan wiHHautomati-
caHHyturn off when parts have cooHed.The fan may continue
to operate after the oven has been turned off. This is normal
A convection fan _seHectmodeHsDis used to circuHate hot air
in the oven when the convection feature is seHected.It
automaticaHHyturns on whenever a Ceuvect pad is pressed
and wiHHturn off when Ceuvect is cancelled.
i Note: The convection fan wiHHautomaticaHHystop whenever
the oven door is opened.
Oven Racks
Do not attempt t° change the rack position when the aven
is hot.
Do not use the oven for storing food Orcookware.
Single and Doable Cenvect Ovens - two fiat and one
offset rack were packaged for each oven.
Single and Doable Nou-Couvect Ovens - one fiat and one
offset rack were packaged for each oven.
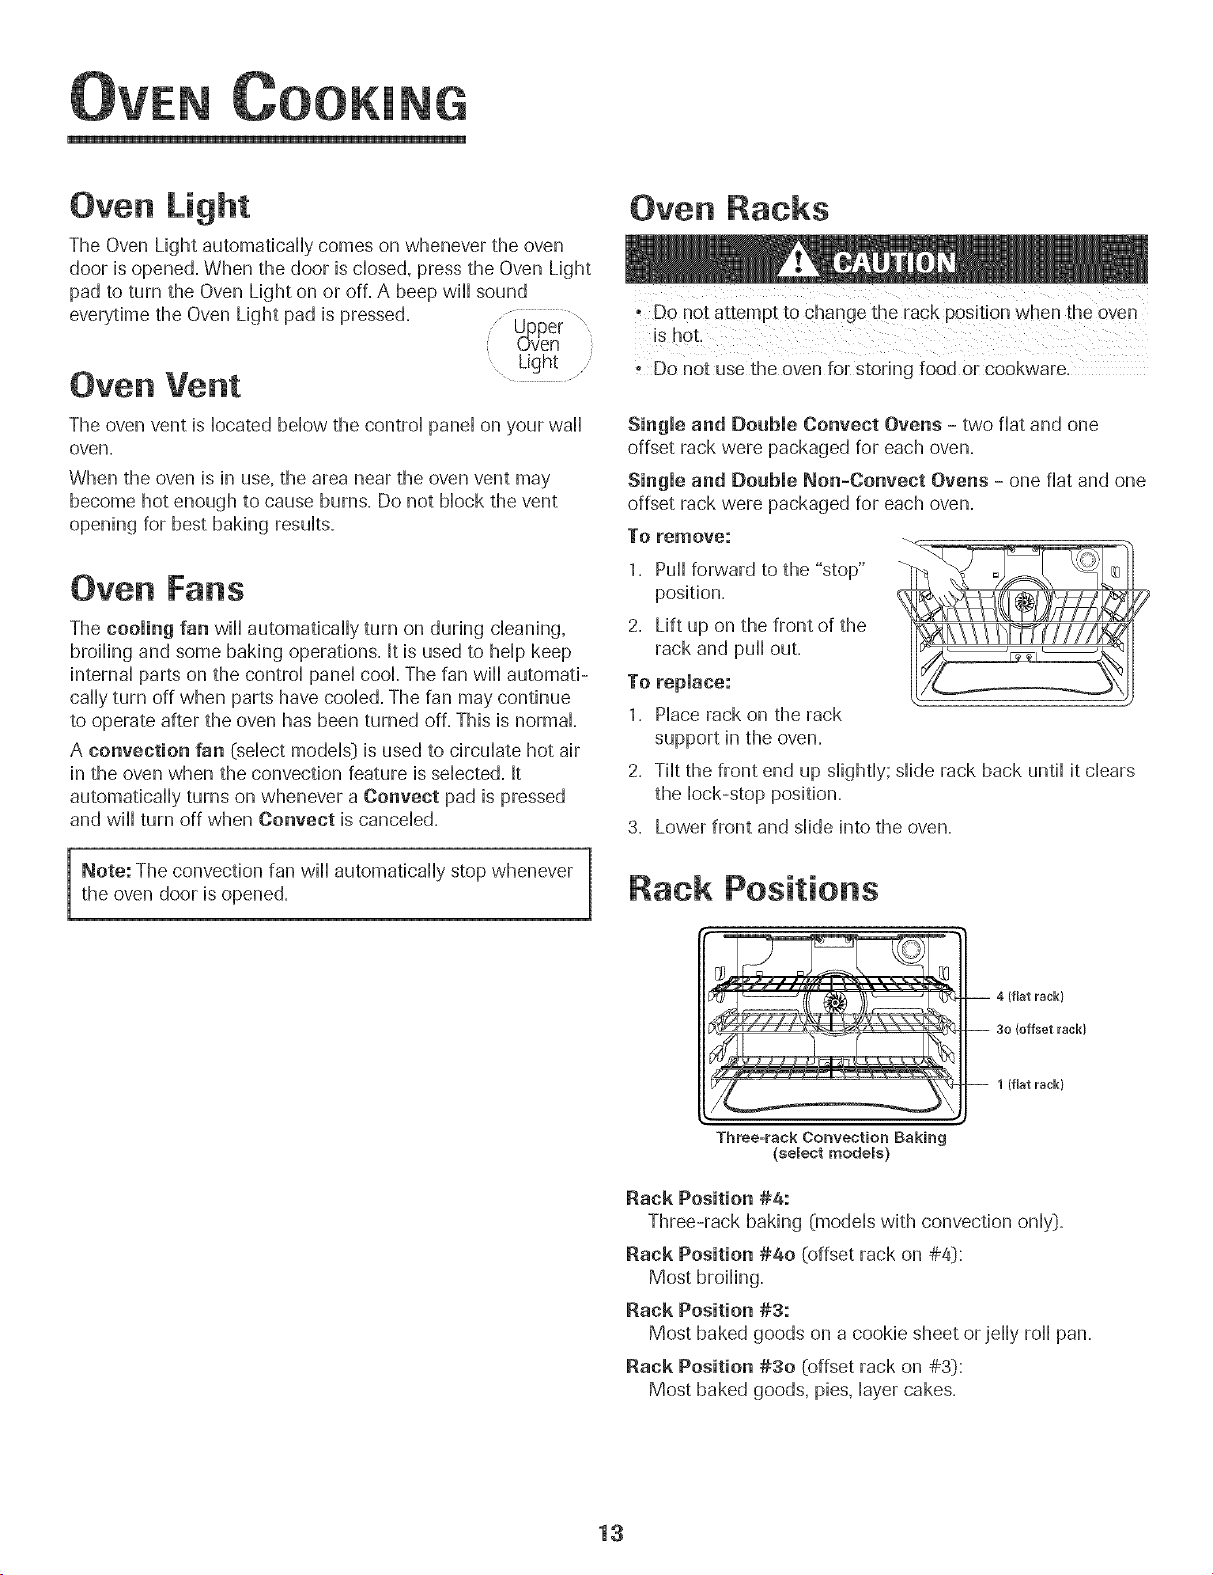
To remove:
1. PuHHforward to the "stop"
position.
2. Lift up on the front of the
rack and puHHout.
To replace:
1. PHacerack on the rack
support in the oven.
2. TiHtthe front end up sHightHy;sHiderack back untiHit dears
the Hock-stop position.
3. Lower front and sHideinto the oven.
Rack Positions
-- 1 (fiat u'ack}
Three=rack Convection Baking
(select models}
Rack Position #4:
Three-rack baking (modeHswith convection onHy).
Rack Position #4o (offset rack on #41):
Most broiHing.
Rack Position #3:
Most baked goods on a cookie sheet or jeHHyroHHpan.
Rack Position #30 [offset rack on #3[):
Most baked goods, pies, Hayercakes.
13
OOKING
Rock Position #2:
Roasting small cuts of meat, cakes in tube or bundt pans,
casseroHes,
Rock Position #2o (offset on #2[):
Roasting, Hoavesof bread, angd food cake,
Rock Position #1:
Large cuts of meat and turkey, custard pie, dessert souffle,
Multiple Rock Cooking:
Two rocks: Use #2o and #4=
Three rocks (convection cooking - sdect modds_):
Use #1, #30, #4= (See illustration on page 13=_)
e The use of the offset rack is denoted in the Histat Heftas
an "o" after the rack position number=
When baking on two or three racks, check foods at the
minimum suggested time to avoid over=browning or
over=cooking,
Do not cover an entire rack with aHuminumfoiHor pHacefoiH
on the oven bottom, Baking resuHtswill be affected and
damage may occur to the oven bottom=
14
Se f-C ean Oven
• tt is normal for parts of the oven to become hot during a
self-cJean cycle.
- To prevent damage to oven door. do not attenl pt to open
the door when the LOCK icon is displayed
, A\oid touching door. window or oven vent area during a
clean cycle.
- Do not use commercial oven cleaners on the oven finish
or around any part of the oven. They wiii damage the
finish or parts.
The self-clean cycle uses above-normal cooking temperatures to
automatically clean the oven interior.
It is normal for flare-ups, smoking, or flaming to occur during
cleaning if the oven is heavily soiled. It is better to clean the oven
regularly rather than to wait until there is a heavy build-up of soil
in the oven.
During the cleaning process, the kitchen should be well venti-
lated to get rid of normal odors associated with cleaning.
Before Seff-Cmeaning
1. Remove broiler pan, all pans, and oven racks from the oven.
The oven racks will discolor and may not slide easily after a
self-clean cycle if they are not removed.
2. Clean oven frame, door frame (area outside of gasket, and
around the opening in the door gasket} with a nonabrasive
cleaner such as Bon AmF or detergent and water. The self-
cleaning process does not clean these areas. They should be
cleaned to prevent soil from baking on during the clean cycle.
(The gasket is the seal around the oven door and window}.
3. To prevent damage, do not clean or
rub the gasket around the oven door.
The gasket is designed to seal in heat
during the clean cycle.
4. Wipe up excess grease or spiiiovers
from the oven bottom. This prevents
excessive smoking, flare-ups or fiam- 2.
ing during the clean cycle. To make cleaning easier, the
heating element can be lifted slightly (about 1 inch}. 3.
5. Wipe up sugary and acidic spiiiovers such as sweet potatoes,
tomato, or milk-based sauces. Porcelain enamel is acid- 4.
resistant, not acid-proof. The porcelain finish may discolor if
acidic or sugary spills are not wiped up before a self-clean
cycle.
To set Self-Clean:
_otes:
, Oven temperature must be below 400° F to program a
clean cycle.
, In double wall oven models, only one oven can be
cleaned at a time.
1. Close the oven door. ..... ,
2. Press the Clean pad. Clean }
, The CLEAN icon flashes.
, "SET" flashes in the display.
3. Press the Autoset pad. Autoset )
\
, "MEd" (Medium Soil, 3 hours} is displayed.
4. Press the Autoset pad to scroll through the self-cleaning
settings.
"HVy" (Heavy Soil, 4 hours}
"MEd" (Medium soil, 3 hours}
"L[TE" ( Light Soil, 2 hours}
Choosing the soil level of the oven automatically programs
the self-cleaning time.
5. After four seconds, the oven wiil start cleaning.
, [f the door is not closed, beeps wiil sound and 'door' wiil
display. [f the door is not closed within 30 seconds, the
self-cleaning operation wiil be canceled and the display
wiil return to the time of day.
, The CLEAN icon wiil appear in the display.
, The LOCK icon wiil flash in the display. Once the
door locks, the icon wiil remain steady.
, The cleaning time wiil start counting down in the display.
To Delay a Self-Clean Cycle: ........... \
1. Press the Delay or delay 1 pad (select models} ( Delay ,
° The DELAY icon flashes.
° 00:00 will flash in the display. Delay 1
Enter the amount of time you want to delay the
cycle using the appropriate number pads.
Press the Clean pad ................
Clean
° SET flashes in the display.
Press the Autoset pad. ..............\
(Autoset
, "LITE" (Light soil level} is displayed.
* Brand names for cleaning products are registered trademarks of the respective manufacturers,
15
IN
5. Pressthe Autoset pad to scroll through the sdf- ...........
cleaning settings. Autoset /
"HVy" (Heavy SoiH,4 hours:)
"MEd" (Medium Soil 3 hours:)
"LITE" (Light Soil 2 hours:)
Choosing the soiHHeveHof the oven automatically programs
the sdf-cHeaning time.
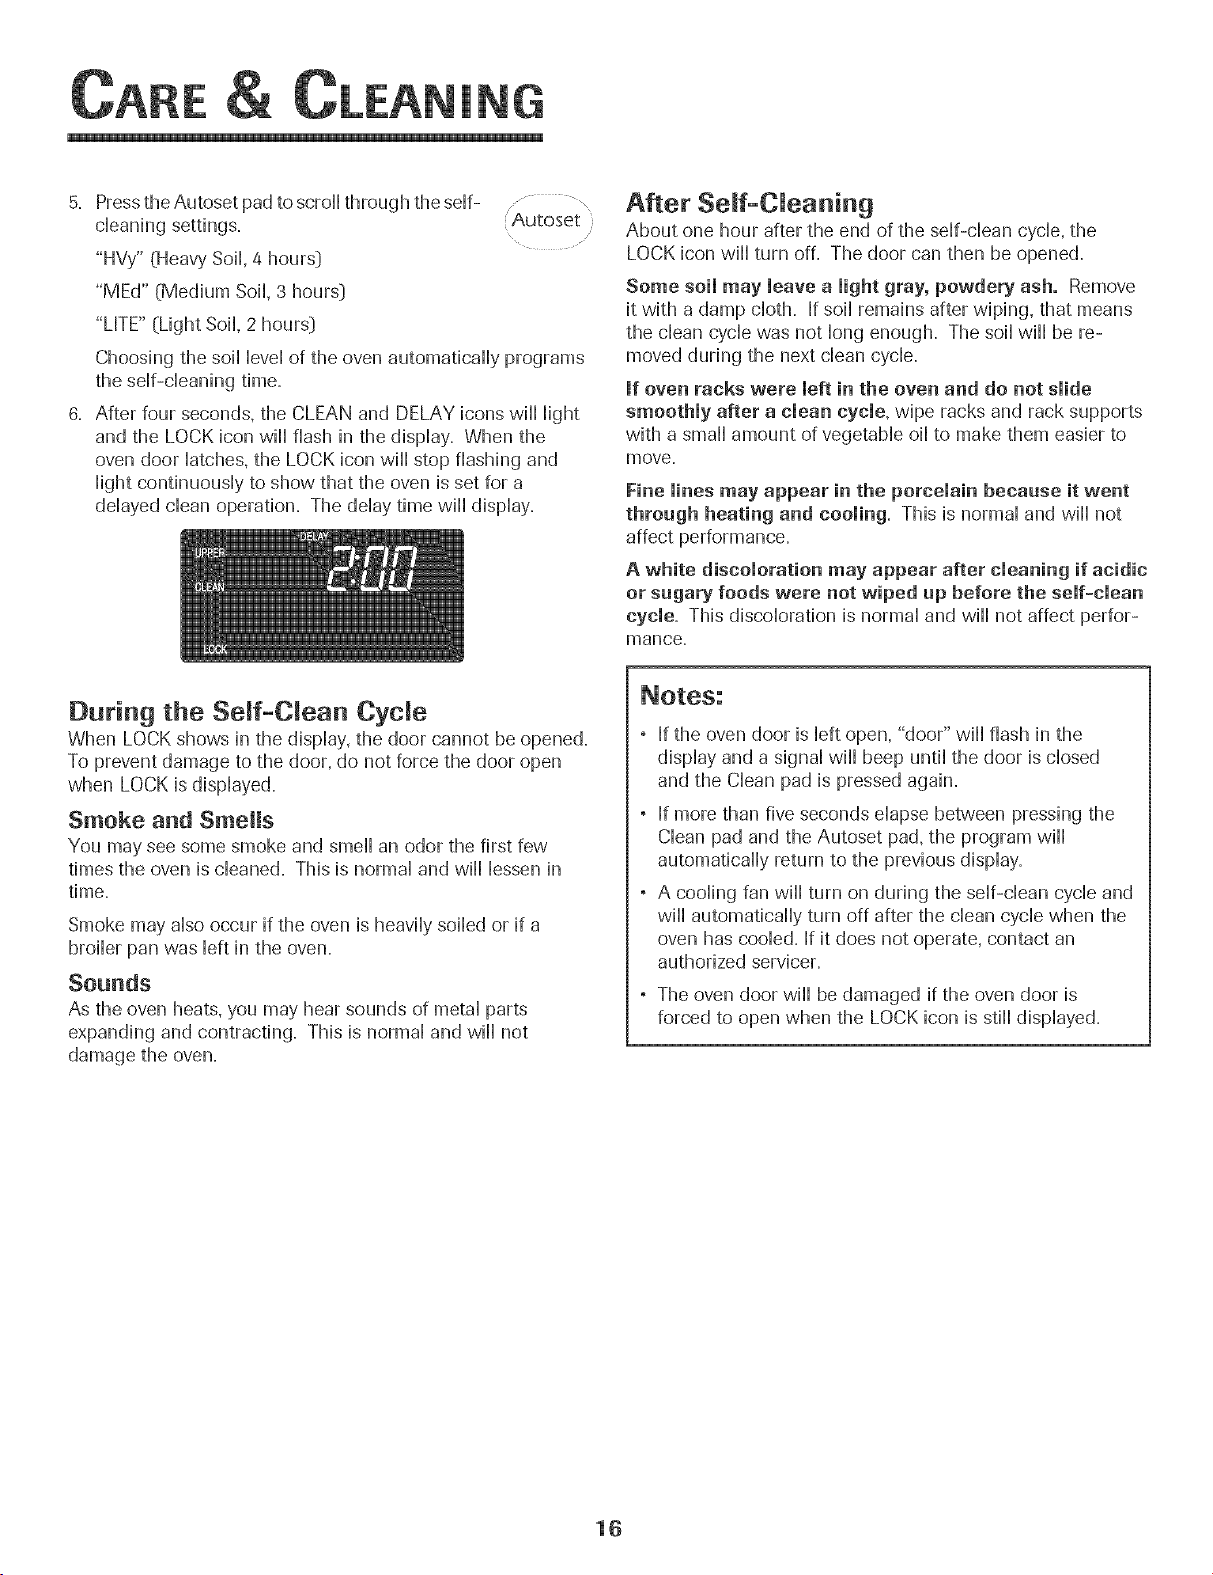
6. After four seconds, the CLEAN and DELAY icons will Hight
and the LOCK icon will flash in the dispHay. When the
oven door Hatches,the LOCK icon will stop flashing and
HightcontinuousHy to show that the oven is set for a
ddayed dean operation. The dday time will display.
After Serf-Cleaning
About one hour after the end of the self-clean cycle, the
LOCK icon will turn off. The door can then be opened.
Some soil may leave a light gray, powdery ash. Remove
it with a damp cloth. If soil remains after wiping, that means
the clean cycle was not long enough. The soil will be re-
moved during the next clean cycle.
mfoven racks were left in the oven and do net slide
smoothly after a clean cycle, wipe racks and rack supports
with a small amount of vegetable oil to make them easier to
move.
Fine lines may appear in the porcelain becaase it went
throagh heating and cooling= This is normal and will not
affect performance.
A white discoloration may appear after cleaning if acidic
or sugary foods were not wiped up before the self-clean
cycle. This discoloration is normal and will not affect perfor-
mance.
During the Seff-C ean Cycle
When LOCK shows in the display, the door cannot be opened.
To prevent damage to the door, do not force the door open
when LOCK is displayed.
Smoke and Smells
You may see some smoke and smell an odor the first few
times the oven is cleaned. This is normal and will lessen in
time.
Smoke may also occur if the oven is heavily soiled or if a
broiler pan was left in the oven.
Sounds
As the oven heats, you may hear sounds of metal parts
expanding and contracting. This is normal and will not
damage the oven.
If the oven door is left open, "door" will flash in the
display and a signal will beep until the door is closed
and the Clean pad is pressed again.
If more than five seconds elapse between pressing the
Clean pad and the Autoset pad, the program will
automatically return to the previous display.
A cooling fan will turn on during the self-clean cycle and
will automatically turn off after the clean cycle when the
oven has cooled. If it does not operate, contact an
authorized servicer.
The oven door will be damaged if the oven door is
forced to open when the LOCK icon is still displayed.
16
Cleaning Procedures
oBe sure appliance is elf and aH pa_s are ceel before handl!ng
or cleaningo This is to avoid damage and possible burns.
TOprevent staining or d!scobratJon, clean appliance after each use,

AINTENAN
Oven Light
OVEN,
: Be sure buHbis CooH.
•DO not touch a hot buHbwith a damp cHothas the buHb
may break
To repmace oven light:
1= Use a dry pothoHderand very carefuHHyunscrew buHbcover
and buHb,
2, RepHacewith a 40 watt, oven-rated appHiancebuHb.BuHb
with a brass base is recommended to prevent fush)g of
buHbhto socket.
3. RepHacebuHbcover and reconnect power to oven.
4, Reset chock,
Oven Window
To protect the oven door window:
1. Do not use abrasive cHeaning agents such as steeHwooH
scouring pads or powdered cHeansersas they may scratch
the gHass.
2. Do not hit the gHasswith pots, pans, furniture, toys, or
other objects.
3. Do not chosethe oven door untiHthe oven racks are in
pHace.
Scratching, hitting, jarring or stressing the gHassmay weaken
its structure causing an increased risk of breakage at a Hater
date.
18
NG
PROBLEM SOLUTION
For most concerns, try these first. , Check if oven controHshave been propedy set.
, Check if oven is propedy connected to dectricaU outHet.
, Check or re-set circuit breaker. Check or repHacefuse.
, Check power suppHy.
Clock, indicator words, and/or , Oven may be set for a Cook & HoHdor DeHayfunction.
lights operate but oven does , The Oven ControHLockout may have been set. (See page 5._)
not heat.
, The HightbuHbis Hooseor defective.
does not function. , The oven Hightdoes not work during stir-cleaning process.
, Oven may be in Sabbath Mode. (See page 11._)
There is a strong odor or light ° This is normal for a newwaH oven and will disappear after a few uses. Initiating adean
smoke when oven is turned on. cycle will "burn off" the smells more quickly. Turning on a ventilation fan will help
remove the smoke and/or odor.
, Excessive food soils on the oven bottom. Use a self-clean cycle.
Oven will not activate the , Oven may be set for a delay clean.
, Oven may be in Sabbath Mode. (See page 11._)
, Oven may be over 400° F. Oven temperature must be below 400° F to program a
clean cycle.
Oven did not clean properly. , Oven may need longer cleaning time.
, Excessive spills were not removed prior to self-cleaning process.
Foods do not broil properly. , Check rack position. (See page 9._)
, Voltage into house may be low.
Baked food is burned or too , Food may be positioned incorrectly in oven. (See "Cooking Made Simp/e"booMet.)
brown on top. , Oven not preheated properly.
Foods bake unevenly. , Oven was not preheated.
, The oven may be installed improperly.
, Check the oven rack with a level.
, Stagger pans. do not allow pans to touch each other or oven wall.
, Check instructions for suggested placement of pans on oven rack. (See "Cooking
Made Simp/e" booklet.]
Oven door will not unlock. , Oven may not have cooled to safe temperature after self-cleaning process.
, The control and door may be locked. (See page 5._)
19
PROBLEM SOLUTmON
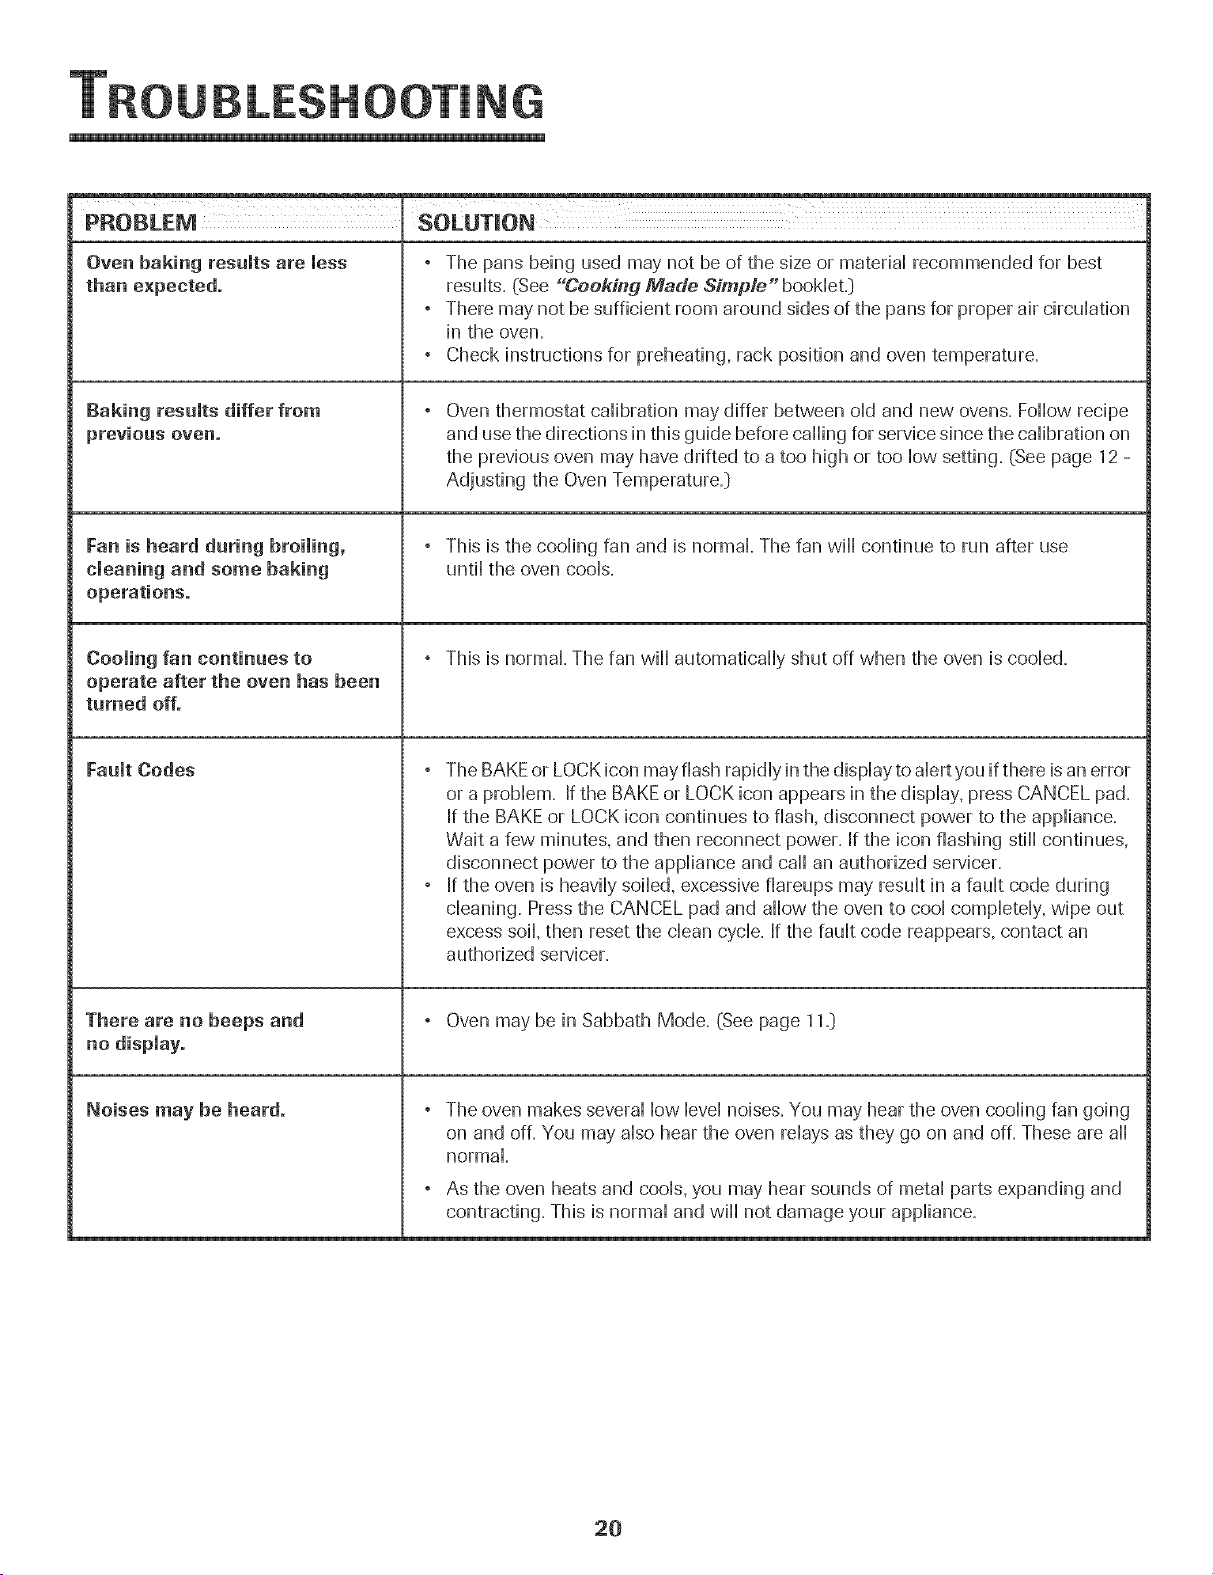
Oven baking results are less
than expected.
gaking results differ from
previous oven.
Fan is heard daring broiling,
cleaning and some baking
operations.
Cooling fan continues to
operate after the oven has been
turned off.
Fault Codes
There are no beeps and
no dispiayo
Noises may be heard.
° The pans being used may not be of the size or materiaHrecommended for best
resuHts.(See "CeekMg Made Simple" booklet.:)
° There may not be sufficient room around sides of the pans for proper air circulation
in the oven.
° Check instructions for preheating, rack position and oven temperature.
Oven thermostat calibration may differ between old and new ovens. Follow recipe
and use the directions in this guide before calling for service since the calibration on
the previous oven may have drifted to a too high or too low setting. (See page 12 -
Adjusting the Oven Temperature=:)
° This is the cooling fan and is normal The fan wi[[ continue to run after use
until the oven cools=
° This is normal. The fan will automatically shut off when the oven is cooled.
° The BAKEor LOCK icon may flash rapidly in the display to alert you if there is an error
or a problem. If the BAKE or LOCK icon appears in the display, press CANCEL pad.
If the BAKE or LOCK icon continues to flash, disconnect power to the appliance.
Wait a few minutes, and then reconnect power. If the icon flashing still continues,
disconnect power to the appliance and call an authorized servicer.
, If the oven is heavily soiled, excessive fiareups may result in a fault code during
cleaning. Pressthe CANCEL pad and allow the oven to cool completely, wipe out
excess soil, then reset the clean cycle. If the fault code reappears, contact an
authorized servicer.
, Oven may be in Sabbath Mode. (See page 11.]
, The oven makes several low level noises. You may hear the oven cooling fan going
on and off. You may also hear the oven relays as they go on and off. These are all
normal.
° As the oven heats and cools, you may hear sounds of metal parts expanding and
contracting. This is normal and will not damage your appliance.
20
Warranty
Full One Year Warranty -
Parts and Labor
For one (1} year from the original retail
purchase date, any part which fails in normal
home use will be repaired or replaced free of
charge
Limited Warranties - Parts Only
Second Year - After the first year from the
original purchase date. parts which fail in
normal home use will be repaired or replaced
free of charge for the part itself, witm-the owner
paying all other costs, including labor, mileage
and transportation
Third Threug h Fifth Year = From the original
purchase date. parts listed below which fail in
normal home use will be repaired or replaced
free of charge for the part itself, with the owner
paying aii other costs, including labor, mileage
and transportation
o Electronic Centrels
- Electric Neating Elements: Broil and bake
elements on electric cooking appliances.
Canadian Residents
The above wall ranties only cover an appliance
installed in Canada that has been certified or
listed by appropriate test agencies for compli
ance to a National Standard of Canada unless
the appliance was brought into Canada d_le to
transfer of residence from the United States to
Canada.
Limited Warranty Outside the United
States and Canada =Parts Only
For two {2} years from the date of original retail
purchase, any part which fails in normal home
use will be repaired or replaced free of charge
for the part itself, with the owner paying all
other costs, including labor, nileage and
transportation.
The specific warranties expressed above are the
@N£ YwafTantlesprovided by tbe manufacmTer:
Thesewarranties give you specific tega/ fights;
and you may also have ot,Oertights which vary
#am state to state
What is Not Covered By These
1. Conditions and damages resulting from any of the following:
a. Improper installation, delivery, or maintenance.
b. Any repair, modification, alteration, or adjustment not authorized
by the manufacturer or an authorized servicer.
c. Misuse, abuse, accidents, or unreasonable use.
d. Incorrect electric current, voltage, or supply.
e. Improper setting of any control
2 Warranties are void if the original serial numbers have been removed,
altered, or cannot be readily determined.
3. Light bulbs.
4. Products purchased for commercial or industrial use.
5. The cost of service or service caii to:
a. Correct installation errors.
b. Instruct the user on the proper use of the product.
c. Transport the appliance to the servicer.
6. Consequential or incidental damages sustained by any person as a
result of any breach of these warranties. Some states do not allow
the exclusion or limitation of consequential or incidental damages, so
the above exclusion may not apply.
If You Need Service
* Call the dealer from whom your appliance was purchased or call
Maytag ServicessM,Jenn-Air Customer Assistance at 1-800-
JENNAIR (1-800-536-0247} to locate an authorized servicer.
Be sure to retain proof of purchase to verify warranty status. Refer to
WARRANTY for further information on owner's responsibilities for
warranty' service.
If the dealer or service company cannot resolve the problem, write to
Maytag ServicesSM,Attn: CAIR_:Center, P.O.Box 2370, Cleveland, TN
37320-2370, or call 1=800=JENNAIR (1 =800=536=6247}.
U.S.customers using TTY for deaf, hearing impaired or speech
impaired, call 1-800-688-2080.
"User's guides, service manuals and parts information are available
from Maytag ServicessM,Jenn-Air Customer Assistance.
When writing or calling about a service problem, please include the
following information:
a. Your name, address and telephone number;
b. Model number and serial number;
c. Name and address of your dealer or servicer;
d. A clear description of the problem you are having;
e. Proof of purchase (sales receipt}.
21
FOURENCASTRE F_LECTRIQUE JENN-AIR
................... TA B L E D E S M ATIE R E S
......... S6cu rite ..........................................................................23-25
Cuisson ..........................................................................26-36
Nettoyage .....................................................................37-39
Entretien .............................................................................../40
Recherche des pannes ............................................41-/42
Garantie et service .........................................................../43
Gu[a del Usuario .............................................................../4/4
_JENN-AIR

Installateur:Remettrece guideau pmpnetaire.
Censemmateur: Lire b guide: le conserverpour consu_at_on
uJterbure.Conserverla tactured'achat ou Jecheque encalsse
commepreuvede rachat.
Numerode modele
Numerodeserie
Dated'achat
Sivousavezdes questions,veuilleznousappeler :
Jenn-Air CustomerAssistance
1-800-JENNAIR(1-800-536-6247}
{lundi auven@ed 3 h _ 20 h. heurede rest}
Internet:http:/ivw¢_jennar.com
Dartsb cadrede nos prat_quesd'ameliorationcons[antede la
quaEit6et de la performancede nospmduits decuisson,des
modificationsde rappareil qui ne son[ pas mentionn@soansce
guideont pu 6tre introduites.
Repeftez_veus _ la paye 43 pourplus d'in[ermatiens
celtcerltant le service apr_s-venteo
f
INSTRUCTIONS DE SECURITE
Les instructions de securite importantes et les paragraphes
<<avertissement>>de ce guide ne sont pas destines a couvrir toutes
les conditions et situations qui pourraient se presenter. II faut
faire preuve de bon sens, de prudence et de soin iors de
I'installation, de rentretien ou du fonctionnement de rappareil.
Toujou rs prendre contact avec ledetailla nt, ledistributeu r,ragent
de service apres-vente ou ie fabricant darts ie cas de probiemes
ou de conditions qui ne seraient pas comprises.
Reconna_tre _es etiquettes, paragraphes
et symbo_es sur _a securit6
Lire toutes les instructions avant d'utiliser cet appareii;
observertoutesies instructions poureiiminer iesrisquesd'incendie,
choc eiectrique, dommages materiels et corporeis que pourrait
susciter une utiiisation incorrecte de rappareii. Utiiiser rappareii
uniquement pour ies fonctions prevues, d@rites darts ce guide.
Pour une utilisation adequate et en s_curit_, ii faut que
rappareii soit convenabiement instaiie par un technicien quaiifie,
et relic a la terre. Ne pas regler, r@arer ni remplacer un
composant, amoins que ceia nesoit sp@ifiquement recommande
dans ce guide. Toute autre reparation doit etre effectuee par un
technicien quaiifie.
Toujours debrancher rappareii avant d'y faire de rentretien.
Pout vitet un incendie ou des
dommages de fum6e
• S'assurer que tous[es materiaux de conditionnement sont
retires de rappareii avant de ie mettre en marche.
. Garder les materiaux combustibles, ressence et autres matieres
et vapeurs inflammables bien eioignes de rappareii. Ne pas
ranger de materiaux inflammables darts un four.
• De nombreux types de piastique sont affectes par la chaieur.
Garder ies piastiques eioignes des pieces de rappareii pouvant
devenir chaudes.
. Pour emp@her qu'un feu de graisse ne se declare, eviter toute
accumulation de graisseou autres matieres inflammables darts
rappareii ou au voisinage.
En cas d'incendie
Ne jamais utiliser d'eau pour eteindre de la graisse
enfiammee. Utiliser du bicarbonate de soude ou un
extincteur 8 poudre chimique ou 8 mousse pour etouffer
les fiammes.
1. [nterrompre raiimentation eiectrique de rappareii pour
minimiser ia propagation des fiammes.
2. NE JAM_[S saisir ou d@iacer un ustensiie de cuisine
enfiamme.
3. Fermer ia porte du four pour etouffer ies fiammes.
POURRAIENTresulterendegravesblessuresoumemelamort. Seo_rite po r e fa ts
POURRAIENTresulter en des blessures mineures.
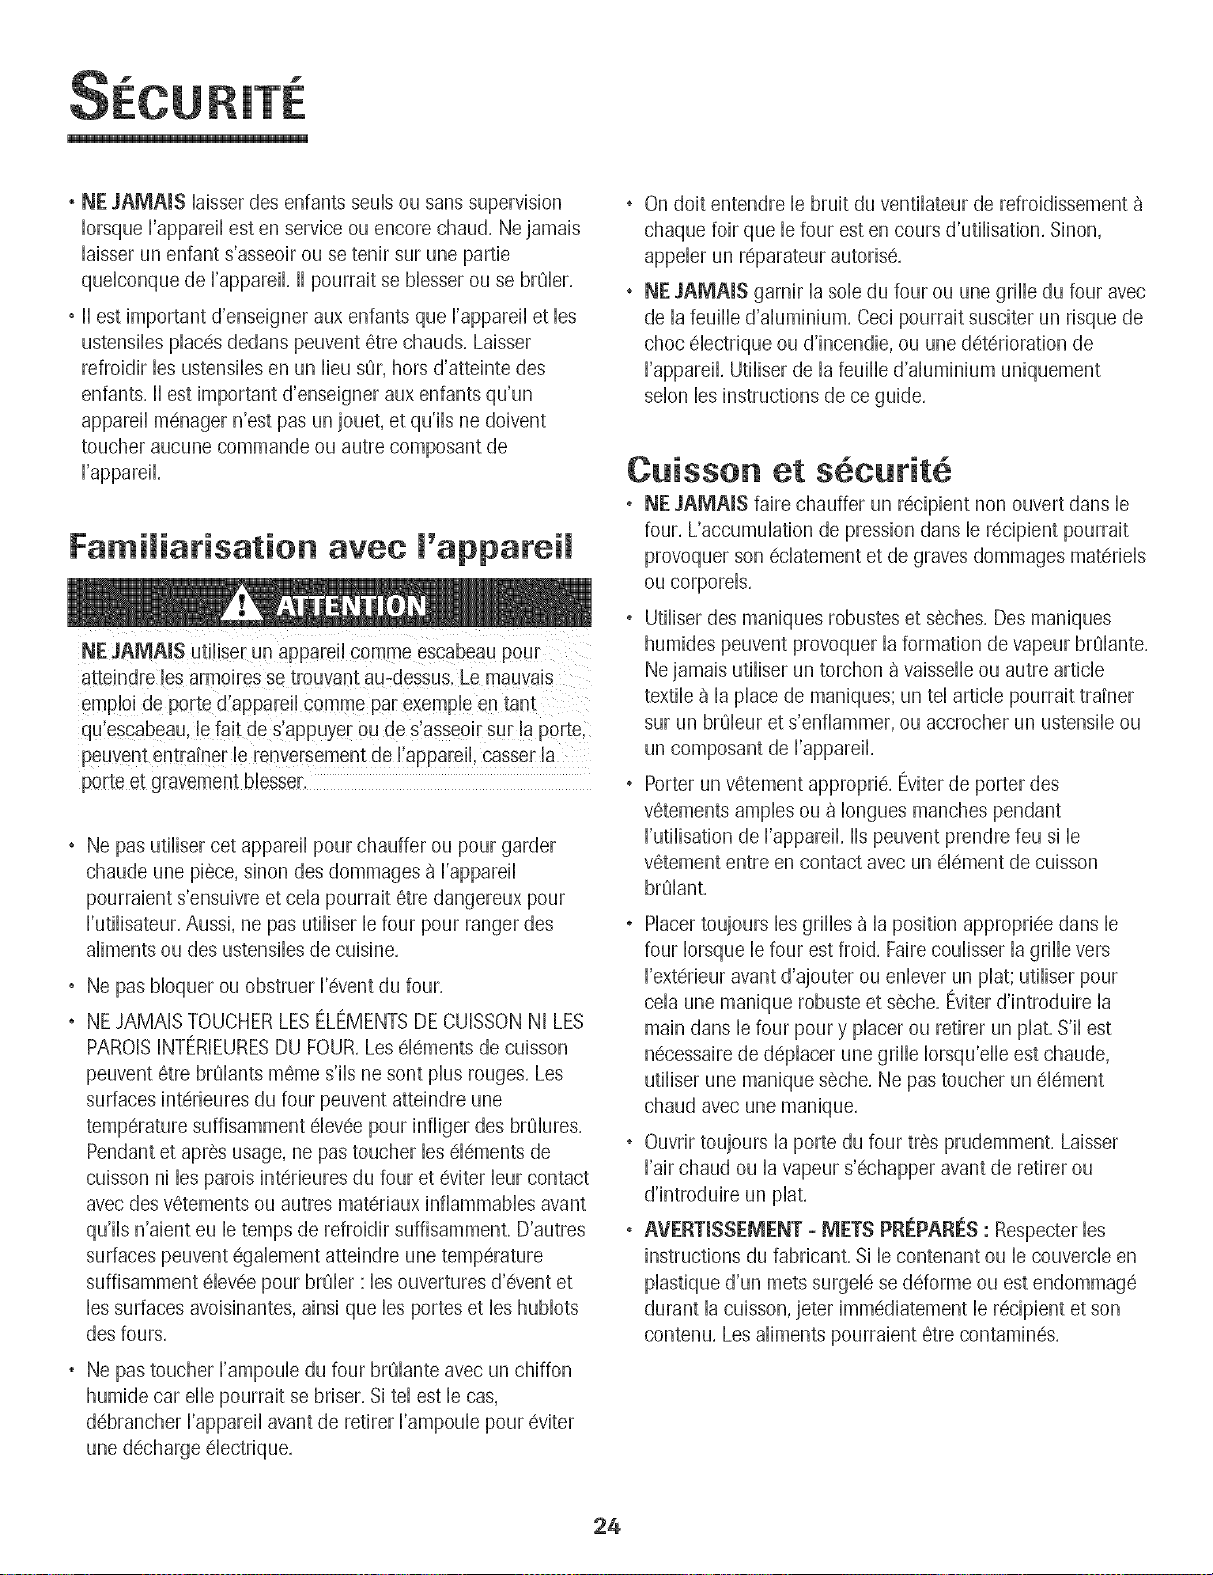
NE JA_AIS remiser dans une armoire au-dessus d'un
SU[ la porte pour atte!ndre un objet, pourrait se b!esser
gravement.
23
f
NE JA[V]AIS laisser des enfants seuls ou sans supervision
Iorsque I'appareil est en service ou encore chaud, Ne jamais
laisser un enfant s'asseoir ou se tenir sur une partie
quelconque de I'appareil, II pourrait se blesser ou se brQler,
• II est important d'enseigner aux enfants que rappareil et les
ustensiles places dedans peuvent etre chauds, Laisser
refroidir les ustensiles en un lieu su3r,hors d'atteinte des
enfants, II est important d'enseigner aux enfants qu'un
appareil menager n'est pas un jouet, et qu'ils ne doivent
toucher aucune commande ou autre composant de
['appareH,
Familiarisation avee l'appareil
emp!oi de porte d'appare!! comme par exemp!e en taut
qulesgabeau, le fair de slappuye[ OUde dasseoir sur !a portel
porte et gravemeut blesser.
Ne pas utiliser cet appareil pour chauffer ou pour garder
chaude une piece, sinon des dommages a i'appareii
pourraient s'ensuivre et ceia pourrait etre dangereux pour
i'utiiisateur. Aussi, ne pas utiiiser ie four pour ranger des
aliments ou des ustensiles de cuisine.
° Ne pas bloquer ou obstruer I'event du four.
• NE JAMAIS TOUCHER LES ELEMENTSDE CUISSON NI LES
PAROISINTERIEURESDU FOUR. Les elements de cuisson
peuvent etre brOlants meme s'ils ne sont plus rouges. Les
surfaces interieures du four peuvent atteindre une
temperature suffisamment eievee pour infiiger des brOiures.
Pendant et apres usage, ne pas toucher les elements de
cuisson ni ies parois interieures du four et eviter ieur contact
avec des vetements ou autres materiaux inflammables avant
qu'ils n'aient eu le temps de refroidir suffisamment. D'autres
surfaces peuvent egalement atteindre une temperature
suffisamment eievee pour brQier : ies ouvertures d'event et
les surfaces avoisinantes, ainsi que les portes et les hublots
des fours.
Ne pas toucher I'ampoule du four brQlante avec un chiffon
humide car eiie pourrait se briser. Si tel est ie cas,
debrancher i'appareii avant de retirer i'ampouie pour eviter
On doit entendre le bruit du ventilateur de refroidissement
chaque foir que ie four est en cours d'utiiisation. Sinon,
appeier un reparateur autorise.
NE JAMAmS garnir ia sole du four ou une grille du four avec
de ia feuiiie d'aiuminium. Ceci pourrait susciter un risque de
choc eiectrique ou d'incendie, ou une deterioration de
i'appareii. Utiiiser de ia feuiiie d'aiuminium uniquement
seion ies instructions de ce guide.
Cuisson et s cutit
• NE JAMAmS faire chauffer un recipient non ouvert darts le
four. L'accumuiation de pression darts ie recipient pourrait
provoquer son eciatement et de graves dommages materiels
ou corporeis.
• Utiiiser des maniques robustes et seches. Des maniques
humides peuvent provoquer ia formation de vapeur brQiante.
Ne jamais utiliser un torchon a vaisselle ou autre article
textile a la place de maniques; un tel article pourrait trainer
sur un brQieur et s'enfiammer, ou accrocher un ustensiie ou
un composant de i'appareii.
• Porter un vetement approprie. Eviter de porter des
vetements amples ou a Iongues manches pendant
I'utilisation de I'appareil. lls peuvent prendre feu si le
vetement entre en contact avec un element de cuisson
bru_iant.
Placer toujours ies grilles a ia position appropriee darts ie
four iorsque ie four est froid. Faire couiisser ia grille vers
i'exterieur avant d'ajouter ou eniever un plat; utiiiser pour
ceia une manique robuste et seche. Eviter d'introduire la
main darts ie four pour y placer ou retirer un plat. S'ii est
necessaire de depiacer une grille iorsqu'eiie est chaude,
utiiiser une manique seche. Ne pas toucher un element
chaud avec une manique.
Ouvrir toujours ia porte du four tres prudemment. Laisser
i'air chaud ou ia vapeur s'echapper avant de retirer ou
d'introduire un plat.
AVERTiSSEMENT - METS PRF.PARES: Respecter ies
instructions du fabricant. Si le contenant ou le couvercle en
piastique d'un mets surgeie se ddorme ou est endommage
durant la cuisson, jeter immediatement le recipient et son
contenu. Les aliments pourraient 6tre contamines.
24
f
Ne pas permettre b contact de papbr d'duminium ou de
sonde a viande avec bs elements chauffants,
• Toujours eteindre toutes bs commandes une fob la cubson
terminee,
Ustensiles et s6cutit
, Appiiquer bs instructions du fabrbant Iors de I'empIoi d'un
sachet pour cuisson au four,
, La securit6 de fonctionnement de cet appareiI a ete testee
I'aide d'ustensibs de cuisine tradidonneB, Ne pas utiiiser un
ustensib ou accessoire qui n'est pas sp@ifiquement
recommande darts ce guide, Ne pas utiliser de systeme de
convection additionnek L'utilisation d'un dispositif ou
accessoire qui n'est pas expressement recommande dans ce
guide peut degrader la securite de I'appareil ousa perfor-
mance, ou reduire la Iongevite des composants,
, Seub certains materiaux en verre, vitroceramique,
ceramique, terre cuite, ou certains ustensibs vitrifies/
emailles peuvent 6tre utilises darts b four sans risque de
bris sous I'effet du choc thermique, Observer bs instructions
du fabricant Iors de I'utilisation d'un ustensib en verre,
Nettoyage et s curit
" Arreter routes bs commandes et attendre b refroidissement
de tous bs composants avant de bs toucher ou
d'entreprendre b nettoyage, Nettoyer I'appareil avec
precaution, Travailbr prudemment pour @iter des br01ures
par la vapeur en cas d'utilisation d'un chiffon ou d'une
@onge humide Iors de [elimination d'un produit renverse
sur une surface chaude, Certains produits de nettoyage
peuvent generer des vapeurs nocives Iorsqu'on bs applique
sur une surface chaude,
Nettoyer uniquement bs pieces mentionnees dans ce guide,
Fow" autonettoyant
Ne laisse[ aucune nourriture, ustensile de cuisine, gr!l!e ou
16chefrite dans le four !ors d une 0perat!0n
d!autonettoyage.
Ne pas nettoyer ie joint de porte; ie joint joue un rOb
essentiel quanta I'etancheite, Ne pas frotter, endommager
ou d@iacer ie joint,
Ne pas utiiiser de produit de nettoyage ou enduits de four
darts ie four autonettoyant ou sur ies zones voisines,
Avant d'executer une operation d'autonettoyage, retirer la
lechefrite, les grilles du four et les autres ustensiles, et
eiiminer par essuyage tout exces de residus renverses pour
eviter la formation de fumee ou I'inflammation de ces
residus,
Avertissement et avis
important pour la securit
La Ioi califomienne _Safe Drinking Water and Toxic Enforce-
ment Act>>de 1986 (proposition 65} stipule la publication par le
gouvemeur de ia Caiifomie d'une iiste de substances que
I'etat de Californie considere comme cancerigenes ou
dangereuses pour ie systeme reproducteur, et impose aux
entreprises commerciaies i'obiigation de signaler a burs
clients ies risques d'exposition a de teiies substances,
Nous informons les utilisateurs de cet appareil que Iors d'une
operation d'autonettoyage, iis peuvent etre exposes a une
faible concentration de certaines substances figurant darts la
iiste mentionnee ci-dessus, dont ie monoxyde de carbone,
Pour minimiser i'exposition, veiiier ace que ia piece o8 se
trouve ie four soit convenabiement aeree durant une operation
d'autonettoyage par i'ouverture d'une fenetre ou d'une porte,
AViS IMPORTANT -OISEAU× FAMILIERS : Les oiseaux ont
un systeme respiratoire tres sensible, Ne pas garder un oiseau
famiiier darts ia cuisine ou darts une piece ou3ii pourrait etre
expose aux fumees, Les fumees emises durant une operation
d'autonettoyage peuvent etre dangereuses ou morteiies pour
un oiseau, de meme que ies fumees emises iors du chauffage
excessif de graisse, huiie, margarine, par exempie darts un
ustensile a revetement antiadhesif,
Remarque : Le fonctionnement en mode micro-ondes
(certains mo@les} est indique clans le guide d'utilisation et
d'entretien embaiie avec ie four a micro-ondes,
Conserver ces instructions pout consultation ult6tieute
25
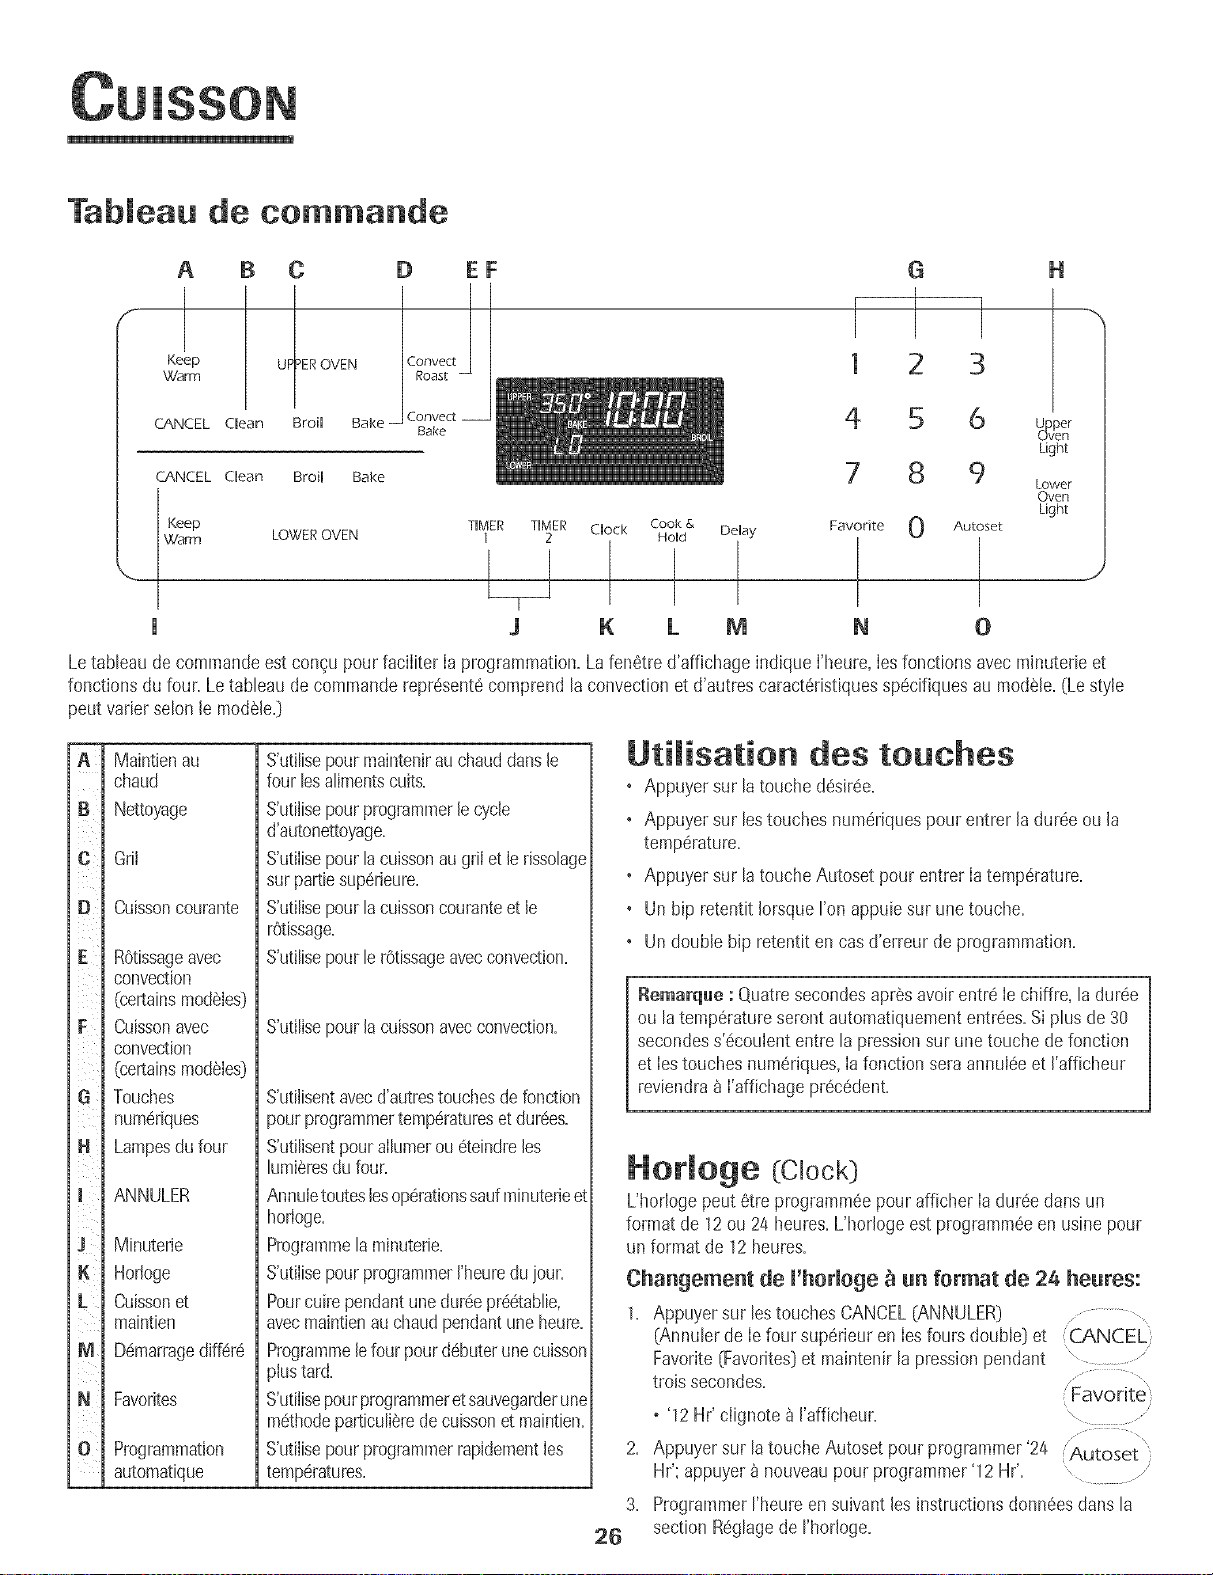
Tableau de commande
A B C
Keep UF_tEROVENWarm
CANCEL Clean Broil Bake
CANCEL Clean Broil Bake
D EF
Convect
Bake
G
1 3
4 5 6
7 8 9
Keep TIMER TIMER Clock DeUay 0
Warm LOWER OVEN 1 2
1 I
J K M 0
Cook &
Hold
I
k
Favorite
t
N
H
_ovper
en
Light
Lower
Oven
Light
Autoset
J
Letableau de commandeest con9upour faciliter Ia programmation.Lafenetred'affichageindique I'heure,Iesfonctionsavecmh_uterieet
fonctions du four. Letableau de commanderepresent6comprendlaconvectionet d'autres caracteristiquesspecifiquesau modele.(Lestyle
peut varierselon le modele.}
t
iB
t_
i l
ie
iF
iG
iJ
+
t
im
i
N
illI
io
Maintien au
chaud
Nettoyage
Gni
Cuisson courante
ROtissageavec
convection
(certainsmodeles}
Cuissonavec
convection
(certainsmodeles}
Touches
numeriques
Lampesdu four
ANNULER
Minuterie
Hortoge
Cuissonet
maintien
Demarragediffere
Favorites
Program+nation
automatique
S'utilisepour maintenirau chauddansle
four lesalimentscuits.
S'utilise pour programmer le cycle
d'autonettoyage.
S'utilise pour la cuisson au grii et le rissolage
sur partie superieure.
S'utilise pour la cuisson courante et le
rOtissage.
S'utilise pour le retissage avec convection.
S'utilise pour la cuisson avec convection.
S'utilisentavecd'autrestouchesde fonction
pourprogrammertemperatureset durees.
S'utilisentpourallumerou eteindreles
lumieresdufour.
Annuletouteslesoperationssaufminuterieet
horloge.
Programmela minuterie.
S'utilisepourprogrammerI'heuredu joun
Pourcuirependantunedureepreetablie,
avecmaintienauchaudpendantuneheure.
Programmelefour pourdebuterunecuisson
plustard.
S'utilisepourprogrammeretsauvegarderune
methodeparticulierede cuissonet maintien.
S'utilisepourprogrammerrapidementles
temperatures.
Utimisation des touches
, Appuyer sur la touche desiree.
+ Appuyer sur lestouches numeriquespourentrer laduree ou la
temperature.
• Appuyer sur la touche Autoset pour entrer Ia temperature.
• Un bip retentit IorsqueI'on appuie sur une touche.
+ Un double hip retentit en casd'erreur de programmation.
Remarque : Quatresecondesapresavoir entre Ie chiffre,la duree
ou latemperatureserontautomatiquemententrees.Si plus de 30
secondess'ecoulententre la pressionsur unetouche de fonction
et Iestouches numeriques,Ia fonction sera annuleeet I'afficheur
reviendra&I'affichageprecedent.
Hormoge (Clock)
L'hor+ogepeut 6tre programmeepourafficher Iadureedans un
format de 12ou 24 heures,L'horlogeest programmeeen usine pour
un format de 12 heures,
Changement de l'horloge _ an format de 24 heures:
1. Appuyersur lostouches CANCEL(ANNULER) ...............
(Annulerde Iefour superieuren Iesfoursdouble} et CJ',NCEL
Favorite(Favorites}et maintenirla pressionpendant " ....................
trois secondes. Favorite
+ '12 Hr' clignote _ I'afficheur. .........
2. Appuyersur la touche Autoset pourprogrammer'24 Autoset
Hr'; appuyer& nouveaupour programmer'12 Hr'. , ..........
3. ProgrammerFheureen suivant les instructionsdonneesclansla
26 section Reglagede I'horloge.
R6gmagede m'horbge :
1. Appuyersur h touche Clock (Horloge}. Clock ,
• Heuredu jour clignotent_ I'afficheur. " ..........
2. Appuyersur bs touchesnumSriquesappropri@spour programmer
Beure du#ur.
• Deuxpoints 8ignotent _ rafficheur.
3. Appuyer_ nouveausur la touche Clockou attendrequatre
secondes.
•Les deuxpointsrestent
Lorsqueb courant@ctrique arriveou apr_sune interruptionde
courant,ia derni_reheureavant rinterruption de courant va clignoter.
PourrappelerBeure dujour Iorsqu'uneautrefonction dedur6e
s'affiche,appuyersur Iatouche CIock
L'heurede I'hortogenepeut 6trechang@ Iorsquele four a 6t6
programm6pour unecuissonou un nettoyagediff6r6ou pourcuisson
et maintien.
Annumation de m'affichage de m'heure:
Si I'on ne @sire pasI'affichagede I'heuredejour:
\
Appuyersur bs touchesCANCEL(ANNULER]et Clock .... ,
(Horloge)et losmaintenirainsi pendanttroissecondes. ' Clock }
L'heuredujour disparaitde I'affbheur.
Lorsqueraffichagede I'heureestannulS,appuyersur latoucheClock
pourafficher briSvementrheuredujour.
@and I'affichagede I'horlogeest annuI6,aprSs15minutes,le r6gu-
lateurdu four se met en mode d'attente pour 6conomiserde
I'@ergie.L'affichageseraalorsella@ et la lampedu four ne
fonctionneraplus.Pourrehncer Ie r6guIateur&partir du mode
d'attente,appuyersur I'unedes touches.Un doublehipse fera
entendre.
Reaffichage de m'heure:
Appuyersur lostouchesCANCELet Clocket lesmaintenirainsi
pendanttrois secondes.L'heuredujour r6apparait_ I'afficheur.
Minuterie (Time0
Laminuterb peut 6tre programm@de une minute(00:01]jusqu'_99
heureset 59secondes(99:59}.
Laminuteriepout 6tre utilis@ind@endammentde toute autre activit6
du four. Ellepout 6tre aussiprogramm6ealorsqu'une autrefonction
du four esten coursd'utiBation.
Laminuterb ne commandepaslefour. EIb nesert qu'_@aettredes
bips.
Programmation de maminuterie :.......
1. Appuyersur la touche Timer (Minuterie}. 'TIMER
• 00:00et I'icOneTIMERclignotent_ I'afficheur.
2. Appuyersur lestouchesnumQriquesappropri@sjusq@ ceque
rheurejuste paraisse_ I'afficheur.
• Losdeuxpointset I'icOneTIMERcontinuent_ clignoter.
3. Appuyer_ nouveausur latoucheTimerou attendrequatre
secondes.
o Lesdeux pointss'arr6tentde clignoteret Jed@omptede la
dur@ commence.
o Laderni6reminutedu d@ompteseraaffich@ sousformede
secondes.
4. A la fin deIa dur@ programm@,un hip long retentitet le mot End
(Fin]seraaffich#.
5. Appuyersur la touche Timer pour d6gagerJ'afficheur.
Annuiation de ia minuterie :TIMER
1. Appuyersur ia touche Timeret la mahtenir ainsi
pendanttroissecondes.
OU
2. Appuyersur ia touche Timeret '0' _ Bide destouches
num6riques.
VerrouiHage des commandes
et de maporte du fou|"
Laporte dufour et Iestouchespeuvent#treverrou@espour des
raisonsde s6curit6,nettoyageou pourernp@hertoute utilisationnon
souhait@.Lostouchesnefonctionnerontpassi ellessont verrouill6es.
SiIefour estencoursd'utilisation,bs toucheset la porte ne peuvent
6treverrouilI@s.
L'heureactuelb du jour resteraa rafficheur Iorsquelestoucheset la
porteserontverrouillaes.
Verrouimmage:
1. Appuyersur IestouchesCANCELet Cook& Hold ,C_ANCEE
(Cuissonet maintbn] et lesmaintenirainsi pendant
troissecondes.
OFF{ARRET}paraita I'afficheur. Homd
®
o L'ic6neLOCK(VERROUILLAGE]clignote Iorsquela porte est
en coursdeverrouillage.
D6verrouimmage:
Appuyersur bs touchesCANCELet Cook &Hoid et les maintenirainsi
pendanttrois secondes.OFFdisparaitde I'affbheur.
[ Remarque : La porte du four et lestouches nepeuvent#tre I
verrouill6essi la temperaturedu four est de400° F (205° C] ou phs.
Codes d'ar|omalie
Les bones BAKE{CUISSONCOURANTE}ou LOCK
0_/ERROUILLAGE}peuventclignoter rapidement_ I'afficheur pour
pr6veniren casd'erreur ou de probIeme.Sitel estie cas,appuyer
sur Ia toucheCANCEL.Si Ies bones BAKEou LOCKcontinuent
clignoter,@brancher I'appareiI.Attendre quetquesminutes,puis
rebrancherI'appareil.Si ricOnecontinue _ cIignoter,d6brancher
I'appareilet prendrecontactavecun r@arateurautoris6.
27
i
Cuisson coutante au four
Programmation de Bake :
1. Appuyersur la touche Bake (Cuissoncourante). ...........
+ L'icOneBAKE(CUISSONCOURANTE)clignote..... .......... "
(Autoset
J
• 000 c@note_ I'afficheur. "...........
2. Select+onnerIatemperaturedu four. Appuyersur la toucheAutoset
pour 350° F 075° C}ou sur Iestouchesnumeriquesappropriees.
+ Chaquepressionadditionne!ledela toucheAutosetaugmente
latemperaturede 25° F05 ° C}.
+ Latemperaturepeut etre programmeede 170° a 550£
3. Appuyerde nouveausur la touche Bakeou attendre quatre
secondes.
+ L'iceneBAKEs'arretede c@noteret s'allumea I'afficheur.
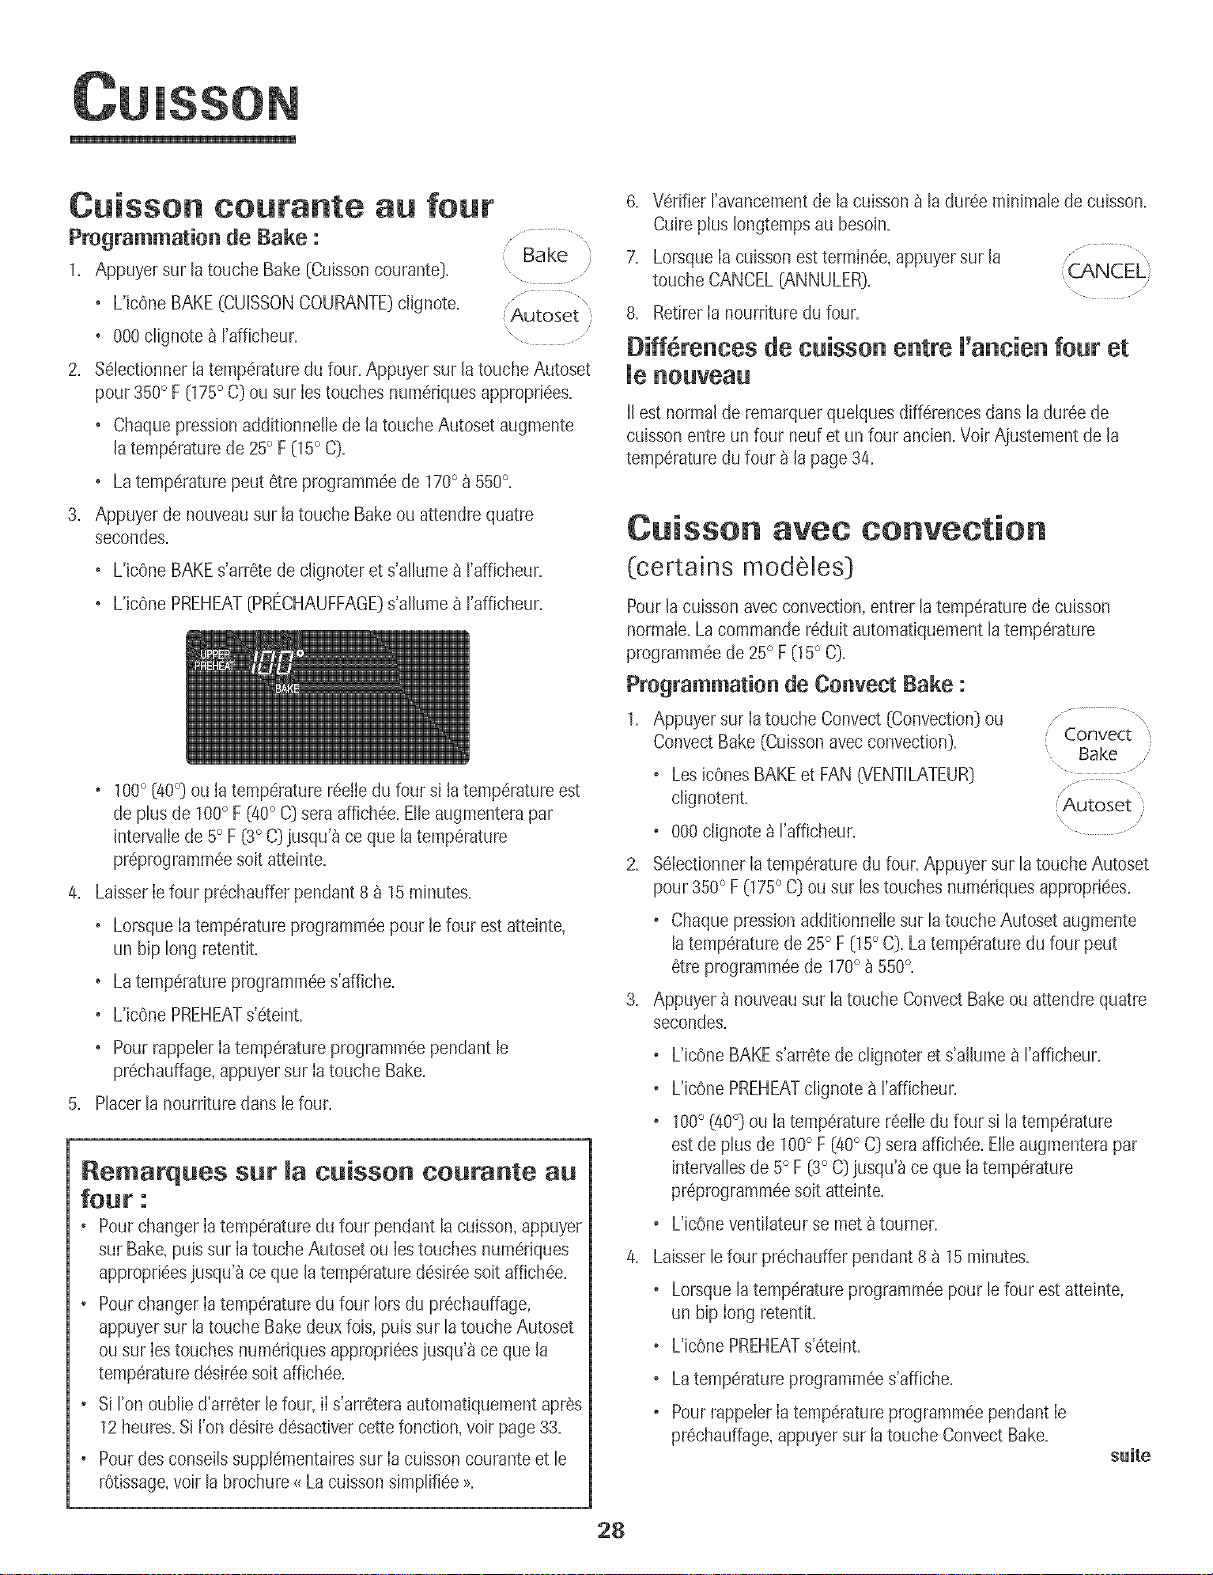
+ L'icenePREHEAT{PRECHAUFFAGE}s'allumea rafficheur.
• 100° (40°} ou ia temperaturereelledufour s+ia temperatureest
de plus de 1000F [40° C}seraaffichee.Elleaugmenterapar
intervallede5° F[3° C}jusqu'_ce que latemperature
preprogrammeesoitatteinte.
4. LaisserIefour prechaufferpendant8a 15minutes+
+ LorsqueIatemperatureprogrammeepour lefour estatteinte,
un hiplong retentit.
• Latemperatureprogrammees'affiche.
• L'icenePREHEATs'eteint.
+ PourrappelerIatemperatureprogrammeependantle
prechauffage,appuyersur IatoucheBake.
5. PlacerlanourrituredansJefour.
Remarques sur la cuisson courante all
four :
+ PourchangerIa temperaturedu four pendantlacuisson,appuyer
sur Bake,puissur IatoucheAutosetou Ies touchesnumeriques
approprieesjusqu'_ce que la temperaturedesireesoitaffichee.
• Pour changerIa temperaturedu four Iorsdu prechauffage,
appuyersur latoucheBakedeuxfois,puissur latoucheAutoset
ou sur Iestouchesnumeriquesapproprieesjusqu'_ce quela
temperaturedesireesoitaffichee.
• Si I'onoublied'arreterle four,iI s'arreteraautomat+quementapres
12heures.Si I'ondesiredesactivercettefonct+on,voir page33.
+ Pourdesconseilssupplementairessur Ia cuissoncouranteet le
r0tissage,voir labrochure<_Lacuissonsimplifiee>>.
6. VerifierI'avancementde la cuissona la duree minimalede cuisson.
Cuireplus Iongtempsau besoin.
7. LorsqueIacuissonestterminee,appuyersur la ...................
Qa,NCEL)
toucheCANCEL(ANNULER}. .................
8. RetirerIa nourdturedu four.
Biff rences de cuisson entre U'ancien four et
IIest normalde remarquerquelquesdifferencesdans ladureede
cuissonentre un four neufet un four ancien.Voir Ajustementde la
temperaturedu four _ la page34.
Cuisson avec convection
(certains modeles)
Pourla cuissonavecconvection,entrerla temperaturede cuisson
normaIe.La commandereduit automatiquementla temperature
programmeede 25° F05 ° C}.
Programmatien de Cenvect Bake :
1. Appuyersur Iatouche Convect[Convection)ou
ConvectBake(Cuissonavecconvection). Convect
Bake
o LesicOnesBAKEet FAN(VENTILATEUK} ...........
c@notent. Autoset
o 000clignote_I'afficheur. "................
2. %IectionnerIa temperaturedu four. Appuyersur la touche Autoset
pour350° F075° C}ou sur lestouchesnumeriquesappropriees.
o ChaquepressionadditionnetIesur latoucheAutoset augmente
latemperaturede 25° F 05° C}. La temperaturedu four peut
6tre programmeede 170° _550°.
3. Appuyer_ nouveausur latoucheConvectBakeou attendrequatre
secondes.
o L'iceneBAKEs'arretedeclignoteret s'allumea rafficheur.
o UicenePREHEATclignotea I'afficheur.
o 100° (40°} ou IatemperaturereeIIedu four si la temperature
estde plus de 100° F (40° C}seraaffichee.Elleaugmenterapar
intervallesde 5° F [3° C}jusqu'_ce quela temperature
preprogrammeesoit atteinte.
+ L'icOneventilateurse metatoumer.
4. Laisserle four p_echaufferpendant8 _ 15minutes+
o Lorsquelatemperatureprogrammeepourlefour estatteinte,
un hip Iong retentiL
o L'icOnePREHEATs'_teJnt.
o Latemperatureprogrammees'affiche.
o PourrappelerIatemperatureprogrammeependantIe
prechauffage,appuyersur la touche ConvectBake.
suite
28
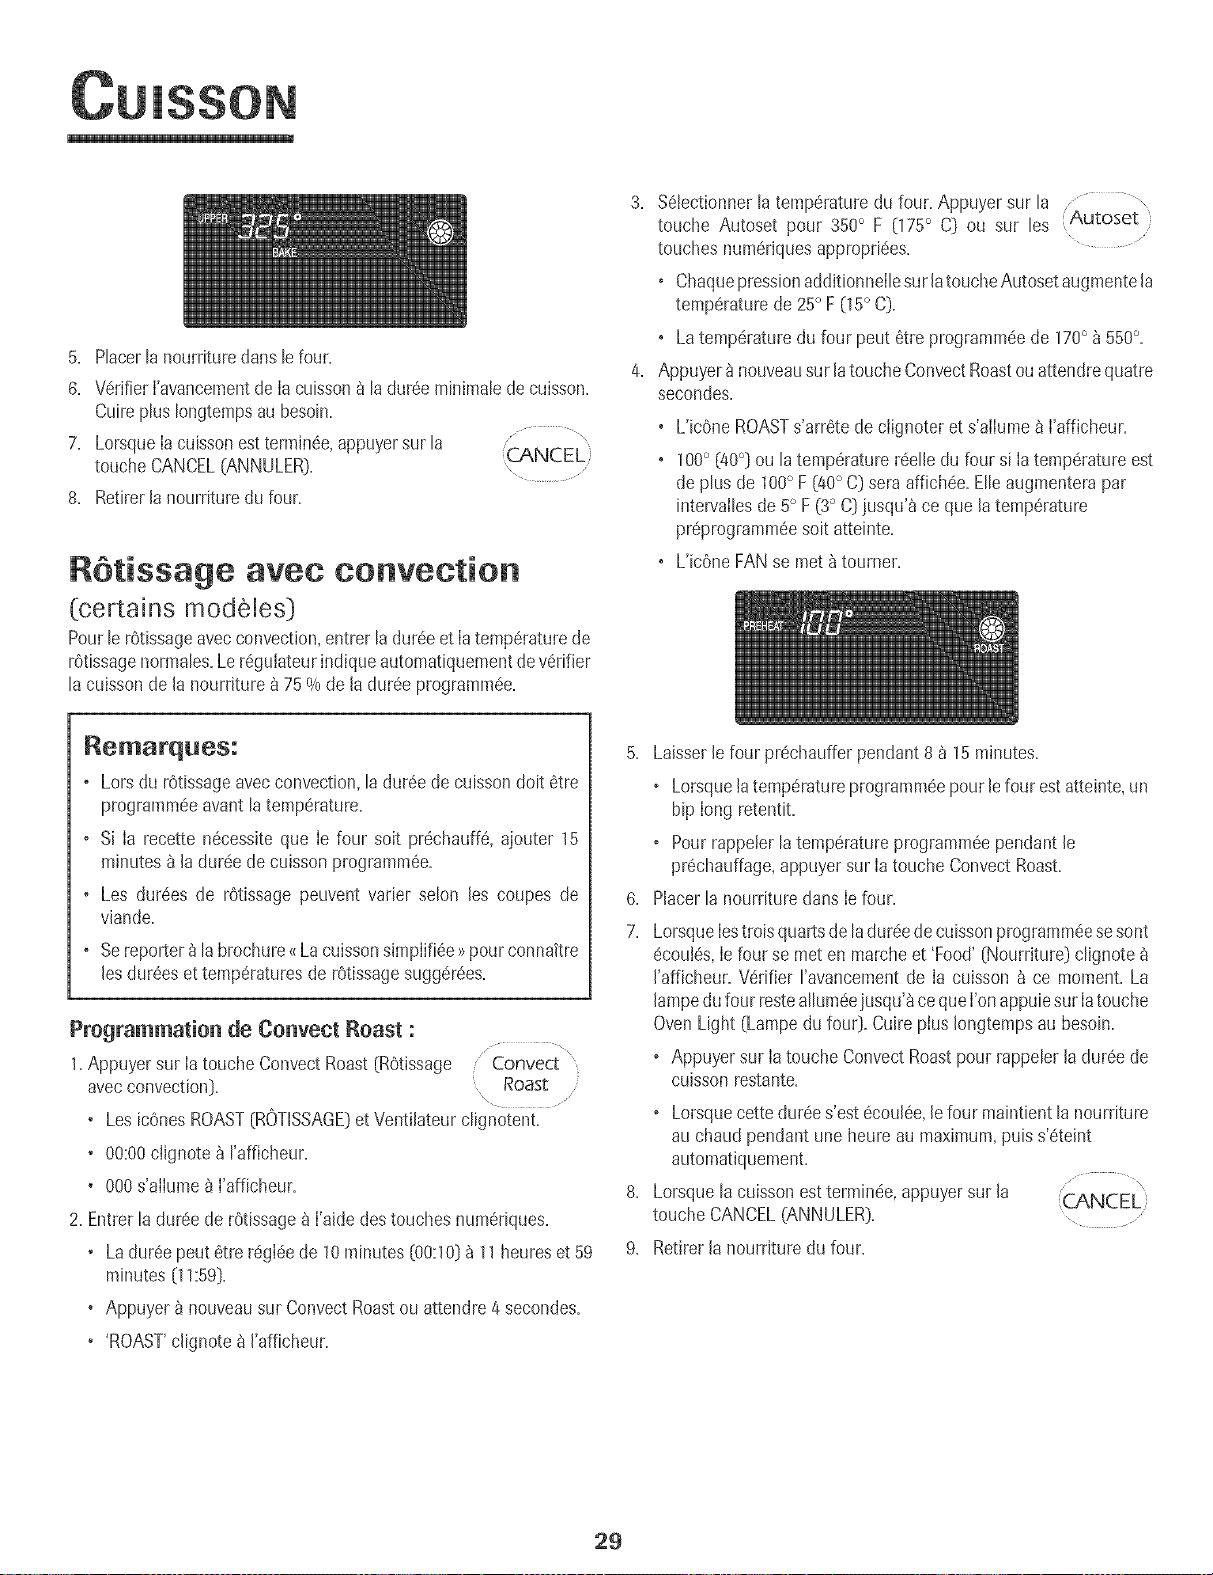
5. Placerlanourrituredartslefour.
6. V6rifier['avancementde [acuisson8 [adur6e minimaJedecuisson.
CuirepJus[ongtempsau besoin.
7. Lorsquelacuissonesttermin6e,appuyersur la ...........................
(CANCEL)
toucheCANCEL(ANNULER}. .....
8. Retirer[a nourrituredu four.
RStissage avec convection
(certains modeles]
Pour[erOtissageaveccmwection,entrer [a dur6eet [atemp6raturede
r6tissagenormates.Le r6gulateurindiqueautomatiquementde v6rifier
[a cuissonde [a nourriture _ 75 % de [adur6e programm6e.
3. %tectionner la temp6raturedu four. Appuyer sur la ............
touche Autoset pour 350° F (175° C] ou sur [es Autoset }
touches num6riquesappropri6es.
• Chaquepressionadditionnei[esur [atouche Autosetaugmente[a
temp6raturede 25° F 05° C}.
+ Latemp6raturedu four peut 6tre programm6ede 170° _550°.
4. Appuyer8 nouveausur [atouche ConvectRoastouattendrequatre
secondes.
+ L'icOneROASTs'arr6te de ciignoter et s'ailume _ ['afficheur.
+ 100° (40°] ou [a temp6raturer6eI[edu four si [atemp6ratureest
deplus de 100° F i!t0° C] seraaffichee.EIIeaugmenterapar
intervaiIesde 5° F (3° C]jusqu'_ ce que latemp6rature
pr6programm6esoit atteinte.
+ L'icOneFAN se met _tourner.
Remarques:
o Lors du r6tissageavec convection,[a dur6e de cuissondoit 6tre
programmeeavant[a temperature+
o Si [a recette n6cess+teque [e four soit pr6chauffS,ajouter 15
minutes _ [a dur_e de cuissonprogrammSe.
o Les dur6es de r6tissage peuvent varier seIon [es coupes de
viande.
o Sereporter_la brochure_Lacuissonsimplifi6e>7pour connaitre
[esdur6eset temp6raturesde r6tissagesugg6r6es.
Programmatioa de Goavect Roast :
1.Appuyer sur la touche Convect Roast[ROtissage /Convect
avecconvection]+ Roast
• LesicOnesROAST[ROTISSAGE]et Ventilateurclignotent.
• 00:00clignote _ rafficheur.
+ 000s'aiiume 8 ['afficheur.
2. Entrer[a dur6ede r6tissage_ ['aide destouches num6riques.
• La dur6e peut 6tre r6gl6ede 10minutes [00:10]_ 11heureset 59
minutes [11:59].
• Appuyer _ nouveausur ConvectRoastou attendre4 secondes.
'ROAST'clignote _ I'afficheur.
5. Laisser[e four prechaufferpendant8 _ 15minutes.
+ Lorsquetatemp6ratureprogramm_epour [efour est atteinte,un
hip long retentit.
o Pourrappeler[a temp6ratureprogramm6ependant [e
pr_chauffage,appuyer sur la toucheConvect Roast.
6. Placer[a nourriture dans le four.
7. LorsqueIestroisquartsdeladur_edecuissonprogramm6esesont
6couI6s,Iefour se meten marcheet 'Food' [Nourriture] cIignote
['afficheur. V6rifier ravancementde Ia cuisson _ ce moment.La
[ampedufour resteaIIum6ejusqu'_ce queI'onappuiesur Iatouche
Oven Light (Lampedu fou0. CuirepIus [ongtempsau besoin.
o Appuyersur Iatouche ConvectRoastpour rappeIer[a dur_ede
cuJssonrestante.
+ Lorsquecettedur6es'est(!cou[_e,[efour maintient[a nourriture
au chaud pendant une heure au maximum,puis s'_teint
automatiquemenL
8. Lorsque la cuissonest termin_e,appuyersur [a (CANCEL
touche CANCEL(ANNULER}.
9. Retirer [a nourriture du four.
2g
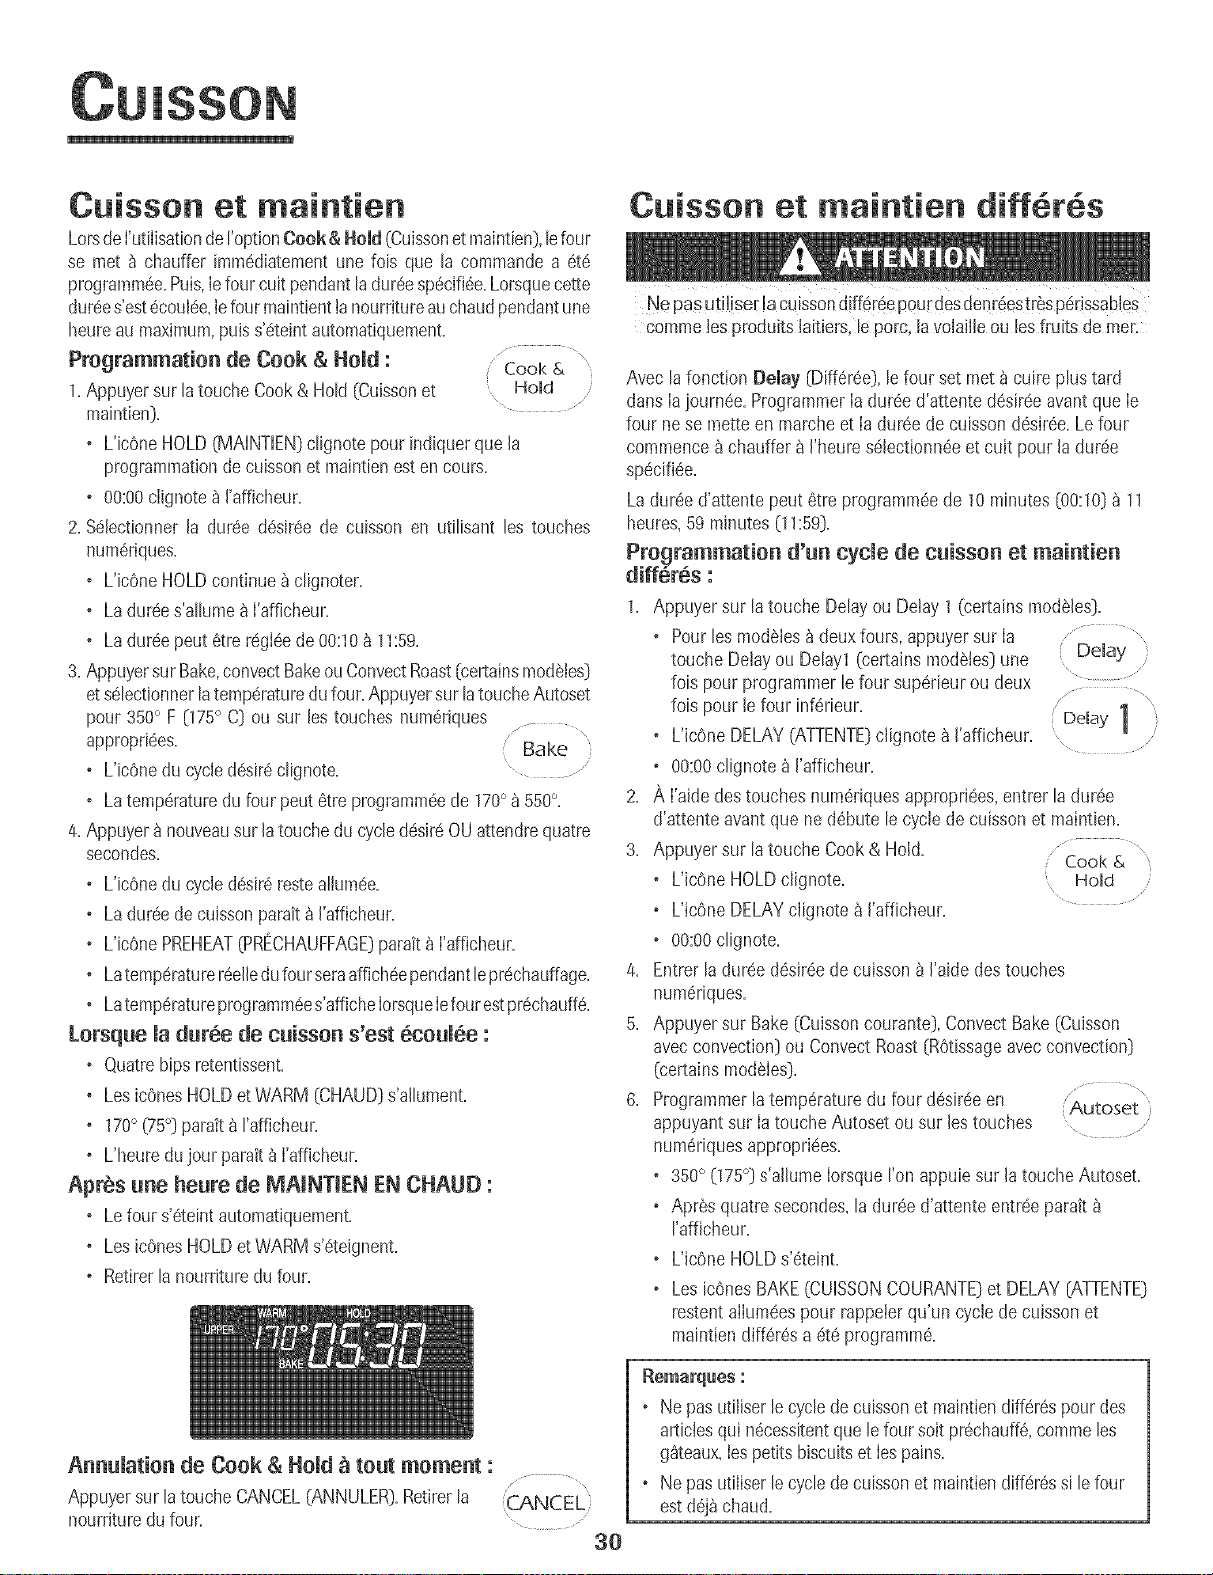
Cuisson et maintien
LorsdeI'utilisationdeFoptionCook & Homd(Cuissonet maintbn),b four
se met _ chauffer imm6diatementune fob que B commandea 6t6
programm@.Pub,Iefour cur pendantladur@sp@i%e.Lorsquecette
dur@s'est@oui@+b fourmaintienttanourritureauchaudpendantune
heureau maximum,pub s'_teintautomatiquement.
Programmation de Cook & Hold :Cook&
1. Appuyersur latoucheCook& Hold (CuJssonet Hold
maintien]. ......
o L'b6ne HOLD(MAINTIEN)clignote pour indiquerque la
programmationde cubson et maintienesten cours.
o %:00 clignote_ J'afficheur.
2. %lectionner la dur6e d6sir6ede cuisson en utilisant les touches
num6riques.
o L'ic6neHOLDcontinue _ clignoter.
o Ladur@s'allume& I'afficheur.
o Ladur6epout 6trer6gI6ede00:10&11:59.
3. AppuyersurBake,convectBakeouConvectRoast(certainsmo@bs]
et s#lectionnerlatemperaturedu four. Appuyersur la toucheAutoset
pour 350° F 075° C] ou sur les touches num@iques
appropri@s. Bake
o L'icOnedu cycled6sir6clignote. .............
o Latemperaturedufour pout6tre programm@de 170° _ 550°.
4. Appuyer_ nouveausur latoucheducycled@ir60U attendrequatre
secondes.
o L'ic6nedu cycled6sir6resteallure@.
o Ladur@ decuissonparait_ I'afficheur.
o L'ic6nePREHEAT(PRECHAUFFAGE]paraR_ I'afficheur.
o Latemp@aturer6elledufourseraaffich@pendantlepr@hauffage.
o Latemp@atureprogramm@s'afficheIorsqueIefourestpt@hauff6.
Lorsqne Ja dnr_e de cnisson s'est _conJ6e :
o Quatrehipsretentissent.
o LosicOnesHOLDet WARM (CHAUD]s'allument.
o
o 170° (75] parait_ I'afficheur.
o L'heuredujour parait _ I'afficheur.
Apr_s une henre de MAINTIEN EN CHAUD :
o Lefour s'6teintautomatiquement.
o LosicOnesHOLDet WARMs'6teignent.
o Retirerla nourrituredu four.
Cuisson et maintien diff r s
Ne PaSutilise[ !acuissondEft@r@pou[desdenr@str@sp@issables
comme les pro@its laitiers,le porc,la volaille ou lesfruits de mer.
Avecla fonction Belay (Diff6r6e],lefour set met_ cuire plus tard
dartsIajourn@. ProgrammerIadur6ed'attente @sir@ avant que Ie
four nese mette en marcheet Ia dur6e de cuisson@sir@. Lefour
commencea chauffera I'heures61ectionn@et cur pour la dur6e
sp@i%e.
Ladur@ d'attentepeut 6tre programm@de 10minutes{00:10]_ 11
heures,59 minutes(11:59].
Programmation d'nn cycle de cnisson et maintien
diff@es :
2.
3.
1. Appuyersur la touche Delay ou Delay 1 (certainsmodules].
o Pourles mo@Ies_ deuxfours, appuyersur Ia
touche Delayou Delay1(certainsmod6tes]une
fob pour programmerle four sup@bur ou deux
fob pour Jefour inf6rieur.
o UicOneDELAY(ATTENTE]clignote a J'afficheur.
o 00:00clignotea J'afficheur.
,_,I'aidedestouches num@iquesapproprJ@s,entrer la dur@
d'attente avant que ne d6bute le cyclede cuissonet maintien.
Appuyersur latouche Cook& Hold.
o L'JcOneHOLDclignote.
o UicOneDELAYclignote_ J'afficheur.
o 00:00clignote.
// ........
Delay
Delay 1
/
,' Cook &
Hold
4. Entrer la dur@ed_sir@de cuisson_ I'aide destouches
num@iques.
5. Appuyersur Bake (Cuissoncourante),ConvectBake(Cuisson
avecconvection]ou ConvectRoast(R6tissageavecconvection]
(certainsmo@Ies}.
\
& ProgrammerlatempSraturedu four d@sir5een (Autoset
appuyantsur la touche Autoset ou sur Jestouches ....
numSriquesappropri@s.
o 350° 0750 s'aihme Iorsque I'onappuiesur Jatouche Autoset.
o Apr@squatresecondes,la dur@ d'attenteentr@ parait
I'afficheur.
o L'ic6neHOLDs'_teint.
o Les bones BAKE (CUiSSON COURANTE} et DELAY [ATTENTE}
restent aJlum@s pour rappeJer qu'un cycJe de cuJsson et
maintien diff6r6s a 6t@programm6.
Annnlation de Cook & Hold _ tent moment :
Appuyersur latoucheCANCEL(ANNULER].Rotiferla
nourrituredufour. (CANCEL)
o Ne pasutiliserb cycle decubson et mahstiendiff@r6spour des
articlesqui n@essitentque le four soit pr@hauff&commelos
g_teaux+IespetJtsbiscuitset Iespains.
o Ne pasutiliserlecycle decuissonet maintiendiff@6ssi le four
estd6j_chaud.

Cuisson au grim
Programmation du grim:
1. Appuyersur h touche Broil[Gri[). .............Broil
• L'icSneBROIL[GRiL)c%note= .........
+ 000Nignote=
, SET(VALiDER}ciignote.
2. Appuyersur [atouche Autoset unefois pour
programmerun gril atemp6rature6[ev6eoudeux
foispourprogrammerungriJ_ temp6raturebasse.
+ Hi [ELEVEE}ou LO (BASSE)serontaffich6s.
Autoset }
%lectionner Hi broil [Gri[a temp6mtum6iev0e]pourun gril normal
%[ectionnerLObroi[ (Gril_temp0raturebasse}pour un gril _tem-
p6ratureinf6rieured'alimentsa cuissonplus Ionguecommela
vo[ai[ie.
3. Apr@squatresecondes,[efour semet enmarche.
+ L'JcOneBROILresteaiJum6e.
• Hi ou LOrestea[ium0.
4. Pourun rissolagemaximum,pr6chauffer['6t0mentde gri[ pendant
3 ou 4 minutesavantd'ajouterla nourriture.
5. Placerlanourrituredartslefour.Laisserla portedu four ouverte
d'environ10cm [4 pc} [premierebut6e}.
6. Retournerla viandeune fois a la moiti6de [a dur0ede cuisson.
7. Lorsque['alimentestcuit, appuyersur [atouche ..................
CANCEL[ANNULER}.Retirer[anourritureet [a :CANCEL}
[6chefritedu four.
o L'heuredu jour r6apparait_ ['afficheur.
Remarques sur [a cuisson au grR :
o PourdemeiIIeursr6su[tats[orsdugd[,seservird'unustensiIepr0vu
pourcetype decuisson.
o Pr6voirdesdur6esde cuissonau gri[ plus[ongueset un rissoiage
[6g6rementmoinsdor6si ['apparei[fonctionnesurun circuitde 208
volts.
o Si pius de 30 secondess'6couiententre[a pressionsur la touche
Broil et [a touche Autoset, le four ne sera pas programm0 et
I'afficheurreviendra_ I'informationpr0c6dente.
o Unvent[iateurderefroidissements'aIiumeautomatiquementpen-
dantlacuissonaugriLS'i[nefonct[onnepas,contacterunprestataire
de serviceapr6s-venteagr6e.
o Legril _ temperatureHi [Elev6e}est utiIis6 pour la majorit0 des
op0rationsde cuissonau griL Ut[iiserlegril _ LO [basse}pour [a
cuissondemetsdevantcuireplusIongtemps,afindeleurpermettre
d'6tre biencuits sansrissoiageexcessiE
o Retournerlanourriture[orsquelamoiti6deladur6epr6vuepourla
cuissonaugril s'est6coul0e.
o Lesdur0esdecuissonaugri[ peuvent0tre plusIonguesavecdes
temp6raturesdegri[ inf6rieures.
• Pour des temp6ratureset des conseiIssuppi6mentairessur [a
cuissonaugril, sereporter_ [abrochure<{La cu[ssons+mpiifi6e>>.
Tableau de cu[sson au gri[
I + I ,.
POSMON DUREE APPROX; DUREE APPROX+
AUMENTS DES GR[LLES_
Boeuf
Bifteck,2,5cm (1 pc} d'0paisseur A point
Biencult
A point
Biencult
4o
4o
4o
4o
PREmiER COTE
9 minutes
11 minutes
5 minutes
6 minutes
DEUX E COT[!
7 minutes
8 minutes
3 a a minutes
4 a 5 minutes
Hamburgem,2cm [3/4 pc} d'6paisseur
Porc
C6telettes,13mm [1/2 pc) 40 7 minutes 5 _ 6 minutes
COtelettes,2,5 cm [1 pc} 3 10_ 11 minutes 9 _ 10minutes
Tranchede jambon 40 4 minutes 2 a 3 minutes
vomaimme GrH_ temperaturebasse Gri[ _temperaturebasse
Demi-poitrine 3 11_ 12 minutes 9 _ 11minutes
Fruits de met
Darnesde poisson,beurr_es,2,5cm (1 pc[}d'0paisseur 40 8 _ 10minutes [sansretourne0
* Un petit<<o >>apr6s[e num0rode [a position des grilles indique que [agrille surbaiss6edoit etre uti[is6e.
Remarq_e : Cetableau n'est qu'un guide de suggestions.Les dur0espeuventvarier seIon['aliment_ cuire.
31
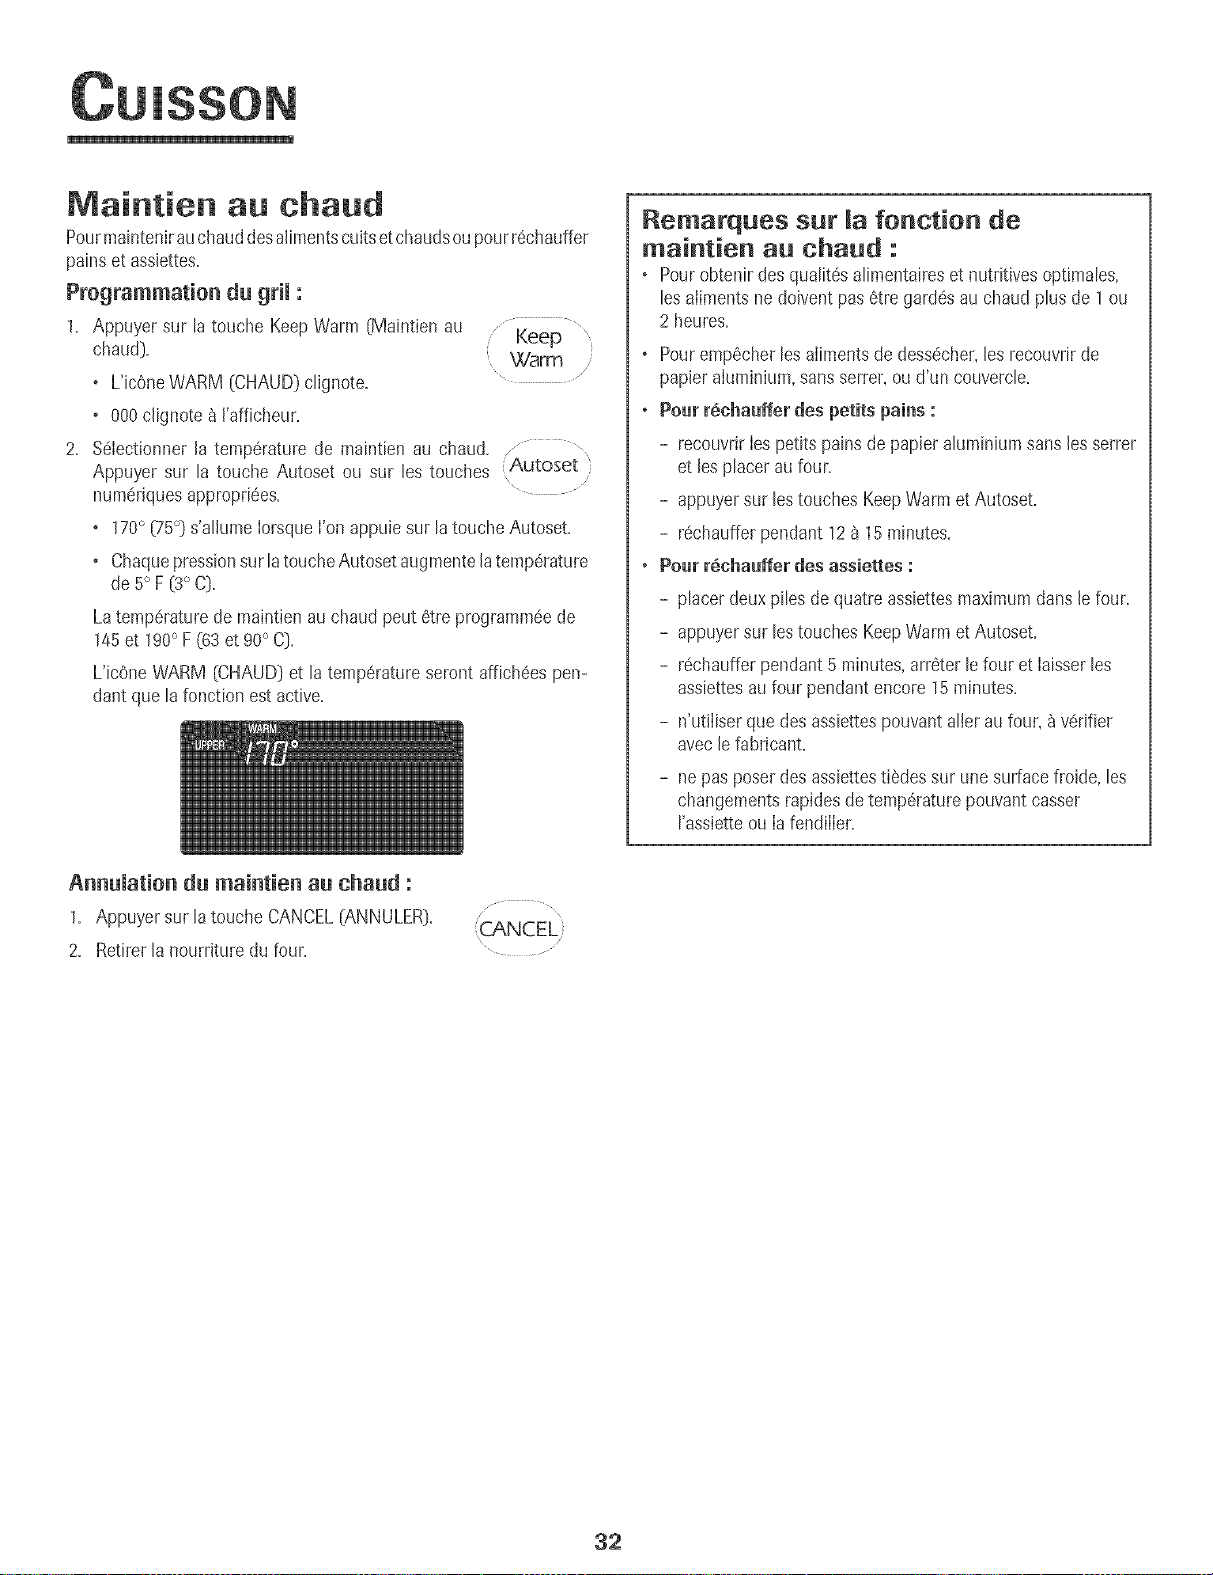
m
Maintien au chaud
Pourmaintenirauchauddesalimentscultsetchaudsoupourr6chauffer
painset assiettes+
Programmation du grim :
1+ ,cppuyersur ta touche KeepWarm [Maintien au
chaud]+
+ L'ic0neWARM [OH,CUD)c@note+
Keep
Wa_r_
+ 000c@note_ I'afficheur+
2+ %Iectionner la temp6rature de maintlen au chaud............... ,
,cppuyer sur la touche ,cutoset ou sur les touches (Autoset
numeriquesappropriees+ .....
+ 170° (75°] s'allume IorsqueI'on appuie sur la toucheAutoset.
+ Chaquepressionsur[atoucheAutosetaugmentelatemperature
de 5° F (3° C)+
Latemperaturede maintienau chaud peut 6tre programmeede
145et 190° F [63 et 90° C).
L'icOneWARM [CHAUD)et la temperatureseront affichees pen-
dant que la fonction est active.
Remarques sur la fonct+on de
maintien au chaud :
o Pourobtenir desqualitesalimentaireset nutntivesoptimales,
lesailments nedoivent pas6tre gardesau chaud plus de 1 ou
2 heures+
o Pouremp6cherlesaiimentsde dessecher,les recouvrir de
papieraIuminium,sansserrer,oud'un couvercle+
+Pourr6chauffer des petits pains :
-recouvrirIespetits pains de papier aluminium sansles serrer
et les placer aufour+
-appuyersur lestouches KeepWarmet ,cutoset+
-rechaufferpendant 12_ 15 minutes+
oPourr6chauffer des assiettes :
-placer deux piles de quatreassiettesmaximum dansle four.
-appuyersur lestouches KeepWarmet ,cutoset+
-rechaufferpendant5 minutes,arreterle four et Iaisserles
assiettesaufour pendantencore 15minutes.
-n'utiIiserquedes assiettespouvant alier aufour, _ verifier
avecle fabricant+
-nepas poserdes assiettestiSdessur unesurfacefroide, les
changementsrapidesde temp6raturepouvantcasser
I'assietteou IafendilIer+
Annuiation dn maintien an chand :
1+ ,cppuyersur latouche CANCEL[ANNULER)+
2+ Retirer lanourriture du four.
CANCEL
32
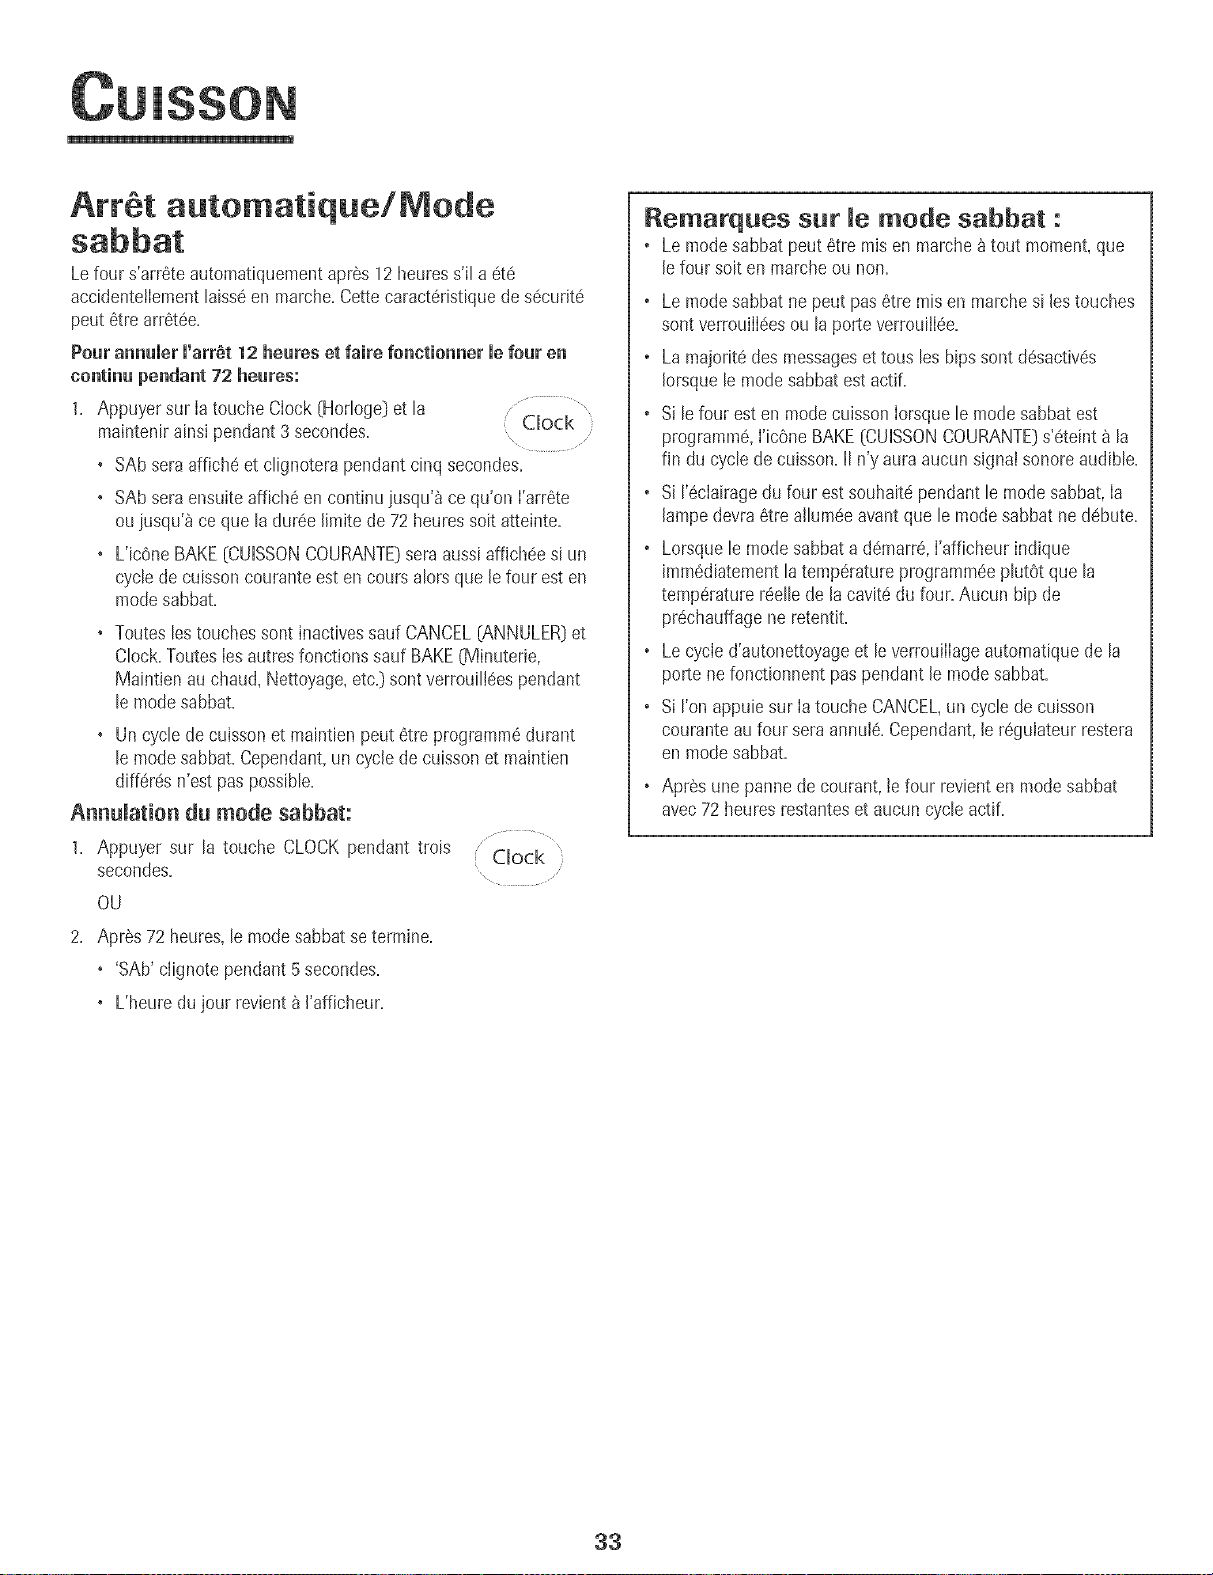
m
Arr6t autornatique/Mode
Lefour s'arr6te automatiquementapr6s 12 heuress'il a 6t6
accidentetIementlaiss6en marche.Cettecaract6ristiquede s6cudt6
peut 6tre arr6t6e.
Pour annumerm'arr6t12 heures et faire fonctionner mefour en
continu pendant72 heures:
1. Appuyersur Ia touche Clock (Hodoge}et la Clock
maJntenirainsJpendant 3 secondes. ..............
• SAb sera affiche et clignotera pendant cinq secondes.
• SAb sera ensuite affich6 en continu iusqu'_ ce qu'on I'arr6te
ou jusqu'_ ce que la dur6eJJmitede 72heuressoit atteinte.
• L'ic6neBAKE(CUiSSONCOURANTE}sera aussi affJcheesi un
cycle de cuissoncourante est en coursalors que Jefour est en
modesabbat.
• Toutesles touchessont inactivessauf CANCEL[ANNULER}et
Clock.ToutesIesautresfonctionssaul BAKE(Minuterie,
Maintien au chaud,Nettoyage,etc.}sont verrouiIBespendant
le modesabbat.
• Un cyclede cuissonet mahltienpeut 6tre programm6durant
le modesabbat.Cependant,un cycle de cuissonet maintien
diff6r6s n'est pas possible.
Annulation du mode sabbat:
1. Appuyer sur la touche CLOCKpendant trois
secondes.
OU
Clock
2. Apres 72 heures,le modesabbatsetermine.
• 'SAb' clignote pendant5 secondes.
• L'heuredu jour revient_ I'afficheur.
Remarques sur Je mode sabbat :
o Le mode sabbat peut 6tre mis en marche _ tout moment, que
Jefour soit en marcheo_Jnon=
o Le modesabbatne peut pas6tre misen mamhesi lestouches
sont verrouilBes ou la porte verrouiJBe.
o La majoritedes messageset tousles hips sontdesactiv6s
Iorsquele modesabbatest actif.
o Si le four est en modecuisson Iorsquele mode sabbatest
programm6,I'icOneBAKE(CUISSONCOURANTE)s'6teint_ la
fin du cyclede cuisson.II n'y auraaucun signal sonoreaudible.
o Si 1'6clairagedu four est souhait_pendantle mode sabbat,Ia
lampedevra6tre allum6eavantque le modesabbat ne d6bute.
o Lorsquele modesabbat a d6marr6,I'afficheur indique
imm6diatementlatemp6ratureprogramm6eplutOtque la
temperaturer6ellede la cavit6du four. Aucun hip de
pr6chauffagene retentJt.
o Lecycle d'autonettoyageet le verrouilIageautomatiquede la
porte nefonctionnent paspendant le modesabbat.
o Si I'on appuiesur Ia touche CANCEL,un cyclede cuisson
couranteau four sera annuB. Cependant,le r6gulateurrestera
en modesabbat.
o Apr6s une panne de courant,te four revienten modesabbat
avec72 heuresrestanteset aucun cycle actif.
33
Ajustement de temperature
du four
La prdcisiondes temperaturesdu four a 6t6 soigneusementverifi@
RJsine.II est normaide remarquerquelquesdifferencesde cuisson
ou de la coubur du rissoIageobtenuentre un four neuf et un four
ancien.Au fur et _ rnesureque b four estmoinsneuf,sa
temperaturepeut varlet.
IIest possibled'ajuster la temperaturedu four si I'on penseque b
four necult pasou ne nssoiepascorrectement.Pourdeciderde
I'ajustement_ @porter,regler le four a une temperaturede 15 °C
(25°F}plus elev@ ou plus basseque la temperatureindiqu@dans
la recette,pub faire cuire la preparation.Lesresultats du premier
essaide cuissondoiventdonnerune ideedu hombrede degr@
duqueI latemperaturedoit 6tre ajustee.
Ajustement de matemp6rature du four : .......
Bake
1. Appuyer sur la toucheBake (Cu+sson}. ,
2. Entrer550° F (285° C} en appuyantsur les touches num_riques
appropriees.
3. Appuyer sur la toucheBakeet la mainten+rainsi pendant
plusieurssecondesoujusqu'_ ce que00° paraisse_ rafficheur.
Si B temperaturedu four a et6 pr@edemmentajustee,Ie
changementseraaffich& Parexemple,si la temperaturedu four
a et6 reduitede 15° F (8° C},rafficheur indiquera -15°F(-8° C}.
4. Appuyer sur la toucheAutoset pour ajusterlatemperature.
A chaquelois que I'onappuiesur Ia toucheAutoset,la
temperaturechangede 5° F {3° C}.La temperaturedu four peut
6tre augment@ou diminu@ de 5 a 35° F (3_ 20° C}.
5. L'heuredu jour reapparaitautomatiquement8 I'afficheur.
II n'est pas necessairede reajuster la temp6raturedu four en cas de
panneou d'interruption de courant.Uajustementde Iatemperature
s'appliqueseubment aux fonctions de cuisson,cuissonavec
convectionet rOtissageavecconvection(certainsmodebs}.
Latouche Favorite(Favorites}permet de sauvegarderIa duree et la
temperatured'un cycle de cuissonet maintiencuisson+cuissonavec
convectionou rOtissageavecconvection(certainsmodeles}.
Pourprogrammerun cycIeFavorite,unefonction de cuissonet
maintiendoit etre activeou tout juste programmee.
Programmation d'un nouveau cycle Favorite ou
sauvegarde d'une fonction en cours de cuisson et
maintien comme favorite :
1= Programmerun cycle de cuissonet maintien commeil est d@rit
Ia section Cuissonet mah_tien_ la page30.
2. Appuyersur la touche Favoriteet la maintenirainsi pendanttrois
secondes.
o Lecyclecuisson et maintbn nouveIIementprogrammeou en
coursde fonctionnementserasauvegard6.
o Un bip se fera entendrepour indiquerque le regulateura
accept8 lereglageFavorite.
D6marrage d'un cycmeprogramm8 darts Favorite :
1. Appuyersur la touche Favorite. ....................
o Ladur@ et Iatemperaturedu cycle programme (Favorite'}
de cuissonet maintienserontaffichees(si aucun
cycle decuisson et maintienn'a et6 programm&<<nonE>>sera
affiche}.
2. Appuyersur la touche Bake, ConvectBakeou ConvectRoast
(certahlsmodetes}.
+ Lecycle Favoritecommence imm_diatement.
o L'bOnedu cycleseiectionn6s'aIIumea I'afficheur.
o Ladur@ de cuissons'allume_ I'afficheur.
Lorsque madurSe de cuisson s'est 6coum6e :
+ L'Jcenedu cycleselectionn_s'6teint.
o L'bOneHOLDWARM (MAINTIENAU CHAUD}s'alhme.
o 170° {75°} parait _ I'afficheur.
Annulation d'un cycle Favorite en tours :
1. Appuyersur la touche CANCEL(ANNULER}.
o Lecycle Favoritesauvegard6ne sera pasaffecte.
2. Retirer la nourriture du four.
34
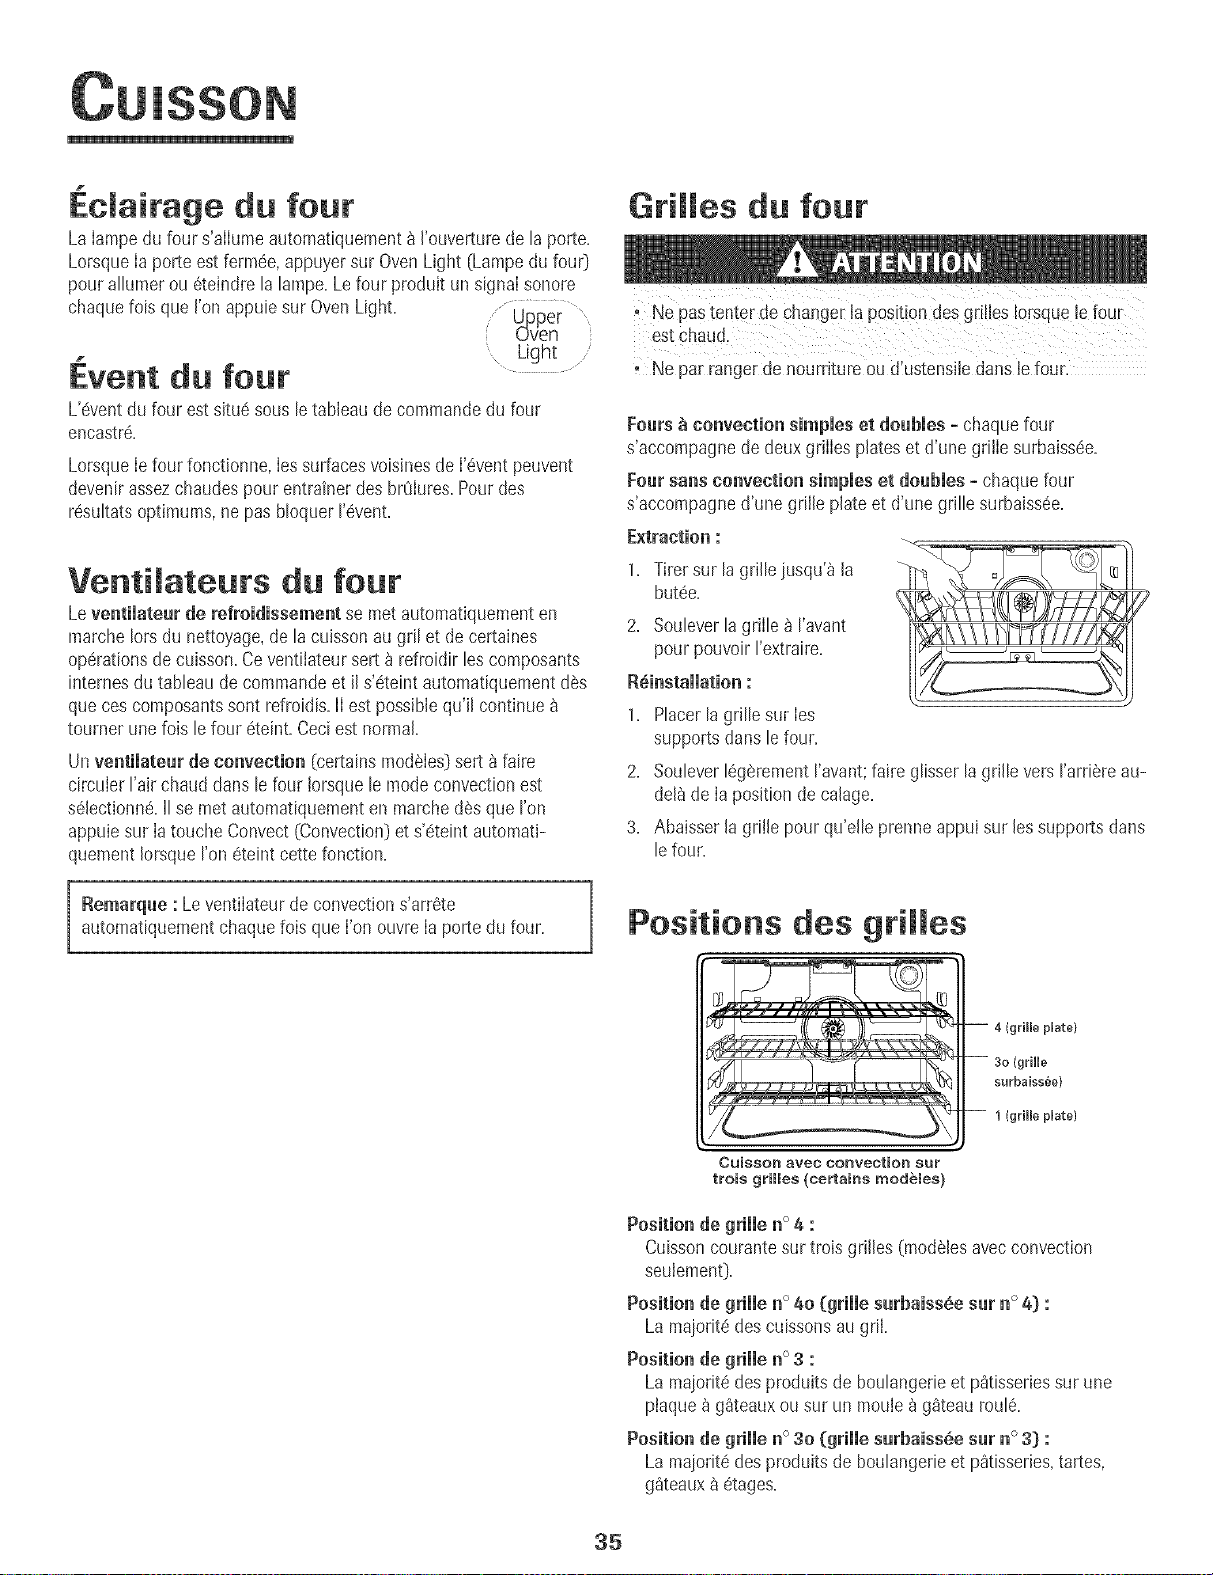
.clairage du four
La Iampedu four s'alIumeautomatiquement_ I'ouverturede la porte.
LorsqueIa porte estferrn6e,appuyersur OvenLight (Lampedu fou0
pour allumerou 6teindre la lampe.Lefour produit un signal sonore
chaquelois que I'onappuie sur OvenLight. Upper ....
uven
.. Light .....
Event du four .........
L'6ventdu four est situe sous le tableaude commandedu four
encastr&
Lorsqueie four fonctionne, ies surfacesvoisinesde i'6vent peuvent
devenirassezchaudespour entrainerdes brOiures.Pour des
r6sultatsoptimums,ne pas bloquer I'evenL
Venti ateuts du four
Leventimateurde refroidissement se met automatiquementen
marchelots du nettoyage,de la cuissonau gril et de certaines
operationsde cuisson.Ceventilateursert _ refroidir les composants
internesdutableau de commandeet il s'eteintautomatiquementdes
queces composantssont refroidis.II est possiblequ'il continue
tourner unelois lefour eteint.Ceciest normal.
Un ventimateur de convection (certains mod6Ies] sert 8 faire
circuier Fair chaud dans le four !orsque le mode convection est
selectionn& II se met automatiquement en marche d6s que I'on
appuie sur Ia touche Convect (Convection] et s'eteint automati-
quement Iorsque I'on eteint cette fenction.
Remarque : Leventilateurde convections'arr6te
automatiquementchaquefois que I'on ouvre Ia porte du four.
Grilles du four
oNe pastenter de changer ia posit!Ondesgrilles Iersqueie four
Ne par rangerde nourdture ou d!ustensiiedans iefour.
Fours _ convection simpies et doubles =chaque four
s'accompagne de deux griIIes plates et d'une grilIe surbaissde.
}:our sans convection simpmeset doubles o chaque feur
s'accompagne d'une grille plate et d'une grille surbaiss6e.
Extraction :
1. Tirer sur la grille iusqu'_ la
but6e.
2. Souleverla grille _ I'avant
pour pouvoirI'extraire.
R_instaiiation :
1. Placerla grille sur Ies
supports clanslefour.
2. Soulever16gerementI'avant;faire glisserlagrille versI'arriSreau-
del_de Ia positionde calage.
3. Abaisser la grille pourqu'elle prenne appui sur lessupports darts
lefour=
Positions des gri es
}Uate}
surbaissee)
1 (grille pUate}
CuisSOn aveo ConveotioR 8ur
trois grilles (certains modeles}
Position de grille n° 4 :
Cuissoncourantesur trois grilles (mod61esavec convection
seulement_.
Position de grille n° 40 (grille surbaiss_e sur n° 4} :
La majolit_ des cuissonsaugriI.
Position de grille n° 3 :
La maioritedes produitsde boulangerieet pStisseriessur une
ptaque_ gSteauxou sur un moule _ g_teaufoul&
Position de grille n° 30 (grille surbaissSe sur n ° 3) :
La maioritedes produitsde boulangerieet pStisseries,tartes,
g_teaux&etage&
35

i
Positionde grille n° 2 :
R6tissagede petitescoupesdeviande, g_teauxdans moules
savarinou mouleshsavarin,platsmijot6s,
Position de grille n° 2o (grille surbaissSe sur n ° 2_):
ROtissage,michesde pain,g_teauxdes anges,
Positionde grille n° 1 :
Grandescoupesdeviande et dinde,tarte _ la crSme,souffle,
Cuissonsur plusieurs grilles :
Oeu× grilles :Utiliserles positions n° 2oet 4=
Trois grilles (cuisson avee convection =eertains modbles) :
Utiliser lespositions [/° 1,[/° 30, n° 4, [Voir illustrationpage 35,_
Remarques :
, L'utilisationde Ia griIIesurbaiss_e est indiqu6epar Ie petit _<o _
qui suit le num6rode positionde la grille clansla listede gauche
et de la pagepr6c6dente=
, Pourla cuissonsur deux outrois grilles, v6rifier lesalimentsh Ia
dur6eminimalesugg6r6epour 6viterun execsde cuissonou de
coloration,
, Ne pas couvrirla totaiit6 d'une grille de papier d'aluminium ni
mettre d'aluminiumsur la sole du four=Ceiane donnerait pasde
bons r6sultatsde cuissonet IasoIe pourrait se trouver abimee=
36
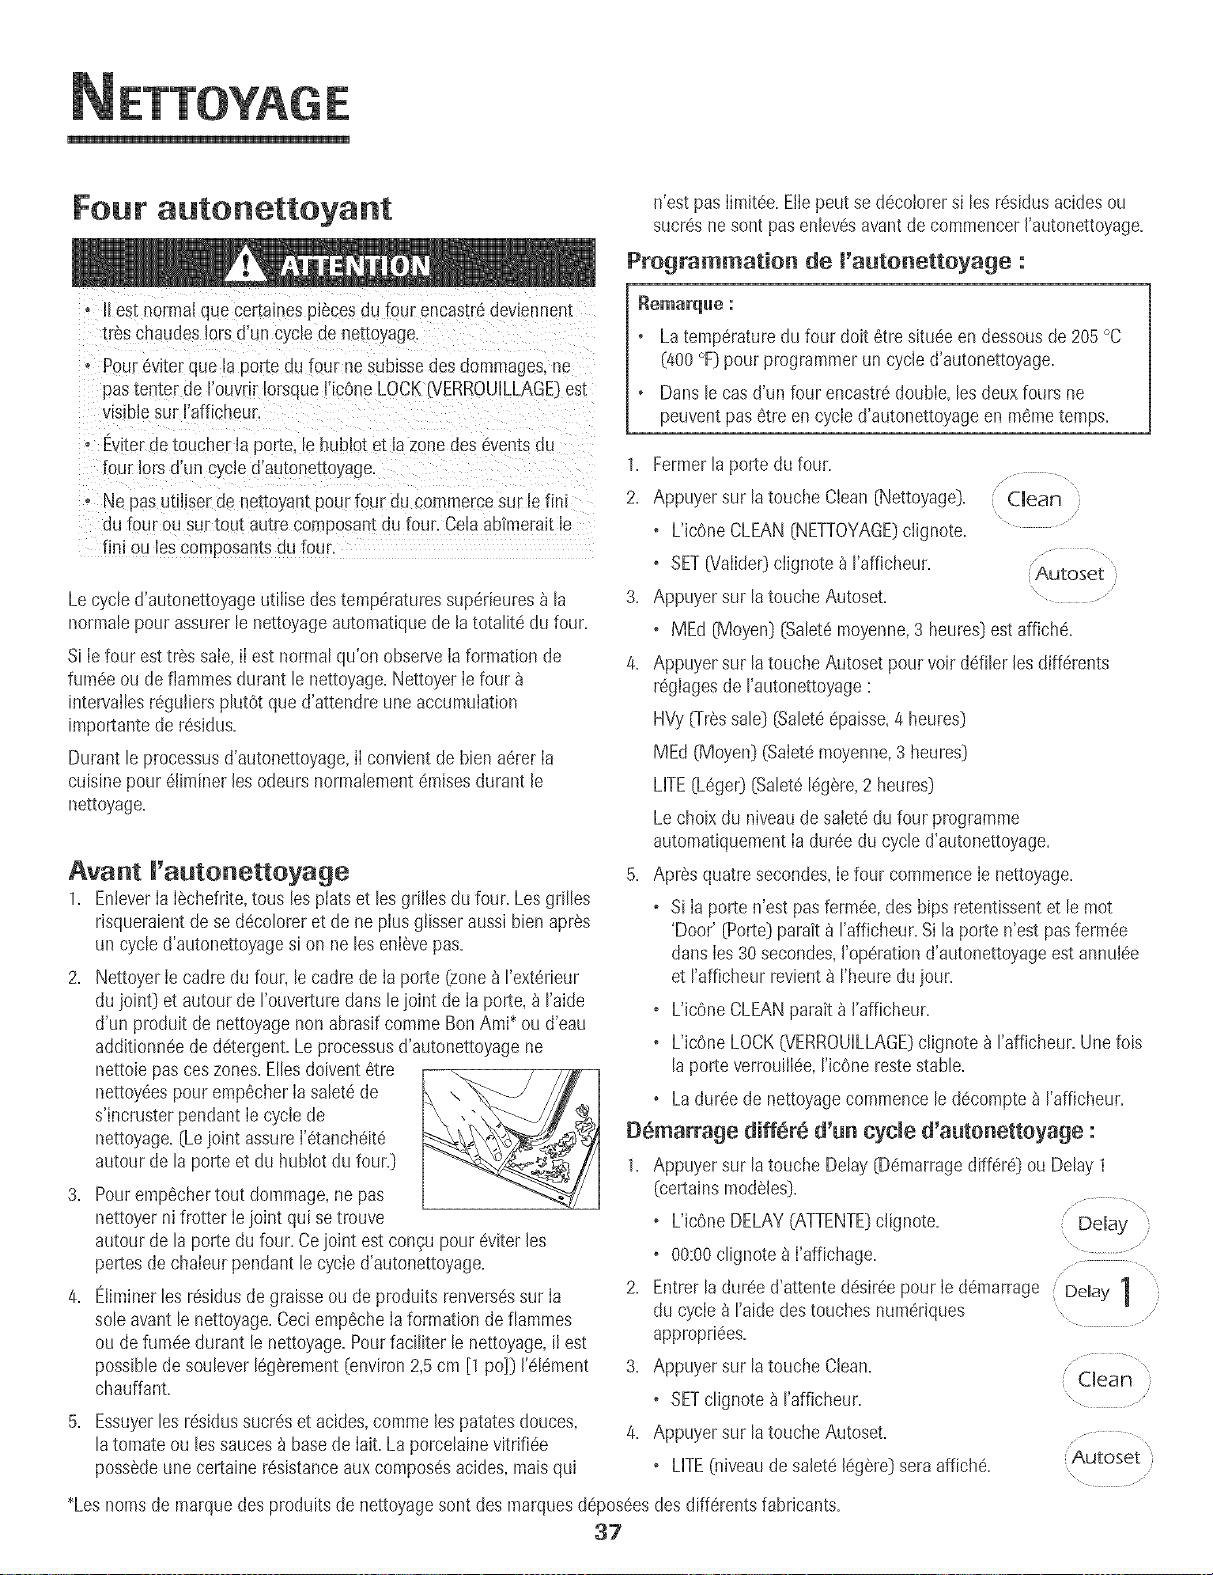
Four autonettoyant n'est pasIimit6e. Etlepeut se d6cotorersi les r6sidus acidesou
sucr6sne sent pasentev6savantde commencerI'autonettoyage.
Pregrammatien de l'autonettoyage :
oII est normalque certamespiecesdu four encastr6deviennent
tr_s chaudes!orsd'un cyclede net[oyage.
• Pour_viter que la porte du four nesuhsse des dommages,ne
pastenter de l'ouvrlr !orsque[icOneLOCKNERROUILLAG[!est
visiblesur I'afficheur.
o Eviterde toucher la porte,le hublot et la zone des eventsdu
four !orsd'un cycle d'autonettoyage
• Ne pasudliser de nettoyan[pour four du commercesur le fini
du four ou sur tou[ au_recomposantdu four. Ceh abfmeraitle
fini ou les composamsou four.
Lecycle d'autonettoyageutiiise des temperaturessup6rieures_ la
normalepour assurerle nettoyageautomatiquede la totalitd du four.
Si Ie four est tres saie,iI est normal qu'on observe Iaformation de
fum6e ou de fiammesdurant lenettoyage.NettoyerIe four
intervailesr6guiiers phtOt que d'attendre une accumulation
importantede r6sidus.
Durant le processusd'autonettoyage,iI convient de bienadrerIa
cuisinepour 61iminerlesodeurs normalement6raisesdurant le
nettoyage.
Avant I'autonetteyage
1. EnteverIaISchefrite,tousles platset lesgrilles du four. Lesgrilles
risqueraientdese ddcoloreret de ne plus glisseraussi bien apres
un cycle d'autonettoyagesi on ne lesenlSvepas.
2. NettoyerIe cadre du four, le cadre de Ia porte (zone_ I'ext6rieur
du joint) et autour de I'ouverturedans lejoint de Ia porte,_ I'aide
d'un produit de nettoyagenon abrasif commeBen Ami_ou d'eau
additionn6ede d6tergent.Leprocessusd'autonettoyagene
nettoiepasceszones.Ellesdoivent6tre
nettoy6espour emp6cherIa salet6de
s'incruster pendantIe cycie de
nettoyage.(Lejoint assureI'6tanch6it6
autour de la porte et du hublot du four.)
3. Pouremp6chertout dommage,ne pas
nettoyerni frotter Iejoint qui se trouve
autour de la porte du four. Cejoint est congu pour6viterles
pertesde chaleur pendant le cycle d'autonettoyage.
4. Eliminerles r_sidusde graisseou de produitsrenversdssur Ia
sole avantle nettoyage.Ceci emp6cheIa formation de flammes
ou de fum6edurant le nettoyage.Pourfaciliter le nettoyage,iI est
possibledesoulever16g_rement[environ2,5cm [1 pc)) 1'616ment
chauffant
5. Essuyerles r6sidussucr6set acides,comme lespatatesdeuces,
latomate ou les sauces_ basede hit. La porcelainevitrifi6e
possSdeune certainer6sistanceaux compos6sacides,maisqui
Remarql[le ."
o Latemperaturedu four dolt 6tre situ6een dessousde 205°C
(400°F)pourprogrammerun cycled'autonettoyage.
o Dansle casd'un four encastr6doubIe,lesdeux fours ne
peuventpas 6tre en cycied'autonettoyageen m6metemps.
1. Fermerla porte du four.
2. Appuyersur la touche Clean (Nettoyage).
o L'JcOneCLEAN(NETTOYAGE)clignote.
o SET[Valide0 ciignote _ I'affJcheur.
3. Appuyersur la touche Autoset.
(Clean)
\ ....
Autoset )
\
o MEd (Moyen)(Salet6moyenne,3 heures)estaffich6.
4. Appuyersur la touche Autoset pourvoir ddiler lesdiff6rents
r_glagesde rautonettoyage
HVy(frSs sale) [Salet@_paisse,4 heures)
MEd (Moyen)(SaletQmoyenne,3 heures)
LITE(LOper)(Salet8IdgSre,2 heures)
Le choixdu niveaudesaletedu four programme
automatiquementIa durSedu cycle d'autonettoyage.
5. AprSsquatresecondes,Iefour commenceIe nettoyage.
Si Ia porte n'est pas fermSe,des bips retentissentet le mot
'Door' {Porte}parait _ I'afficheur.Sila porte n'est pasferm6e
dartsIes30secondes,I'op6rationd'autonettoyageest annulee
et I'afficheur revient_ I'heuredujour.
o L'icOneCLEANparatt_ I'afficheur.
o L'icOneLOCK(VERROUiLLAGE}clignote_ rafficheur. Unefois
laporte verrouillee,ric0ne restestable.
• La duree de nettoyagecommence le d_compte_ I'afficheur.
OS_arrage differe d'_n cycle d'a_tenetteyage :
1. Appuyersur la touche Delay (D_marragedifferS) ou Delay 1
(certainsmod_les).
\
o L'icOneDELAY(ATTENTE)clignote. Delay
o 00:00clignote8 I'affichage. ...............
.... x
2. Entrer la duree d'attentedSsir6epour Ie d_marrage Delay 1
du cycle _ raide des touches numeriques ....
appropriSes.
3. Appuyersur la touche Clean.................. "
Clean
o SETclignote_ rafficheur. ........
Appuyersur latouche Autoset.............
o LITE(niveaudesalet_ I_g_re)seraaffich_. Autoset
x
*Lesnomsde marquedes produits de nettoyagesent des marquesd_pos6esdes diff_rentsfabricants.
37
ETTOYAGE
5. Appuyer sur la toucheAutoset pourvoir ddiler les
differents reglagesde rautonettoyage: Autoset
HVy(Tressale} (Salet66paisse,4 heures}
MEd (Moyen}(Saletemoyenne,3 heures}
LITE(Leger} (Salet6legere,2 heures}
Lechoixdu niveaudesaletedu four programme
automatiquementIa dureedu cycled'autonettoyage.
6. Apres quatre secondes,IesicenesCLEAN(NETTOYAGE}et
DELAY(ATTENTE}s'allumerontet I'icene LOCK
6iERROUILLAGE)clignotera_ I'afficheur.LorsqueIaporte du
four se verrouille,I'icOneLOCKs'arretede clignoter et reste
allumeeen continu pour indiquerque le four estprogramme
pour une operationde nettoyagediffere. Le delai d'attentesera
affiche.
Pendant cycle d'autonettoyage
LorsqueLOCKparait 8 rafficheur, Ia porte ne peut 6tre ouverte.Pour
eviterd'endommagerla porte, ne pas forcer la porte pour I'ouvrir
IorsqueLOCKest affiche.
}:umee et odeurs
La premierelois oQ le four est nettoye,iI peut y avoir production
d'odeur et de fumee.Ceci est normalet disparaitra_ I'usage.
Si Ie four est tr_s saleou si la lechefritea 6t6 laisseedans le four, il
peut y avoir productionde fumee.
Bruits
Pendantque Ie four chauffe, il peut se produiredes bru+tsde metal
en dilatationou en contraction.Ceciestnormal et n'indique pasque
le four s'abtme.
Aprbs le cycle d'autonettoyage
Environune heure apres Iafin du cycle,I'icOneLOCKs'etehlt.Ace
mopaent,la porte peut 6tre ouverte.
La salet_ peut avoir laiss_un residu gris poudreu×. L'enlever
avecun Iinge humide.S'il restede Ia salete,cela indique que Ie cycle
de nettoyagen'a pas6t6 assezlong. Cettesalet_restantesera
enleveeau prochaincycle d'autonettoyage.
S+ruesgrilles du four ont 6t6 ma+ss+es_ m'+m_Heurpendant me
cycle d'autonettoyage et qu'emmesgmissemmare+ur meurs
supports, lesenduire,ainsi que les supports,d'une fine couche
d'huiie vegetale.
De fines mignespeuventapparaitre darts maporcemaineparce
qu'eiie a subi ehaie_r et refroidisseme_t, Ceci est normal et
n'affecterapas la performance.
Une de¢omomt+o_blanche peru appa_a_t_eapsesme_ettoyage
si des amime_tsaeides o_ s_cres _'o_t pas _.t8e_leves avast
q_e _e comme_ee i'a_to_ettoyage, La decolorationest normale
et n'affecterapas la performancedu four=
_ematq_es :
+ Si la porte du four n'est pas ferrule, le mot. door >>(_oortel}
ciignote _ I'afficheur et Ie four emet des bipsjusqu'_ ce quela
porte soitfermeeet que ton appuie_ nouveausur Clean+
+ S'il s'ecouleplus de cinq secondesentre le momento8 !'on
appuiesur Cleanet celui o8 I'on appuiesur Ia touche Autoset,
I'afficheurretourne automatiquement_ I'affichageprecedent+
+ Unventilateur se metautomat+quementen marchependantie
cycle d'autonettoyageet s'eteintautomatiquementunelois le
cycle de nettoyagetermine et le four suffisammentrefroidLSi
ce ventilateur nefonctionne pas,contacterun prestatairede
serviceapres-venteagree+
• La porte du four se trouveraendommag6esi I'on force son
ouverturealorsque I'icOneLOCK07ERROUILLAGE}est encore
affichee+
38
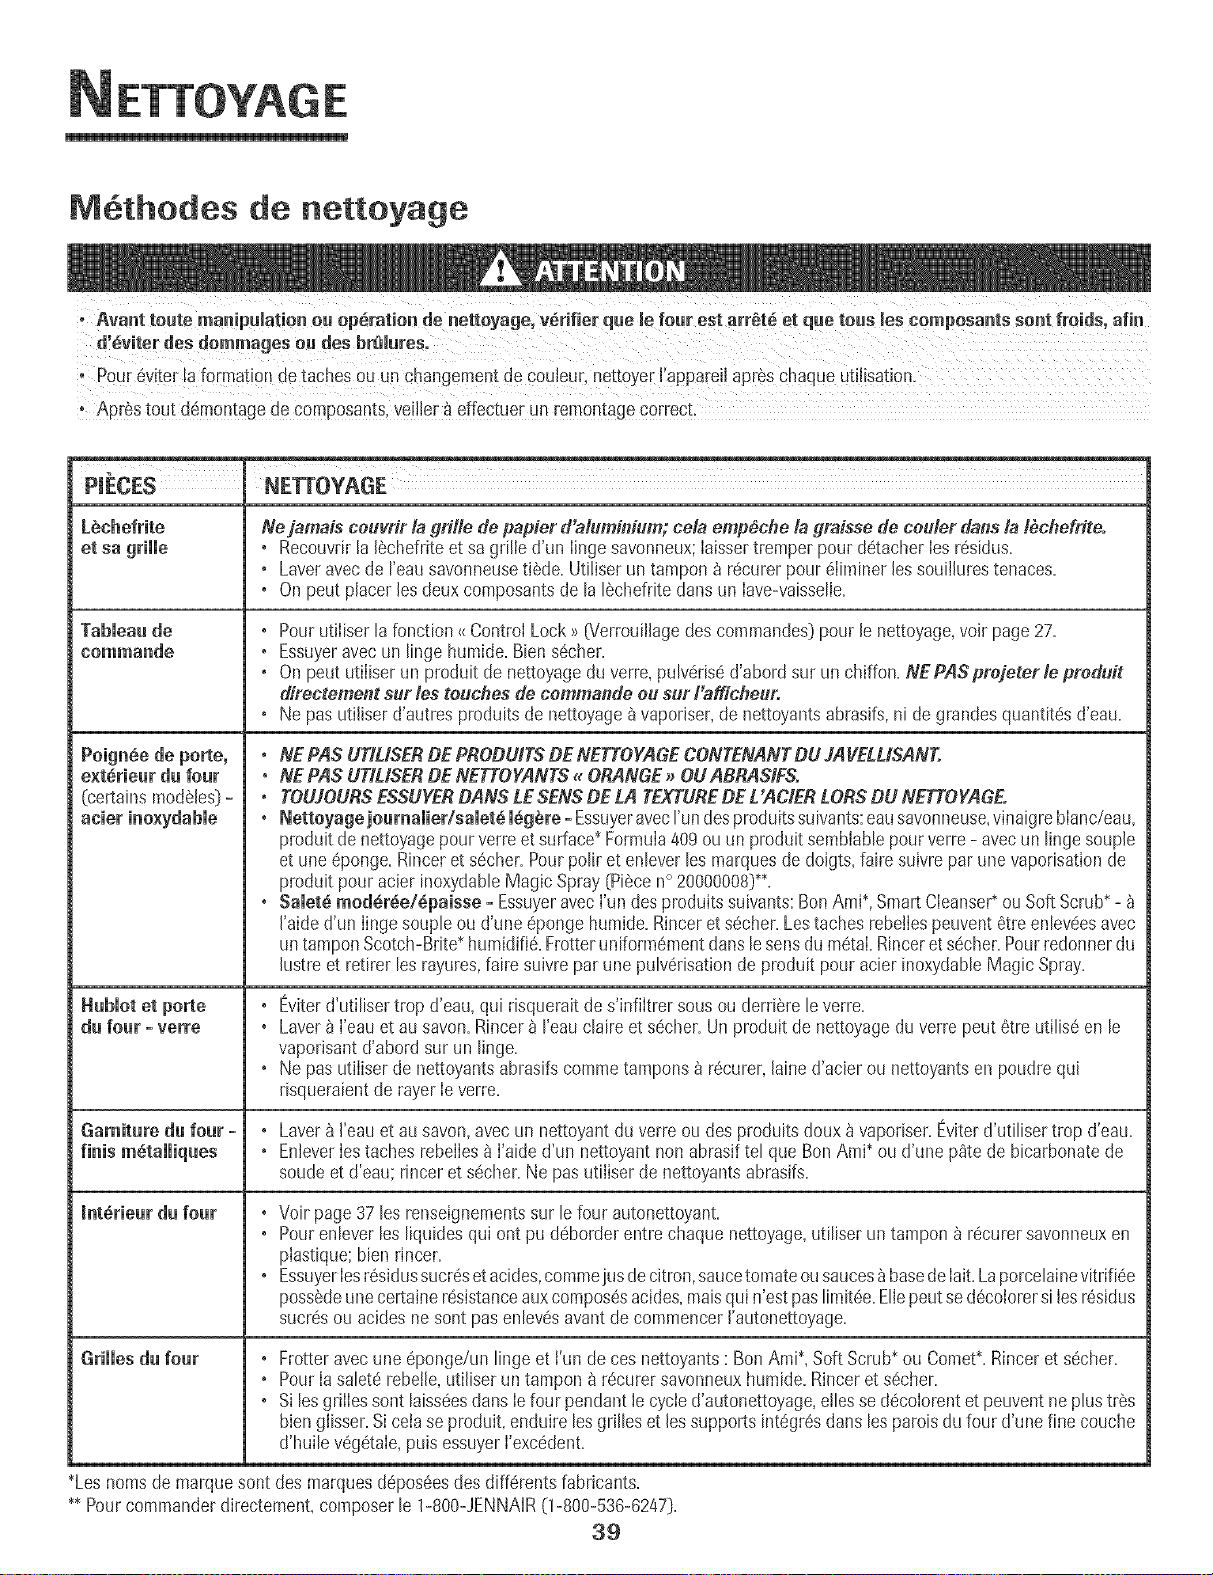
ETTOYAGE
Methodes de nettoyage
, Pour6viterla formation detaches ou un changementde CouJeur, nettoyerJ'appareilap reschaque utiiisation,
PIECES NETTOYAGE
PeignSe de porte,
e×tdrieur du four
(certains modeles_-
Hubmotet po_e
du four - verre
Ne jamais ceuvfir la grille de papier d'alumildum; ceia empeche la graisse de ceuler dans la tbche#ite.
• Recouvrirla lechefriteet sa grille d'un Iingesavonneux;Iaissertremperpour detacher Ies residus.
• Laveravec de I'eausavonneusetiede.Utiliser un tampon _ recurer pour eIiminer lessouiihres tenaces.
• On peut placer lesdeuxcomposantsde lalechefdte clansun Iave-vaisselie.
• Pour utiliser la fonction_{ControlLock_ [Verrouillagedes commandes)pour le nettoyage,voir page 27.
• Essuyeravecun linge humide.Bien secher.
• On peut utiliser un produit de nettoyagedu verre, pulverised'abord sur un chiffon. NEPASprejeterte preduit
directement sur les touches de eemmande eu sur Fafficheur.
•Ne pas utiliserd'autres produitsde nettoyage_ vaporiser,de nettoyantsabrasifs,ni degrandesquantites d'eau.
•NE PAS UTIUSERDE PRODUITSDE NETTOYAGECONTENANTDU JAVELUSANT.
°NE PAS UTILISERDE NETTOYANTS_ORANGE_OUABRASIFS.
°TOUJOURSESSUYERDANS LE SENSDE LA TEXTUREDE L'ACIER LORSDU NETTOYAGE.
° Nettoyage jeumamier/samet_meg_re- EssuyeravecI'undesproduitssuivants:eausavonneuse,vffmigreblanc/eau,
produit de nettoyagepour verreet surface*FormuIa409 ou un produit sembiablepour verre - avec un linge soup]e
et uneeponge. Rinceret secher.Pourpolir et enlever lesmarquesde doigts,faire suivre parune vaporisationde
produit pouracier inoxydableMagic Spray(Piecen° 20000008)**.
• SaJet_ med_r_e/_paisse - Essuyeravecfun desproduits suivants:BenAmi*, SmartCleanse¢ ou SoftScrub*-
I'aided'un Iinge soupleou d'une eponge humide.Rinceret secher.Lestaches rebe!lespeuventetre enleveesavec
un tamponScotch-Bdte*humidifie.Frotteruniformementclanslesensdumetal.Rinceret secher.Pourredonnerdu
hstre et retirer les rayures,faire suivre par une pulverisationde produit pour acier inoxydableMagic Spray.
Eviterd'utilisertrop d'eau,qui dsquerait de s'infiltrer sousou derriere [e verre.
Laverb ['eau et au savon.Rincer_ reau claire et secher.Un produit de nettoyagedu verre peut etre utilise en le
vaporisantd'abord sur un linge.
Ne pas utiiiserde nettoyantsabrasifscommetampons _ recurer,[ained'acier ou nettoyantsen poudrequi
risqueraientde rayer[everre.
Garniture du fear - , Lavera I'eauet au savon,avecun nettoyantdu verreou des produits doux _ vapodser.Eviterd'utiliser trop d'eau.
finis metalliques • EnJeverIes taches rebelIesbI'aide d'un nettoyant non abrasif tel que Ben Ami* ou d'une p_te de bicarbonatede
soude et d'eau; rinceret secher.Ne pas utiliserde nettoyantsabrasifs.
Jnt_rieurd_ fo_r ,
Grilles d_ fe_r
Voir page37 les renseignementssur le four autonettoyant.
Pourenleverles liquides qui ont pu deborderentre chaque nettoyage,utiliser un tampon _ recurersavonneuxen
plastique:bien rincer.
EssuyerIesresidussucresetacides,commeiusdecitron,saucetomateousauces_basedeIait.Laporcelainevitrifiee
possedeunece_aine resistanceauxcomposesacides,maisqui n'estpas limitee.EIIepeutse decolorersi lesresidus
sucresou acidesne sentpas enlevesavantde commencerI'autonettoyage.
Frotter avecune eponge/un linge et fun de ces nettoyants: Ben Ami_,Soft Scrub_ou Comet*.Rinceret secher.
PourIa saleterebeile,utiliserun tamponb recurer savonneuxhumide.Rincer et secher.
Si lesgrilles sent laisseesdartsIefour pendantle cycled'autonettoyage,ellesse decolorentet peuventneplus tres
bien glisser.Si ceta se produit, enduire lesgrilles et lessupportsintegresdarts les patois dufour d'une fine couche
d'huile vegetale,puis essuyerI'excedent.
_Lesnomsde marquesent des marquesdeposeesdes differentsfabricants.
_ Pourcommanderdirectement,composerle 1-800-JENNAR(1-800-536-6247).
39
NTRETIEN
Lampe du four
+ Avant de rempJacer!'ampoule,DEBRANCHERLEFOUR.
+ Ne pastoucher une ampoulechaudeavecun Hngehumide,
llampouterisquede se bdser.
Remplacement de l'ampoule du four :
1, Porterunemaniques_cheet d6vissertrSssoigneusementle
cabochonet rampoule+
2. Remp+acerI'ampoulepar uneampoule pourfour, de 40watts. II
est recommand6d'utiliser une ampouleavecun culot en laiton
pour 6viter lafus+ondu cu+otclansla douille.
3. Remettreen place Ie cabochonet rebrancherlefour.
4. Remettrerhorloge _ I'heure.
Hublot du four
Pour prot6ger le hublot de la porte du four:
1= Ne pas utiIiserde produJtsnettoyantsabras+fscommedes
tampons _ r6cureren laine d'acier ou des produits de nettoyage
en poudre qui risqueraientde rayer le verre.
2. Ne pas heurter le hublot en verre avecun ustensJle,un article de
mobiIier,un jouet,etc.
3. Ne pasfermer la porte du four avantque lesgrilles ne soienten
pIacedans le four.
Touted6gradationdu hubIot de verre - rayure,choc,tension, etc. -
peut affaiblir sa structure et augmenterle risquede bris _ unedate
ult6rJeure.
4O
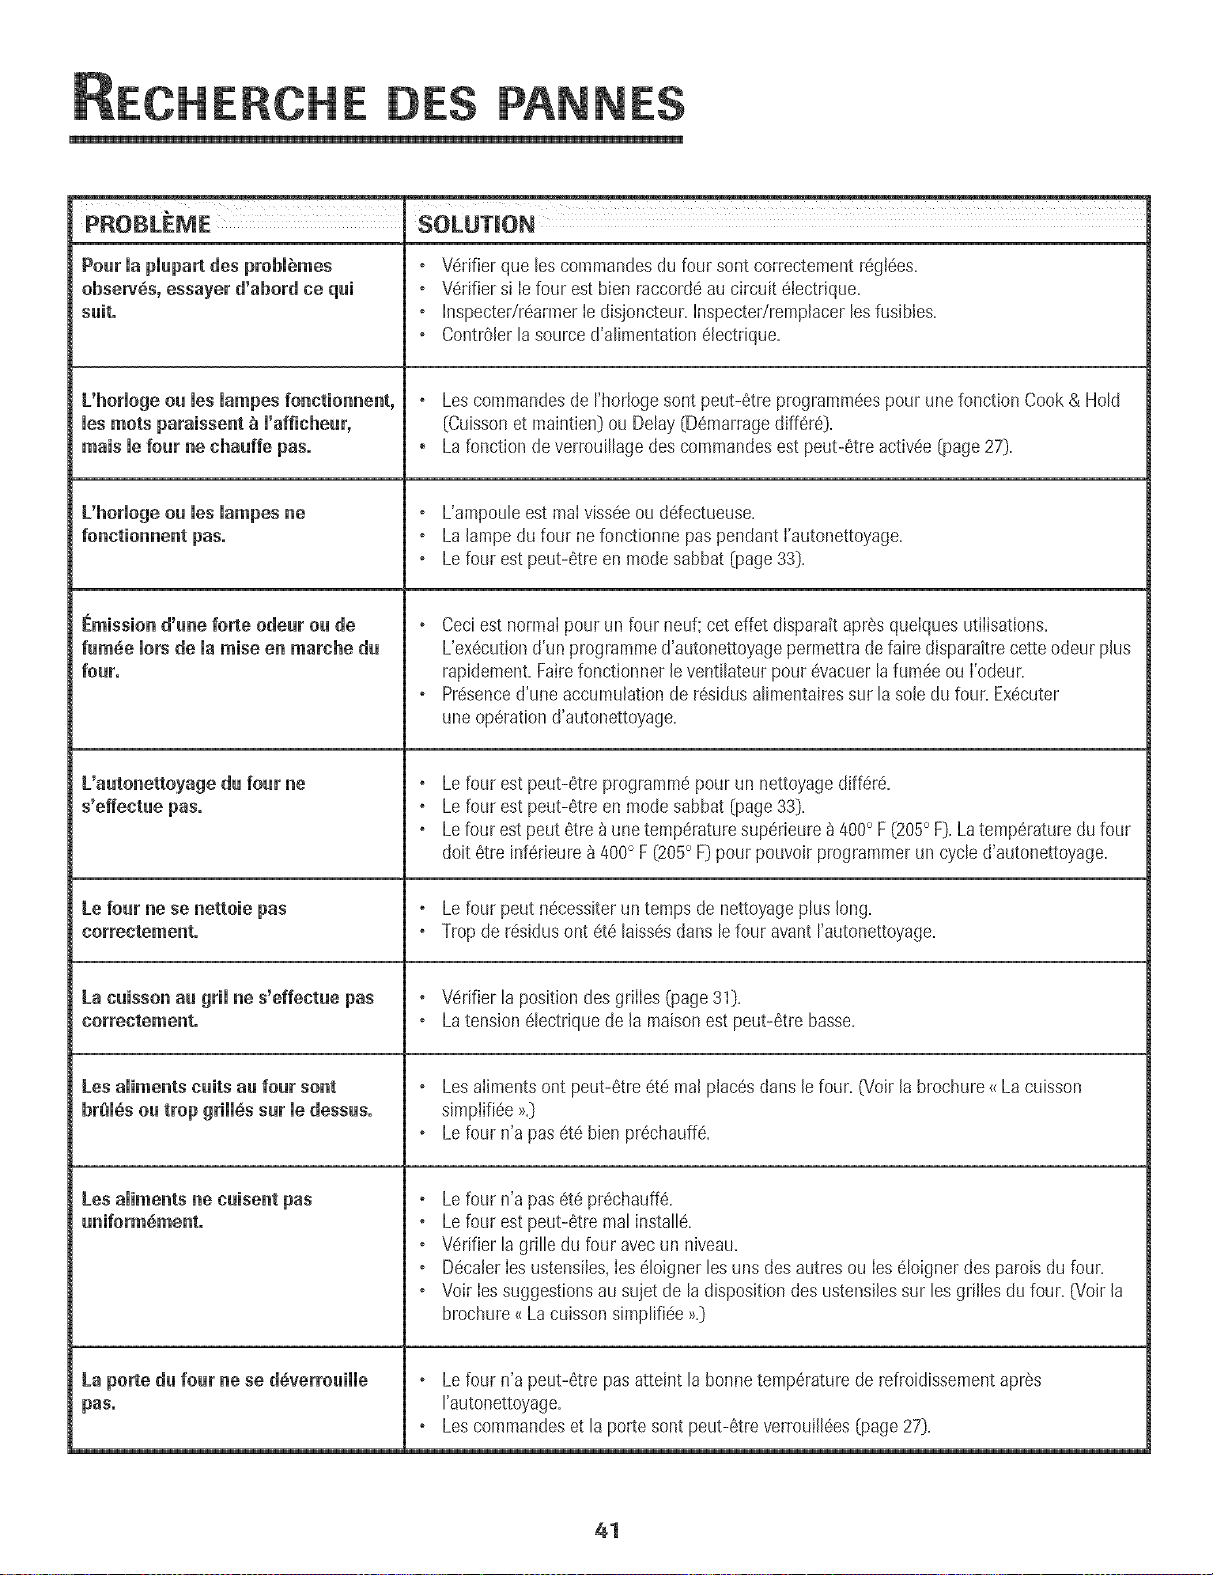
ERCHE DES PANNES
PROBLEME
Pourmapmupa desprobl mes
obseW6s, essayer d'abord co qui
suit.
L'hormogeou ruesmumpesfonctionnent,
ruesroots paraissent _ m'afficheur,
mais mefour ne chauffe pus.
L'horiogeou ies iampes ne
[_mission d'une forte odeur ou de
fum_e morsde maraise en marche du
four.
['autonettoyage du four ne
Le four ne se nettoie pus
La cuisson au grimne s'effectue pus
Corr@ct@m@nt.
Lesamimentscults au four sont
br_m_sou trop grimm,ssur medessus.
Lesamimentsne euisent pus
uniform6ment.
La porte du four ne se d6verrouimme
pus.
SOLUTION
V6rifier que les commandesdu four sontcorrectementregl6es.
V6rifier si Iefour est bien raccord6au circuit 61ectrique.
Inspectedr6armerIe disjoncteur.InspectedrempJacer[esfusibles.
ContrOler[a sourced'aIimentation61ectdque.
Lescommandesde rhorlogesont peut-6tre programm6espour une fonction Cook & Hold
(Cuissonet maintien)ou Delay(D6marragediff6r6).
, Lafonction de verrouiIIagedes commandesest peut-6treactiv6e(page27).
L'ampouIe est real vissee ou ddectueuse,
La Jampe du four ne fonctionne pas pendant l'autonettoyage,
Le four est peut-6tre en mode sabbat (page 33)=
Ceciest normal pour un four neuf;cet effet disparait apresquelguesutilisations.
L'ex6cutiond'un programmed'autonettoyagepermettrade faire disparaitrecette odeur plus
rapidement.Fairefonctionner le ventilateurpour 6vacuer[afum6eou I'odeur.
Presenced'une accumulationde r6sidusaIimentairessur [a sole du four. Ex6cuter
uneop6rationd'autonettoyage.
Lefour est peut-6treprogramm6pour un nettoyagediff6r6.
Lefour est peut-6treen modesabbat (page33).
Lefour est peut 6tre _ une temp6raturesup6rieure_ 400° F (205° F).Latemp6raturedu four
doit 6tre inf6rJeure_ 400° F (205° F)pour pouvoir programmerun cycle d'autonettoyage.
Lefour peut n6cessiterun temps de nettoyageplus long.
Trop de r6sidusont 6t6 [aiss6sdans [efour avantrautonettoyage.
V6rifier la position des grilles (page 31),
Latension@lectriquede [a maisonest peut-6tre basse.
Lesalimentsont peut-@tre_t_ real placSsdans Jefour. 07oirJabrochure_{La cuisson
simplifi6e >_.)
Lefour n'a pasete bJenpr_chauff_.
Lefour n'a pasete prSchauff&
Lefour est peut-etre mal installS.
o Wrifier la grille d_lfour avecun niveau.
DecalerIesustensiIes,Ieseloigner les uns des autresou Iesdioignerdes parois du four.
o Voir Iessuggestionsau sujet de la dispositiondes ustensilessur les grillesdu four. _v_oirla
brochure_<La cuissonsimpiifide_>.)
Le four n'a peut-Stre pas atteint [a bonne tempSrature de refroidissement aprSs
rautonettoyage,
Les commandes et [a porte sont peut-_tre verrouill_es [page 27)=
41
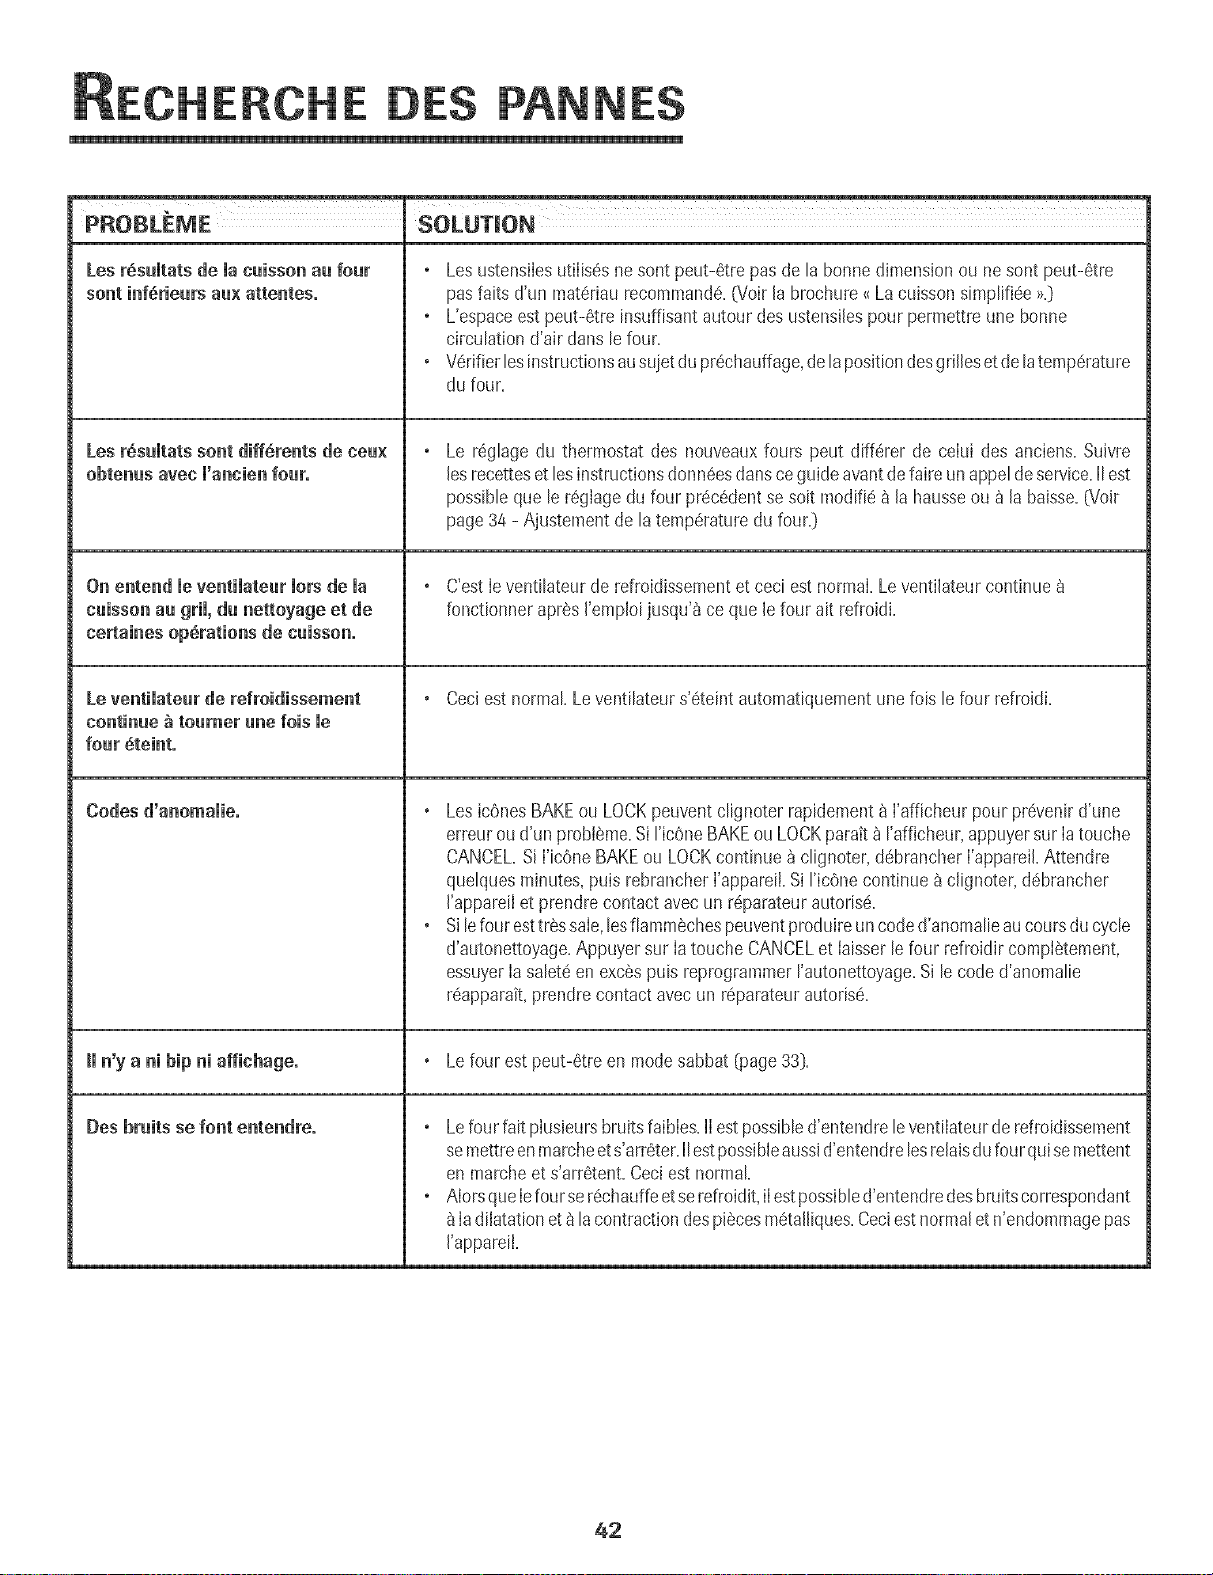
ERCHE DES PANNES
PROBLEME SOLUTION
Les r6sumtatsde macaissonau four Les ustensilesutilis_s nesont peut-6trepas de la bonnedimensionou nesont peut-6tre
sont inf_rieurs aa× attentes, pasfaits d'un mat6riau recommand_.GioirJabrochure_Lacuisson simpli%e >>.}
L'espaceest peut-Stre[nsuffisantautour des ustensJlespourpermettre une bonne
circulationd'air clansle four.
o Wrifier lesinstructionsausuietdu pr6chauffage,de la positiondesgrilleset de latemp6rature
du four.
Lea r6sultats sent cliff,rents tie nea× Le r_ghge du thermostat des nouveauxfours peut diff6rer de celui des anciens.SuJvre
obtenus avec m'annienroar. lesrecetteset lesinstructionsdonn6esclansce guideavantdefaire unappeldeservice.IIest
possibleque le r6glagedu four pr6c6dentse soit modifie _ la hausseou _ la baisse.G_oir
page34 - Ajustementde latemp6raturedu four.}
On entend le ventilatear lots de la C'estleventilateur de refroidissementet ceci estnormal.Leventilateurcontinue
caisson aa gril, du nettoyage et de fonctionnerapr_s J'empJoijusqu'_ ce que lefour ait refroidi.
nertaines operations de caisson.
Le ventimatearde refroidissement Ceciest normal.Leventilateurs'6teint automatiquementunefois le four refroidi.
continue _ roamer ane lois me
roar 6teinto
Codes d'anomamie. Les ic6nesBAKEou LOCKpeuventclignoter rapidement_ l'afficheur pour pr_venird'une
erreuroud'un probleme.Si ricOneBAKEou LOCKparatt_ I'afficheur,appuyersur Ia touche
CANCEL.Si I'icOneBAKEou LOCKcontinue _ clignoter,d6brancherI'appareiLAttendre
quelquesminutes,puis rebrancherI'appareiLSi I'ic6ne continue_ c@noter,d6brancher
J'appareilet prendrecontact avecun r6parateurautoris6.
o Silefour esttr_ssale,lesfiammechespeuventproduireun coded'anomalieaucoursdu cycle
d'autonettoyage.Appuyersur Ia touche CANCELet Iaisserle four refroidircompI6tement,
essuyerIa salet6enexcSspuis reprogrammerrautonettoyage.Si le code d'anomalie
r6apparait,prendrecontactavecun r6parateurautoris6.
Hn'y a ni hip ni affinhuge. Lefour est peut-6treen modesabbat (page33}.
Des bruits se font entendre. Le four fait plusieursbruits faibles.IIestpossibled'entendrele vent[lateurde refroidissement
semettreenmarcheets'arr6ter.IIestpossibleaussid'entendrelesreJaisdu fourqui semettent
en marcheet s'arr6tent.Ceciestnormal.
o AlorsqueIefourser6chauffeetse refroidit,iIestpossibled'entendredesbruitscorrespondant
ladiJatationet8 lacontractiondespi6cesm6taJiiques.Ceciest normaJet n'endommagepas
I'appareiL
42
ARANTIE ERV! ,%
APRES-VENTE
i
Garantie complete d'une annee = Pieces et
maiN-d_evre
Duramune periode d'un (1) an _ compter de la date de
I'achatm_tialau detail, toute p_ecequi se revelerat
@tectueusedab des conditionsnormalesd'usage
menagersera r@areeou remplac@gratutemen[.
Garanties iimitees -Pieces seulemem
Deu×i_me annee =Apres Japremiereanneesuivant la
date de I'achatinitial au detail, les pieces qul se
r@ebralent udectueuses dansdes conditions normaJes
d'usagemdnagerseront repareesou remplac@s
gratu@ment :piecesseubment}; leproprietaire devra
assumertousles autresfrais,y compris bs trais de main-
d'ceuvre,de d@iacementet detransport.
De ia troisi_me _ la eJnquJ_meannie =A compter de
la dareoe Fachatinitial au detail les piecesde la hstecP
dessousqul se reveleraientddectueuses dans aes
conditionsnormaJesd'usagem@ager seron[repareesou
rempla@esgratuitement _i_ces seuJemen0;le
proprietairedevraassumertousles au[res frais,y compns
lesfrais de main-d'ceuvre,de d@lacementet de trans-
port.
• Commandes _leetroniqaes
• Elemeats ehaaffants 61ectriqaes: Elementsae grll e[
de cu_sson au four sur appareiB ae cuisson electriques.
Residents canadiens
Lesgarantlescbdessuscouvrentun appareilinstaJl6au
Canada.seulements'il a 6te agreepar lesagencesde test
habiiit@s(verificationde Jaconformitea une norme
natlonab du Canada).saufsi I'appareJla et6 introdu_tau
Canada_ I'occaslond'un changementde r@idencedes
Ctala-Unisversle Canacla.
Garantie limitee hers des [_tats=Uais et da
Canada = Pieces seulemeat
Pendantdeux (2}arts_ compter de B date de I'achat
initia_au a_taH,toute piece qul se r@ebrait ddec[ueuse
clansdes conditions normalesd'usage menagersera
r@areeou remp_as@gratultement [pieceseulemenL le
proprietairedevraassumertousles autres fras, y compns
les fraisde main-d'ceuvre,de d@lacementet de trans-
port.
Lesgaranties_p@ifiqueslnrmut6esd-dessusson_les
SEULESque le fabflcam accorde.Cettegarantievous
conf#redes droitsjuridiquess##cffiqueset vouspouvez
egalementjouirdt_utresdroit& wm#blesd'un dtat _/'autre=
Ne so t pas converts par ces
garanties ."
1. Les dommagesou d_rangementsdus _:
a. Mise en service,Iivraisonou entretieneffectu@incorrectemenL
b. Touter@aration,modification,aIterationet tout r_glage non autorises
par lefabrbant ou par un prestatairedeserviceapres-venteagr@.
c. Accidents,mauvaiseutiIisatJonou usageabusifou deraisonnable.
d. Aiimentation_lectrique (tension,intensJt@incorrecte.
e. Reglageincorrect d'une commande.
2. Les garantbs ne peuvent6tre honor@ssi Ies numerosde serJed'orJgine
ont _te enteves,modifi@ou nesent pas facibment lisJbles.
3. Ampoules.
4. Appareilsachet@auxfins d'usagecommerciaIou industrbL
5. Lesfrais de visite d'un prestatairede serviceou de serviceapres-vente
encouruspour Iesraisonssuivantes:
a. Correctiond'erreursde raiseenservice.
b. initiation de Futilisateur_ I'emploide I'appareik
c. Transportde I'appareilaux Iocauxdu prestatairede service.
6. Dommagessecondairesou indirects subispartoute personnesuiteau
non-respectde cesgaranties.Certainsetats ne permettentpas
I'exclusionou la limitation des dommagessecondairesou indirects;par
con@quentles limitationsou exclusionsci-dessuspeuventnepas
s'appliquerfl votrecas.
Si l'i#terve tio# d' n r parate r
est cessaire
* Contacterle d_taillantchezqui I'appareiIa 6t_ achete,oucontacter
MaytagServicessMservice_ la clientelede Jenn-Air au 1-80O-JENNAIR
(1-800-536-6247},pour obtenir les coordonn@sd'une agencede service
agre@.
o Veilbr fl conserverIafacture d'achat pourjustifier de lavaliditede Ia
garantie.Pourd'autres informationsen ce qui concerne les responsabilites
du proprietairefl I'egarddu servicesousgarantie,voir le texte de la
GARANTiE.
• Si Ie detaillant ou I'agencede serviceapr@-ventene peut r@oudrele
probleme,ecrire _Maytag Services-aM,attention CAIR:_Center,P.O.Box
2370,Cleveland,TN 37320-2370ou tel@honer au 1-800-JENNAIR
(1-800-536-6247}.
• Lesguides de I'utilisateur,bs manuelsde serviceet les renseignements
des piecessent disponiblesaupresde Ma}¢agServicessr_,service_ la
clienteledeJenn-Air.
Lorsde tout contact concernantun probl@_e,fournir I'information
suivante:
a. Nora, adresseet num_rode tel@hone du client;
b. Num@ode modeleet numerode seriede ['apparei[;
c. Nora et adressedu @taillant ou de I'agencede service;
d. Description claire du problemeobserve:
e. Preuved'achat (facturede vente}.
43
HORNOI ELC:CTRICOJENN-AIR
_JENN-AIR
Instalador: Perfavordeje estagu[ajunto conel ebctrodomeshco,
Consamidor: Per favor leay conservees_a_uia para referenc_a
futura. Conserveel recibode compray/oel chequecanceJa(_ocome
pruebade compra.
Niimerode Modelo
NQmero (_eSene
Fechade Compm
Sit_enepreguntas.Hamea:
Jenn-Air CustomerAssistanc_
]-80O-JENNAR{1-800-536-6247]
(LunesaViernes.8:00a.m.a 8:00p.m.Hera del Este}
Internet:http:i/www.jenna r.com
Ennuestrocontinue af_n de mejorar la calidad y rend_mientode
nues[rosebctrodom@ticos,puedequesea necesanomodificareL
ebctrodomesticosm actualizarestagufa.
Para inlermad6# sebre senficie, vet pbgina 65.
RIDAD
IM PORTANTES SOBRE
SEGURIDAD
Las advertencias e instrucciones importantes sobre seguridad
que aparecen en esta guia no est_n destinadas a cubrir todas
ias posibies circunstancias y situaciones que puedan ocurrir,
Se debe ejercer sentido comu3n,precauci6n y cuidado cuando
instale, realice mantenimiento o haga funcionar el artefacto,
Siempre p6ngase en contacto con su distribuidor, agente de
servicio o fabricante si surgen probiemas o situaciones que
usted no comprenda,
Reconozca {os simbo_os, advertencias,
etiquetas de seguridad
PODRtAN causar bsi6n personal grave o mortal,
Lea y siga todas las instrucciones antes de usar este
electrodom_stico para evitar el riesgo potencial de incendio,
cheque electrico, bsi6n personal o da_ioal ebctrodomestico
come resultado de su use inapropiado, Utilice este
ebctrodomestico soBmente para el prop6sito que ha side
destinado seguJnse describe en esta guia,
Para asegurar fwlciomlam_iento correcto y seguro: El
ebctrodom_stico debe ser instalado debidamente y puesto a
tierra per un t@nico caiificado, No intente ajustar, reparar,
prestar servicio o reempBzar ninguna pieza de este producto
a menos que sea espedficamente recomendado en esta guia,
Todas las reparaciones deben ser reaiizadas per un tecnico
calificado,
Siempre desenchufe el electrodom6stico antes de efectuar
aiguna reparaci6n,
Para Evitar Da e a Causa de
lr|cer|die e Hu e
• Asegurese de que todos los materiaies de empaque hayan
sido quitados del homo antes de ponerlo en
funcionamiento,
No coloque materiales combustibles cerca del
electrodom6stico, No se deben guardar en el homo
materiales infiamables,
• Muchos pl_sticos son afectados por el calor, Mantenga los
plasticos alejados de las piezas del electrodom6stico que se
pueden entibiar o calentar,
• Para evitar incendios de grasa, no permita acumulaci6n de
grasa de cocinar o de otros materiales inflamables en el
homo o en su cercania,
£n Case de lr|cer|die
• Use un extinguidor con producto quimico seco o dei tipo
espuma o bicarbonato de soda para apagar ei incendio o
ias llamas, Nunca use agua en un incendio de grasa,
1. Apague el homo para evitar que la llama se disperse,
2. NUNOA levante o mueva una sarten en llamas,
3. Apague el fuego o la llama cerrando la puerta del homo,
Seguridad #ara los Ni es
causarlesi6n personal menos grave, NUNCA guarde a[t{culos de inter6s pare !0s nihos en !0s
para a!canza[ los articuios pueden lesionarse gravemente,
45
URIDAD
.NUNCA deje a los nifios solos o sin supervisi6n cuando eI
homo estd en uso o cuando est_ caibnte. No se debe nunca
permidr que los nifios se sbnten o se paren en ninguna
pbza deI ebctrodomdstbo pues se pueden bsionar o
quemar.
.Se bs debe ensefiar a los nifios que eI ebctrodomesdco y
los utensflios que est_n en 61 pueden estar caibntes. Deje
enfriar los utensflios caibntes en un lugar seguro, fuera deI
abance de los nifios. Se bs debe ensefiar a los nifios que
un ebctrodomesdco no es un juguete y que no deben jugar
con los controbs u otras piezas del artefacto.
lnstrucciones Generales
NUNCA use un electrodomdstico como un pe!daSo para
apoyarse o sentarse en la puerla puede Fesultar en que e!
e!ectrodomdstice se vuelque , Se rompa !a puerta Y Se
causen lesiones graves.
.Para evitar posibbs riesgos para el usuario y dafio al
ebctrodom6stico, no use este producto como una estufa
para cabntar o entibiar una habitaci6n. Adem_is no use el
homo como un lugar para guardar dimentos o utensflios de
cocina.
• No obstruya la circulaci6n del aire bloqueando el respiradero
del homo.
• NO TOQUE LOS ELEMENTOSCALEFACTORESNI LAS
SUPERFICIESINTERIORESDEL HORNO. Los eiementos
calefactores pueden estar calientes aun cuando su color sea
obscuro. Las superficies interiores de cuaiquier homo se
calientan Io suficiente como para causar quemaduras.
Durante y despuas dei uso, no toque ni permita que ias ropas
u otros materiales inflamables entren en contacto con los
eiementos caiefactores o ias superficies interiores dei homo
hasta que no se hayan enfriado. Otras superficies dei
electrodomdstico pueden estar Io suficientemente calientes
para causar quemaduras - entre estas superficies est_in las
aberturas dei respiradero dei homo y ias superficies cerca de
estas aberturas, ias puertas dei homo y ias ventanas de ias
puertas dei homo.
.No toque un foco caiiente dei homo con un patio hSmedo
pues ei foco se puede quebrar. Si ei foco se quiebra,
desenchufe el electrodomestico antes de sacar el foco para
evitar sufrir un choque ei@trico.
Se debe oir el ruido de un ventilador cuando el homo estd
en funcionamiento. Si usted no oye el ruido del ventilador,
llame a un tdcnico autorizado.
NUNCA use papei de aiuminio para cubrir ias parriiias dei
homo ni el panel inferior del homo. Eluso incorrecto puede
resultar en un riesgo de choque eldctrico, incendio o dafio
al electrodomdstico. Use papel de aluminio solamente
como se indica en esta guia.
Seguridad al Cocinar
.Nunca cdiente un contenedor de alimento cerrado en el
homo. La acumuBci6n de presi6n puede reventar el
contenedor causando una bsi6n personal grave o dafio al
ebctrodomdstico.
• Use tomaollas secos y gruesos. Los tomaollas hSmedos
pueden causar quemaduras por vapor. No se deben usar
toallas de secar los platos ni otros sustitutos en vez de los
tomaollas porque ellos pueden pasar sobre los elementos
calientes y prenderse fuego o pueden quedar atrapados en
las piezas del electrodomdstico.
.Usevestimentas apropiadas. Las ropas sueltas o ropas con
mangas largas sueltas no se deben usar cuando se est_
cocinando. La ropa se puede prender fuego y causar
quemaduras si entra en contacto con los elementos
calefactores.
Siempre coioque ias parriiias dei homo en ias posiciones
deseadas cuando el homo este frio. Deslice la parrilla del
homo hacia afuera para agregar o retirar alimento usando
tomaollas secos y gruesos. Siempre evite colocar o retirar
alimento del homo sin sacar la parrilla hacia afuera. Si una
parrilla debe set movida cuando estecaliente, use un tomaollas
seco. No deje que el tomaolla entre en contacto con el
elemento caliente del homo.
• Tenga cuidado cuando abra ia puerta dei homo. Primero deje
que salga el aire o vapor caliente antes de sacar o volver a
colocar el alimento en el homo.
ADVERTENCIA SOBRE ALIMENTOS PREPARADOS:
Siga las instrucciones del fabricante del alimento. Si un
contenedor de alimento congelado de pldstico y/o su tapa
se deforma, comba o de otra manera se dafia durante la
cocci6n, inmediatamente descarte el alimento y su
contenedor. El alimento puede estar contaminado.
46

RIDAD
. No permita que eI papeI de aiuminio o la sonda de la came
toque eI ebmento cabfactor.
• Sbmpre @ague todos los controbs cuando haya terminado
de codnar.
Seguridad sobre eJ Uso de
• Siga [as instrucciones de[ fabricante cuando use boisas para
cocinar en e[ homo.
• Se ha comprobado eI rendimbnto y fundonambnto seguro
de este ebctrodom6sdco usando utensiiios de cocina
tradbionabs. No use ningLin dispositivo o accesorio que no
haya sido espec[ficamente recomendado en esta guia. No
use sistemas de convecci6n agregabbs a hornos. EI uso de
dispositivos o accesorios que no sean expresamente
recomendados en esta guia puede crear peiigros graves de
seguridad, afectar eI rendimbnto y reducir la vida ,Jtil de los
componentes de este ebctrodom6stico.
. SoBmente ciertos tipos de utensilios de vidrio,
vidrio/cer_mico, cer_mica, de gres u otros utensilios de vidrio
son convenientes para su uso en el homo sin quebrarse
debido al repentino cambio de temperatura. Siga Bs
instrucciones del fabricante del utensilio cuando use vidrio.
Seguridad en Ja Limpieza
, Apague todos los controbs y espere que se enfrien Bs
piezas del ebctrodom6stico antes de tocarlas o limpiarlas.
Limpie con cuidado. Tenga cuidado para evitar quemaduras
de vapor si usa una esponja o un paso mojado para limpiar
los derrames en una superficie caliente. Algunos
limpiadores pueden producir vapores nocivos cuando se
aplican a una superficie cdiente.
• Limpie solamente las piezas indicadas en esta guia.
Homo AutoJimpiante
NO deje las parr!!!as, asade_a, atiment0s o utensil!o s
de cocina, etc. en el homo durante el ciclo de
autoljmp!eza.
No iimpie ia junta de ia puerta, Lajunta de ia puerta es
esencial para obtener un buen sello, Se debe tener cuidado
de no frotar, da_iar ni mover la junta,
• No use limpiadores de homo ni forros de homo de ningun
tipo alrededor ni en ninguna parte del homo autolimpiante,
• Antes del cicio de autolimpieza del homo, retire la asadera,
las parrillas del homo y otros utensilios y limpie cualquier
derrame para evitar humo excesivo o llamaradas,
Aviso yAdve|'tencia
l portante Sobre Seguridad
La Propuesta 65 de la Ley de 1986 del Estado de California
Sobre Seguridad y Contaminaci6n del Agua Potable [California
Safe Drinking Water and Toxic Enforcement Act of 1986] exige
que el Gobernador de California publique una lista de hs
sustancias que segLin el estado de California causan cancer o
dafio al sistema reproductivo y exige que Bs empresas
adviertan a sus dientes sobre la exposici6n potencial a tales
sustancias.
Se advierte a los usuarios de este electrodom6stico que
cuando el homo esta funcionando en el cicio de autolimpieza,
puede haber exposici6n de bajo nivei a aigunas de ias
sustancias indicadas en la lista, incluyendo mon6xido de
carbono, La exposici6n a estas sustancias puede ser reducida
a un minimo ventilando el homo al exterior en forma
adecuada, abriendo las ventanas y/o la puerta en la habitaci6n
en donde esta ubicado el electrodom6stico durante el cicio de
autolimpieza,
AVISO IMPORTANTE RESPECTO A LOS PAJAROS
DOMESTICOS: Nunca mantenga los p_jaros en ia cocina o
en ias habitaciones donde puedan iiegar los humos de ia
cocina. Los p_jaros tienen un sistema respiratorio muy
sensitivo. Los humos producidos durante ei cicio de
autoiimpieza dei homo pueden ser periudiciaies o mortaies
para los p_ijaros. Los humos que despide ei aceite de cocina
recaientado, ia grasa, margarina y los utensiiios
antiadherentes recaientados pueden tambi@ ser periudiciaies.
Nora: Para funcionamiento de los Hornos de Microondas
[modeios seiectos}, consuite ia guia de uso y cuidado
inciuida con ei homo de microondas.
Conserve estas instrucciones para referencia futura
47
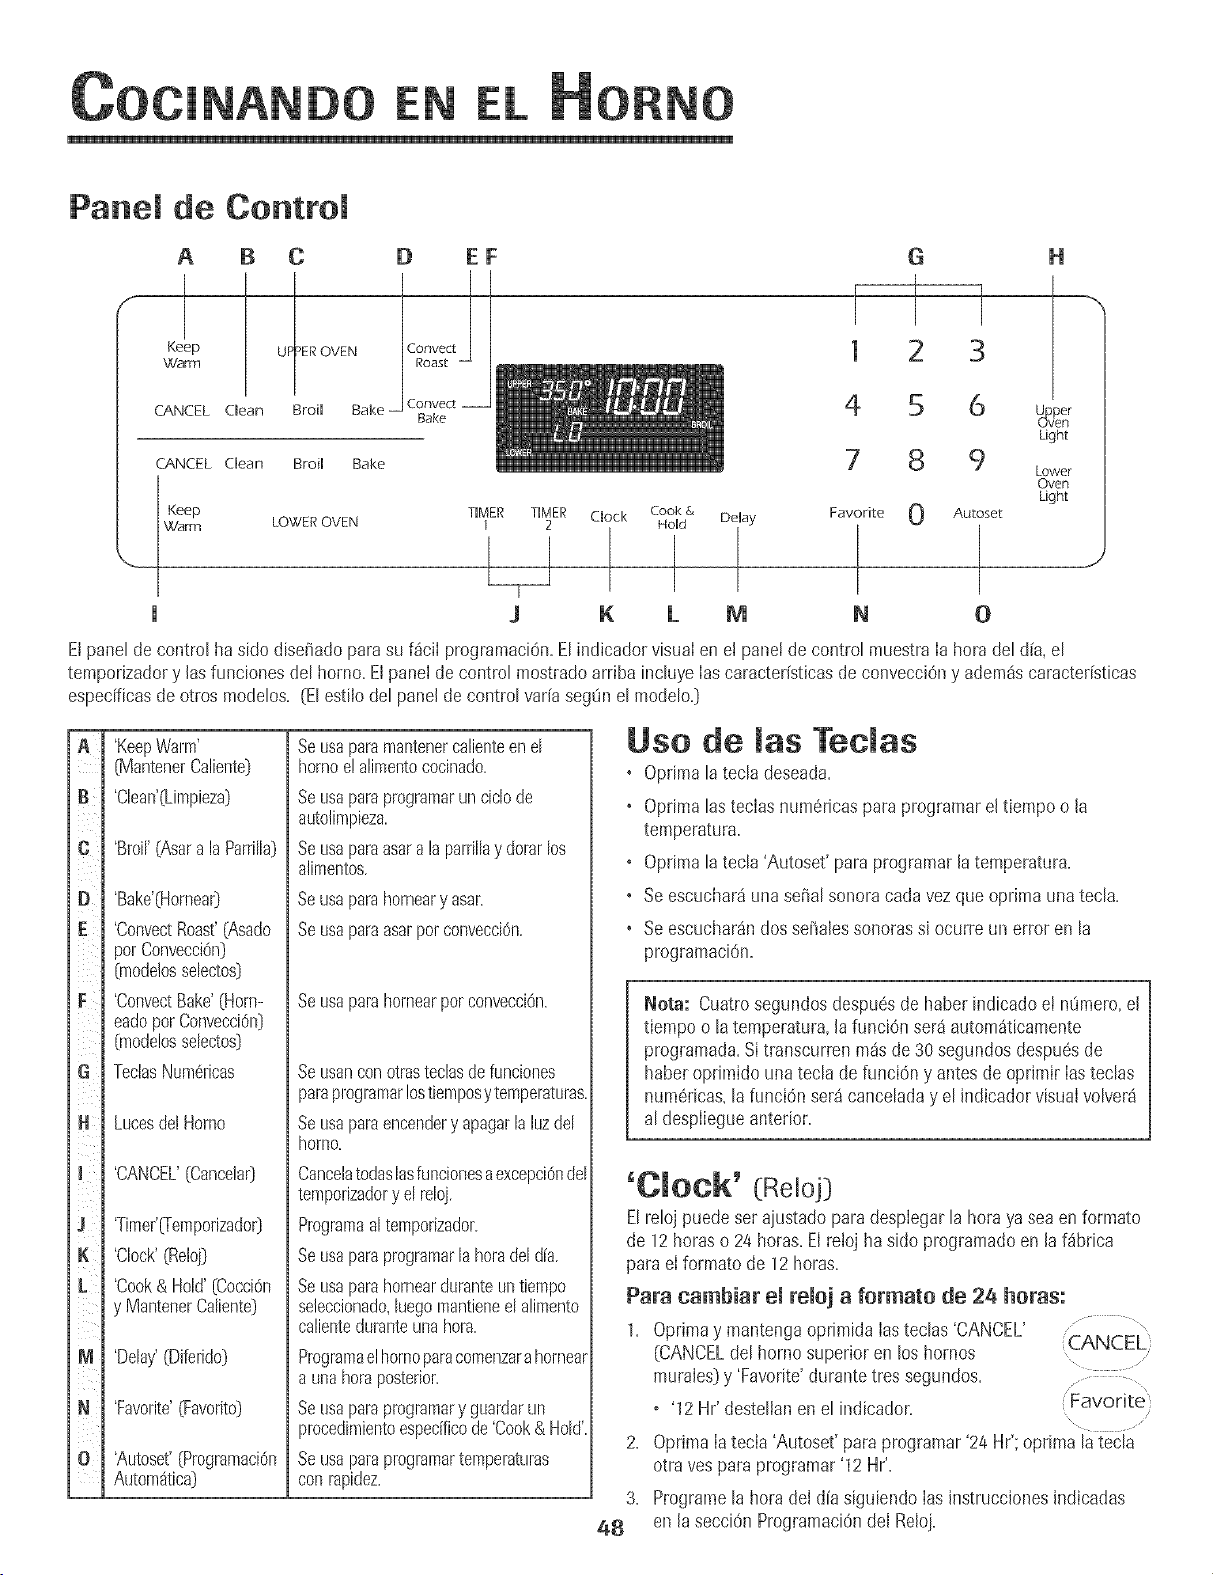
EN
Panel de Control
A B C
Keep UP ER OVEN
\_d'anT1
CANCEL aean Broil Bake
CANCEL dean Broil Bake
D EF
Convect
Bake
I
1
4
G H
2 3
6 U_aper
uven
Light
8 9 Lower
Oven
Light
Keep TIMER TIMER Clock Cook & Delay Favorite 0 Autoset
Warm LOWER OVEN 1 2 Hold
U
J K LMN0
,J
Elpane}de controEha sido disefiadopara su f4ciI programaciOn.Elindicadorvisua}en et pane!de contro}muestraIa horadel d[a,el
temporizadory losfuncionesdel horno. El panel de contro}mostradoarribainc}uyeIascaracter[sticasdeconvecciOny adem4scaracter[sticas
especificasde otros modelos. (El estilo del panel de contro}var[aseg0n el modeb.}
jA
B¸
I
i¢
i
iD
I
iF
i i}_i
iG
j.
jlC
ii
j J L
iK
i j'j
i
I
im
IN
ill
'KeepWarm'
[MantenerCaliente}
'Cban'(Limpieza}
'Broi}'(AsaralaParri}}a}
'Bake'(Hornea0
'ConvectRoast'(Asado
porConvecciOn}
%ode!assebctos}
'ConvectBake'(Horn-
eadopotConvecci@}
%odelossebctos}
TectasNum@icas
LucesdelHomo
'CANCEL'[Cancela0
'Timer'_emporizador}
'Clock'(RelBj}
'Cook& Hold'(Cocci@
y MantenerCaliente}
'Delay'(Diferido}
'Favorite'(Favorito}
'Autoset'(Programaci@
Autom_tica}
Seusaparamantenercalienteen el
hornoe!alimentococinado.
SeLisaparaprogramarun cic}ode
autolimpieza.
Seusaparaasaralaparrillay dorarlos
alimentos.
Beusa parahomearyasar.
Seusaparaasarpoteonvecei6n.
Se usa para horneal par convecciOn.
Seusanconotrasteclasdefunciones
paraprogramarlostiernposy temperaturas.
Seusaparaencendery apagarla luzdel
homo.
CancelatodasBsfuncionesaexcepci6ndel
tempofizadory el reloj.
Programaaltemporizador.
Seusaparaprogramarla horadel dia.
Seusaparahornearduranteuntiempo
seleccionado,Begomantieneel alimento
calienteduranteunahora.
Programael homo paracomenzarahorneal
a una hora posterior.
Se usa para programary guardar un
procedimientoespedfico de 'Cook& Hold'
Se usa para programartemperaturas
con rapidez.
Uso de las Teclas
• Optima la tecla deseada.
• Oprimalas teclasnum6ricaspara programarel tiempoo la
temperatura.
• Optima la tecla 'Autoset' para programarla temperatura.
• Se escuchar4una seiial sonoracodavez que oprJmaunatecla.
• Se escucharandossefialessonorassJocurre un error en la
programaci6n.
Nota: Cuatrosegundos despu@de haberindbado et n8mero,el
tiempo o la temperatura,}afunci6n ser4 autom4ticamente
programada,Sitranscurrenm4sde 30segundosdespuesde
haberoprimido unatec}ade funci6ny antesde oprimir Iastec}as
num6ricas,lafunci6n ser4cance}aday el indicadorvisua}volver4
al despliegueanterior.
'Clock' (Reloj}
Elreloj puede set aiustadoparadesplegarla horaya sea enformato
de 12horas o 24horas.Elrelojha sido programatic en laf_brica
paraeI formato de 12 horas.
Para cambiar el reloj a formate de 26 horas:
1. Optima y mantengaoprimida Iasteclas 'CANCEL' ..... "
(CANCELdel hornosuperioren los hornos CANCEL}
murales}y 'Favorite'durantetres segundos.
o '12 Hr' destellanen el indicador. Favorite
2. Oprima Iatecla 'Autoset' paraprogramar'24 Hr'; oprima la tecla
otra yes para programar'12 Hr'.
3. Programe}ahora del d[asigubndo Ias instruccionesindicadas
48 en Jasecci6n Programaci6ndel Relo].
EN
ProgramaciSn dei Reioj:
\
1. Oprima[atech 'Clock'. Clock
+ Lahorade[ dia destellanenel indicador+ .........
2. Optimalasteclas num@Jcasapropiadaspara programarla hora
del d[a.
• Losdos puntos contint_andestellando.
3. Optima [atech 'Clock' nuevamenteo esperecuatrosegundos.
+ Losdos puntospermanecer_niluminados.
Cuandose conecta energ[ael6ctr+caa[ horno o despu6sde una
interrupciOnde Ia energ[aelectrica,la 01timahoradel reloj previaa
la interrupciOndestetIar_en el indicador.
ParadesplegarIa hora del dia cuando el indicadorest6 mostrando
otra funciOndetiempo, oprima Iatecla 'Clock'.
La horadel reloj no puedeser cambiadacuandoel horno hasido
pmgramadopara 'Delaycook' o 'dean' o 'Cook & Hold'.
Para cancelar el despliegue del reloj:
Si no deseaque el indicadorvisuai muestre[a hora del d(a:
Optimay mantengaopnmida [asteclas 'CANCEL'y ........
'Clock'durante tressegundos.La horadel d[a (CANCEL
desaparecer4deJindicador. .............
Cuandose cancelael desplieguedeJreloj,oprima la Clock
tecJa'CJock'paradesplegarbrevementeIahora deJdia.
Cuandose canceJae! despJieguedeJreioj,despu6sde 15 minutos,eJ
control deJhorno pasar4a modo 'Standby' paraahorrarenergFa.Et
indicadorvisuaJquedara en bJancoy la luz deJhorno no funcionar4.
Para"activar" el controJy canceJareJmodo 'Standby',oprima
cualquiertecJa.Se escuchar4ndossefiaJessonoras.
Para restaurar el despliegue del reloj:
Optimay mantengaoprimida lasteclas 'CANCEL'y 'Clock'durante
tres segundos.La horadel d[a reaparecer_del indicador.
'Timer' (Temporizador}
Eltemporizadorpuedeser programadode un minuto (00:01}hasta
99 horasy 59segundos(99:59}.
Eltemporizadorpuedeser usadoindependientementedecualquier
otra actividaddeI homo.Adem_spuedeset programaticcuando otra
funciOndeI homo est6en actividad.
Elternporizadorno controIael homo.Solamentecontrola una serial
sonora.
Para programar el temporizador: ............ ,
TIMER
1. Optima [atecla 'Timer'. .... 1 ......
• Enel indicadorvisual destellar400:00y el [cono 'TIMER'.
2. Oprima [asteclas numSricasapropiadashastaque el tiempo
correcto aparezcaen el indicadorvisual.
+ Losdos puntosy el [cono'TIMER'continuar4ndestellando.
3. Oprima nuevamente[a tecia 'Timer'o esperecuatm segundos.
o Losdos puntosdejan de destellary el tiempocomienzala
cuenta regresiva.
o Ei01timomJnutode Ia cuenta regresivade[ temporizadorse
despiegar_en segundos.
4. Ai final del tiempo programatic,se escuchar_unaserial sonora
largay e! Fcono'End' [Fin)se despiegar_en el indicador visual.
5. OprJmalatecla 'Timer'para quitar el indicador.
Para cancelar el temporizador: ......................,
TIMER
1. Oprimay mantengaoprimida la tecIa 'Timer'
durantetres segundos.
U
2. OprJmalatecJa'Timer'y la tecla '0' usandolas teclasnum6ricas.
Bloqueo de los Controles yde
la Puerta de[ Homo
EItecJadoy la puertadel horno puedenser bloqueadospara
seguridad,limpiezao evitar el uso no autorJzado.Lasteclas no
funcionancuandoest_n bloqueadas.
Sise est4usandouna funci6n del horno,el controly la puerta no
puedenset bloqueados.
La hora de! d[a continuar_n iluminadosen el indicadorcuando el
controly la puerta est4n bloqueados.
Para bloquear: ...............,
(CANCEL}
1. Optimay mantengaoprimidaslastecIas'CANCEL' .....
y 'Cook & Hold'durante tres segundos.
• En el indicadorvisual aparece'OFF'
+ El Fcono'LOCK'destella cuando la puertase est_bloqueando.
Para desbloquear:
Optimay mantengaoprimidaslas tedas 'CANCEL'y 'Cook& Hold'
durantetres segundos.El icono 'OFF'desaparecedel indicador
visual
Nora: Lastec[asy [a puertade[ horno no puedeb[oquearsesJ[a
temperaturade[ hornoes 400° F (205° C) o superior.
C6digos de Errores
'BAKE'y 'LOCK'puedendeste[[arr@idamentepara advertideque
hay un erroro un probIema.Si'BAKE'y 'LOCK'contin0an
desteIIando,desconecte[a corrienteeI6ctricahaciae[ artefacto.
Espereunos pocosminutosy vueivaa conectar[a corriente el6ctrica.
Silos sffnboIoscontin_andestelIando,desconecte[a corriente
e[6ctricahacia e[ artefactoy [lamea un t6cnico deservicio
autorizado.
49
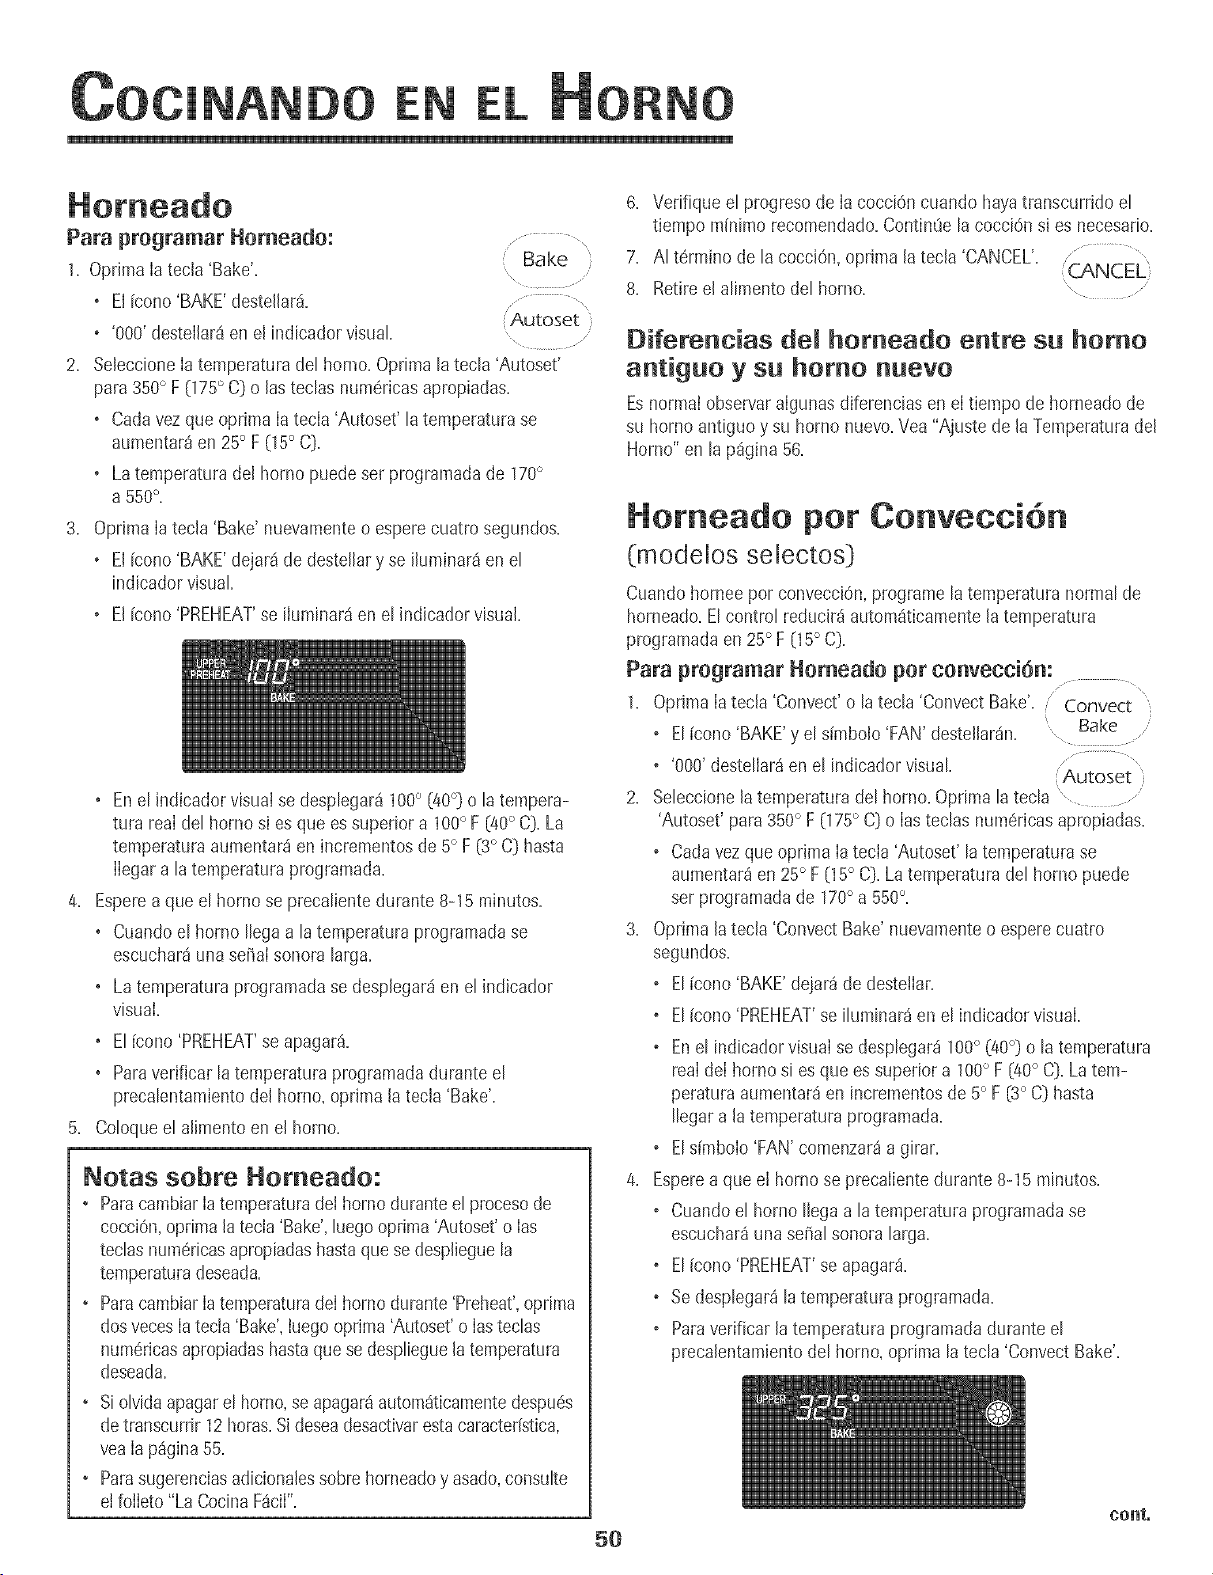
EN
Para programar Horneado: ...........,
'Bake
1. Oprima Iatecla 'Bake'.
, ElFcono'BAKE'desteliar_...................
fAutoset
,'000'desteilar4en el indicador visual.
2. SeieccioneIa temperaturadel homo. Oprimala tecla 'Autoset'
para350° F (175° C] o las techs num@icasapropiadas.
, Cadavezque oprima Iatecla 'Autoset' latemperaturase
aumentar_en25° F (15° C].
, Latemperaturadel homo puedeser programadade 170°
a 550°,
3. OprJmaIa tech 'Bake' nuevamenteo esperecuatrosegundos.
, El{cono'BAKE'dejar4de @stellary se ihminar4 en el
indicadorvisual
, El{cono'PREHEAT'se iiuminar4en el indicador visual.
• Enel indicadorvisuai se desplegar4100° [40°] o la tempera-
tura reaIdel horno si es que essuperior a 100° F [40° C]. La
temperaturaaumentaraen incrementosde 5° F (3° C] hasta
Ilegara latemperaturaprogramada.
4. Esperea que el horno se precalientedurante8-15 minutos.
• Cuandoel homo Ilegaa la temperaturaprogramadase
escuchar4unasefiaisonora larga.
• La temperaturaprogramadase desplegar4en el indicador
visual.
• El[cono'PREHEAT'seapagar_.
• Paraverificar la temperaturaprogramadadurante el
precalentamientodel homo, oprJmalatecla 'Bake'.
5. Coloqueel alimentoen el homo.
Notas sobre Homeado:
• ParacambiarIatemperaturadei horno duranteel procesode
cocciOn,optimaJatecia 'Bake',luegooprima 'Autoset'o Ias
teclasnum@icasapropiadashastaquese desplieguela
temperaturadeseada.
• ParacambiarIatemperaturadeI horno durante'Preheat',oprima
dosvecesIatecJa'Bake',Iuegooprima'Autoset'o Iasteclas
num6ricasapropiadashastaque sedesplieguelatemperatura
deseada.
• Si olvidaapagarel horno,seapagar_autom4ticamentedespu#s
detranscurrir 12horas.Si@seadesactivarestacaracter{stica,
yeaIa p4gina55.
• Parasugerenciasadicionalessobrehorneadoy asado,consulte
el foileto "La CocinaF4ciI".
8. Verifiqueel progresode Ia cocciOncuando hayatranscurrido el
tiempo minimo recomendado.Contimie la cocci6nsJes necesario.
7. AI t@minode la cocciOn,oprJmala tecJa'CANCEL'. ....
,CANCEL
8. Retire eJalimento del homo. ,............
Diferencias deJ homeado entre su homo
antiguo ysu homo nuevo
EsnormaIobservaralgunasdiferenciasen eI tiempo de horneado de
su horno antiguoy su horno nuevo.Vea "Ajustede la Temperaturadel
Homo" en la p_gina56.
Homeado per Conveeei6n
(modelos seJectos]
Cuandohorneepor convecci6n,programela temperaturanormal de
horneado.Elcontrol reducir4 autom4ticamentelatemperatura
programadaen 25° F 05° C].
Para programar Homeado per convecci6m
1. OprJmalatecla 'Convect'o la tecla 'ConvectBake'. ' Convect
, El[cono'BAKE'y el simbolo'FAN' destellar4n. Bake ......
" '000' destellar4en el indicadorvisual "..........................."
Autoset
2+ Seleccionelatemperaturadel homo+Oprima latecla ",..................
'Autoset'para350° F (175° C] o Iasteclas numericasapropiadas.
, Cadavezqueoprima Ia tecia 'Autoset'la temperaturase
aumentar_en 25° F 05° C]. Latemperaturadel horno puede
ser programadade 170° a 550°.
3. Oprima ]atecla 'ConvectBake'nuevamenteo esperecuatro
segundos.
. El [cono 'BAKE'dejar_de destelIar.
, El[cono'PREHEAT'se iluminar4en el indicadorvisual.
, Enel indicadorvisual se desplegar_100° (40°] o la temperatura
reaIdeI homo si esque es superiora 100° F (40° C]. Latem-
peratura aumentar_en incrementosde 5° F [3° C] hasta
Ilegara latemperaturaprogramada.
. Els/mbolo'FAN' comenzar_a girar.
4. Esperea que el horno se precalientedurante 8-15 minutos.
, Cuandoel horno Hegaa la temperaturaprogramadase
escuchar_una serialsonora larga.
, El icono 'PREHEAT'se apagar_.
, Sedesplegar_la temperaturaprogramada.
, Paraverificar la temperaturaprogramadadurante el
precalentamientodel homo, optima latecla 'ConvectBake'.
5O
conto
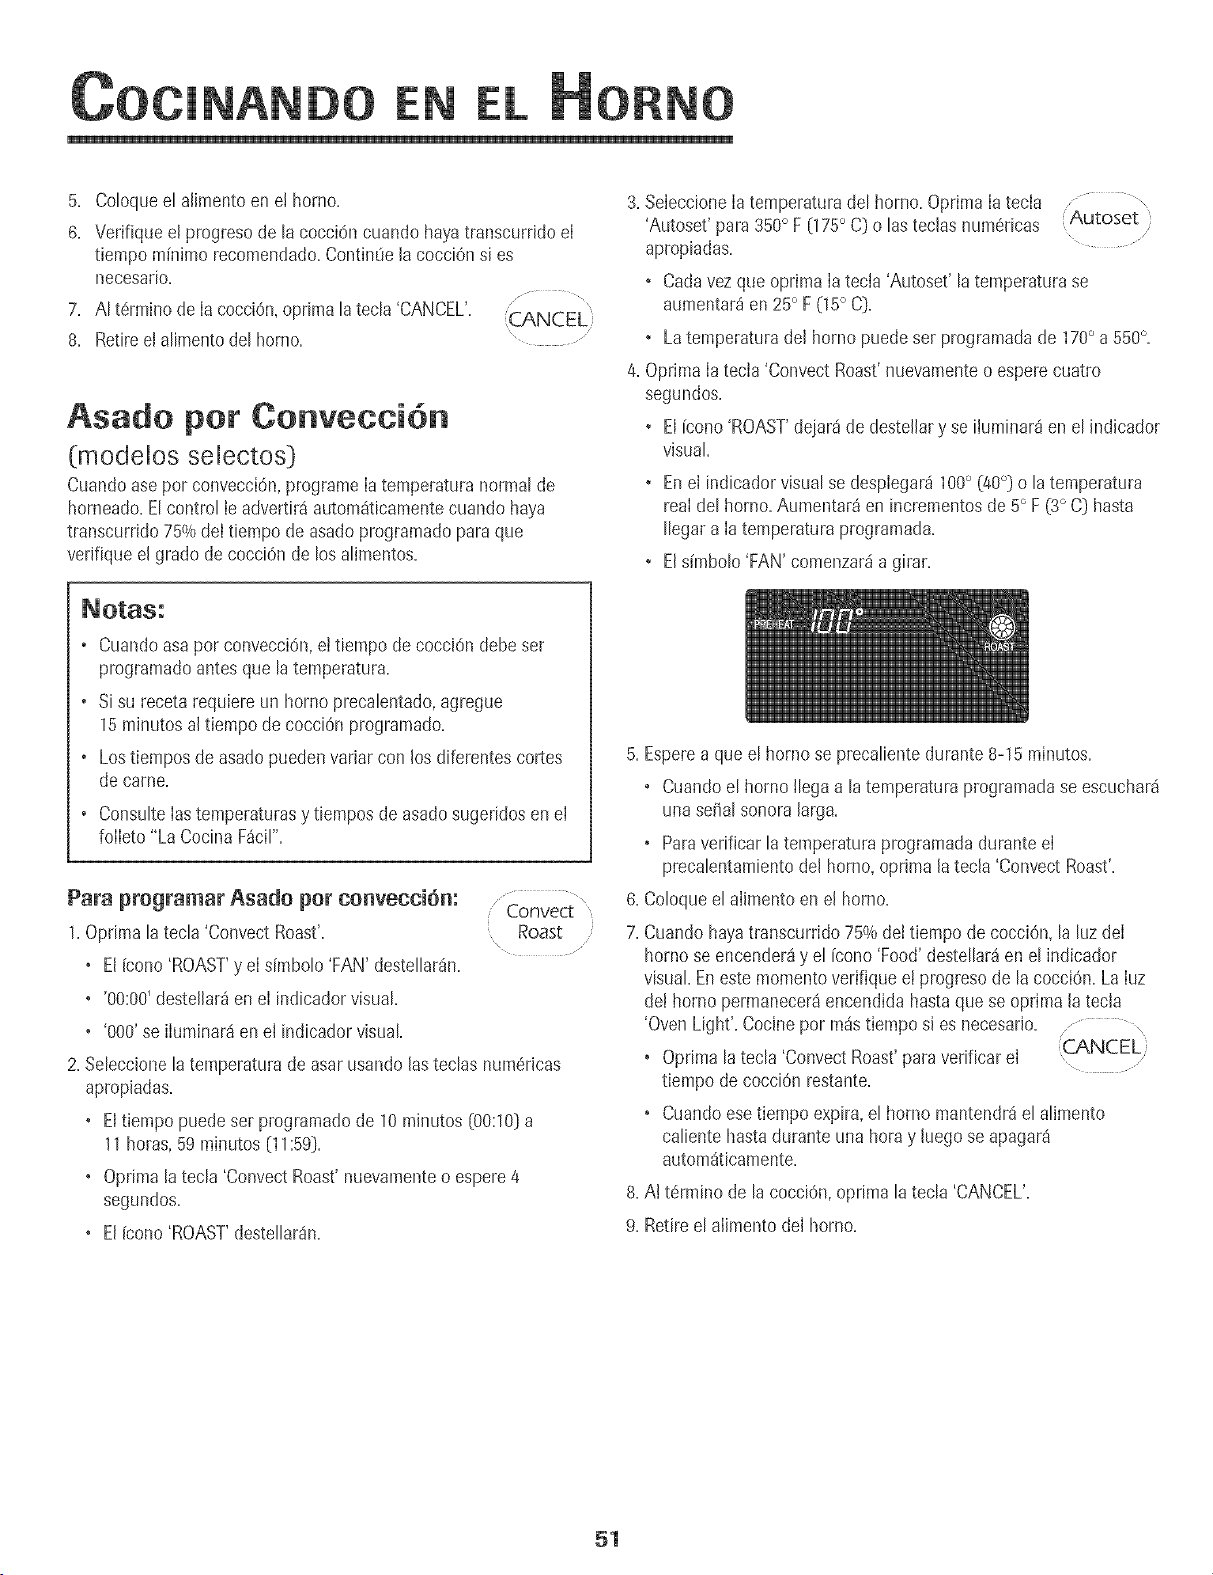
EN
5. Coloqueel alimentoen e! homo.
6. Verifique el progresode lacocci6n cuando hayatranscurridoel
tiempo mfnimorecomendado.ContinOela cocciOnsi es
necesario.
7+ AI t6rminode IacocciOn,oprimala tecla 'CANCEL'. +::CANCEL
8+ Retireel alimentodel homo+ ..........
Asado per Conveeei6n
(modelos selectos])
Cuandoase por convecci6n,programeIatemperaturanormal de
horneado=Elcontrol Ieadvertira autom_tlcamentecuando haya
transcurrido 75%deI tlempode asadoprogramadopara que
verifiqueel grado de cocciOnde los alimentos=
3. SeleccioneIatemperaturadel homo. Oprima Iatecla ............. ,
'Autoset'para 350° F (175° C} o las teclasnum6ricas Autoset
apropiadas. .....
• Cadavez que oprimala tecla 'Autoset' la temperaturase
aumentar_en 25° F 05° C).
• La temperaturadel homo puede set programadade 170° a 550°,
4. Optima la tecla 'ConvectRoast'nuevamenteo esperecuatro
segundos.
• Elfcono'ROAST'dejar_ de destellary se iluminar8en el indicador
visual.
Enel indicadorvisualse despiegarJ100° (/t0°} o la temperatura
realdel horno.Aumentar_en incrementosde 5° F (3° C} hasta
Ilegara Iatemperaturaprogramada.
Elsfmbolo'FAN' comenzar_a girar.
o Cuandoasa por convecci6n,et tiempo de cocci6n debeset
programadoantesque latemperatura.
o Si su receta requiere un horno precalentado,agregue
15minutosal tiempo decocci6n programado.
o Lostiemposde asadopueden variarcon los diferentescortes
de came.
o ConsulteIastemperaturasy tiempos de asadosugeridosen el
folIeto "La CocinaF_cil".
Para programar Asado per convecci6n:
1+Optima latecla 'ConvectRoast'+
• El [cono 'ROAST'y eI simbolo'FAN' destellar_n.
• '00:00+destellar_en eI indicadorvisual
Convect
Roast
\
+ '000'se iluminar_en el indicadorvisual
2. Seleccionelatemperaturade asarusando lasteclas num6ricas
apropiadas.
• Eltiempo puedeset programadode 10 minutos {00:10}a
11horas,59 minutos (11:59}+
+ Oprimalatecla 'ConvectRoast'nuevamenteo espere4
segundos.
• El icono 'ROAST'destellarSn.
5. Esperea que el homo se precalientedurante 8-15 minutos.
• Cuandoel homo tlega a latemperaturaprogramadase escuchaM
unasepal sonoralarga.
• Paraverificar la temperaturaprogramadaduranteel
precalentamientodel horno,oprima la tecla 'Convect Roast'.
6. Coloqueel alimento enel homo.
7. Cuandohayatranscurrido75%dett+empode cocciOn,laluz deI
hornose encendeMy el [cono 'Food' destellar_en el indicador
visual Enestemomentoverifique e!progresode lacocci6n.La Iuz
de! hornopermanecer8encendida hastaque se oprimala tecla
'OvenLight'. Cocinepor rosstiempo si es necesario.
Oprimala tecla 'ConvectRoast'paraverificarel +C__,NCEL)
+
tiempo de cocciOnrestante.
• Cuandoesetiempo expira, el homo mantendrael alimento
calientehastadurante una hora y hego se apagar_
autom_ticamente.
8.A! t6rmino de lacocciOn,oprima la tecla 'CANCEL'.
9. Retireel alimento del homo.
51
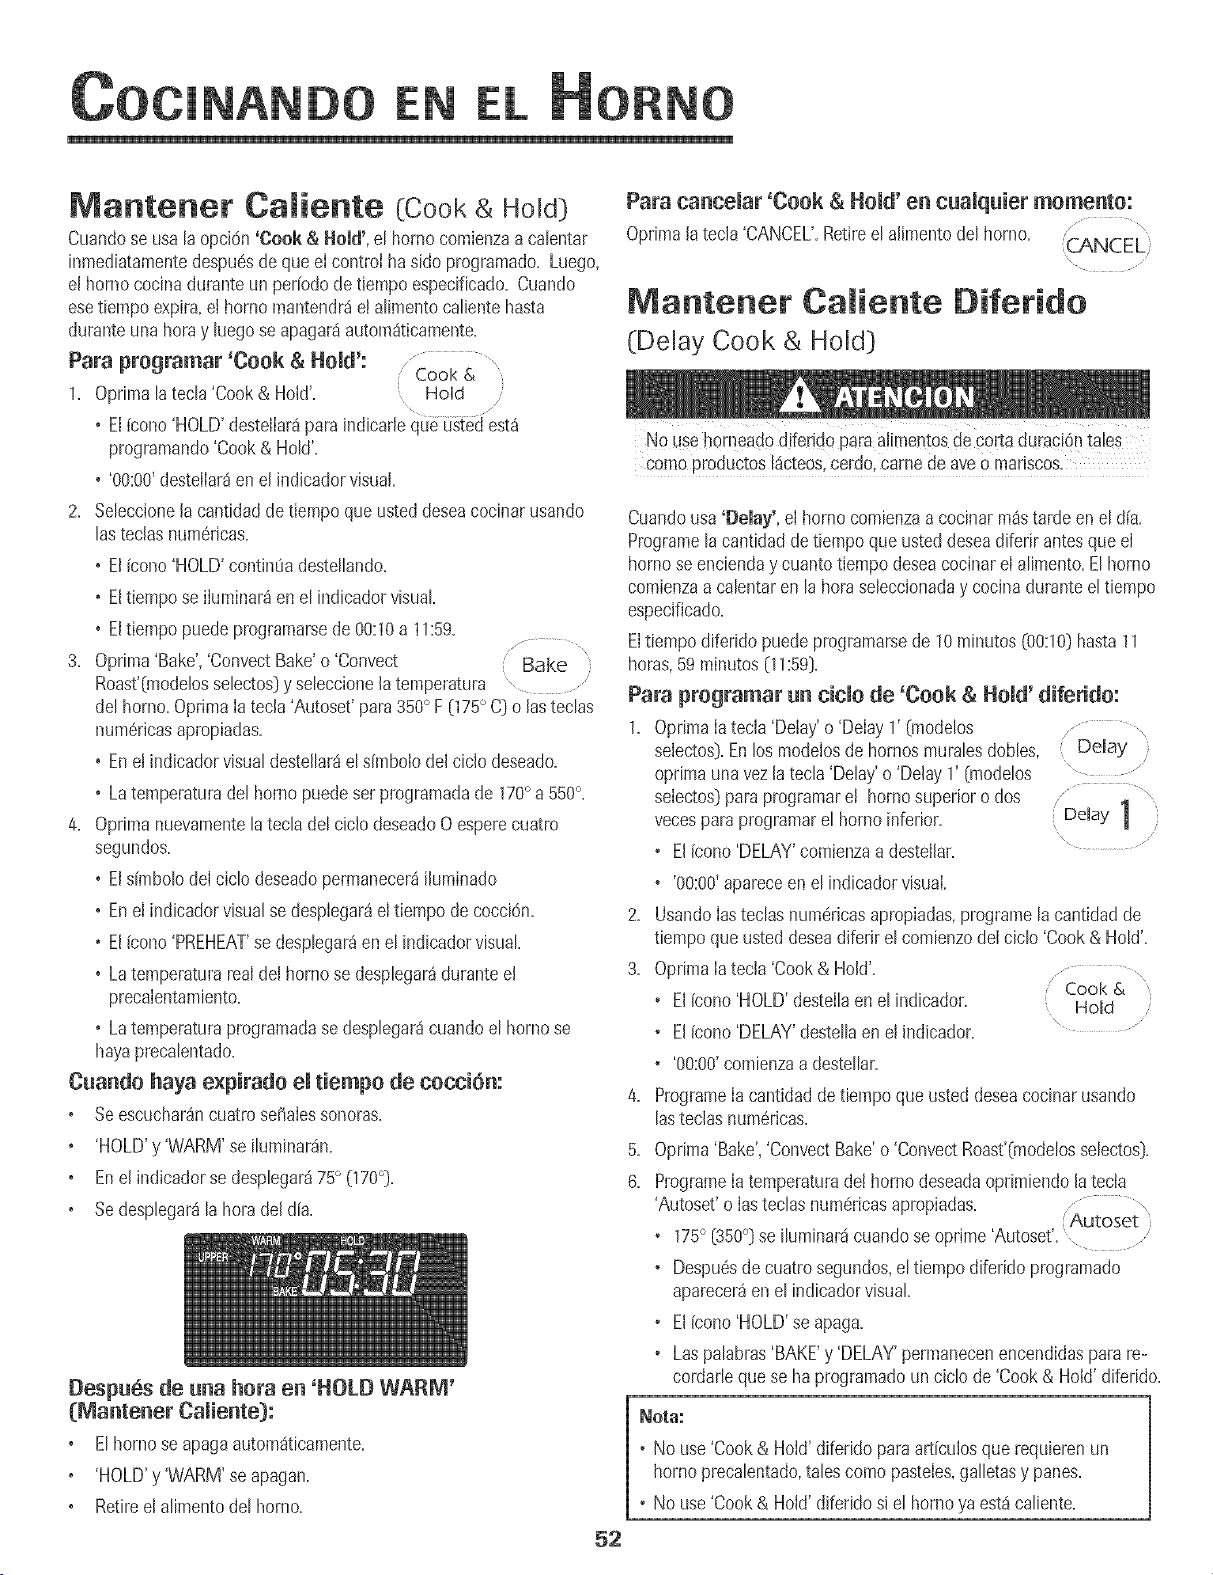
EN
Mantener Caliente (Cook& Hold)
Cuandose usala opci6n'Cook & Hold', et horridcomienzaa calentar
inmediatamentedespu6sde que elcontrol haside programado.Luego,
el hornococinaduranteun per[odede tiempoespecificado.Cuando
esetiempoexpira+el homo mantendr_iel alimentocalientehasta
duranteunaheray tuegose apagaMautomSticamente.
Para pregramar 'Cook & Held': ................. ,
Cook &
1. Oprima[atecla 'Cook & Hold'. Hold
+ El[cone'HOLD'desteliar_paraindicar[equ_O_ei] est_
programando'Cook& HoW.
• '00:00'desteliar_en el indicadorvisual.
2. Seleccione[acantidadde tiempoqueusteddeseacocinarusando
lasteclasnum6ricas.
+ El[cone'HOLD'contin0adeste%ndo.
•Eltiemposeiluminar_enel indicadorvisual
+ Eltiempopuedeprogramarsede00:10a 11:59.
3. Oprima'Bake','ConvectBake'o 'Convect Bake
Roast'(modelosselectos}y seleccionelatemperatura
del borne.OptimaIa tecla 'Autoset'para 350° F 075° C} o lasteclas
num6ricasapropiadas.
+ Enel indicadorvisual destellar8el simbolodel ciclodeseado.
+ Latemperaturadel borne puedeset programadade 170° a 550°.
4. Oprimanuevamentelatecladel ciclodeseadoOesperecuatro
segundos.
• ElsffnbolodeIciclo deseadopermanecer_ihminado
+ En el indicadorvisualse desplegar_eltiempo decocci6n.
• El[cone'PREHEAT'sedesplegar_en el indicadorvisual
+ La temperaturarealdel homose desplegar_duranteel
precalentamiento.
+ La temperaturapmgramadase desplegar8cuandoel borne se
hayaprecalentado.
Cuande haya expirade emtiempe de cecci6m
Seescuchar_ncuatm sefiaiessonoras.
'HOLD'y 'WARM'se iluminaran+
Enel indicadorse desplegar_i75° (170°].
Sedesplegar_la hera del dia.
Bespu6s de una hera en 'HOLD WARM'
Elhomose apagaautom_tieamente,
'HOLD'y 'WARM'se apagan.
Retireel alimentodel borne.
52
Para cancemar'Cook & Herod'en cuamquier memento:
Optimalatecla'CANCEL'.Retireel alimentodel horno. .......... ....
:CANCEL:
\
Mantener Caliente Diferido
(Delay Cook & Hold)
NOusehorneadodifeddoparaa+!mentosde cortaduraciOntales
comepmductoskieteos,cerdo,camede aveo mariscos.
Cuandousa'Delay', ei homo comienzaa cocinar m4stardeen el dia.
Pmgramelacantidaddetiempoque usteddeseadiferir antesque el
hornose encienday cuantotJempodeseacocinarel alimento.Elhomo
comienzaa calentaren lahoraseleccionaday cocinaduranteel tiempo
especificado.
Eltiempodiferido puedeprogramarsede 10 minutes(00:10)hasta 11
horas,59 minutes(11:59).
Para pregramar un cicmede 'Cook & Herod'diferide:
OprimaIatecla'Delay'o 'Delay1' (modelos
selectos).En los modelosde homesmumlesdobles,
optimaunavezlatecla'Delay'o 'Delay1' (modelos
selectos)paraprogramare! homosuperioro dos
vecesparaprogramarel homo inferior.
• El (cone'DELAY'comienzaa destellar.
,: Delay
[ Delay J
\
'00:00+apareceen el indicadorvisual.
2. UsandoIasteclasnum6ricasapropiadas,pmgramela cantidadde
tiempoqueusteddeseadiferir el comienzodelciclo 'Cook& Hold'.
3. OprimaIatecia'Cook& Hold'. .............. ,,
Cook &
+ Elicono 'HOLD'destellaenel indicador. Hold
•Elicono 'DELAY'destellaen el indicador. \ ......
4,
5.
6.
+ '00:00' comienza a destellar.
ProgrameIa cantidadde tiempo que usteddeseacocinarusando
lasteclas num6ricas.
Oprima 'Bake', 'Convect Bake' o 'Convect Roast'(modelos selectos).
Programe[a temperaturadeJhomo deseadaoprimiendo[atecia
'Autoset'o Iasteclasnum6ricasapropiadas..... (Autoset
• 175° (350°) se iluminar5cuandose oprime'Autoset'., ....
+ Despu6sde cuatro segundos,eltiempodiferido programado
aparecer5en el indicadorvisual
+
+
Elicono 'HOLD'se apaga.
Laspahbras 'BAKE'y 'DELAY'permanecenencendidasparare-
cordarleque se ha programadoun ciclo de'Cook& Hold'diferido.
Nora:
+ No use'Cook& HoWdiferidoparaart[culosque requierenun
homo precalentado,talescomepasteles,galletasy panes.
• No use'Cook& Hold'diferidosi el borneya est_caliente.
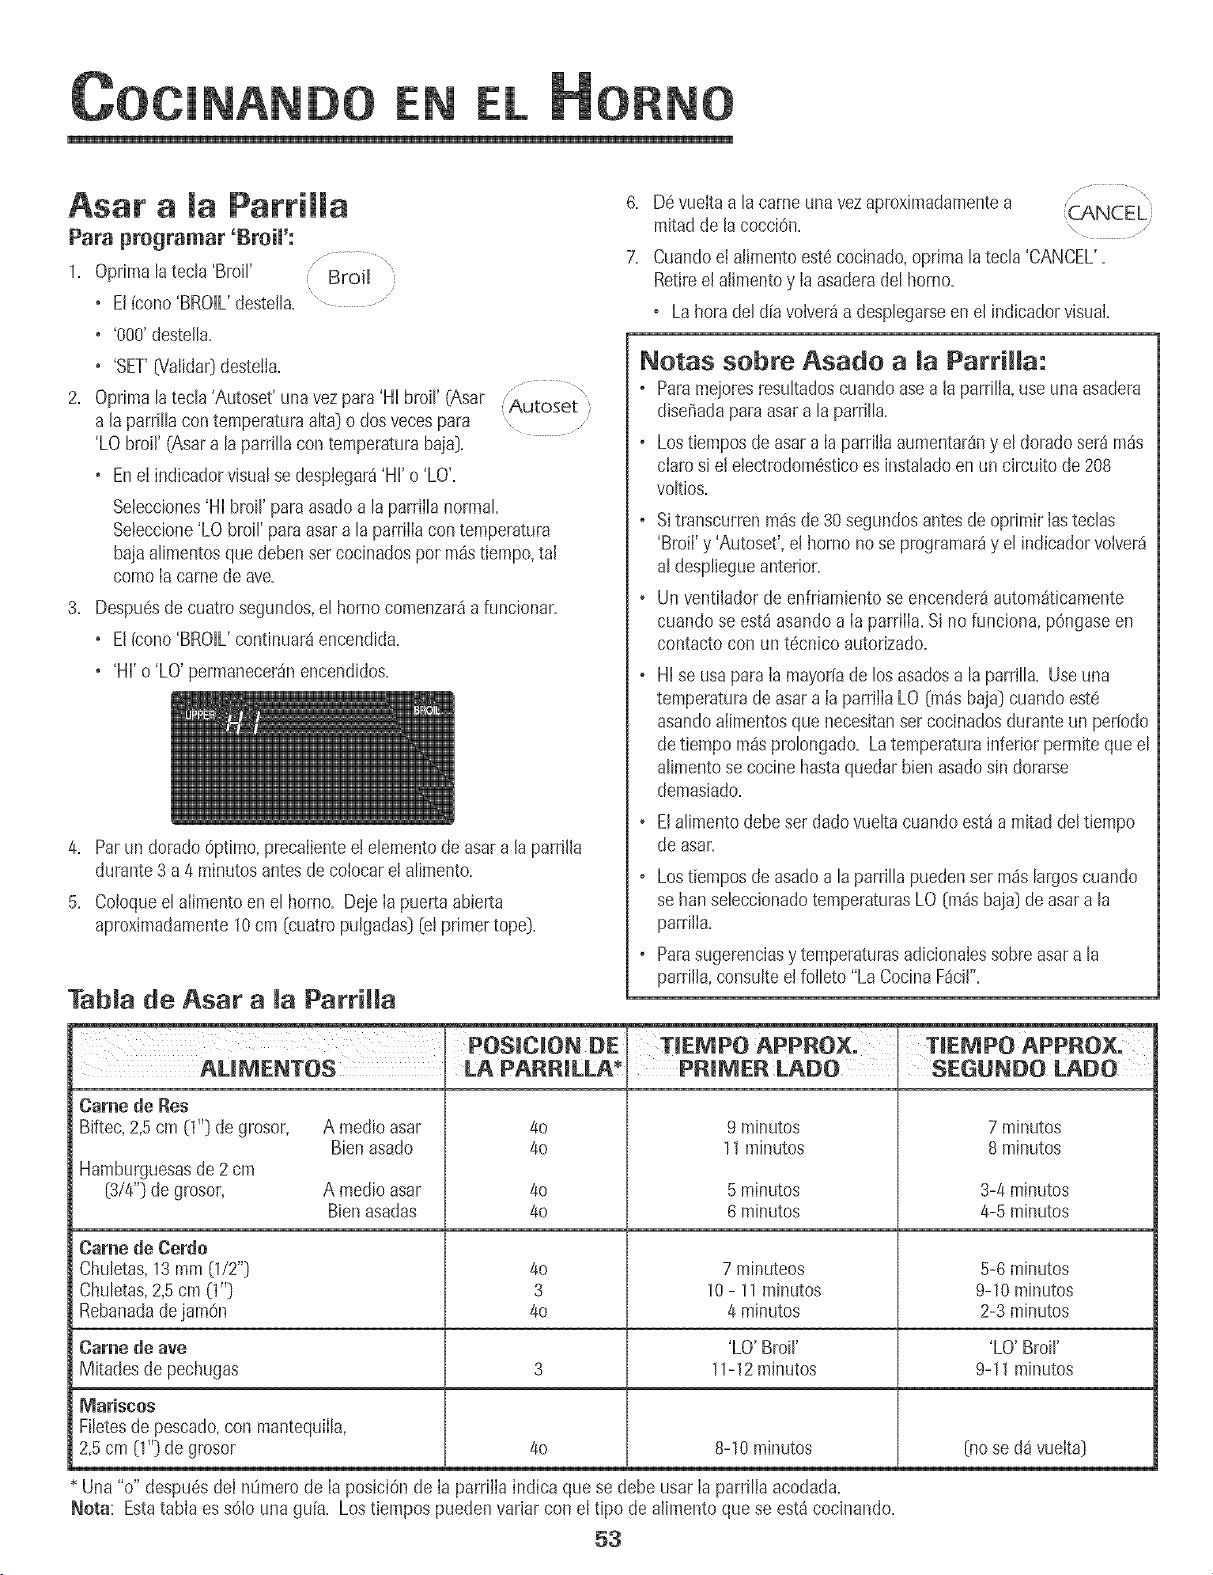
EN
Asar a [a ParriHa
Para programar _Broil':
1. Oprima[atecB 'Broil' Broil
+ El[cono'BROIL'deste[[a. '.....................
• '000'deste[[a.
+ 'SET'0?aiidar}desteila.
2. Oprima[atec[a'Autoset'una vezpara'Hi broil' (Asar ('Autoset',
6. D6 vueltaa [a cameunavezapmximadamentea ..................
mJtadde [a cocci@+ ........
7. Cuandoel alimentoest6cocinado,oprima [atec[a'CANCEL'.
Retiree[ alimentoy [aasaderade[horno.
o Lahorade[d[avolver_a despbgarseen e[ indbador visual.
Netas sebre Asade a [a ParriHa:
o Paramejoresresu[tadoscuandoasea [a parr[Ha,use unaasadera
diseffadaparaasara [a parrJ[[a.
a [a parri[[acontemperaturaa[ta} o dosvecespara .....
'LO broil' (Asara la parrillacon temperaturabaja}.
+ Ene[ indicadorvisualsedespiegar4'Hl'o 'LO'.
Selecciones'HI broil' para asadoa la parrii[anormal
Seleccione'LO broil' paraasar a la parriiiacon temperatura
bajaalimentosque debensetcocinadospot m_stiempo,ta[
como[a camedeave.
3. Despu6sdecuatrosegundos,el horno comenzar4afuncionar.
+ Elicono 'BROIL'continuar4encendida.
+ 'HI'o 'LO' permaneceranencendidos.
4. Parun dorado@timo, precaiientee[ ebmento de asara [aparrfl[a
durante3 a 4 minutosantesdecobcar el alimento.
5. Co[oqueel alimentoen el homo+Deje[a puertaabierta
aproximadamente10cm [cuatro pu[gadas}[el primertope).
Tab[a de Asar a [a Parri[[a
o Lostiemposde asara Iaparri[iaaumentar4ny e[ doradoseraim4s
ciaro si e[ ebctrodom6sticoes instaladoen un circuitode 208
voItJos.
o Sitranscurrenm4sde30segundosantesde oprimirIasteclas
'Broil' y 'Autoset',el homo no se programar_y el indicadorvolver_
al despliegueanterior.
o Un ventiiadorde enfriamientose encender4automdticamente
cuando se estdasandoa Ia parriIIa.Si nofunciona, pOngaseen
contactocon unt@nico autorizado.
o HI se usapara Ia mayoffade losasadosa la parrilla. Useuna
temperaturadeasara Ia parrillaLO (m4sbaja} cuandoest6
asandoaiimentosque necesitanser cocinadosduranteun per[o@
detiempo m4sprolongado. La temperaturainferiorpermite queel
alimentose cocinehastaquedarbbn asadosin dorarse
demasiado.
o EIa[imentodebeset dadovueltacuandoest4a mitaddeltiempo
de asar.
o Lostiemposde asadoa la parrillapuedenset m4slargoscuando
se hartsebccionadotemperaturasLO (m4sbaja}de asara la
parriiIa.
o Parasugerenciasy temperaturasadicionaIessobreasara la
parriiIa,consulteel folbto "La CocinaF4ci[".
AUMENTOS
Came de Res
Biftec,2,5cm (1+'}de grosor,
Hamburguesasde2 cm
(314"}de grosor,
A medio asar
Bien asado
POSlOION DE
LA PARRJLLA* JPR@_ER LADO I SEGUNDO LADO
4o
4o
9 minutos
11mJnutos
A medio asar 40 5 minutos
BJenasadas 40 6 minutos
Came de Cerdo
Chubtas, 13 mm (1/2"} 40 7 minuteos
Chubtas, 2,5 cm (1"} 3 10 - 11 minutos
Rebanada de jamOn 40 4 minutos
Came de ave 'LO' Broil'
Mitades de pechugas 3 11-12 mJnutos
4o 8-10minutos
Mariscos
Fi[etesde pescado+con mantequiila,
2+5cm O'+)de grosor
7 minutos
8 minutos
3-4 minutos
4-5 minutos
5-6 minutos
9-10 mJnutos
2-3 minutos
'LO' Broil'
9-11 minutos
[no se da vueJta}
Una "o" despu@deI ntimero de la posici6nde la parriiia indica quese debe usar laparrilia acodada.
Nora: Estatabla es s61ouna gu[a. Los tiempospuedenvarJarcon el tipo de alimentoque se est_cocinando.
53
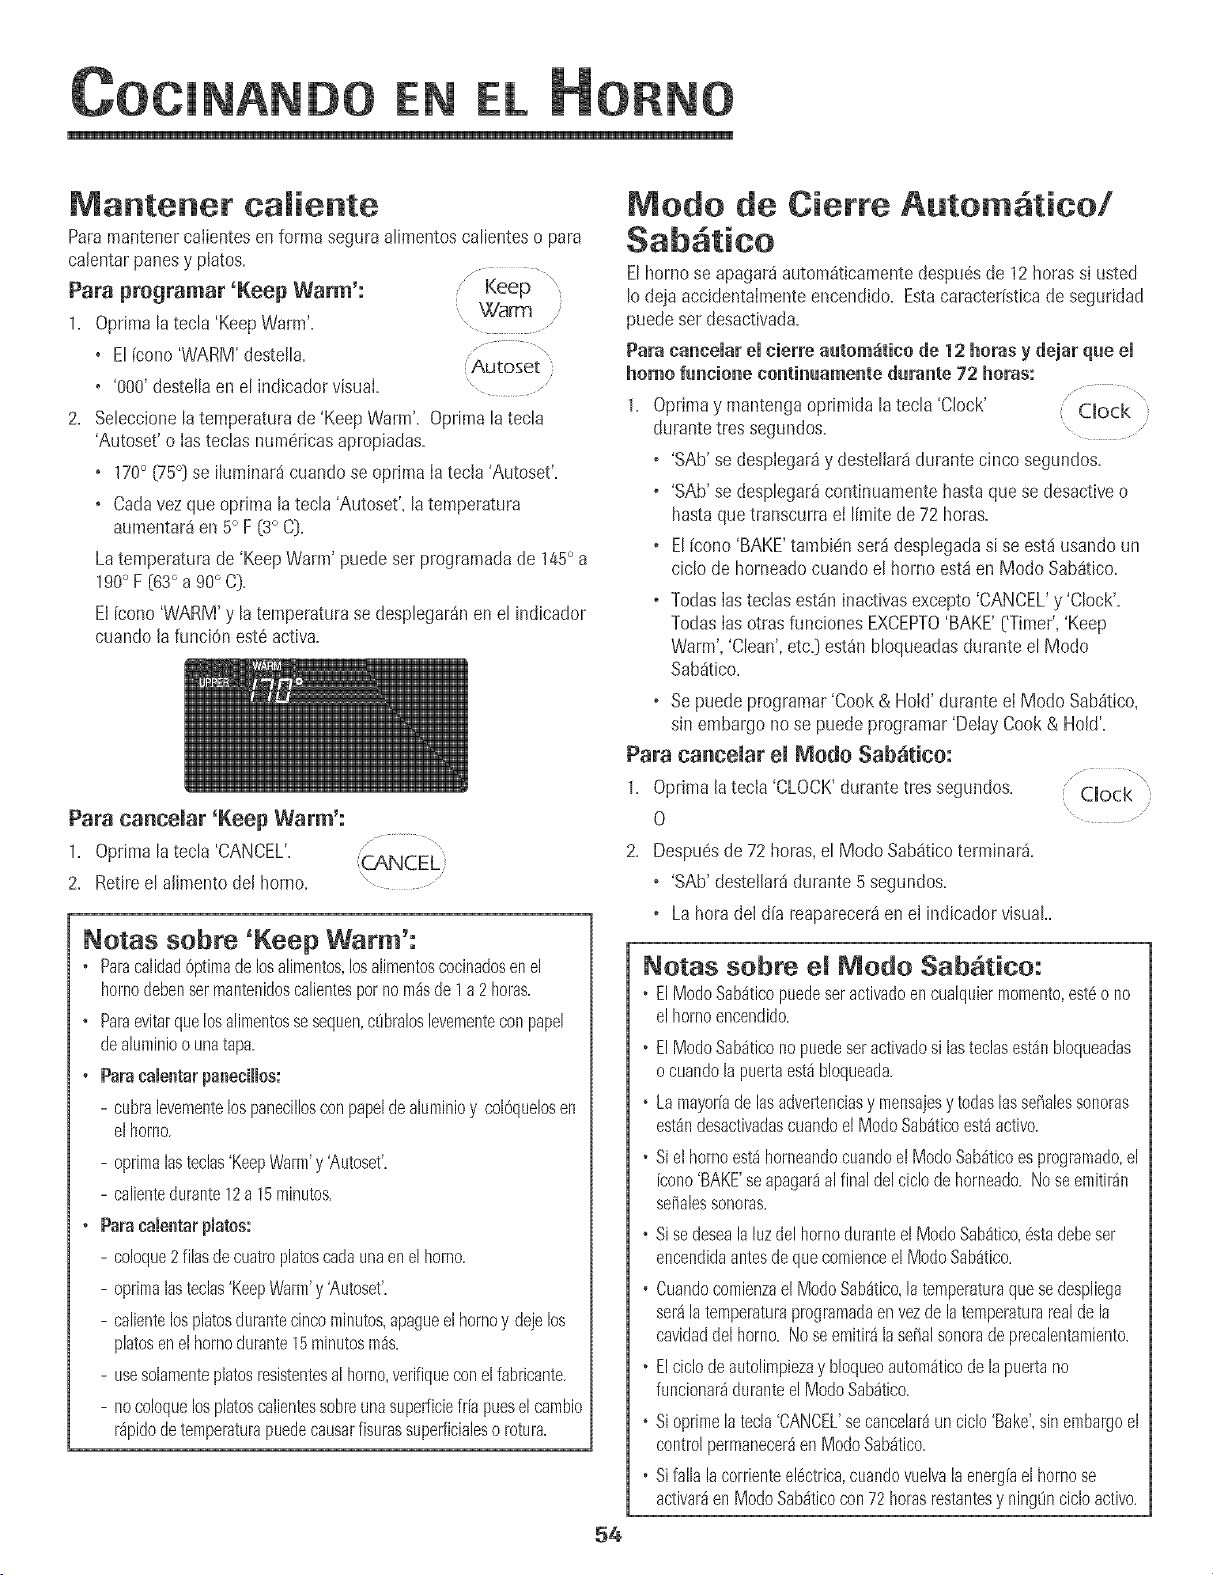
EN
Mantenet caJiente
Paramantenercaiientesen forma segura a[imentosca[ienteso para
ca[entarpanesy piatos+
Para programar 'Keep Warm':
1. Optimalatecla 'KeepWarm'... Warm..... ,
+ Et[cono'WARM'desteJta. Autoset
• '000'destettaen et indicadorvisual+ " .......
2. Seleccionela temperaturade 'KeepWarm'. Oprimala tecla
'Autoset'o Iasteclas num@icasapropJadas.
+ 170° (75°) se iluminar_ cuando se oprima la tecla 'Autoset'.
+Cada vez que optima latecla 'Autoset',latemperatura
aumentar4en 5° F (3° C[.
La temperatura de 'Keep Warm' puede set programada de 145° a
190° F [63° a 90° C].
El[cono'WARM'y la temperaturase desplegar4nen el indicador
cuando la funclOnest6 activa+
Para cancelar 'Keep Warm':
1. Opnmalatecla 'CANCEL'.
2. Retireel alimentodel homo.
CANCEL
BJotas sobre 'Keep Warm':
* ParacalidadOptimadelosalimentos,losalimentoscocinadosenel
hornodebensermantenidoscalientespornom_sde1a2horas.
* Paraevitarquelosalimentossesequen,c0braloslevementeconpapel
deahminioounatapa.
, ParacalentarpaneciHos:
- cubralevementelospanecillosconpapeldeahminioy colOquelosen
elhorno.
- optimalasteclas'KeepWarm'y 'Autoset'.
- calientedurante12a 15minutos.
, Paracalentarpmatos:
- coloque2 filasdecuatroplatoscadaunaenel horno.
- oprimalasteclas'KeepWarm'y 'Autoset'.
- calientelosplatosdurantecincominutos,apagueel homoy dejelos
platosenelhomodurante15minutosm4s.
- usesolamenteplatosresistentesal homo,verifiqueconel fabricante.
- nocoloquelosplatoscalientessobreunasuperficiefrh puesel cambio
r4pidodetemperaturapuedecausarfisurassuperficialeso rotura.
Mode de Cien'e Autom tico/
54
Elhomo se apagar4autom_ticamentedespuOsde 12 horassi usted
Io dejaaccidentalmenteencendido. Estacaracteristicade seguddad
puedeset desactivada.
Para canceiar el cierre autom4tico de 12 horus y dejur que el
homo fmlcione contimiamente durunte 72 betas:
1. Oprimay mantengaoprimida la tecla 'Clock' Clock ;
durantetres segundos. , .............
o'SAb' se desplegar_y destellar4durante cinco segundos.
o'SAb' se desplegar_continuamentehastaquese desactiveo
hastaquetranscurra el I[mite de 72 horas.
o El[cono'BAKE'tambi_nser_desplegadasi se est_usandoun
ciclo de horneadocuando el homo est4en Modo Sab4tico.
o TodasIasteclas est4ninactivasexcepto 'CANCEL'y 'Clock'.
TodasIasotrasfunciones EXCEPTO'BAKE'('Timer','Keep
Warm','Clean',etc.) est_nbloqueadasdurante el Modo
Sab4tico.
o Sepuedeprogramar'Cook & Hold' durante el Modo Sab4tico,
sin embargonose puedeprogramar'DelayCook& Hold'.
Para cancelar el Medo Sab_tice:
1. Oprima la tecla 'CLOCK'durantetres segundos.
O
2. Despuesde 72 horas,el Modo Sab4ticoterminate.
o'SAb' destellar4durante 5segundos.
o Lahoradel d[a reaparecer4en el indicadorvisual
\
" Clock
Notas sobre el Mode SabOt+co:
• ElModoSab4ticopuedeseractivadoencualquiermomento,est6ono
elhomoencendido.
, ElModoSab4ticonopuedeseractivadosi lasteclasest4nbloqueadas
ocuandola puertaest4bloqueada.
, Lamayorfadelasadvertenciasy mensajesy todaslasserialessonoras
est4ndesactivadascuandoel ModoSab4ticoest4activo.
, Sielhomoest4horneandocuandoel ModoSab4ticoesprogramado,el
icono'BAKE'seapagar4al finaldelciclodehorneado.Noseemitir4n
sefialessonoras.
, SisedesealaluzdelhornoduranteelModoSab4tico,6stadebeser
encendidaantesdequecomienceel ModoSab4tico.
• CuandocomienzaelModoSab4tico,latemperaturaquasedespliega
set4laternperaturaprogramadaenvezde latemperaturarealde la
cavidaddelhomo.Noseemitir4laserialsonoradeprecalentamiento.
, Elciclodeautolimpiezay bloqueoautom4ticodelapuertano
funcionar4duranteelModoSab4tico.
• Sioprimela teclaCANCEL'secancelar4un ciclo'Bake',sinembargoel
controlpermanecer4enModoSab4tico.
• Sifallalacorrienteel@trica,cuandovuelvala energiael hornose
activar4anModoSab4ticocon72horasrestantesy ning0ncicloactivo.
EN
Ajuste de [a temperatura de[
Laexactitudde [astemperaturasdel homo escuidadosamente
probadaen [a f_brica. Esnorrnai notar aiguna diferenciaentre [a
temperaturade horneadoo en el dorado,entre un homo nuevoy un
homo antiguo. A medidaque el homo se usa,latemperaturadel
homo puedecambiar.
Ustedpuedeajustarla temperaturade[ homo, si consideraque su
borneno est_horneandoodorandoen forma correcta. Paradecidir
cuantodebecambiarla temperatura,programelatemperaturadel
homo a 25° F (15° C) rodsaita o m_sbajaque [atemperatura
indicadaen sus recetas,[uego hornee. Los resuitadosen etprimer
homeadole dar_nuna ideade cuanto debeajustarlatemperatura.
Ajuste de [a temperatura de[ homo: ...................
Bake
1. Oprima[a tecia 'Bake'.
2. Programe550° F (285° C) oprimiendo lastecias numericas
apropiadas.
3. Oprimay mantengaoprimida [atecia 'Bake'durante varies
segundoso hastaque 00° aparezcaenel indicadorvisual.
Si [atemperaturade[ homo ha side previamenteajustada,ei
cambioaparecerden el indicadorvisual. Per ejemplo,s[ la
temperaturadel borne fue reducidaen 15° F (8° C) el indicador
mostrar_- 15° (-8°).
4. Oprima[a tecia 'Autoset'para ajustar la temperatura.
Cadavezque se optima la tecia'Autoset', latemperaturacambia
en 5° F (3° C). Latemperaturade! bornepuedeset aumentadao
disminuidaen5° a35° F ( 3° a 20° F).
5. La herade[ d[a reaparecer_autom_ticamenteen el indicador
visual
No necesitareajustar[atemperaturade[ homo si hay unafaHao
interrupciOnde energ[aei6ctrica. El ajuste de la ternperaturaes
v_iido para 'Bake','Convect Bake'y 'ConvectRoast'(modelos
selectos)solamente.
o Elcic[o "Cook& Hold' recientementeprogramadoo en
progresoser8guardadoen memoria.
o Seescuchar_una seffalsonorapara indicar que el control
haaceptadoel ajuste'Favorites'.
Para comenzar un cic[o programatic come Favorite:
1. Oprima la tecla 'Favorite'.
o SedespIegar_el tiernpoy [a temperaturapara el ciclo 'Cook&
HoWprogramatic (s[ no hay ciclo 'Cook & HoW programado,
en el indicadorvisualse despiegar8'nonE'.)
2. Optima [atecla 'Bake','ConvectBake'o 'ConvectRoast'(modelos
seIectos).
o EIciclo Favoritecomenzar_inmediatamente.
. Els[mbo[ode[ cic[o se[eccionadose i[uminar_en el ind+cador
visual
o Elt[empo de cocci6nse [[um[nar_en el [ndicadorvisual
Cuando ha expirado el tiempo de cocci6m
o Seapagar_e[ cic[o seleccionado+
o Seencender_el simbo[o'HOLDWARM'.
o Ene[ indicadorse desp[egar_170° {75°}.
Para canoe[at un title favorite en progreso: ........... ,
1. OprJma[atecla 'CANCEL'.
o EIciclo favorite guardadoen memoriano ser8afectado.
2. Retire el aIimentodel borne.
Luz de[ Homo
LaIuzdel homo se eneiendeautom_ticamentesiempreque se abre
[apuerta de[ homo+ Cuandose cierra [a puerta,oprima [a tecia
'OvenLight' paraencendero apagar[a [uzdei homo.
Seescuchar_unasofia[sonoracada vezquese
optima [a tecIa'Oven Light'.
'Favorite' (Favorite)
Latecla 'Favorite'[e permiteguardaren memoriae[ tiempoy [a
temperaturade un cic[o 'Cook & Hold Bake','ConvectBake'o
'ConvectRoast'(modeIosselectos).
Paraprogramarun cic[o favorite, debe estar activao recientemente
programadauna funciOnde'Cook & HoW.
Para programar un nuevo cic[o Favorite o para
guardar come Favorite un cic[o 'Cook & Hold' que
est6 en progreso:
1+ Programeun cielode 'Cook & Hold'comese describeen la
secci6n 'Cook& Hold' en [ap%ina 52+
\
2. Opdmay mantengaoprimida [a tecIa'Favorite' Favorite'
durante tressegundos. .....
Respiradero de[ Homo
Elrespiraderode[ borneest_ubicado debajode[ panelde centre[en
su homo mural.
Cuandoe[ borne est_ en use,et _reacercade[ respiraderode[ borne
puedecalentarse1osuficientecome paracausarquemaduras+No
bIoquee[a aberturade[ respiraderoparaobtener mejolesresuitados
de[ horneado+
55
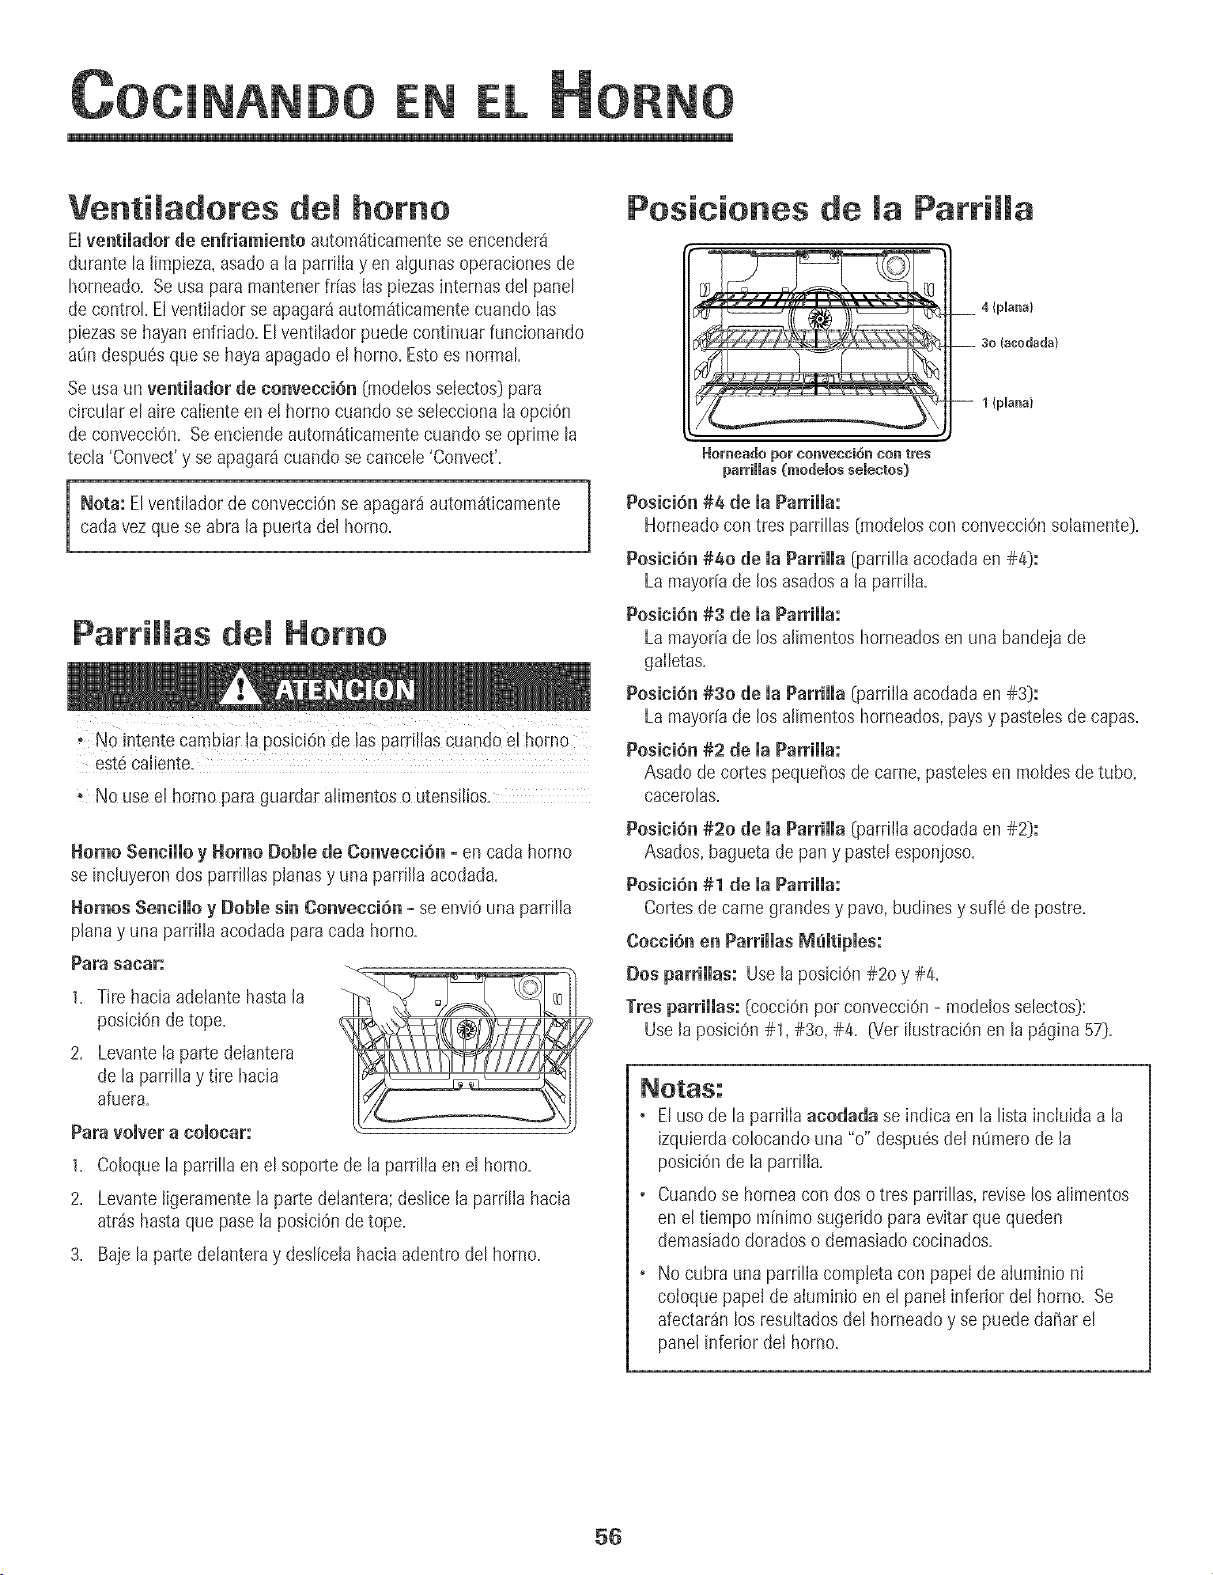
EN
Ventiladores del homo
Elventiiadorde enfriamiento autom_ticamentese encendera
durante la limpieza,asadoa la parrilla y enalgunasoperacionesde
horneado+Seusa para mantenerfrfas Iaspiezasinternasde[ pane[
de control El ventilador se apagar_autom_ticamentecuando Ias
piezasse hayanenfriado+El ventilador puede continuarfuncionando
a_ndespu6sque se hayaapagadoel homo+Estoes normal
Se usaun ventilador de convenciOn [modelosselectos)para
circularel aire caliente en e! homo cuandose seleccionaIa opciOn
de convecci6n+Seenciendeautom_ticamentecuando se oprime la
tecla 'Convect'y se apagaracuando se cancele'Convect'+
Nota: El ventiladorde convecci6nse apagar_autom_ticamente
cadavezque se abra la puerta del homo+
Parrillas del Homo
. No intente cambiar [a posic+Onde ias patti![ascuando e[ homo
est6ca[iente.
. No use e[ homo pare guardara[irnentoso utensilios.
Homo Senciiio y Homo Dobie de Gonvecci6n- en cada homo
se incluyerondos parrillas planasy una parrilla acodada+
Homes Senciiio y Doble sin ConvectiOn - se envi6 una parrilia
planay unaparrilla acodadaparacada homo+
Para sacar:
1. Tire hacia adetantehasta la
posiciOnde tope.
2. LevanteIa parte delantera
de laparrillay tire hacia
afuera.
Para volver a colecar:
1+ Co[oque[a parri[[a en 8[ soportede [a parri[iaen 8[ homo+
2+ Levanteligeramentela partedeiantera;deslice[a parrilia hacia
atr_s hastaque pase[a posiciOnde tope.
3+ Baje laparte de[anteray deslicelahacia adentrodel homo+
Posieienes de la ParriHa
4 {plana}
3o (acodada)
1 {plana}
_orl]/eado por ConveoGioI]/ COn tres
parriHas Onodelos selectos)
Posici6n#4 de maParriHa:
Horneadocon tres parrillas {modeloscon convecciOnsolamente)=
Posici6n #40 de maParrimma{parriliaacodadaen #4):
La mayorfade los asadosa [a parrilia=
Posici6n #3 de maParriiia:
La mayorfade los a[imentoshorneadosen una bandejade
gailetas=
Posici6n #30 de la Parrilla _earrii[aacodadaen #3):
La mayorfade los a[imentoshorneados,paysy pastelesde capas=
Posici6n #2 de maParrimma:
Asado de cortespequeffosde came,pastelesen moldesde tube,
oaeerolas=
Posici6n #20 de ia Parriiia (parri[iaacodadaen #2):
Asados,baguetade pany paste[esponjoso=
Posicihn #1 de maParHmma:
Cortesdecame grandesy pave, budinesy sufl6 de postre+
Cocci6n en ParrimmasIVlemtipmes:
Dos parrimmas:Usela posici6n#20 y #4.
Tresparriiias: [cocci6n perconvecci6n- modelosse[ectos):
Use[a posici6n#1, #3o, #4. _/er ilustraci6nen la p_gina57).
+ Elusede laparrilla acodada se indica en la lista incluida a la
izquierdaco[ocandouna "o" despu6sde[ n_merode [a
posici6nde [a parrilia.
• Cuandose horneacon doso tres parrillas, reviselos alimentos
en el tiempo minimosugeridopara evitarquequeden
demasiadodoradoso demasiadococinados.
+ No cubra una parri[[acompietacon pape[de aluminio ni
coioque papeide aluminio en el panelinferior dei borne. Se
afectardn los resultadosdel horneadoy se puededaffar el
panelinferior de[ borne.
56
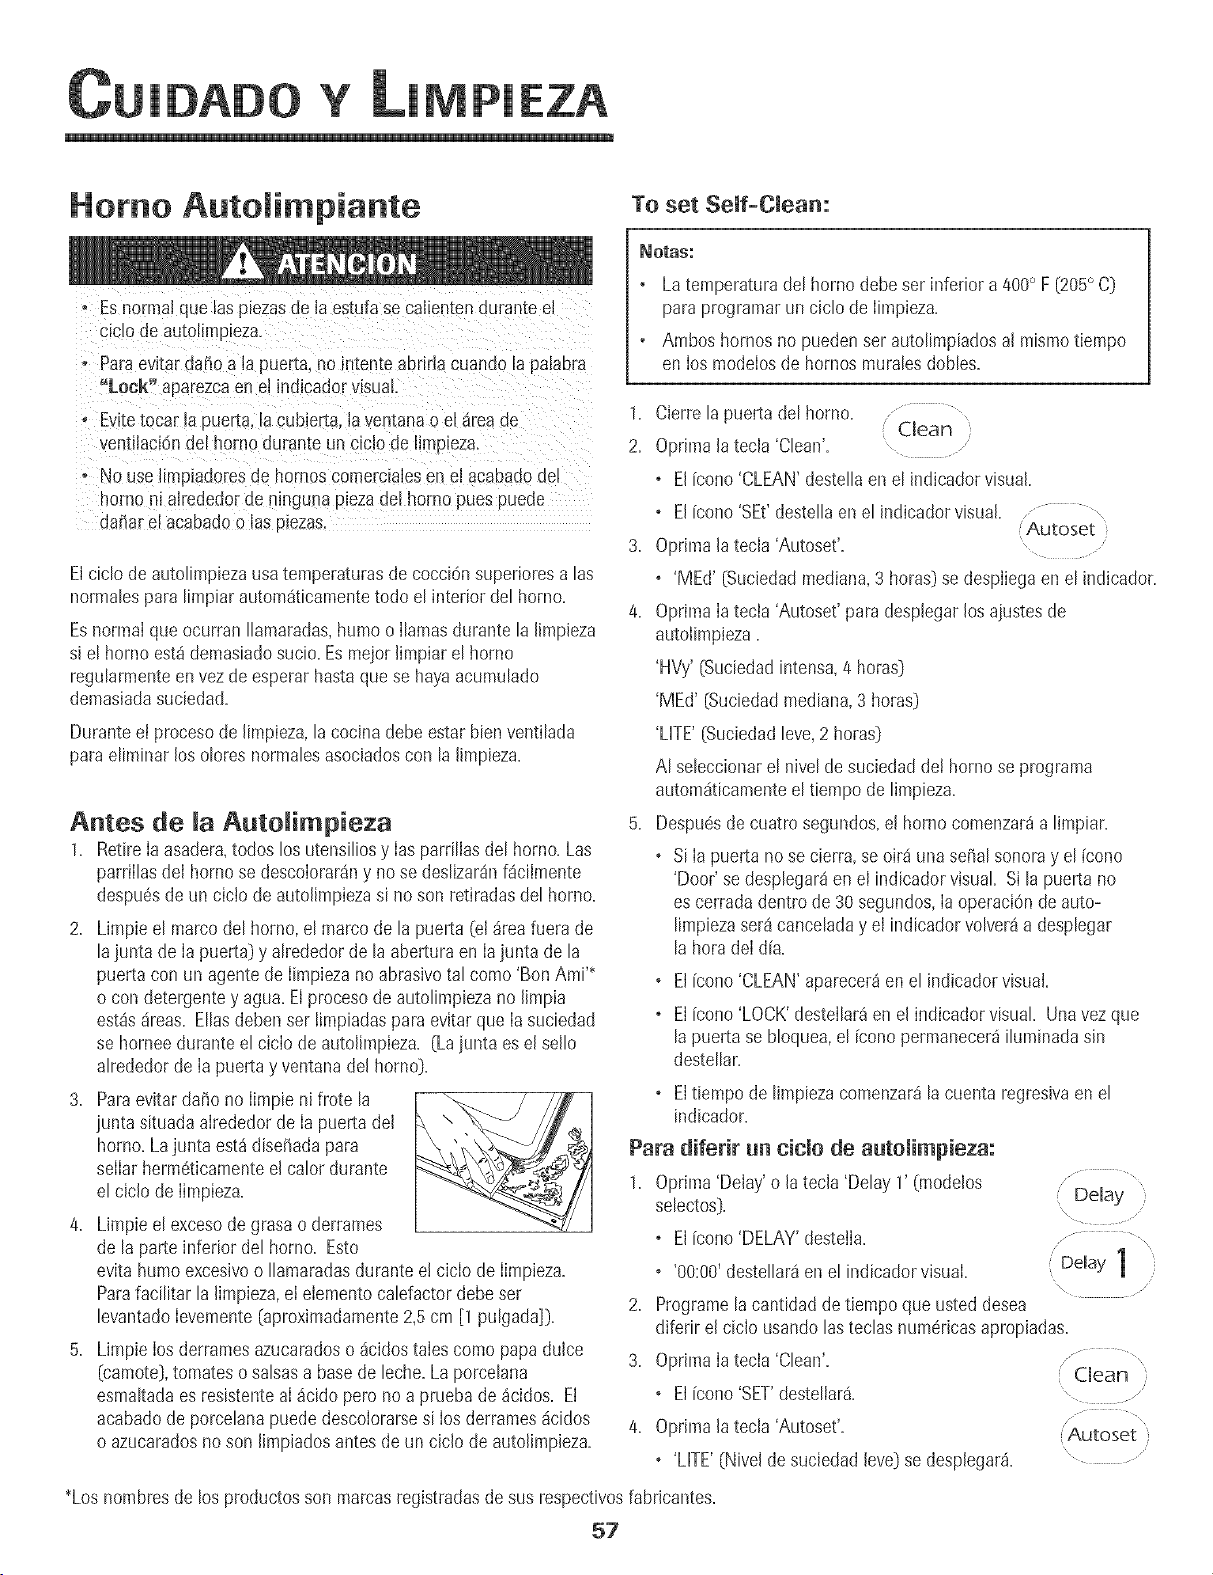
loAoq ¥ LIMPIA
Homo Autolimpiante To set Self-Clean:
o Esnormalque las piezasde la estufase calientendurante el
s_c_ode autolimp_za.
, ParaevRar@fro a la puerta,no mtente abrirlacuando la pa[abra
"Lock" aparezcaen el indicadorvisuaL.
o Evitetocar la puerta,la cubieita, la ventanao e_areaae
JentilaciOndel homo durante un ciclo de hmo_eza.
oNo use limpladoresde hornoscomercialesen el acabadooe,
nornoni alrededorde ninguna plezadel homo pues puede
dalharel acabadoo las plezas.
Elciclo de autolimpiezausatemperaturasde cocci6nsuperioresalas
normalesparalimpiar autom4ticamentetodo el interior del homo.
Esnormalque ocurran Ilamaradas,humo o Ilamasdurante la limpieza
si el horno est4demasiadosucio. Esmejorlimpiar el horno
regularmenteen vezde esperarhastaquese hayaacumulado
demasiadasuciedad.
Duranteet procesode [impieza,[a cocinadebeestar bienventi[ada
paraeliminar los oloresnormalesasociadoscon la [impieza.
Antes de la Autolimpieza
1. Retire [a asadera,todoslos utensi[iosy [as parriliasdel horno. Las
parrillasde[ hornose descolorar4ny nose deslizar4nf_cilmente
despu6sde un cicio de auto[impiezasi no son retiradas del homo.
2. Limpie el marco del homo, el marco de la puerta (e[4tea fuera de
la junta de [apuerta) y a[rededorde la aberturaen [ajunta de la
puerta con un agente de [impiezano abrasivotal como 'Bon AmP
o con detergentey agua. El procesode autolimpiezano [[mpia
est4s4reas. Eliasdebenset [impiadaspara evRarque [asuciedad
se horneedurante el cic[ode autolimpieza. (Lajunta es el sello
alrededorde Iapuerta y ventana del homo).
3. Paraevitar da_ono limpie ni frote la _ _
iunta situadaalrededorde Ia puerta del \,
horno. Lajunta est4 dise_adapara
selIarherm6ticamenteel calor durante
el ciclo de Iimpieza.
4. Limpie e[ excesode grasao derrames
de la parte inferior del homo. Esto
evita humoexcesivoo Ilamaradasdurante e! ciclo de Iimpieza.
Parafacilitar la limpieza,el elementocalefactordebeser
levantadoIevemente(aproximadamente2,5 cm [1 pulgada]}.
5. Limpie los derramesazucaradoso 4cidostales como papa dulce
(camote},tomateso salsasa basede leche.Laporcelana
esmaRadaes resistenteaI _cido pero no aprueba de4cidos. El
acabadode porcelanapuededescolorarsesi losderrames4cidos
o azucaradosnoson limpiadosantesde un ciclo de autolimpieza.
_OtaS:
• Latemperaturade[ homo debe ser inferior a 400° F [205° C]
paraprogramarun ciclode limpieza.
° Ambos hornosno puedenserautolimpiadosalmismotiempo
en los modelosde hornos mura[esdomes.
1. Cierre[a puertadel horno..............
Clean )
2, 0prima latecla 'Clean'= ....
o Elicono 'CLEAN'destellaenel indicadorvisual.
o El[cone'SEt'destellaenel indicadorvisual........................
Autoset
3. Oprima[atecla 'Autoset'.
o 'MEd' [Suciedadmediana,3 horas)se despliegaen el indicador.
4. OprimaIatecla 'Autoset'para desplegarlos aiustesde
autolimpieza.
'HVy'[Suciedadintensa,4 horas]
'MEd' [Suciedadmediana,3 horas)
'LifE' [Suciedadleve,2 horas]
AI seleccionarel nivel de suciedad de! homo se programa
autom4ticamenteel tiempo de limpieza.
5. Despu#sdecuatro segundos,el homo comenzar_a limpiar.
o Si Ia puerta no se cierra, se oir4 una seiial sonoray el {cone
'Door' se desplegaMen el indicadorvisual Sila puerta no
es cerrada dentrode 30 segundos,Iaoperaci6nde auto-
limpiezaset4canceladay el indicadorvolver4a desplegar
la hora deI d[a.
®
®
El[cono'CLEAN'aparecer_en el indicadorvisual.
El[cono'LOCK'destellar_en el indicadorvisual Unavezque
lapuerta se bloquea,el [cone permanecer4iluminadasin
desteIlar.
Eltiempo de limpiezacomenzaMla cuentaregresivaenel
®
indicador.
Para diferir un ciclo de autolimpieza:
1. Oprima'Delay'o la tecla 'Delay 1' (modelos ................
selectos]. Delay )
\
o El[cone'DELAY'desteJla. , .......... ,,
o '00:00'destellar4enel indicadorvisual. Delay 1
/
\
2. Programelacantidadde tiempo queusted desea
diferir el ciclo usandolas teclasnumericasapropiadas.
3. OprimaIatecla 'Clean'.
o El[cone'SET'destellar& , .................
4. Oprima[atecla 'Autoset'. [Autoset )
o'LifE' (Nivelde suciedadleve} se desplegar4.
*Los hombresde los productosson marcasregistradasde susrespectivosfabricantes.
57
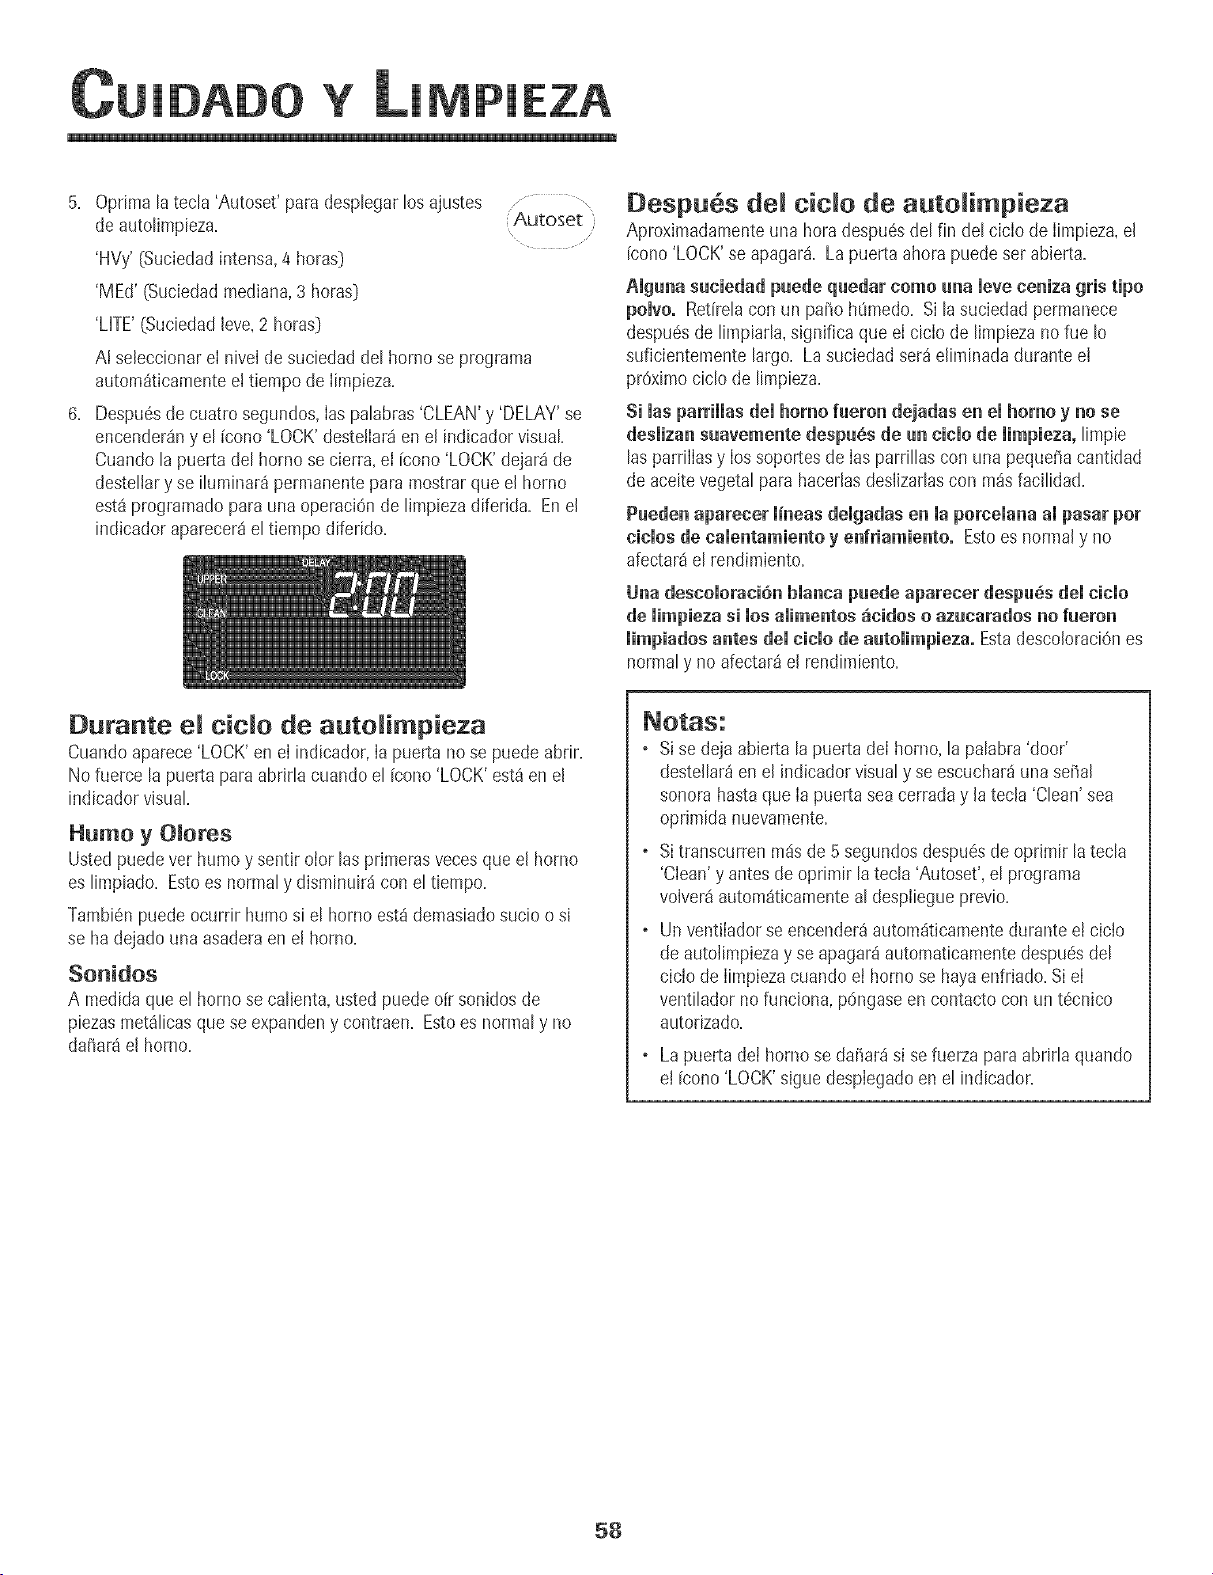
YMPIEZA
5. Optimatatecta 'Autoset'para desptegartosajustes ,..........
de auto[impieza+ Autoset
'HVy' (Suciedadintensa,4 horas)
'MEd' (Suciedadmediana,3 horasD
'LHTE'(Suciedad[eve,2 horasD
A[ seleccionare[ nivel desuciedaddet homo se programa
autom_ticamentee! tiempode [impieza+
6+ Despu6sde cuatro segundos,[aspatabras'CLEAN'y 'DELAY'se
encenderSny et [cono 'LOCK'desteliar_en e[ indicadorvisual
Cuando tapuerta de[ homo se cierra+el Fcono'LOCK'dejar_ de
destetiary se i[uminar_permanentepara mostrarque e[ homo
est8 programatic para una operaci6nde limpiezadiferida+ Ene[
indicadoraparecer8el tiempo diferido+
Despu6s demtide de auto impieTa
Aproximadamenteuna hora despu6sdel fin del cicIo de Iimpieza,el
[cono'LOCK'se apagar& La puerta ahorapuedeset abierta.
Alguna suciedad puede quedar como una [eve ceniza gHs ripe
poivo. Ret[re[acon un pa_o h0medo+Si lasuciedadpermanece
despu6sde limpiarla,significa que e[ cic[ode limpiezanofue Io
suficientementelargo+La suciedad ser_e[iminadadurante e[
proximociclo de limpieza+
Si masparrimmasdemhomo fueron dejadasen emhomoy no se
desiizan suavemente despu_s de un cinio de iimpieza, limpie
las parriiiasy [ossoportesde [as parrillas con una peque_acantidad
de aceitevegetalpara haceriasdes[izarlascon rodsfacilidad+
Paeden aparecer iineas deigadas en ia porceiana ampasar pot
cities de namentamientoy enfriamiento. Estoes normaly no
afectar_el rendimiento+
Una descoiorani6n bianca puede aparener despu_s dei title
de mimpiezas[ los amimentos_cMos o azucarados no fueron
limpiadosantes demn+nmode autolimpieza. Estadesco[oraciOnes
normaly no afectar_e[ rendimiento+
Durante e[ dc[o de auto[impieza
Cuandoaparece'LOCK'ene[ indicador,[a puerta no se puedeabrir+
No fuerce la puerta para abrirla cuando el [cono 'LOCK'est_en el
indicadorvisual
Humo yOIotes
Ustedpuedevet humo y sent+rolor las primerasvecesque el homo
es limpiado+Estoes normaly disminuir_icon el tiempo+
Tambi6npuedeocurdr humo si el homo est_ demasiadosucio o si
se ha dejadouna asaderaen el homo+
SonidOS
A medidaque el hornose calienta,usted puededr sonidosde
piezasmet_licasquese expandeny contraen+Esto es normaly no
dafiara el homo+
o Sise dejaabierta la puerta del horno,la palabra 'door'
destellar_en el indicadorvisualy se escuchar_unasehal
sonorahastaque Iapuerta seacerraday la tecla 'Clean'sea
oprimida nuevamente.
o Sitranscurrenm_sde 5 segundosdespu6sdeoprimir latecla
'Clean'y antesdeoprimir latecla 'Autoset',el programa
volver_autom_ticamenteal despiiegueprevio+
o Un vent+iadorseencender_autom_ticamentedurantee! ciclo
deautolimpiezay se apagar_automaticamentedespu6sdel
ciciode IimpiezacuandoeI hornose hayaenfriado+Si eI
ventilador nofunciona, p6ngaseen contactocon un t6cnico
autorizado.
Lapuerta de[ hornose dafiar_ s+sefuer_apara abrir[a quando
e+[cono'LOCK's+guedespiegadoenel indicador.
58
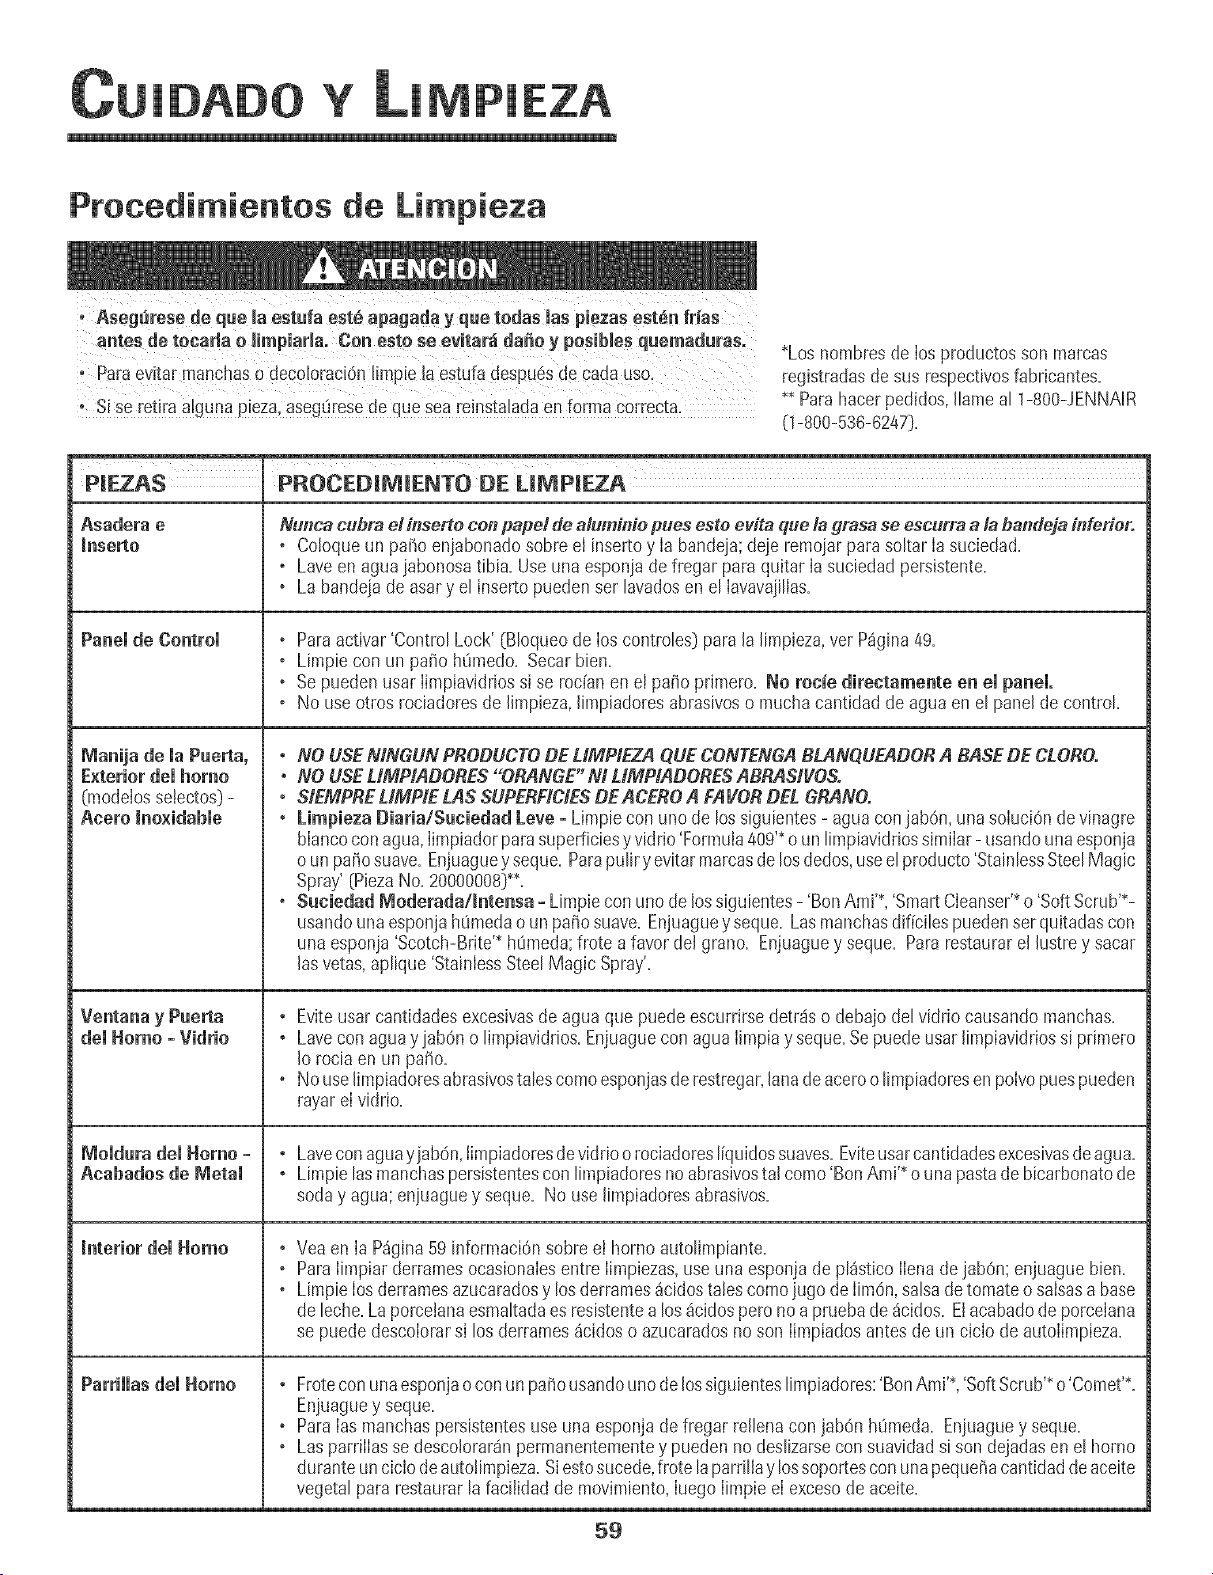
YMPIEZA
Procedi ientos de Li pieza
"S ise ret!raa!gunapieza,asegOresede quesea reinstaladaen forma correcta.
*Los hombresde los productosson marcas
registradasdesus respectivosfabricantes.
** Parahacerpedidos,Ihme al 1-800-JENNAR
(1-800-536-6247)=
PIEZAS
Panel de Control
Manija de maPuerta,
Exterior demhomo
(modelossetectos)-
Anero Ino×idabme
del Homo -VidHo
_'lomdurademHomo -
Anabados de Metam
_nterior demHomo
Parrillas del Homo
PROCEDIM[ENTO DE L[MPIEZA
Nunca cubra el inserte con pape! de alum&io pues esto evRa que la grasa se escurra a la bandeja &ferior.
o Coloqueun paso enjabonadosobre el insertoy Ia bandeja;deje remoiarparasokarIa suciedad.
o Laveen agua iabonosatibia. Useuna esponjadefregar paraquitar Ia suciedadpersistente.
• La bandeiade asary el inserto pueden set lavadosen el Iavavaiillas.
o Paraactivar 'Control Lock' (BIoqueode los controles)para la limpieza,vet P_gina49.
o Limpie con un patio h0medo. Secar bien.
o Sepuedenusar Iimpiavidriossi se rodan en el patio primero. No rode directamente en el panel°
o No useotros rociadoresde limpieza,limpiadoresabrasivoso muchacantidadde aguaen el panelde control
° NO USEMNGUN PBODUCTODE UMPIEZA QUECONTENGABLANQUEADOBABASEDE CLOBO.
.NO USEUMPtADOBES "ORANGE" Nt UMPIADOBESABBASIVOS.
° SIEMPBELIMPIE LAS SUPEBFICIESDEACEBO A FAVOR DEL GBANO.
,Limpieza DiarialSuciedad Leve=Limpie con uno de los siguientes- agua conjab0n, una soluciOndevinagre
blancocon agua,Iimpiadorparasuperficiesy vidrio'Formula409'*o un limpiavidriossimilar- usandounaesponja
o un patiosuave. Enjuaguey seque. Parapulir yevitarmarcasdelosdedos,useel producto'StainlessSteelMagic
Spray'[PiezaNo.20000008}%
o $uciedadModerada/_ntensa-Limpieconunodelossiguientes-'BonAmP 'SmartCIeanser'*o'SoftScrub'*-
usandounaesponjah0medaoun patiosuave. Enjuaguey seque. Lasmanchasdificiles puedenset quitadascon
una esponja'Scotch-Brite'_h0meda;frote a favordel grano. Enjuaguey seque. Pararestaurarel hstre y sacar
lasvetas,aplique'StainlessSteelMagic Spray'.
° Eviteusarcantidadesexcesivasde aguaque puedeescurrirsedetrdso debajo del vidrio causandomanchas.
, Lavecon aguay iabdno limpiavidrios.Enjuaguecon aguaIimpiay seque.Se puede usarlimpiavidriossi primero
Io rociaen un patio.
• No uselimpiadoresabrasivostalescomoesponjasderestregar,lanadeaceroo limpiadoresenpolvopuespueden
rayar elvidrio.
° Laveconaguayjab6n, timpiadoresdevidrioorociadoresliquidossuaves.Eviteusarcantidadesexcesivasdeagua.
° Limpie lasmanchaspersistentescon limpiadoresno abrasivostal como'BonAmP o una pastadebicarbonatode
soday agua;eniuaguey seque. No use limpiadoresabrasivos.
®
®
Veaen Ia P_gina59 informaci0nsobreet horno autolimpiante.
ParaIimpiarderramesocasionalesentre Iimpiezas,use una esponjade pl_stico Ilenade jabOn;enjuaguebien.
Limpie losderramesazucaradosy los derrames_cidostalescomojugo de IimOn,salsade tomateo salsasa base
de leche.Laporcetanaesmakadaesresistentealos _cidospero no a pruebade _cidos. Elacabadode porcelana
se puededescolorarsi los derrames_cidoso azucaradosno son Iimpiadosantesde un ciclo de autolimpieza.
° Froteconunaesponjaoconun patiousandounodelossiguienteslimpiadores:'BonAmP, 'SoftScrub'*o'Comet'*.
Enjuaguey seque.
o ParaIasmanchaspemistentesuse unaesponjade fregar rellena con jabOnh0meda. Enjuaguey seque.
o Las parrilIasse descolorar_npermanentementey pueden no deslizarsecon suavidadsi son dejadasen e! homo
duranteunciclodeautolimpieza.Siestosucede,frote laparrillay lossoportescon unapequetiacantidaddeaceite
vegetalpararestaurarlafacilidad de movimiento,IuegoIimpieel excesode aceite.
59
ANTENIM!
Luz del Homo
. Antesde colocarel foce DESCONECTELA CORRIENTE
ELECTRUCAAL HORNO.
o Aseguresede queeJfoco estefr[o.
• No toque un toco cal_entecon un paso htimedo pueseJfoco
puedequebrarse.
Para cambiar Ja Juz deJ homo:
1. Use un tomaottasseco y con muchocuidado destorniJleJa
cubiertadeIfoco yet foco.
2. ReempIacecon un foco para homo de eIectrodom6sticode 40
wats. SerecomiendanIosfocos con basede htOn para evitar
fusi6n det foco en el casquiJIo.
3. ReemplaceIa cubierta del focoy vuelvaa conectar lacorrJente
el6ctricaal homo.
4, Vuelva a programar el reloj,
Ventana deJ EJomo
Para proteger Javentana deJ homo:
1. No use agentes de limpieza abrasivos tales como esponjas
de lana de acero o limpiadores en polvo puespueden rayar el
vidrio.
2. No goJpeeelviddo con olhs, sartenes,muebles,juguetes u otros
obietos.
3. No cierre la puertadel homo hasta que las parrillasdel homo no
est6nen su lugar.
AI golpear,rayar,hacervibrar o esforzarel vidrio puededebilitar su
estructuracausandoun mayorrJesgode rotura en unafecha
posterior.
6{}

H
Y DE
ml
PROBLEMA SOLUCION
Para la mayori'a de los prohlemas, + Revises+los contmlesdel homo est_ndebidamenteajustados+
verifiqae primero 1osiguiente. , Verifique si el horno esta debidamenteenchufadoen un tomacorrienteel6ctrico+
, Verifique o vuelvaa reponer e! disyuntor+Verifiqueo reemplaceel fusible+
, Verifique el suministrodeenergfael6ctrica+
El reloj, las palahras en el indicador + LoscontroIespuedenestar programadospara 'Cook & Hold'o 'Delay'+
visaal y/o las laces fancionan pnro + Puedeestaractivadalacaracterfsticade bloqueode los controles+[VerP%ina 49y
el homo no se nalienta.
La laz del homo y/o el reloj no , Elfoco puedeestarsue+too defectuoso+
fancionan. + La luzdel homo no funcionadurante un ciclo de autolimpieza+
+ Elhomo puedeestaren Modo Sab_tico+_er p%ina 55+]
Hay an olor faerte o hamo leve , Estoesnormalenunhornomuralnuevoydesaparecer_despu6sdeunospocosusos.Aliniciar
naando se enniende el homo. un ciclo de autolimpiezase "quemarU' los olores pn_sr_pidamente.Si se enciendeel
ventiladorayudar_a eliminarel humoy/o el olor.
, Suciedadexcesivade alimentosen el panelinferior del homo. Use un ciclo deautolimpieza.
El homo no activa el proeeso de + Elhomo puedeestar programadoparauna limpiezadiferida.
+ Elhomo puedeestaren Modo Sab_tico. (Verp%ina 55y
, Elhomo puedeestara m_s de 205° C (400° F]. Latemperaturadel homo debe ser inferior
a205° C [400° F] paraprogramarun ciclo de limpieza.
El homo no limpia en forma dehida° + El homo puede necesitarun tiempo de Iimpiezam_s proIongado.
+ No se Iimpiaronlos derramesexcesivosantesdel procesode autolimpieza.
Los alimentos no se asan a la parrilla , Verifique Ia posici0nde Ia parrilIa. _SerP_gina53._
en forma debida. , Elvoltaje del hogarpuedeser bajo.
Los alimentos homeados se qaeman + Elalimentopuedeestarcolocadoen formaincorrectaen el homo+ [Verel folleto "La Cocina
o se doran demasiado. F_ciI"y
,Elhomo norue precalentadoenforma debida+
Losaiimentos se homean de , El homo no fue precalentado+
manera irregular. , Elhomo puedeestar instaladoen forma indebida+
, Vedfique la parrilladel homo con un niveL
, ColoqueIosutens+liosde homearalternadapnenteysinque setoquenentresio sin quetoquen
la paredde+homo+
, VerifiqueIasinstruccionesparaIacorrectacolocaciOndelosutensiliosenlaparrilladelhomo+
_er el folleto "La CocinaF_cir'y
La paerta del homo nose , Elhornopuedequenose hayaenfriadoIo suficientedespu6sdeun procesode autolimpieza.
+ Elcontroly la puerta puedenestarbloqueados. _/er p%+na4%
61
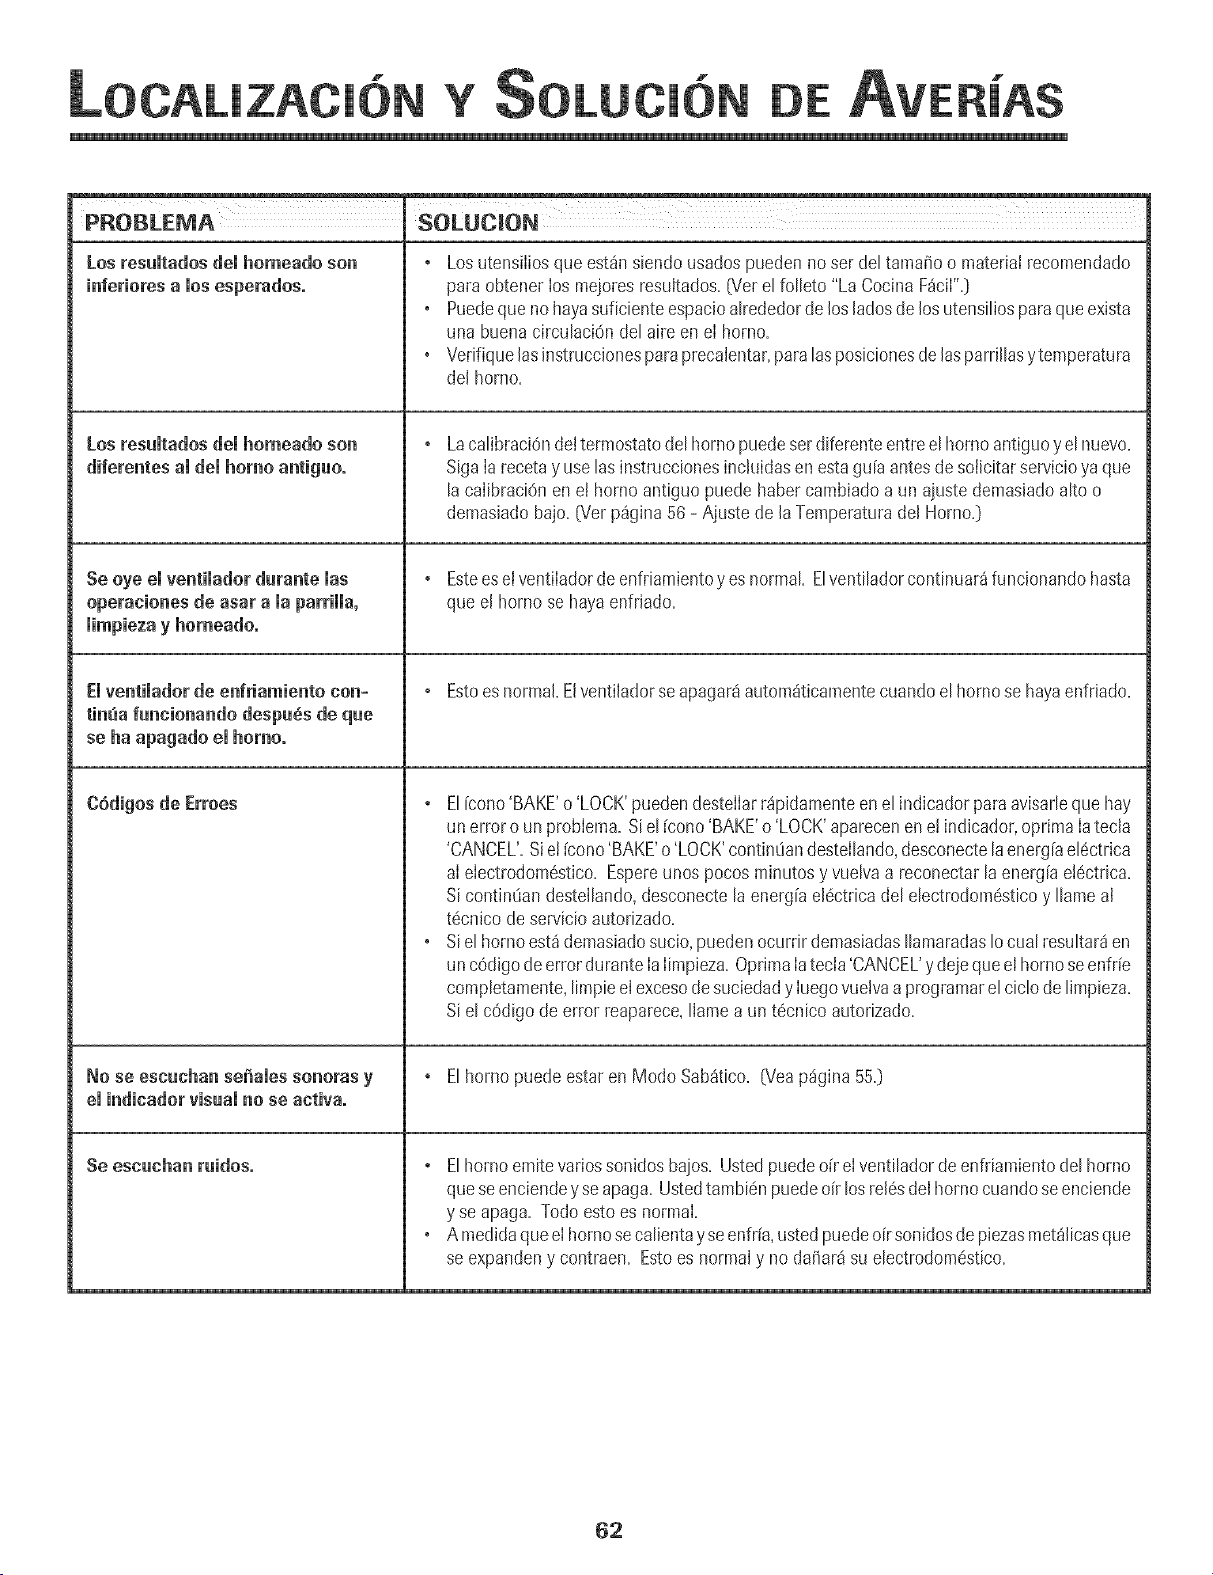
H
Y DE
Losresuitados dei homeado son
inferioresalosesperados.
Losresumtadosdemhomeadoson
diferentes amdemhomo antiguo°
Se oye emventimadordurante mas
operaciones de asar a maparHHa,
iimpieza y horaeado.
Emventimadorde enfriamiento con-
tinua funcionando despu6s de que
se ha apagado el homo°
C6digos de Erroes
No se escuchan sefiaies sonoras y
ei indicadorvisual no se activa.
Se escuchan ruidos.
, Los utensiiiosqueest_nsiendousadospuedenno ser del tamafio o material recomendado
paraobtener ios meioresresuitados=(Vet elfolleto "La CocinaF_cii"=]
Puedeque nohayasuficienteespacioalrededorde Josladosde Josutensiliosparaque exista
una buenacirculaci6ndel aire enei homo=
• Verifiquelas instruccionesparaprecalentar,paralasposicionesdelasparrfllasytemperatura
del homo=
LacalibraciOndeItermostatodeIhomo puedeserdiferenteentreeIhomo antiguoy eInuevo.
SigaIa recetay use lasinstruccionesinckfidasenestagu[aantesdesolicitarservicioyaque
la calibraciOnen eI hornoantiguo puedehabercambiadoaun aiustedemasiadoalto o
demasiadobajo. {'v_erp%ina 56 - Ajustede laTemperaturadel Horno.}
, Estees elventiladordeenfriamientoy esnormal Elventiladorco@nuar_funcionandohasta
que el hornose hayaenfrJado.
, Estoesnormal.Elventiladorseapagar4autom4ticamentecuandoel hornose hayaenfrJado.
, EJ[cono'BAKE'o 'LOCK'pueden@stellarr4pJdamenteen e[ indicadorpara avisarJeque hay
un erroro un problema.Siel[cono'BAKE'o 'LOCK'aparecenene! indJcador,oprima IatecJa
'CANCEL'.Sie! [cono 'BAKE'o 'LOCK'contin@ndestellando,desconectelaenerg[ael@trica
aI electrodom6stico.Espereunos pocosminutosy vueJvaa reconectarlaenerg[ae!6ctrica.
Sicontin@n destellando,desconectela energ[ael6ctricadel electrodom6sticoy Ilame al
t6cnJcodeservicio autorizado.
• Si el horno est4demasiadosucio,puedenocurrir demasiadasIlamaradasIocual resultar4en
unc6digodeerrorduranteIaIimpieza.OptimaIatecia'CANCEL'y dejequeel homoseenfr[e
completamente,limpieeIexcesode suciedady Iuegovueivaaprogramarel ciclo de limpieza.
Siel cOdigode error reaparece,liamea un t6cnico autorizado.
, Elhomo puedeestaren Modo Sab4tico. (Veap%ina 550
, E[homo emitevariossonidosbaios. Ustedpuedeo[r el ventiladorde enfriamientode[ homo
queseenciendeyse apaga.Ustedtambi@ puedeoir losreJ6sde[homo cuandoseenciende
y se apaga. Todoestoes normal
•Amedidaqueel homosecalientayseenfr[a,ustedpuedeoirsonidosde piezasmet41icasque
se expandeny contraen. Estoes normaly no dafiar4 su electrodom6stico.
62
Y
Garant_aCompleta de Un A_o -Piezas y
Mane de Obra
Duranteun (1} a_e desdelafechaoriginaldecompra
alpar menoLse repararao reemplazaragratultamenl
cualqulerpmzaquefalle duranteusanormalen el
hogan
Gatant[as Limitadas -Piezas Solamente
SegundoAmio= Despu6sdelprimerariadesdelafecha
onginaJde compra,se reemplazarano repararan
gratuitamentelaspiezasque fallen auran[eusanormal
enel hogaren Ioque respectaalas pmzasy eE
propietariodeberapagartodoslos otlascos[as
incluyendomanodeobra.kilometrajey transporm.
[}esde el Te_ero I_astael Qointo A_o =A partlrde la
fechaoriginaldecompra,se [epararano reempiazaran
gratuitamentelaspiezasind[cadasacontinlmcionque
[allenduran-ceusanormalenel hogaren Ioque
respectaalas piezasy el propietariodeberapagartooos
losotroscostosincluyendomanodeobra. k_lometraje
[ransoorl[e.
o Controles ElectrOn[cos
o Elementos Calefocteres EI6etrices: el 61ementode
asar a la parnNa,de convecci0n ,, de hornear en los
artefac[os de cocinar e[6ctricos.
[_esidentes Canadienses
Lasgarantiasantenorescubrensolamen[eaquellos
electrodomestmosinstaladosen Canad_que han sldo
certiticadoso aprobadospar lasagenciasde pruebas
correspondientespara cumpiimientocon laNorma
Nacionalde Canadaa menosque elelectrodomestico
hayasidotra[doaCanada1desdeios EE.UU.debido a un
carnDlode _osLdencla.
Lo que No Cubren Estas Garantias
1. Situacionesy daSosresultantesde cualquierade lassiguientes
eventualidades:
a. hlstalaciOn,entregao mantenimientoinapropiados.
b. Cualquierreparacidn,modificaciOn,alteraciOno aiustenoautorizadopar
el fabricanteo par uncentro de servicioautorizado.
c. Mal usa,abuso,accidenteso usa irrazonable.
d. CornenteeI6ctrica,voltaieo suministroincorrecto.
e. ProgramaciOnincorrectade cualquierade los controles.
2. Los gorantias quedanhulas si Iosntimerosdeserie originaleshansido
retirados,alteradoso no son fdcilmente legibles.
3. Focos.
4. Productoscompradosparausa comercialo industrial
5. ElcostadeI servicioo Ilamadadeserviciopara:
a. Corregirerroresde instalaci6n.
b. Instruir al usuanosabre el usa correctodel artefacto.
c. Transportedel artefactoai establecimientode sewicio.
6. Losdat_osconsecuenteso incidentaIessufridospar cuaIquierpersonacoma
resuItadodel incumplimientode estasgarant[as.Enalgunos estadosno se
permitela excIusi6no limitaciOnde tiaras consecuenteso incidentaies,par
Io tanto la limitaci6no exclusionanterior puede no aplicarseen su caso.
Si Necesita Setvicio
• Llamea! distribuidor donde compr6 su eIectrodom6sticoo Ilamea Maytag
Servicess_,Jenn-Air CustomerAssistanceal 1-800-JENNAIR(1-800-536-6247}
para ubicar a unt6cnico autorizado.
• Aseg8resede conservareI comprobantede compraparaverificar el estadode
ta garant[a. ConsulteIasecciOnsabrela GARANTIAparamayor informaciOn
sabre las responsabilidadesdel propietariopara serviciobajola garantia.
• Si el distribuidor o Ia compa_[ade servicio no pueden resolverel probIema,
escribaa Maytag ServicessM,Attn: CAIR:_Center,P.O.Box2370,Cleveland,TN
37320-2370o Ilameal 1-800-JENNAIR[1-800-536-6247}.
• Las gu[asdel usuario,manuaiesde servicioe informaciOnsabre las piezas
puedensolicitarsea Maytag Services sM, Jenn-Air CustomerAssistance.
Garantia Limitada Fuera de los Estades
Unides y Canad_ -Piezas Somamente
DurantedosC2}ariasdesdelafecnaoe compraoriginal
alpar menoccualqumrpiezaquefalleduranteusa
normalen el hogarserareemplazadao reparada
gratuitamenteen _oque respectaa la piezay el
propietariodeberapagartodoslos altos cosmos
inclu,,endomanode obra.kiiometrajey transporm.
Las_Torantiasespedficosexpresadosanteriormenteson
/asUMCASgarant/asprovistaspar d fobricante.Fsto_
[/orantiasle otorganderecfios/edalesespedf,@osy us_ed
puedeteneradembsotrosdefechosque vat/ande un
es[odoo o[ro.
Cuando[lameo escnbaacemade un pmblemade servicio,par favor
incluya[asiguienteinformaciOn.
a. Sunombre,direcciOny nOmerode teldono;
b. NOmerode mode[oy nOmerode serie;
c. Nombrey direcciOnde su distribuidor o tecnico desewicio;
d. Una descripciOnclarade[ problemaque est_experimentando:
e. Comprobantedecompra (recibode compra}.
Form No. #,/04/03 Part No. 8112P216-60 Q2003 Maytag Appliances Sales Co, Litho U,S,A.