
Loading ...
Loading ...
Loading ...
1. Unpack the items supplied and check them for completeness and transport damage. If the machine or the power cord has
damage, do not use the machine, but contact our customer service department at cs@espresso-works.com
2. Remove all packaging materials and any possible protective lm used for protection during transportation.
NOTES
• Never remove the rating plate.
• Keep the original packaging during the warranty period of the machine so that the machine can be properly packaged up if
it needs to be returned. The warranty claim shall lapse if any damage is caused during transport.
KEY
1 Heating tray
2 Brew head
3 Portalter
4 Fold down espresso cup support
5 Cover for the drip tray
6 Drip tray
7 Water tank lid
8 Water tank
9 Control panel
10 Release button for milk frother and reservoir
11 Milk froth dial
12 Milk frother and reservoir cover
13 Milk nozzle lever
14 Milk nozzle
15 Milk frother and reservoir
TECHNICAL DATA
Model number: AEW-3000
Voltage supply: 120 V ~ 60 Hz
Power: 1250W
Pressure: 19-bar pump pressure system
Capacity:
• Water tank: max. 1.4 liters
• Milk frother and reservoir: 390 ml
• Cappuccino glasses: 310 ml
• Espresso cup: 80 ml
• Filter (single cup): 7g coffee powder
• Filter (double cup): 14g coffee powder
7
8
9
10
1
2
3
4
5
6
11
12
13
14
15
CONTROL PANEL
ON / OFF button
SINGLE button
DOUBLE button
Red Indicator Light
Yellow Indicator Light
CAPPUCCINO button
LATTE button
MILK FROTH button CLEAN button
1. Wipe down the espresso machine with a clean, damp cloth. Rinse the water tank, the milk reservoir, the portalter, the two
lters, the drip tray, the cover and the measuring spoon and tamper with a little mild detergent and clear water.
2. Set up the machine in a suitable location, following the safety instructions and the notes provided in this guide.
3. Completely unwind the mains cable and plug into a properly installed power outlet that is easily accessible.
NOTE
• When the machine is rst used, production-related additives (e.g. grease) may cause a small amount of smoke and / or an
odor to be produced. This is normal and not a machine defect.
• Do not place the machine below kitchen wall units or similar cupboards. The rising steam could cause damage to them.
• The surfaces of furniture may possibly contain elements which can attack and soften the adjustable feet of the machine. If
necessary, place a suitable pad below the adjustable feet.
• Do not operate the machine without water. If this does happen, the machine issues an error message (the red indicator light
ashes, and several beeps will sound in succession). Please refer to the Troubleshooting Your Machine chapter on page 17-19.
• Do not pour milk or other liquids into the water tank. Use only water to make coffee.
• Only pour milk or if necessary water for cleaning into the milk reservoir.
• Never overll the portalter.
• Do not use the machine without a suitable container below the brew head and the milk nozzle.
COFFEE GRINDER
• Never use attachments or accessories that are not recommended by the manufacturer. They may cause malfunction or injury.
• Make sure there is no hard object in the grinder chamber before use. This may cause damage to the appliance and personal
injury to persons.
• This appliance can be used by children aged from 8 years and above and persons with reduced physical, sensory or mental
capabilities or lack of experience and knowledge if they have been given supervision or instruction concerning use of the
appliance in a safe way and understand the hazards involved. Children shall not play with the appliance. Cleaning and user
maintenance shall not be made by children without supervision.
• This appliance is for household use only. Do not use it for professional catering.
• Do not use the appliance outdoors.
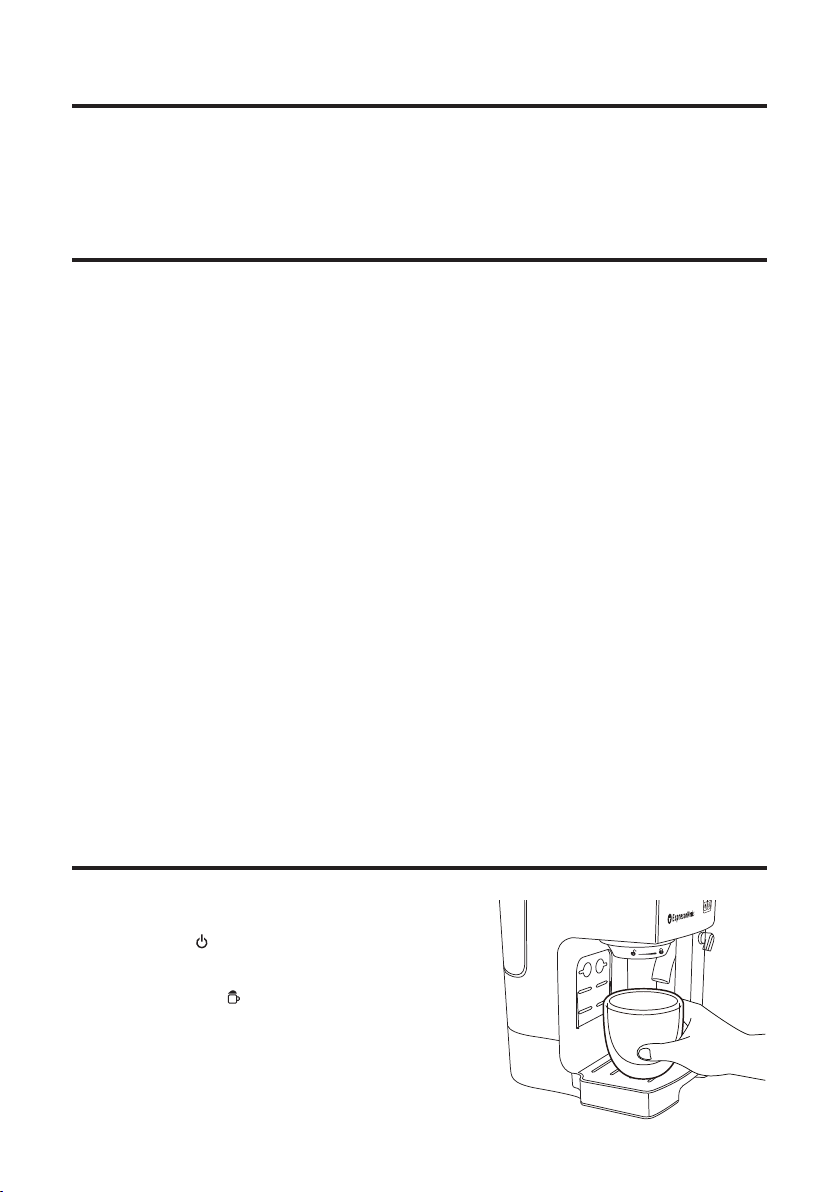
BEFORE INITIAL USE
1. Plug the machine into the power source.
2. Fill the water tank and milk reservoir with water.
3. Press the “ON/OFF” button to switch on the machine. Machine will be
ready when the blue lights stop ashing and become steady.
4. Place a suitable sized cup under the brew head.
5. Press the “CAPPUCCINO” button and the machine will draw water
through both the brew head and milk reservoir.
6. The machine is now cleaned and ready for use. Enjoy!
NOTE
• There may still be some production residue on the machine. Please clean
the machine before you rst use it.
• Remove the sticker before use.
FIRST TIME USE
• This machine is only intended to be used to make specialty coffees using coffee powder and cool milk.
• This machine is only designed for use in a personal household and is not intended for commercial applications.
• The machine should only be used as described in the operating instructions. Any other use is deemed to be improper.
INTENDED USE
ON/OFF
DOUBLE
LATTE
CLEAN
SINGLE
CAPPUCCINO
FOAM
54
Loading ...
Loading ...
Loading ...