
Loading ...
Loading ...
Loading ...
10 − English
UNPACKING
This product requires assembly.
Carefully lift mixer from the carton and place it on a level
work surface.
NOTE: This tool is heavy. To avoid back injury, keep your
knees bent and lift with your legs, not your back, and get
help when needed.
WARNING:
Do not use this product if any parts on the Loose Parts List
are already assembled to your product when you unpack
it. Parts on this list are not assembled to the product by
the manufacturer and require customer installation. Use
of a product that may have been improperly assembled
could result in serious personal injury.
Inspect the tool carefully to make sure no breakage or
damage occurred during shipping.
Do not discard the packing material until you have
carefully inspected the tool, identified all loose parts, and
satisfactorily operated the tool.
If any parts are damaged or missing, please call
1-800-525-2579 for assistance.
WARNING:
If any parts are damaged or missing, do not operate this
tool until the parts are replaced. Use of this with damaged
or missing parts could result in serious personal injury.
WARNING:
Do not attempt to modify this tool or create accessories
not recommended for use with this tool. Any such
alteration or modification is misuse and could result in a
hazardous condition leading to possible serious personal
injury.
WARNING:
Do not connect to power supply until assembly is
complete. Failure to comply could result in accidental
starting and possible serious personal injury.
WARNING:
Do not lift the mixer without help. Hold it close to your
body. Keep your knees bent and lift with your legs, not
your back. Ignoring these precautions can result in back
injury.
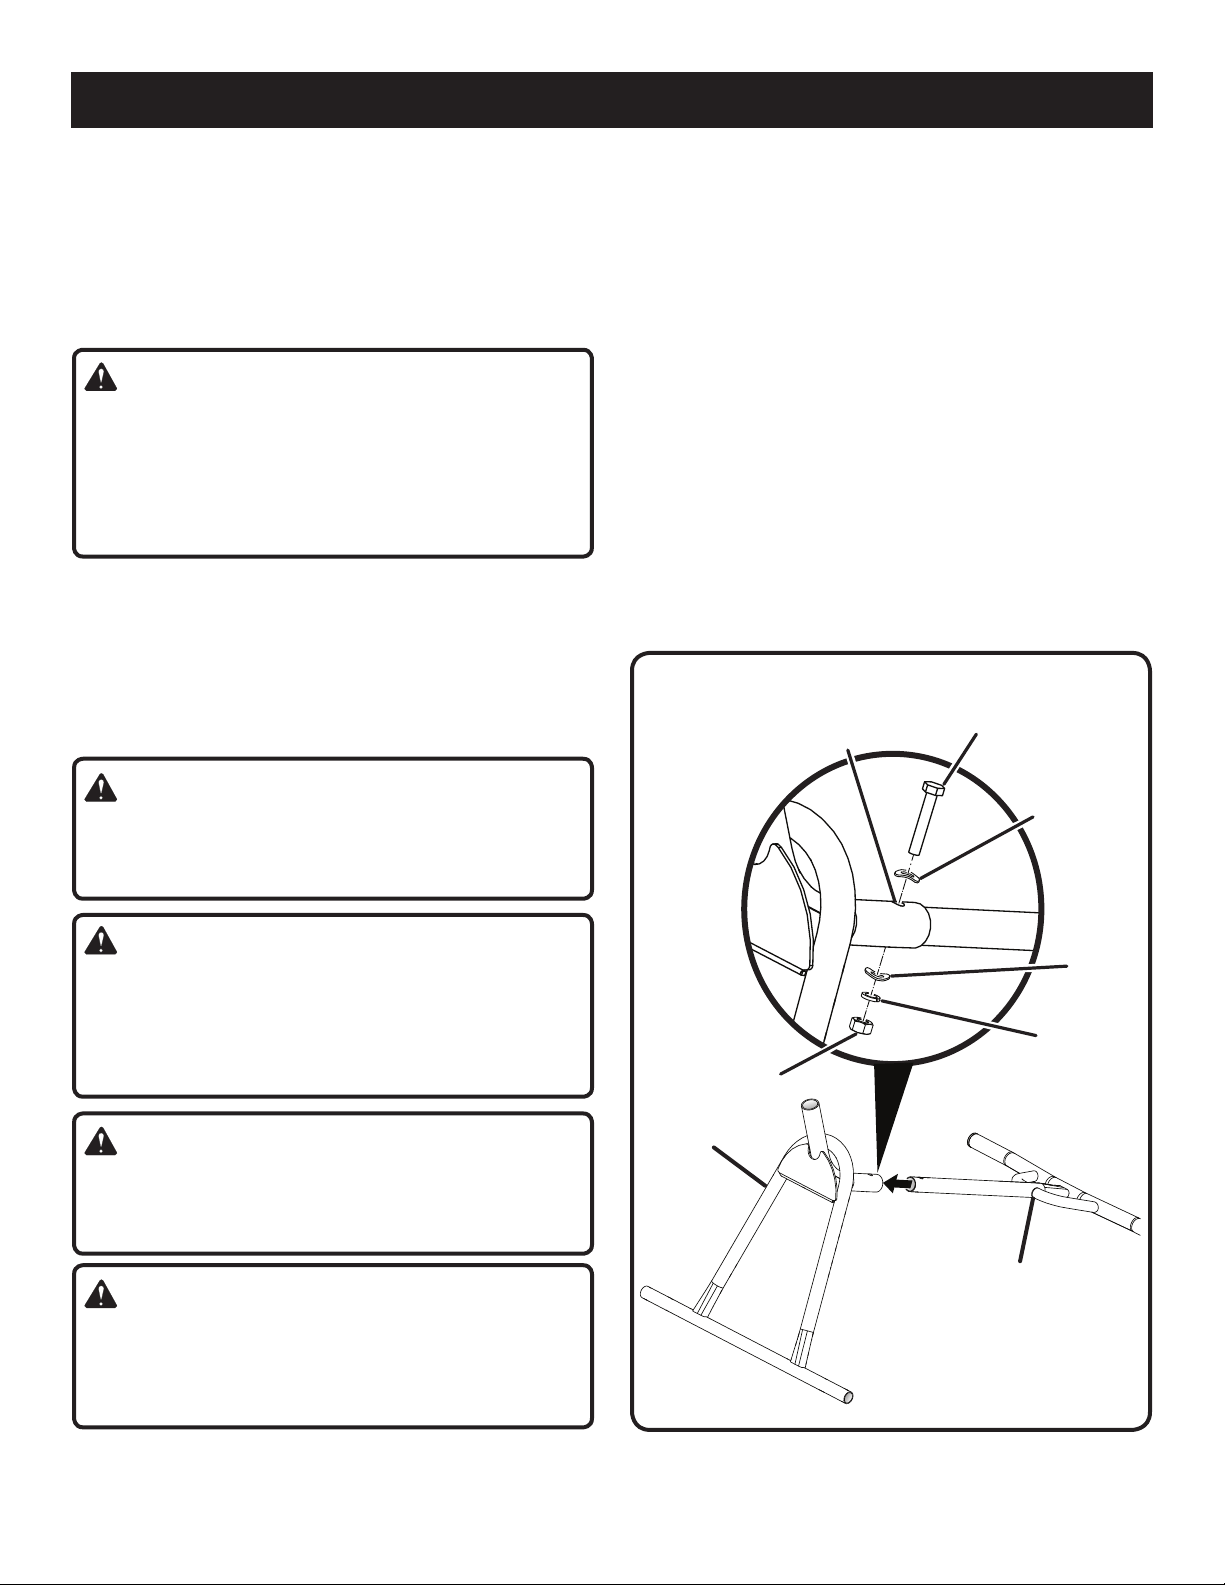
ASSEMBLING THE FRAME
See Figures 6-7.
Locate the following parts:
Front Leg ...................................................................... 1
Rear Leg ....................................................................... 1
Pivot Bracket ................................................................ 1
Bolt (17 mm) in plastic bag (C) ..................................... 1
Bolt (10 mm) in plastic bag (A) ...................................... 1
Nut (10 mm) in plastic bag (A) ...................................... 1
Arc Washers in plastic bag (A) ...................................... 2
Lock Washer in plastic bag (A) ..................................... 1
Slide the rear leg into the front leg as shown.
Align the holes in the legs.
Insert 10 mm bolt through arc washer and holes in the
legs.
Install arc washer, lock washer, and nut onto bolt. Tighten
securely.
ASSEMBLY
Fig. 6
REAR
LEG
HOLE
LOCK
WASHER
NUT
FRONT
LEG
ARC
WASHER
ARC
WASHER
BOLT
Loading ...
Loading ...
Loading ...