Loading ...
Loading ...
Loading ...
13
D. Setup
1. Dispenser Unit/Ice Storage Bin and Icemaker Setup
WARNING
The installer must ensure the dispenser unit/ice storage bin is compatible with
the icemaker, and the dispenser unit/ice storage bin and icemaker are properly
attached and secured.
NOTICE
• Donot connect the icemaker to an external power source. Icemaker power supply
and ground connection are supplied from the remote condensing unit via the wire
bundle provided with the remote condensing unit. For details, see "II.F. Electrical
Connection."
• Before operating the icemaker, the bin control must be installed correctly. Failure
to properly install the bin control could result in ice backup and unit damage.
1) If mounting the icemaker on top of a dispenser unit, follow the dispenser unit's setup
procedure. If mounting the icemaker on top of an ice storage bin, unpack the ice storage
bin and attach the 4 adjustable legs provided (bin accessory) to the bottom of the ice
storage bin.
2) Position the dispenser unit/ice storage bin in its permanent location.
3) If required, install an adapter kit or top kit. Contact your local Hoshizaki distributor for
recommendations.
4) Level the dispenser unit/ice storage bin in both the
left-to-right and front-to-rear directions. Ifusing an
ice storage bin, adjust the ice storage bin legs to
level.
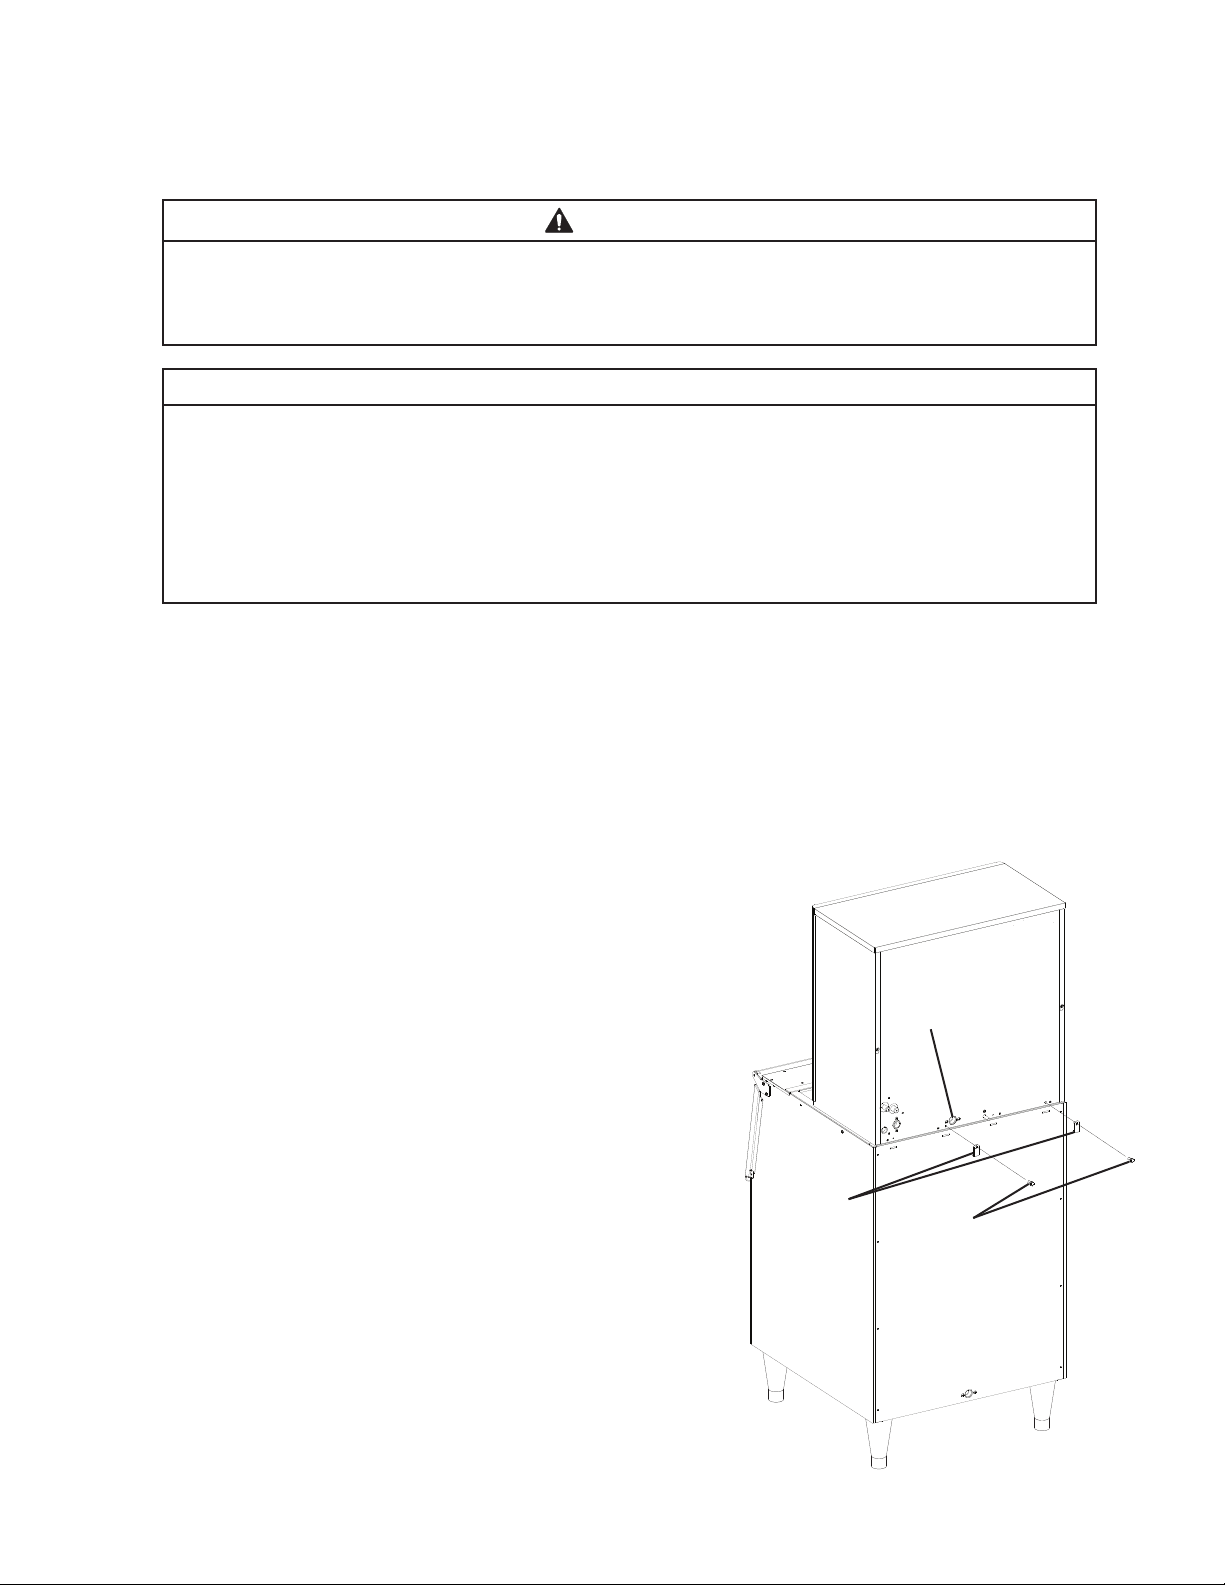
5) Place the icemaker on top of the dispenser unit/
ice storage bin.
6) Secure the icemaker to the dispenser unit/ice
storage bin using the mounting brackets and bolts
provided. See Fig.5.
Icemaker
Bolts
Mounting
Brackets
Ice Storage Bin
Fig. 5
Icemaker Drain
Outlet
Loading ...
Loading ...
Loading ...