Blackmagic
Cloud Store
Blackmagic Cloud Store
Blackmagic Cloud Store Mini
Blackmagic Cloud Pod
May 2022
Operation Manual


Welcome
Thank you for purchasing your Blackmagic Cloud Store.
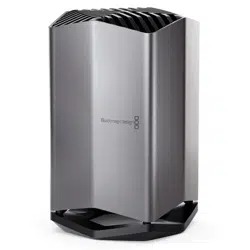
The Blackmagic Cloud Store is a very fast high capacity network storage solution
that’sdesigned to handle large media files used on Hollywood feature films. The design
uses advanced flash memory so it easily handles lots of simultaneous users. Plus it’s
extremely easy to set up!
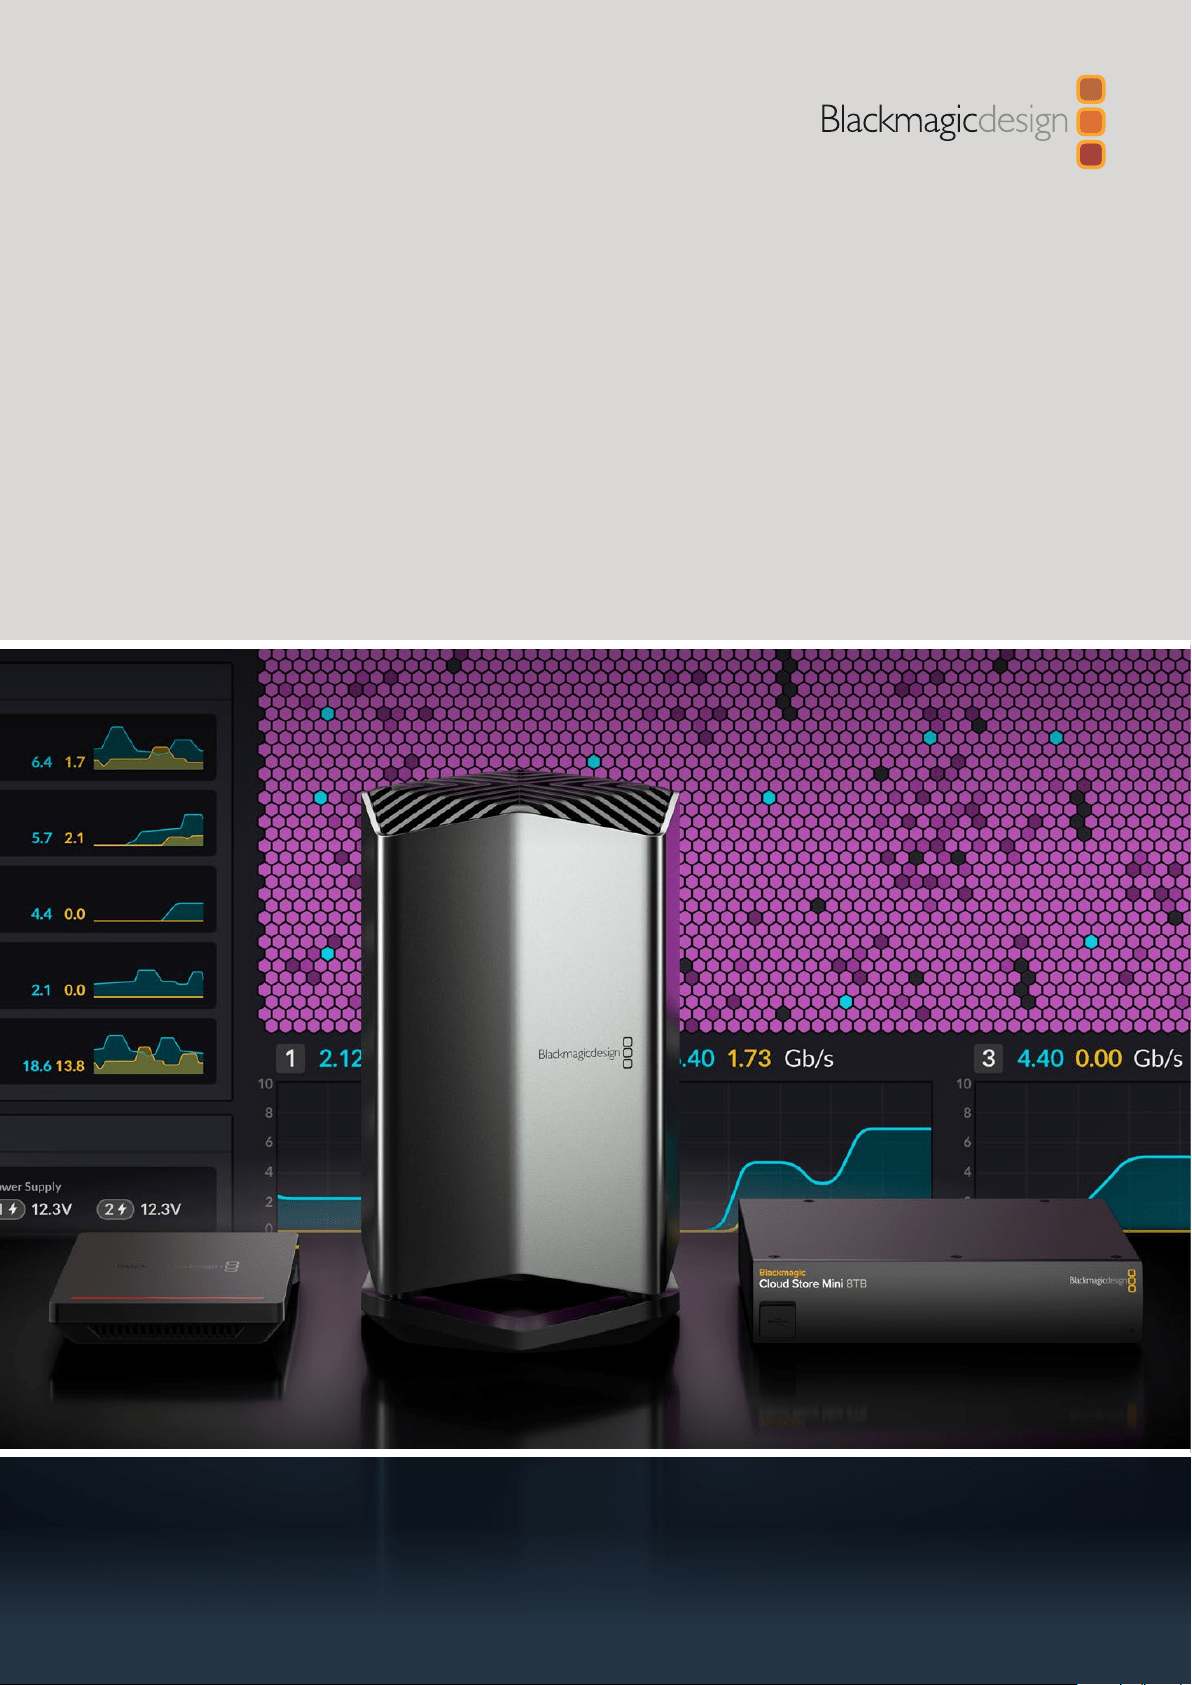
The Blackmagic Cloud Store Mini has a portable rack mount design and features four
internal M.2 cards in a RAID 0 configuration so it can sustain the maximum possible
speed on its 10G Ethernet port.
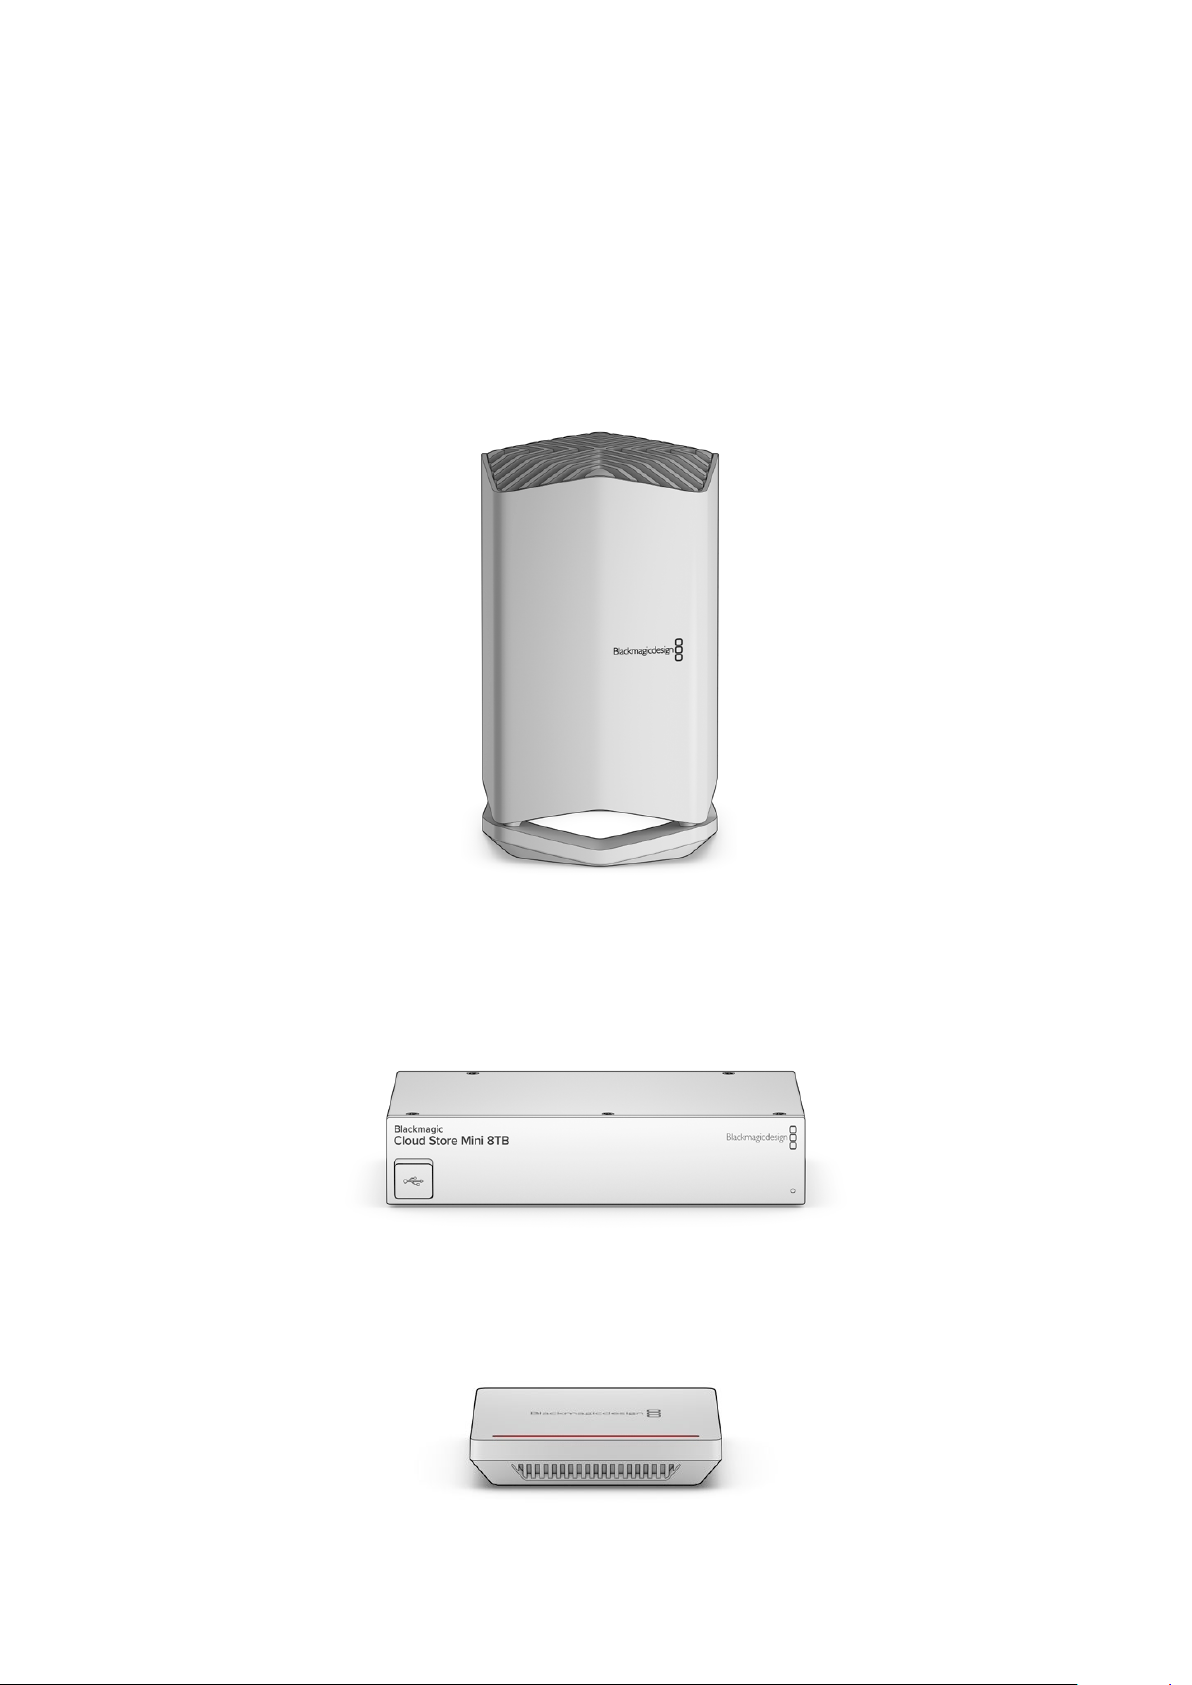
Blackmagic Cloud Pod allows any USB disk to be shared on your network. That means
you can use the USB disks you already have!
This instruction manual shows you how to get started with Blackmagic Cloud Store.
Check the support page on our website at www.blackmagicdesign.com for the latest
version of this manual and for updates to your Blackmagic Cloud Store’s internal
software. When downloading the software, be sure to register with your information
sowe can keep you updated when new software is released.
We are continually working on new features and improvements, so we are keen to
hear from you!
Grant Petty
CEO Blackmagic Design
English

Contents
Introducing Blackmagic Cloud Store 5
Blackmagic Cloud Store Mini 5
Blackmagic Cloud Pod 5
Getting Started 6
Plugging in Power 6
Connecting to a Network 7
What is 10G Ethernet? 7
Accessing Storage 7
Monitoring 7
Adding Syncs 8
Setting Date and Time 8
Sign into Dropbox 8
Sync Folder and Direction 9
Ingest and Backup 10
HDMI Monitor Output 10
Storage Map 11
Cloud Sync Panel 11
User Activity Panel 11
Data Rate Graphs 12
Hardware Panel 12
Error Messages 13
Ejecting your Cloud Store 14
Blackmagic Cloud Store Setup 14
Home Screen 14
Settings 15
Setup 15
Cloud Sync 16
Storage 17
Proxy Generator 18
Adding Watch Folders 18
Setting the Format 20
Managing Proxy Files 20
Formatting USB Drives 21
Formatting Drives on a Mac 21
Formatting Drives in Windows 21
Updating the Internal Software 22
Help 23
Regulatory Notices 24
Safety Information 25
Warranty 26
4Blackmagic Cloud Store
Introducing Blackmagic Cloud Store
The Blackmagic Cloud Store is a very fast high capacity network disk designed to handle large
media files. Using advanced flash memory, Blackmagic Cloud Store handles many simultaneous
users and is available in various storage capacities. With Dropbox live sync, files can be
distributed between multiple units globally for very fast local file access, even on lower cost
internet connections. Blackmagic Cloud Store includes four 10G Ethernet connections with
Ethernet switch, RAID 5 data protection and redundant power supplies.
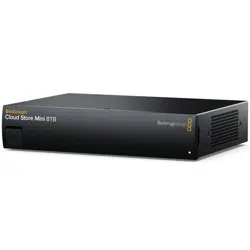
Blackmagic Cloud Store Mini
The Blackmagic Cloud Store Mini is a fast network storage solution in a compact rack mount
design with 8 TB of flash memory. It features a high speed 10G Ethernet connection and four
internal M.2 flash memory cards operating in parallel RAID 0 for fast file access.
Blackmagic Cloud Pod
The Blackmagic Cloud Pod lets you turn any USB-C disk into network storage. For example,
sharing a media disk recorded on a camera with multiple users on your network.
5Introducing Blackmagic Cloud Store
Getting Started
To get started with your Blackmagic Cloud Store, all you need to do is plug in power
andconnect to a network.
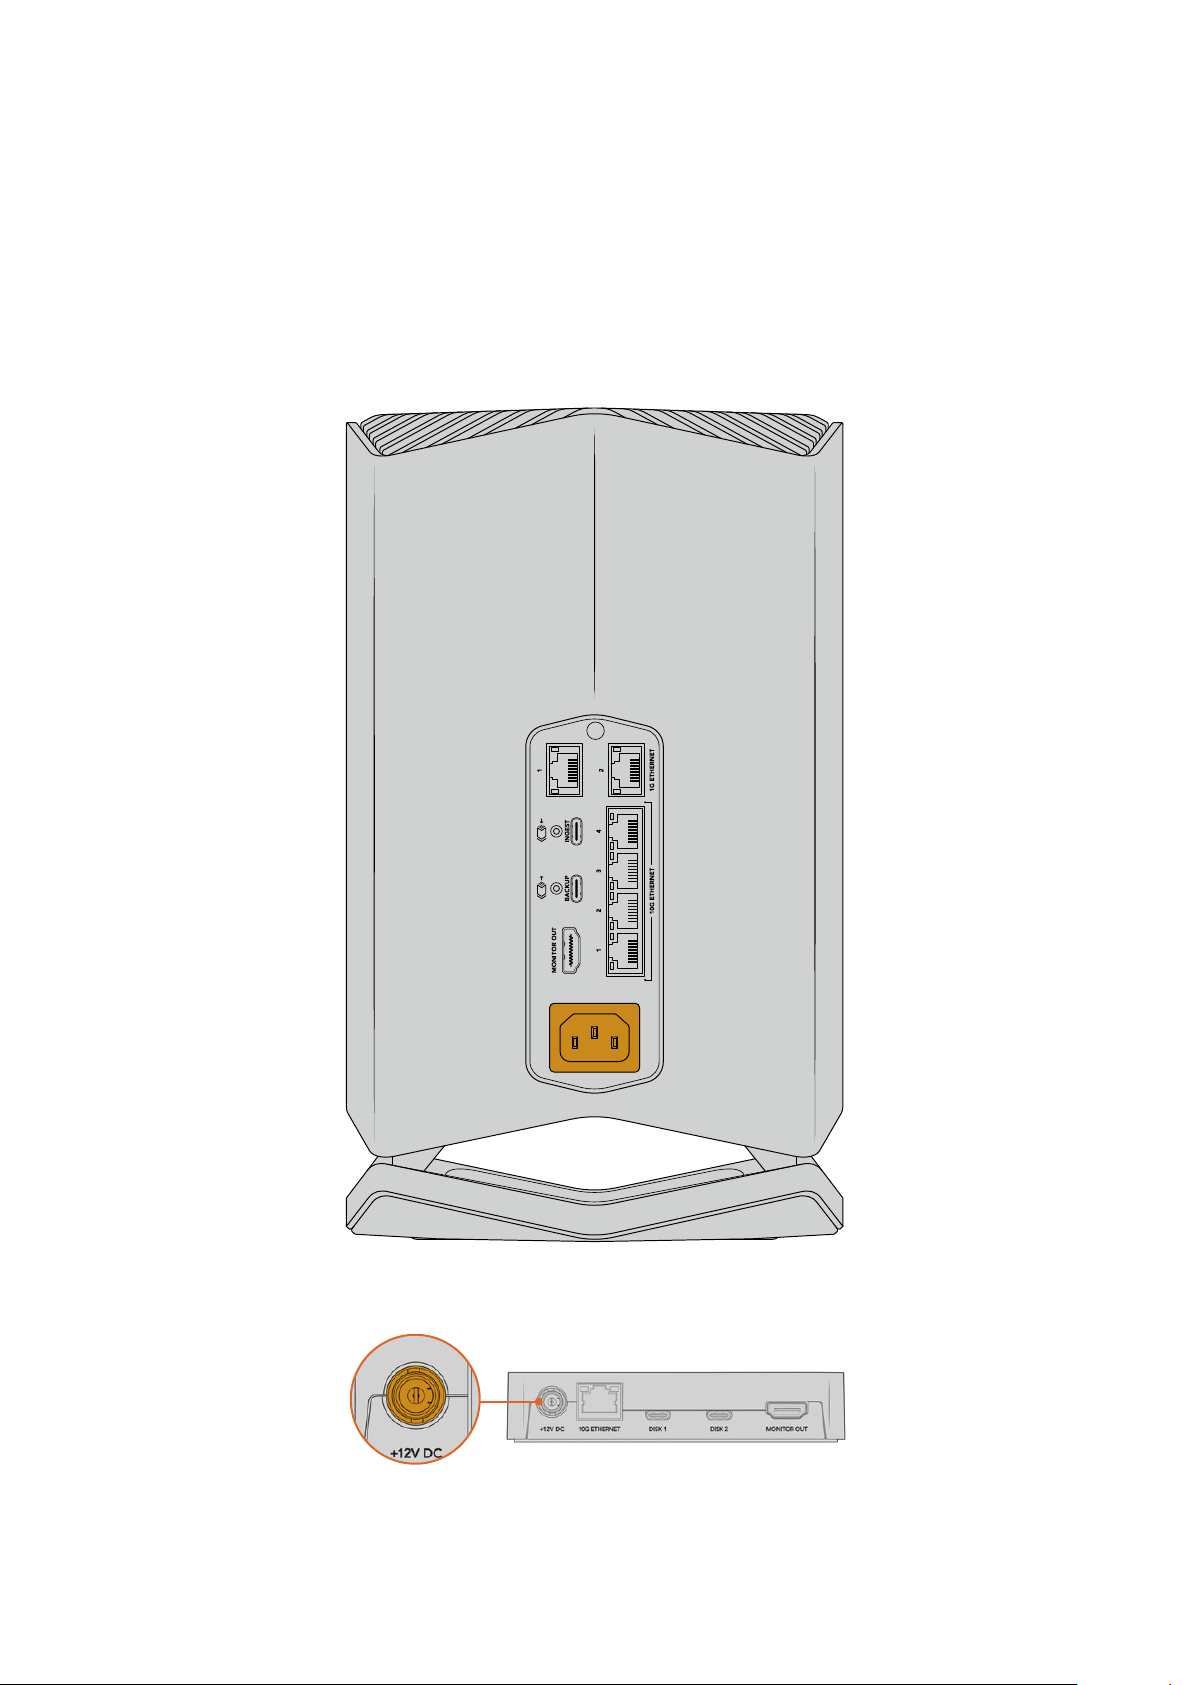
Plugging in Power
Connect power to Blackmagic Cloud Store using a standard IEC power cable.
When power is connected, a soft light will illuminate
from the underside of the unit
On Blackmagic Cloud Pod, connect power using
the supplied 12V DC power adapter
6Getting Started

Connecting to a Network
For the fastest file transfer speeds, connect a 10G Ethernet connector
fromyourcloudstoretoaporton your 10G network switch. We
recommendusing CAT 6A Class E or F network cables for longer cable
runs. If you havea 1G network switch, connect using your cloud store’s
1GEthernetconnector.
What is 10G Ethernet?
10G Ethernet is a very fast Ethernet connection used in the latest Ethernet
switches capable of transferring data at up to 10 Gb/s. 10G Ethernet is
perfect for video workflows where files are typically very large.
1G Ethernet connectors are provided for slower connections such as the
internet or slower computers. They are part of your cloud store’s built in
Ethernet switch and help keep the faster 10G ports free.
TIP If your computer does not have a 10G Ethernet port but has a Thunderbolt 3 port,
you can plug in using a Thunderbolt 3 to 10G Ethernet adapter. This means you will get
faster transfer speeds than you would via a 1G Ethernet port. These adapters are also
available as PCIe cards that you can install in your computer.
Accessing Storage
To access storage on a Mac computer:
1 Open Finder and click on ‘network’ in the sidebar menu.
2 Double click on your Blackmagic Cloud Store in the list.
3 Now double click on internal storage.
Your Blackmagic Cloud Store will now appear in the locations sidebar.
To access storage on a Windows computer:
1 Click on the ‘Network’ menu item in File Explorer sidebar. You will see your Blackmagic
Cloud Store listed.
2 Double click on your cloud store and a Windows security dialog box will appear
askingfor network credentials.
3 Set the username and password to ‘guest’.
4 Click ‘OK’.
You will now see your cloud store in the File Explorer window and can access the storage like
anyother network drive.
Monitoring
The HDMI monitor output lets you see the status of your cloud store in real time. Simply plug
in a TV or monitor. You can see a storage map, speed graphs, sync, active users and power
status. For more information, refer to the ‘HDMI monitor output’ section.
That’s all there is to getting started! Keep reading this manual for information about how to
syncto Dropbox, set sync folders and direction, plug in USB drives and more.
7Getting Started
Adding Syncs
The first step to adding syncs is to download and install Blackmagic Cloud Store Setup from the
Blackmagic Design support center at www.blackmagicdesign.com/support
After installing the software, launch Blackmagic Cloud Store Setup and click on the settings icon
to open the settings for your cloud store. The sync settings are located in the ‘cloud sync’ tab.
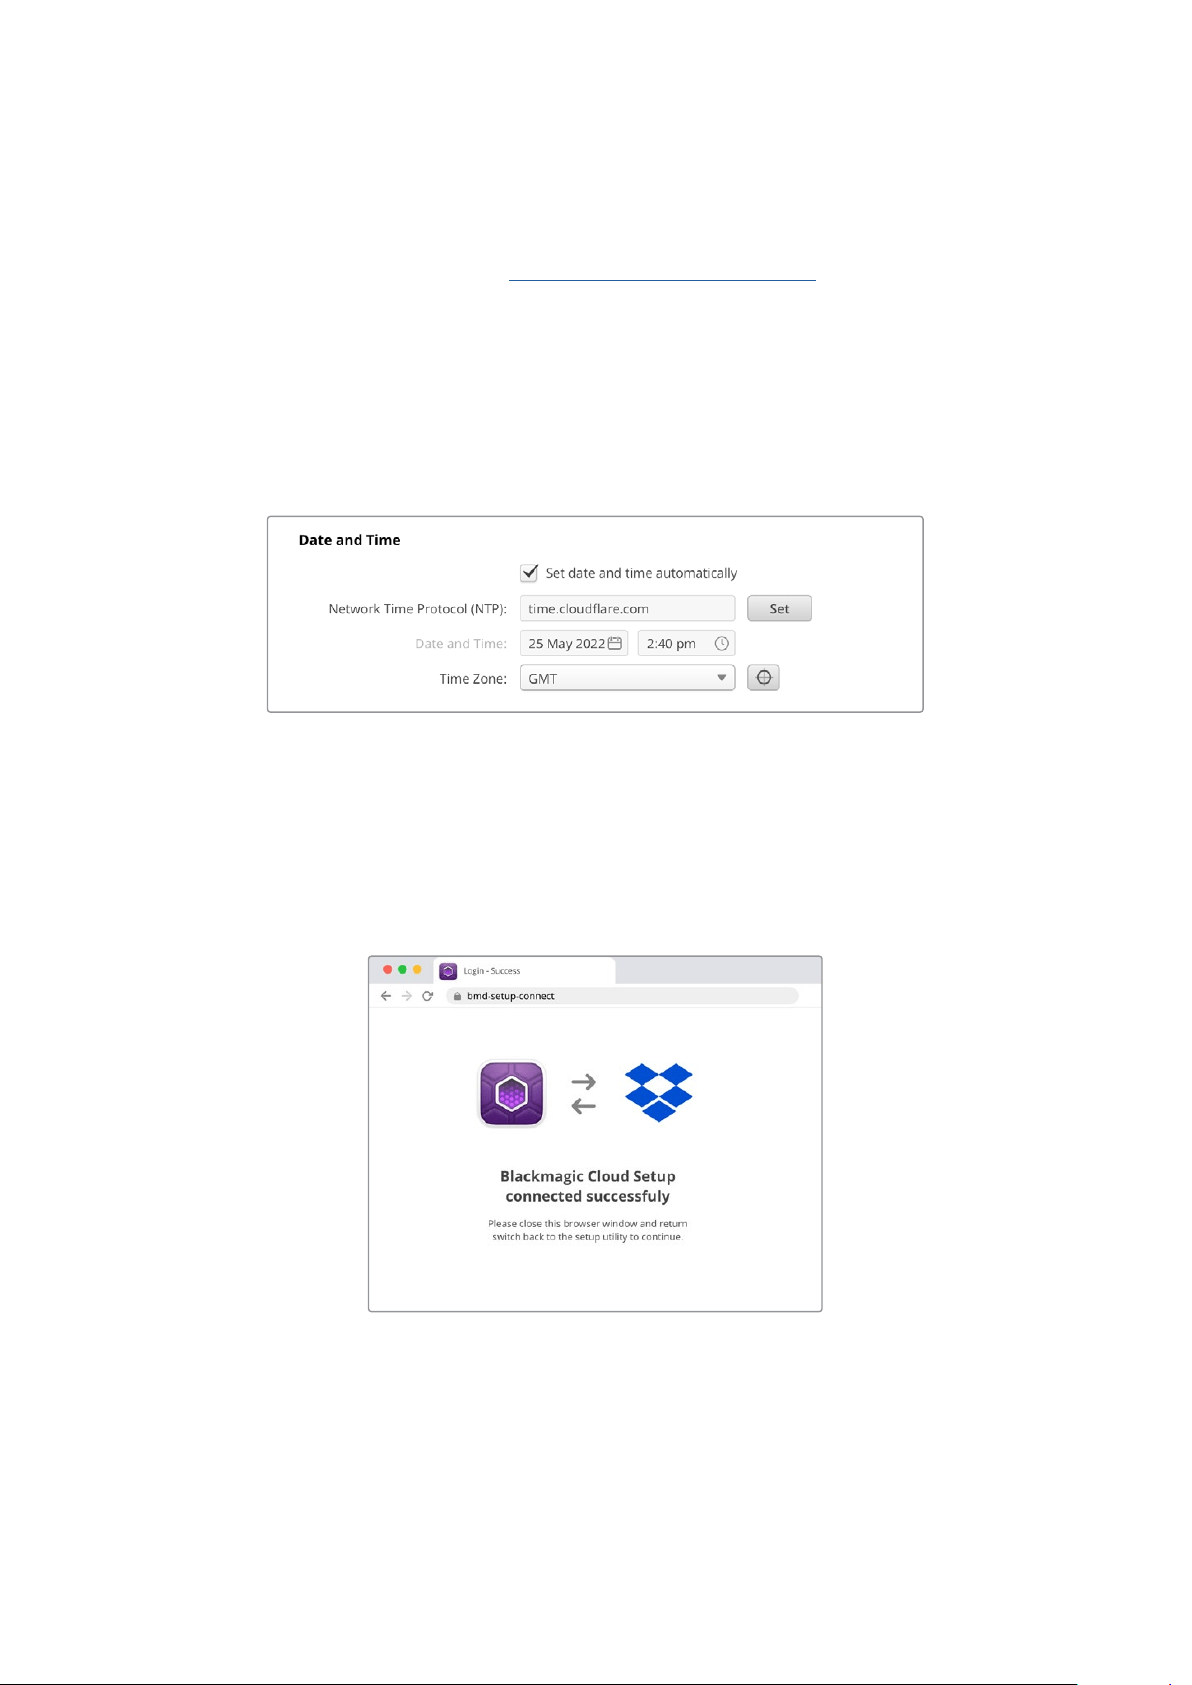
Setting Date and Time
Cloud services such as Dropbox require the correct date and time to sync to your Blackmagic
Cloud Store. By default, your cloud store will use the Cloudflare NTP server to automatically set
thedate and time.
To sync your Dropbox account with Blackmagic Cloud Store all you need to do is sign into your
Dropbox account using the cloud sync settings, set the folder you want to sync to and set the
sync direction.
Sign into Dropbox
1 Click on the ‘sign in’ button for the Dropbox account. A sign in window will appear.
2 Sign into Dropbox.
A confirmation message will indicate that you have successfully connected.
Iftheconnection failed, check your computer is connected to the Internet.
3 Click ‘close’.
8Adding Syncs
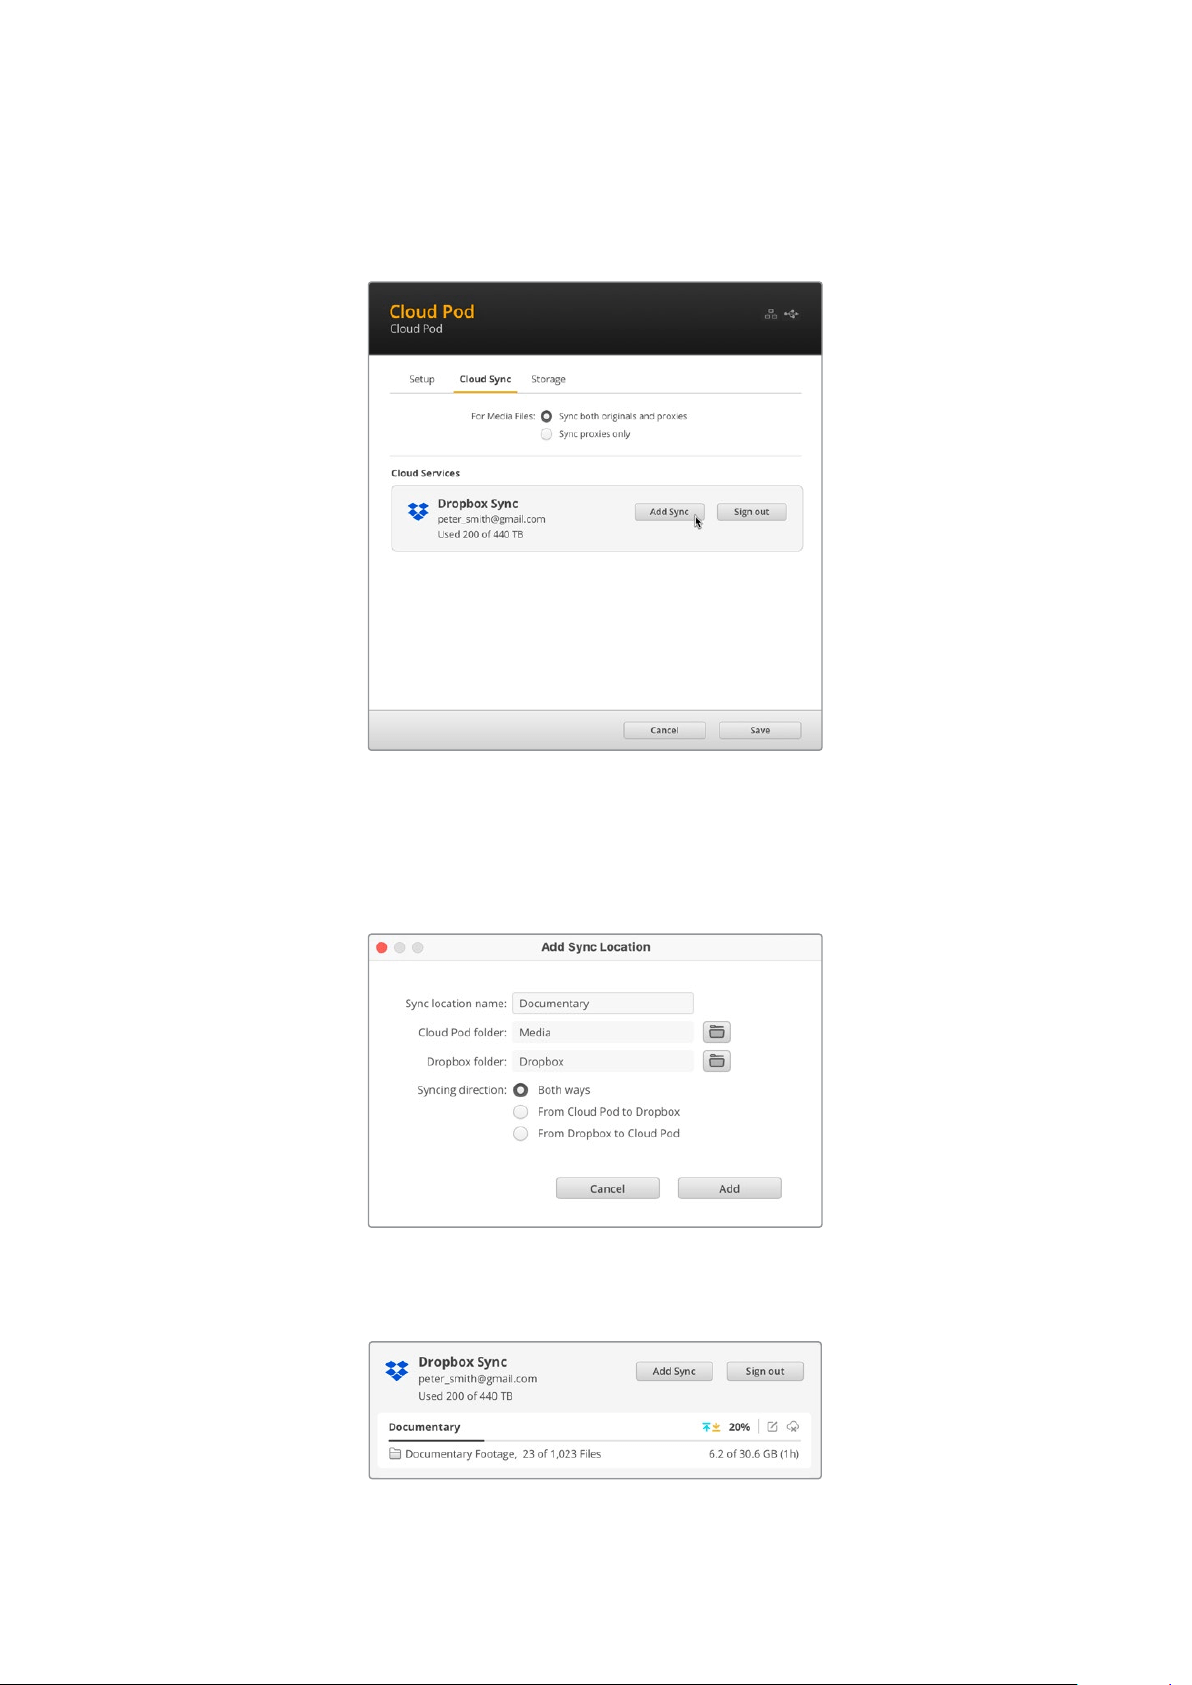
Sync Folder and Direction
1 You will now see the ‘add sync’ button enabled. Click on the button to open the
‘addsync location’ window.
2 Name the sync location and click on the folder icons to point to your desired sync
folders. These would typically share the same name.
3 Select the sync direction. For example, if you are syncing to Dropbox and you want to
sync files from your cloud store to Dropbox but not from Dropbox to your cloud store,
select ‘from cloud store to Dropbox’.
4 Click ‘add’.
Your Dropbox account is now synced to your Blackmagic Cloud Store.
Status indicators provide information about the sync process
9Adding Syncs
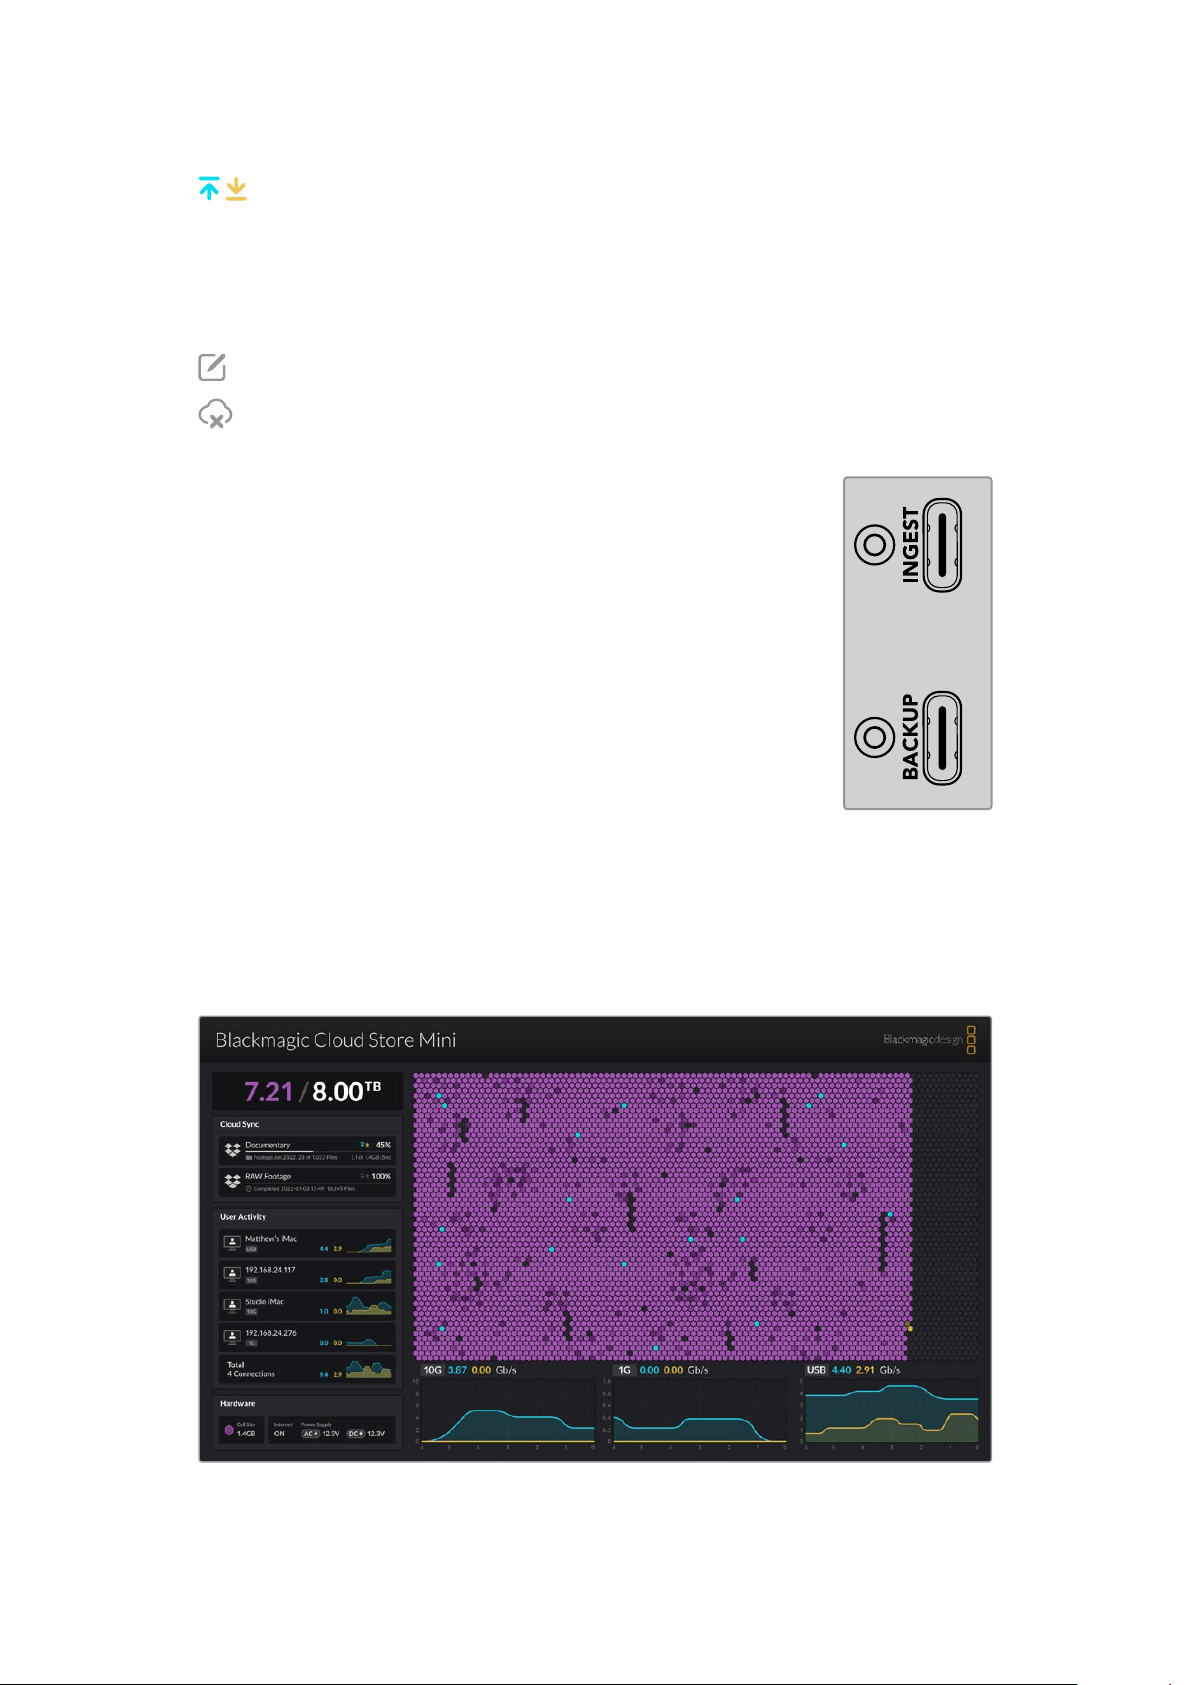
The sync arrows show the sync direction. A blue arrow shows that data is being sent
from your cloud store and a yellow arrow shows that data is being received. If data
is being sent and received at the same time, then a blue and yellow arrow will be
displayed. A gray arrow indicates when data is not being synced in that direction.
The percentage figure to the right of the sync arrows shows the current status of the
syncprogress.
Click on the ‘edit sync’ indicator to change the sync folder name and location.
Click on this indicator to delete the sync location. In the confirmation dialog box,
click‘continue’ to confirm or ‘cancel’ to abort the deletion.
Ingest and Backup
The two USB-C ports on the Blackmagic Cloud Store can be used for
loading and backup of files.
If you connect a media card reader or a USB-C disk to the ingest port,
thenall fileson that disk will be loaded into the cloud store.
Backup is also important and while Dropbox is a good backup solution,
byconnecting a USB disk to the backup port, you can do local backups
without any ongoing costs and with total privacy. It works with a USB-C
disk,or even large USB-C disk arrays. The latest files will be loaded first
andthe Blackmagic Cloud Store will keep backing up for as long as the
diskis connected.
HDMI Monitor Output
The monitor output provides a comprehensive overview of the storage status, plus all user
activity in real time. This section of the manual includes information about the different panels
and graphs.
10HDMI Monitor Output
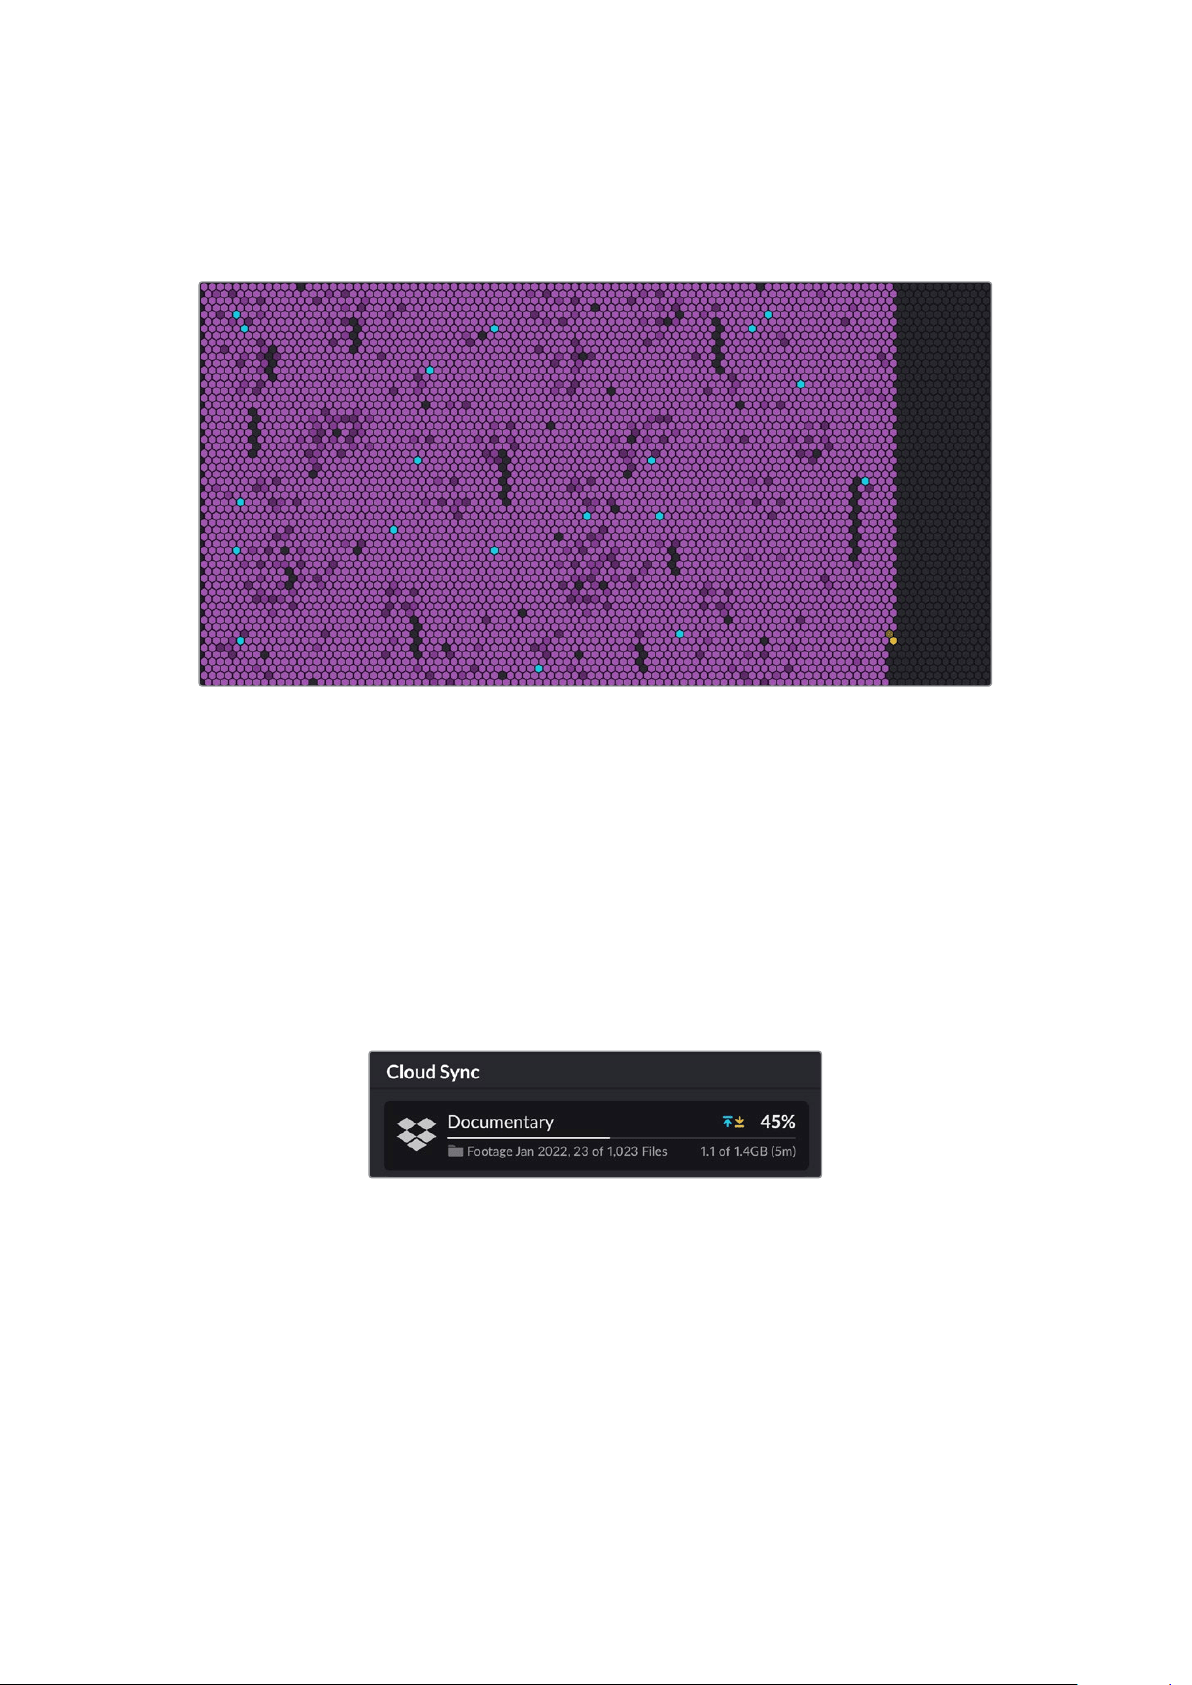
Storage Map
The storage map shows a graphic representation of the memory core and where the read and
write access is happening for the connected users.
The cells represent storage sectors being written to and read. Each cell will change color as
it fills with data, for example a cell will start gray to represent an empty sector then change to
purple and brighten as it fills with data.
The orange cells represent data being written and the blue cells represent data being read.
Cloud Sync Panel
The cloud sync panel shows all the syncs you have added. Blue arrows indicate data is
being synced to Dropbox and the orange arrows indicate data syncing from Dropbox toyour
Blackmagic Cloud Store.
Storage space indicators are visible under the Dropbox location name and the panel will
expand asmore syncs are added.
User Activity Panel
This panel shows all connected users and their data being synced. Forexample, the panel
identifies the user and the speed of their connection. Read and write activity is displayed
together with a continuously updating graph with a 60 second activity history.
11HDMI Monitor Output
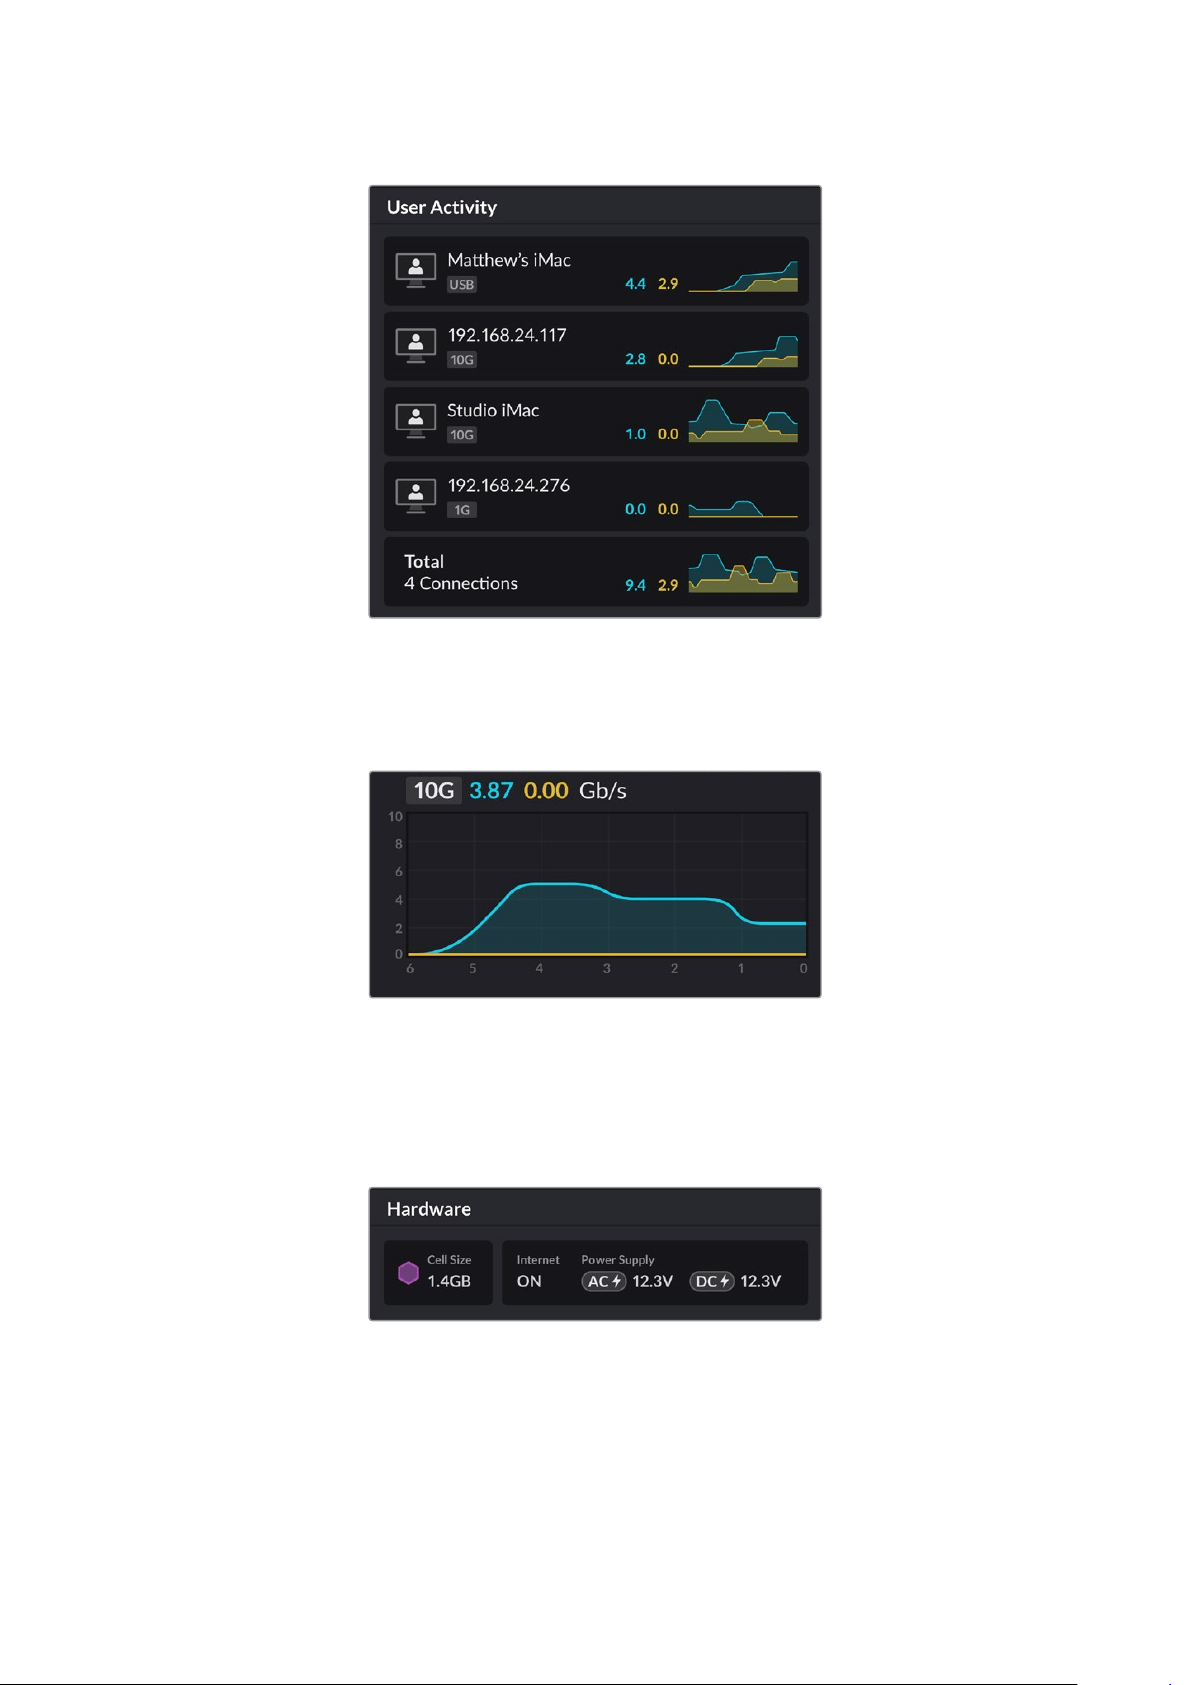
Data Rate Graphs
The data rate graphs display the read and write data rate over a 6second period.
Orangeinformation represents data being written and blue represents data being read.
Hardware Panel
This panel displays the cell size for each sector on the storage map.
USB drives plugged into Blackmagic Cloud Pod will also appear here. The power supply
indicators display the status for AV and DC power inputs.
The Internet icon confirms your cloud store is connected to the Internet so syncs can
beperformed.
12HDMI Monitor Output

Error Messages
This section shows the different error messages that may appear in the hardware panel and
what they represent.
Sync Errors
No Internet
Check that your Internet is connected.
You have been logged out of Dropbox
This may appear when Dropbox has been connected for a long
period of time and has automatically disconnected. All you need
to do is log back into your Dropbox account using the cloud sync
settings in the Blackmagic Cloud Store Setup utility.
Cannot connect to Dropbox server
This can appear if there is a problem with your Internet connection.
Check that your Internet is connected and your network settings
are correct.
Invalid Dropbox login information
This may happen if your credentials have been changed for your
Dropbox account. To solve this error, simply log back into your
Dropbox account using the Blackmagic Cloud Store Setup utility.
Disk is full
Your cloud store’s internal storage is full and you will need to
delete files to make room.
Storage is full
Your Dropbox account has run out of space and you will need
todelete some files to make space to enable syncs.
Cannot find Dropbox sync folder
This can happen when the sync folder on Dropbox has been
deleted or renamed.
Set to read only
Your cloud store has been set to read only mode. Disable read
only mode using the setup utility.
Disk Errors
Disk Error
Unable to connect to drive in USB-C DISK 1
The USB disk plugged into port 1 is not formatted using exFAT
or HFS formats. You can format the disk using a Mac or Windows
computer. Refer to the ‘formatting USB drives’ section.
No Local Drive Attached
Connect drive via USB-C
This will appear if there is no USB drive plugged into
BlackmagicCloud Pod.
Disk Failure
Replace disk 1
Blackmagic Cloud Store Mini has 4 internal disks in a RAID
formatand in the rare event a disk fails, an error message will
report the disk number. The example shows that disk 1 has failed
and needs to be replaced.
Disk Requires Format
Format disk via Cloud Store Setup
After replacing a disk in Blackmagic Cloud Store Mini you will
beprompted to format the disk using the Blackmagic Cloud
StoreSetuputility.
Disk Failure
Replace disk B5
In Blackmagic Cloud Store, the internal storage disks are
arrangedin banks. In the rare event a disk fails, this error will
identify the bank and slot number.
Disk Requires Rebuild
Rebuild disk via Cloud Store Setup
After replacing a disk in Blackmagic Cloud Store, rebuild the disk
array using the Blackmagic Cloud Store Setup settings. This will
recover the RAID so you can continue working without losing data.
Disk Error
Unable to connect to drive in USB-C BACKUP
This will appear if the USB drive plugged into the backup
connector has not been formatted using exFAT or HFS formats.
Refer to the ‘formatting USB drives’ section for more information.
13HDMI Monitor Output

Ejecting your Cloud Store
You can eject the Blackmagic Cloud Store the same way you would eject a USB drive on your
computer’s operating system. For example, once you have started writing and reading files
on aMac, an ‘eject’ icon will appear next to the Blackmagic Cloud Store’s name in the Finder
sidebar. Simply click on the eject icon and your cloud store will be ejected. This makes sure no
new files are written and you can safely remove the drive.
If there are multiple users accessing the drive on your network and you need to power the
unit down, or disconnect from the network, it’s important that each user ejects the Blackmagic
Cloud Store from their computer.
Blackmagic Cloud Store Setup
The Blackmagic Cloud Store Setup utility contains all the settings for your Blackmagic Cloud
Store including naming the unit and updating the internal software.
Download the latest Blackmagic Cloud Store software from the Blackmagic Design Support
Centre at: www.blackmagicdesign.com/support
Home Screen
The home screen is the primary page you will see when you launch the software. All connected
Blackmagic Cloud Store units on your network are accessible and if you have more than one
unit connected, you can select the desired unit by clicking on the left or right arrows.
The indicators at the bottom of the home screen display the total storage capacity, amount of
space used, the network connection status, plus the current maximum data rate.
The icons near the unit’s name indicate when the unit is connected to your computer via
Ethernet or USB. Click on the settings icon to open the settings for your cloud store.
14Blackmagic Cloud Store Setup

Settings
The settings in Blackmagic Cloud Store Setup are arranged in three tabs. These include ‘setup’,
‘cloudsync’ and ‘storage’.
Setup
Setup settings let you change the name of your cloud store, set the date and time, change
network settings and displays the current version of your cloud store’s internal software.
Name
Naming your Blackmagic Cloud Store is helpful if you have more than one unit connected
toyour network and you need to identify them individually.
Language
Use the language setting to change the language used on the HDMI monitor output.
Software
Displays the current version of your cloud store’s internal software.
15Settings

Date and Time
You can set your Blackmagic Cloud Store’s date and time automatically using network time protocol.
To set the date and time automatically using network time protocol select the checkbox.
Thiswill use the default Google NTP server, but you can also set it manually.
To set the date and time manually, deselect the checkbox and use the contextual menus.
Clicking the location icon will automatically set the time zone to match your computer’s.
Network Settings
Blackmagic Cloud Store can connect to the network using a static IP address or by using DHCP.
DHCP will automatically set an IP address for your cloud store and connect to the network
without the need to change any settings.
The dynamic host configuration protocol, or DHCP, is a service on network servers and routers
that automatically finds your Blackmagic Cloud Store and assigns an IP address. DHCP makes
iteasy to connect equipment via Ethernet and make sure that IP addresses do not conflict with
each other. Most computers and network switches support DHCP.
Select static IP if you want to set the IP address yourself, simply set the protocol setting to
‘staticIP’ and change the IP settings manually. A static IP address is one that won’t change even
if your Blackmagic Cloud Store is rebooted.
Using a static IP address might be necessary if you are connecting to a corporate network.
Ifyou have a network administrator, it’s possible your network might have custom IP addresses
for all the equipment connected to it. It’s best to check with your network administrator if they
are managing your computers and network in your company.
Allow utility administration
Enabling the ‘via USB’ setting removes the risk of anyone on the network making accidental
settings changes by limiting control to the computer the unit is connected to via USB.
Cloud Sync
Use the cloud sync settings to add
syncs and set how the Proxy Generator
application syncs proxy files. The
Proxy Generator application is installed
when you install the Blackmagic Cloud
Store software.
Media Files
These two radio buttons let you decide
whether to sync both proxy and original
files, or to only sync proxy files.
For more information refer to the ‘Proxy
Generator’ section in this manual.
Cloud Services
Use the cloud services pane to sign into
Dropbox and add Dropbox syncs.
16Settings
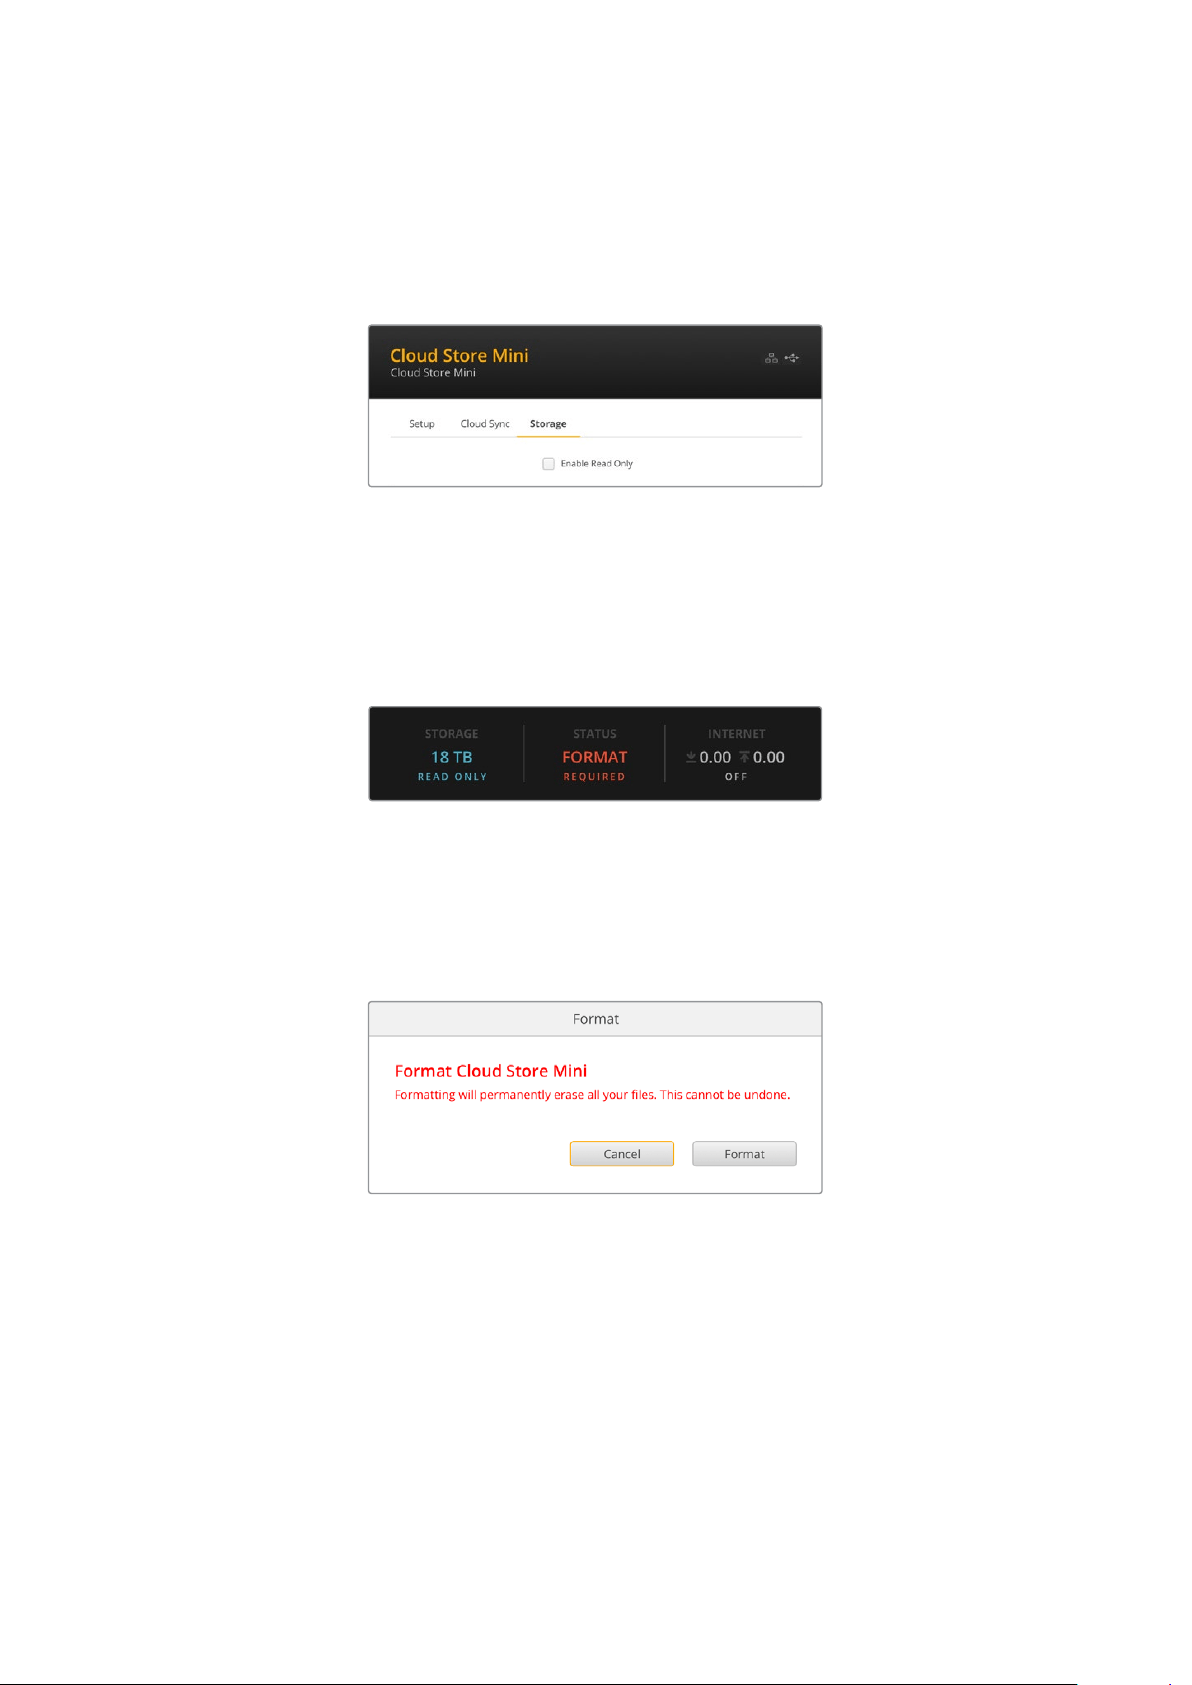
Storage
Enable Read Only
The storage settings include a checkbox to enable read only and a factory reset button.
Whenthe storage requires formatting, a format indicator will appear.
Check this option to set your Blackmagic Cloud Store’s storage to ‘read only’. When enabled,
noadditional files can be written to the drive.
Format
Occasionally, it may be necessary to format your Blackmagic Cloud Store’s internal storage.
Your cloud store will let you know when formatting is required by displaying a ‘format required’
message on the home page.
It’s worth noting that formatting the internal storage will delete all files stored on the drive.
Werecommend copying them to another drive before formatting.
To format the internal storage:
1 Click the ‘format drive’ button and then click ‘format’.
2 In the first confirmation dialog box, click the ‘format’ button.
3 A second dialog box will ask you to confirm your selection. Click ‘erase’ to start
theformatting process, or click ‘stop’ to exit without formatting.
4 A percentage indicator will display the formatting progress.
Factory Reset
The factory reset button lets you restore your Blackmagic Cloud Store to its factory default
state. Any files that you have stored on the unit will not be changed.
17Settings
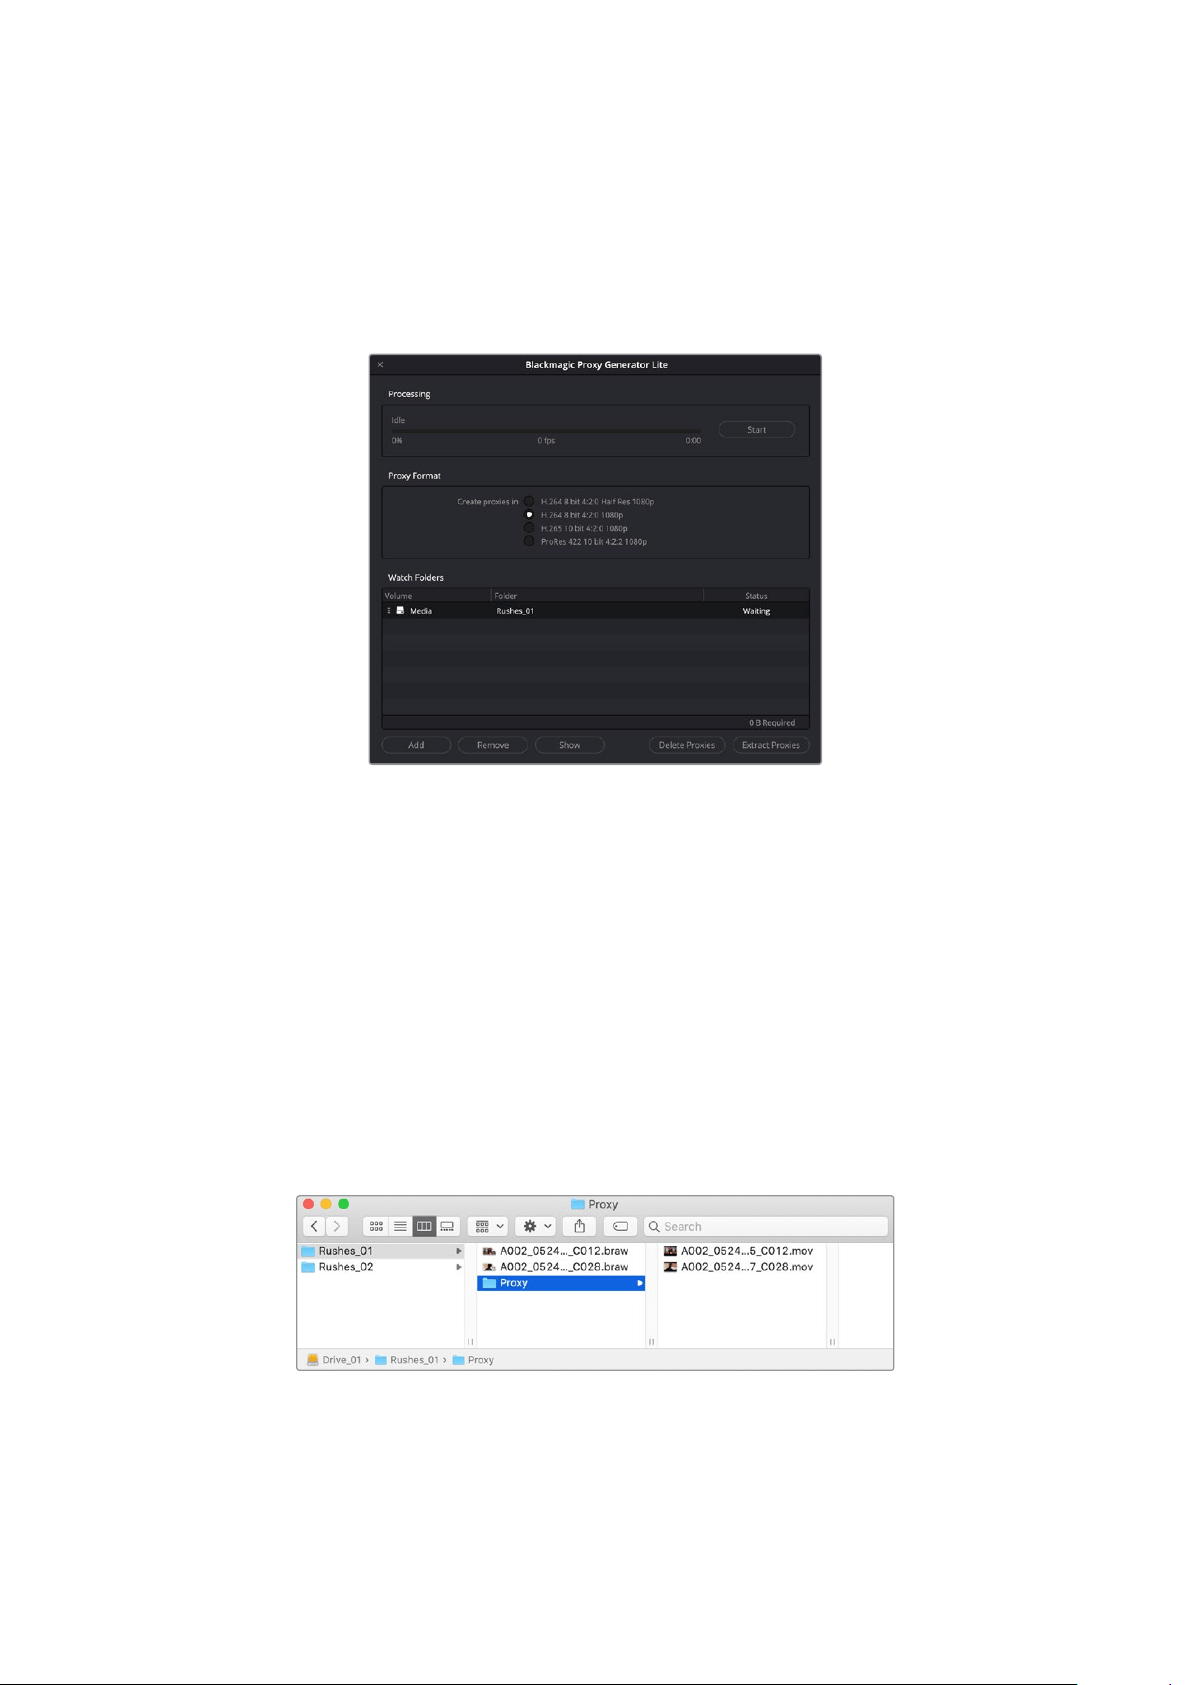
Proxy Generator
Proxy Generator is an application that automatically generates proxy files for source files located
in watch folders. A watch folder can be any folder on your cloud store or disk connected to your
computer. All you need to do is tell Proxy Generator where the watch folders are, click ‘start’,
then the application runs in the background while you work.
Set your watch folder and proxy format and when new files are added
tothe watch folder, proxy files will be automatically generated
The Blackmagic Proxy Generator is included with DaVinci Resolve Studio, but there is a lite
version that’s included with the cloud store products. The difference is the Blackmagic Proxy
Generator included with DaVinci Resolve Studio includes all the camera codecs that DaVinci
Resolve Studio supports.
However due to licensing limitations, the Blackmagic Proxy Generator Lite included with the
Blackmagic Cloud Store products uses the codecs built into your computer’s operating system.
Thismeans on Windows, ProRes proxies are disabled. Plus other formats could be disabled unless
the HEVC video extensions download is purchased from Microsoft.
Adding Watch Folders
A watch folder is constantly monitored by the application and when new files are added
tothatfolder, proxy files are created and saved in a subfolder named ‘proxy’.
Proxy files will be saved in a ‘proxy’ subfolder automatically created in your watch folder
18Proxy Generator

You can add as many watch folders as you want, but it is important there is enough free
storagespace to store both the original media files and the new proxy files.
When launching Proxy Generator for the first time, the application will automatically prompt
youto add a watch folder.
1 Locate an existing folder and click ‘open’, or create a new one by clicking ‘new folder’.
2 After the folder has been selected or created, it will appear in the ‘watch folders’ pane.
3 Add additional watch folders by clicking the ‘add’ button. You can also drag and drop
folders into the watch folders pane.
To remove a watch folder, select the folder in the list and click on the ‘remove’ button.
TIP Click the ‘show’ button to open the watch folder in your computer’s file browser.
You can observe the status of all your watch folders and change their order of priority by
dragging and dropping them into different positions. The information beneath your watch
folders list displays how much storage space is required tostore the proxy files.
19Proxy Generator
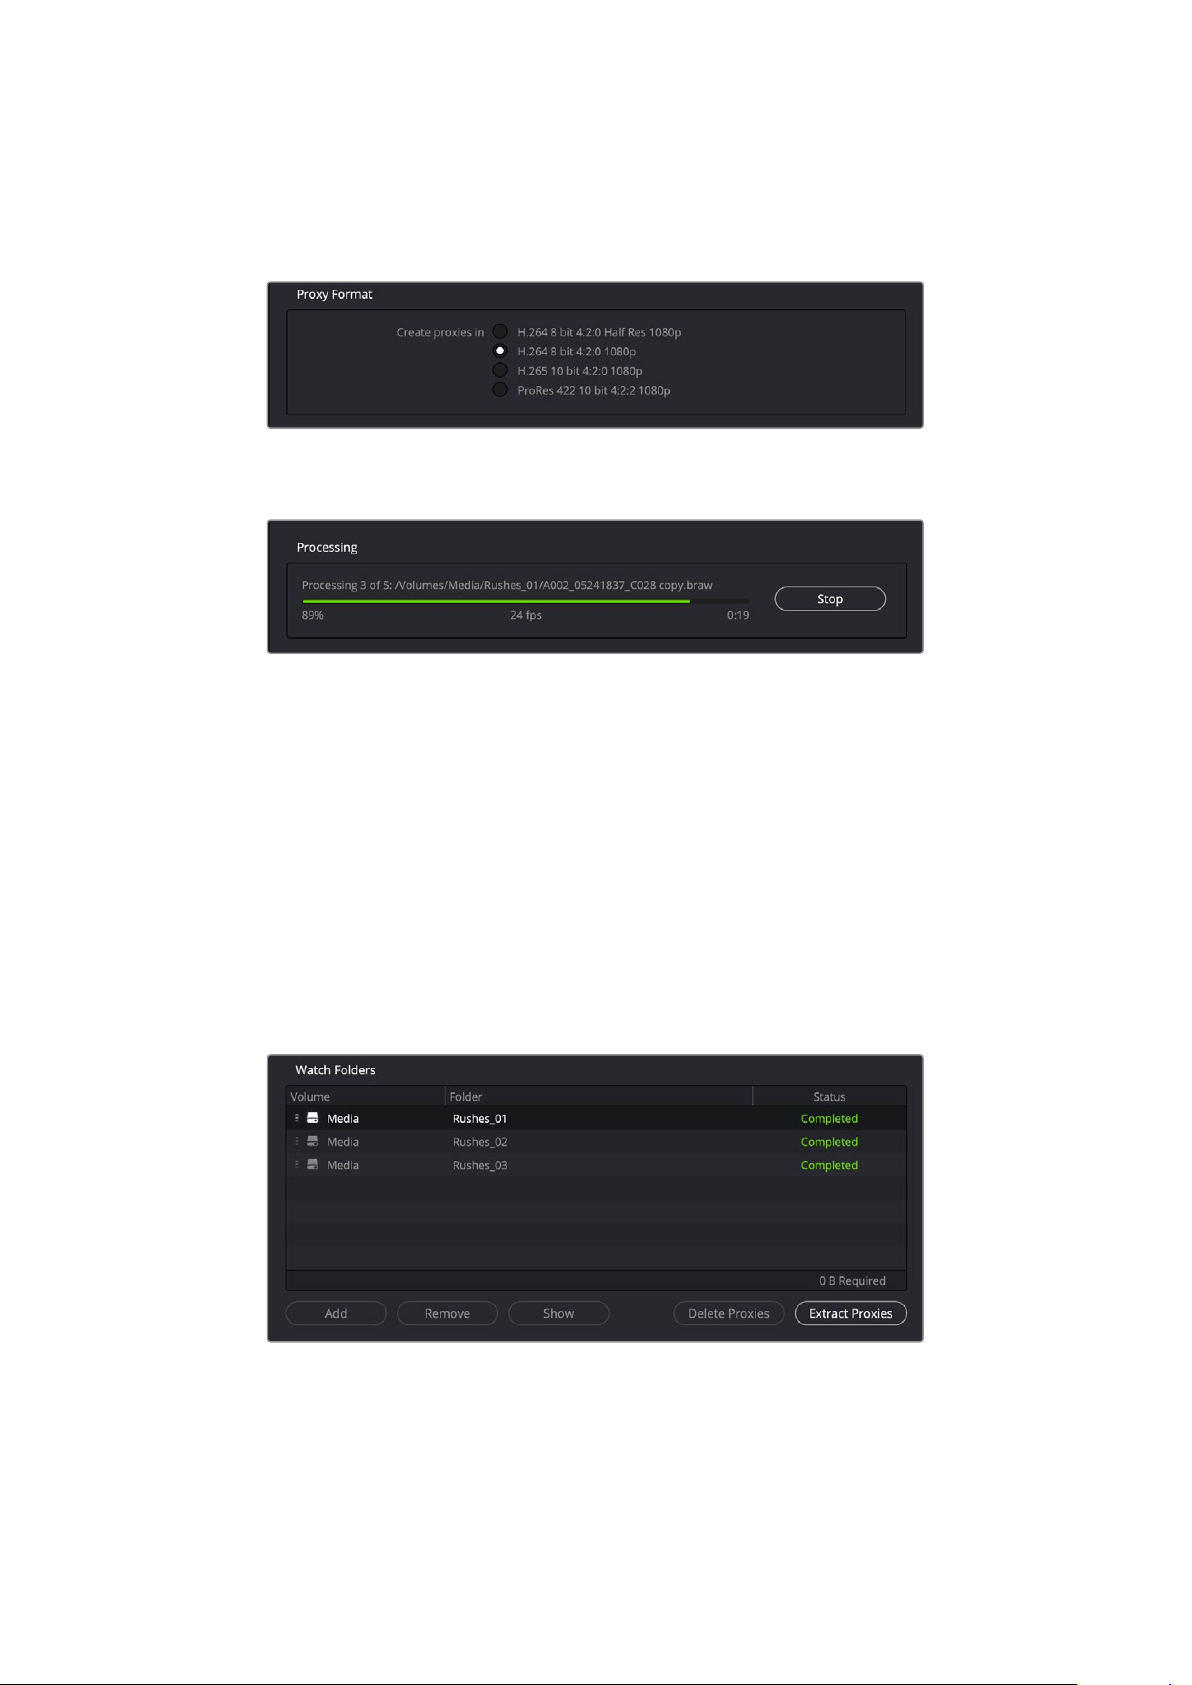
Setting the Format
Set the proxy file codec and format you want to use by clicking on the appropriate radio button.
Youcanchoose H264, H265 and Apple ProRes codecs.
All you need to do now is click the ‘start’ button in the processing pane. Ifyou want to stop
theprocess at any time, just click the ‘stop’ button.
Managing Proxy Files
There are two options available to help manage your proxy files once processing has
been stopped.
Delete Proxies
This option deletes all proxy files and the proxy folder from the selected watch folders.
Extract Proxies
This option copies all proxy files from the selected watch folders to a new destination.
Thefollowing instructions show how to extract proxy files.
1 In the watch folders pane, click on the folder that contains the proxy files that you
wantto extract and then click ‘extract proxies’.
2 Select a location to copy your proxy files to and click ‘open’. A progress bar
displaystheextraction process.
20Proxy Generator
Formatting USB Drives
When using a disk with the Blackmagic Cloud Pod, it needs to be formatted in HFS+ or ExFAT.
Most disks come as NTFS format, but the disk needs to be reformatted to work with the cloud
pod. This section explains how to format disks on your computer.
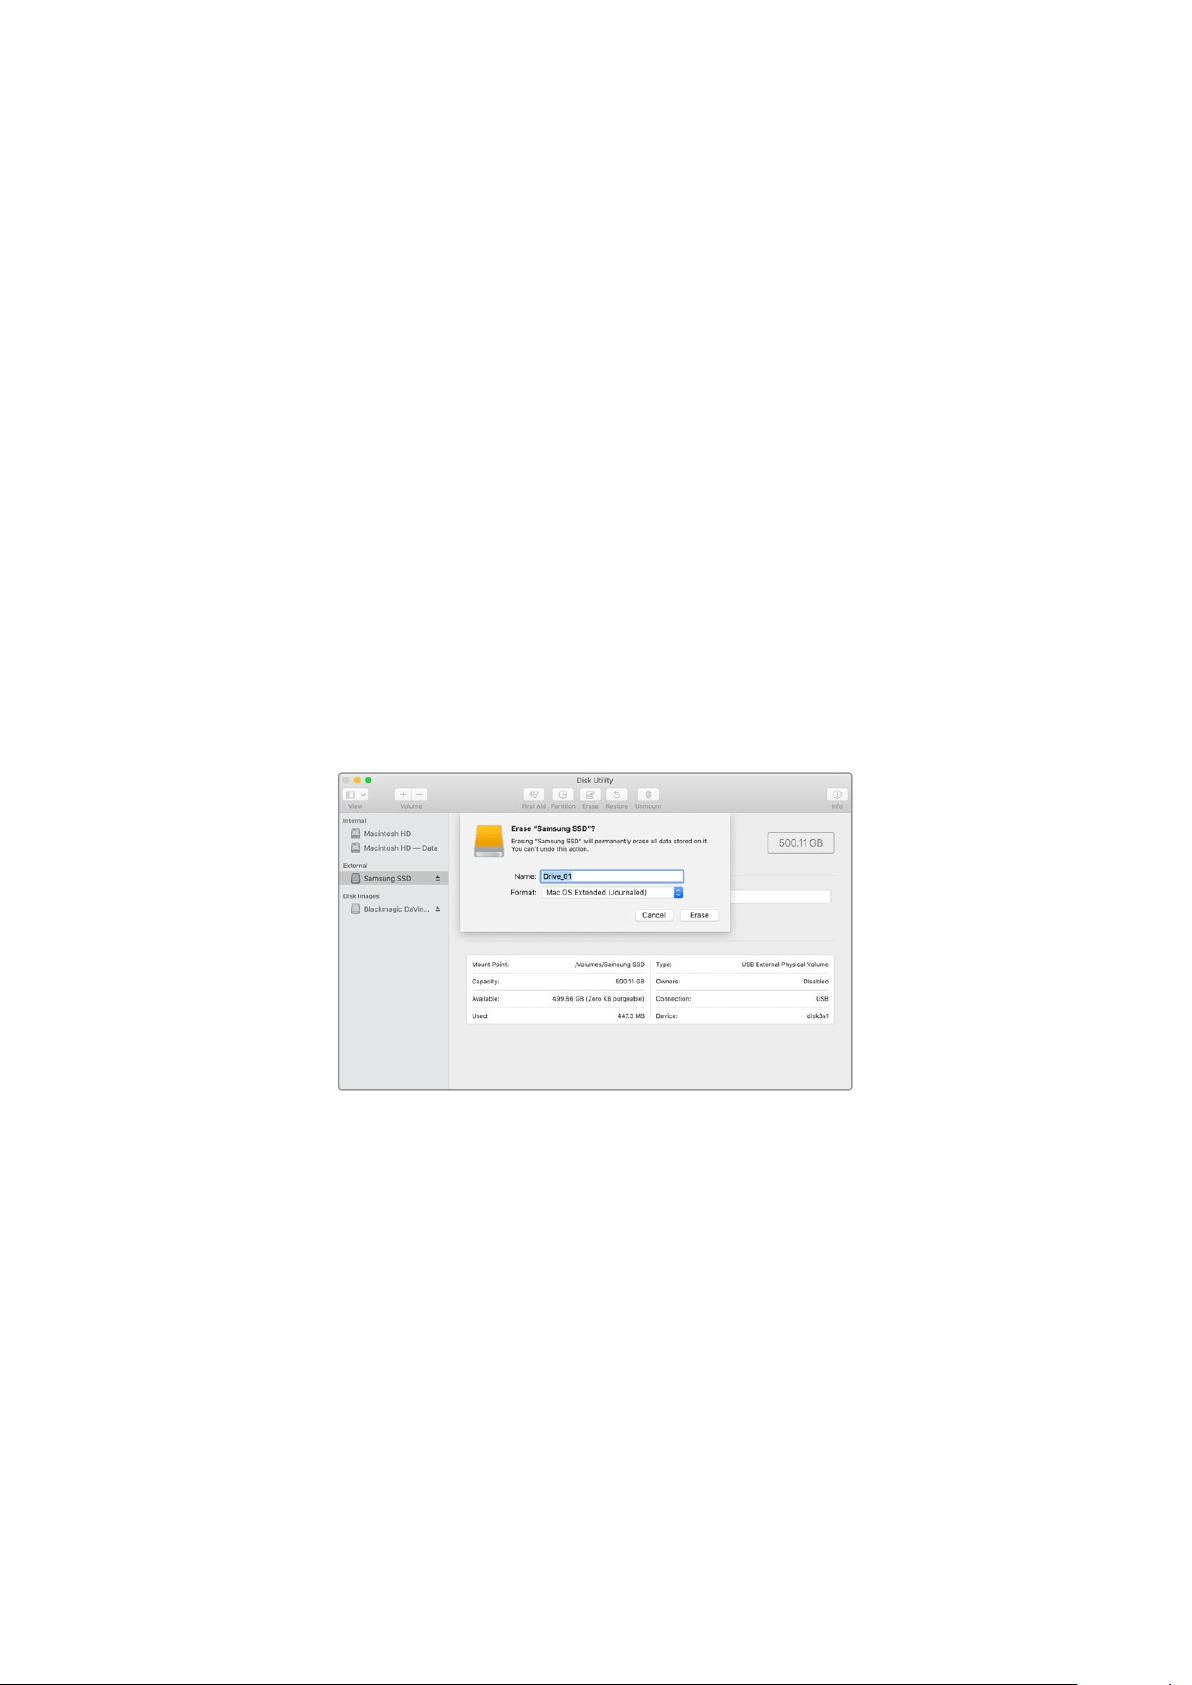
Formatting Drives on a Mac
The Disk Utility application included with Mac can format a drive in the HFS+ or ExFat formats.
HFS+ is also known as Mac OS Extended which includes a journaling feature that helps the
drive recover if it has a problem.
Make sure you back up anything important from your drive as you will lose everything on it
when it is formatted.
1 Connect a USB drive to your computer and dismiss any message offering to use
itforTime Machine backups.
2 Go to applications/utilities and launch Disk Utility.
3 Click on the disk icon of your USB drive and then click the erase tab.
4 Set the format to Mac OS Extended or ExFat.
5 Type a name for the new volume and then click erase. Your media will quickly be
formatted and made ready for use with Cloud Pod.
Formatting Drives in Windows
The format dialog box can format a drive in the ExFat format on a Windows PC. Make sure you back
up anything important from your USB drive as you will lose everything on it when it is formatted.
1 Connect a USB drive to your computer.
2 Open the start menu or start screen and choose ‘computer’. Right-click on your
USB drive.
3 From the contextual menu, choose format.
4 Set the file system to ExFat and the allocation unit size to128 kilobytes.
5 Type a volume label, select quick format and click Start.
6 Your media will quickly be formatted and made ready foruse with your Blackmagic
Cloud Store.
21Formatting USB Drives
Updating the Internal Software
To update your Blackmagic Cloud Store, first connect the unit to your computer via USB.
Download the latest version of Blackmagic Cloud Store software from the Blackmagic Design
support center at www.blackmagicdesign.com/support
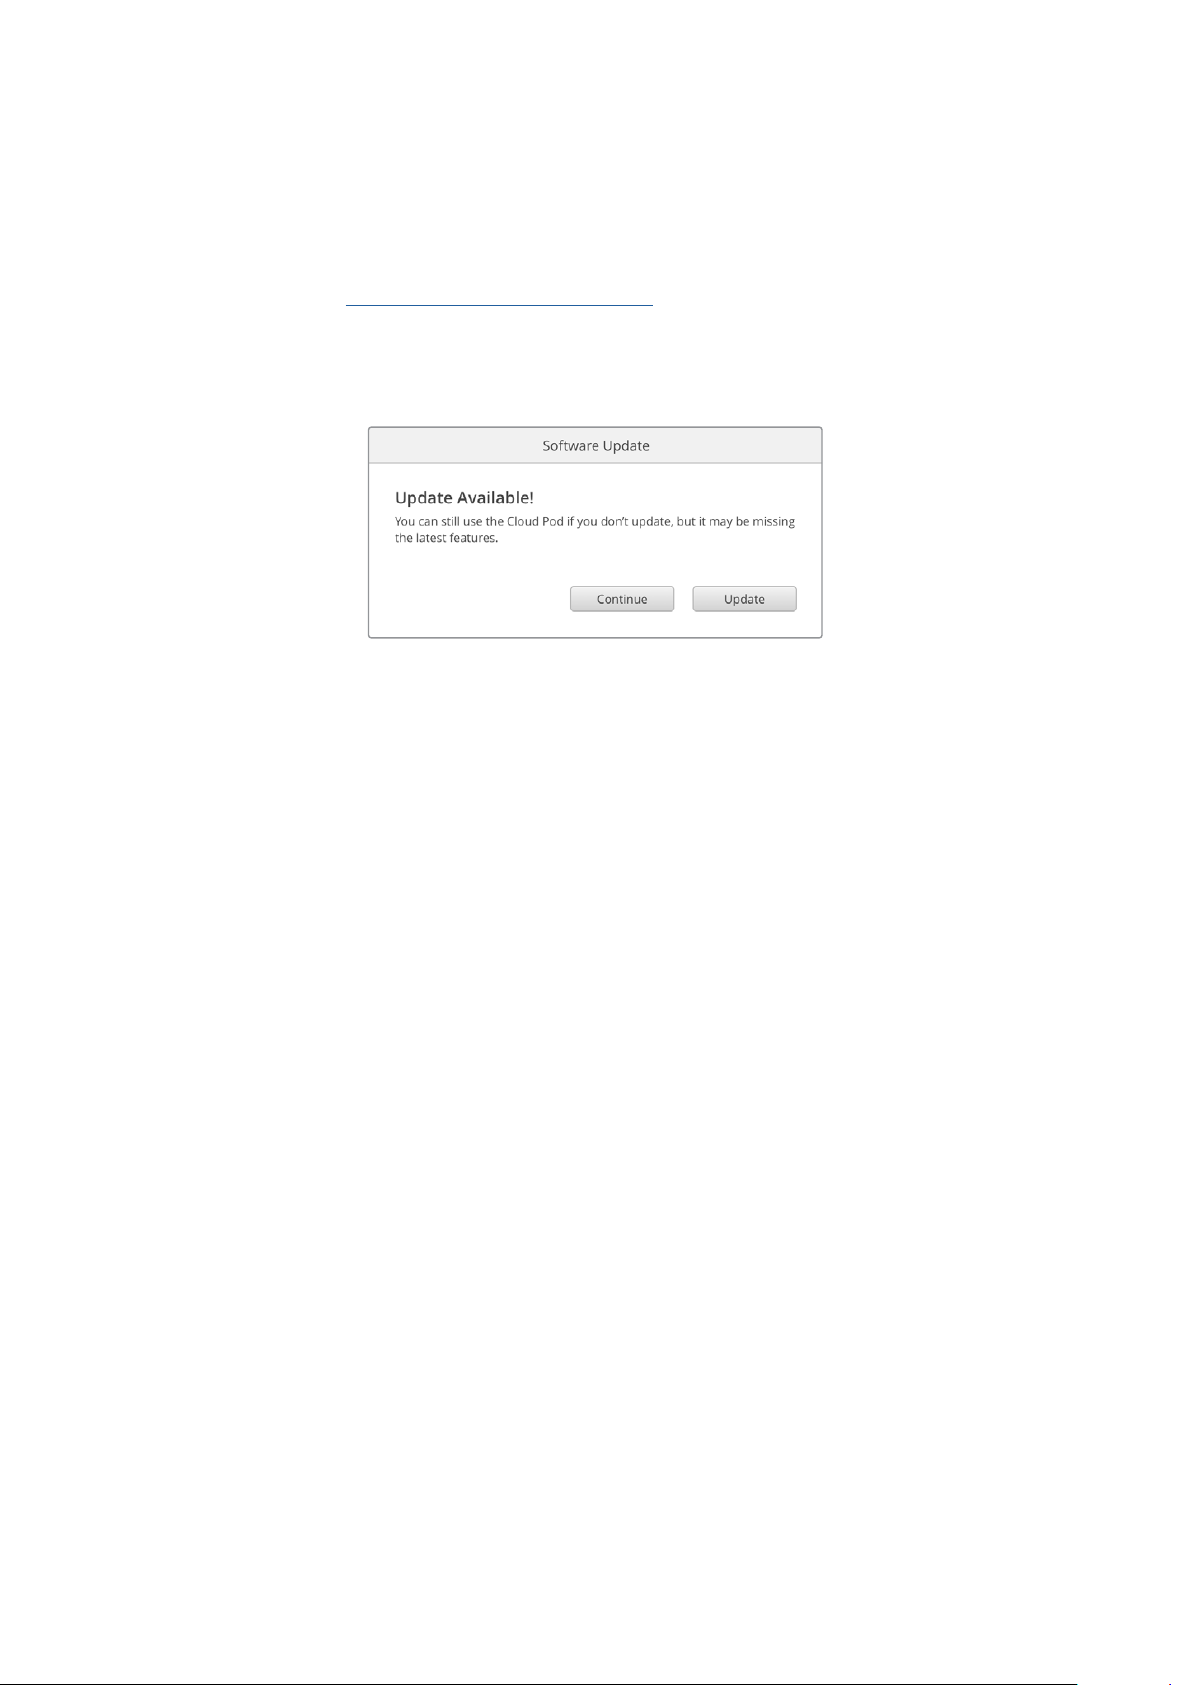
When you launch Blackmagic Cloud Store Setup the software will automatically detect the
current software version installed on your cloud store and will prompt you to update.
Click on ‘update’ and follow the on screen instructions to complete the update process.
After installing the latest Blackmagic Cloud Store software onyour
computer, an update prompt will appear in Blackmagic Cloud
Store Setup the next time you plug in the unit via USB
22Updating the Internal Software

Help
Getting Help
The fastest way to obtain help is to go to the Blackmagic Design online support pages and
check the latest support material available for your Blackmagic Cloud Pod and Blackmagic
Cloud Store Mini.
Blackmagic Design Online Support Pages
The latest manual, software and support notes can be found at the Blackmagic Design support
center at www.blackmagicdesign.com/support.
Blackmagic Design Forum
The Blackmagic Design forum on our website is a helpful resource you can visit for more
information and creative ideas. This can also be a faster way of getting help as there may already
be answers you can find from other experienced users and Blackmagic Design staff which will
keep you moving forward. You can visit the forum at https://forum.blackmagicdesign.com
Contacting Blackmagic Design Support
If you can’t find the help you need in our support material or on the forum, please use the
“Sendus an email” button on the support page to email a support request. Alternatively,
click on the “Find your local support team” button on the support page and call your nearest
Blackmagic Design support office.
Checking the Software Version Currently Installed
To check which version of Blackmagic Cloud Store software is installed on your computer, open
the About Blackmagic Cloud Store Setup window.
On Mac OS, open Blackmagic Cloud Store Setup from the Applications folder.
Select About Blackmagic Cloud Store Setup from the application menu to reveal the
version number.
On Windows, open Blackmagic Cloud Store Setup utility from your Start menu or Start
Screen. Clickon the Help menu and select About Blackmagic Cloud Store Setup to
reveal theversion number.
How to Get the Latest Software Updates
After checking the version of Blackmagic Cloud Store Setup software installed
on your computer, please visit the Blackmagic Design support center at
www.blackmagicdesign.com/support to check for the latest updates. While it is usually a good
idea to run the latest updates, it is wise toavoid updating any software if you are in the middle
of an important project.
23Help
Regulatory Notices
Disposal of Waste of Electrical and Electronic Equipment Within the European Union.
The symbol on the product indicates that this equipment must not be disposed of
with other waste materials. In order to dispose of your waste equipment, it must be
handed over to a designated collection point for recycling. The separate collection
and recycling of your waste equipment at the time of disposal will help conserve
natural resources and ensure that it is recycled in a manner that protects human health
and theenvironment. For more information about where you can drop off your waste
equipment for recycling, please contact your local city recycling office or the dealer
from whom you purchased the product.
Class B Product
NOTE: The equipment has been tested and found to comply with the limits for a
ClassBdigital device, pursuant to Part 15 of the FCC Rules. These limits are designed
to provide reasonable protection against harmful interference in a residential
installation. This equipment generates, uses and can radiate radio frequency energy
and, if not installed and used in accordance with the instructions, may cause harmful
interference to radio communications. However, there is no guarantee that interference
will not occur in a particular installation. If this equipment does cause harmful
interference to radio and television reception, which can be determined by turning the
equipment off and on, the user is encouraged to try to correct the interference by one
or more of the following measures.
• Reorient or relocate the receiving antenna.
• Increase the separation between the equipment and the receiver.
• Connect the equipment to an outlet on a circuit different from that to which the
receiver is connected.
• Consult the dealer or an experienced radio/TV technician for help.
R-R-BMD-20210818001
R-R-BMD-20211115001
ISED Canada Statement
This device complies with Innovation, Science and Economic Development
Canadastandards for Class B Digital apparatus.
Any modifications or use of this product outside its intended use could void
compliance to these standards.
Connection to HDMI interfaces must be made with high quality shielded
HDMI cables.
24Regulatory Notices

Safety Information
For protection against electric shock, the equipment must be connected to a mains socket
outlet with a protective earth connection. In case of doubt contact a qualifiedelectrician.
To reduce the risk of electric shock, do not expose this equipment to dripping orsplashing.
Product is suitable for use in tropical locations with an ambient temperature of up to 40
o
C.
Ensure that adequate ventilation is provided around the product and that it is not restricted.
When rack mounting, ensure that the ventilation is not restricted by adjacent equipment.
No operator serviceable parts inside product. Refer servicing to your local Blackmagic Design
service center.
For Cloud Store Mini, use only at altitudes not more than 4000m above sea level.
State of California statement
This product can expose you to chemicals such as trace amounts of polybrominated biphenyls
within plastic parts, which is known to the state of California to cause cancer and birth defects
or other reproductive harm.
For more information go to www.P65Warnings.ca.gov.
25Safety Information

Warranty
12 Month Limited Warranty
Blackmagic Design warrants that this product will be free from defects in materials and workmanship
for a period of 12 months from the date of purchase. If a product proves to be defective during this
warranty period, Blackmagic Design, at its option, either will repair the defective product without
charge for parts and labor, or will provide a replacement in exchange for the defective product.
In order to obtain service under this warranty, you the Customer, must notify Blackmagic Design
of the defect before the expiration of the warranty period and make suitable arrangements for
the performance of service. The Customer shall be responsible for packaging and shipping the
defective product to a designated service center nominated by Blackmagic Design, withshipping
charges pre paid. Customer shall be responsible for paying all shipping charges, insurance, duties,
taxes, and any other charges for products returned to us for any reason.
This warranty shall not apply to any defect, failure or damage caused by improper use or improper
or inadequate maintenance and care. Blackmagic Design shall not be obligated to furnish
service under this warranty: a) to repair damage resulting from attempts by personnel other than
Blackmagic Design representatives to install, repair or service the product, b) to repair damage
resulting from improper use or connection to incompatible equipment, c) to repair any damage or
malfunction caused by the use of non Blackmagic Design parts or supplies, or d) to service a product
that has been modified or integrated with other products when the effect of such a modification or
integration increases the time or difficulty of servicing the product. THIS WARRANTY IS GIVEN BY
BLACKMAGIC DESIGN IN LIEU OF ANY OTHER WARRANTIES, EXPRESS OR IMPLIED. BLACKMAGIC
DESIGN AND ITS VENDORS DISCLAIM ANY IMPLIED WARRANTIES OF MERCHANTABILITY OR
FITNESS FOR A PARTICULAR PURPOSE. BLACKMAGIC DESIGN’S RESPONSIBILITY TO REPAIR
OR REPLACE DEFECTIVE PRODUCTS IS THE WHOLE AND EXCLUSIVE REMEDY PROVIDED TO
THE CUSTOMER FOR ANY INDIRECT, SPECIAL, INCIDENTAL OR CONSEQUENTIAL DAMAGES
IRRESPECTIVE OF WHETHER BLACKMAGIC DESIGN OR THE VENDOR HAS ADVANCE NOTICE
OF THE POSSIBILITY OF SUCH DAMAGES. BLACKMAGIC DESIGN IS NOT LIABLE FOR ANY
ILLEGAL USE OF EQUIPMENT BY CUSTOMER. BLACKMAGIC IS NOT LIABLE FOR ANY DAMAGES
RESULTING FROM USE OF THIS PRODUCT. USER OPERATES THIS PRODUCT AT OWN RISK.
© Copyright 2022 Blackmagic Design. All rights reserved. ‘Blackmagic Design’, ‘DeckLink’, ‘HDLink’, ‘Workgroup Videohub’,
‘Multibridge Pro’, ‘Multibridge Extreme’, ‘Intensity’ and ‘Leading the creative video revolution’ are registered trademarks in the
US and other countries. All other company and product names may be trade marks of their respective companies with which
they are associated.
26Warranty