Loading ...
Loading ...
Loading ...

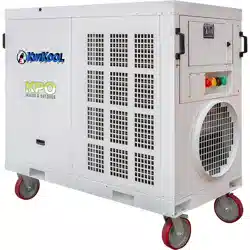
Install Flex Duct (hot-air discharge) - You will need to direct the hot air discharge
away from your conditioned space and away from the condenser air intakes. This is
especially true when the KPO is used in a confined space or an indoor closed space.
This is completed with a 20“ diameter duct for the 12-ton and a 12” diameter duct for
the 5-ton. Clamp the duct onto the flange on the control side of the KPO and route to
your desired location (Visit www.kwikool.com for specific model specifications on
maximum duct lenght). NOTE: It may not be necessary to connect a hot-air discharge
duct if you are using the KPO outdoors and ducting the cooling into a space. When
used indoors or in a confined space and the hot air exhaust is ducted out, the KPO
must have a supply of make-up air for the condenser. The condenser make-up air
cannot be ducted into the KPO, and has to come from the surrounding space. Make
sure you have adequate fresh air supply or the unit will shut down to protect the
compressor from catastrophic failure.
Apply Electrical Power - When power is supplied to the unit, the controller will
become operational. KPO 12-ton users will have to place the units built in breaker to the
ON position to engage the controller. For units equipped with a Phase Monitor (all 12-ton
KPOs and KPO 5-tons 3 Phase models), the unit will display a red light alarm for 5
seconds, then clear when the microprocessor in the Phase Monitor “boots up”, this is a
normal condition. For units with a Phase Monitor, the most common reason the fault light
will not clear on initial start up is incorrect phasing. This condition is easily corrected. If
the red light fails to clear in 5 seconds a qualified personal may turn the source power off
and exchange any of the 3 line voltage wires with the other. DO NOT SWAP THE
GREEN WIRE. Power the unit back up and wait for the fault red light to clear for 5
seconds and then proceed to the next step. If the fault light fails to clear after changing
the phase, turn the power off at the source, return the wires back to the original
configuration and refer to the Troubleshooting Guide (section IX) of this manual.
Set your Controller - The controller of your KPO is factory set to start cooling above
72 degrees F and will be displaying the current room temperature; it is in cooling mode
and is set to come on within a 2 degrees temperature differential. If it is necessary to
alter these settings, the set routine is as follows:
E.
D.
F.
Page 7
Press set. F is displayed, use the up or down arrow to choose Celsius and
Fahrenheit, the letter C is then displayed.
Press set again, the current set point is displayed, use the up or down arrow to
change the temperature that the unit will cycle on or off at. NOTE: Lowering or
raising this temperature setting will not change the actual temperature of the supply
air, for best results always set the unit to a realistic temperature that it can maintain.
Press set again, the number 2 is displayed, this is the temperature differential,
changing this setting up or down is not recommended and only varies the range that
the temperature must be when cycling, and under some conditions may not allow the
unit to cycle on at all if adjusted out of the factory range.
Pressing set again, and C1 displays do not adjust this setting, this is the mode
setting and moving the control from this setting will place the unit in H1 which is
heat mode and not the abbreviation for the word HIGH and not used or available
in KPO models. Your KPO will not operate in this mode. H1 DOES NOT SIGNIFY
HI..IT IS HEAT 1 - THIS MUST BE SET TO C1.
a.
b.
c.
d.
Loading ...
Loading ...
Loading ...