Loading ...
Loading ...
Loading ...
23
Read all maintenance instructions fully before you start any repair work. In some conditions, an assistant is required to do
the necessary tasks.
Equipment must be regularly examined for damage and repairs. The owner is responsible to make sure that
regular maintenance is done. Worn or damaged components must be repaired or replaced immediately.
Only manufacturer supplied components can be used to maintain and repair the equipment.
If at any time the Warning labels become loose, unreadable or dislodged, replace the labels. If purchased
in US/Canada, contact Customer Service for replacement labels. If purchased outside US/Canada, contact
your local distributor for them.
Disconnect all power to the machine before you service it.
Daily: Before each use, examine the exercise machine for loose, broken, damaged, or worn parts. Do not
use if found in this condition. Repair or replace all parts at the rst sign of wear or damage. Make
sure adjustment knobs are tight. Tighten as necessary. After each workout, use a damp cloth to
wipe your machine and Console free of moisture.
NOTICE: If necessary, only use a mild dish soap with a soft cloth to clean the Console. Do not
clean with a petroleum based solvent, automotive cleaner, or any product that contains
ammonia. Do not clean the Console in direct sunlight or at high temperatures. Be sure to
keep the Console free of moisture.
Weekly: Check pedals and tighten as necessary.
This bike cannot stop the Pedals independently of the Flywheel. Reduce the pace to
slow the Flywheel and Pedals to a stop. Do not dismount the bike until the Pedals have
come to a complete stop. Be aware that the moving Pedals can strike the backs of the
legs.
Clean the machine to remove any dust, dirt, or grime from the surfaces.
Check for smooth seat operation. If needed, sparingly apply a thin coating of silicone lube to ease
operation.
Silicone lubricant is not intended for human consumption. Keep out of reach of
children. Store in a safe place.
Note: Do not use petroleum based products.
Monthly
or after 20
hours:
Check crank arms and tighten as necessary. Make sure all bolts and screws are tight. Tighten as
necessary.
Check the drive belt tension and adjust if necessary.
Checking the Drive Belt Tension
To check the Drive Belt tension, the bike needs to be operated. Get the pedals rotat-
ing at about 20 RPM. Then suddenly increase the RPM to your maximum ability. If the
pedals move normally with no slipping, the tension is correct. If the Pedals slip, the belt
needs to be adjusted.
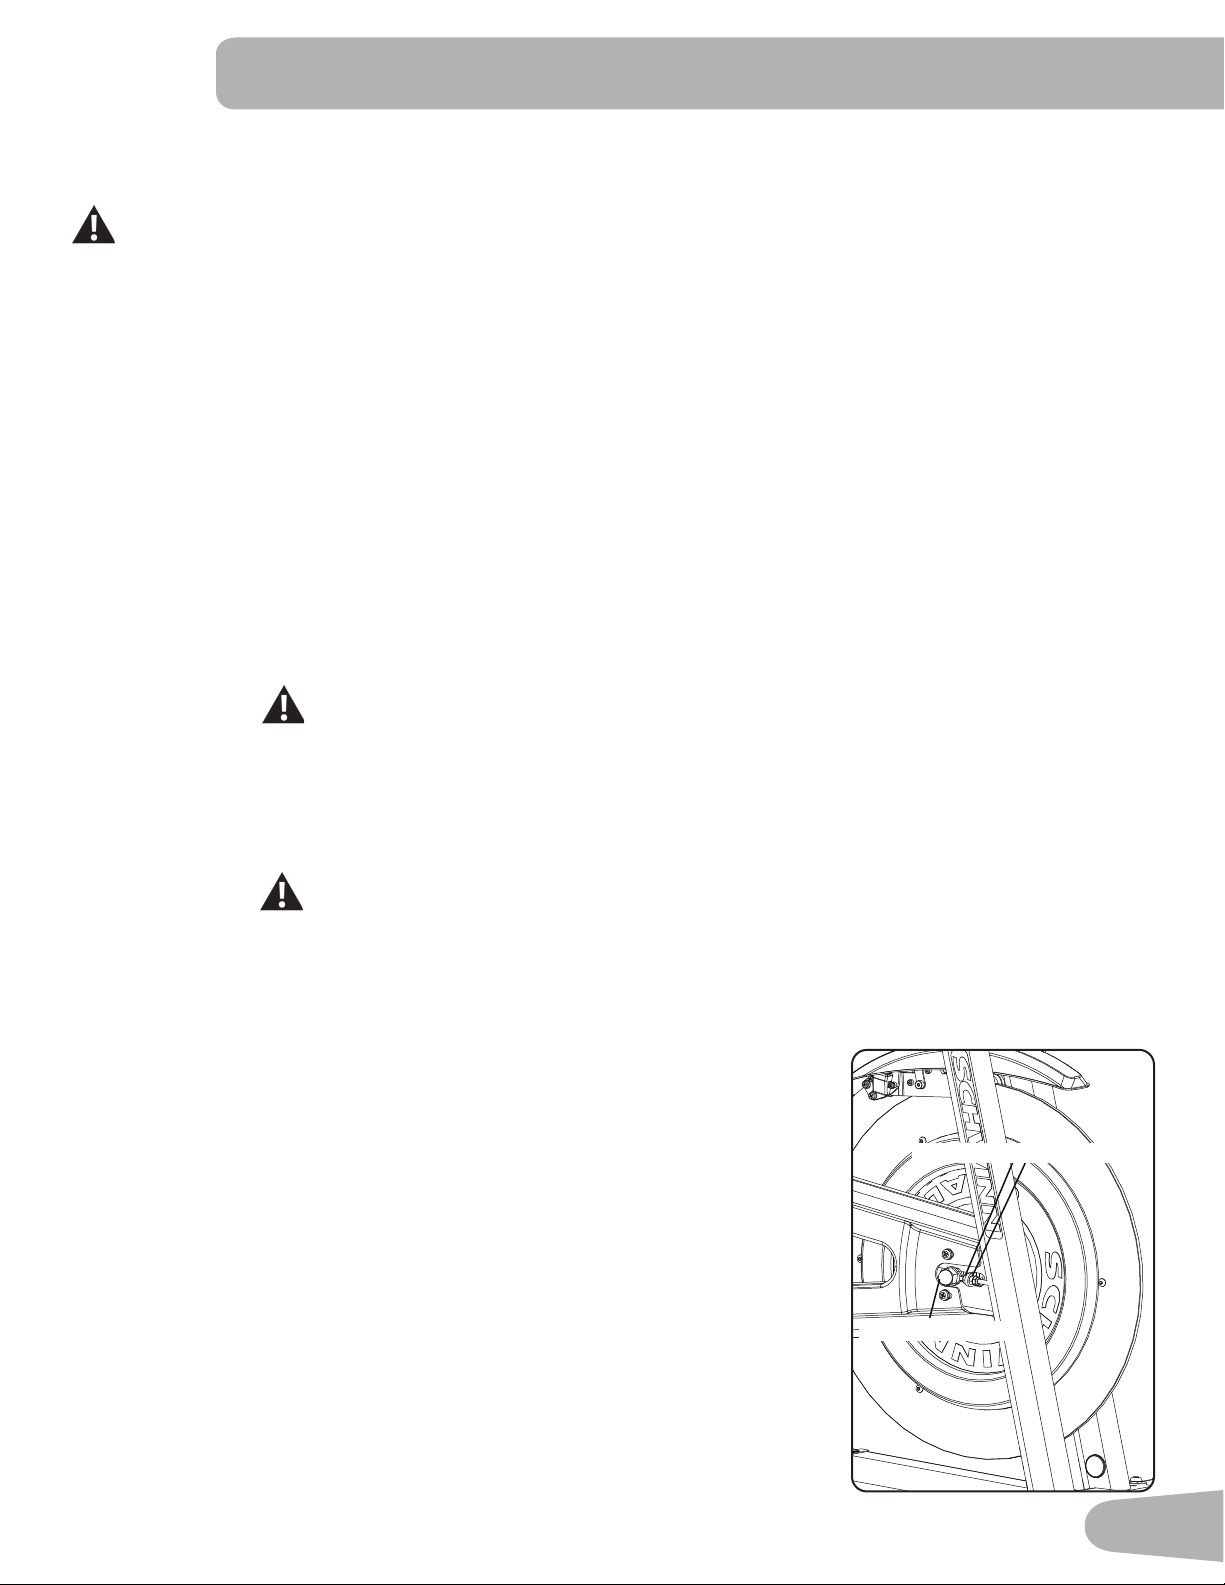
Adjusting the Drive Belt Tension
1. To change the tension of the Drive Belt, loosen the Axle Nuts. Use a 15mm open
end wrench to hold the Axle Nut on one side steady, and loosen the Axle Nut on
the opposite side with a 15mm socket and wrench.
2. If the Drive Belt is too loose and slipping, use a 10mm wrench to turn each Fly-
wheel Retainer Nut a 1/4 turn to the right (clockwise).
3. Re-test the tension of the Drive Belt, and adjust if still necessary.
A detailed “Adjust the Belt Tension” procedure can be found in the Service Manual.
MAINTENANCE
Flywheel Retainer Nuts
Axle Nut
Loading ...
Loading ...
Loading ...