Loading ...
Loading ...
Loading ...
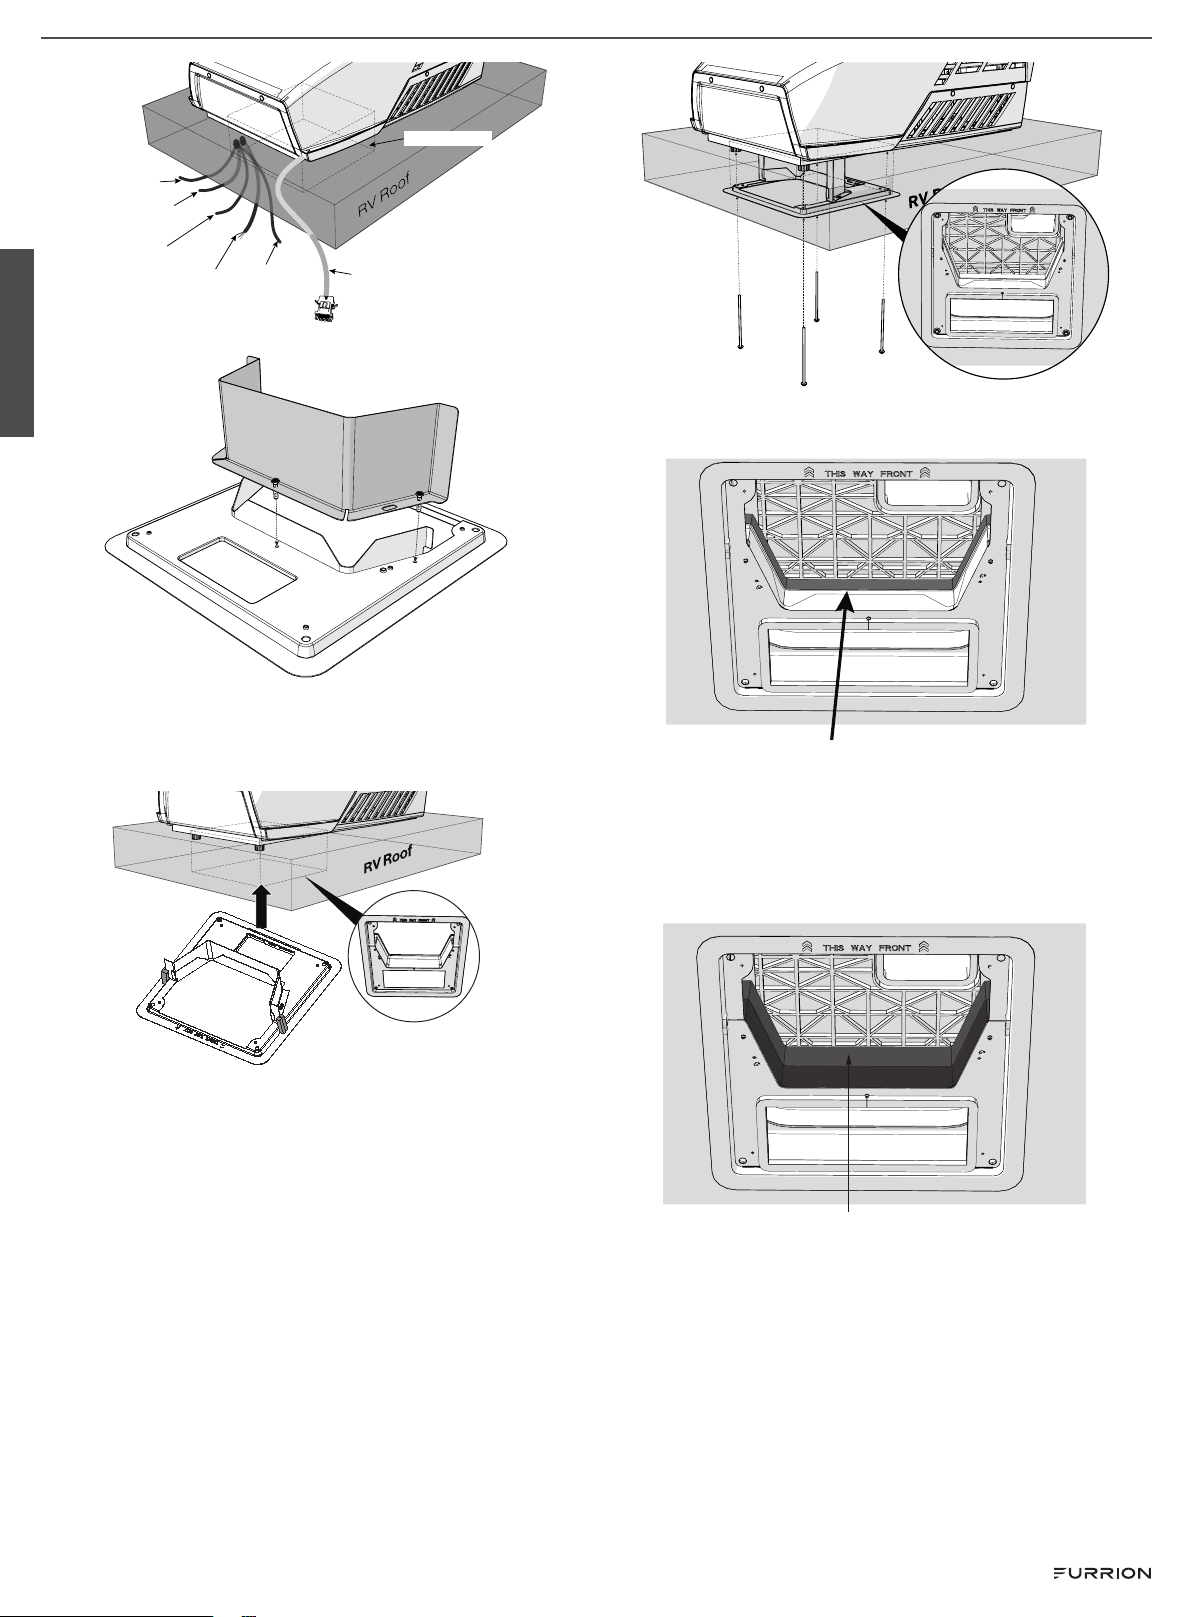
Rooftop Unit
Cable
115VAC
Power Cord
±12VDC
Wires
Thermostat Wire
(4-wire min.)
Return to Furnace
(optional)
12V+ from Furnace
(optional)
Roof Opening
3. Assemble the lower duct divider to the mounting frame.
4. Install the assembled mounting frame and the lower duct
divider into the rooftop opening. Make sure the “THIS WAY
FRONT” mark is facing front (the direction of the vehicle)
while installing.
5. Fix the assembled mounting frame and lower duct divider
into the rooftop unit using 4 bolts provided. Evenly tighten
the four bolts to a torque of 40 to 50 inch pounds. This will
compress the roof gasket to approximately ½”.
NOTE: If bolts are left loose there may not be an adequate
roof seal or if over tightened, damage may occur to the
rooftop base or mounting frame.
6. Remove the film off the double sided sticky tape found on
the top inner side of the lower duct divider.
Peel off the film
7. Stick the upper duct divider into the assembled mounting
frame.
NOTE: Make sure the upper duct divider is compressing
the top foam on the base of the air conditioner unit, and
compress tightly to the doubled sided tape on the lower
duct divider to ensure a positive retention.
Upper duct divider
8. Use self adhesive foil tape to seal the two halves of the
duct divider together and any potential gaps around the
duct divider to roof opening that may allow cold air to leak
back into the warm intake side.
NOTE: Clean metal surfaces to remove any oils to ensure
good adhesion of the foil tape.
English
CCD-0005730 Rev: 04-25-22
- 7 -
Loading ...
Loading ...
Loading ...