
Loading ...
Loading ...
Loading ...
5
ASSEMBLY INSTRUCTION
We value your experience using Sunny Health and Fitness products. For assistance with parts or
troubleshooting, please contact us at support@sunnyhealthfitness.com or 1-877-90SUNNY
(877-907-8669).
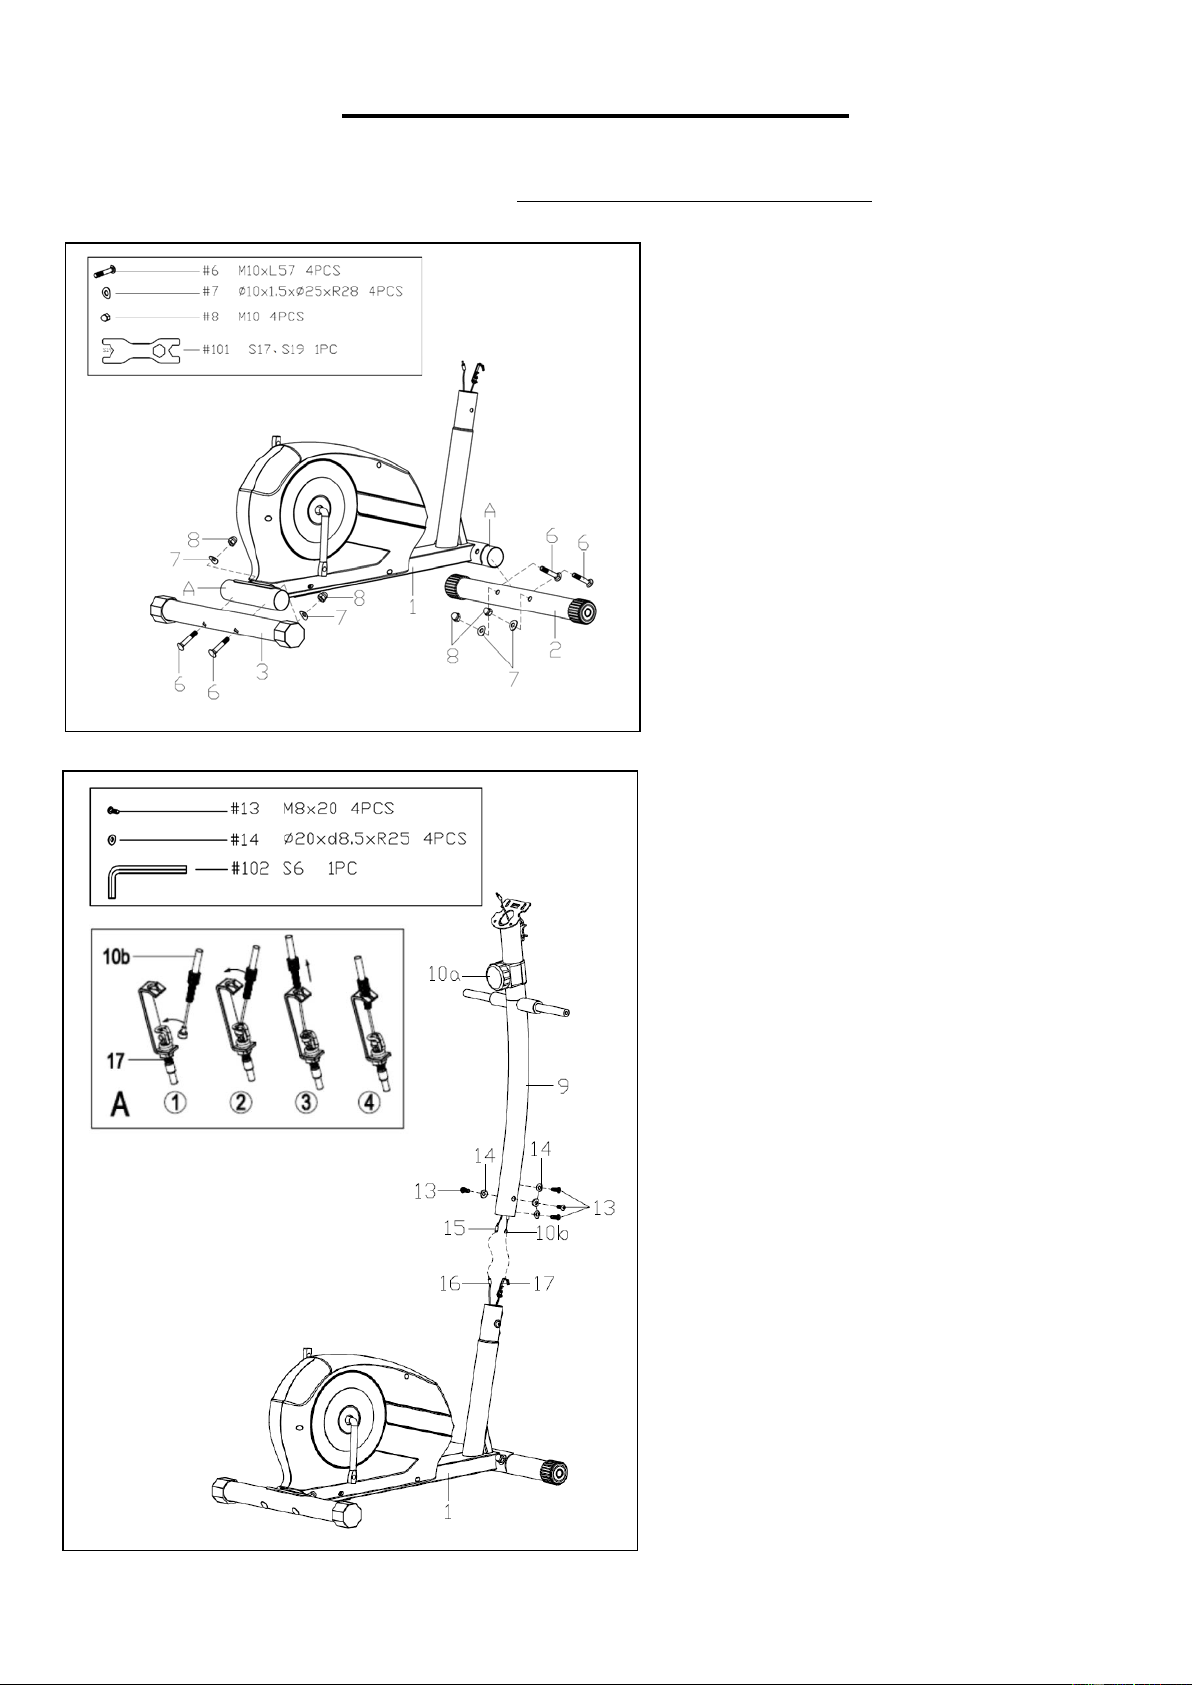
STEP 1:
Remove 2 Paper Tubes (No. A) from the
Main Frame (No. 1).
Remove 4 Carriage Bolts (No. 6), 4 Arc
Washers (No. 7) and 4 Domed Nuts (No.
8) from the Front Stabilizer (No. 2) and
Rear Stabilizer (No. 3) using Spanner (No.
101).
Attach the Front Stabilizer (No. 2) and
Rear Stabilizer (No. 3) onto the Main
Frame (No. 1), secure with 4 Carriage
Bolts (No. 6), 4 Arc Washers (No. 7) and 4
Domed Nuts (No. 8) that were just remove
by Spanner (No. 101).
Note: Ensure that all bolts and washers are
in place and partially threaded in before
completely tightening any of them.
STEP 2:
A: Connect the Lower Sensor Wire (No.
16) to the Upper Sensor Wire (No. 15), and
then connect Tension Hook (No. 17) with
Tension Cable (No. 10b)
as shown in
Diagram A.
Note: Make sure the Tension Controller
(No. 10a) is at the lowest level before you
connect the Tension Cable (No. 10b). This
ensures the wires are at their longest point.
We recommend the assistance of a second
person to help hold the Handlebar Post
(No. 9). This will make the connection easier
when you are attaching Tension Hook (No.
17) to Tension Cable (No. 10b).
B: Remove the preassembled 4 Allen Bolts
(No. 13) and 4 Arc Washers (No. 14) from
the Main Frame (No. 1)
. Insert the
Handlebar Post (No. 9) into the post of the
Main Frame (No. 1); secure with 4 Allen
Bolts (No. 13) and 4 Arc Washers (No. 14)
that were just removed with Allen Wrench
(No. 102).
Note: Ensure that all bolts and washers are
in place and partially
threaded in before
completely tightening any of them.
Loading ...
Loading ...
Loading ...