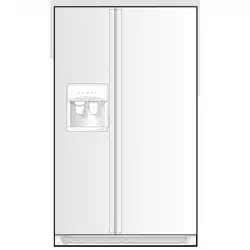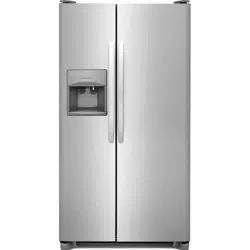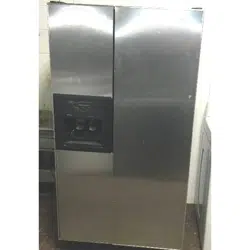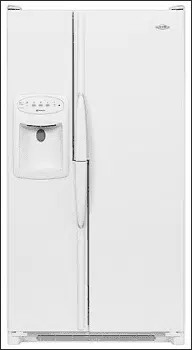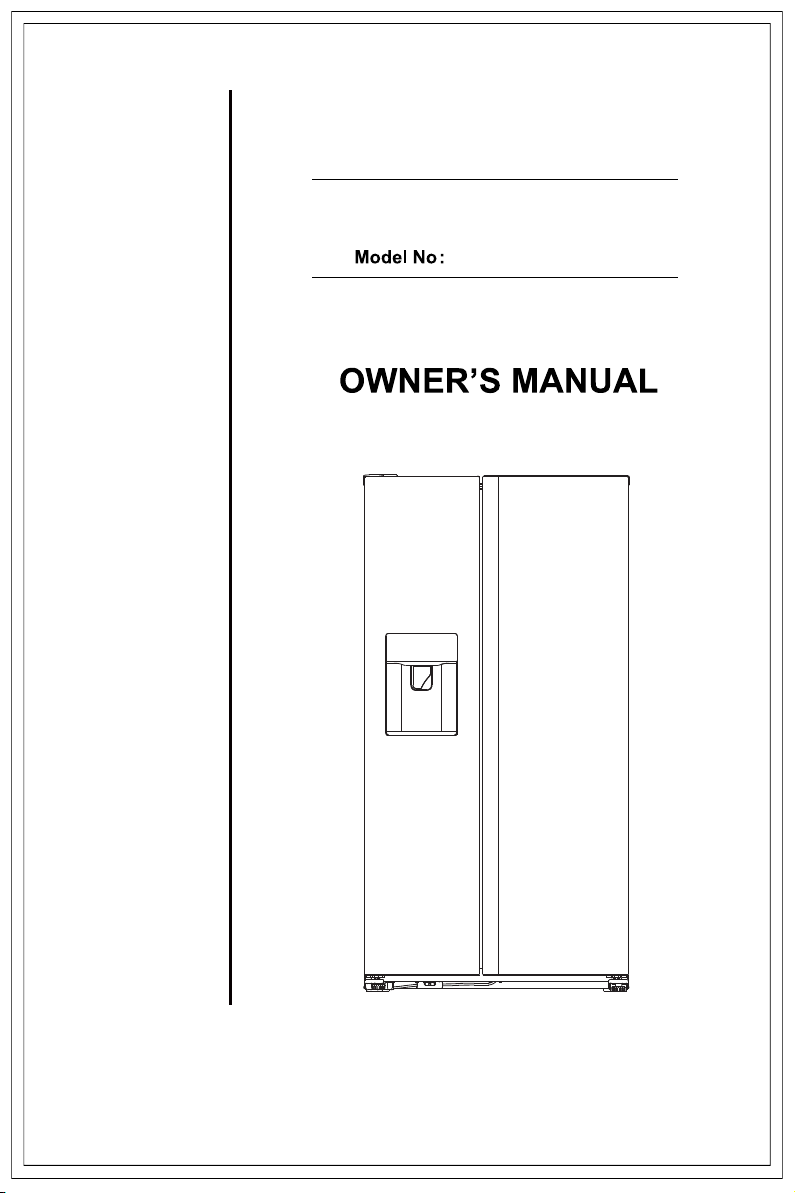
SIDE BY SIDE
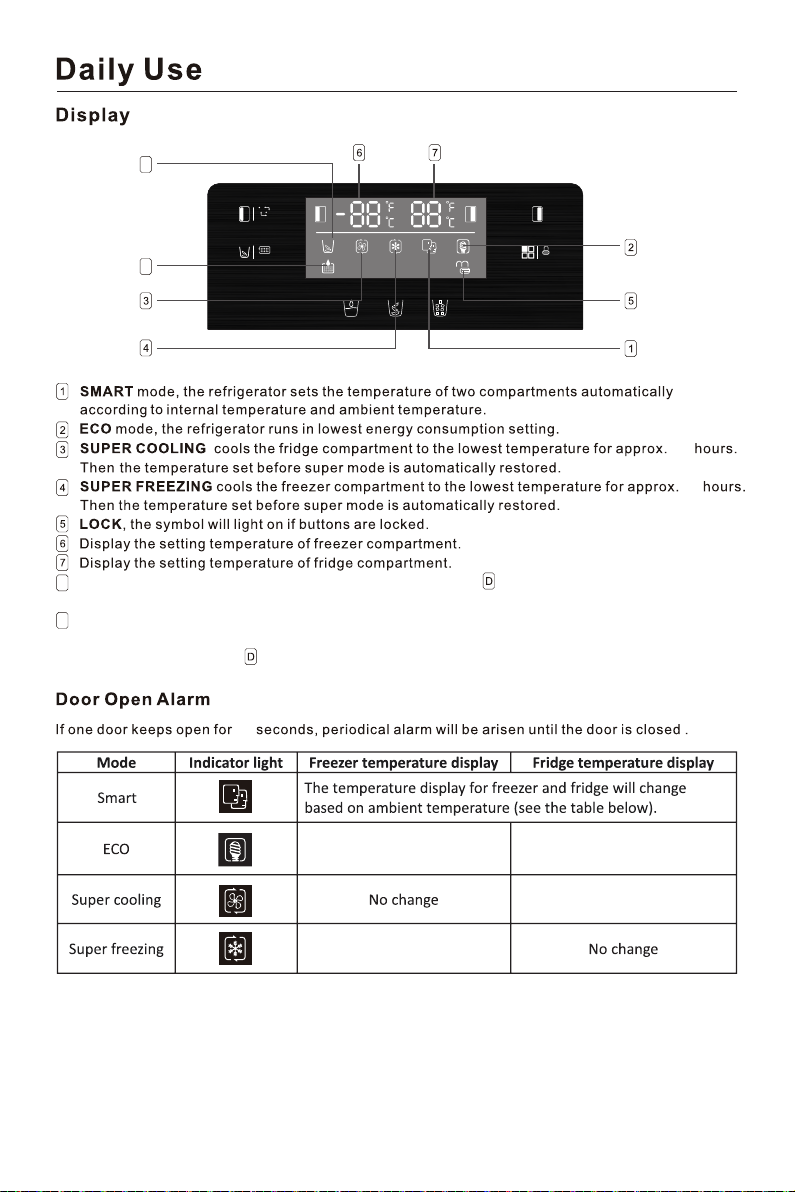
REFRIGERATOR FREEZER
AMAUS-NF-FF2-69IMFS
SAFETY REQUIREMENTS
DANGER: Risk of fi re or explosion. Flammable
refrigerant used. Do not puncture refrigerant tubing.
• Do not use mechanical devices to defrost
refrigerator.
• Ensure that servicing is done by factory
authorized service personnel, to minimize
product damage or safety issues.
• If the power supply cord is damaged, it must be
replaced by the manufacturer, its service agent
or similar qualifi ed person in order to avoid
hazard.
• Consult repair manual or owner’s guide before
attempting to service this product. All safety
precautions must be followed.
• Dispose of properly in accordance with federal
or local regulations.
• Follow handling instructions carefully.
• Do not store explosive substances such as
aerosol cans with a fl ammable propellant in this
appliance.
WARNING: Keep ventilation openings, in the
appliance enclosure or in the built-in structure, clear
of obstruction.
WARNING: Do not use mechanical devices or other
means to accelerate the defrosting process, other
than those recommended by the manufacturer.
WARNING: Do not damage the refrigerant circuit.
WARNING: Do not use electrical appliances inside
the food storage compartments of the appliance,
unless they are of the type recommended by the
manufacturer.
CAUTION: Children should be supervised to ensure
that they do not play with the appliance.
DANGER: Risk of child entrapment. Before throwing
away an old appliance:
• Remove the door or lid.
• Leave shelves in place so that children may not
easily climb inside.
DANGER: Do not add a lock to the door or lid. This
can cause child entrapment and harm.
SAFETY REQUIREMENTS
This appliance is not intended for use by persons
(including children) whose physical, sensory or
mental capabilities may be different or reduced,
or who lack experience or knowledge, unless such
persons receive supervision or training to operate
the appliance by a person responsible for their
safety.
This appliance is intended to be used in household
and similar applications such as:
• Staff kitchen areas in shops, offi ces and other
working environments;
• Farm houses and by clients in hotels, motels and
other residential type environments;
• Bed and breakfast type environments;
• Catering and similar non-retail applications.
GROUNDING INSTRUCTIONS
This appliance must be grounded. Grounding
reduces the risk of electrical shock by providing an
escape wire for the electrical current.
This appliance has a cord that has a grounding
wire with a 3-prong plug. The power cord must be
plugged into an outlet that is properly grounded.
If the outlet is a 2-prong wall outlet, it must be
replaced with a properly grounded 3-prong wall
outlet. The serial rating plate indicates the voltage
and frequency the appliance is designed for.
WARNING - Improper use of the grounding
plug can result in a risk of electric shock.
Consult a qualifi ed electrician or service agent
if the grounding instructions are not completely
understood, or if doubt exists as to whether the
appliance is properly grounded.
Do not connect your appliance to extension
cords or together with another appliance in the
same wall outlet. Do not splice the power cord.
Do not under any circumstances cut or remove the
third ground prong from the power cord. Do not
use extension cords or ungrounded (two prongs)
adapters.
Important Safety Information
READ AND FOLLOW ALL SAFETY INSTRUCTIONS
SAVE THESE INSTRUCTIONS!
1
LOCATION
• Two people should be used when moving the
appliance.
• Remove interior and exterior packaging prior to
installation. Wipe the outside of the appliance
with a soft, dry cloth and the inside with a
lukewarm wet cloth.
• Place the appliance on a fl oor that is strong
enough to support it when it is fully loaded.
• Do not place the appliance in direct sunlight or
near sources of heat, such as a stove or heater,
as this can increase electrical consumption.
Extreme cold ambient temperatures may also
cause the appliance to perform improperly.
• Do not use the appliance near water, for
example in a wet basement or near a sink.
• This appliance is intended for household use
only. It is not designed for outside installation,
including anywhere that is not temperature
controlled (garages, porches, vehicles, etc.).
• Before connecting the appliance to a power
source, let it stand upright for approximately
6 hours. This will reduce the possibility of a
malfunction in the cooling system from handling
during transportation.
• Allow 5 cm (2 inches) of space between the
back, sides and top of the appliance and all
adjacent walls.
• This appliance is intended for free-standing
installation only and is not intended to be
built into a cabinet or counter. Building in this
appliance can cause it to malfunction.
OPERATING INSTRUCTIONS
Prop. 65 Warning for California Residents
WARNING:
Cancer and Reproductive Harm - www.P65Warnings.ca.gov.
2
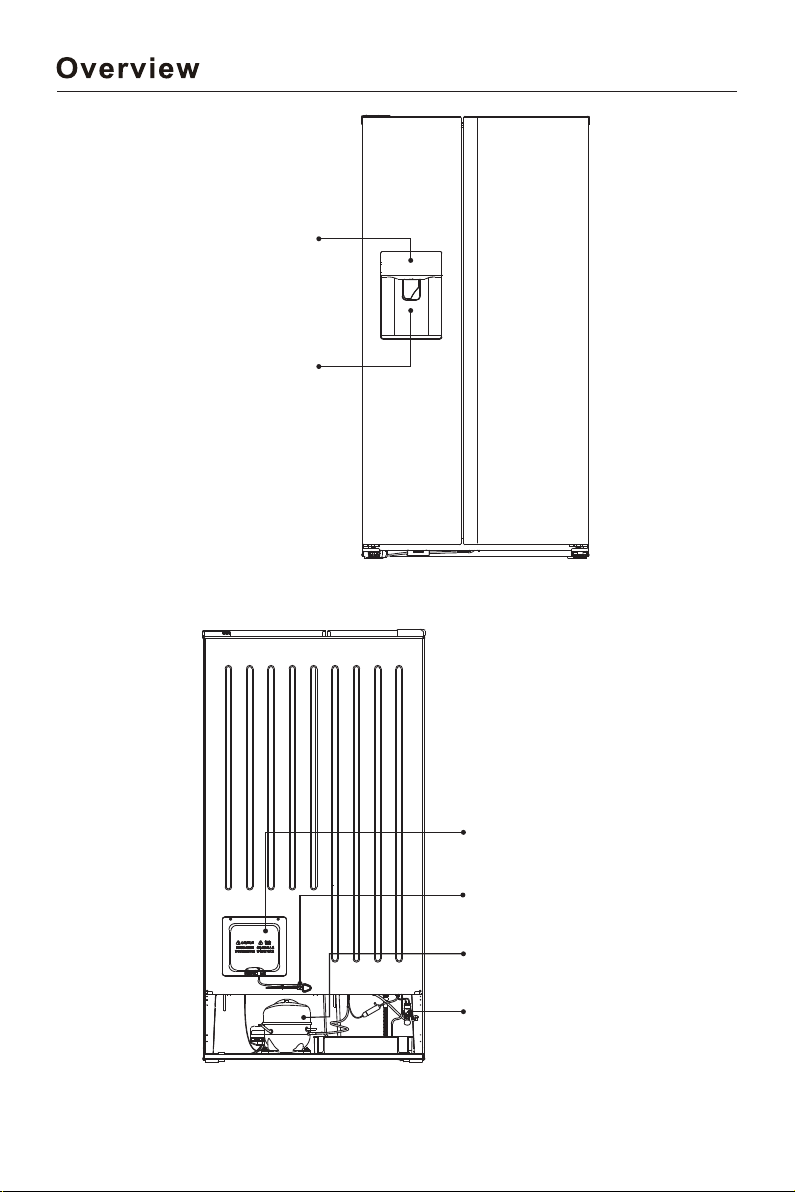
Control panel
Water/ ice Dispenser
(Remove away the metal compressor room cover)
Main control board
Power cord
Compressor
External main water valve
3

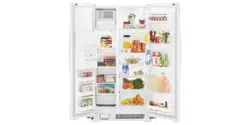
Ice box cover
Ice storage box
Freezer shelves*3
Freezer drawers*2
Freezer balcony*1
Water pipe connector
Fridge balcony*4
Fridge shelves*3
Fridge crispers*2
4

IMPORTANT SAFETY INSTRUCTIONS
WARNING
T
o reduce the risk of fire, electrical shock, or injury when
using your refrigerator-freezer, follow these basic
precautions:
• Read all instructions before using the refrigerator-freezer.
• DANGER or WARNING: Risk of child entrapment.
Child entrapment and suffocation are not problems of the past. Junked or abandoned
refrigerator-freezers are still dangerous. . . even if they will “just sit in the garage a few
days.”
• Before you throw away your old refrigerator-freezer: Take off the doors. Leave
the shelves in place so that children may not easily climb inside.
• Never allow children to operate, play with, or crawl inside the refrigerator-freezer.
• Never clean refrigerator-freezer parts with flammable fluids. The fumes can create a
fire hazard or explosion.
• Do not store or use gasoline or any other flammable vapors and liquids in the vicinity of
this or any other refrigerator-freezer. The fumes can create a fire hazard or explosion.
-Save these instructions-
INSTALLATION INSTRUCTIONS
Before Using Your Appliance
• Remove the exterior and interior packing.
• Before connecting the unit to the power source, let it stand upright for approximately 2 hours.
This will reduce the possibility of a malfunction in the cooling system from handling during
transportation.
• Clean the interior surface with lukewarm water using a soft cloth.
Installation of Your Appliance
• Place your refrigerator-freezer on a floor that is strong enough to support the refrigerator-
freezer when it is fully loaded. To level your refrigerator-freezer, adjust the leveling legs at the
bottom of unit.
• Allow 2 inches of space between the back and sides of the unit, which allows the proper air
circulation to cool the compressor and condenser.
• Locate the unit away from direct sunlight and sources of heat (stove, heater, radiator, et
c.).
Direct sunlight may affect the acrylic coating and heat sources may increase electrical
consumption. Extreme cold ambient temperatures may also cause the refrigerator- freezer not
to perform properly.
• Avoid locating the unit in moist areas.
• Plug the unit into an exclusive properly installed-grounded wall outlet. Do not under any
circumstances cut or remove the third (ground) prong from the power cord. Any questions
concerning power and
/or grounding should be directed toward a certified electrician or an
authorized products service center.
5

ELECTRICAL CONNECTION
This appliance should be properly grounded for your safety. The power cord of this appliance is
equipped with a three-prong plug which mates with standard three prong wall outlets to minimize the
possibility of electrical shock.
Do not under any circumstances cut or remove the third ground prong from the power cord supplied. For
personal safety, this appliance must be properly grounded.
This appliance requires a standard 115/120 Volt AC ~/60Hz electrical ground outlet with three-prong.
Have the wall outlet and circuit checked by a qualified electrician to make sure the outlet is properly
grounded. When a standard 2-prong wall outlet is encountered, it is your responsibility and obligation to
have it replaced with a properly grounded 3-prong wall outlet.
The cord should be secured behind the appliance and not left exposed or dangling to prevent
accidental injury.
The appliance should always be plugged into its own individual electrical outlet which has a voltage
rating that matches the rating label on the appliance. This provides the best performance and also
prevent overloading house wiring circuits that could cause a fire hazard from overheated. Never unplug
the appliance by pulling the power cord. Always grip the plug firmly and pull straight out from the
receptacle. Repair or replace immediately all power cords that have become frayed or otherwise
damaged. Do not use a cord that shows cracks or abrasion damage along its length or at either end.
When moving the appliance, be careful not to damage the power cord.
EXTENSION CORD
Because of potential safety hazards under certain conditions, it is strongly recommended that you do
not use an extension cord with this appliance. However, if you must use an extension cord it is
absolutely necessary that it be a UL/CUL-Listed, 3-wire grounding type appliance extension cord
having a grounding type plug and outlet and that the electrical rating of the cord be 115 volts and at least
10 amperes.
SURGE PROTECTOR
Most electrical appliances use a series of electric control boards to operate. These boards are very
susceptible to power surges and could be damaged or destroyed.
If the appliance is going to be used in an area or if your city / country is prone to power surges / outages;
it is suggested that you use a power surge protector for all electrical devices / appliances you use. The
surge protector that you select must have a surge block high enough to protect the appliance it is
connected to. If you have any questions regarding the type and size of surge protector needed contact
a licensed electrician in your area.
Damages due to power surges are not considered a manufacturer covered defect and will void your
product warranty.
6

Product accessories
Water pipe parts * 1 Water filter * 1 Water pipe connector*1
Water filter connector*2
Anti-slip clips *8
Dispenser water tray * 1 User manual * 1
7

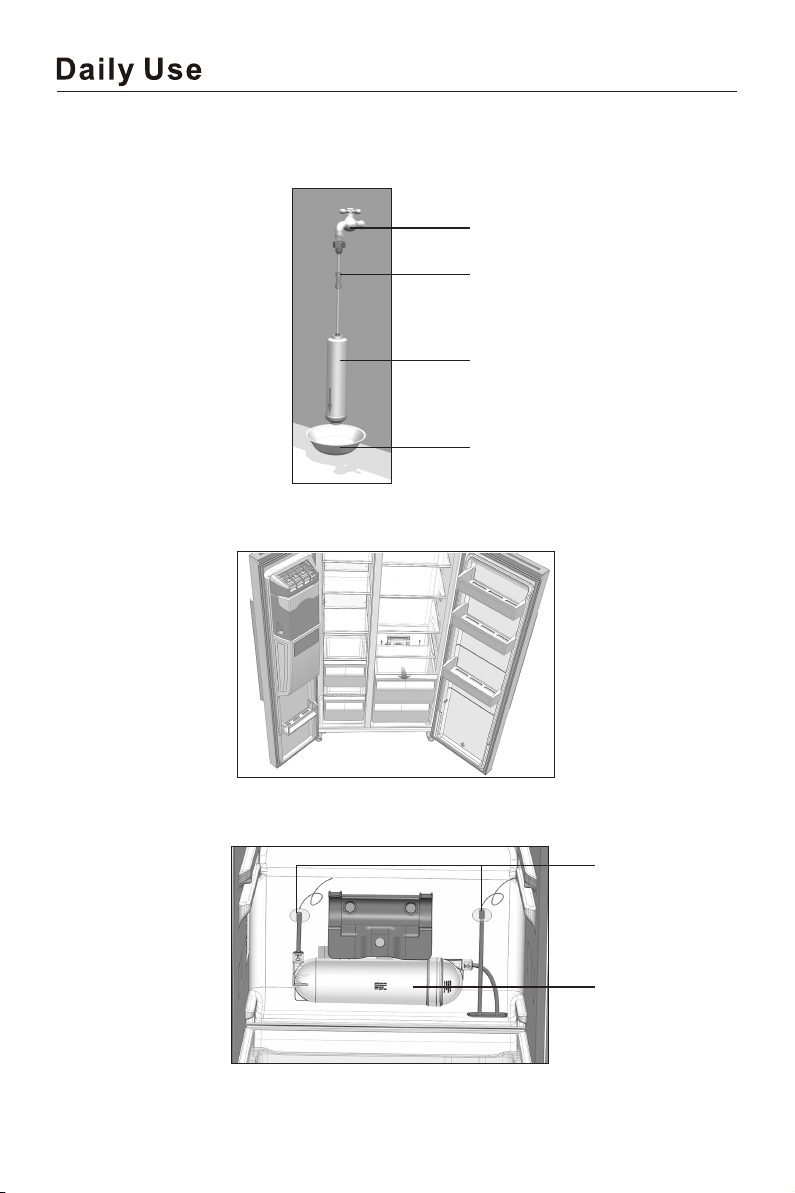
4. There is a water pipe connector at the bottom of the refrigerator freezer. Remove it from the
protective cover and disconnect from the water pipe, and remember to pull the water pipe out of
the lower hinge.
8
Important!
How to install the water filter and water pipe
1.Before installing, the filter should be rinsing with water for 5 minutes or 5L of water to ensure that the
toner in the filter is rinsed clean.
Water source
Connect tube
Filter
Basin
2. Open the refrigerator door and take out the crispers.
3. Take out the rubber plugs on both sides of the water box.
Rubber plugs
Water box
9
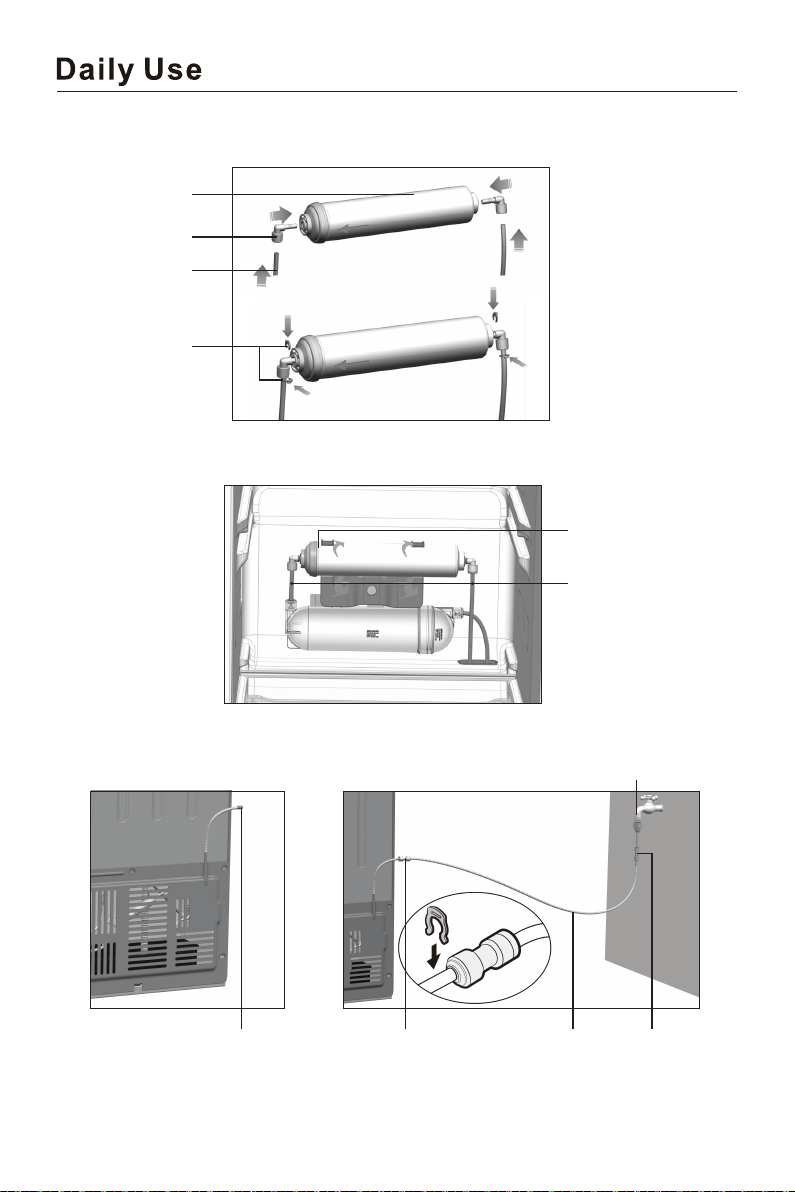
4. Take out the water filter from the accessory bag, insert the connectors on both sides of the filter, then
connect the water pipe and clamp into the anti-slip clips (pay attention to the direction of the filter arrow)
Water filter
Connectors
Water pipes
Anti-slip clips
5. Assemble the water filter parts with retaining bracket above the water box, and connect the water
pipes of water box with water filter.
Fix the water filter parts
Connect the water pipes
of water box with filter
6. Take off the rubber plug. Connect the water pipe part to the main valve on the compressor cover
with connector, and remember to insert the anti- slip clips, then connect the end of the water pipe
with the nut to the water source.
Take off the rubber plug Connect the water pipe with
connector,and remember to
insert anti-slip clips on both
side of connector.
Water pipe connect the end of the
water pipe with the nut
to the water source
Water source
10

Caution!
•
•
The external water source must be clean and the water pressure should be 30~100 psi to guarantee
INCORPORATED ICE-MAKERS are to be installed only by the manufacturer or its service agent.
WARNING: Connect to potable water supply only.
proper working.
The new hose-sets supplied with the appliance are to be used and that old hose-sets should not
be reused.
•
•
Check the water pipe connection, check whether there are any other things inside the ice making
machine and ice storage box.
• After accessing the water source, open the faucet and check whether there is leakage between the
faucet and the connecting pipe. If there is leakage, check the connection of the pipe.
• Select the water function, use a large cup to press the dispenser, keep the water exhausting for 5
minutes until the water is clean and smooth, during the process the water taken out is not drinkable.
• Select the function of taking ic
e and breaki
ng ice, use a large cup to press the dispenser, and check
the normal operation of the internal motor through the sound judgment.
• Wait for 3 minutes and check whether the water inlet valve of the refrigerator, the water pipe
connectors and water filter are leaking or not.
11
(35 F)
(47 F)
( 7 F )
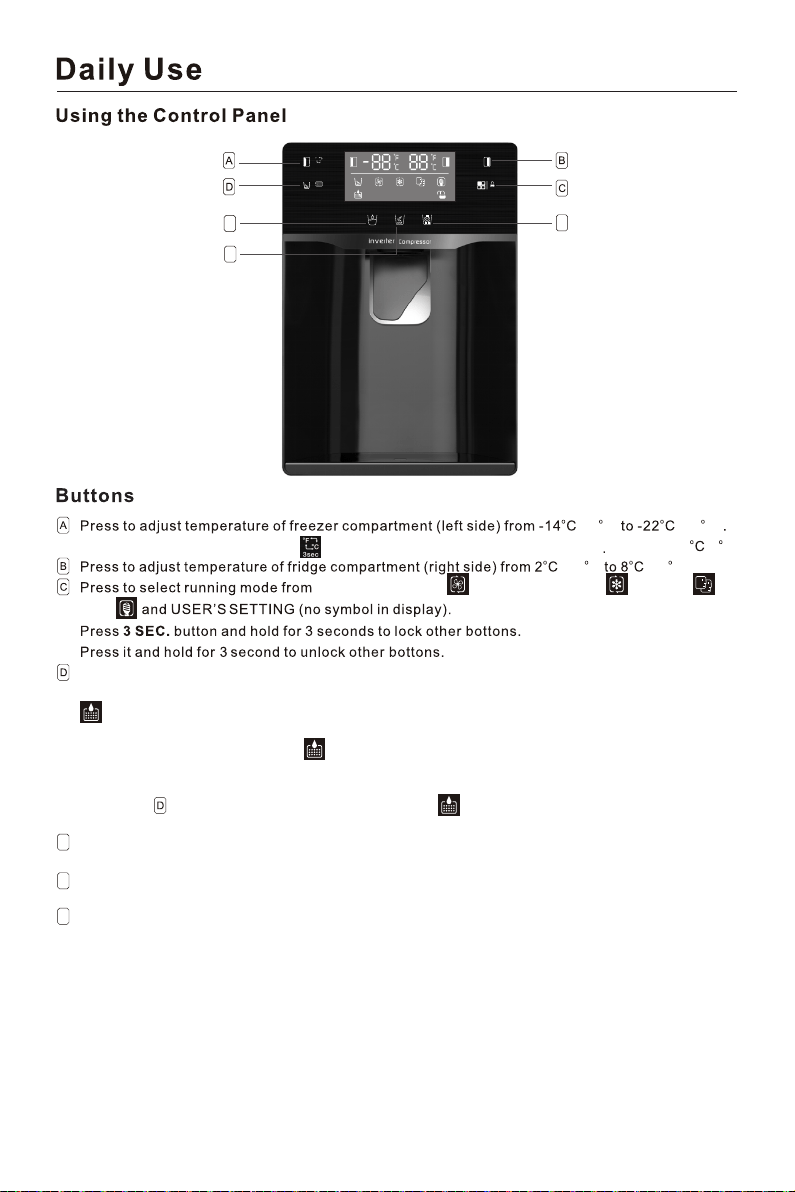
You can keep pressing this button for 3 seconds to switch the temperature display between to F .
( -8 F )
E
SUPER COOLING ,SUPER FREEZER ,SMART ,
ECO
Press the ice off button to control the ice maker. If you want to close the ice maker, press this
button, then the product will stop making ice until you press this button again.
“ change your water filter”.
In general, you should need the water filter every 6 months to ensure the highest water quality.
After half a year, the display icon will be lit up for reminding you should replace a new water
filter.You can purchase a new water filter from the retailer where you buy the refrigerator or the
after-sales system. After you finish replacing a new water filter inside the refrigerator, you should
Press thi
s button and hold for 3s, the disp
lay icon will be extinguished, and the water filter
will be reset.
Press this button to receive cubed ice. You can press this button to choose the type of ice to be
dispensed.
Press this button to receive crush ice. You can press this button to choose the type of ice to be
dispensed.
Press this button to receive cooling water. You can press this button to choose cooling water to
be dispensed.
F
G
Note!
• When the freezer door is opened or child lock is on, the dispenser will not work.
you need to close the door or unlock the child lock to receive the cubed ice, crushed ice, cooling
water you want.
• You don’t need ice, turn the function off to save energy.(see ice off above)
• If water is not dispensed or dispensed slowly, you need to replace the water filter because it may
become clogged.
• Some areas have large amounts of lime in the water, which causes the water filter to clog more
quickly.
3se c 3se c
Cru shed ic e
Wate r
Cub ic ice
OFF
3se c
C
F
OFF
E
F
G
12
5℉(-15℃)
-13℉(-25℃)
35℉(+2℃)
47℉(+8℃)
2.5
50
60
8
ICE OFF mode, the symbol will light on when you touch the button to close the ice maker, it
means the refrigerator will stop making ice any more.
REMIND CHANGING WATER FILTER mode, the symbol will light on when the water filter has
been used for 6 months to remind you replace a new water filter in time. Until you replace a new
filter and keep press the button for 3s, the symbol will be extinguished.
9
8
9
3s ec 3s ec
Cr us he d ic e
Wat er
Cu bi c ic e
OFF
3s ec
C
F
OFF
13
2.5
30
5 times
3 seconds
14
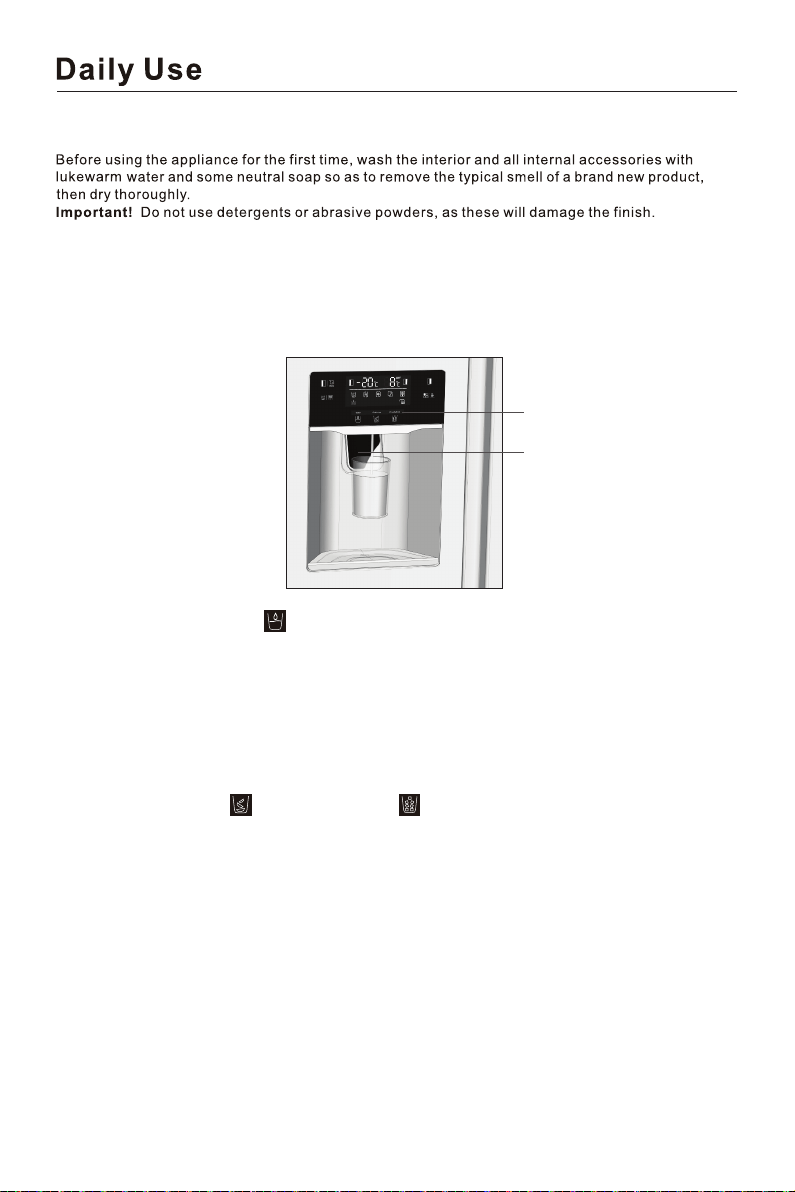
First use
Cleaningtheinterior
How to use the dispenser?
You can get cubed ice, crushed ice and cooling water by pressing the paddle switch, which is
selected by displaying the operation panel;
Note! If the paddle switch is pressed continuously for more than 3 minutes, the dispenser will stop
working to protect the electrical components. If you need more cooling water or ice, you can release
the paddle switch and press it again to get more water or ice as you want.
Cubed ice, crushed ice,
cooling water mode
Paddle switch
Get cooling water
Select the cooling water mode , place the cup in the middle of the paddle switch, press the paddle
switch to receive water, and stop pressing the paddle switch after taking an appropriate amount of
water, and the water will stop flowing automatically.
Note!
• Wait for 2 seconds before taking the cup away to avoid the water splash out.
• If cooler water is needed, fill the glass with ice before taking;
• If more than 800ml of water is taken at one time, water with high temperature may be taken out. In
this case, it is recommended to wait half an hour for a cold drink;
Get ice
Select the cube ice mode or crushed ice mode to get ice type as you want.
Place the cup in the middle of the paddle switch, press the paddle switch to receive ice, and stop
pressing the paddle switch after taking an appropriate amount of ice, and the ice will stop flowing
automatically.
Note!
• Wait for 2 seconds before taking the cup away to avoid the ice splash out.
• To prevent ice from falling out of the cup, place the cup as close to the dispenser outlet as possible.
• When taking ice, the internal motor runs to churn ice and break ice, which may produce some noise.
• After taking ice, please use it as soon as possible to avoid melting ice.
15
Important!
This section tells you how to avoid most issues you would happen. We recommend
that you read through them carefully before using the appliance.
1. When taking water for the first time or not taking water for a long time, please take out 1~2L of
water and pour it away;
2. When using the ice maker for the first time or not using it for a long time, the first box of ice cubes
should not be used;
3. It is recommended to use a cup with a diameter of more than 70mm to take water and ice;
4. Do not use fragile containers to take ice cubes, so as to avoid damage caused by broken
containers;
5. Do not put your hands or tools into the opening part of the distributor, so as to avoid causing
failure to the internal mechanism;
6. Do not pull the paddle switch too much force, so as to avoid the failure of the paddle switch;
7. The ice maker automatically makes ice without manual operation. When the ice storage box is
filled with ice (about 1.6kg), the ice maker automatically stops making ice;
8. In the smart mode, the daily ice production capacity of the refrigerator is about 1.2kg;
9. When the freezer door is open, the ice water distributor is locked and cannot carry out water or ice;
10. When the freezer door is open, if the ice maker is performing the making ice procedure, some ice
will fall into the ice storage box.
11. If the ice is not discharged smoothly, please check whether the ice outlet of the distributor is
blocked by ice. If so, clean up the ice before taking it;
12. After the refrigerator is powered on in the first time, turn on the ice maker, the ice maker will start
making ice about 10 hours later;
13. During the process of using, you may hear the sound of water valve opening, water flowing and
ice falling, which is normal;
14. If you are on vacation or do not need ice cubes for a long time, please turn off the ice making
function and take out the ice cubes in the ice box to avoid the ice cubes become frozen together
to block the outlet.
15. In case of power failure, please clean the food in the refrigerator in time, and clean the ice in the
ice storage box to avoid ice melting.
16. Do not eat the ice cubes when they have odor. Check if the filter has expired or if there are
unsealed foods with pungent odor in the refrigerator.
How to clean and care the dispenser?
Use a soft towel to clean the refrigerator and ensure to disconnect the power supply before cleaning it.
Please use clean water when cleaning, do not use benzene, diluent, sodium hypochlorite, abrasive,
bleach and other chemical reagents. Do not spray detergent directly on the display screen, otherwise
the printed text on the display screen may fall off.
1) Take down the water box of the distributor regularly and pour out the water inside, and wipe it clean.
16
2) Clean the ice storage box regularly
If the ice is not used for a long time or the freezer door is frequently opened, the ice in the ice storage
box may melt and became frozen together, which makes the distributor outlet blocked. The ice in the
ice storage box needs to be removed manually.
When cleaning the ice storage box, it is necessary to turn off the ice maker function to avoid the ice
falling into the refrigerator or the floor.
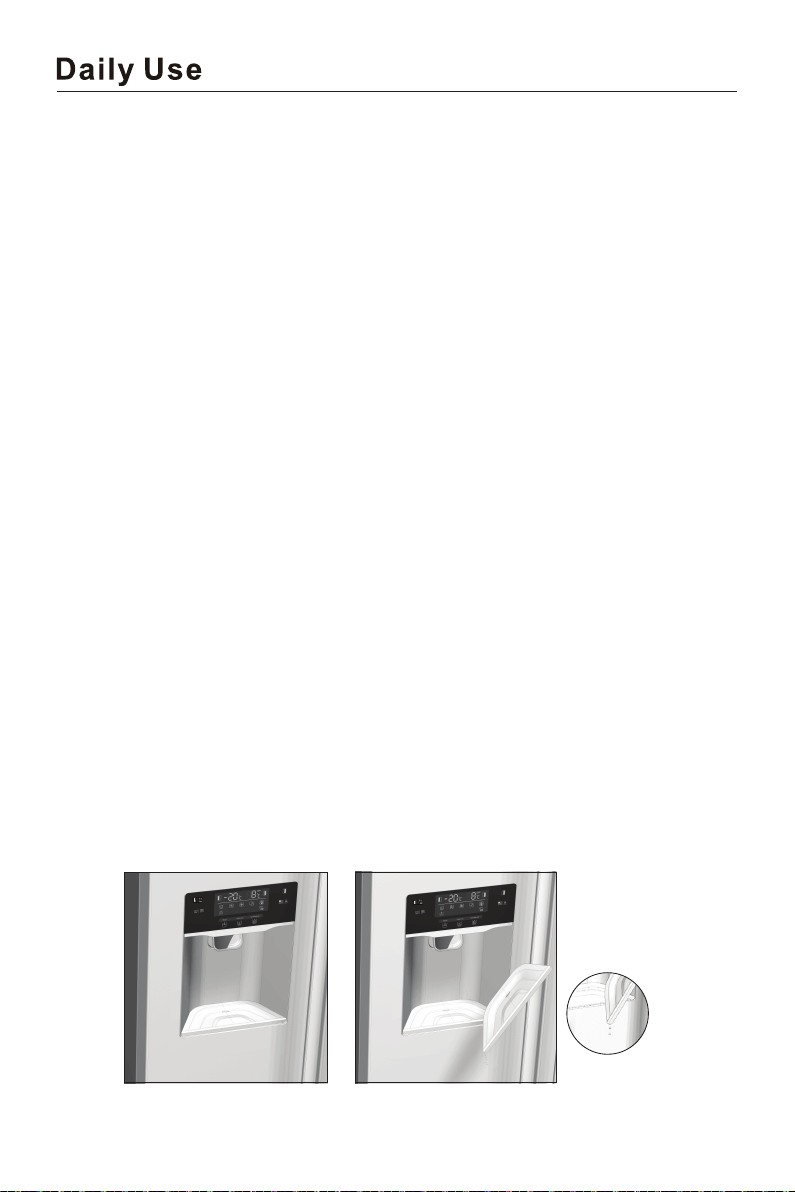
3) How to assemble and disassemble the ice storage box
Grasp the ice storage box with both hands on the buckle, lift the ice storage box up about 10mm with
a little force, and then drag the ice storage box out of the fixed buckle;
1
2
After taking out the ice storage box, take out the internal ice manually and carefully, and then clean
with clean water.
After cleaning the ice storage box, install it as reversed process.
Note!
• Do not use acid, chemical solvents (alcohol, dishwashing liquid) and other scrubbing;
• After cleaning, it is necessary to dry the ice box thoroughly before installing in the refrigerator to
avoid ice freezing;
• Use a clean towel to clean the ice outlet, do not press the internal structure with too much force to
avoid damaging the internal mechanism;
• Do not place anything else in the ice outlet to avoid blocking the ice outlet;
• Do not allow child to climb on the refrigerator, or it may fall down to hurt people.
• Do not put your fingers, hands, or any other unsuitable objects in the ice chute or ice bucket. This
can cause personal injury or material damage.
17

39℉(4℃)
0℉(-18℃)
39℉(4℃)
0℉(-18℃)
39℉(4℃)
0℉(-18℃)
Thawing
Ice-cube
Accessories
Movable shelves
Positioning the door balconies
3se c 3se c
Cru shed ic e
Wat er
Cub ic ice
OFF
3se c
C
F
OFF
18
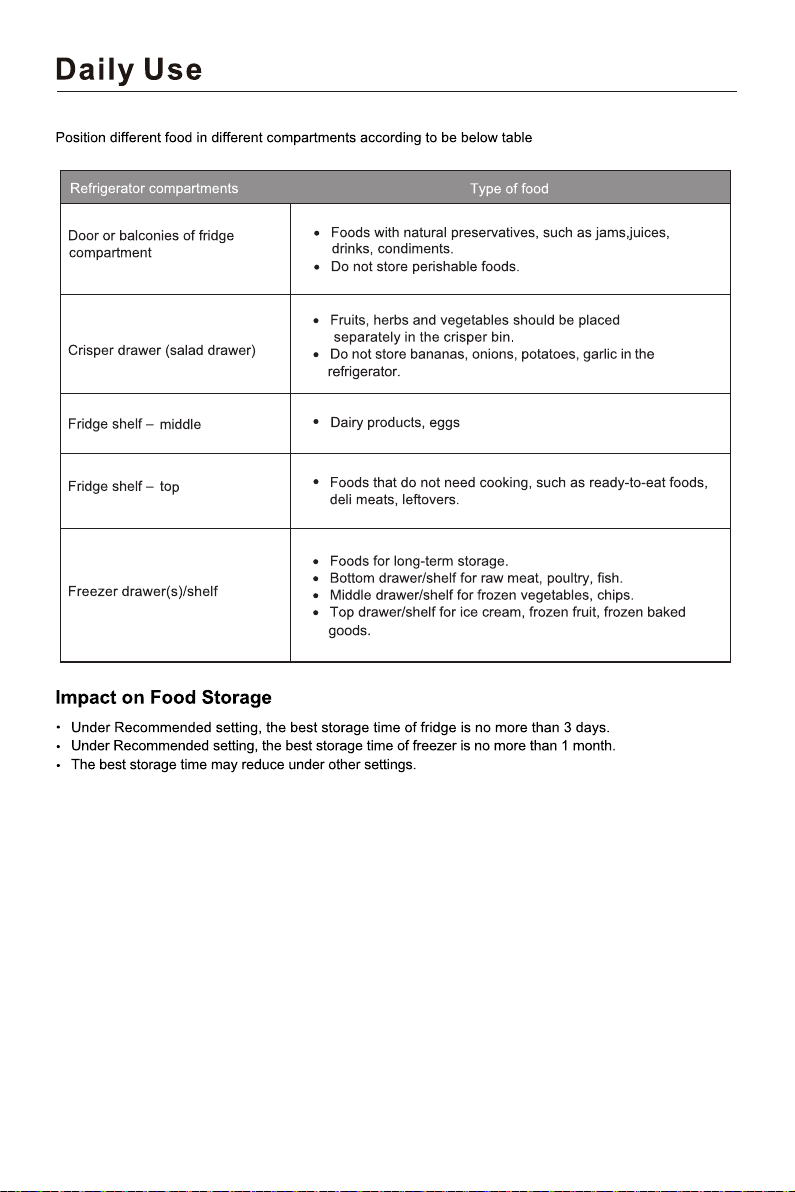
Daily use
19
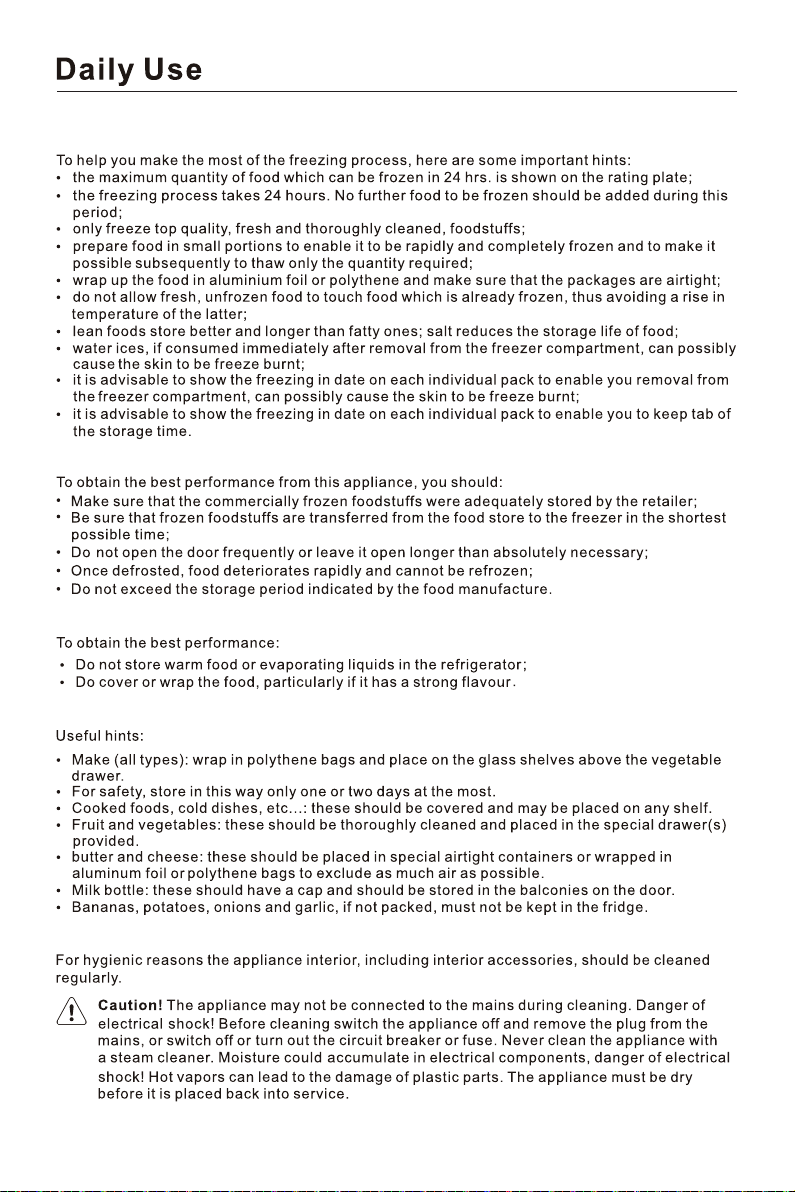
Helpfulhintsandtips
Hints for freezing
Hints for storage of frozen food
Hints for fresh foodrefrigeration
Hints for refrigeration
Cleaning
20
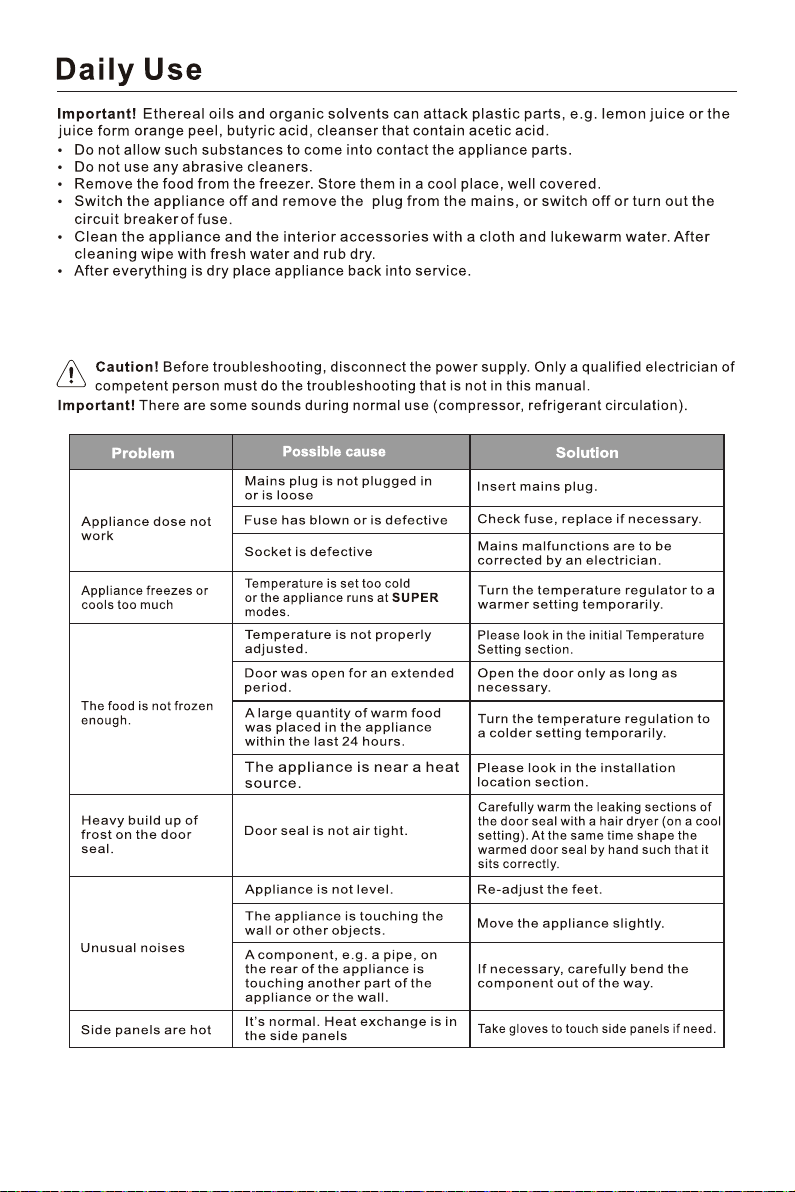
Troubleshooting
If you experience a problem with your appliance or are concerned that theappliance is not functioning
properly, you could follow below tips to check the appliancebefore calling for service.
21
will start making ice);
Failing to access the water source or
Make sure the water source and the
valve is open
The “ice off” mode is working, it will
Turn off the “ice off “ mode
The pressure of water source is not
Ensure the source water pressure is
30 ~ 100 psi
The water valve or connectors are
Check whether water valve or
connectors are reversed
Check whether the filter direction is
reversed
The ice cubes are frozen together in
the storage box to block the ice outlet
Remove the frozen ice cubes
Remove the thing which blocks the outlet
The doors is not closed totally which
Ensure the doors is closed totally
The pressure of water source is not
Ensure the source water pressure is
30 ~ 100 psi
The water filter is blocked, because
Dispenser couldn’t get
cooling water
Failing to access the water source
or open the water valve
Make sure the water source and the
valve is open
The filter is not installed correctly
Check whether the filter direction is
reversed
The water valve or connectors are
not installed correctly
Check whether water valve or
connectors are reversed
The water is not cooled
enough
The fridge temperature is set too high
Set the fridge temperature lower
Take too much water in one time (1L) Wait for the water cool down
Take the water so often Wait for the water cool down
Dispenser couldn’t
get ice
No ice inside the storage box
Wait for the ice maker to finish making
ice (the first time on the refrigerator
needs to be fully cooled, the ice maker
open the water valve
stop making ice
enough
not installed correctly
The filter is not installed correctly
There is something hard in the
storage box, which prevents the
motor from running
will make the cold air leak out
enough
The cubed ice or
water is too small
it has been used too long time
Replace a new water filter
The water flow meter is fault
Contact maintenance personnel
CKFCA-C01
22