Loading ...
Loading ...
Loading ...

10/12
the middle wheel can zoom in and out of the graphics. At the same time, the content of the G-Code will be displayed
in the lower command bar. During processing, the machine will run one by one according to the G-Code commands.
(5). Fixture, tool installation and Set the working coordinate origin
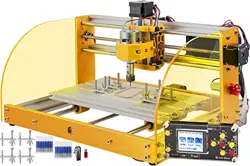
The fixture in the product kit is not
assembled. There are four sets in total. The
appearance and usage of the assembled
fixture are shown in the right figures.
Before running the G code program, you
need to find the position of the engraving
figure relative to the overall engraving plate.
There is a three-axis coordinate system in the
visual graphics. The origin of the three-axis
coordinate system is the tool setting point of
the actual processing graphic.
You can move the tool to determine the position of the engraving graphic relative to the overall engraving plate
based on the position of this origin. The engraving figure in the figure below is taken as an example.
After the selected tool position is started, the X/Y and Z axes are reset to zero (the are zeroing X/Y and Z
axes buttons). Before returning to zero, make sure that the tool approaches the distance of one sheet of paper for
engraving, and then return the X/Y and Z axes to zero (please use a flat-bottom sharp knife when engraving, and use
a cylindrical milling cutter when machining planes, slots, and holes) The effect is that the sculpted figure will be carved
with the blade tip as the origin.
The ER11 collet on the spindle motor should be clamped into the fixed head first, and it must be clamped in place.
When installing the cutter, please do not extend the collet too much, as shown in the first figure below.
(6) Start carving
After finding the engraving position, click the send button below and the device will automatically start engraving.
The status bar at the top right shows running. The visualization window shows that the tool is moving along the tool
path. You can choose the pause and stop buttons below when engraving. (After pausing, click again to continue the
previous carving. After termination, click Send to start processing from the beginning).
(7). Finished processing
After the processing is completed, the visualization window prompts that the engraving is completed and the time
required for carving.
Loading ...
Loading ...
