Loading ...
Loading ...
Loading ...
Time-setting options en
13
You can change the standard setting of the preset
power levels. You can find out how to do this in the
"Basic settings" section →Page17.
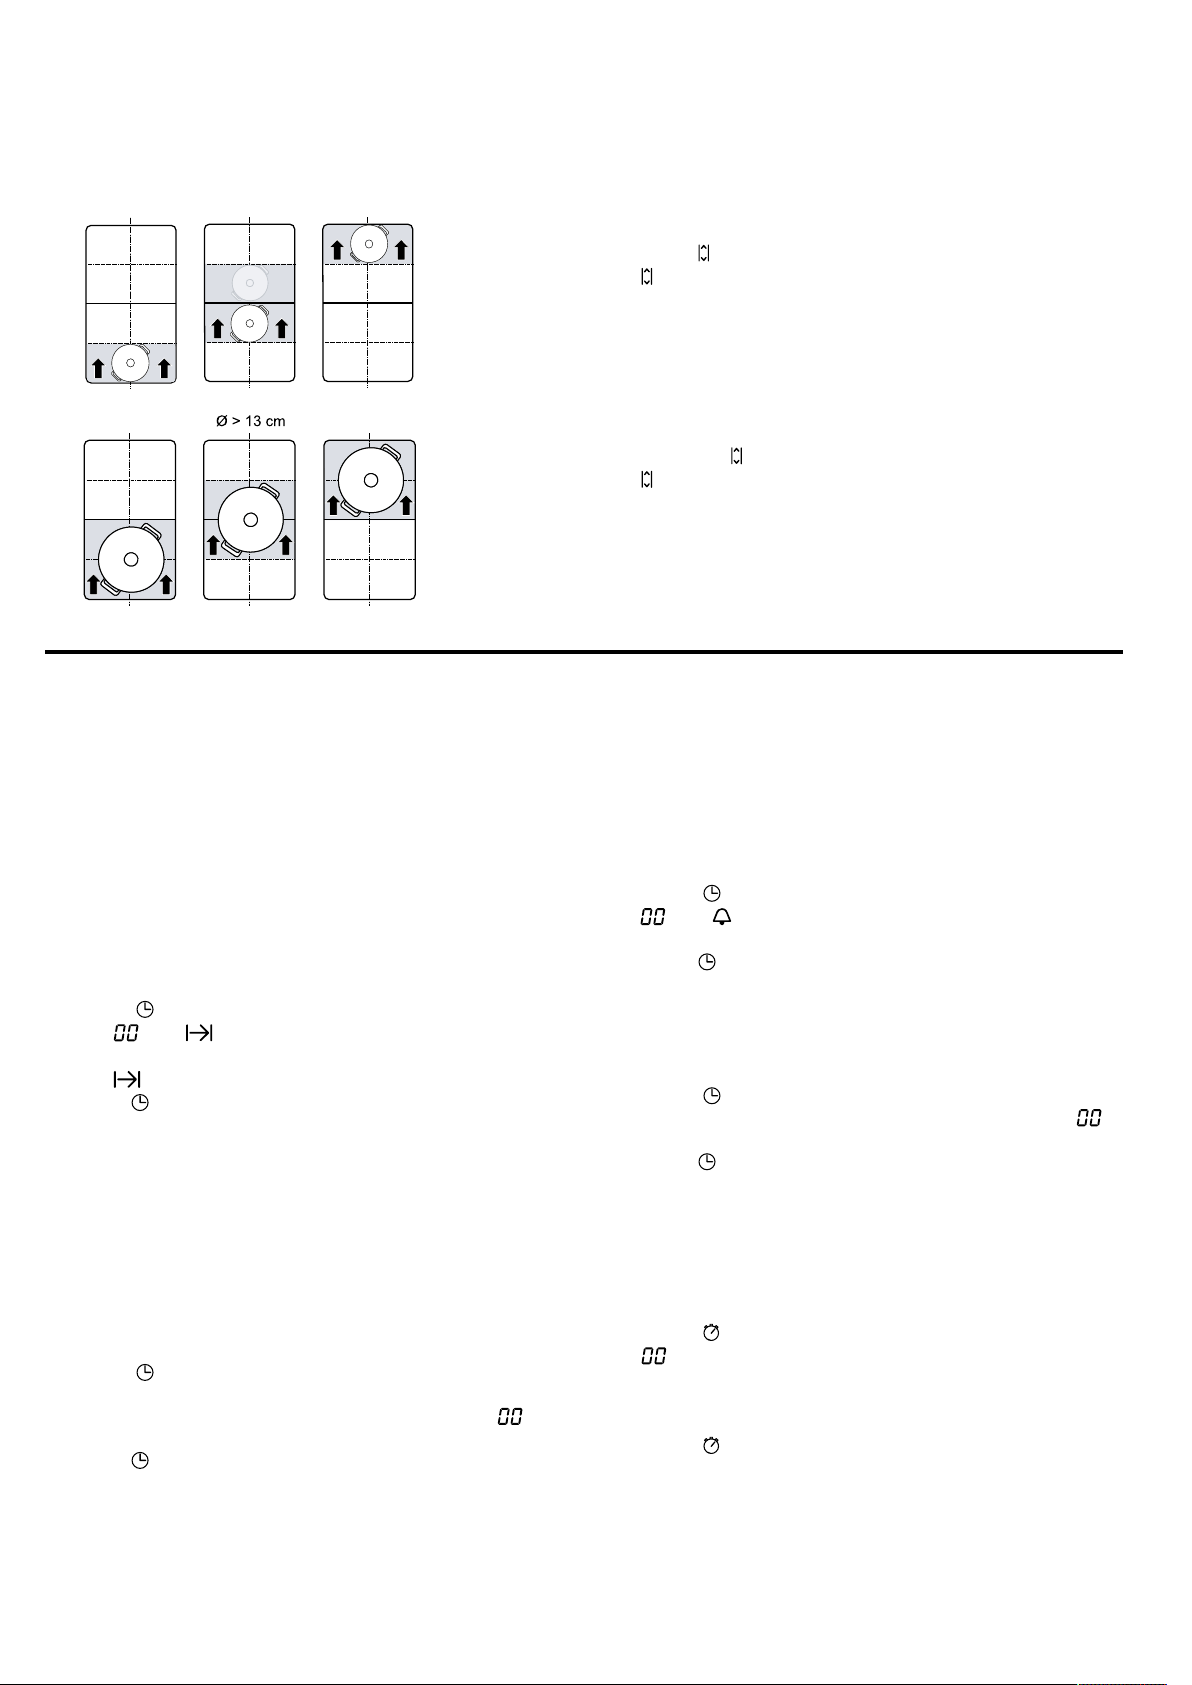
Ø ≤ 13 cm
11.2 Activating powerMove Plus
Requirement:Only place one item of cookware on a
flexible zone.
1.
Select one of the two cooking zones in the flexible
zone.
2.
Press
.
a lights up brighter and the power level for the area
in which the container is located lights up.
a The function is switched on.
Note:You can change the power levels during cook-
ing.
11.3 Deactivating powerMove Plus
▶
Touching
a lights up dimly.
a The function has been deactivated.
12 Time-setting options
Your hob has various functions for setting the cooking
time:
¡ Switch-off timer
¡ Timer
¡ countUp function
12.1 Switch-off timer
Allows you to program a cooking time for one or more
cooking zones. Once the time has elapsed, the cook-
ing zone is automatically switched off.
Switching on Switch-off timer
1.
Touch
twice.
a The and displays light up.
2.
Select the required cooking zone and cooking time.
a The
indicator for the hotplate will light up.
3.
Press
to confirm.
4.
Select the required power level.
a The cooking time begins to count down.
a Once the cooking time has elapsed, the cooking
zone switches itself off and an audible signal
sounds.
Note:When you set a cooking time for a cooking zone
in which the fryingSensor is activated, the cooking time
will not start counting down until the selected temperat-
ure level has been reached.
Changing or switching off Switch-off timer
1.
Touch
twice.
2.
Select the cooking zone.
3.
In the settings area, change the time or set to to
delete the time.
4.
Press to confirm.
12.2 Timer
Enables the activation of a timer of 0–99 minutes. This
function can be used independently of the cooking
zones and other settings. It does not automatically
switch off the cooking zones.
Switching on Timer
1.
Touch
.
a and light up.
2.
Set the required time in the settings area.
3.
Press
to confirm.
a The time begins to count down.
a An audible signal sounds and the displays flash
once the time has elapsed.
Changing or switching off the Timer
1.
Touch
.
2.
In the settings range, change the time or set to
to delete the time.
3.
Press to confirm.
12.3 countUp function
The stopwatch function displays the time that has
elapsed since activation.
Switching on countUp function
▶
Touch
.
a light up.
a The time begins to count down.
Switching off countUp function
▶
Touch
.
a The displays for the run time programming function
go out.
a The function has been deactivated.
Loading ...
Loading ...
Loading ...