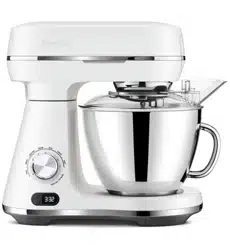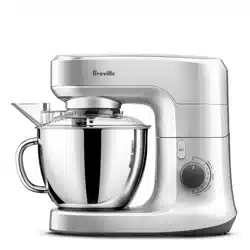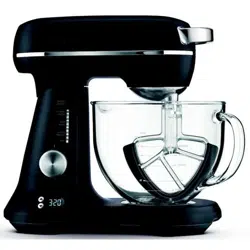

compact twin motor
hand and stand mixer

2
IMPORTANT SAFETY INSTRUCTIONS. READ CAREFULLY AND
KEEP FOR FUTURE REFERENCE
This appliance can be used by children aged from 8 years
and above and persons with reduced physical, sensory or
mental capabilities or lack of experience and knowledge if
they have been given supervision or instruction concerning
use of the appliance in a safe way and understand the hazards
involved. Children shall not play with the appliance. Cleaning
and user maintenance shall not be made by children without
supervision.
Always disconnect the appliance from the mains supply socket
if it is left unattended and before assembling, disassembling or
cleaning.
If the supply cord is damaged, it must be replaced by the
manufacturer, its service agent or similarly qualied persons
in order to avoid a hazard.
product safety

3
! Never use this appliance for anything other than its intended use. This appliance is for
household use only. Do not use this appliance outdoors.
! Always ensure that hands are dry before handling the plug or switching on the
appliance.
! Always use the appliance on a stable, secure, dry and level surface.
! This appliance must not be placed on or near any potentially hot surfaces (such as a
gas or electric hob).
! Never immerse any part of the appliance or power cord and plug in water or any other
liquid.
! Never let the power cord hang over the edge of a work top, touch hot surfaces or
become knotted, trapped or pinched.
! Do not use the appliance if it has been dropped, if there are any visible signs of
damage or if it is leaking.
! Never use any accessory or attachment not recommended by the manufacturer.
! Remove attachments from the appliance before washing or cleaning them.
! Keep ngers, hair and clothing away from the moving parts of the appliance when it is
in use.
! Do not attempt to eject, t or remove attachments until the appliance has come to a
complete stop.
product safety

4
features and parts
1. Mixer stand/bowl turntable
Two speed turntable provides a powerful and thorough mixing action
2. Stainless steel bowl
Dishwasher safe.
3. Detachable hand mixer
Can be detached from the stand for hand use.
4. Beater release button
Press the beater release button to remove the beaters or dough hooks
5. On/off switch and 5-way speed selector
Turns your mixer on or off and selects one of 5 speed ranges. When used in
conjunction with the speed range selector switch, up to 10 speeds can be selected.
6. Speed range selector switch
Selects the high or low range of mixer speeds. Used in conjunction with the 5-way
speed selector.
7. Boost button
When held down, operates your mixer at its highest speed.
8. Mixer head lock release button
Press to release the head lock and tilt or lower the mixer head.
9. Hand mixer release button
When the mixer head is in the raised position the button can be pressed to detach
the hand mixer.
10. Bowl speed control
Selects Off, Hi or Lo speed for the mixing bowl turntable.
11. Dough hooks
Stainless steel dough hooks ideal for kneading dough and cookie mixes. The
dough hook with the red collar must be inserted into the red recess on the mixer.
Dishwasher safe.
12. Beaters
Suitable for making cakes, biscuits, pastry, scones, icing, llings, etc. Dishwasher
safe.

5
Due to our policy of continuous improvement, the actual product may differ slightly from the one illustrated in these instructions.
features and parts

6
using your mixer on the stand
Before rst use
Make sure your mixer is switched off and unplugged from the mains supply
socket before cleaning, detaching or tting it to the mixer stand or before tting or
removing the beaters or dough hooks.
Before using your mixer for the rst time, wash the beaters, dough hooks and stainless
steel bowl in warm, soapy water. Rinse and dry thoroughly. Do not use harsh abrasives,
chemicals or oven cleaners. Using a damp cloth or sponge, wipe the exterior of the hand
mixer and mixer stand. Dry thoroughly.
Using
Always avoid contact with moving parts while the appliance is in operation.
Keep hands, hair, clothing as well as other utensils away from the beaters/dough
hooks during operation.
Never attempt to remove or replace the beaters/dough hooks whilst your food
mixer is in operation, or plugged in to the mains supply.
Never attempt to make pastry with the mixer on the stand. For best results, remove
the mixer and use by hand.
1. Ensure that your mixer is unplugged from the supply socket and the speed selector
is set to 0 (off). Press the mixer head lock release button and raise the mixer stand
head until it clicks.
2. Position the lower rim of the stainless steel mixing bowl over the mixing bowl
turntable.
3. Rotate the mixing bowl in a clockwise direction until it clicks into position.
4. Connect the hand mixer to the mixer stand by locating the two prongs on the stand
into the two rectangular holes in the heel of the hand mixer. Press the hand mixer
down until it clicks into place. Ensure that the hand mixer and mixer stand are rmly
connected together.
5. Insert one of the beaters into one of the recesses and push it rmly into place. Insert
the remaining beater into its recess pushing it rmly into place. When correctly tted,
both beaters should be locked in place.
To use the dough hooks, insert the dough hook with the red collar into the recess that
is red. Insert the other dough hook into the remaining recess. Don’t use the dough
hooks the other way round.
6. Press the mixer head lock release button and lower the mixer head into the bowl until
the head clicks. Never plug in or switch on your stand mixer before the mixer head
has been lowered into the mixing bowl.
7. Add the ingredients to the mixing bowl. The beaters are offset to easily allow this.
8. Plug your mixer into the mains supply socket.
9. Turn the on/off speed selector switch to 1 to start mixing. Adjust the speed as
required (see Mixing speeds on page 8). Use the bowl speed control to select the
appropriate bowl speed.

7
using your mixer on the stand

8
using your mixer by hand
Make sure your mixer is switched off and unplugged from the mains supply
socket before cleaning, detaching or tting it to the mixer stand or before tting or
removing the beaters or dough hooks.
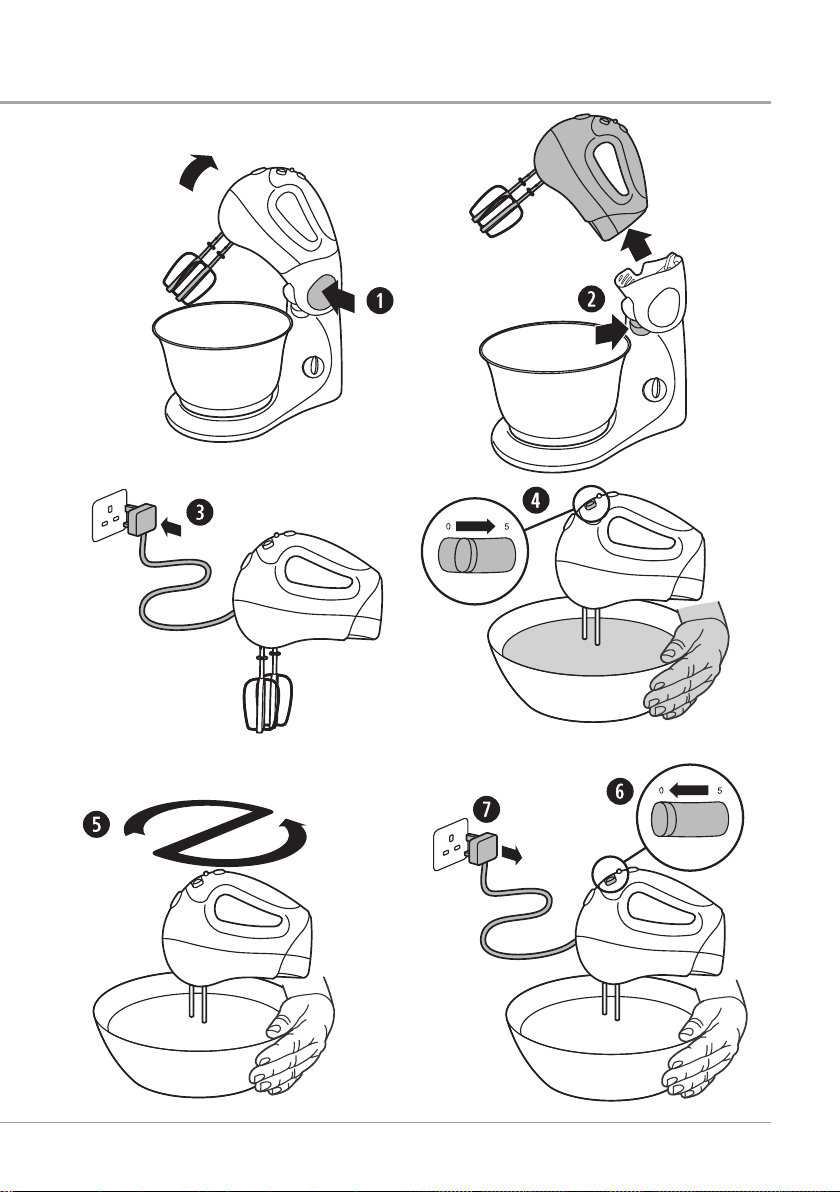
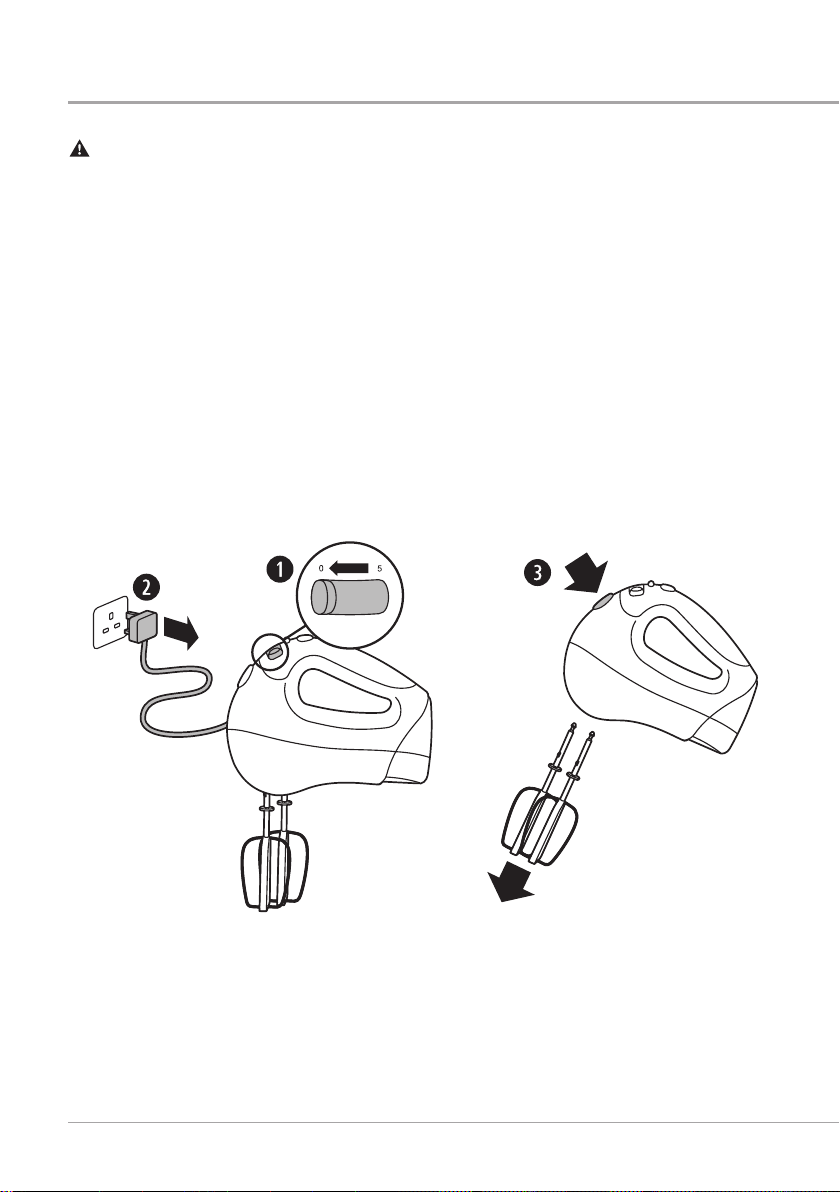
1. Ensure that your mixer is unplugged from the supply socket and the speed selector
is set to 0 (off). Press the mixer head lock release button and raise the mixer stand
head until it clicks.
2. Press and hold the hand mixer release button while lifting the hand mixer from the
mixer stand.
3. Plug your hand mixer into the mains supply socket.
4. Place the beaters/dough hooks into the ingredients to be mixed. Always support the
container or bowl in which you are mixing ingredients whilst operating your hand
mixer. Set the on/off speed selector switch to 1 to start mixing. Adjust the speed as
required (see Mixing speeds below).
5. When mixing, guide the hand mixer through the centre and around the sides of the
mixing bowl. When making pastry, use the mixer by hand and not on the stand. For
best results always make sure that you:
• use twin beaters
• soften the butter/margarine/lard before use
• disperse fat evenly into the our before mixing
6. When you have nished mixing the ingredients, set the on/off speed selector to 0
(off). Use a spatula to scrape around the bowl to remove any remaining ingredients.
7. Unplug your hand mixer from the mains supply socket.
Always avoid contact with moving parts while the appliance is in operation.
Keep hands, hair, clothing as well as other utensils away from the beaters/dough
hooks during operation.
Never attempt to remove or replace the beaters/dough hooks whilst your food
mixer is in operation, or plugged in to the mains supply.
Mixing speeds
Task
Speed Range
Selector Switch
Recommended Speed
Blending and folding LO 1 and 2
Light mixing LO 3 and 4
Creaming and beating HI
LO
2 and 3
5
Whipping and aerating HI 4, 5 or Boost button
9
using your mixer by hand
10
care, cleaning and storage
Make sure your mixer is switched off and unplugged from the mains supply
socket before cleaning, detaching or tting it to the mixer stand or before tting or
removing the beaters or dough hooks.
To make cleaning easier, clean your hand mixer and the beaters/dough hooks as soon as
you have nished using them.
1. Set the speed selector to 0 (off) and unplug your hand mixer from the mains supply
socket.
2. Eject the beaters/dough hooks from your hand mixer by pressing the eject button.
The beaters/dough hooks are heavy and care should be taken not to let them fall
onto fragile surfaces or items when they are being ejected. The beaters/dough hooks
can’t be ejected unless the speed selector is set to 0 (off).
3. Wash the beaters/dough hooks and the bowl in warm soapy water. Alternatively,
wash them in a dishwasher.
4. Rinse and dry the beaters/dough hooks before storing or using again.
5. Using a dampened cloth, wipe the body of your hand mixer.
Storage
Store your hand mixer in a clean, dry place, out of the reach of children, ensuring that all
the parts are dismantled.

11
hints and tips
1. Before starting, read the recipe completely.
2. Refrigerated ingredients, e.g. butter and eggs, should be at room temperature before
mixing begins. Set these ingredients out ahead of time.
3. Before starting your recipe, preheat the oven to the baking temperature
recommended in the recipe.
4. Place all the ingredients and any required utensils near the mixer.
5. To eliminate the possibility of shells or deteriorated/off eggs in your recipe, break
eggs into a separate container rst, then add to the mixture.
6. When mixing egg whites, be sure the bowls and beaters are thoroughly cleaned
and dried, as even the smallest amount of oil on beaters or bowl may cause the egg
whites not to aerate.
7. Always start mixing at slow speeds, especially when mixing in our or icing sugar.
Mix these ingredients slowly at rst, then gradually increase the speed as required.
8. Do not over beat. Be careful that you only mix/blend mixtures until recommended
in your recipe. Fold in dry ingredients only until just combined. Always use the low
speed. At any stage of mixing, over beating can cause toughness, close texture, lack
of rising or excessive shrinkage. Climatic conditions, seasonal temperature changes,
temperature of ingredients and their texture variation from area to area all play a part
in the required mixing time and the results achieved.
9. All recipes have been kitchen tested, but should you nd it necessary to vary the
ingredients or size of the tin etc. allow for this in the cooking time. Always test that
baked foods are done before removing them from the oven or cooking appliance.
10. During mixing, ingredients may splash to the sides of the bowl. To scrape the bowl,
turn the beaters and bowl control dials to the ‘OFF’ position and use a spatula to
scrape the bowl. A light scraping after the addition of each ingredient assists in
achieving efcient mixing.
11. If you don’t have a tin the same size as the recipe suggests here are some
alternatives: two 20cm sandwich tins, one 28 x 18cm tin, one 20 x 7cm round cake
tin or a standard loaf tin.
12. Cooking times and temperatures are meant only as a guide. Light mixtures should
spring back when lightly touched and heavy mixtures, fruit cake and the like, should
be tested with a skewer towards the end of the suggested cooking time. If the skewer
is clean when removed, the cake is cooked.
13. When making pastry, use the mixer by hand and not on the stand. For best results
always make sure that you:
• use twin beaters
• soften the butter/margarine/lard before use
• disperse fat evenly into the our before mixing

12
hints and tips
Oven Temperatures
°C °C (fan) °F Gas Mark
Very Cool 110 90 225 ¼
130 110 250 ½
Cool 140 120 275 1
150 130 300 2
Moderate 170 150 325 3
180 160 350 4
Moderately hot 190 170 375 5
200 180 400 6
Hot 220 200 425 7
230 210 450 8
Very hot 240 220 475 9
Symptom Possible cause
Sponge cake shrink Unbalanced ingredients, over beating of egg whites, sudden
changes of temperature or draught when taking from the oven.
Cakes do not rise Mostly due to gross over beating, but can also be caused by too hot
an oven during the rst part of cooking.
Cakes sink in the centre Too much fat, raising agent, liquid or sugar; too little our, under
cooking or slow cooking.
Cakes run over the edges Too much batter for size of pan, too cool an oven, too much sugar,
over beating, too much raising agent.
Hard outer crust Too much our, too little sugar, over mixing, too hot an oven.
Moist, sticky outside Too much sugar, over beating, under baking.
Coarse, crumbly texture Over beating, low baking temperature.
Heavy, close texture Too much fat or sugar, over mixing, under baking, or too hot an
oven.
Fruit sinks Mixture too soft, damp fruit, too little our, ingredients not correctly
balanced, over beating.

13
Preparing dough
1. Fit the dough hooks (don’t forget to t the hook with the red collar in the red recess).
2. Place the dry ingredients into the mixer bowl. Always keep dried yeast away from the
salt or your bread will fail to rise.
3. Turn the speed control switch to 1 and the bowl control dial to LO.
4. Begin to gradually add the liquid ingredients to the bowl.
You may nd it useful to use a spatula to scrape the dry ingredients from the sides of
the bowl during the kneading process. Always switch the unit off before scraping the
sides of the bowl. Do not use the spatula near or directly behind the dough hooks.
Use only a rubber or plastic spatula.
Never attempt to feed the dough into the dough hooks with your hands, spatula or
any other utensil while the mixer is plugged into the supply socket or is in operation.
5. As the ingredients start to form a ball, scrape down the sides of the bowl if necessary
with a spatula and remove your dough.
Always switch off and unplug the mixer rst. Do not use the mixer near the edge of
a work surface or table top because movement of the mixer during operation may
cause it to fall off.
6. Depending on the recipe you may need to manually knead your dough. Place the
dough onto a well oured surface and knead it until it is smooth and elastic. This
should take approximately 5–10 minutes.
7. After kneading place the dough into a large well greased mixing bowl. Place the bowl
in a warm, draft-free area and cover the bowl with a light damp cloth until the dough
doubles in size.
8. Plunge your st into the centre of the risen dough to remove the excess air. Fold the
outer edges into the centre and turn the dough out onto a lightly oured surface for
shaping.
9. Place the dough into tins for baking, or cut and shape the dough for making buns,
rolls, etc.
10. For the nal rising stage of the dough cover it with a light damp cloth and place it in a
warm, draft-free area until doubled in size again.
Finishing touches
• Sprinkle loaves or buns with sesame, poppy or caraway seeds before baking.
• Top loaves with shredded cheese during the last few minutes of baking.
• Glazes may be brushed over the dough at any time before, during or after baking.
• For a shiny crust, brush with cream or evaporated milk before baking.
• For a matt nish, brush with melted butter or margarine after baking.
making dough

14
recipes
Basic White Loaf
• 7g dried yeast
• 1 tbsp sugar
• 250ml lukewarm water
• 90ml of lukewarm milk
• 60g butter, melted
• 500g strong white plain our
• 1 tsp salt
1. Combine the rst ve ingredients in a small bowl and allow to stand in a warm place
until mixture begins to froth. About 10 minutes.
2. Insert dough hooks into the mixer. Place sifted dry ingredients into the bowl.
3. Using a low speed, gradually add yeast mixture. Note that it will be necessary to
scrape sides of bowl with a rubber spatula. Knead for 3–4 minutes.
4. Continue the kneading process until all ingredients are incorporated and dough
forms a ball. Mixture will be wet and sticky. Remove the dough from the bowl using a
rubber spatula.
5. Place the dough in a greased bowl, turning once to grease the top of dough. Cover
and let rise in a warm place until doubled in size (40–50 minutes).
6. Knock back (punch down) the dough to release the air. Remove the dough from the
bowl and place onto a well oured surface. Lightly knead dough with palm of your
hands until smooth and elastic. Cut dough in half and shape into two loaf pans.
Cover loosely with plastic wrap and allow to rise in a warm place until doubled in
size, about 30–40 minutes. Preheat the oven to 200ºC.
7. Bake for approximately 30 minutes. Baked loaves sound hollow when tapped.
Bread Rolls (makes approx. 12)
1. Follow steps 1–5 from the Basic White Loaf recipe.
2. Knock back (punch down) the dough to release the air. Knead lightly on a well oured
surface for 3–5 minutes until the dough is smooth and elastic. Cut the dough into 12
portions and roll each portion across the bench, until an even soft ball.
3. Place each portion of dough onto a baking tray lined with baking paper. Cover in
plastic wrap, allow to double in size (about 20–40 minutes), brush with eggwash and
sprinkle with a mixture of poppy and sesame seeds.
4. Bake on 200ºC for 15–20 minutes.
Note: Eggwash is a mixture of egg yolk and tepid water used to glaze the top of uncooked
bakery goods to give a shiny glaze.
Variations:
Flat rolls can be made using this recipe. After dividing the dough into equal portions
and shaping into rounds, atten each round with a rolling pin to approximately 1.5cm
thick. Place close together on prepared trays, brush with melted butter and sprinkle
with sesame seeds. Cover with plastic wrap and allow to rise in a warm place for
approximately 10 minutes. Bake for approximately 20 minutes.

15
Fruit Loaf (makes 2 loaves)
• 7g dry yeast
• 20g sugar
• 60g butter or margarine, melted
• 310ml lukewarm milk
• 190ml of water
• 500g plain our or bread our
• 2 tbsp powdered milk
• 1 tsp salt
• 175g mixed fruit
1. Combine the yeast, sugar, butter and water in a small bowl. Allow to stand in a warm
place until mixture begins to froth.
2. Insert dough hooks into the mixer. Place the sifted dry ingredients including the mixed
fruit into the mixer bowl.
3. On a low speed, gradually add the yeast mixture. Note that it will be necessary to
occasionally scrape the sides of the bowl with a spatula. Always stop the mixer rst.
Knead for 4–5 minutes.
4. Continue the kneading process until all ingredients are incorporated and dough forms
a ball. Mixture will be wet and sticky. Remove the dough from the bowl using a rubber
spatula.
5. Place the dough in a greased bowl, turning once to grease top of the dough. Cover
and let rise in a warm place until doubled in size (40–50 minutes).
6. Knock back (punch down) the dough to release the air. Turn the dough out onto a
well oured surface and knead lightly for 1–2 minutes until smooth.
7. Cut and shape into loaf pans. Cover with plastic wrap and allow to rise in a warm
place until doubled in size, about 30–40 minutes. Preheat the oven to 200ºC.
8. Bake for approximately 30 minutes. Baked loaves sound hollow when tapped. This
makes 2 loaves.
If the dough is too wet, while the mixer is kneading slowly sprinkle a tablespoon of our
at a time until the mixture is smooth and moist but not wet. The dough should be slightly
sticky, soft and elastic.
recipes

16
recipes
Wholemeal Loaf (makes one large or two small loaves)
• 7g dry yeast
• 2 tbsp sugar
• 300ml lukewarm water
• 30g butter, melted
• 250g strong white plain our
• 180g strong wholemeal our
• 1 tsp salt
1. Combine the yeast, sugar, water and butter in a small bowl and allow to stand in a
warm place until mixture begins to froth. About 10 minutes.
2. Fit the dough hooks. Place the sifted dry ingredients into the mixer bowl.
3. On a low speed, gradually add the yeast mixture. Note that it will be necessary to
occasionally scrape the sides of the bowl with a spatula. Always stop the mixer rst.
Knead for 3–5 minutes.
4. Continue the kneading process until all ingredients are incorporated and dough forms
a ball. The dough will be wet and sticky.
5. Place dough in a greased bowl, turning once to grease top of dough. Cover with
plastic wrap and let rise in a warm place until doubled in size (40–50 minutes).
6. Knock back (punch down) the dough to release the air. Knead on a lightly oured
surface. Cut the dough in half and shape into loaf pans. Cover with plastic wrap and
allow to rise in a warm place until doubled in size, (about 30 minutes). Preheat the
oven to 200ºC.
7. Bake for approximately 30 minutes. Baked loaves sound hollow when tapped.
Variations:
This dough can be used to make bread rolls, breadsticks, and as the basis for other
wholemeal bakery goods.
Note: Grain bread our mix can be used as a substitute for plain and wholemeal ours.
Scones (makes approximately 8)
• 225g plain our
• 2 tsp baking powder
• pinch of salt
• 55g butter plus extra for greasing
• 25g caster sugar
• 150ml milk plus extra for brushing
1. Heat the oven to 220°C. Lightly grease a baking sheet.
2. Mix together the our, baking powder, sugar and salt in the mixer bowl on a low
speed. Add the butter and mix until the mixture resembles crumbs. Add the milk bit
by bit to get a soft dough.

17
Victoria Sponge Cake
• 225g self raising our (sifted)
• 225g softened butter (extra for greasing)
• 225g caster sugar
• 4 large free range eggs
• Icing sugar for dusting
• 1 tsp vanilla essence
For the lling:
• 6 tbps strawberry jam
• 300ml double cream (chilled)
1. Heat the oven to 180°C.
2. Lightly grease two sandwich tins 15–17.5cm (6–7in) and line base with greaseproof
paper.
3. Cream together the butter and sugar in the mixer bowl on a medium speed until it’s
pale and creamy to get lots of air into the mixture (approx 3–5 minutes).
4. Add the vanilla essence, then beat in the eggs one at a time adding a tablespoon of
our if the mixture starts to curdle.
5. Fold in the our but be careful not to over mix as the air will be lost.
6. Divide the mixture between the two cake tins and level off the top. Create a slight well
in the centre to avoid a mound when the mixture rises during baking.
7. Bake for approximately 20 minutes or until cakes are a pale golden colour and spring
back when pressed.
8. Leave to cool for 10 minutes and remove from tins, placing on a wire rack to cool
completely.
9. Whip the cream until soft peaks are formed.
10. Spread the sponge with jam and the whipped cream on one cake, then carefully
sandwich together.
11. Dust with icing sugar and serve.
3. Turn on to a oured work surface and knead very lightly. Pat out to a round 2cm (¾in)
thick. Use a 5cm (2in) cutter to cut out rounds and place on a baking sheet. Lightly
knead together the rest of the dough and cut out more scones until the mixture is
used up.
4. Brush the tops of the scones with milk. Bake for 12–15 minutes until well risen.
5. Cool on a wire rack and serve with butter and jam and maybe some clotted cream.
Variations:
Fruit scones: Dried fruit of your choice. Add at step 2.
recipes

18
recipes
Vanilla Cupcakes (makes about 24)
• 225g of good quality butter
• 225g of caster sugar
• 4 medium eggs
• 225g of self raising our
• ½ tbsp of natural vanilla extract
1. Pre heat the oven to 180ºC.
2. Separate the cake cases on to a baking tray.
3. Put the caster sugar, chopped up butter and vanilla into the mixer bowl and cream
together on a medium speed. Then add the sieved our.
4. Mix together for about 1 minute until all the ingredients are combined.
5. Next, add the eggs one at a time and slowly mix until soft and creamy.
6. Spoon the mixture into the cases and ll about ⅔ full.
7. Cook the cupcakes for approximately 10–15 minutes or until they feel spongy and
rm.
Alternative Flavours
Chocolate cupcakes: Use the Vanilla cupcake recipe but instead use 195g of self raising
our and 30g of good quality cocoa powder.
Lemon cupcakes: Substitute vanilla extract with lemon extract or alternatively the zest of
1 lemon.
Simply Creamy Frosting
Delicious on its own or you can use it as a base for adding avours.
• 200g of full-fat cream cheese at room temperature
• 100g of soft unsalted butter
• 600g of sieved icing sugar
1. Add all the ingredients to your mixer bowl. Mix for 1 minute until smooth.
Alternative Flavours
Vanilla: Add 1 tsp of natural vanilla extract whilst mixing.
Chocolate: Melt 100g of good quality chocolate (preferably 72% cocoa). Allow the
chocolate to cool slightly and then slowly add it to the frosting mixture using a slow speed
setting on your processor.
Zesty Lemon: Mix in the grated zest of 1 lemon.

19
Pavlova
• 4 egg whites
• 200g caster sugar
• 2 tsp vinegar
• 3 tsp cornour
• ½ tsp vanilla extract
1. Preheat the oven to 120ºC. Grease and our 20cm (8in) round tin.
2. Using the clean dry mixer bowl whip the egg whites on a high speed until stiff peaks
are formed.
3. Gradually add the sugar, a teaspoon at a time to start. Beat well between each
addition. As mixture thickens add the sugar more quickly. This should take
approximately 5–8 minutes mixing time.
4. Reduce speed to 1 and fold through vinegar, cornour and vanilla. Continue mixing
until mixture is stiff and glossy, approximately 2–3 minutes.
5. Spread half of the pavlova onto a prepared tray. Pipe the remaining mixture to form
border.
6. Bake for 1¼ –1½ hours. If able, turn oven off and allow to cool in the oven overnight
or for a few hours.
Decorate as desired. Fresh cream and lots of fresh berries is delicious. Sprinkle with icing
sugar to nish off.
Eton Mess
• Meringue shell prepared and baked as per the Pavlova recipe
• 570ml double cream
• 450g fresh strawberries/raspberries, washed and hulled
• Mint leaves (optional)
1. Place the cream in the bowl and lightly whip until soft peaks are formed.
2. Break the meringue into small pieces and combine with the fruit and the cream.
3. Spoon into a glass dish decorating with some slivers of fresh mint.
4. Serve immediately.
recipes

20
recipes
Chocolate Chip Cookies (makes approx. 10-15)
• 125g butter or margarine
• 120g caster sugar
• 120g brown sugar
• 2 eggs
• 1 tsp vanilla essence
• 270g plain our
• 1 tsp salt
• 1 tsp bicarbonate of soda
• 180g chocolate chips
1. Preheat the oven to 170ºC and grease the baking trays.
2. Place the butter and sugar into the mixing bowl and cream until combined.
3. Add the eggs and vanilla and beat on a high speed until light and uffy.
4. Fold in the sifted dry ingredients and mix until well combined.
5. Fold in the chocolate chips using a spoon.
6. Place teaspoonfuls of the mixture onto the trays and bake for 12–15 minutes or until
golden.
7. Allow to cool on wire racks.

21
Easy Chocolate Fudge Cake
• 225g plain our
• 375g caster sugar
• 85g good quality cocoa powder
• 1.5 tsp baking powder
• 1.5 tsp bicarbonate of soda
• 2 large free range eggs
• 250ml milk
• 125ml vegetable oil
• 2 tsp vanilla essence
• 250ml boiling water
For the ganache icing:
• 200g dark chocolate – plus extra for decoration
• 200ml double cream
1. Heat the oven to 180°C.
2. Lightly grease and line two sandwich tins 20cm (8in).
3. Put all the cake ingredients except the hot water into mixing bowl and beat the
mixture until well mixed and smooth (approx 3–5 minutes).
4. Gradually add the boiling water to the mixture and continue whisking until completely
smooth and of a runny consistency.
5. Divide the mixture between the two cake tins and bake for approximately 25–35
minutes or until the top is rm to touch. Check cake is cooked by inserting a skewer
into the centre of the cake and if it comes out clean then it is cooked.
6. Remove the tins from the oven and leave to cool before removing from the tins.
7. For the icing, heat the cream slowly in a saucepan over a low heat. Remove from the
heat then add the chocolate and cream to the mixer bowl. Whisk on a low speed until
completely smooth and glossy (the heat of the cream should melt the chocolate).
Leave to cool until the mixture thickens enough to spread it onto the cake.
8. Remove the cakes from the tins. Spread some of the chocolate ganache on one then
sandwich them together. Use the remainder of the icing to cover the cake.
9. Using a peeler scrape some chocolate off the extra chocolate kept for decoration and
sprinkle on top of the cake.
recipes

22
recipes
Zesty Lemon Drizzle Cake
• 225g self raising our (sifted)
• 225g softened butter (extra for greasing)
• 225g caster sugar
• 4 large free range eggs
• Juice and zest of 1 lemon
For the lling:
• 100g lemon curd
• 200g mascarpone
• 75ml double cream (chilled)
• 50g of icing sugar
For the topping:
• Juice and zest of 2 lemons
• 85g caster sugar
1. Heat the oven to 180°C.
2. Lightly grease two sandwich tins 15–17.5cm (6–7in) and line the base with
greaseproof paper.
3. Cream together the butter and sugar on a medium speed in the mixer bowl until pale
and creamy to get lots of air into the mixture (approx 3–5 minutes).
4. Beat in the eggs, lemon zest and juice until well mixed, then fold in the our.
5. Divide the mixture between the two cake tins and level off the top. Create a slight
well in the centre to avoid a mound when the mixture rises during baking.
6. Bake for approximately 20 minutes or until the cakes are a pale golden colour and
spring back when pressed.
7. Leave to cool for 5 minutes and using a skewer prick the top of one of cakes.
8. To make the lemon drizzle, mix together the lemon juice and caster sugar for the
topping and drizzle over the skewered cake, sprinkle the top with the zest then leave
both cakes to cool completely then remove from tins.
9. Add all the lling ingredients into a bowl and whisk until well mixed.
10. Spread the lling onto the non skewered cake then carefully sandwich together,
ensuring the lemon drizzle is at the top of the cake.

23
Carrot and Pecan Cake
• 350g carrots
• 50g pecans
• 110g self-raising wholemeal our
• 110g plain wholemeal our
• 2tsp ground mixed spice
• 1 tsp bicarbonate of soda
• 240ml vegetable oil
• 170g soft brown sugar
• 4 eggs
• 2 tbsp golden syrup
1. Peel and grate the carrots. Chop the pecans and set to one side.
2. In a separate bowl, sieve together both ours, bicarbonate of soda and the mixed
spice.
3. Using the food mixer bowl, whisk together the vegetable oil, sugar, eggs and golden
syrup.
4. Add the dry ingredients to the mixture and mix slowly until the mixture is nice and
smooth. Add the carrots and pecans.
5. Tip the mixture into a greased, lined tin and cook at 160ºC for 1 hour or until cooked.
For the topping:
• 200g cream cheese
• 56g softened, unsalted butter
• 56g sifted icing sugar
• 1 tsp vanilla essence
1. Mix the cream cheese, butter, icing sugar and vanilla essence with your food mixer
until the mixture is smooth.
2. Allow the cake to cool then add the topping.
recipes

24
recipes
Rich Fruit Cake
• 225g plain our (sifted)
• 200g softened butter (plus extra for greasing tin)
• 200g dark brown sugar
• 4 large free range eggs lightly beaten
• 900g mixed dried fruit
• 150g glacé cherries (halved)
• 2tbsp black treacle
• 1 tbsp marmalade
• ½ tsp mixed spice
• ¼ tsp nutmeg
• ¼ tsp vanilla essence
• ¼ tsp salt
• 3 tbsp brandy (optional)
• Blanched almonds to decorate if not icing (optional)
1. Heat the oven to 150°C.
2. Lightly grease an 20cm (8in) round tin or 18cm (7in) square sandwich tin and line
with greaseproof paper.
3. Sieve the our, salt and spices into a bowl.
4. Cream the butter and sugar in the mixing bowl on a medium speed for about 2
minutes or until it’s pale in colour. Then add the treacle, marmalade and vanilla
essence until the mixture is well mixed, light and smooth.
5. Add the eggs a little at a time and mix well (add a tablespoon of our if the mixture
starts to curdle). Add a tablespoon of our with the last of the eggs.
6. Fold in the remaining our until well mixed and then add the dried fruit and glacé
cherries and mix until well combined.
7. Put the mixture into the prepared cake tin, smoothing the top and create a hollow in
the centre to help level the cake when it rises.
8. If you are not icing the cake and are using the almonds, place them lightly on the top
of the cake in your desired pattern. Do not press them into the mix as they may sink
into the cake.
9. Place in the oven for a minimum of 3 hours. Don’t be tempted to open the oven door
to check your cake.
10. Test with a skewer in the centre of the cake, if it comes out clean it is ready if not
bake for another hour checking with a skewer approximately every 20 minutes.
11. When the cake’s ready remove it from the oven and leave it in the tin to cool for
approx 15–20 minutes.
12. Remove the cake from the tin and place it on a wire rack. Leave it to fully cool down.
13. If you are using brandy, make some ne holes in the top of the cake with a skewer
and pour the brandy over the top allowing it to soak into the cake.
14. If you are preparing the cake in advance, wrap it in foil or greaseproof paper and
store it in an airtight container.
15. For a rich, moist cake spoon 2–3 tbsp of brandy over the cake each week until it’s
ready to be eaten.

25
Gluten-free/Flourless Chocolate Cake
• 2 tbsp ground almonds plus extra for dusting the tin
• 300g dark chocolate
• 275g caster sugar
• 165g softened butter (plus extra for greasing tin)
• 5 large free range eggs
• Pinch of salt
• Finely grated zest of an orange
• ¼ tsp of mixed spice
• ¼ tsp vanilla essence
• Icing sugar for dusting
• Double cream to serve
1. Heat the oven to 180°C /160°C fan /Gas 4.
2. Brush the tin with a little melted butter and dust with some ground almonds.
3. Slowly melt the chocolate, caster sugar, butter and salt in a bowl over a pan of hot
water then remove from the heat. Don’t let the water touch the bowl or the chocolate
may scorch and turn grainy.
4. In your mixer bowl, whisk the eggs, ground almonds, mixed spice, vanilla essence
and orange zest together on a medium speed until light, then fold the mixture into the
melted chocolate for approx 1–2 minutes or until the mixture thickens.
5. Pour mixture into cake tin and bake for 35–40 minutes. The cake will not rise much
and a light crust should form on the top of the cake whilst the inside remains moist.
6. Remove it from the tin and leave it to cool. Dust with icing sugar.
7. For best results, chill overnight to get a rich, fudgey texture.
recipes

26
recipes
No-bake Double Chocolate Cheesecake
• 175g chocolate digestive biscuits
• 50g butter (melted)
• 300g cream cheese
• 200g mascarpone
• 200g good quality dark chocolate (plus extra for decoration)
• 200g good quality white chocolate (plus extra for decoration)
1. Crush the biscuits and mix with the melted butter. Press the biscuit mixture into a
springform tin (approx 20cm) and set aside.
2. Slowly melt the dark and white chocolates separately in bowls above a pan of water.
Do not let the water touch the bowl or the chocolate will scorch and turn grainy.
3. Mix the cream cheese and mascarpone together in the mixer bowl on a low speed
then divide equally into two bowls.
4. Add the melted dark chocolate to one portion of the mix and the white chocolate into
the other and fold until combined.
5. Spoon both mixtures into the tin on top of the biscuit base and create a marbled
effect by running a knife in a swirling motion through the mixture.
6. Level the top and refrigerate for at least 2 hours but preferably overnight.

27
Yorkshire Puddings (makes approx 8)
• 175g plain our
• 2 large eggs
• Pinch salt
• Pinch black pepper
• 175ml milk
• 110ml water
1. Preheat the oven to 220°C. Add the fat or oil of your choice into the Yorkshire
pudding tin then place the tin into the hot oven and allow the tin to heat up until the
fat or oil is piping/smoking hot.
2. Sieve our into bowl from a height to ensure our is aerated.
3. Make a well in the centre and break the eggs into the well. Add the salt and pepper.
4. Start your mixer and beat well for approx 2–3 minutes or until the mixture becomes
stiff.
5. Gradually add the milk and water mixture and continue whisking until the batter is
smooth, aerated and a thick pouring consistency (3–4 minutes).
6. Pour the mixture into the pudding tin then return it to the oven. Cook for
approximately 40 minutes or until golden brown and well risen.
Sweet Crêpes
Why not try using up any left over Yorkshire pudding batter mix by making some
pancakes?
1. Heat a suitable skillet or heavy frying pan. Pour ⅓ cup of batter into the pan tilting the
pan to distribute the batter evenly.
2. Cook over a medium heat until lightly browned. Toss or ip the pancake over and
brown the other side.
3. Turn out onto a warmed plate. Dust with sugar and add a drizzle of lemon juice. Roll
and serve hot.
Turn on your Creativity
™
Let the Breville
®
team help you turn on your creativity with a gateway to a world of food
and drinks without limits. You don’t have to travel far—just to your computer, tablet or
mobile—where you will discover our FREE website with top tips and recipes to inspire
your imagination. Join us now at:
www.turnonyourcreativity.com
®
recipes

28
connection to the mains supply
If the plug is not suitable for the socket outlets in your home, it can be removed and
replaced by a plug of the correct type.
If the fuse in a moulded plug needs to be changed, the fuse cover must be retted. The
appliance must not be used without the fuse cover tted.
If the plug is unsuitable, it should be dismantled and removed from the supply cord and
an appropriate plug tted as detailed. If you remove the plug it must not be connected to
a 13 amp socket and the plug must be disposed of immediately.
If the terminals in the plug are not marked or if you are unsure about the installation of the
plug please contact a qualied electrician.
This symbol indicates that this unit is a Class II appliance and therefore an earth
connection is not required.
Blue
(Neutral)
Brown
(Live)
Fuse
Green/Yellow
(Earth)
Plug should be ASTA approved to BS1363
Fuse should be ASTA approved to BS1362
Ensure that the outer sheath of
the cable is firmly held by the cord grip
13A

29
after sales service
These appliances are built to the very highest of standards. There are no user serviceable
parts. Follow these steps if the unit fails to operate:
1. Check the instructions have been followed correctly.
2. Check that the fuse has not blown.
3. Check that the mains supply is functional.
If the appliance will still not operate, return the appliance to the place it was purchased for
a replacement. To return the appliance to the Customer Service Department, follow the
steps below:
1. Pack it carefully (preferably in the original carton). Ensure the unit is clean.
2. Enclose your name and address and quote the model number on all correspondence.
3. Give the reason why you are returning it.
4. If within the guarantee period, state when and where it was purchased and include
proof of purchase (e.g. till receipt).
5. Send it to our Customer Service Department at the address below:
Customer Service Department
Jarden Consumer Solutions (Europe) Limited
Middleton Road, Royton, Oldham
OL2 5LN, UK
Telephone: 0161 621 6900 Fax: 0161 626 0391
e-mail: [email protected]

30
guarantee
Please keep your receipt as this will be required for any claims under this guarantee.
This appliance is guaranteed for 1 year after your purchase as described in this
document.
During this guaranteed period, if in the unlikely event the appliance no longer functions
due to a design or manufacturing fault, please take it back to the place of purchase, with
your till receipt and a copy of this guarantee.
The rights and benets under this guarantee are additional to your statutory rights, which
are not affected by this guarantee. Only Jarden Consumer Solutions (Europe) Limited
(“JCS (Europe)”) has the right to change these terms.
JCS (Europe) undertakes within the guarantee period to repair or replace the appliance,
or any part of appliance found to be not working properly free of charge provided that:
• you promptly notify the place of purchase or JCS (Europe) of the problem; and
• the appliance has not been altered in any way or subjected to damage, misuse,
abuse, repair or alteration by a person other than a person authorised by JCS
(Europe).
Faults that occur through, improper use, damage, abuse, use with incorrect voltage, acts
of nature, events beyond the control of JCS (Europe), repair or alteration by a person
other than a person authorised by JCS (Europe) or failure to follow instructions for use
are not covered by this guarantee. Additionally, normal wear and tear, including, but not
limited to, minor discoloration and scratches are not covered by this guarantee.
The rights under this guarantee shall only apply to the original purchaser and shall not
extend to commercial or communal use.
If your appliance includes a country-specic guarantee or warranty insert please refer
to the terms and conditions of such guarantee or warranty in place of this guarantee or
contact your local authorized dealer for more information.
Waste electrical products should not be disposed of with household waste. Please recycle
where facilities exist. E-mail us at [email protected] for further recycling
and WEEE information.
Jarden Consumer Solutions (Europe) Limited
5400 Lakeside
Cheadle Royal Business Park
Cheadle
SK8 3GQ
UK

31

VFP026_Rev4 09/15 93581-3 UKPUL
P.N. 185209
Jarden Consumer Solutions (Europe) Limited
Cheadle Royal Business Park, Cheadle, SK8 3GQ, United Kingdom
e-mail: [email protected]
Telephone: 0161 621 6900
For Customer Service details, please see the website.
www.breville.co.uk
© 2015 Jarden Consumer Solutions (Europe) Limited
All rights reserved. Imported and distributed by Jarden Consumer Solutions (Europe) Limited,
Cheadle Royal Business Park, Cheadle, SK8 3GQ, United Kingdom.
The product supplied may differ slightly from the one illustrated due to continuing product development.
Printed in China
®