Loading ...
Loading ...
Loading ...

ENGLISH
8
Installing and Removing the Battery Pack
(Fig. F)
WARNING: Ensure the tool/appliance is in the off
position before inserting the batterypack.
OPERATION
WARNING: To reduce the risk of serious personal
injury, turn unit off and remove the battery pack
before making any adjustments or removing/
installing attachments or accessories. An
accidental start‑up can causeinjury.
Bit and Bit Holder
WARNING: Burn Hazard. ALWAYS wear gloves when
changing bits. Accessible metal parts on the tool and
bits may get extremely hot during operation. Small bits
of broken material may damage barehands.
The rotary hammer can be fitted with various chisel bits
depending on the desired application. Use sharp drill
bitsonly.
Inserting and Removing SDS Max® Bits
(Fig. E)
1. Clean the insert shank end of the accessory to remove
any debris, then lightly grease with a light oil or lubricant.
2. Insert bit in the bit holder
6
and apply downward
pressure while rotating to secure the bit into place. The
bit shank must beclean.
3. Ensure the bit is properlyengaged.
NOTE: The bit needs to move several centimeters in and
out of the bit holder
6
when properlyengaged.
4. To remove the bit, pull back the locking sleeve
7
and
pull the bitout.
Bail/Loop Style Auxiliary Handle (Fig. D)
WARNING: To reduce the risk of personal injury,
ALWAYS operate the tool with the bail/loop style
auxiliary handle properly installed. Failure to do so may
result in the bail/loop style auxiliary handle slipping
during tool operation and subsequent loss of control.
Hold tool with both hands to maximizecontrol.
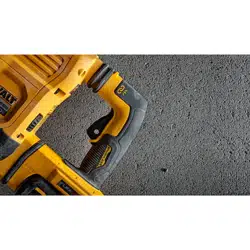
The bail/loop style auxiliary handle
2
clamps to the front
of the gear case and may be rotated 360˚ to permit right- or
left-handuse.
Mounting the Bail/Loop Style Auxiliary
Handle (Fig. D)
1. Widen the ring opening
13
of the bail/loop style
auxiliary handle
2
by rotating the screw for handle
mounting
14
counterclockwise.
2. Slide the assembly onto the nose of the tool through
the ring opening
13
and onto the chisel position index
collar
3
, past the chisel holder andsleeve.
3. Rotate the bail/loop style auxiliary handle to the
desiredposition.
4. Lock the bail/loop style auxiliary handle in place by
securely tightening the screw for handle mounting
14
rotating it clockwise so that the assembly will notrotate.
ASSEMBLY AND ADJUSTMENTS
WARNING: To reduce the risk of serious personal
injury, turn unit off and remove the battery pack
before making any adjustments or removing/
installing attachments or accessories. An
accidental start‑up can causeinjury.
Wall Mounting
Some DeWALT chargers are designed to be wall mountable
or to sit upright on a table or work surface. If wall mounting,
locate the charger within reach of an electrical outlet, and
away from a corner or other obstructions which may impede
air flow. Use the back of the charger as a template for the
location of the mounting screws on the wall. Mount the
charger securely using drywall screws (purchased separately)
at least 1” (25.4mm) long, with a screw head diameter of
0.28–0.35” (7–9mm), screwed into wood to an optimal
depth leaving approximately 7/32” (5.5 mm) of the screw
exposed. Align the slots on the back of the charger with the
exposed screws and fully engage them in theslots.
SAVE THESE INSTRUCTIONS FOR
FUTURE USE
overheating or deep discharge. The tool will automatically
turn off and the battery pack will need to berecharged.
Important Charging Notes
1. Longest life and best performance can be obtained if
the battery pack is charged when the air temperature
is between 65°F – 75°F (18° C– 24°C). DO NOT charge
when the battery pack is below +40°F (+4.5°C), or
above +104°F (+40°C). This is important and will
prevent serious damage to the batterypack.
2. The charger and battery pack may become warm to the
touch while charging. This is a normal condition, and
does not indicate a problem. To facilitate the cooling of
the battery pack after use, avoid placing the charger or
battery pack in a warm environment such as in a metal
shed or an uninsulatedtrailer.
3. If the battery pack does not charge properly:
a. Check operation of receptacle by plugging in a lamp
or other appliance;
b. Check to see if receptacle is connected to a light
switch which turns power off when you turn out
the lights;
c. If charging problems persist, take the tool, battery
pack and charger to your local servicecenter.
4. You may charge a partially used pack whenever you
desire with no adverse effect on the batterypack.
Charger Cleaning Instructions
WARNING:Shock hazard. Disconnectthe charger
from the AC outlet before cleaning. Dirt and grease
may be removed from the exterior of the charger using
a cloth or soft non‑metallic brush. Do not use water or
any cleaningsolutions.
Loading ...
Loading ...
Loading ...
