Loading ...
Loading ...
Loading ...
Read and understand the operator's manual
for the battery and the battery charger.
Keep the battery and the battery charger in the correct
ambient temperatures.
Ambient temperature
Operation of the battery 5 °C-40 °C / 41 °F-104 °F
Ambient temperature
Charging of the battery 5 °C-40 °C / 41 °F-104 °F
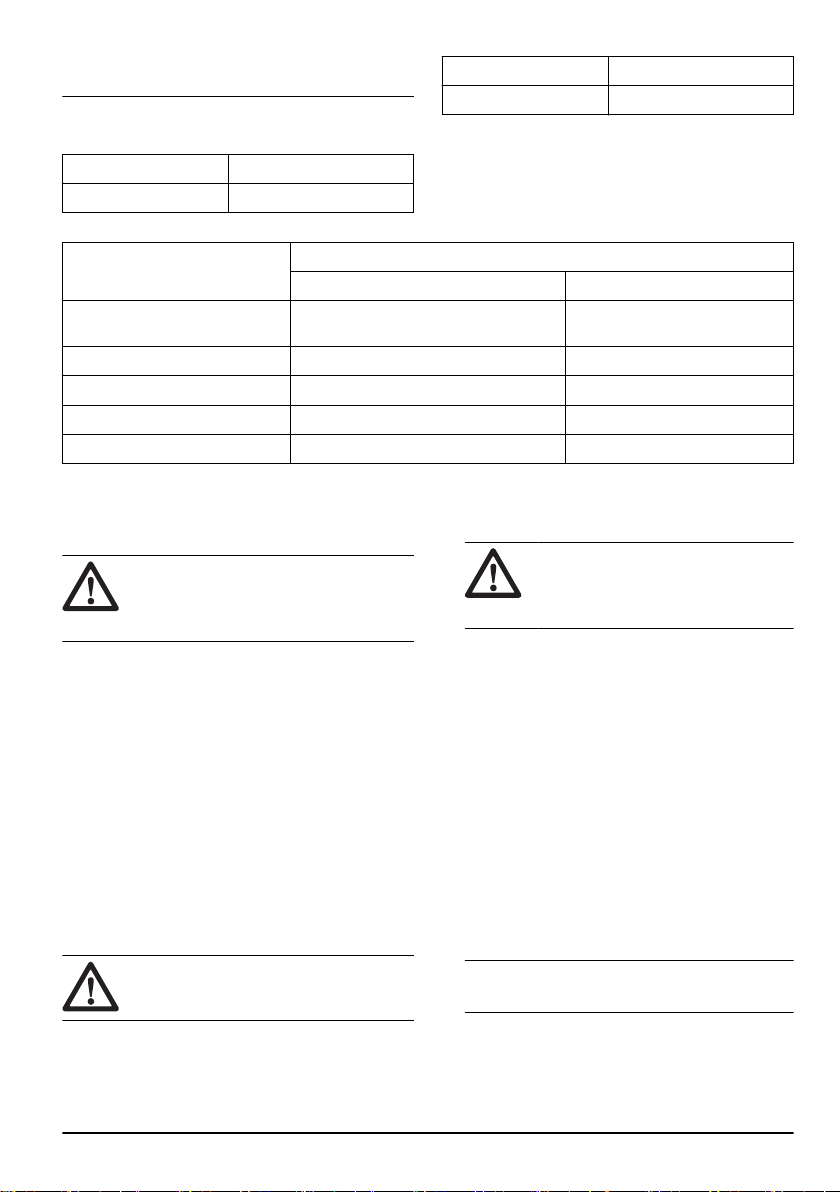
Battery status
The display shows the state of charge and if there are
problems with the battery.
(Fig. 35)
LED indicator Battery status (state of charge)
BLi10, BLi20 40-B70, 40-B140
4 LED lights are on N/A The battery is 76% - 100% charg-
ed.
3 LED lights are on The battery is 76% - 100% charged. The battery is 51% - 75% charged.
2 LED lights are on The battery is 51% - 75% charged. The battery is 26% - 50% charged.
1 LED light is on The battery is 26% - 50% charged. The battery is 6% - 25% charged.
1 LED light flashes The battery is 0% - 25% charged. The battery is 0% - 5% charged.
To charge the battery
Charge the battery if it is the first time that you use it. A
new battery is only 30% charged.
CAUTION: Connect the battery charger
to a power outlet with the voltage and
frequency that is specified on the rating
plate.
The battery does not charge if the battery temperature is
more than 50 °C/122 °F.
1. Connect the power cord to the battery charger.
2. Connect the battery charger to a grounded power
outlet. The charging LED flashes one time. (Fig. 36)
3. Connect the battery to the battery charger. The
charging LED comes on. Charge the battery for
maximum 24 hours. (Fig. 37)
4. Push the battery indicator button, if all the LED
indicators come on, the battery is fully charged.
5. Pull the power plug to disconnect the battery charger
from the power outlet. Do not pull the power cord.
6. Remove the battery from the battery charger.
To connect the battery to the product
WARNING: Only use the initial
Husqvarna battery for the product.
1. Fully charge the battery.
2. Push the battery into the battery holder of the
product. The battery locks into position when you
hear a click. (Fig. 38)
CAUTION: If the battery does not
move easily into the battery holder, the
battery is not installed correctly. This can
cause damage to the product.
To start the product
1. Push and hold the start/stop button until the green
LED comes on. (Fig. 39)
2. Push the power trigger lockout and the power
trigger. The cutting equipment starts to rotate.
To adjust the loop handle and
telescopic shaft
1. Loosen the locking handle and adjust the loop
handle to a correct position. (Fig. 40)
2. Close the locking handle.
3. Loosen the lever on the shaft. (Fig. 41)
4. Set the necessary length on the shaft. Make sure
that you can see the triangle on the shaft. (Fig. 42)
5. Close the lever and tighten the screw.
Note: Do not attach the loop handle onto the
Warning decals on the shaft.
To use the SavE function
This product has a power saving function, SavE.
1737 - 003 - 11.10.2022
13
Loading ...
Loading ...
Loading ...