Loading ...
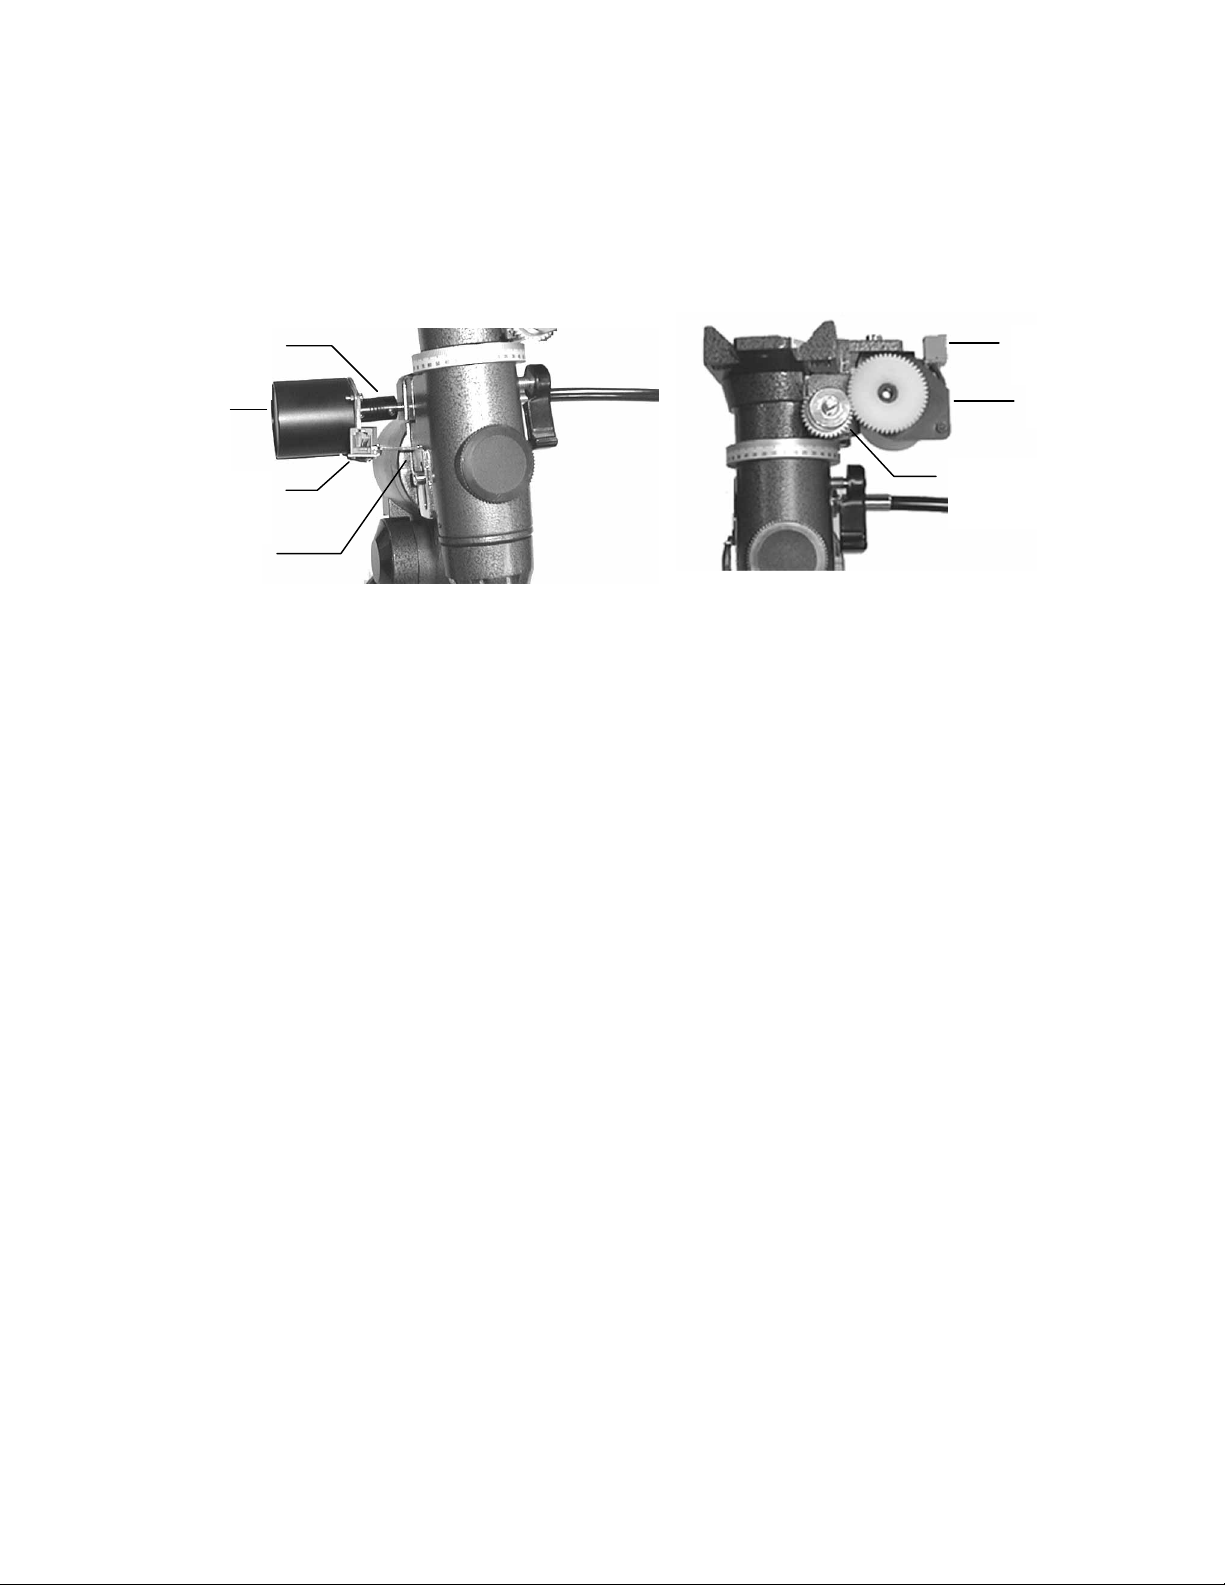
Figure 2
R.A. Motor
Flexible Motor
Coupling
RJ-11 Jack
Outlet
Mounting
Bracket
INSTALLING THE R.A. MOTOR TO THE MOUNT
The R.A. motor will only install on the right side of the mount (i.e., when standing behind the mount where
the R.A. setting circle is located).
1. Locate the flexible motor coupling at the end of the R.A. motor.
2. Attach the R.A. motor to the mount by placing the end of the motor coupling over the R.A. slow
motion shaft. Make sure the flat side of the shaft is positioned under the coupling thumb screw
before tightening.
3. Use the R.A. slow motion knob to rotate the motor until the slotted hole on the metal bracket
aligns with hole on the side of the polar housing. (See Figure 2).
4. Insert the socket head screw through the slotted bracket and into the hole on the polar housing.
Tighten down with an Allen wrench.
POWERING THE DRIVE
The DA-CG-4 motor drive is powered by 4 D-cell size batteries (not included). This can operate the
motor drive for up to 20 hours or more depending on the ambient temperature. To power the drive
system:
1. First, remove the battery compartment from its vinyl case.
2. Insert batteries into the compartment so that they snap firmly into place.
3. Put the battery compartment back inside its vinyl case.
The DA-CG-4 Motor Drive has three cables that must be plugged in. Two cables attach to the drive
motors and the other attaches to the hand control. To install the cables:
1. Locate the phone jack cable coming from the hand control unit (marked “DEC”) and plug it into
the jack outlet on the DEC motor. Likewise, plug the cable marked R.A. into the jack outlet on
the R.A. motor.
2. Plug the battery pack cable (stereo jack type) into the outlet on the hand control labeled "DC
Power".
Slip Clutch
Gear Assembly
DEC Motor
RJ-11 Jack
Outlet
Figure 3
Loading ...
Loading ...
Loading ...