Loading ...
Loading ...
Loading ...
10
Intended Applications
This heat gun is intended for the purposes listed below:
• Soften paint, caulking and putty for easier removal.
• Soften adhesives to help remove stickers, oor tiles,
wallpaper, etc.
• Shrink tubing for electrical work.
• Shrink plastic lm for wrapping or weatherproong.
Any usage other than the applications listed above may
cause personal injury and property damage, and will void the
warranty.
mDANGER! DO NOT use under wet conditions or in
presence of ammable liquids or gases. DO NOT let children
come into contact with the tool. Supervision is required when
inexperienced operators use this tool.
Starting and Stopping
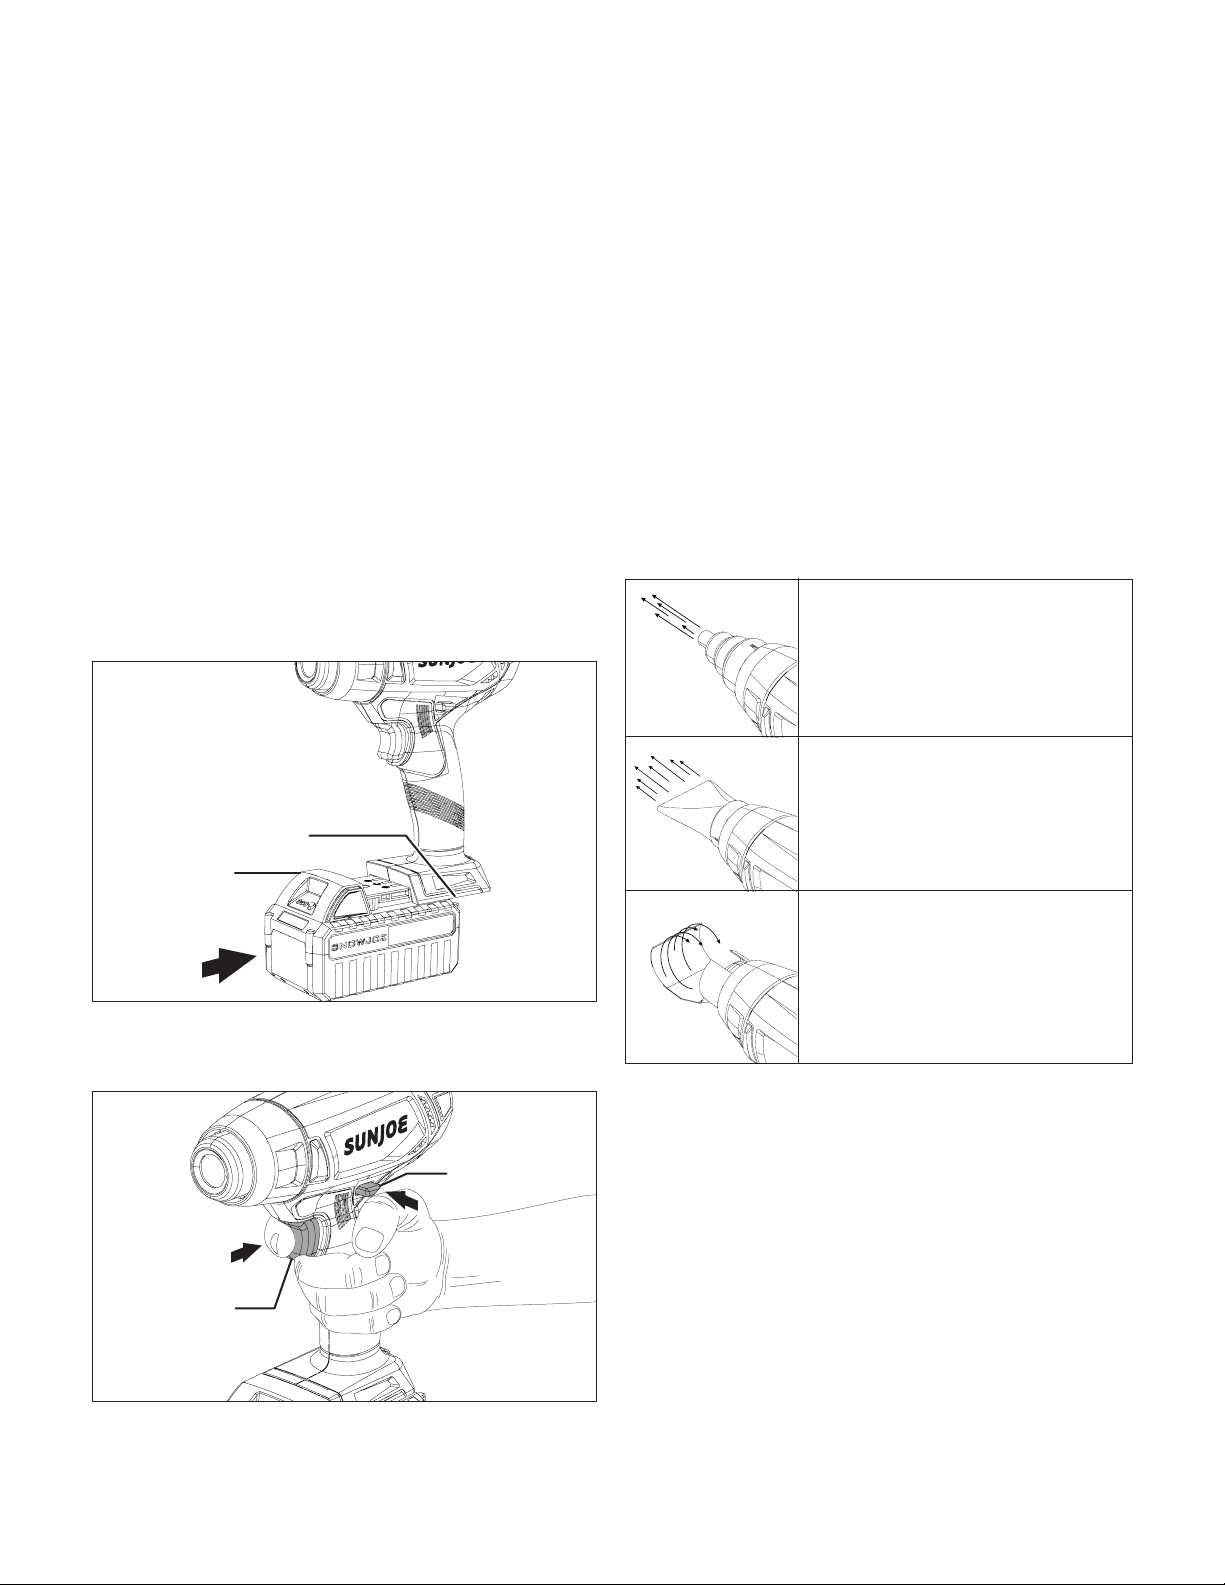
1. Insert the battery in the battery compartment. Push to
make sure it is locked in place (Fig. 4).
2. To turn the heat gun on, depress the safety lock button.
While the safety lock button is pressed, press the trigger
switch (Fig. 5).
NOTE: The safety lock button reduces the possibility of
accidental starting. It can be depressed from either the left
or right side.
3. When the heat gun is on, release the safety lock button
rst, and release the trigger switch. The heat gun is
equipped with hand-free operation function and it's not
necessary to keep pressing the trigger switch to use the
gun.
NOTE: When the heat gun is just started, it's normal that
smoke is produced from the heat outlet.
4. To turn the heat gun o, press the safety lock button
again.
Using the Nozzles
3 nozzle attachments are included with the heat gun to expand
its capabilities. Check the table below for details of each
attachment.
1. Make sure the trigger switch is in the o position and the
tool is disconnected from the battery pack. Ensure that
both the heat outlet and the desired nozzle are cooled
down.
2. Place the desired nozzle onto the heat outlet of the heat
gun. Push in to secure.
3. Before disconnecting a nozzle, turn o the heat gun and
remove the battery. Make sure both the nozzle and the
heat outlet is cooled down.
General Operation Process
mWARNING! Make sure the nozzle always points away
from you and any bystanders. Do not direct hot tip or nozzle
toward clothing, hands, or other body parts. Intense heat from
the heat gun can cause serious burns or cause clothing to
ignite.
Battery pack
Fig. 4
Battery compartment
Trigger switch
Fig. 5
Safety lock
button
Concentrator nozzle.
The concentrator nozzle intensies
the application of heat in a specic
area. Uses for this nozzle include
bending acrylic plastic sheets and
directing heat into corners.
Flat nozzle.
The at nozzle spreads heat over
wide area. Use this nozzle for
drying, removing paint, removing
vinyl or linoleum, thawing.
Reector hook nozzle.
The reector hook nozzle reects
heat around item, avoiding excess
heat burning or hurting surface
behind item being heated. It's good
for applying heat to shrinkable tubing
and thawing pipes.
Loading ...
Loading ...
Loading ...