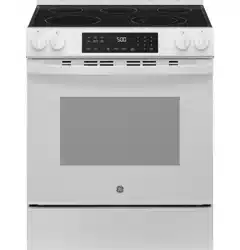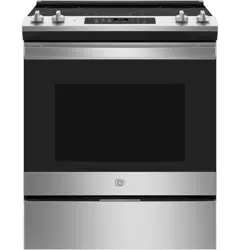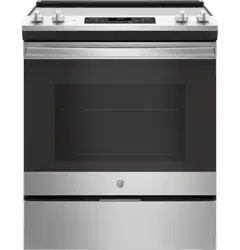
www.GEAppliances.com
Safety Instru_tions ... 9-4
Operating In_lru_ions
Clock and Timer ....... ] 0
Control Lockout ........ 7
Conuols ............. 6, 7
()yen ................ 8, 9
Power Outag> .......... 7
Sabbath Featule ..... 11, 12
Special Feaun_es ........ 11
SurPace Units ........... 5
Thermostat ........... 12
Care and Cleaning
Broiler Pan and Grid ... 16
Conuol I_mobs ......... 13
Drip Pans ............. 17
Heating Elements ...... 13
I,ift-Off Oven Door . .... 15
I,ift-Up Cooktop ....... 17
I ,igh t ................. 16
()yen Inmrior. ......... 15
Shelxes ............... 14
Smrag_ Drawer ........ 16
Surface Units .......... 17
Vent ................. 14
Troubleshooting
Tips .............. 18, 19
Accessories ........... 20
Consumer Support
Consmner
Support ...... Back Co_er
Product
Registration ........ 91,92
VVarrantv ............. 23
yss2s
Write the model and serial
numbers here:
Model #
Serial #
You can find them on a label
behind the storage drawer on
the fl'ont of the range fl'ame.
164D4290P396 49-80245-1 09-04 JR
IMPORTANTSAFETYINFORMATION.
READALLINSTRUCTIONSBEFOREUSING.
WARNING!
For your safe_ the information in this manual must be followed to minimize the risk of fire, electric
shock, or to prevent property damage, personal injury, or loss of fife.
WARNINGANTI-TIPDEVICE
Aft ranges can tip and injury could result
Toprevent accidental tipping of the range, attach #to the waft and floor by installing the Anti-tip
device supplied.
If the Anti-tip device supplied with the range does not fit this application, use the universal Anti- tip
device WB2X7909.
Tocheck if the device is installed and engaged properly, remove the storage drawer and inspect the
rear leveling leg. Make sure it fits securely into the slot.
If you pull die range out fiom dm wall for any reason, make sure tile device is properly
engaged when you push file range back against tile wall. If it is not, there is a possible iisk of
the rang_ dpping oxer and causing i,_ni T if you o1 a child stand, sit oi lean on an open door
Please reDr m tile Anti-Tip device infom/ation shipped with tile device and ill this manual.
Failure m take this piecaufion could result ill tipping of file rang> and item T.
2
SAFETYPRECAUTIONS
When using electrical appflances, basic safety precautions should be followed, including the following:
Use this appliance only for its intended Large scratches oi impacts to glass doors
puq:ose as descnbed ill fllis O_mer's Manual.
Be sure your appliance is properly
installed and grounded by a qualified
installer ill accordance wifll the provided
installation instructions.
Haw the installer show you file location
of die circuit breaker oi fllse. Mark it for
easy reference.
Do not atmmpt to repair or replace any
part of your range unless it is specifically
recommended in this mamlal. All other
servicing should be refeITed to a qualified
mchnician.
Before performing any service, disconnect
tile range power supply at tile household
disuibution panel by removing the filse or
switching off the circuit breaken
Do not leaxe children alone----children
should not be left alone or unatmnded in
an area where all appliance is ill use. They
should nex>r be allowed to sit or stand on
any part of the appliance.
Do not allow anyone to climb, stand or
hang on the dooi; storage drawer or
cooktop. They could damag_ the rang_
and even Op it ovel; cansing sex>re
personal ii_n U.
iiiiiiiiiiii_iii
call lead to broken or shattered glass.
Do not store flammable mate_qals ill all
oxen or near the cooktop.
CAUTION: temsofinterestto
children should not be stored ill cabinets
aboxe a rang_ or on the backsplash of a
rang_---<:hild_en climbing on the range to
reach items could be selqously injmed.
Nexer wear loose-fitting or hang{ng
gam/ents while nsing the appliance. Be
careflll when ieaching for imms stored
oxer file range. Flammal)le mamiial could
be ignimd if brought in contact wifll hot
surPace units or heating elements and may
cause sex>re 1)/11_/1s,
Use only dUpot holders--moist or damp
pot holders on hot sur/_aces may result in
bur]is from steam. Do not let pot holders
touch hot sui/_ace units or heating
elements. Do not use a towel or other
bulky cloth ill place of pot holders.
www.GEAppliances.com
WARNING!
SAFETYPRECAUTIONS
For your safety, ne_er use your appliance
for wai_ning or heating the room.
Teach children ,lot to play with file
controls or any other part of tile rang_.
Always kee I) dish rowels, dish cloths, pot
holders and other linens a sad distance
from your rang_.
Always kee I) wooden and plastic umnsils
and canned food a safe distance fiom
vonr range.
Always kee I) combustible wall cox>iings,
curtains or drapes a safe distance from
vonr rang_.
Do not let cooldng gTease or other flammable
materials accumulate in or near the rang>.
Kee I) file hood and grease filmrs clean
m maintain g_od x_nfing and m ax_id
grease fires.
Do not use water on grease fires. Never
pick up a flaming pan. Turn die controls
off. Smother a flaming pan on a surface
unit by coveiing the pan completely wifl/a
well-fitting lid, cookie sheet or fiat trW. Use
a multi-purpose di wchemical or foam-type
fiie extinguisher
Flaming giease outside a pan can be put
out by cox>ring it with baking soda oi, if
available, by using a muld-puq)ose dU
chemical or %am-type fire exdnguishel:
Flame in the oxen can be smothered
completely by closing tile oven door and
turning the oven off or by using a mulfi-
puq)ose di T chemical or foam-type fire
exfinguishen
Do ,lot much file sur£tce units, the heating
elements or the inmiior surPace of file oven.
These snit_aces nl W be hot enong]l to l)nlJl
e_en though they are dark in color Dining
and after use, do *lot touch, or let clod_ing
or other flammable mamnals contact the
surPace units, areas nearl)y tile surPace units
or any inte3ior area of the oven; allow
sufficient time for cooling fi_t.
Pomntially hot surfaces include tile
cooktop, areas Pacing file cooktop, oven
_ent opening, surfaces near file opening,
crevices around the oxen door
REMEMBER:Tlle inside snit_ace of the ox>n
may be hot when die door is opened.
Do not store or use combustible materials,
gasoline or other flammable vapors and
liquids in the vicinity of this or any other
appliance.
COOKMEATANDPOULTRYTHOROUGHLY...
Cookmeat andpoultry thomughl)/--meat to atleast an INTERNALtemperatureof 160°Fandpoultry toat least
an iNTERNALtemperatureof 180°ECookingto thesetemperaturesusual/)/protectsagainstfoodbomeillness.
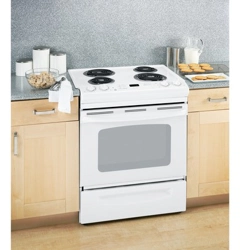
SURFACECOOKINGUNITS
Useproper pan size--select cookware having flat bottoms large enough to cover the surface un#
heating element. Theuse of undersized cookware will expose a portion of the surface unit to direct
contact and may result in ignition of clothing. Proper relationship of cookware to surface unit will also
improve effic&ncy.
Never leme die surface units nnatmnded
at higtl heat settings. Boiloxers cause smoking
and g_easy spillox_rs that m W camh on fire.
Do not use alnn]innn] foil to line the drip
pans or an>vhere in the o_en except as
described in this manual. Misuse could
result in a shock, fire hazard or damage to
tile range.
Be sure the dlip pans and tile vent duct
are ,lot co_ered and are in place. Their
absence during cooking could damag>
rang> parts and wiring.
Only certain types of glass, glassX:eramic,
earthenware or other glazed containers are
suitable for cooktop service; others may
break because of the sudden chang> in
temperature.
To minimize the possibili)' of Nn_ls, ig_ifion
of flammaNe materials and spillage, tile
handle of a container should be turned
toward the cenmr of the range withont
exmnding o\er nearby surface units.
Alwws ulrn the surface units off before 3
renloving cookware.
IMPORTANTSAFETYINFORMATION.
READALLINSTRUCTIONSBEFOREUSING.
SURFACECOOKINGUNITS(cont.)
Do not immerse or soak tile remoxable
surface units. Do not put them ill a
dishwasher.
When preparing flaming foods nnder
file hood, ulrn tile thn on.
To a_id tile possibility of a bni_l or
electric shock, ahvays be certain that the
controls for all surthce units are at tile
OFFposition and all coils are cool before
atmmpdng to lift or remox.e a unit.
Clean file cooktop with caution. If a wet
spong.e is used to wipe spills on a hot
cooktop, be carefill to ax_id steam bums.
Kee I) all eye on foods being flied at high
or medium high heat setting:s.
Foods %r fiTing should be as dry as
possible. Frost on flozen foods or moisture
on flesh foods call cause hot tht to bubble
up and ox.er tile sides of tile pan.
Use little tilt for effective shallow or deep
flit flying. Filling tile pan too fllll of Jht call
cause spillox.ers when food is added.
If a combination of oils or thts will be used
ill flTing, s6r tog.ether before heating, or as
thts meh slowly.
Always heat tht slowly, and watch as it heats.
Use a deep feat them/omemr whenex.er
possible to prex.ent ox.erheating fat beyond
tile smoking point.
WARNING'!
OVEN
Stand away from the range when opening the oven door. Hot ak or steam which escapes can cause
bums to hands, face and/or eyes.
Do not heat unopened food containers.
PI.essure could build up and file container
could burst, causing all iI_/n T.
Kee I) tile oven x.ent nnobstnlcmd.
Kee I) tile ox.en flee from grease buildup.
Place tile ox.en shelf ill file desiI.ed position
while file ox.en is cool. If sheh.es must be
handled when hot, do not let pot holder
contact file heating elements.
Pulling out file shelf m the stop-lock is a
com.enience ill lifting hemy foods. It is also
a precaution against burns fronl ranching
hot surfitces of tile door or ox.en walls.
When using cooking or roasting bags
ill tile oxen, tbllow tile manufacturer's
directions.
Do *lot use tile ox.en to d_T newspapers.
If overheamd, filey can catch on fire.
Do not use file ox.en for a storag.e area.
Imms stored ill all oven call ignim.
Do not leax.e paper products, cooking
umnsils or food in file oven when not
ill use,
Do not use ahuninunl foil to line oxen
1)ottoms, except as suggested ill this
mannal. Improper installation of
almninum tbil may result ill a risk
of electric shock or fire.
READANDFOLLOWTHISSAFETYINFORMATIONCAREFULLY.
SAVETHESEINSTRUCTIONS
4
Usingthesurfaceunits, www.GEAppliances.com
Throughout this manual, features and appearance may vary from your model.
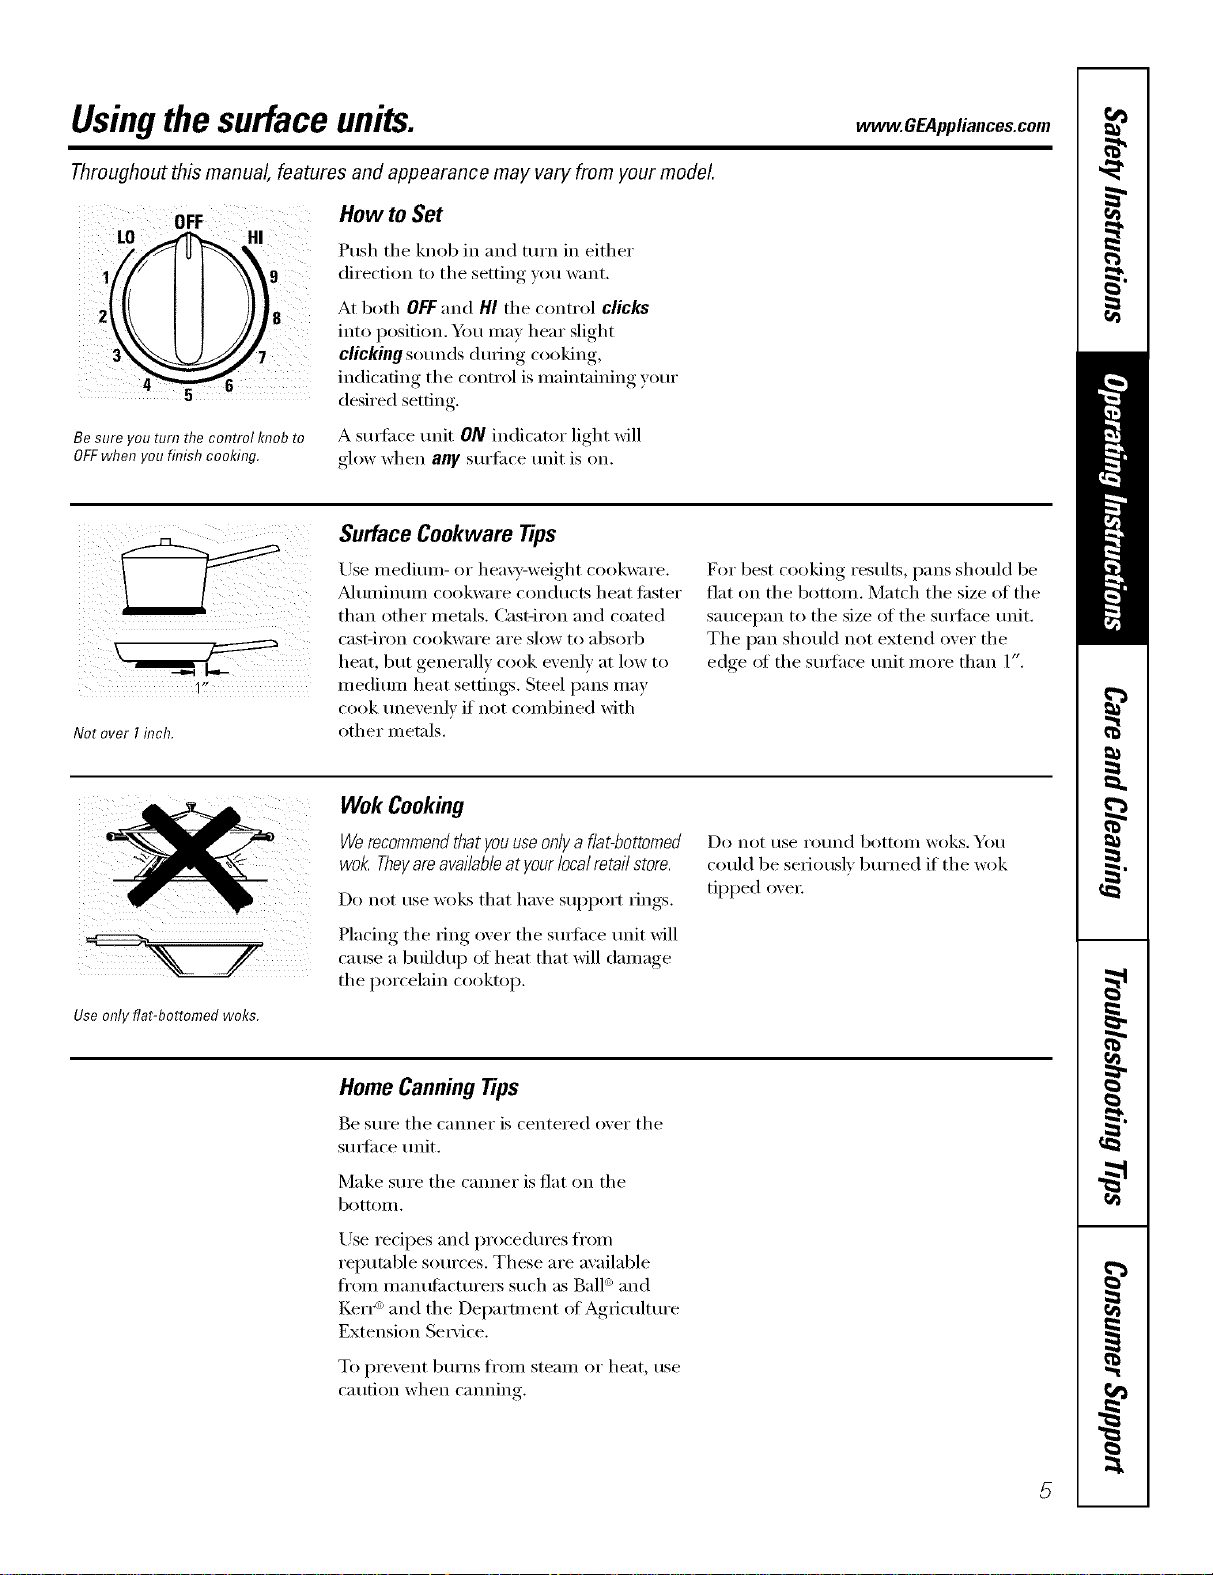
OFF
LO HI
9
Be sure you turn the cmTtrolknob to
OFFwhen you finish cooking.
How to Set
Push the knob in and turn in either
direction to the setting you want.
At both OFF and HI the control clicks
into position. Ym may hear slight
clicking sounds during cooking,
indicating the control is maintaining your
desired setting.
A sm_i_ce trait ON indicator light will
glow when any surti_ce trait is on.
1I,
Not over I inch.
Surface Cookware Tips
Use medium- or hea\y-weight cookware.
_Muminum cookware conducts heat fi_ster
than other metals. CasOron and coamd
cast-iron cookware are slow to absorb
heat but generall_ cook exenl_ at low to
medium heat settings. Steel pans may
cook unevenly if not combined with
other metals.
For best cooking results, pans should be
fiat on tile bottom. Match tile size of tile
saucei)an to tile size of tile surli_ce trait.
The pan should not extend over the
edge ot the surlhce unit more than 1".
Use only flat-bottomed woks.
Wok Cooking
We recommend that you use only a flat-bottomed
wok. They are available atyour local retail store.
Do not use woks that have support rings.
Placing the ring oxer the s/wlhce trait will
cause a buildup of heat that will damage
the porcelain cooktop.
Do not t/se ro//nd bottoIll woks, You
could be seriously bm'ned if tile wok
tipped oxen:
Home CanningTips
Be sure tile canner is centered o_er tile
surli_ce trait.
Make sure tile canner is fiat on tile
bottom.
Use redpes and procedm'es fl'om
reputable sources. These are available
fl'oin inanufilcturei_ such as Ball '_and
Ken _'_and the Department oI Agriculture
Extension Se_'ice.
To })i'e'_ent b/Irns froill steaIll or heat, rise
caution when cmming.
5
Usingtheovencontrols.
Throughout this manual, features and appearance may vary from your model.
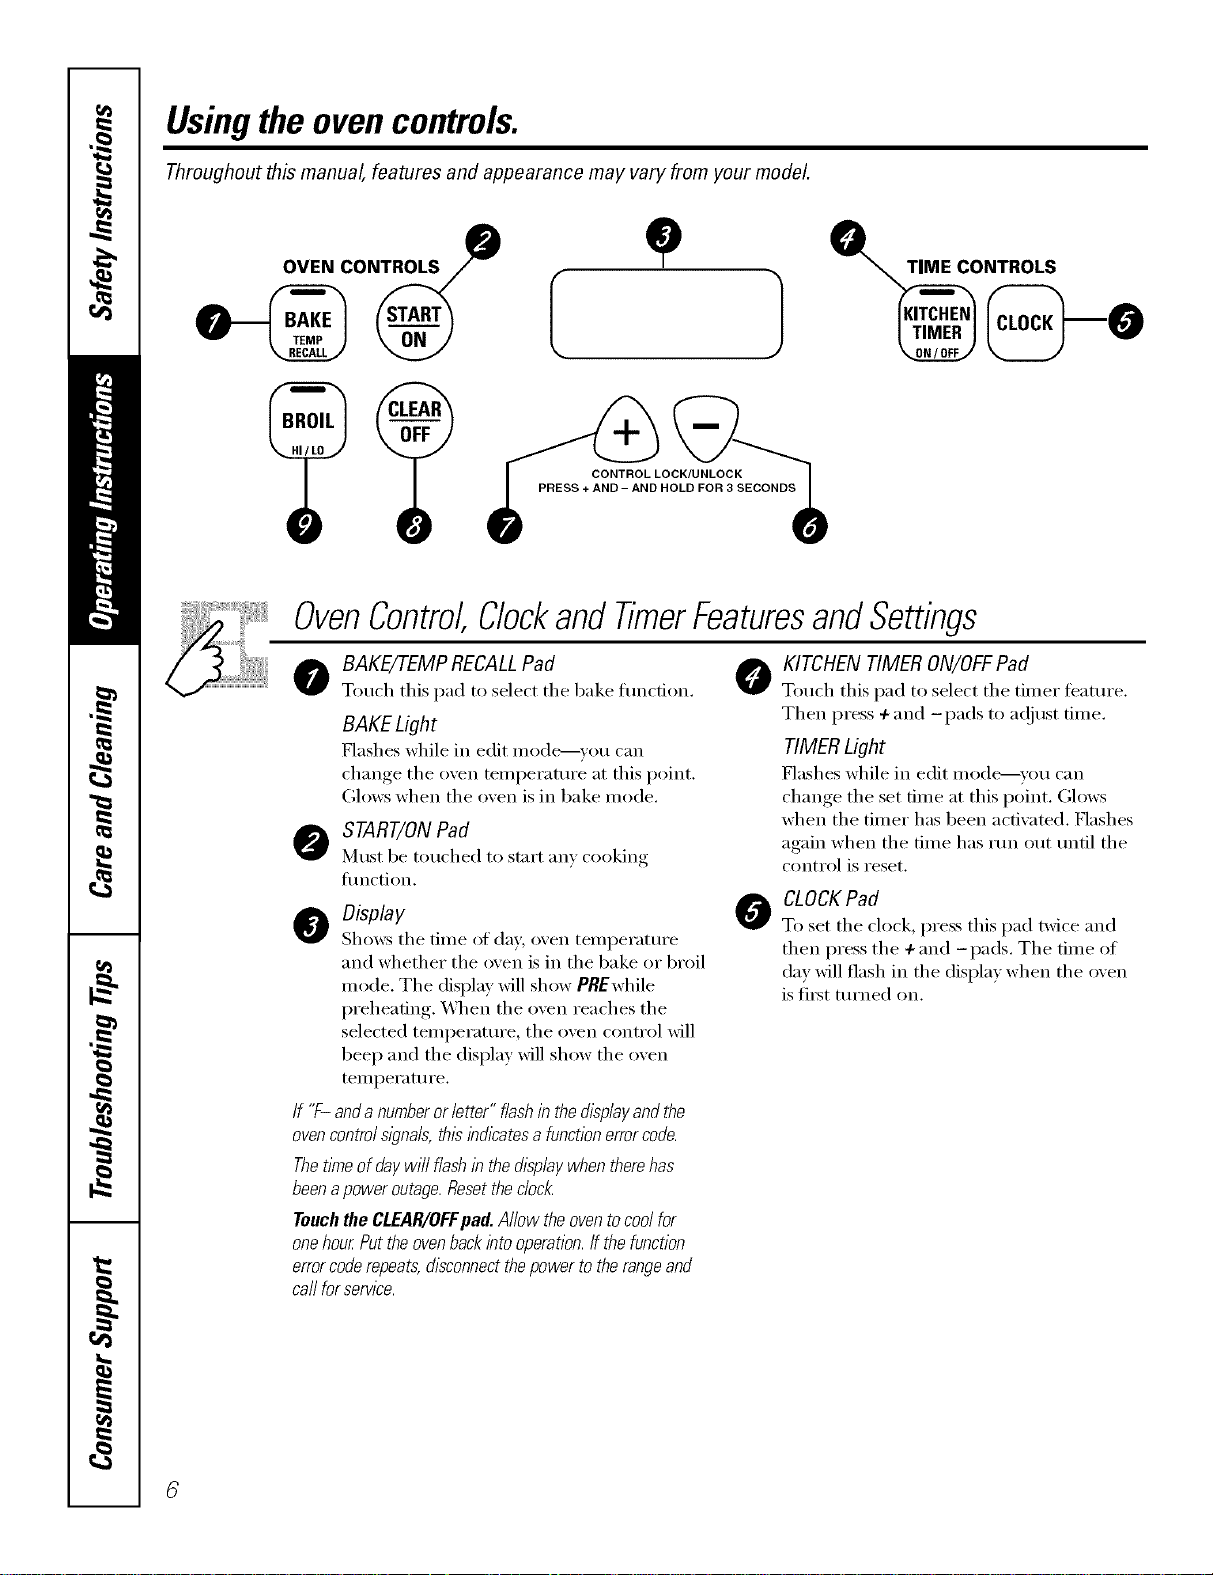
OVEN CONTROLS
O O
e
CONTROL LOCK/UNLOCK
PRESS +AND -AND HOLD FOR 3 SECONDS
OvenControl,ClockandTimerFeaturesandSettings
oBAKE/7-EMPRECALLPad 0
Touch this pad to select the bake funcdon.
BAKE Light
Flashes while in edit mode_vou can
change the oven telnperature at this point.
Glows when the oven is in bake mode.
START/ONPad
Must be touched to start }lily cooking
flmction.
ODisplay
Sh(m:s the time of da)', oven temperature
and whether the oven is in the bake or broil
mode. The display will show PREwhile
preheating. _,_]_en the oven reaches the
selected temperature, the oven control will
beep and the display will show the oven
temperature.
If "F- and anumberor letter" flashin the displayand the
ovencontrol s/gna& thisihdlcatesa functionerrorcode.
Thetime of day wi// flash in the displaywhen there has
beena power outage.Resetthe c/oc/_
Touch the CLEAR/OFFflad. Allow the oventocool for
onehour Put the ovenback into operation,ff the function
errorcoderepeats, disconnectthepower to the rangeand
ca//for service.
0
KITCHEN TIMER ON/OFFPad
Totl(h this pad to select the timer teattlre.
Then press +and -pads to a(!iust time.
TIMERLight
Flashes while in edit made--you can
change the set time at this point. Glows
when the timer has been actiw_ted. Flashes
again when the time has run out until the
control is reset.
CLOCK Pad
To set the clock, press this pad twice and
then press the +and -pads. The time of
day will flash in the display when the oven
is fi_t turned on.
www.GEAppliances.com
OvenControl,ClockandTimerFeaturesandSettings
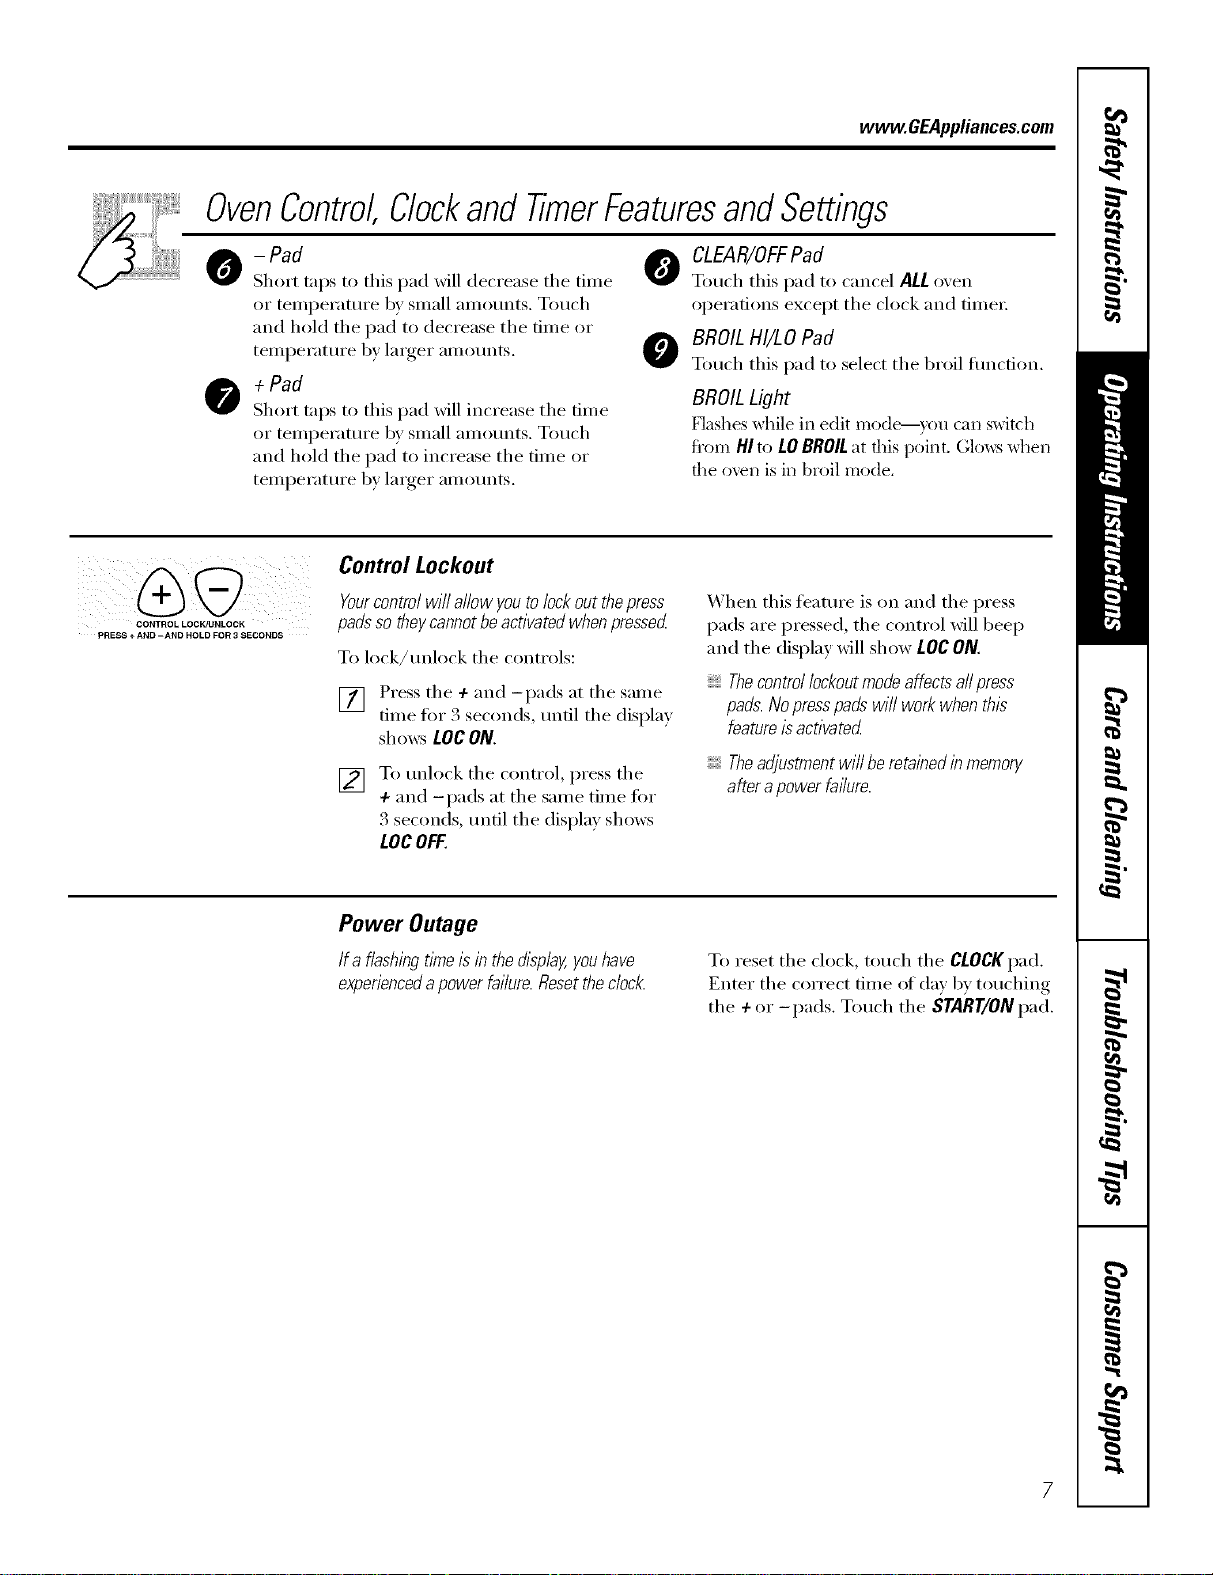
-Pad
Short trips to this pad _dll decrease the time
or teml_erature by small anlounts. Touch
and hold the pad to decrease the time or
teinl)erature by larger ainounts.
+Pad
Short taps to this pad will increase the time
or temperature by small amotmts. Touch
and hold tile pad to increase tile time or
teinl_erature by larger ainounts.
OLEAR/OFFPad
Tou(h this pad to cancel ALL o',en
operations except the clock and time_:
OBROILHI/LO Pad
Touch this pad to select the broil flmcfion.
BROILLight
Flashes while in edit mode--you can switch
from HI to tO BROIL at fills point. Glows wtlen
file oven is in broil mode,
CONTROL LOCK/UNLOCK
PRESS +AND -AND HOLD FOR 3 SECONDS
Control Lockout
Yourcontrolwillallowyoutolockoutthepress
padssotheycannotbeactivatedwhenpressed
To lock/tmlock tile controls:
] Press the +and -pads at the same
time for 3 seconds, lmtil tile displa)
shows tOCON.
[] To tmlock the control, press the
+and -pads at the same time for
3 seconds, tmtil tile display shows
LOCOFF.
When this feature is on and the press
pads are i)ressed, the control will beep
and tile display will show LOC ON.
Thecontrol lockoutmode affectsall press
pads.Nopresspads wi// work when this
featureis activated
Theadjustment will be retainedin memory
after apower failure.
Power Outage
Ifa flashingtlYne/sinthedisplay,youhave
experienced a power failure. Reset the clock. To reset tile ch)ck, touch tile CLOCKpad.
Enter tile correct time of day by touching
the +or -pads. Touch the START/ONpad.
Usingtheoven.
Toavoid possible bums, place the shelves in the desired position before you turn the oven on.
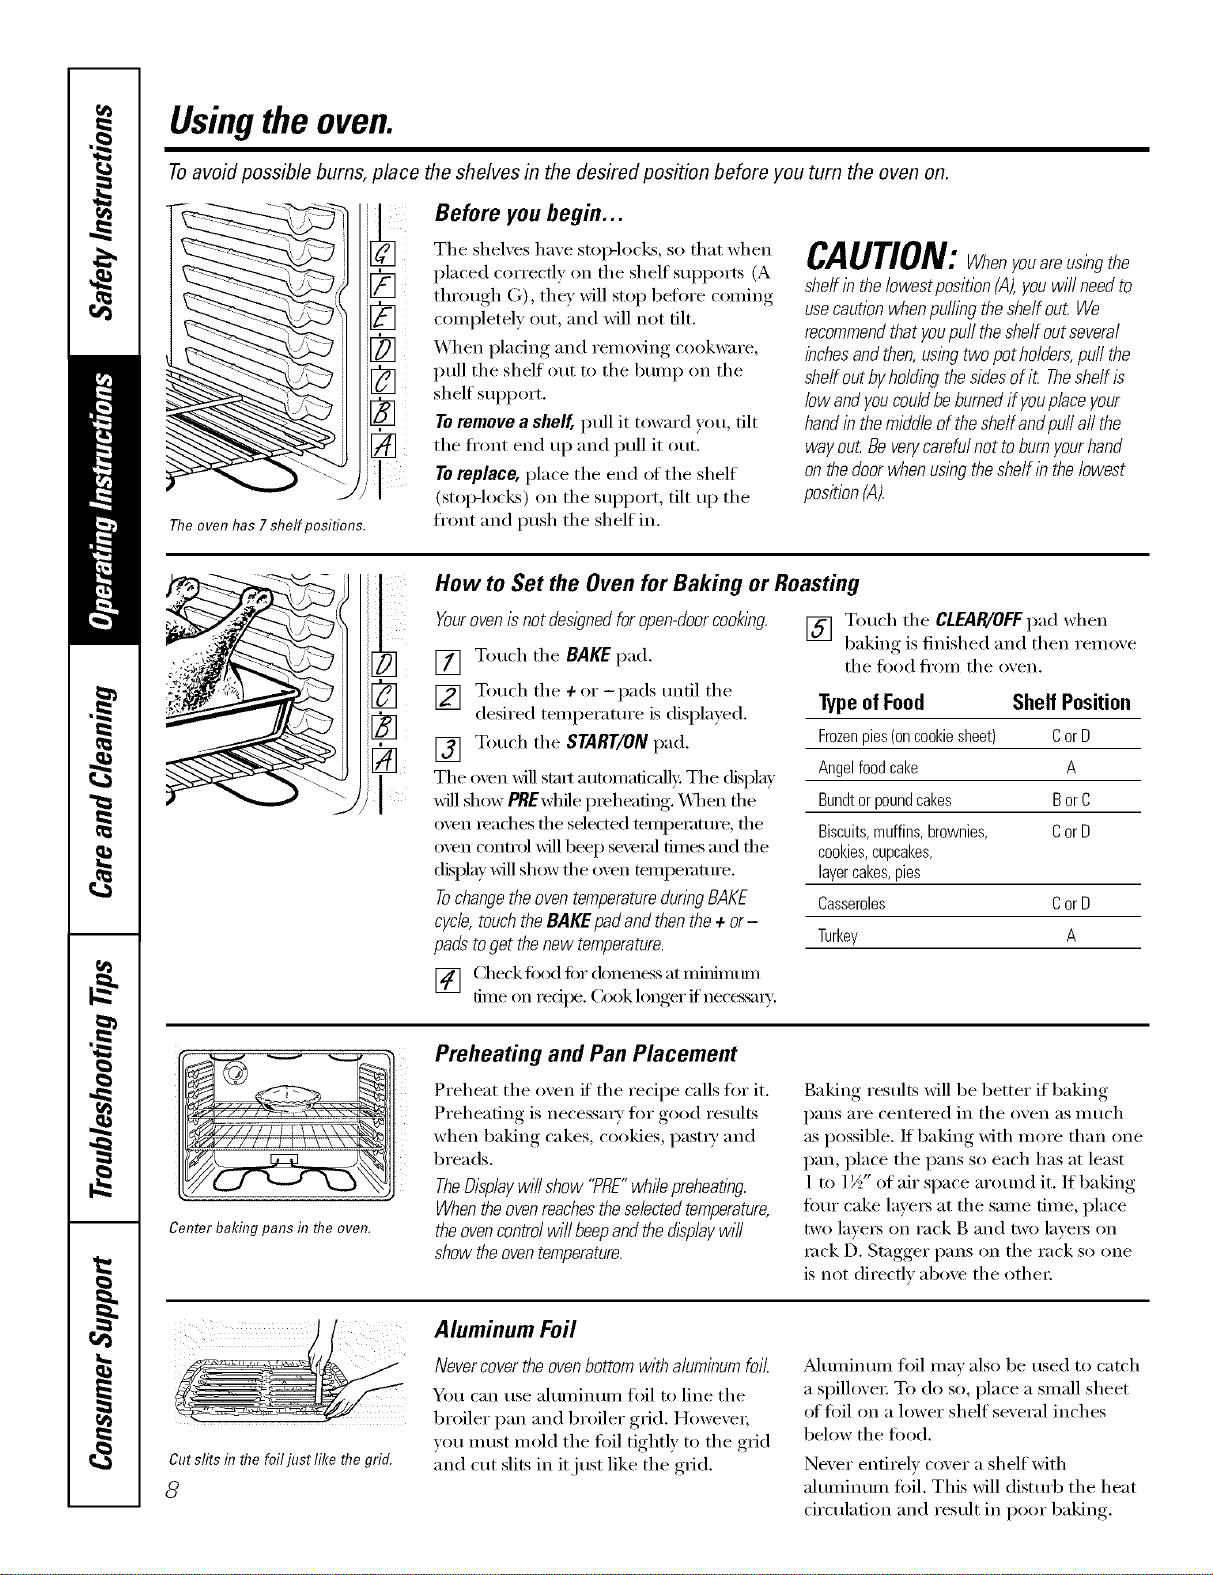
The oven has 7 shelf positions.
3
3
[]
[]
Before you begin...
The shelves have stop-locks, so that when
placed correctly on the shelf supports (A
through G), they will stop before coming
completely ()tit, and will not tilt.
When placing and removing cookware,
pull the shelf out to the bunlp on the
shelf support.
Toremove a sheff, pull it toward you, tilt
the ti'ont end tlI) and pull it Otlt.
To replace, place the end (ff the shelf
(stoi>locl<s) on the support, tilt up the
front and push the shelf in.
CAUTION:Whenyouareusingthe
shelf in the lowest position (,4),you wi// need to
usecaution whenpuffing the shelf out We
recommendthat youpuff the shelf out several
inchesandthen,using two pot ho/dera,puff the
sheff out by ho/ding thesidesof iL Theshelf is
low andyou couldbe burnedif youplace your
handin the middle of the she/fandpu// all the
way out Beverycarefulnot to burnyourhand
on thedoor when using the shelf in the lowest
position (A).
i'U - /
How to Set the Oven for Baking or Roasting
Yourovenisnotdes,#nedforopendoor ooking
[] Touch the BAKE pad.
[_] [] Touch the +or-pads until the
desired temperature is displayed.
Touch the START/ON
[] pad.
The oxen _ill strut automaficalk: The (Nplay
will show PBEwhile preheating. X._q_enthe
oven iead/es the sdec_e(1 ten/pemture, the
oven cxmn-ol _ill beep seveial tillles and the
display _ill show the oven tempelature.
Tochangethe oventemperatureduringBAKE
cycle,touchthe BAKE padand thenthe + or-
pads toget the new temperature.
[] Touch the CLEAR/OFFpad when
baking is finished and then remoxe
the food fl'om the oven.
TypeofFood Shelf Position
Frozenpies(oncookiesheet) CorD
Angelfoodcake A
Bundtorpoundcakes BorC
Biscuits,muffins,brownies, CorD
cookies,cupcakes,
layercakes,pies
Casseroles CorD
Turkey A
[] Check todd fiw donen_s at miifimtm/
time on redpe. Cook longer if neces,_u_,'.
Center baking pans in flTeoven.
Preheating and Pan Placement
Preheat the oven if the recipe calls tiw it.
Preheating is necessa_ T for good results
when baking cakes, cookies, past_ T and
breads.
TheDisplaywill show "PRE"while preheating.
Whentheovenreachestheselectedtemperature,
the ovencontrolwill beepand thedisplaywill
show theoventemperature.
Baking results will be better if baking
pans are centered in the oven as much
as possible. If baking with more than one
pan, place the pans so each has at least
1 to 1½" of air space arotmd it. If baking
Ibm" cake lave_ at the same time, place
two laye_ on rack B and two lave_ on
rock D. Stagger pans on the rack so one
is not directly above the othe_:
Cutslitsin flTefoiljustlike flTegrid.
8
Aluminum Foil
Nevercover the ovenbottom with aluminumfoil.
You can use aluminum foil to line the
broiler pan and broiler grid. However;
vou must mold the foil tightly to the grid
and cut slits in it just like the grid.
_Mmninum frill may also be used to catch
a spillove_: To do so, place a small sheet
of foil on a lower shelf several inches
below the food.
Never entirely cover a shelf with
aluminmn foil. This will distm'b the heat
circulation and result in poor baking.
www.GEAppliances.com
_J
I
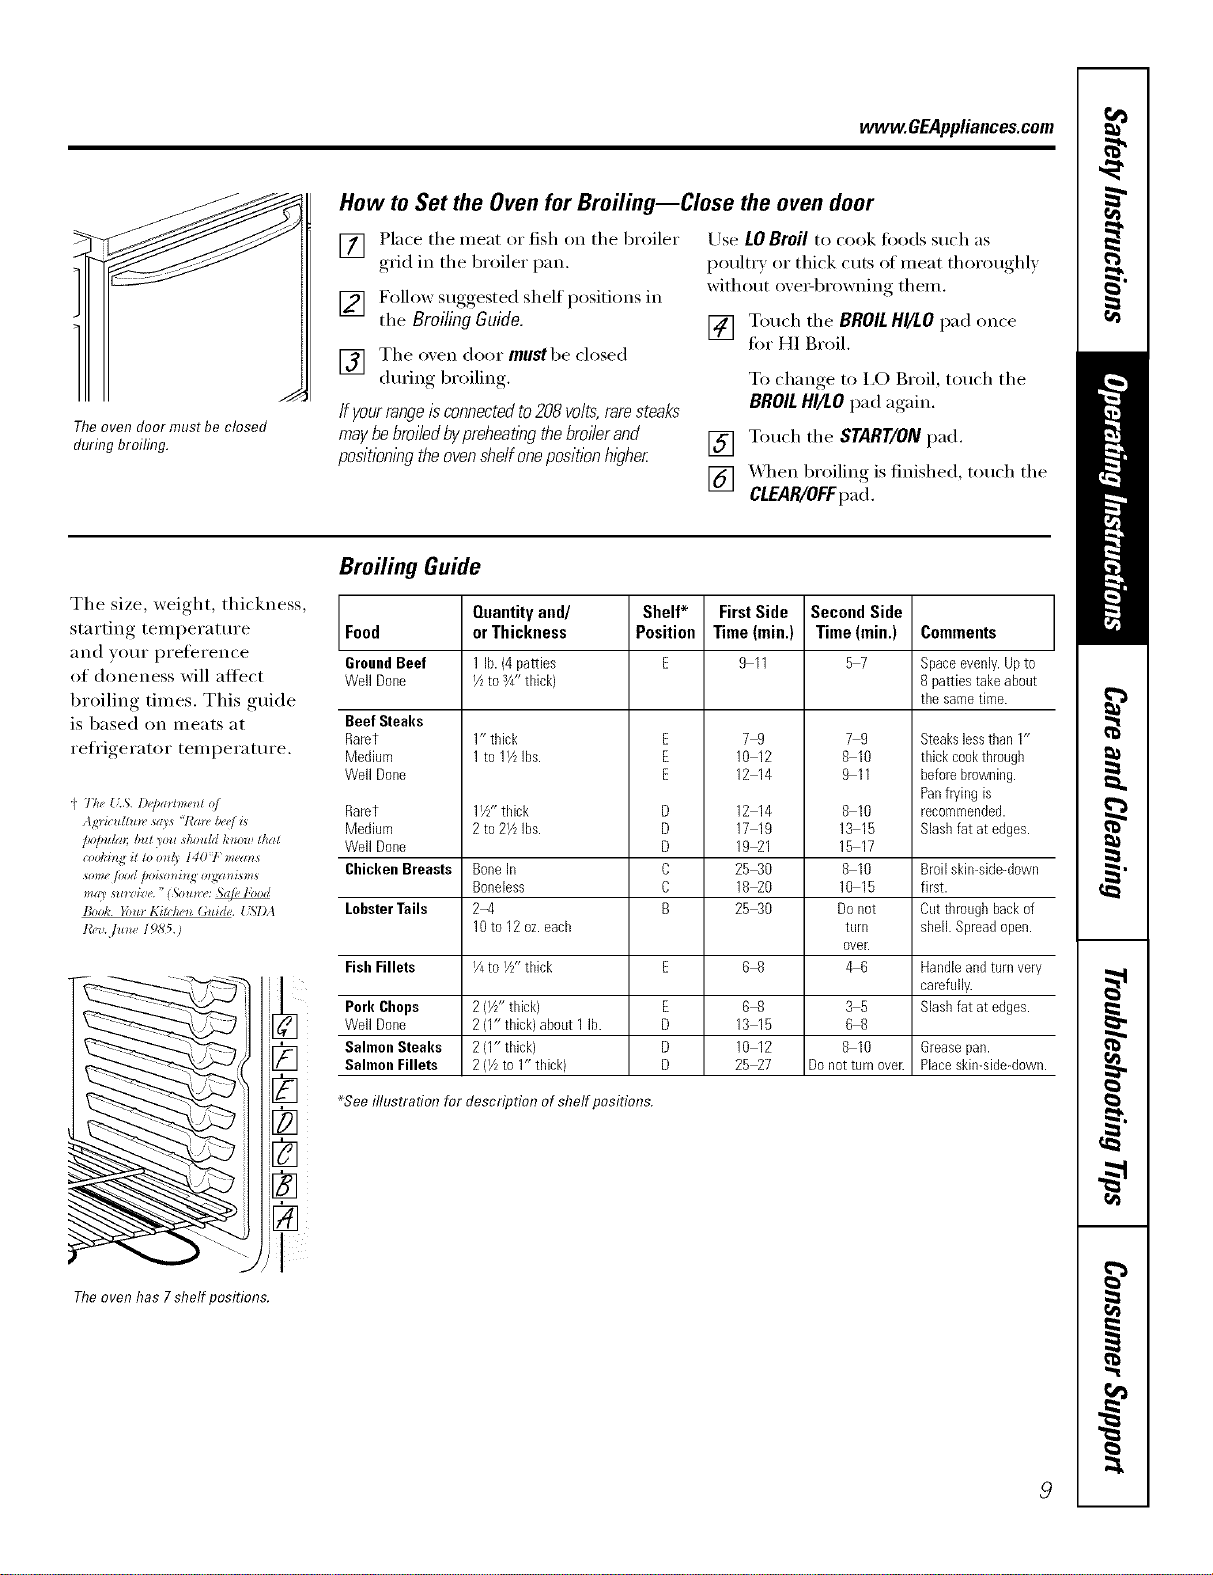
Theoven door must be closed
during broiling.
How to Set the Oven for Broiling--Close the oven door
[] Place the meat or fish on the broiler
gad in the broiler pan,
[] Follow suggested shelf positions in
the BroilingGuide.
[] The oxen door mus'tbe closed
during broiling.
If yourrangeisconnectedto208volts,raresteaks
maybebroiledbypreheatlhgthebroilerand
positioningtheovenshelfonepositionhigher
Use LOBroil to cook fi_ods such as
poultxT or thick cuts of meat thoroughly
without ore>browning them.
[] Touch the BROILHI/LOpad once
tot HI Broil.
To change to I,O Broil, touch the
BROILHI/LOpad again.
[] Touch the START/ONpad.
[] _._q/enbroiling is finished, touch the
CLEAR/OFFpad.
Broiling Guide
The size, weight, thickness,
starting temperatm'e Food
and VO/li" preference GroundBeef
of doneness will affect Well Done
broiling times, This guide
is based on Illeats at Beef Steaks
Rarer
refl'igerator temperatm'e. Medium
Well Done
{' The {L,_,.D(,/,am*_e_l o/
Agrictdtm_, says "/'m_,/we/i*
/*o/m/m [mr yo*l should/,'now that
_>ol,'h_g _!to on{} I40 V" _m'ans
*o#wfiJod hoAo_*bg o_gzn*i*_*
B,J&. };,m l(i>l,._ (a*i(h,. USlM
t_F_,.]u_** / 9,S'5.)
Rarer
Medium
Well Done
Chicken Breasts
LobsterTails
Fish Fillets
Pork Chops
Well Done
Salmon Steaks
Salmon Fillets
Quantityand/
orThickness
1 lb.(4 patties
I/zto 3/4"thick)
1" thick
1to 1VLIbs.
1W' thick
2to 2VLIbs.
BoneIn
Boneless
2-4
10to 12oz.each
V4to I//' thick
2(i/z-thick)
2(1" thick)about 1 lb.
2(1"thick)
2(I/Lto 1" thick)
Shelf*
Position
E
E
E
D
D
D
C
C
B
E
D
D
D
FirstSide
Time(min.)
911
79
10 12
12 14
12 14
17 19
19_1
25_0
18_0
2540
6_
6-8
13 15
10 12
25_7
SecondSide
Time(rain.)
57
79
8 10
911
8 10
13 15
15 17
8 I0
10 15
Donot
turll
ovelt
&6
35
68
8 10
Donotturnovelt
Comments
Space evenly. Up to
8 patties take about
the same time.
Steakslessthan 1"
thick cookthrough
beforebrowning.
Panfrying is
recommended.
Slashfat atedges.
Broilskin-side-down
first.
Cutthroughbackof
shell.Spreadopen.
Handleandturnvery
carefully.
Slashfat atedges.
&ease pan.
Placeskin-side-down.
_Seeilhtstrafion for description of shelf positions.
Theoven has 7shelf positions.
9
Usingthe clock andtimer.
Not all features are on all models.
To Set the Clock
[] Touch tile CLOCKpad twice.
[] Touch tile ÷or-pads.
If tile ÷ or -pads are not touched Mthin
one nfinute alter you touch tile CLOCK
pad, tile display reverts to tile original
setting. If this hai)pens, touch the CLOCK
pad twice and reenter tile time of day.
[_ Touch tile START/ONpad until tile
time of day shows in the display. This
ente_ tile time and starts tile clock.
Tocheckthetimeofdaywhenthedisplayis
showingotherinformation,sl_np/ytouchthe
CLOCKpad Thet/meofdayCows untilanother
padistouchecL
ToTurnOffthe Clock Display
It you have several clocks in yore" kitchen,
you may wish to tm'n off tile time of day
clock display on yore"range.
[] Touch tile CLOCKpadonce to tm'n
off the time of day display. Mthough
w_u will not be able to see it, the
[]
clock maintains tile correct time
of day
Touch tile CLOCKpad twice to recall
the clock display.
TheCLEAR/OFFpad does not affect
the time_
To Set the Timer
Thetimerdoesnotcontrolovenoperatbns.
Themaximumsettingonthetimeris9 hours
and59minutes.
[] Touch tile KITCHENTIMERON/OFF
pad.
[] Touch tile +or-pads tmtil tile
alllOtlnt of time you want shows in
the displa). Tile maximum time that
can be entered in minutes is 59.
Times more than 59 minutes should
be changed to hom_ and minutes.
Ifyoumakeamistake,touchtheKITCHEN
TIMERON/OFFpadandbeginagain.
[] Touch tile START/ONpad. Tile time
will strut co/mting down, althouoh
tile display, does not ch'lno-e,_ tmtil
one minute has passed.
[] X._q/en tile timer reaches :00, tile
control will beep 3 tilnes fi)llowed by
one beep exerv 6 seconds tmtil tile
KITCHEN TIMER ON/OFFpad is
touched.
To Reset the Timer
If tile display is still showing tile time
remaining, you may change it by touching
tile KITCHEN TIMER ON/OFFpad, then
touching tile +or -pads until tile tilne
you want appears in tile (lispla};
If the remaining time is not in tile display,
recall it by touching the KITCHEN TIMER
ON/OFFpad and then touching tile +or -
pads to enter tile new time you want.
10
ToCancel the Timer
Touch tile KITCHENTIMERON/OFF
pad twice.
Special featuresofyourovencontrol www.GEAppliances.com
Yournew touch pad control has additional features that you may choose to use. The following are the features and
how you may activate them.
Thespecial feature modes can only be activated while the display is showing the time of day. They remain in the
control's memory until the steps are repeated.
When the display shows your choice, touch the START/ONpad. Thespecial features will remain in memory after
a power failure.
NOTE: The Sabbath feature and the Thermostat Adjustment feature are also Special Features, but they are
addressed separately in the following sections.
12Hour Shut-Off
Withthisfeature,shouldyouforgetandleavethe
ovenon,thecontrolwillautomaticallyturnoffthe
ovenafter 12hoursduringbakingfunctionsor
after3hoursduringabroilfunction.
If you wish to mrn OFF this teature, fi)llow
tile steps below.
pads at tile same time fin" 3 seconds
[] T,).chtileBAKE..d BROILHI/tO
until tile display shows SF
[] Touch tile CLOCKpad. Tile (lispla}
x_ll show ON (l 2 hour sitar-off).
Touch tile CLOCKp'ad repeatedly
tmtil tile display shows OFF(no
shut-off).
[] Touch tile START/ON pad to acti', ite
tile no shut-off and lea_e tile control
set in this special features mode.
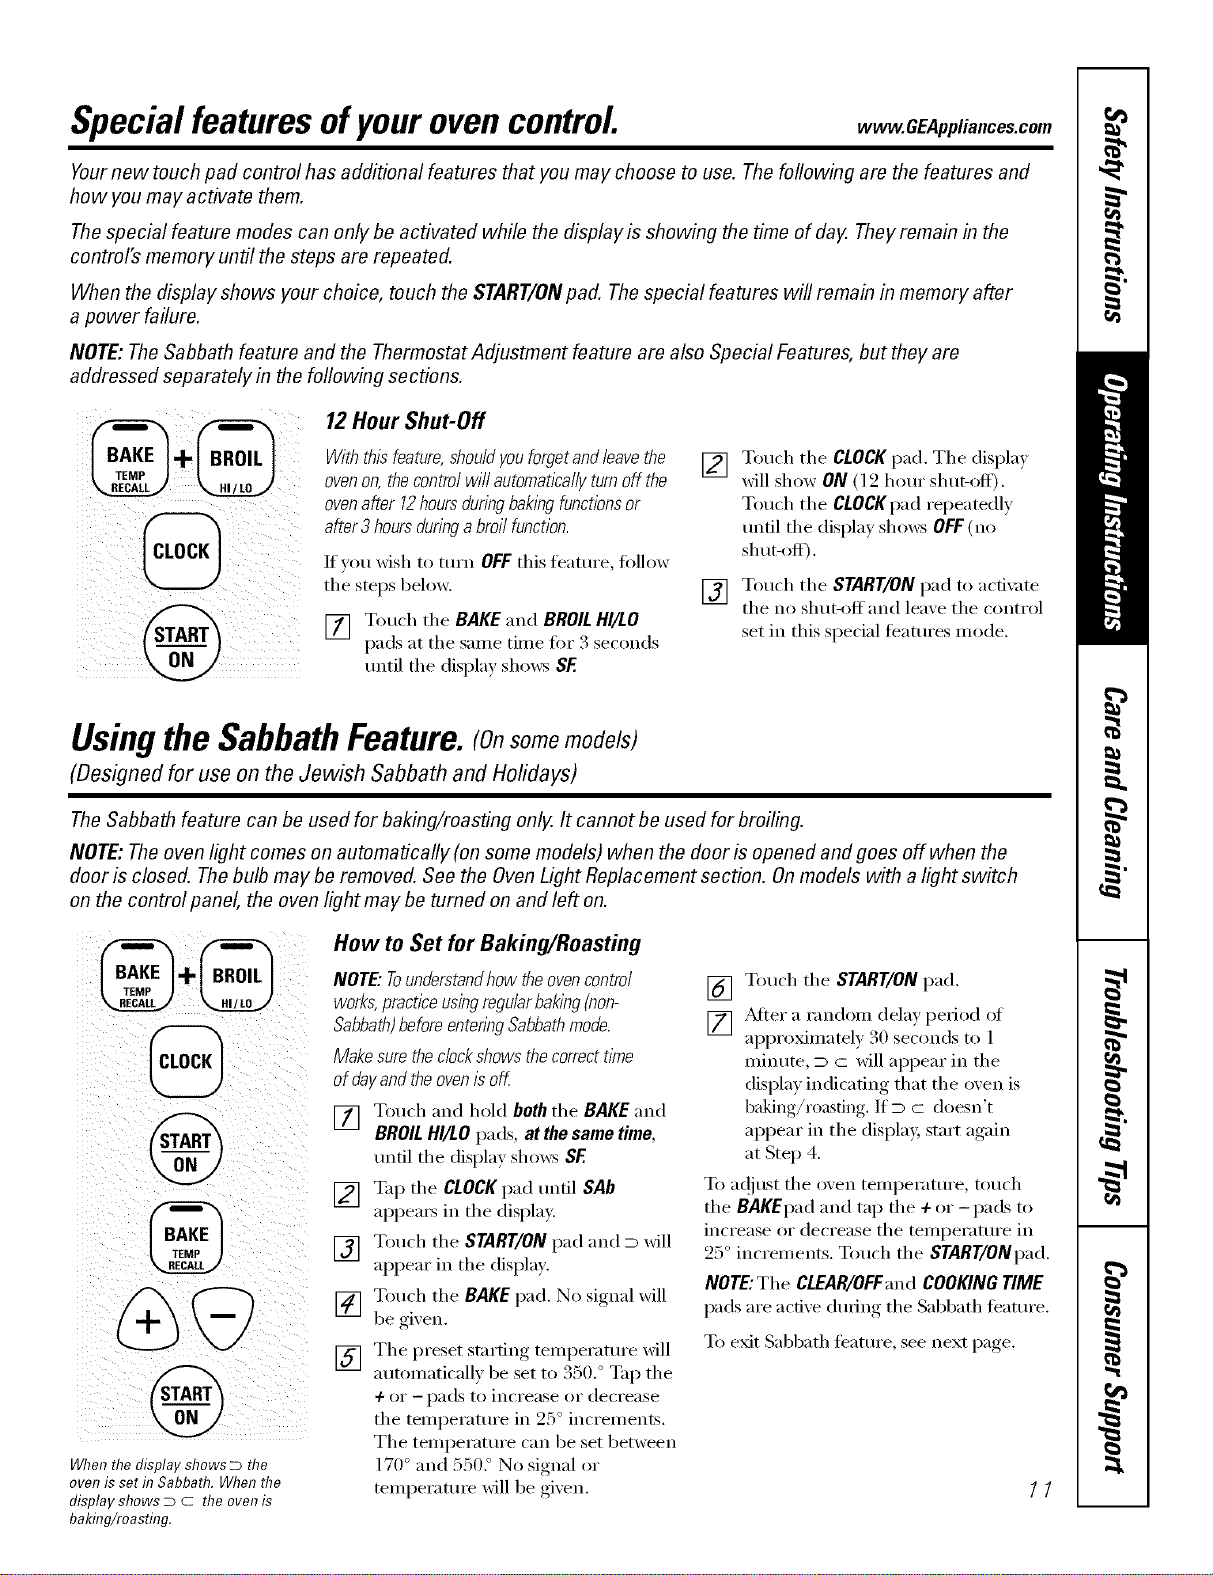
Usingthe SabbathFeature.(Onsome,,odels)
(Designed for use on the Jewish Sabbath and Holidays)
The Sabbath feature can be used for baking/roasting only. It cannot be used for broiling.
NOTE: The oven light comes on automatically (on some models) when the door is opened and goes off when the
door is closed. Thebulb maybe removed. See the OvenLight Replacement section. Onmodels with a light switch
on the control panel, the oven light may be turned on and left on.
@
%
WhenthedisplayshowsDthe
ovenissetf17Sabbath.Whenthe
displayshowsD C theovenis
baking/roasting.
How to Set for Baking/Roasting
NOTE."Tounderstandhow the oven control
works,practice using regularbaklbg(non-
Sabbath)beforeentenbg Sabbathmode.
Make surethe clockshows the correctt/me
of dayand the oven/s off.
[] Touch and hold both the BAKE "and
BROILHI/LO pads, at the same time,
tmtil tile display shows SF.
[] %q_ tile CLOCKpad tmtil SAb
appea_ in tile display.
[] Touch tile START/ON pad and D will
appear in tile display.
[] Touch tile BAKE pad. No signal will
be gi_ on.
I
[] Tile _reset starting temperature will
a t/ttnnaticalh be set to 350. ° Tap the
4- or --pads to increase or decrease
tile temperature in 25 ° increments.
Tile temperature can be set between
170 ° and 550. ° No signal or
temperature will be given.
[] Touch tile START/ON pad.
[] _Mter a random delay period of
approximately 30 seconds to l
minute, D c will appear in tile
display indicating that tile oven is
baking/roasting. If D c doesn't
appear in tile displa 5 start again
at Step 4.
To ac!iust tile oven telnperature, touch
tile BAKEpad and tap tile +or -pads to
increase or decrease tile temperature in
25 ° increments. Touch tile START/ONpad,
NOTE:Tile CLEAR/OFF'and COOKING TIME
pads are active during tile Sabbath t_'atm'e.
T() exit Sabbath teature, see next page.
11
UsingtheSabbathFeature.
(Designed for use on the Jewish Sabbath and Holidays)
@How to Exit the Sabbath Feature
[] Touch the CLEAR/OFFpad.
[] If the oxen is cooking, wait
tot a randon_ dela_ period of
approximately 30 seconds to
1 minute, until only D is in the
display,
[] Touch and heM both the BAKE and
BROIL HI/LO pads, atthe same time,
tmtil the display shows SF.
[] Tap the CLOCKpad until ONor OFF
appeax_ in the display, ON indicates
that the oven will automatically mrn
off after 12 hom_. OFFindicates that
the oven will not automatically mrn
ofl_ See the Special Features section
for an explanation of the 12 Hour
Shut-Off leamre.
[] Touch the START/ONpad.
NOTE:Ira poweroutageoccurredwhiletheoven
wasin Sabbath,theovenw///automaticallyturn
offandstayoffevenwhenthepowerratums.
Theovencontrolmustbereset.
Adjustthe oventhermostatmDo#yourself!
Youmay find that your new oven cooks differently than the one it replaced. Use your new oven for a few
weeks to become more familiar with it If you still think your new oven is too hot or too cold, you can adjust
the thermostat yourself.
Do not use thermometers, such as those found in grocery stores, to check the temperature setting of your oven.
These thermometers may vary20-40 degrees.
NOTE,"This adjustment will not affect the broiling temperatures. The adjustment will be retained in memory after
apower failure.
To Adjust the Thermostat
[] Touch the BAKE and BROILHglLO
pads at the same time fin" 2 seconds
tmtil the display shows SF.
[] Touch the BAKE pad. A two-digit
number shows in the displa).
[] The oxen temperatm'e can be
a(!justed up to (+) 35°F hotter or (-)
35°F coole_: Touch the ÷pad to
increase the temperature in 1-degree
inci'ei//ents.
[] When you have made the
a(!jusunent, touch the START/ON pad
to go back to the time of day display:
Use ] Ol.lI" o_,en as VOl.i would
nommllv.
NOTE:Thisadjustmentwillnotaffectthebroiling
temperatures.It w///beretainedlbmemoryafter
apowerfa//ura.
Touch the -pad to decrease the
temperatm'e in 1-degree increments.
Thetype ofmargarine will affect bakingperformance!
Most recipes for baking have been developed using high-fat products such as butter or margarine (80% fat). If you
decrease the fat, the recipe may not give the same results as with a higher-fat product.
Recipe failure can result if cakes, pies, pastries, cookies or candies are made with low-fat spreads. The lower the fat
content of a spread product, the more noticeable these differences become.
Federal standards require products labeled "margarine" m contain at least 80% tilt by weight. I,ow-fi_t spreads,
on the other hand, contain less fiat and more water: The high moistm'e content of these spreads affects the
texture and flavor of baked goods. For best results with w)ur old tm/orite redpes, use mmgarine, butter or
stick spreads containing at least 70% vegetable oil.
12

Careand cleaningofthe range. CEA ,ia,cescom
Be sure all controls are off and all surfaces are cool before cleaning any part of the range.
If your range is removed for cleaning, servicing or any reason, be sure the anti-tip
device is re-engaged properly when the range is replaced. Failure to take this
precaution could result in tipping of the range and cause injury.
How to Remove Packaging Tape
To assure no (lmnage is done to the finish
of the product, the satest way to remove
the adhesive left fl'om packaging tape on
new appliances is an application at a
household liquid dishwashing deteigent,
mineral oil or cooking oil.
Apply wifl/a soft doth and all()w to soak.
Wipe (liT and then apply an appliance
polish to thoroughly clean and protect
the sml'hce.
NOTE: Theplastic tape(onsomemodels)must
be removedfroma//chrometnm. /tcannotbe
removedif it is bakedon.
GrooveStem
/10 aea rib
x\\
/Springclip
(;leargroove/
x
Control Knobs
Thecontrol knobs may be removed for easier
cleaning.
To remove a knob, pull it straight
off' tile stem. If a knob is difficult to
ten/eve, place a towel or dishcloth
between tile knob and control panel
and pull gently. _M_sh tile knobs in soap
and water or a vinegar and hot water
sohltion.
getOre removing tile knobs fi)r
cleaning, please note that tile knobs are
in the OFFposition. When replacing the
knobs, check the OlaFposition to ensure
proper placement.
Do not 1)end knobs by pulling them
up or down or by hanging a towel or
other such loads. This can damage
the shall
Toreplace:
[] Check tile back of tile knob.
V2] Tile molded rib of the knob is
i¢-,i designed to fit I)eIl'bctly onto tile
knob stem.
[] _Mign tile molded rib to tile clear
grooxe in the knob stem. Push the
knob back as far as it will ,o
Control Panel
It's a good idea to wipe tile control panel
after each use (ff tile ()veil. Use a damp
cloth to clean or rinse. For cleaning, use
mild soap and wamr or a 50/50 solution
(ff vinegar and watei: For rinsing, rise
clean water. Polish (h_' with a soft cloth.
Do not tlse abI'asive cleanseYs, strong
liquid cleanei_, plastic scouring pads or
oven cleaners on tile control panel--
they will damage the finish.
Oven Heating Elements
Do not dean thebake element or thebroil
e/emen_Anysoil wi// burn off when the
elementsare heated
To clean tile oven flooi; gently lift
the bake element. Clean with warn/
soap}' water.
13

Careand cleaningoftherange.
Oven Shelves
Clean the o_en shelves with an abrasive
cleanser or scourii_g pad. _Mtei" clealfing,
rinse the shelves with clean water and d_'
with a clean cloth.
To make the shelves slide more easily,
apply a small amount of vegetable oil
to a paper towel and wipe the edges oI
the oven shelves with the paper towel,
Do not spray with Pare '_or other
lubricant sprays.
Porcelain Enamel Cooktop
The porcelain enamel finish is sturdy but
breakable if misused. This finish is acid-
resistant. However, anv addic toods
spilled (such as fl'uitjuices, tomato or
vinegar) should not be pemfitted to
remain on the finish.
If acids spill on the cooktop while it is
hot, use a (hy paper towel or cloth to
wipe it up right away: When the sm_i_ce
has cooled, wash with soap and warn1:
Rinse well.
For other spills such as tilt spatterings,
wash with soap and water or cleansing
powdei_ atter the sm_hce has cooled.
Rinse well, Polish with a dry cloth,
Painted Surfaces
Painted sm'fi_ces include the sides and
the drawer fl'ont.
Clean these with soap and water or
a \'inegar and water sohltion.
Do not rise CO111111ei"cial oven cleanei3_
cleaning l)ow(leis, steel wool or haish
abrasives on any painted sm_hce.
Oven Vent
The oven is vented through an opening
trader the left rear sur{hce trait.
This area could become hot during oven use.
It is noi_nal for steam to come out of the
\'ent and lnoisture 1nay collect tmdemeath
the coils when the oven is in use.
The vent is important tOTproper air
circulation.
Neverblock this vent withaluminum foil.
14
www.GEAppliances.com
Porcelain Oven Interior
X_]th proper care, the porcelain enamel
finish on the inside of the ()yen--toil,
bottom, sides, back and inside of the
dom_will stay nm_qooking tot vea_.
i.et the range cool before cleaning. We
recommend that you wear rubber gloves
when cleaning the range.
Soap and water will nom_ally do the job.
Hea W spattering or spillove_ may
require cleaning with a mild abrasive
cleane_: Soap> wet metal pads may also
be used.
Do not allow foodspills with a high sugaror acid
content (suchas tomatoes,sauerkraut,fruitjuices
orple filling) to remain on thesurface. Theymay
causea duffspot even after cleaning.
Household ammonia may make the
cleaning.job easier. Place ]/2 cup in
a shallow glass or potte_ T container in
a cold oven overnight. The ammonia
flunes will hel I) loosen the burned-(m
grease and tood.
If necessai'v, }Oil II]_IX'tlse _111o',en cleanei _.
Follow the package directions.
Donotsprayovencleanerontheelectrical
controlsandswitchesbecauseitcouldcause
ashortcircuitandresultinsparkingorfke.
Donotallowa filmfromthecleanertobumup
onthetemperaturesensor--itcouldcausethe
oventoheatimproperly.(Thesensorislocated
at thetopoftheoven.)Carefullywipethe
sensorcleanaftereachovencleaningbeing
carefulnottomovethesensorasachangein
itspositioncouldaffecthowtheovenbakes.
Donotsprayanyovencleanerontheoven
door,handlesoranyexteriorsurfaceofthe
oven,cabinetsorpaintedsurfaces.Thecleaner
candamagethesesurfaces.
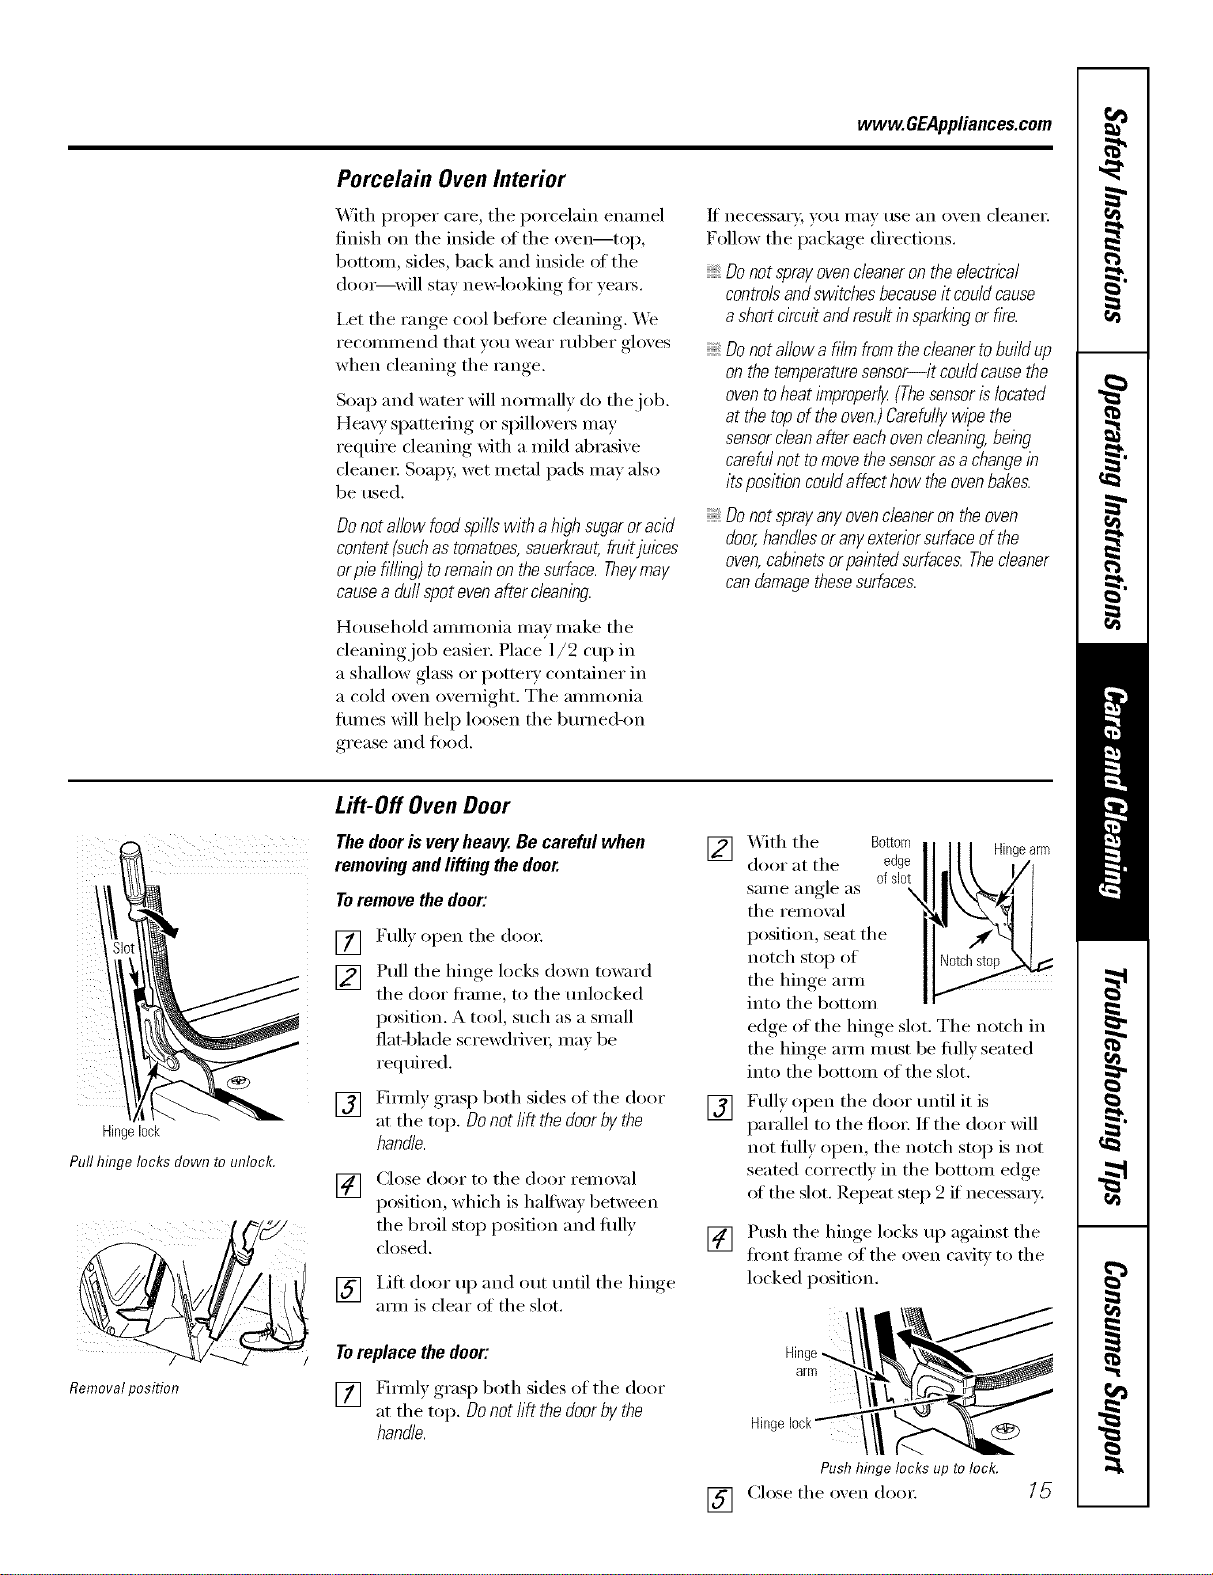
Hingelock
Pull hinge locks down to unlock.
Removalposition
/
Lift-Off Oven Door
The dooris veryheavy. Be careful when
removing and lifting the door.
Toremove the door:
[]
[]
[]
Full) open the doo_:
Pull the hinge locks down toward
the door fl'ame, to the tmlocked
position. A tool, such as a small
flat-blade screw(hixe_, ma_ be
required.
Firefly grasp both sides of the door
at the top. Donot lift the door bythe
handle.
[] Close door to the door remox d
position, which is halfwa_ between
the broil stop position and fifth'
closed.
[] I.ifl door up and (lilt tmtil the hinge
aml is clear ol the slot.
Toreplace the door:
[] gimfly grasp both sides of the door
at the top. Donot lift the door by the
handle.
]X&ith the Bottom Hingearm
door at the edge
same angle as ofslot
the remo',;d
position, seat the
notch stop of
the hinge am_
into the bottom
edge oI the hinge slot. The notch in
the hinge am/m ust be fifllv seated
into the bottom of the slot.
[] Fully open the door tmtil it is
parallel to the floo_: If the door will
not fldly open, the notch stop is not
seated con'ecflv in the bottom edge
of the slot. Repeat step 2 if necessary':
[]
[]
Push the hinoe., locks up against, the
fl'ont fl'ame of the oxen caxiP,' to the
locked position.
Hinge//\
Pushhingelocksuptolock.
Close the oxen dora: 15
Careand cleaningoftherange.
i I
Oven Light Replacement
CAUTION:Beforereplacingyour
oven light bulb, disconnect the electrical
power to the range at the main fuse or
circuit breaker panel
Be stlre to let tile light (-o_,er and bulb
cool completely.
Toremove the cover:
[] Twist lens counterclockwise about a
qtlarter ttli'n to i'ei//o_,e.
Donot removeanyscrews toremovethecover
[] Replace bulb with a 4(Mvatt
appliance bulb or two-i)rong,
halogen bulb, as appropriate.
Toreplace the cover:
[] I,ine up tabs oI lens in fl'ont oI tabs
on housing and rotate clockwise to
engage.
After broiling, remove the broiler
pat?from the oven.
Broiler Pan and Grid
_Mter broiling, remove tile broiler pan
fl'om tile oven. Remove tile grid fl'om tile
pan. Caretiflly pore" out tile grease fl'om
tile pan into a proper containe_;
Wash and rinse the broiler pan and grid
in hot water with a soap-filled or plastic
scom_ing pad.
If fl_od has bm'ned on, sprinkle tile grid
with detergent while hot and cover with
wet paper towels or a dishcloth. Soaking
tile pan will remove bm'ned-on toods.
Both tile broiler pan and grid may be
cleaned with a commercial oven cleane_:
Both tile broiler pan and grid can also be
cleaned in a dishwasher:
Donotstoreasoiiedbroiierpanan@rid
anywhereintherange.
il St@guide
Storage Drawer Removal
Toremove the drawer:
[] Pull tile drawer out tmtil it stops.
[] I,ifl tile fl'ont of tile drawer tmtil tile
stops clear tile guides.
[] Remoxe tile (h'awe_:
Toreplace the drawer:
[] Place tile drawer rails on tile guides.
[] Push tile drawer back tmtil it stops.
[] Lift tile fl'ont of tile drawer and
push back tmtil tile stops clear tile
guides.
[] I,ower the fl'ont of the drawer and
push back tmtil it closes.
16
vvww.GEAppliances.com
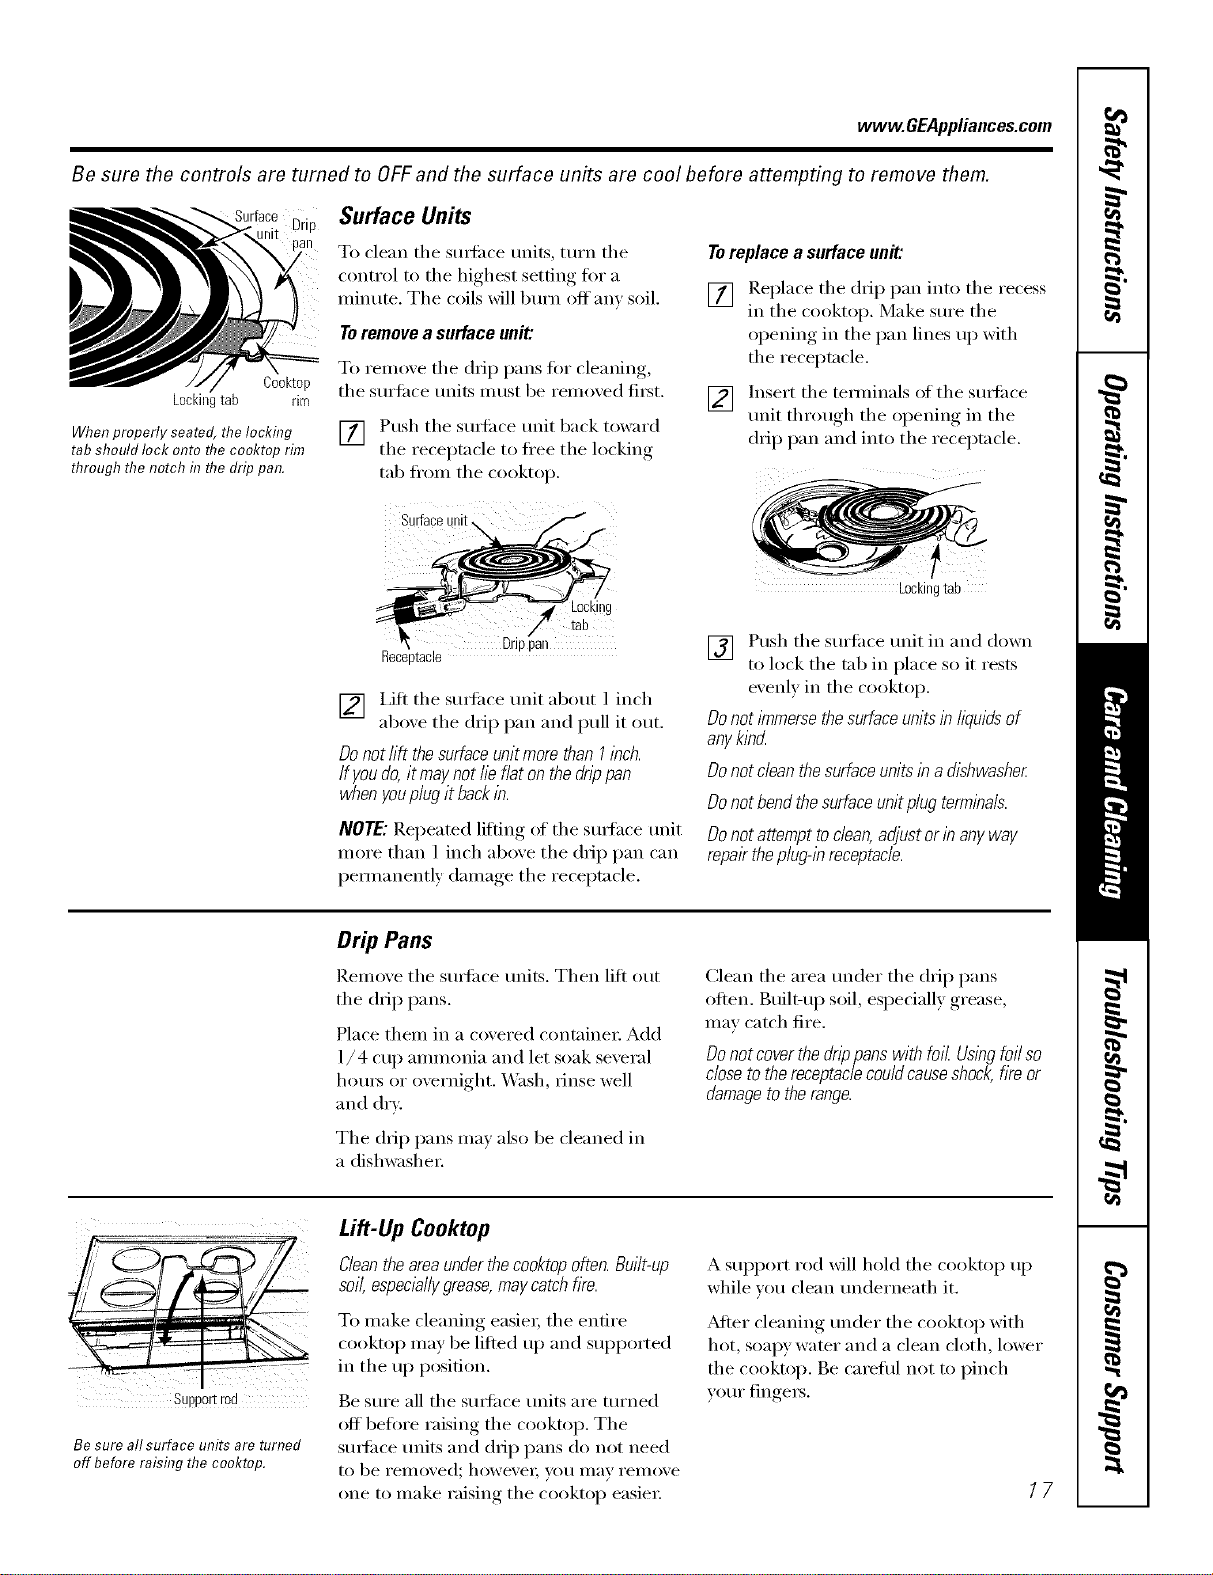
Be sure the controls are turned to OFFand the surface units are cool before attempting to remove them.
Drip
Cooktop
Lockingtab rim
When properly seated, the locking
tab should lock onto flTeco&top rim
through the notch in flTedrip pan.
Surface Units
To clean tile suHilce units, turn tile
control to tile highest setting t0r a
minute. Tile coils will bm'n off' any soil.
Toremove a surface unit:
To remove tile drip pans for cleaning,
tile surtilce milts nlust be removed fi_st.
[] Push tile suHilce trait back toward
the receptacle to flee the locking
tab fl'om the cooktop.
Surfaceunit\
Z
4 Locking
/' tab
Drppan
Receptacle
[] i,ifl tile SUltilce trait about 1 inch
aboxe tile drip pan and pull it out.
Do not lift thesurface unit more than I inch.
If youdo, it may not lie flat on the drippan
when youplug it backin.
NOTE: Repeated lifting of tile smthce trait
more than 1 inch above tile drip pan can
pemmnently damage tile receptacle.
Toreplace a surface unit:
[] !leplace tile drip pan into tile recess
m the cooktop. Make sm'e the
opening in the pan lines up with
the receptacle.
] h_sert the temfinals of the sm_ilce
trait through the opening in the
drip pan and into the receptacle.
Lockingtab
[] Push tile surtilce trait in and down
to lock tile tab in place so it rests
evenly in tile cooktop.
Do not/?nmersethe surface unitsin l/wids of
anyklbcL
Do not dean the surfaceunits in a dishwasher
Do not bend thesurface unit plug terminals.
Do not attempt todean, adjust or in any way
repairthe plug@ receptacle.
Drip Pans
Remove tile smtilce milts. Then lift out
tile drip pans.
Place them in a covered containe_: Add
1/4 cup ammonia and let soak several
hours or overnight. _._hsh, rinse well
and dry.
Tile drip pans ma) also be cleaned in
a dishwasher:
Clean tile area trader tile drip pans
often. Built-u I) soil, especially grease,
may catch fire.
Donot coverthe drippans with foil Usingfoil so
close to the receptaclecould causeshock,fire or
damageto the range.
Supportrod
Be sure all surface units are turned
off beforeraisingthecooktop.
Lift-Up Ceoktep
Cleanthe areaunderthe cooktopoften. Built-up
soft,espec&//ygrease,may catch fire.
To make cleaning easier; tile entire
cooktop may be lifted tlI) and SUl)ported
in tile up position.
Be st]re all tile surlilce traits are turned
off before raising the cooktop. Tile
SUltilce units and dil I) pans do not need
to be rellloved; howevei; yo/l Ill}IV rei//ove
one to make raising tile cooktop easier:
A SUl)l)ort rod will hold tile cooktop up
while xou clean tmderneath it.
After cleaning trader tile cooktop with
hot, soapy water and a clean cloth, lower
tile cooktop. Be cmeflfl not to pinch
yore" fingers.
17
Beforeyoucall forservice...
Troubleshooting -tips
Save time and money! Review the charts on the following
pages first and you may not need to call for service.
Possible Causes What ToDo
Surface units do not The surface milts are *With the controls off, check to make sure the stu_f_ce
work properly not plugged in sofidly, unit is plugged completely into tile receptacle.
improperlyThesurfaCeset.mfit controls *CheCkunitvout°areSeeusingtl/ecorrect control is set for the stu_fiwe
The drip pans are not set •With tile controls off, check to make sure tile drip
securely in the cooktop, pan is in tile l'ecess in tile cl>l>ktop and that the
()l_euiw_ in tile pan lines up with tile receptacle,
Controlsignalsafter You forgot to enter a*Press the BAKEpad and desired teInperature,
enteringcookingtime bake temperature.
Fooddoesnotbake Oven controis improperly set. *See the Using theoven section.
Shelf position is incorrect * See tile Using the oven section.
or the shelf is not level.
Incorrect cookware or •See tile Usingtheoven section.
cookware of improper
size being used.
Oven thermostat needs *See tile Adjust the oven thermostat--Do it yourself!
adjustment, section.
Clock and timer do Plug on range is not completely •Make sure electrical l)lug, is l)lugged,, into a live, properly
not work inserted ha the electrical outlet, grotmded outlet.
A fuse in your home may *Replace the fi/se or reset the circuit breaker:
be blown or the circtfit
breaker tripped.
Oven controls improperly set. *See the Using the clock and timer section.
Ovenlightdoes Light bulb is loose or defective. *Tighten or replace the btdb.
not work Switch operating light *Call for service.
is broken.
Fooddoes not Oven door not closed. * See tile Using the oven secti(m.
broilproperly Oven controis improperly set. •Make sure you press tile BROIL HI/LO pad.
hnproper shelf position * See tile BroilingGuide.
being used.
Cookware not suited *Use tile broiling, l)an and ,grid that came with your range.
for broiling.
Aluminum foil used on the *See tile Using the oven section.
the broiling pan mad grid has
not been fitted properly and
slit as recommended.
In some areas the power
(voltage) may be low.
•Preheat the broil element fiw 10 minutes.
•Broil fin" the lonoest_, period of tilne recoum_ended in
the Broiling Guide.
18
www.GEAppliances.com
Possible Causes What ToDo
Oven temperature too Oven thermostat *See tile Adjust the oven thermostat--Do it yourself[
hot or too cold needs adjustment, section,
Oven willnot work Plug on range is not *Make sure electrical }_lug, is })lugged,, into a live,
completely inserted in l)i'1)l_erlv.,grlmuded oudet.
the electrical outlet.
A fuse ha your home may *Replace tl/e fl/se or reset tl/e circuit breaker:
be blown or the circuit
breaker tripped.
Oven conlrols improperly set. * See tl/e Using the oven section.
Storagedrawer Rear drawer support is "Repositiou tile drawer. See the Storage Drawer
is crooked on top of the guide rail. Removaliustmctious in the Careand cleaning of your
range section.
Storage drawer Power cord may be *Reposifiou the (h'awer and power cord. See the
won't close obstructing drawer Storage Drawer Removal iustmcfious in tl/e Care and
in the lower back cleaning of your range section.
of the range.
Rear drawer support is *Repositiou tile drawer. See the Storage Drawer
on top of the guide rail. Removal instructions in the Care and cleaning of your
range section.
"Crackling "or This is the sound of the *This is normal.
"popping" sound metal heating and cooling
during the cooking functions.
"F-and a number You have a function *Press tile CLEAR/OFFpad.Put tile i)veu back iutl)
orletter"flash error code. operation.
in the display If the function code repeats. •Disconnect all power to tile range fin" at least 30
seconds and then reconnect power./f tl/e flmctiou
el'l'Ol" ('ode repe;Hs, call for sel'\i('e.
Displayflashes "bAd" The installed cmmection •Contact installer or electrician to correct miswire.
then "linE" with afrom the house to the unit
loud tone is miswired.
Display goes blank A fuse ha your home may be *Replace tile ti/se or reset tile circuit breaker:
blown or the circuit
breaker tripped.
The clock is turned off from *See tl/e Using the clock and timer section.
showing ha the display.
Display flashes Power failure. "Reset tile clock.
Unable to get the Oven control pads were "Tile BAKEaud BROILHI/LOpads must be pressed
displaytoshow "SF" not pressed properly, at tl/e same time and held for 3 secouds,
Power outage, Power outage or surge. *Reset the clock. ]f tile oven was in use you must reset
clock flashes it by _ressiug tile CLEAR/OFF pad,.,I,settiu,_ tile clock
and resetting any cooking flu]orion.
19
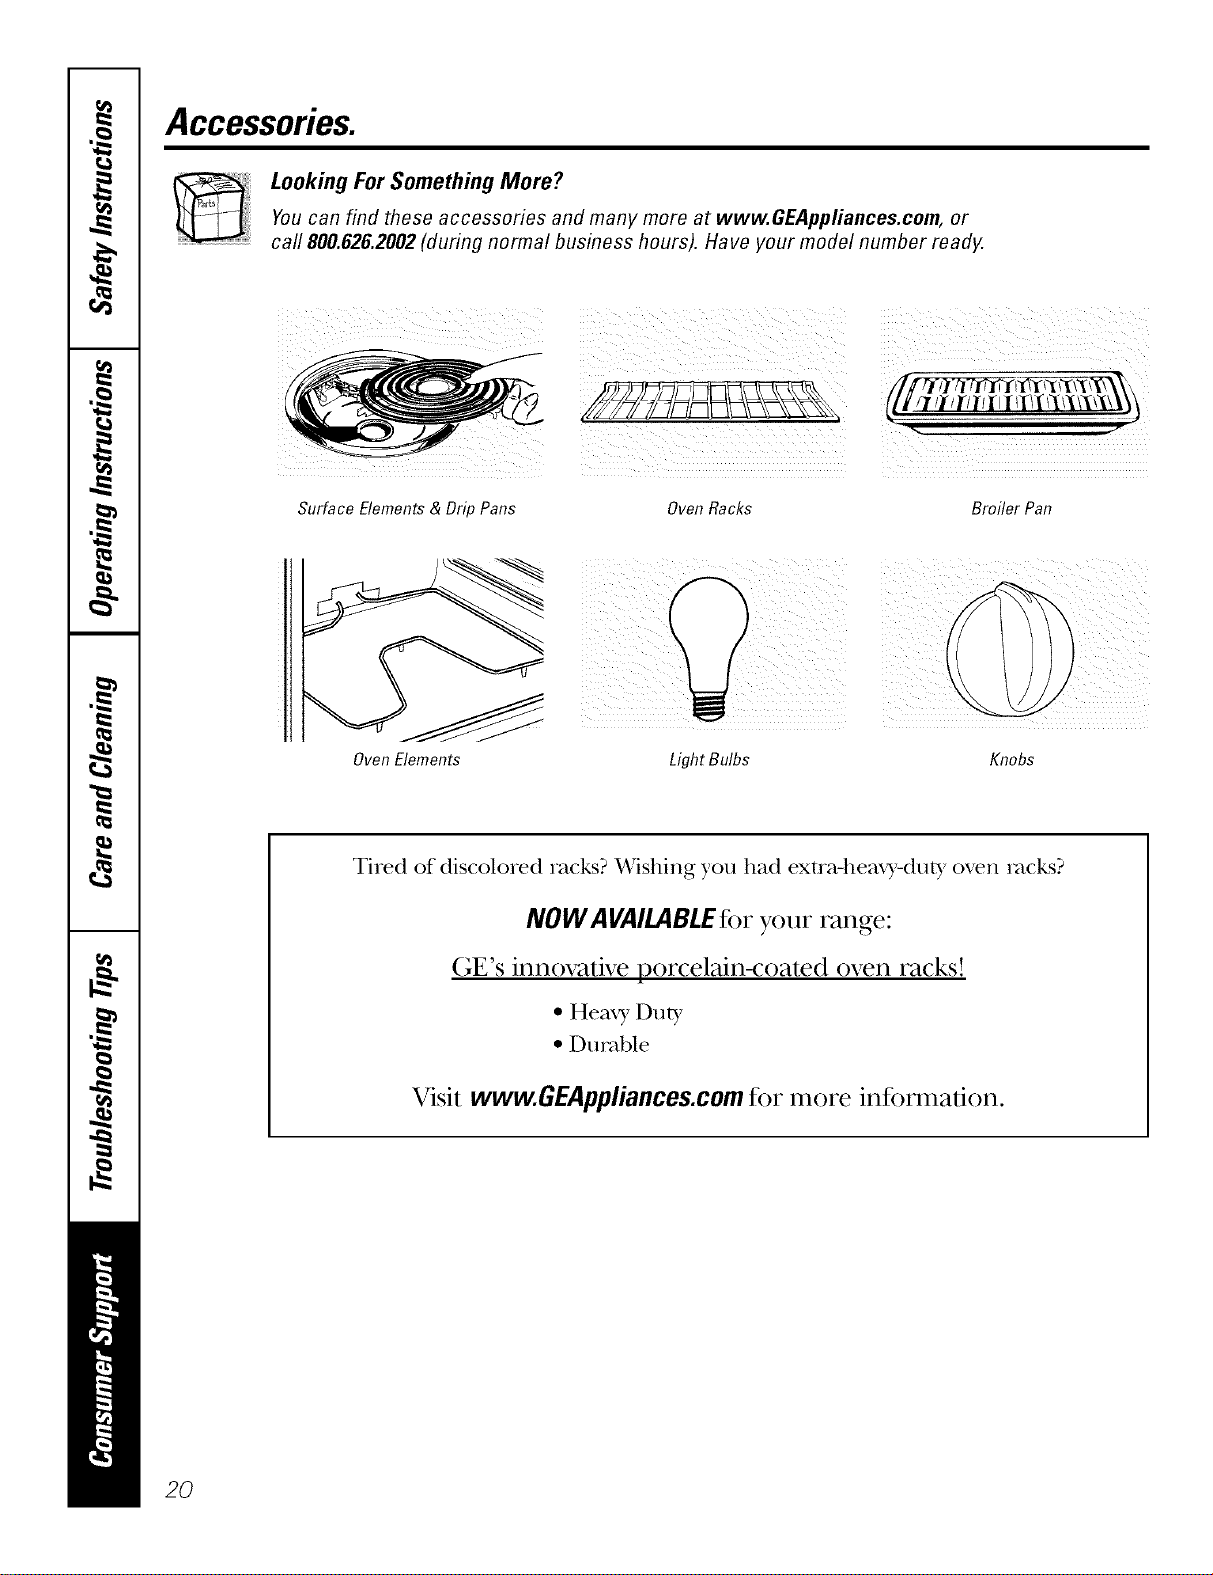
Accessories.
Looking For Something More?You can find these accessories and many more at www.GEAppfiances.com, or
call 800.626.2002 (during normal business hours). Have your model number ready.
Surface Elements & Drip Pans Oven Racks Broiler Pan
Oven Elements
¸¸
LightBulbs Knobs
Tired of discolored racks? Wishing you had extra-heaxy.duty oven rocks?
NOW AVAILABLEfor your range:
GE's innovative porcelain-coated oven racks!
•Heaxy Duty
• Durable
Visit www.GEAppliances.com for more information.
2O
GE Service Protection Plus 'M
GE, a name recognized worldwide %r quality' and dependability, oflers y'ou
Service Protection Plus'_'--comprehensive protection on all y'our appliances--
No Matter What Brand!
Benefits Include:
• Backed by GE
•All brmads covered
• Unlimited service calls
• All parts mad labor costs included
•No out-of-pocket expenses
• No hidden deductibles
• One 800 number to call
We71CoverAnyAppliance.
Anywhere. Anytime.*
You will be completely satisfied with our service protection or you ma} request ,your inone,_ back
on the remaining value of 3our contract. No questions asked. It's that simple.
Protect yore" reffigerat(m dishwasher; washer and dryer; range, TV, VCR and much more--rely brand!
Plus there's no extra charge tot eulergency ser;'ice and low inonthly financing is available. Even icelnaker
coverage and tood spoilage protection is ottered. You can rest eas> knowing that all your valuable
household products are protected against expensive repairs.
Place your confidence in (;E and call us in the IU.S. toll-free at _tllt._Z_.ZZZ_
foY UlOI'e inloi'u/ation.
"*Allbrands cmered, up to 2(}years old. in the contin< nlal I_.S.
_.. (2."._22.............
Please place in envelope and mail to:
General Electric Company
Warranty Registration Department
EO. Box 32150
Louisville, KY 40232-2150
21
Consumer Product Ownership Registration
Dear Customer:
Thank you for purchasing our product and thank you for placing your confidence in us.
_A/eare proud to ha_e you as a customer!
Follow these three steps to protect your new appliance investment:
Complete mid mail
your Consumer
Product Ownership
Registration today.
ttaw' tim peace of
mind of knowing wc
call colltact VOl/ ill
tile tmlikelv (vent of
asaI_ B modification.
Aiter mailing tile
registration below,
store this document
ill a satb place. It
contains inlormation
you will need should
you require service.
Oln- selvice number
is 800.GE.CARES
(800.432.2737).
Read your Owner's
Manual carethllv.
It will help you
operate yol/r lle',_
appliance properly.
Model Number Serial Number
,,,,,I I ,,,,,,,I
Important: If you did not get a registration card with your
product, detach and return the form below to
ensure that your product is registered, or register
online at www.GEAppliances.com.
.................................................................................................... _,,,_ (MI h_r(
Consumer Product Ownership Registration
Model Number Serial Number
I,,,,,, , , , , , I I , , , , , , I
MI: Ms. M*>,. Mix_,
Fir',l I IL:_slI
Name IIIIIIIII Nain(! I I I I I I I I I I I I
_1 r( (!1 I
Addr(';s IIIIIIIIIIIIIIIIIIIIIIII
Apt. # Ii i
(;i,,II I
l )ale Placed
hi Use III
Monlh
III I I IEqnailAddress*
IIII
D_,yl , I
I I I I I I I I s_l(,I
_,i!a r III Phon(
Nulnl)(!r I i I
Zip I
I]Code I I II
I-I,, I-I , , ,
I
I
0GEAppliances
BE Consumer & /ndustria/
Louisville, Kentucky
ww_GEAppliances, com
22
* Please pr(wi(le your e-mail address to rcceive, via e-mail, discounts, special ofl;:l-, and other impoltant
commmficafions from (;E Appliances ((;15\).
[ Check herc if you do not want to receixe COlnmunications fi-om G1LVs carcfillly select((l paltner_,.
FAILUlZE T() COMt'LET1.2 AND RETURN TIIIS CAR1) DOES NOT DIMINISII YOIR
"_T\I_L\N'IY RI(;IfFS.
For more intormation about GILVs prixacy and (lala usage polio); go to _x_cw.(;EAppliances.com and
click on 'Prixa_y Policy" or call 8t10.626.2224.
GEElectric Range Warranty.
Aft warranty service provided by our Factory Service Centers,
or an authorized Customer Care®technician. Toschedule service,
on-line, 24 hours a day, vis# us at GEAppliances.com, or carl
800.GE.CARES(800.432.2737).
Staple your receipt here.
Proof of the original purchase
date is needed to obtain service
under the warranty.
GEWill Provide:
Fromthedateof the
origina!purchase
Anypattot the range which tidls due to a detect in materials or workmanship, During this
full one-year warranty, GE will also proxkle, free of charge, all labor and in-home sei_ice t()
replace the defective part,
Service trips to your home to teach you how to use
the product.
Improper installation, delivery or maintenance.
Failure of the product if it is abused, misused, or used
for other thml the intended purpose or used
commercially.
Replacement of house fuses or resetting of circuit
breakers.
Damage to the product caused by accident, fire, floods
or acts of God.
h_cidentaJ or consequential damage caused by possible
defects with this applimace.
Damage caused after delivery.
This warranty is extended to the original purchaser and any succeeding owner for products purchased for
home use within the USA. In Alaska, the warranty excludes the cost of shipping or service calls to your home.
Some states do not allow the exclusion or limitation of incidental or consequential damages. This warranty
gives you specific legal rights, and you may also have other rights which vary from state to state. Toknow
what your legal rights are, consult your local or state consumer affairs office or your state's Attorney General.
Warrantor: General Electric Company.Louisville, KY40225
23

ConsumerSupport.
GEAppliancesWebsite www.GEAppliances.com
Have a question or need assist;race with your appliance? Try the (;E Al)pliances Website 24 hom_ a (la);
any day of the year'. For greater convenience and faster se_Mce, you can now download Owner's Manuals,
order parts, catalogs, or even schedule service on4ine. You can also "_&sk Ore" Team of Experts .....
yo/tt" questions, and so tiluch t/lot'e,,,
ScheduleService www.GEAppliances.com
Expert (;E repair setMce is onlx one step awa) from your (loot; Get on-line and schedule your service at
your comenience 24 hom_ am dm of the '_ear! Or call 800.GE.(:ARES 800.432.2737) during nomml
business hom_.
RealLifeDesignStudio www.GEAppliances.com
GE supports tile Universal Design concel)t--products, services and enviromnents that can be used by
people of all ages, sizes and capabilities. _'e recognize the need to design fi)r a wide range of physical and
ment;d abilities and impaim_ents. For details of GE's Universal Design applications, including kitchen
design ideas fin" people with disabilities, check out ore" _'ebsite today. For tile hearing impaired, please call
800.TDD.GEAC (800.833.4322).
ExtendedWarranties www.GEAppliances.com
Pro'chase a (;E extended warrant_, and learn about special disco/rots that are axailable while veto" warranty
is still in effect. You can pro'chase it on-line anytime, or call 800.626.2224 dtwing nomml business hom_.
(;E Consumer Home Serxices will still be there after )our wan'an D, expires.
PartsandAccessories www.GEAppliances.com
Individuals qualified to setMce their own appliances can have parts or accessories sent directly to their
homes (VISA, MasterCard and Discover cards are accepted). Order on-line today, 24 hom_ every day or
by phone at 800.626.2002 dtwing nomml business hom_.
Instructions contained in this manual cover proceduresto be performedbyany user. Other servicinggenerally
should be referred to qualified service personnel Caution must be exercised, since improper servicing may cause
unsafe operation.
ContactUs www.GEAppliances.com
If you are not satisfied with tile service you receive from GE, contact us on our _'ebsite with all tile details
including yore" phone nlltllber, or write to: General Manager; CllStOtller Relations
GE Appliances, Appliance Park
I,ouisville, K¥ 40225
RegisterYourAppliance www.GEAppliances.com
Register your new applimlce on-line---at your conYenience! Tiinely product registration will allow fin"
enhanced COillilltlnication and prompt service tin(let" tile terms ofxotlr WalTallt}_ should tile need arise.
You may also mail in tile pre-printed registration card included in tile l)ackim*_ material.
Printed in flTeUnited States