Loading ...
Loading ...
Loading ...
14 INSTALLATION
How to Level the Washer
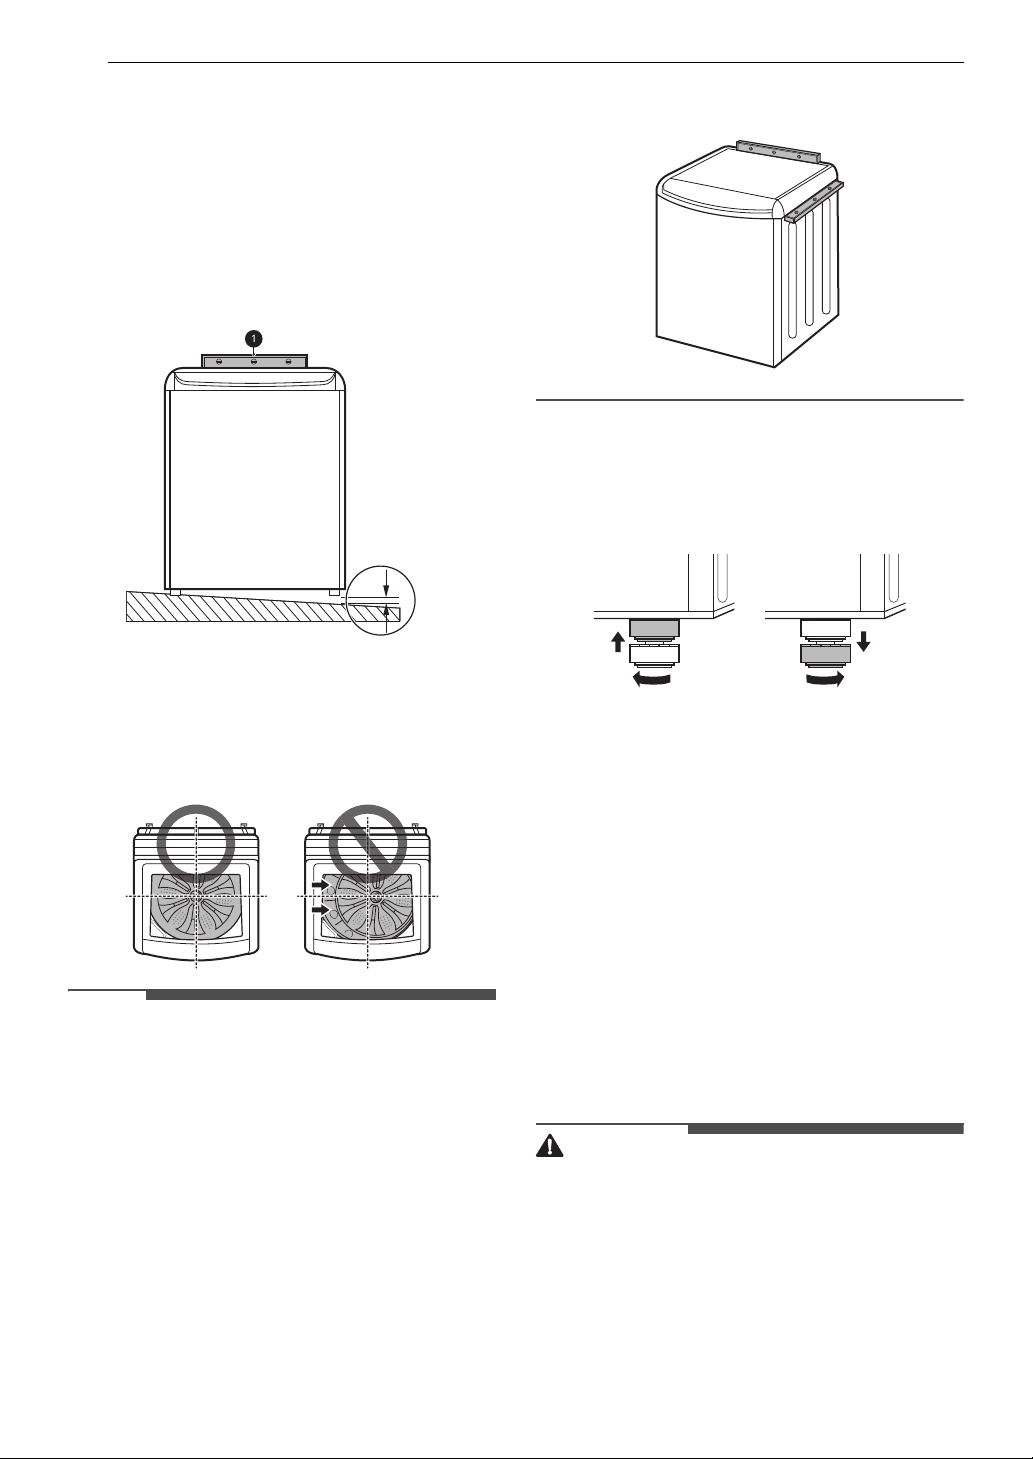
1 Position the washer in its final location.
• Take special care not to pinch, strain, or
crush the water and drain hoses. If you have
a carpenter’s level a, you can use it to
check that the washer is level. The slope
beneath the washer should not exceed 1
inch, and all 4 leveling feet must rest firmly
on the floor.
2 Open the lid and look from above to see if the
tub is centered.
• If the tub is not centered, readjust the front
feet. If you have a level, check the washer
with the level.
NOTE
• To check if the washer is level from side to side,
place a level on the back edge of the lid.
• To check if the washer is level from front to back,
place a level on the edge where the cabinet side
meets the top cover. Do not place the level on
the top of the lid. Using these surfaces will result
in the washer being unlevel.
3 Adjust the leveling feet.
• Turn all 4 leveling feet in one direction to
raise the washer or the other direction to
lower it.
4 Recheck the washer’s levelness.
• Push or rock the top edges of the washer
gently to make sure the washer does not
rock. If the washer rocks,readjust the
leveling feet.
• If the lid does not stay open properly,
extend the front leveling legs until the
washer is level from front to back.
Final Installation Check
Connecting to the Power Supply
Plug the washer into a 120 VAC, 60 Hz grounded 3-
prong outlet.
WARNING
• Do not use a worn or damaged power cord or
power plug. Replace or repair it immediately.
Failure to do so may result in death, fire, electric
shock, or malfunction.
• Do not modify the power cord and plug provided
with the appliance. Do not damage it when
installing or moving the appliance. Doing so may
result in death, fire, electric shock, or
malfunction.
• Make sure that the appliance is grounded.
1″
Loading ...
Loading ...
Loading ...