Loading ...
Loading ...
Loading ...
Alignments .........................
Cutter Knife Alignment/Adjustments
I WARNING: The cutter knives are extremely sharp. I
Do not let your hand or fingers touch the cutter
fknives.
Tools Needed
8ram open end wrench (Supplied).
- Unplug jointer/planer,
I WARNING: To avoid injury from accidental start, ]
made sure switch is "OFF" and plug is not con-
I
nected to power source outlet.
Checking Alignment
Note: The blades are adjusted at the factory, and should
not require adjustment.
1. Assemble knife setting gauge.
a, From the loose parts find the following:
Description Qty.
Shaft Knife Adjustment ....................................... 1
Gauge ................................................................ 2
Retaining Ring .................................................... 4
b. Assemble the two inside retaining rings to the shaft.
Slide one of the gauges on the shaft, and assemble
the outside retaining ring. Repeat for the other side
of gauge.
2. Lower infeed table by turning the depth of cut hand-
wheel clockwise.
3. Position the fence to the rear of the jointer, approxi-
mately 1/4" beyond the cutter knives. Lock the fence in
this pasit[on.
4. Remove cutter head guard.
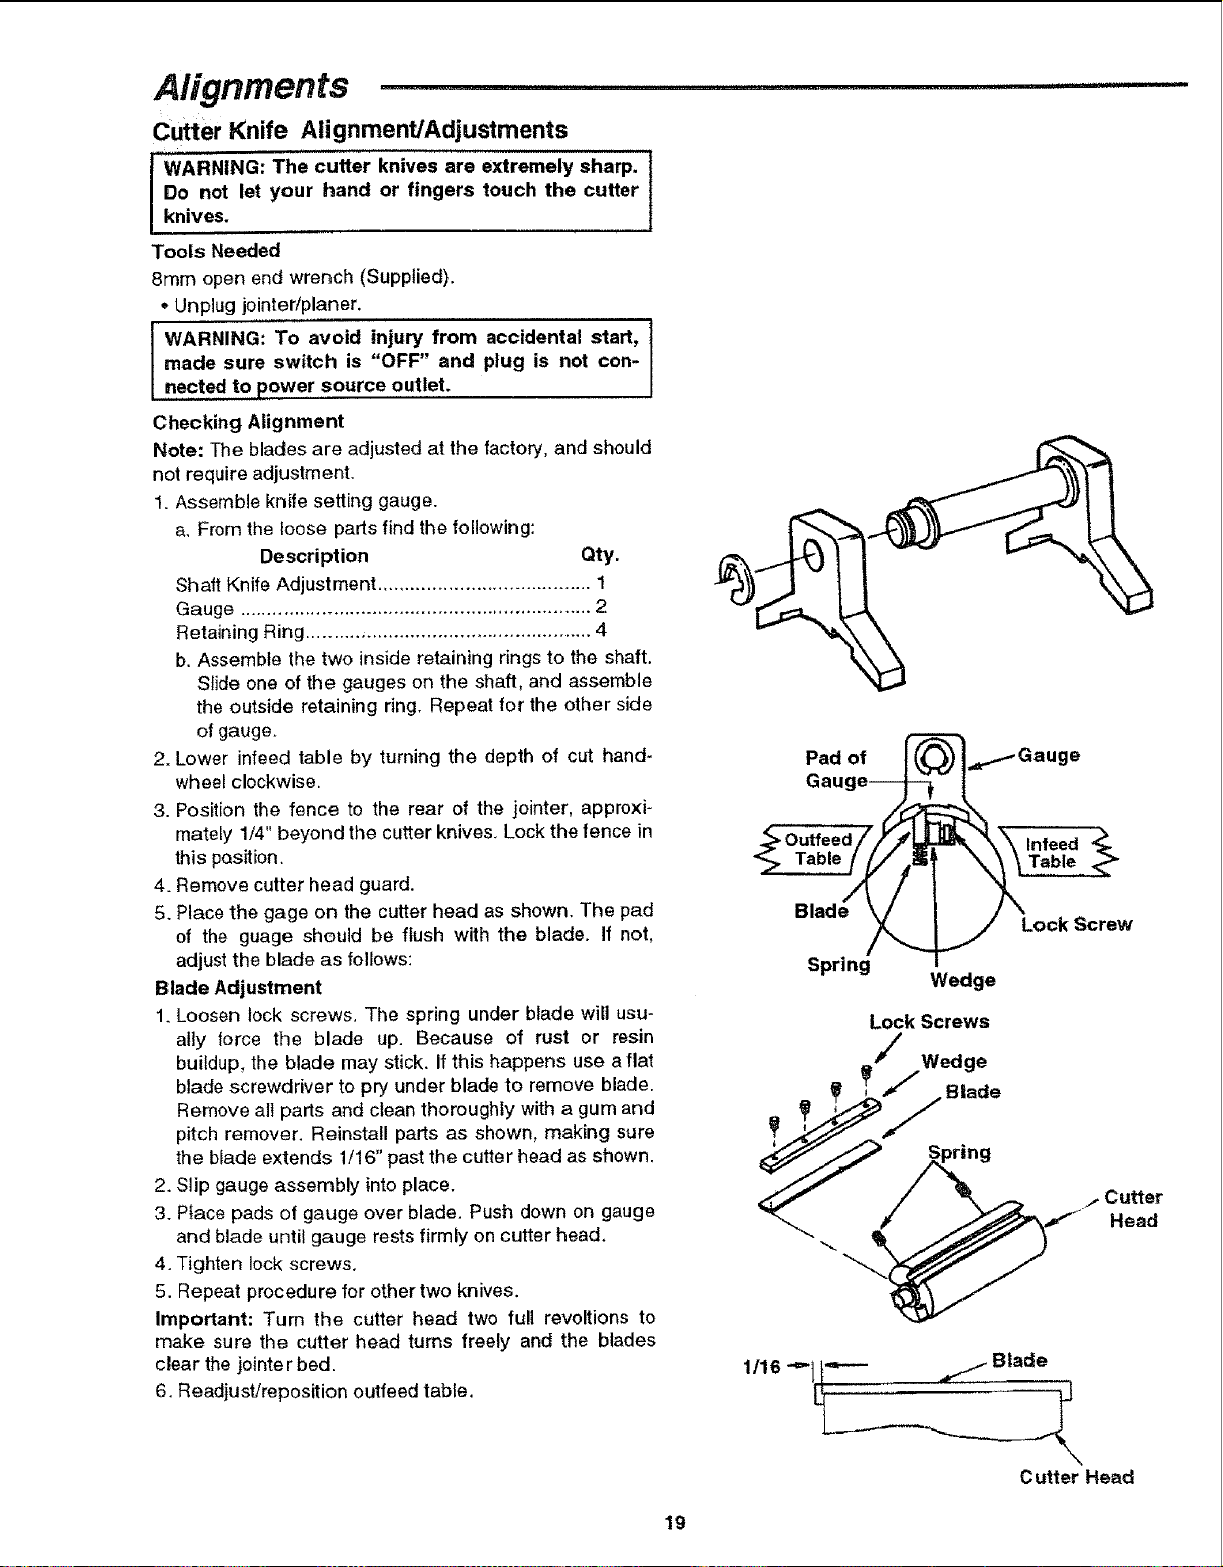
5. Place the gage on the cutter head as shown. The pad
of the guage should be flush with the blade. If not,
adjust the blade as follows:
Blade Adjustment
1. Loosen lock screws. The spring under blade will usu-
ally force the blade up. Because of rust or resin
buildup, the blade may stick. If this happens use aflat
blade screwdriver to pry under blade to remove blade.
Remove all parts and clean thoroughly with a gum and
pitch remover. Reinstall parts as shown, making sure
the blade extends 1/16" past the cutter head as shown.
2. Slip gauge assembly into place.
3. Place pads of gauge over blade. Push down on gauge
and blade until gauge rests firmly on cutter head.
4. Tighten lock screws,
5. Repeat procedure for other two knives.
Important: Turn the cutter head two full revoltions to
make sure the cutter head turns freely and the blades
clear the jointe r bed.
6. Readjust/reposition outfeed table.
Pad of
Gnu
Blade
Lock Screw
Spring
Wedge
Lock Screws
Wedge
_ _____Blade
"_._. "-___ Head
1/16 -=" _ Blade
Cutter Head
19
Loading ...
Loading ...
Loading ...