Loading ...
Loading ...
Loading ...
Page 4 of 20 803341 - Tap Installation Instructions - 02.17 - v2.02
2 - HydroTap Arc/Cube
The HydroTap Arc/Cube has a spout that may be fixed in one of 6 angular positions (depending on the
position of the rotary control) and fixed in one of two height positions. The spout is fixed and does not swivel.
NOTE: The tube kit must be fitted after the HydroTap has been mounted on the benchtop or sink.
Refer to the tube kit assembly instructions, supplied with the tap kit.
To reduce the risk of scalding, Position A should not
be selected with any of the Boiling water units.
(See fig. 1.8)
2.1
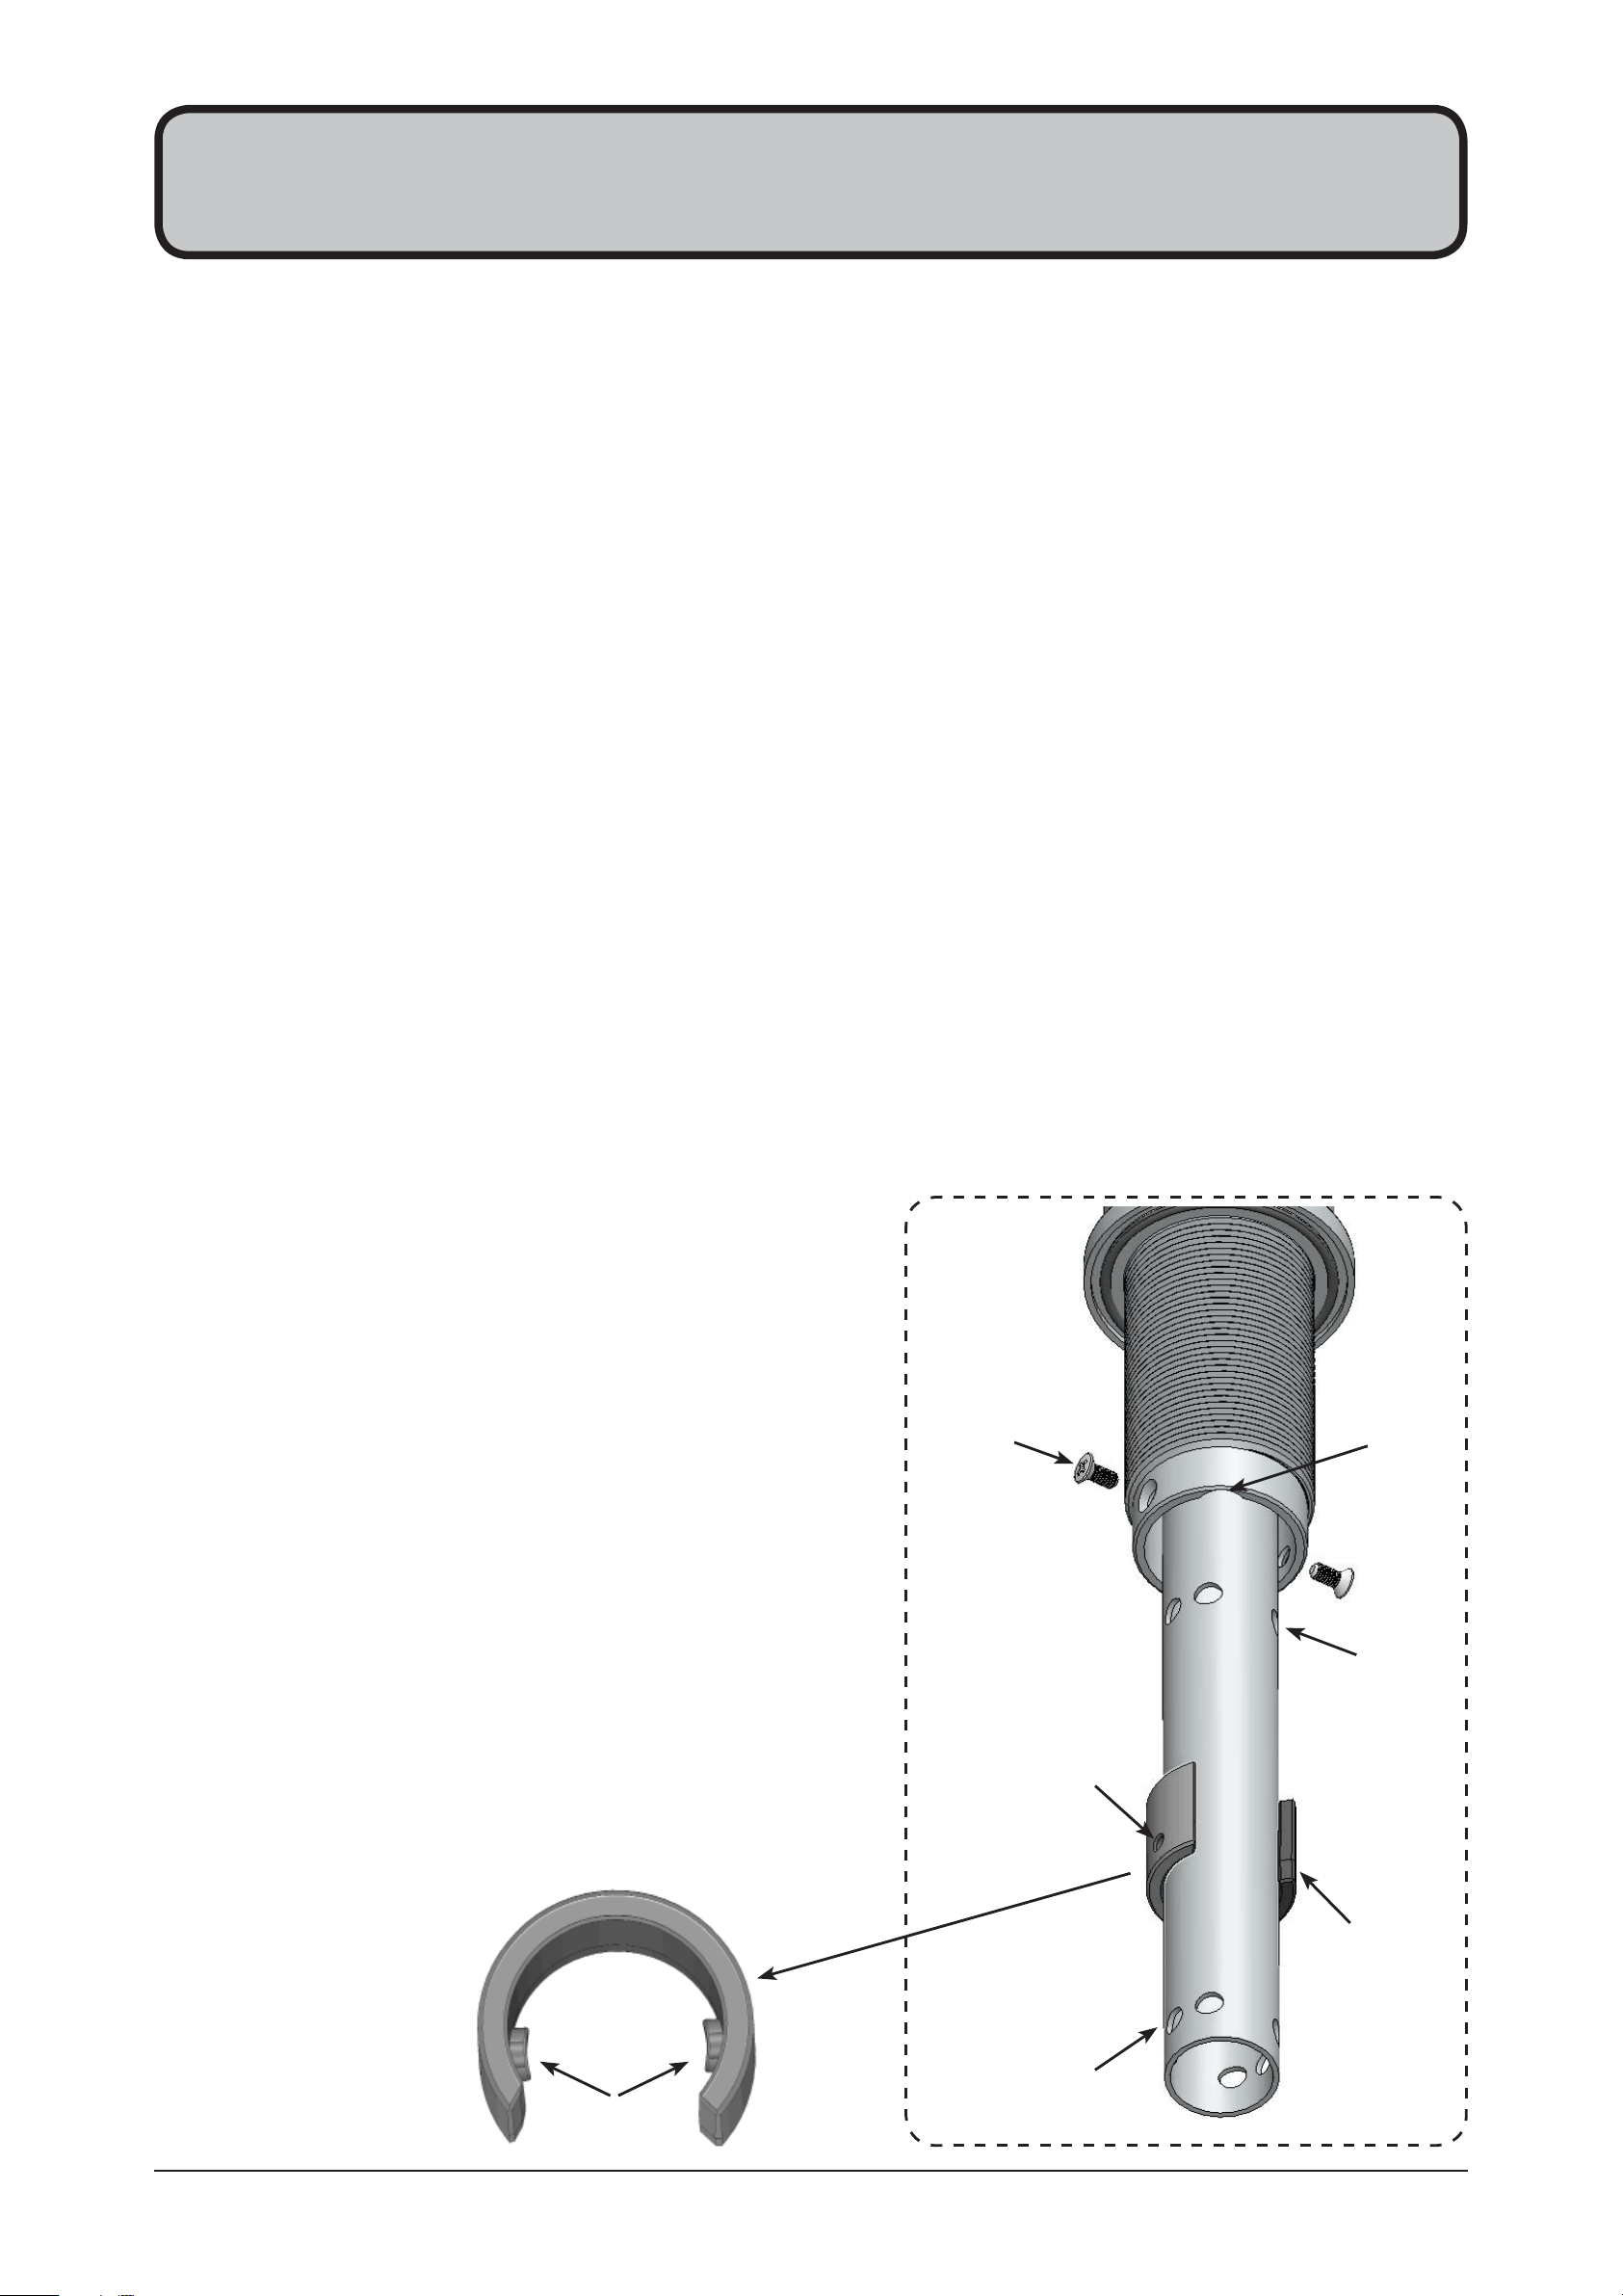
1.
Remove the 2 x spout locating screws and lower the spout to expose the plastic spring clip
NOTE: The plastic spring clip has two internal dimples that may be positioned in the 6 upper or 6 lower,
pre drilled holes in the spout (see diags. below & Figs. 1.7 & 1.8)
2.
To reposition the spout, gently spread the plastic spring clip to release the dimples from the spout
holes. When released, slide the clip on the spout so that it ends up between the two rows of holes.
3.
Rotate the plastic clip on the spout to orient the dimples, so they are in line with the newly selected
holes.
NOTE: When determining which of the 6 holes are required for the new spout height and orientation,
check the new plastic clip position will clear the undercut and that the wiring loom will not be pinched,
when assembled.
4.
Slide the plastic clip up/down to engage with the selected holes, making sure the two dimples engage
simultaneously with the two selected holes.
NOTE: The clip will not fit correctly if one dimple engages before the other. Both dimples must engage at
the same time.
5.
With the clip fitted to the newly selected holes,
carefully raise the spout (ensure the wiring loom is
a neat fit in the undercut and is located between the
open ends of the clip) until the clip locating holes are
in line with the spout locating screws.
6.
Replace the 2 x locating screws.
7.
If mounting on an uneven surface, apply a light
smearing of silicon sealant on the O ring to ensure a
watertight fit. (See fig. 1.9)
8.
Pass the assembly through the 35mm hole and
position the tap so it discharges into the sink.
9.
Fit the lower rubber seal to the threaded extension.
10.
Secure the tap in position with the metal washer and
nut.
11.
Fit the tube kit, as supplied.
To change the spout position
Spout locating
screws (2)
Plastic spring
clip
Upper locating
positions
Lower locating
positions
Clip locating
holes (2)
Undercut
for loom
Plastic spring clip
Dimples
Loading ...
Loading ...
Loading ...