Loading ...
Loading ...
Loading ...
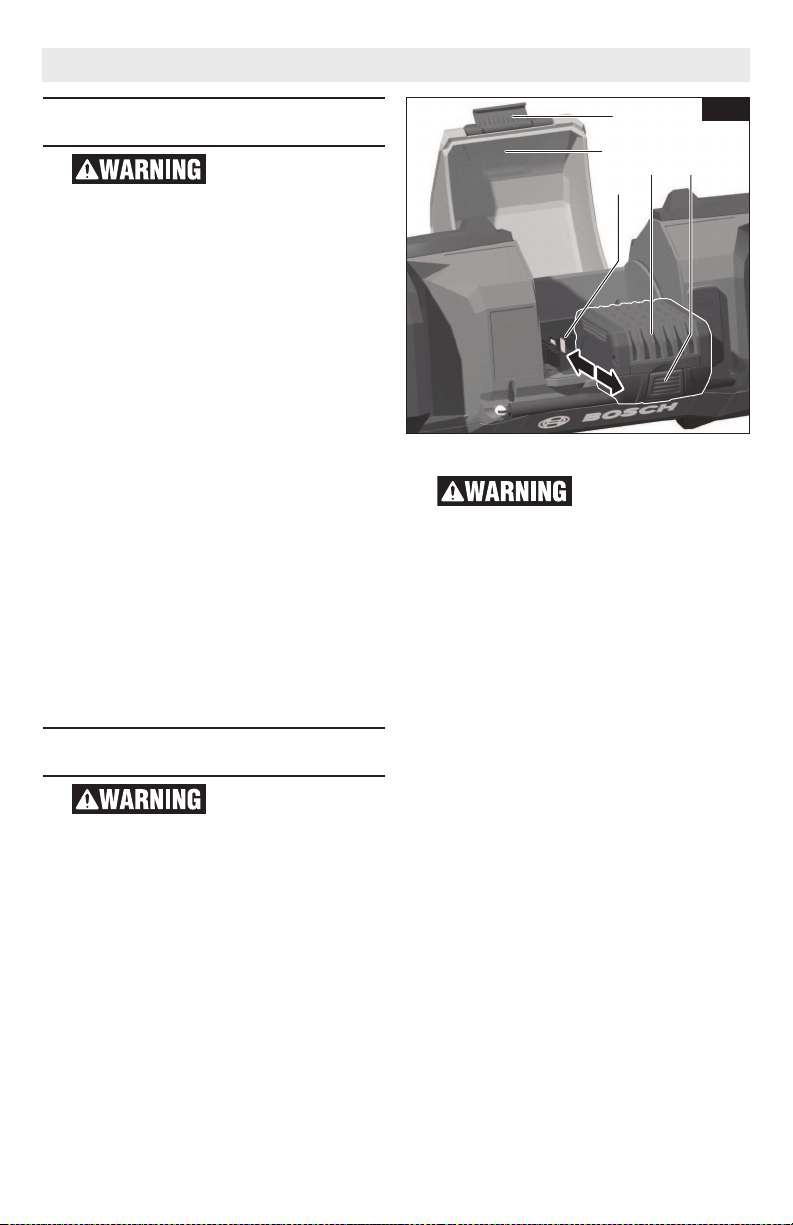
Inserting and Releasing
Battery Pack
Use only Bosch
BAT611 or the
batteries listed in the battery/charger
list.
Release the locking latch 14 of the
battery bay door and flip the door 13
open (Fig. 3).
• To insert battery pack, align battery
pack 23 and slide it into battery pack
terminal 19 until it locks into position
(an audible click sound is an
indication that the battery pack is
locked). Do not force.
• To remove the battery pack, press
the battery pack release button 24
and slide the battery pack completely
out of the battery bay. It may be more
convenient for some users to remove
the battery if the unit is standing on
one of its sides.
• To close the battery bay door, bring it
up against the seal on the housing
and lock it by placing the latch's
catch in the mating slot on the
housing and pressing the latch's lever
section.
The battery door must be installed,
closed and latched before the unit can
be operated.
Powering the Unit With
Power Supply (Adapter)
To reduce risk of
electric shock, only
plug the power supply into a Ground
fault circuit interrupter (GFCI)
protected outlet when used in damp
locations. If a GFCI protected outlet is
not available, use a portable receptacle
with built-in GFCI protection. Test GFCI
protected outlet according to
instruction provided by GFCI
manufacturer. If the GFCI protected
outlet does not pass the GFCI testing,
do not use that outlet. Only plug unit
into a functional GFCI protected outlet.
Use only the original
Bosch power supply
1619PB4882 intended for your unit.
As an alternative, the unit can be
powered using the included power
supply adapter.
Open the connection ports cover 12.
Insert the plug-in connector of the
power supply into connection socket 17
(Fig. 1). Connect the power supply to
power outlet.
After removing the plug-in connector,
reattach the connection ports cover to
protect against dirt/debris.
-10-
Assembly and Set Up
14
13
23 24
19
Fig. 3
Loading ...
Loading ...
Loading ...