Loading ...
Loading ...
Loading ...
SERVICING - WARNING
Disconnect from electricity and gas before servicing. Check appliance is safe when you have nished.
6
Servicing Notes – WARNINGS – GAS
When servicing or replacing gas carrying components
disconnect from gas before commencing operation and
check appliance is gas sound after completion.
When checking for gas leaks use a liquid leak detector at all
joints and connections to check for leaks in the system. Use a
product specically manufactured for leak detection.
CAUTION: DO NOT USE A FLAME TO CHECK FOR GAS
LEAKS.
DO NOT use re-conditioned or unauthorised gas controls.
Servicing Notes – WARNINGS –
ELECTICITY
Disconnect the appliance from the electricity supply
before carrying out any servicing work on the
appliance.
After completion any electrical work, make sure the product
is electrically safe by performing the following tests.
• Earth Continuity Check – Ensuring that the
Resistance to Ground is less than 0.10 Ohms
between dead metal and the ground terminal of
the appliance
• Electrical Strength Test - Ensuring that there are no
short circuits between live terminals and the Earth
of the Appliance.
NOTE: The design of the appliance means that for some
of the service work the Deep Side Panels will need to be
removed before access to main parts is required. They will
need to be removed for the following procedures.
• Facia Removal
• Gas Hotplate Removal
Place protective means on the oor to prevent any
damage to oor whilst moving the appliance forward.
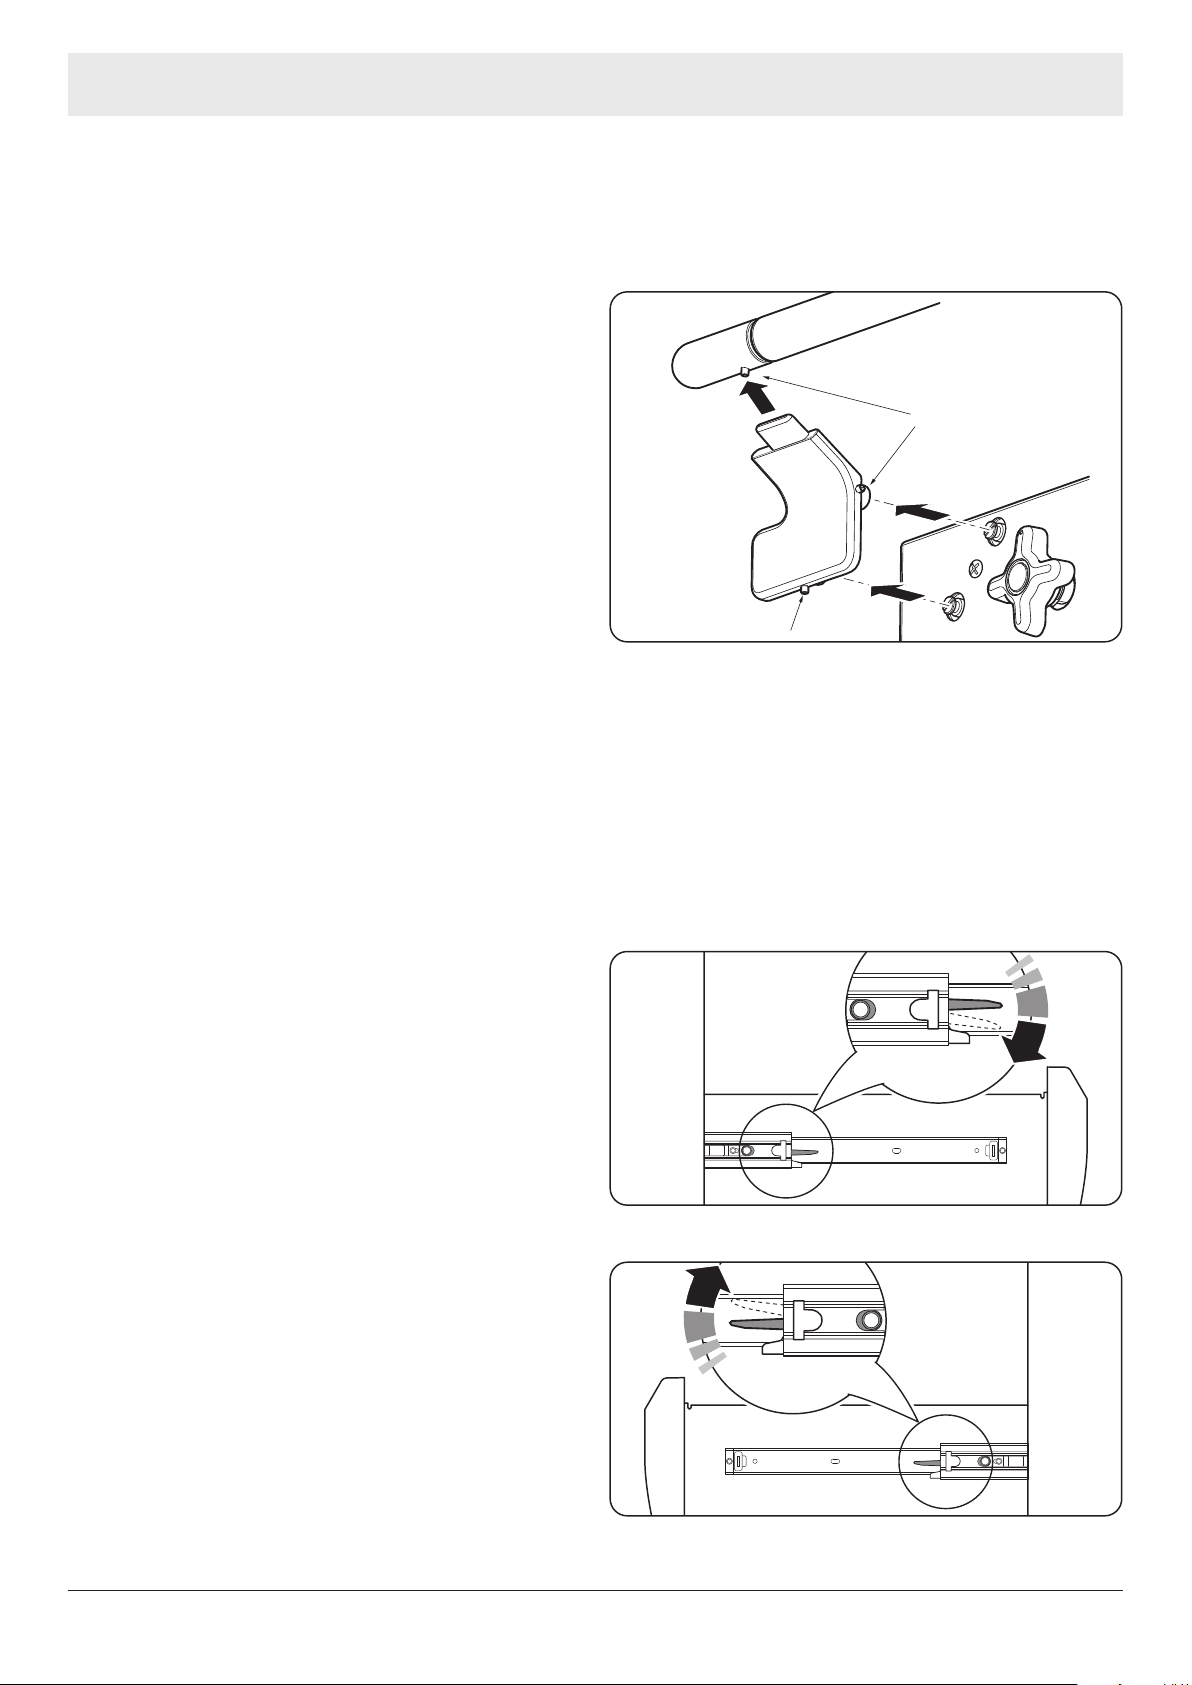
1. To Remove the Handrail
a. Locate and loosen the 4 retaining screws – 2 per side
located on the end of the hand rail.
b. Carefully pull the hand rail towards you so that it
disengages with the location pins on the appliance.
Grub Screw
Grub Screw
c. Re – Assembly: Re – assemble in the reverse order,
make sure all screws are engaged correctly.
2. Remove the storage drawer
a. Pull the drawer out to its furthest point.
b. Push the ends of the plastic clips to release the
catches holding the drawer to the side runners. At
the same time pull the drawer forward and away
from the side runners.
Down on the left-hand side
Up on the right-hand side
For safety make sure the drawer runners are out of
the way.
Loading ...
Loading ...
Loading ...