
Loading ...
Loading ...
Loading ...
-14-
trigger and slowly push the saw
forward (Fig. 11).
CIRCLE CUTTING
Circle cuts can be made from 5” to 16-
1/2” in diameter
1. Determine the center point of the
desired circle.
2. Drill a 3/16” (5 mm) center hole 7/8”
(23 mm) deep in workpiece. (For
enhanced precision, drill the hole
using a drill press, if possible).
3. Drill or plunge cut near the circle’s
edge, turn saw off, and disconnect
the plug from power source.
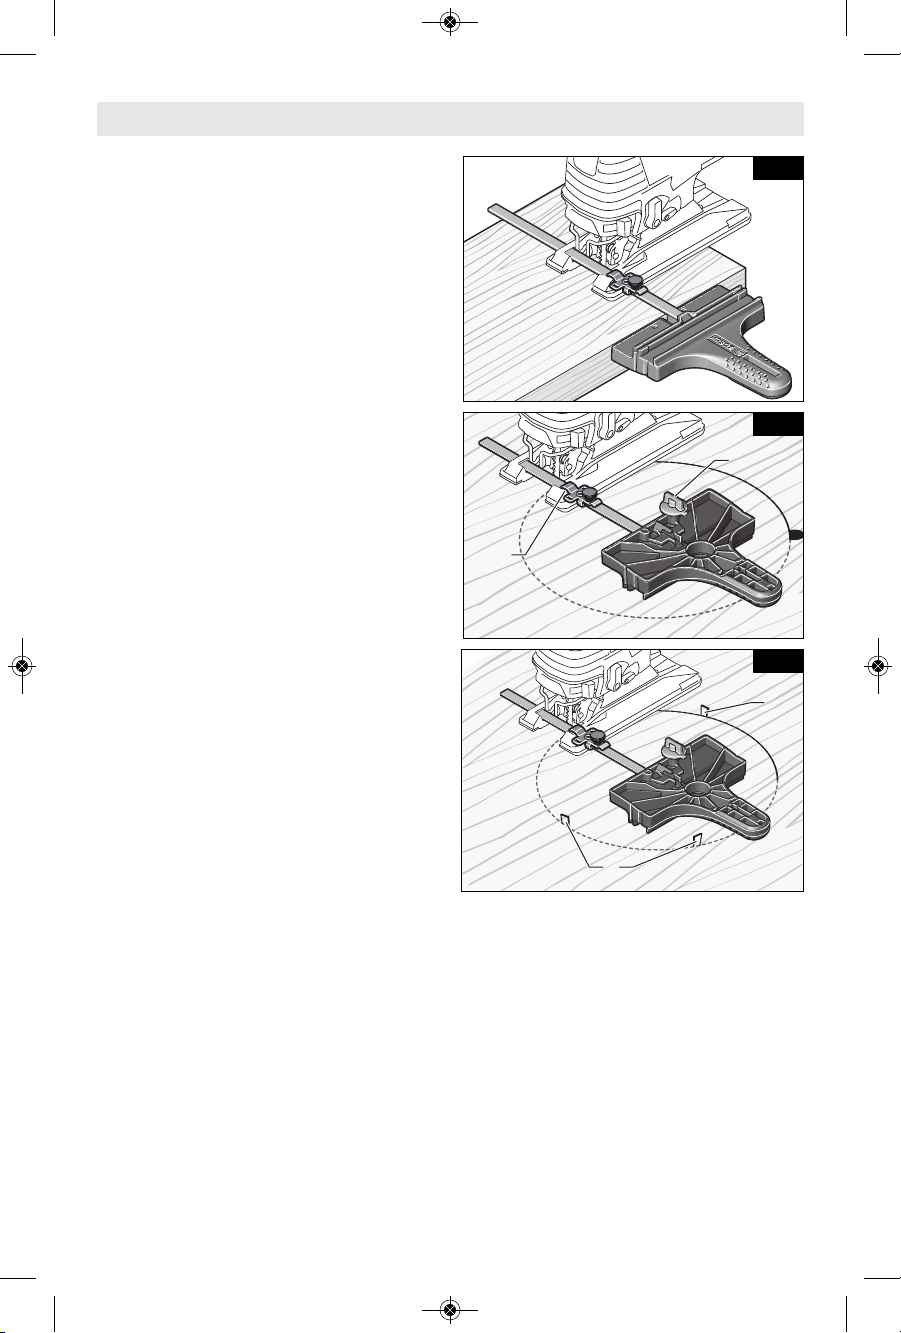
4. Insert guide bar through a clamp,
then through the slots provided in
foot, from either side of foot (Fig. 5).
(If possible, place second clamp on
bar from opposite side of jig saw).
5. Remove guide pin B from end of
guide, push pin through proper hole
provided in guide, then into center
hole of workpiece. (When used with a
Bosch JS572 jig saw – or the JSH180
cordless jig saw – the holes labeled
for the JS572 should be used.) For
other jig saws, one of the other holes
should be used.
6. Measure the distance from the center
of the hole to the desired circle
radius. Adjust that measurement as
necessary to account for the width of
the blade:
- When cutting a hole, cut from
inside the intended radius.
- When cutting wheels or discs, cut
from the outside the intended
radius.
7. Hook clamp(s) onto footplate, and
position the guide to that adjusted
radius measurement.
8. Place lock knob(s) on proper side of
clamp(s) and securely tighten lock
knob(s) on the clamp(s) (Fig. 10).
9. Insert jig saw’s plug into power
source, hold the saw firmly, squeeze
trigger and slowly push the saw
forward.
CIRCLE-CUTTING TIPS:
• Place small wedges W in the cut as
shown in Fig. 13, to keep the inner
circle from spreading when near the
end of the cut.
• Use a thick jig saw blade, such as the
Bosh T101TP or T144DP whenever
possible.
• Make sure that the jig saw’s orbital
setting is at 0 (zero)
• Cut slowly so the blade will stay
straight in the cut.
Operating Instructions
A
B
W
W
Fig. 11
Fig. 12
Fig. 13
2610051978.qxp_JSH180 3/16/20 8:33 AM Page 14
Loading ...
Loading ...
Loading ...